Downloaded 12 times


This document is a tutorial on configuring a mail server using Cisco Packet Tracer, featuring a setup with one switch, four PCs, and two servers (email and DNS). It provides step-by-step instructions on building the network topology, configuring IP addresses, setting up mail clients, and testing the email service. Finally, it details the configuration of a DNS server to resolve domain names for the email server's functionality.
Introduction to configuring an email server with a network topology using switches and PCs.
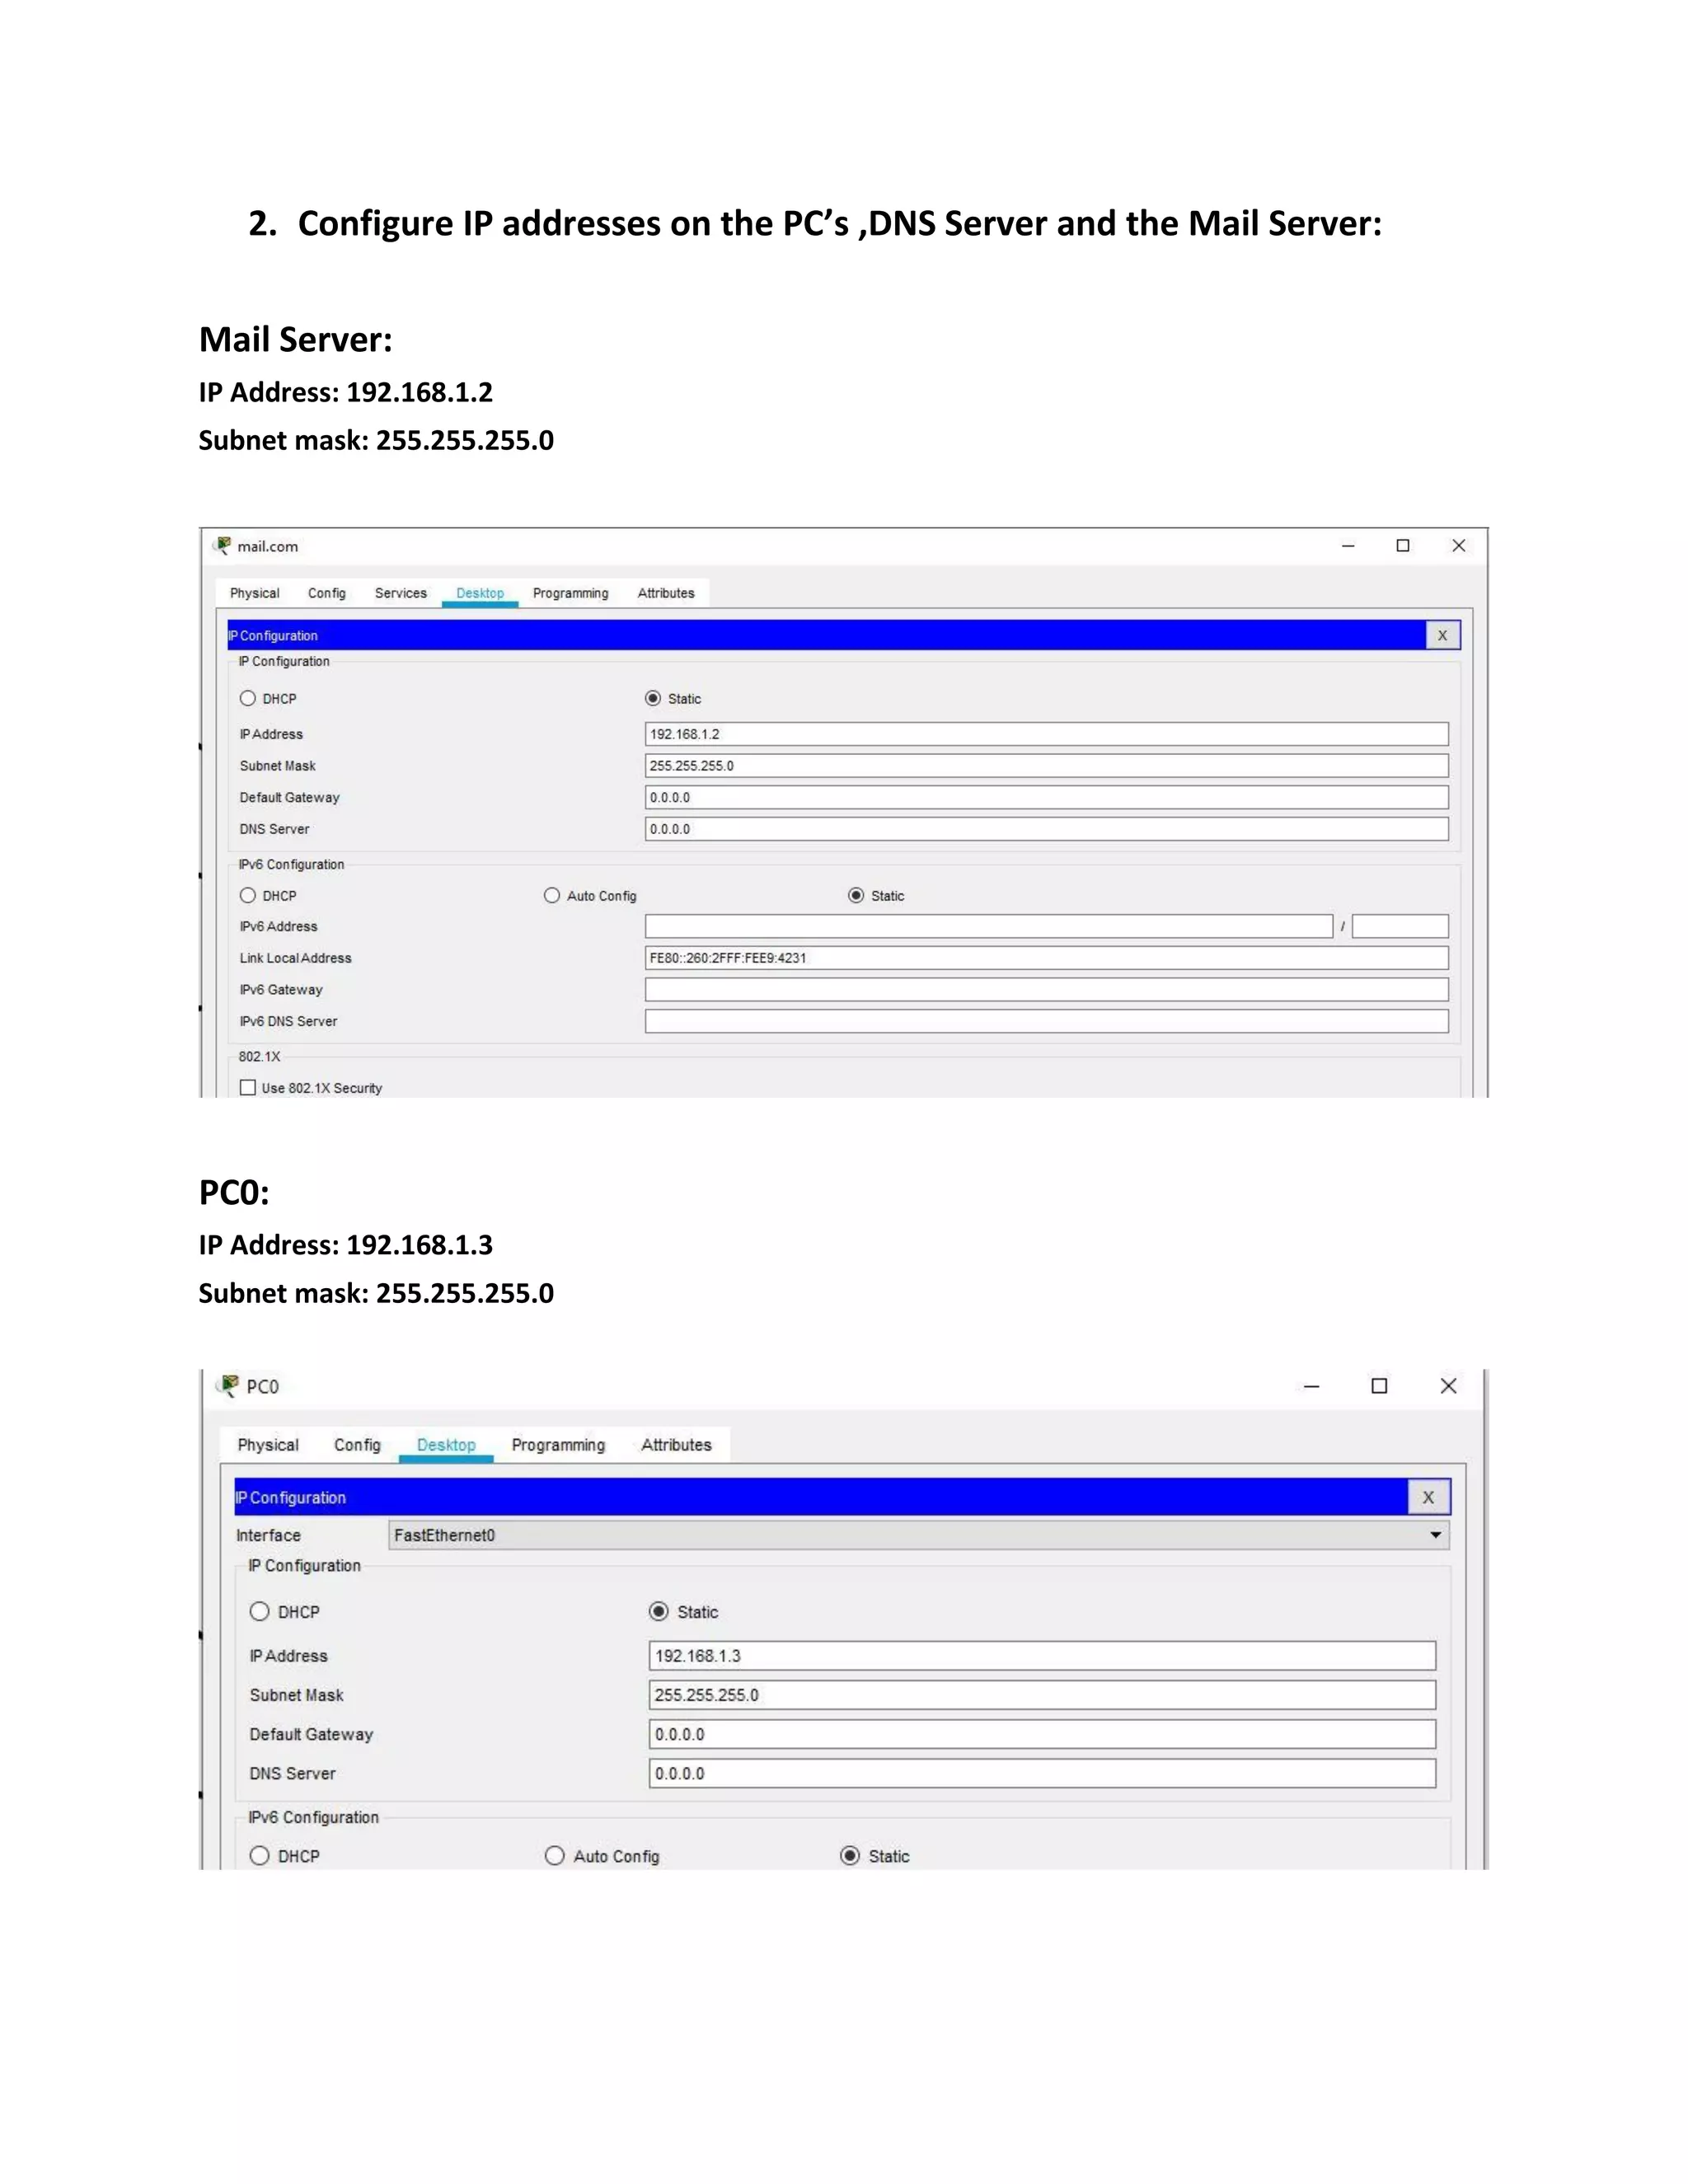
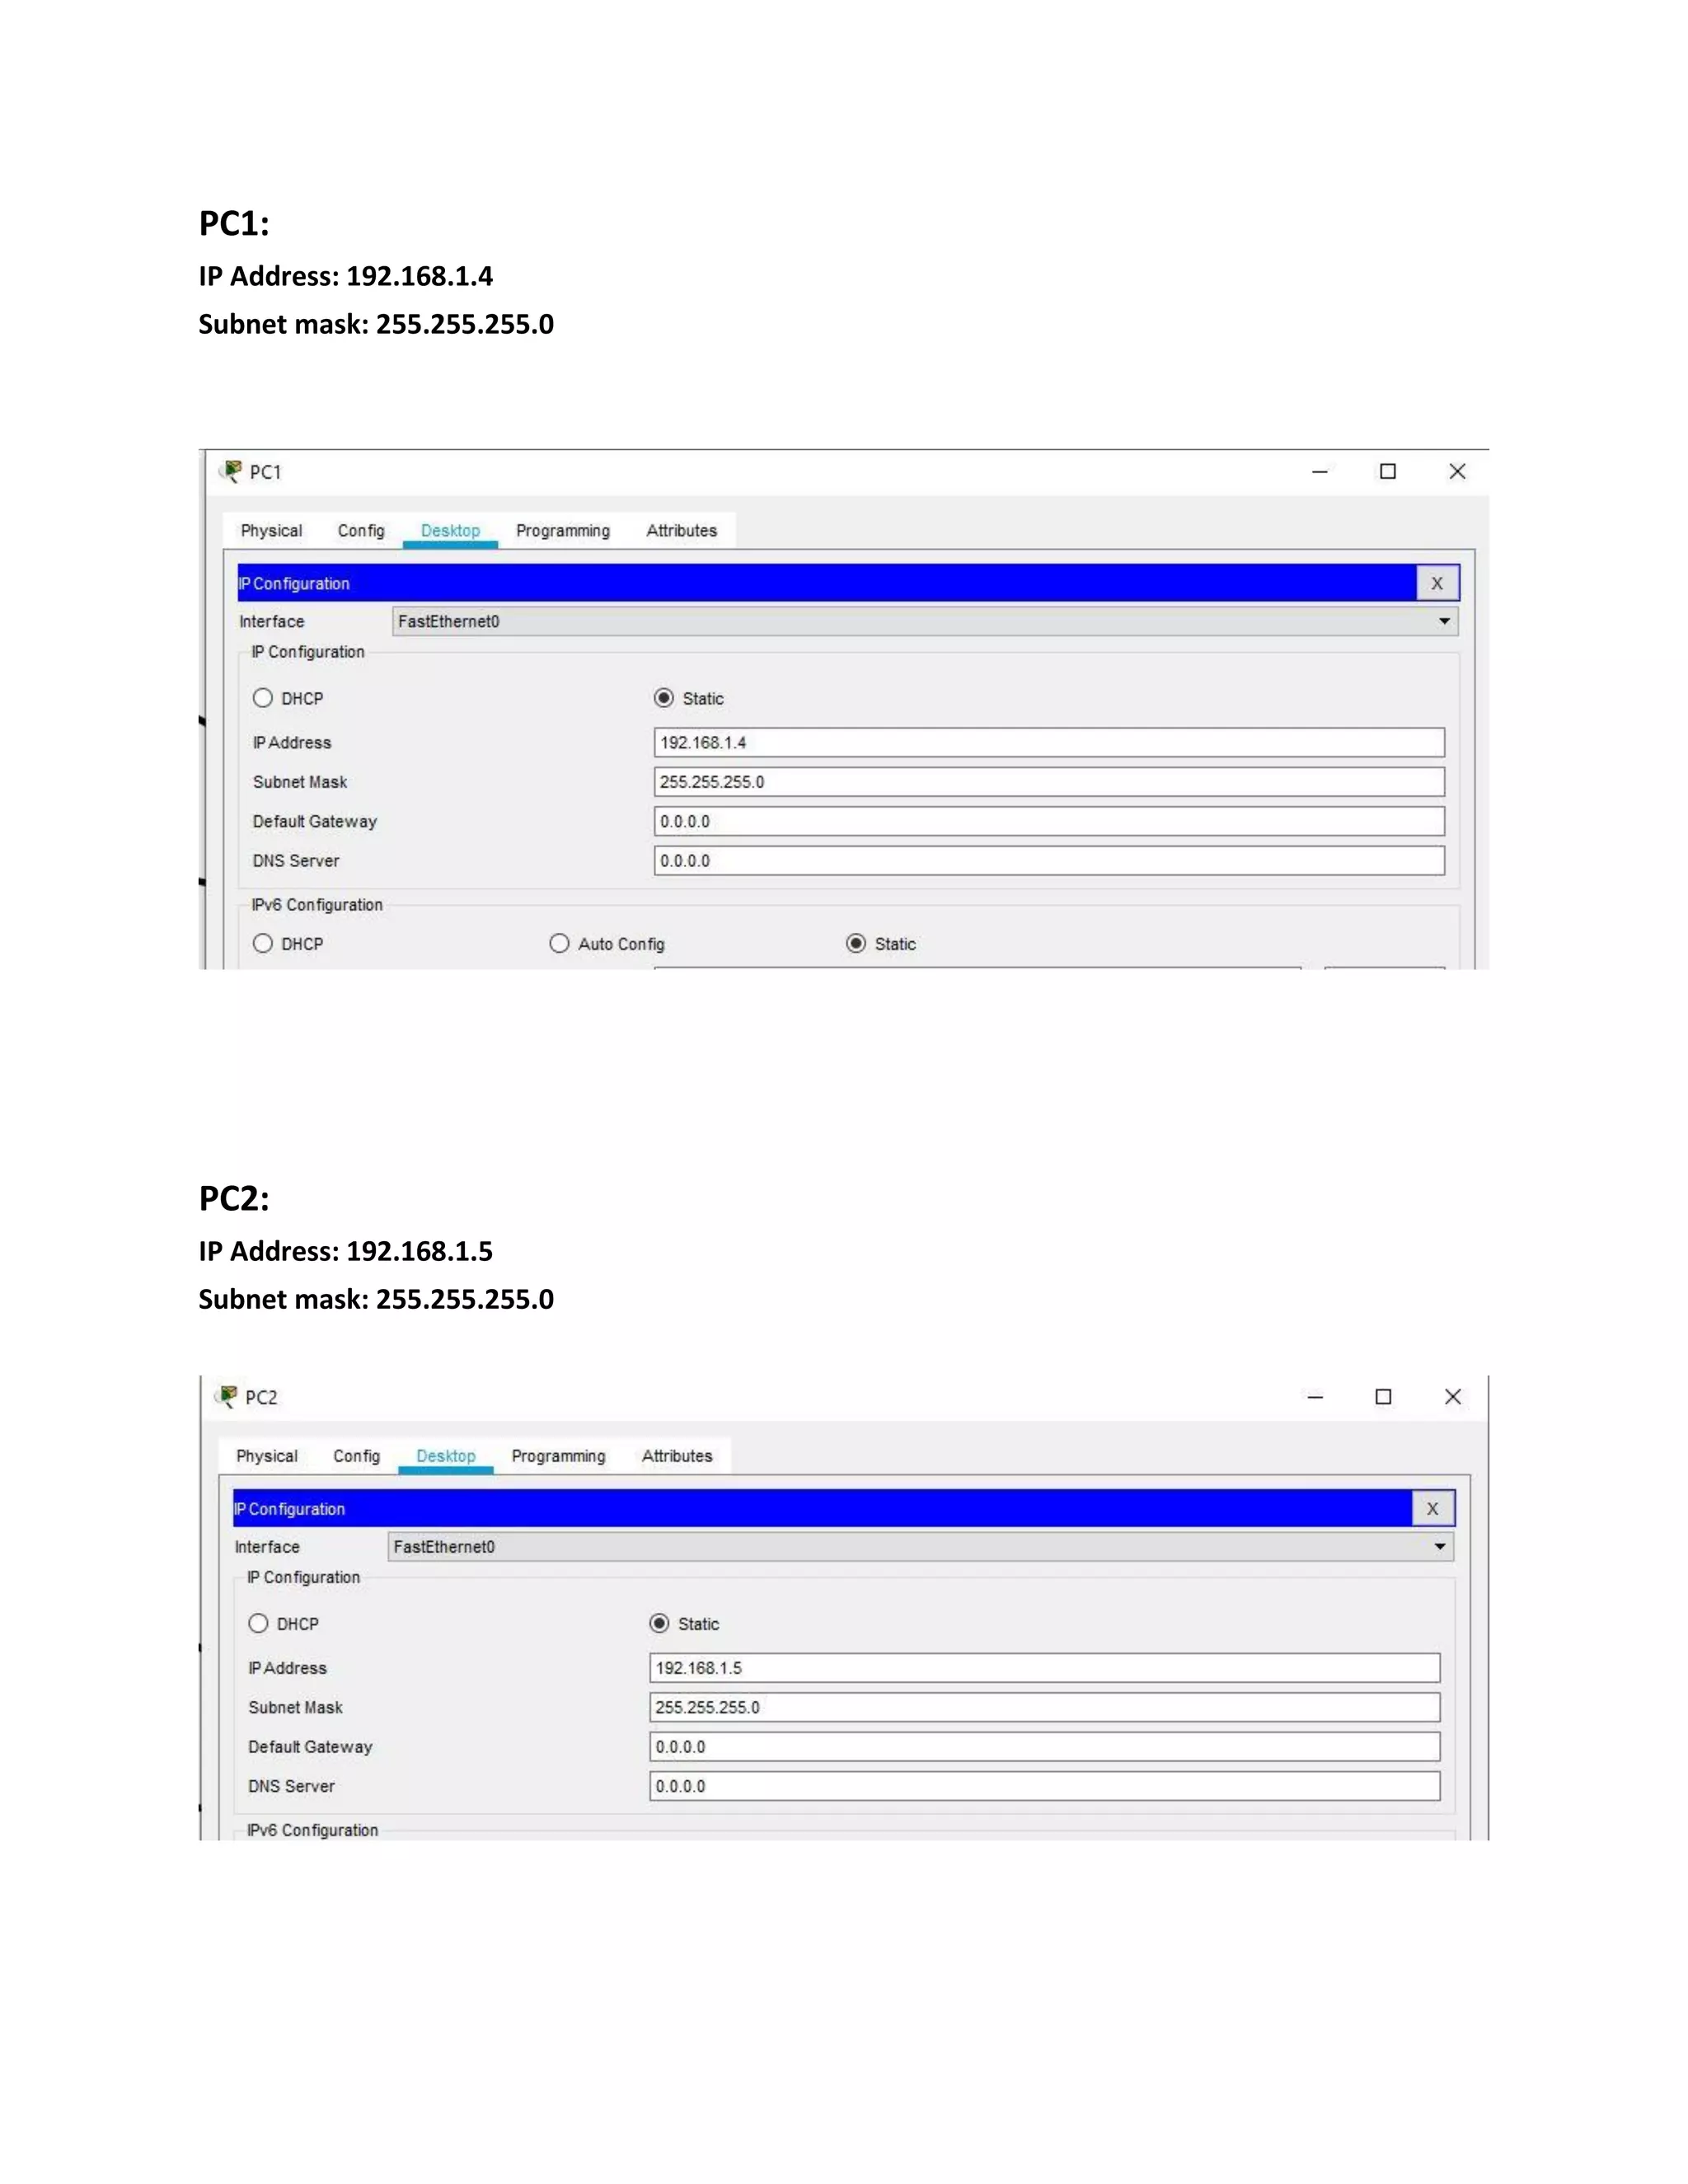
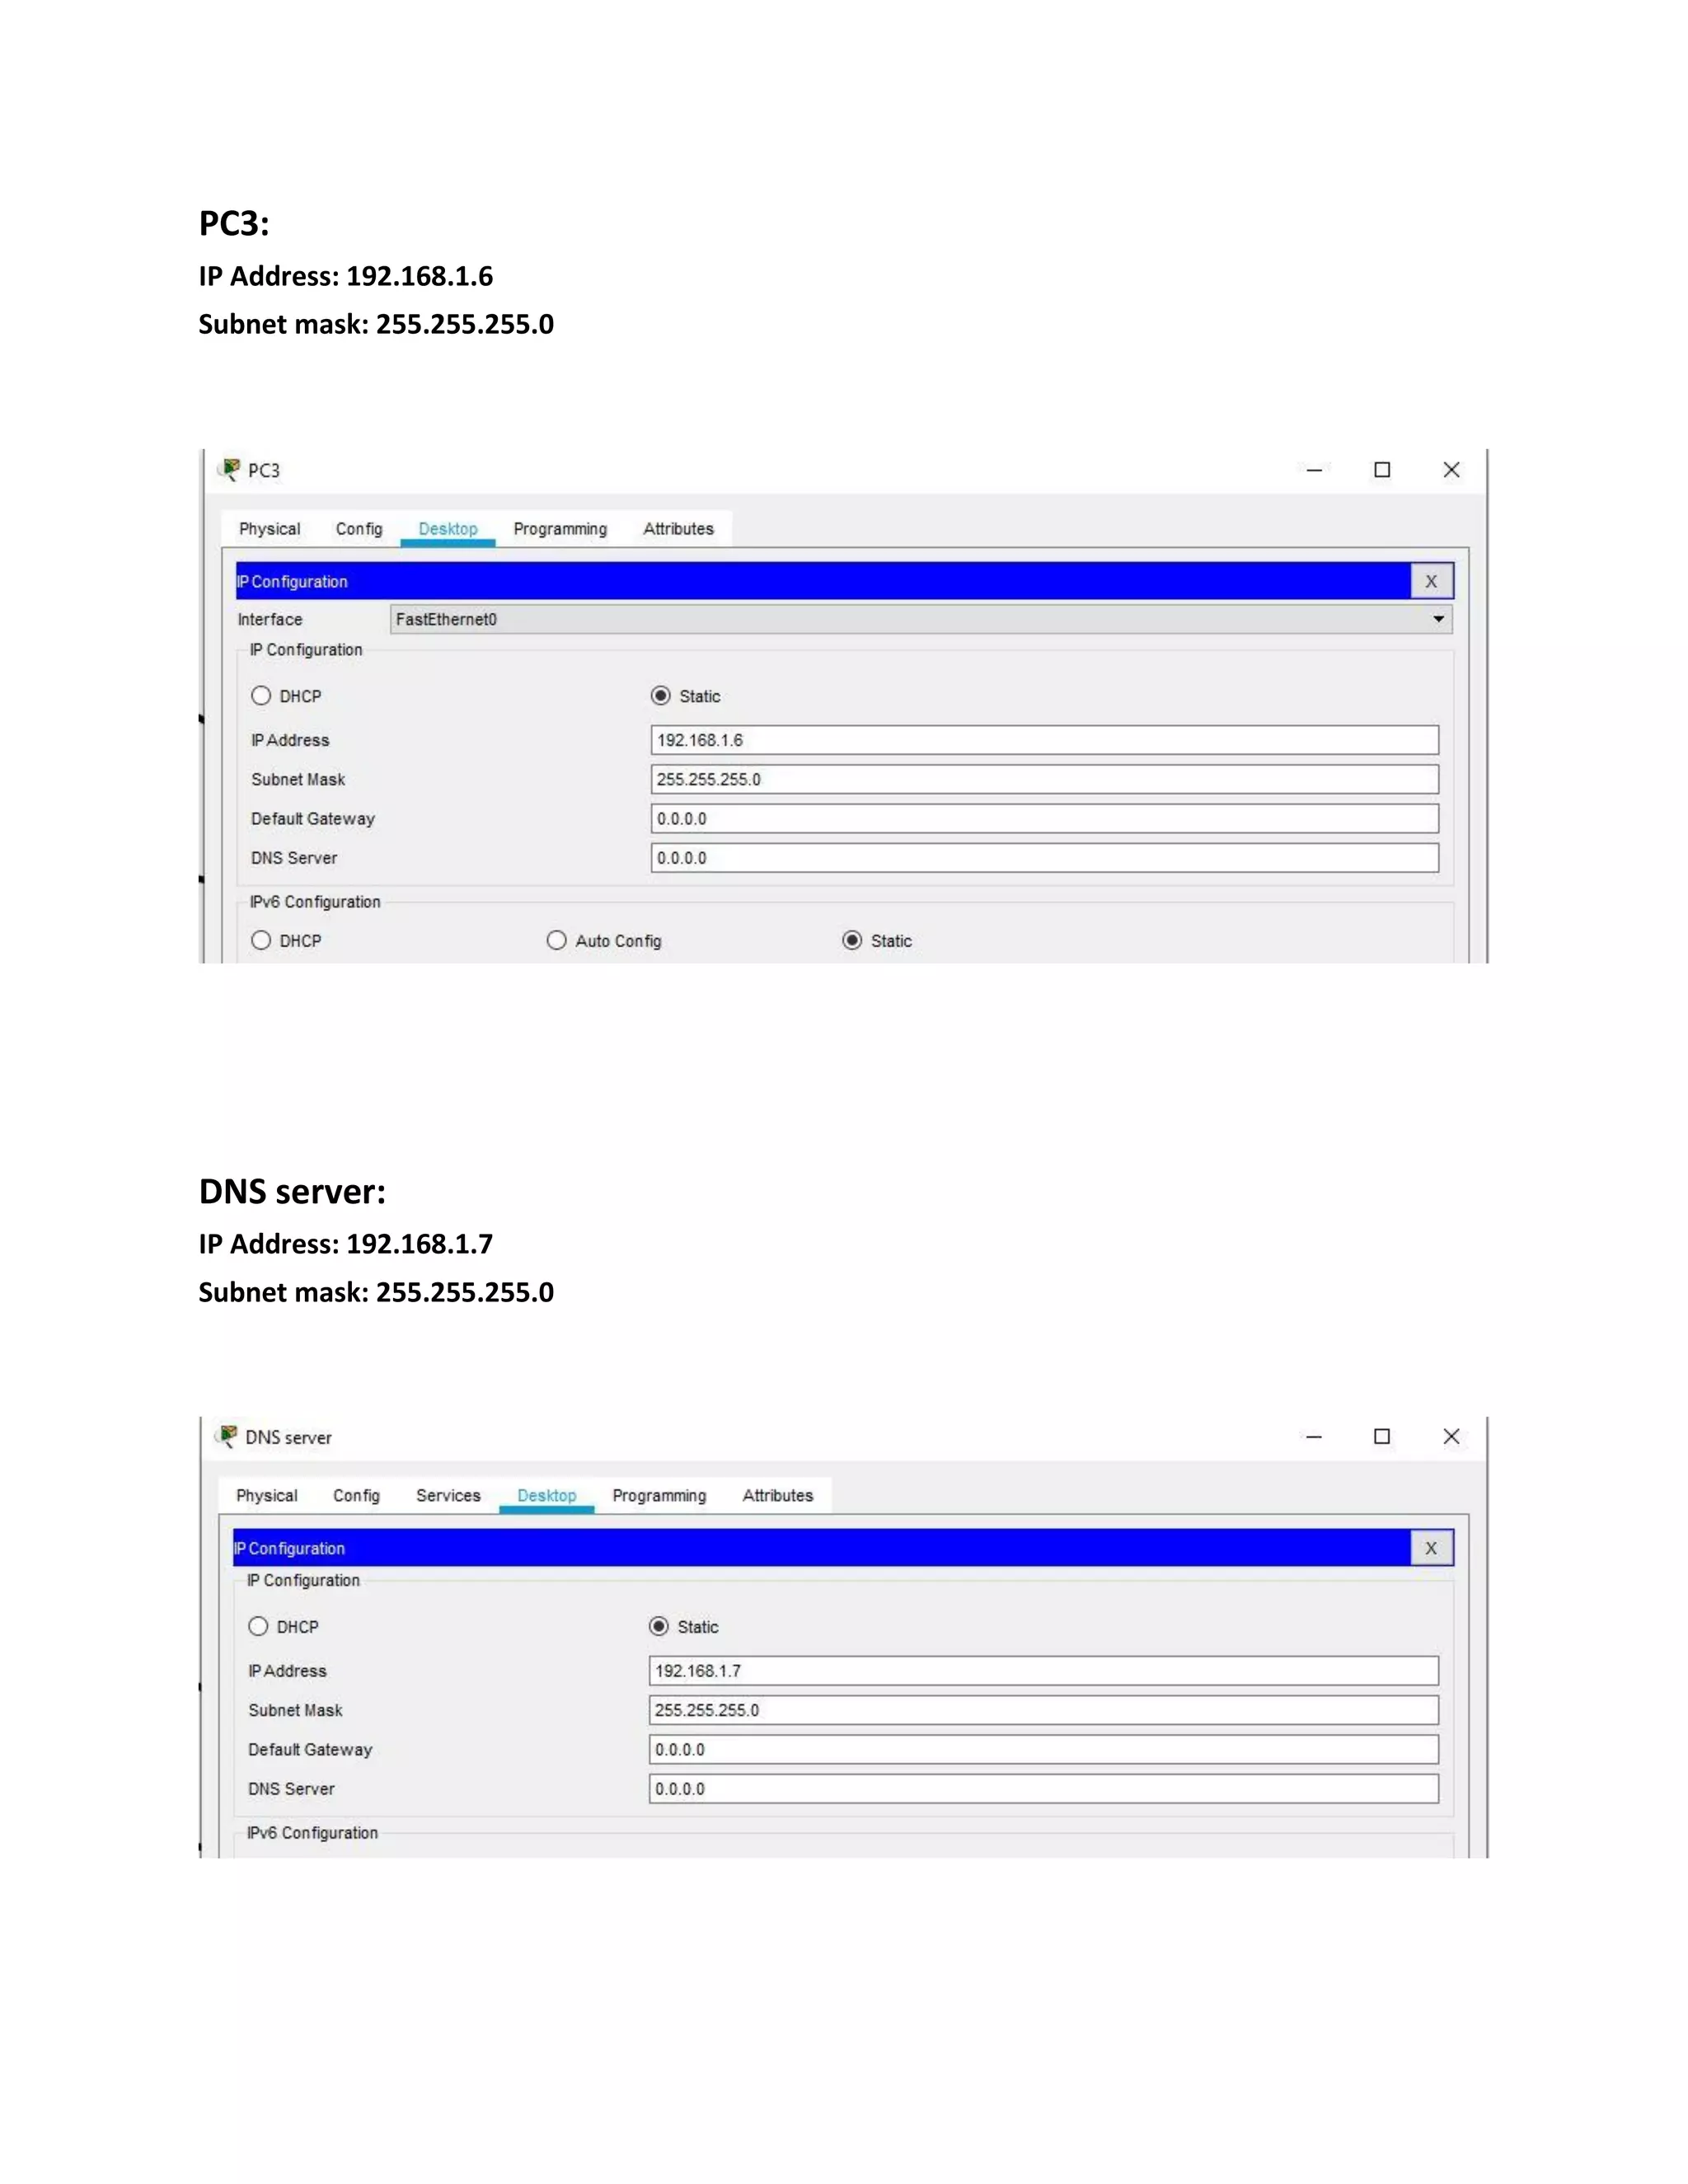
Details IP address assignments for the mail server, DNS server, and PCs in the network.
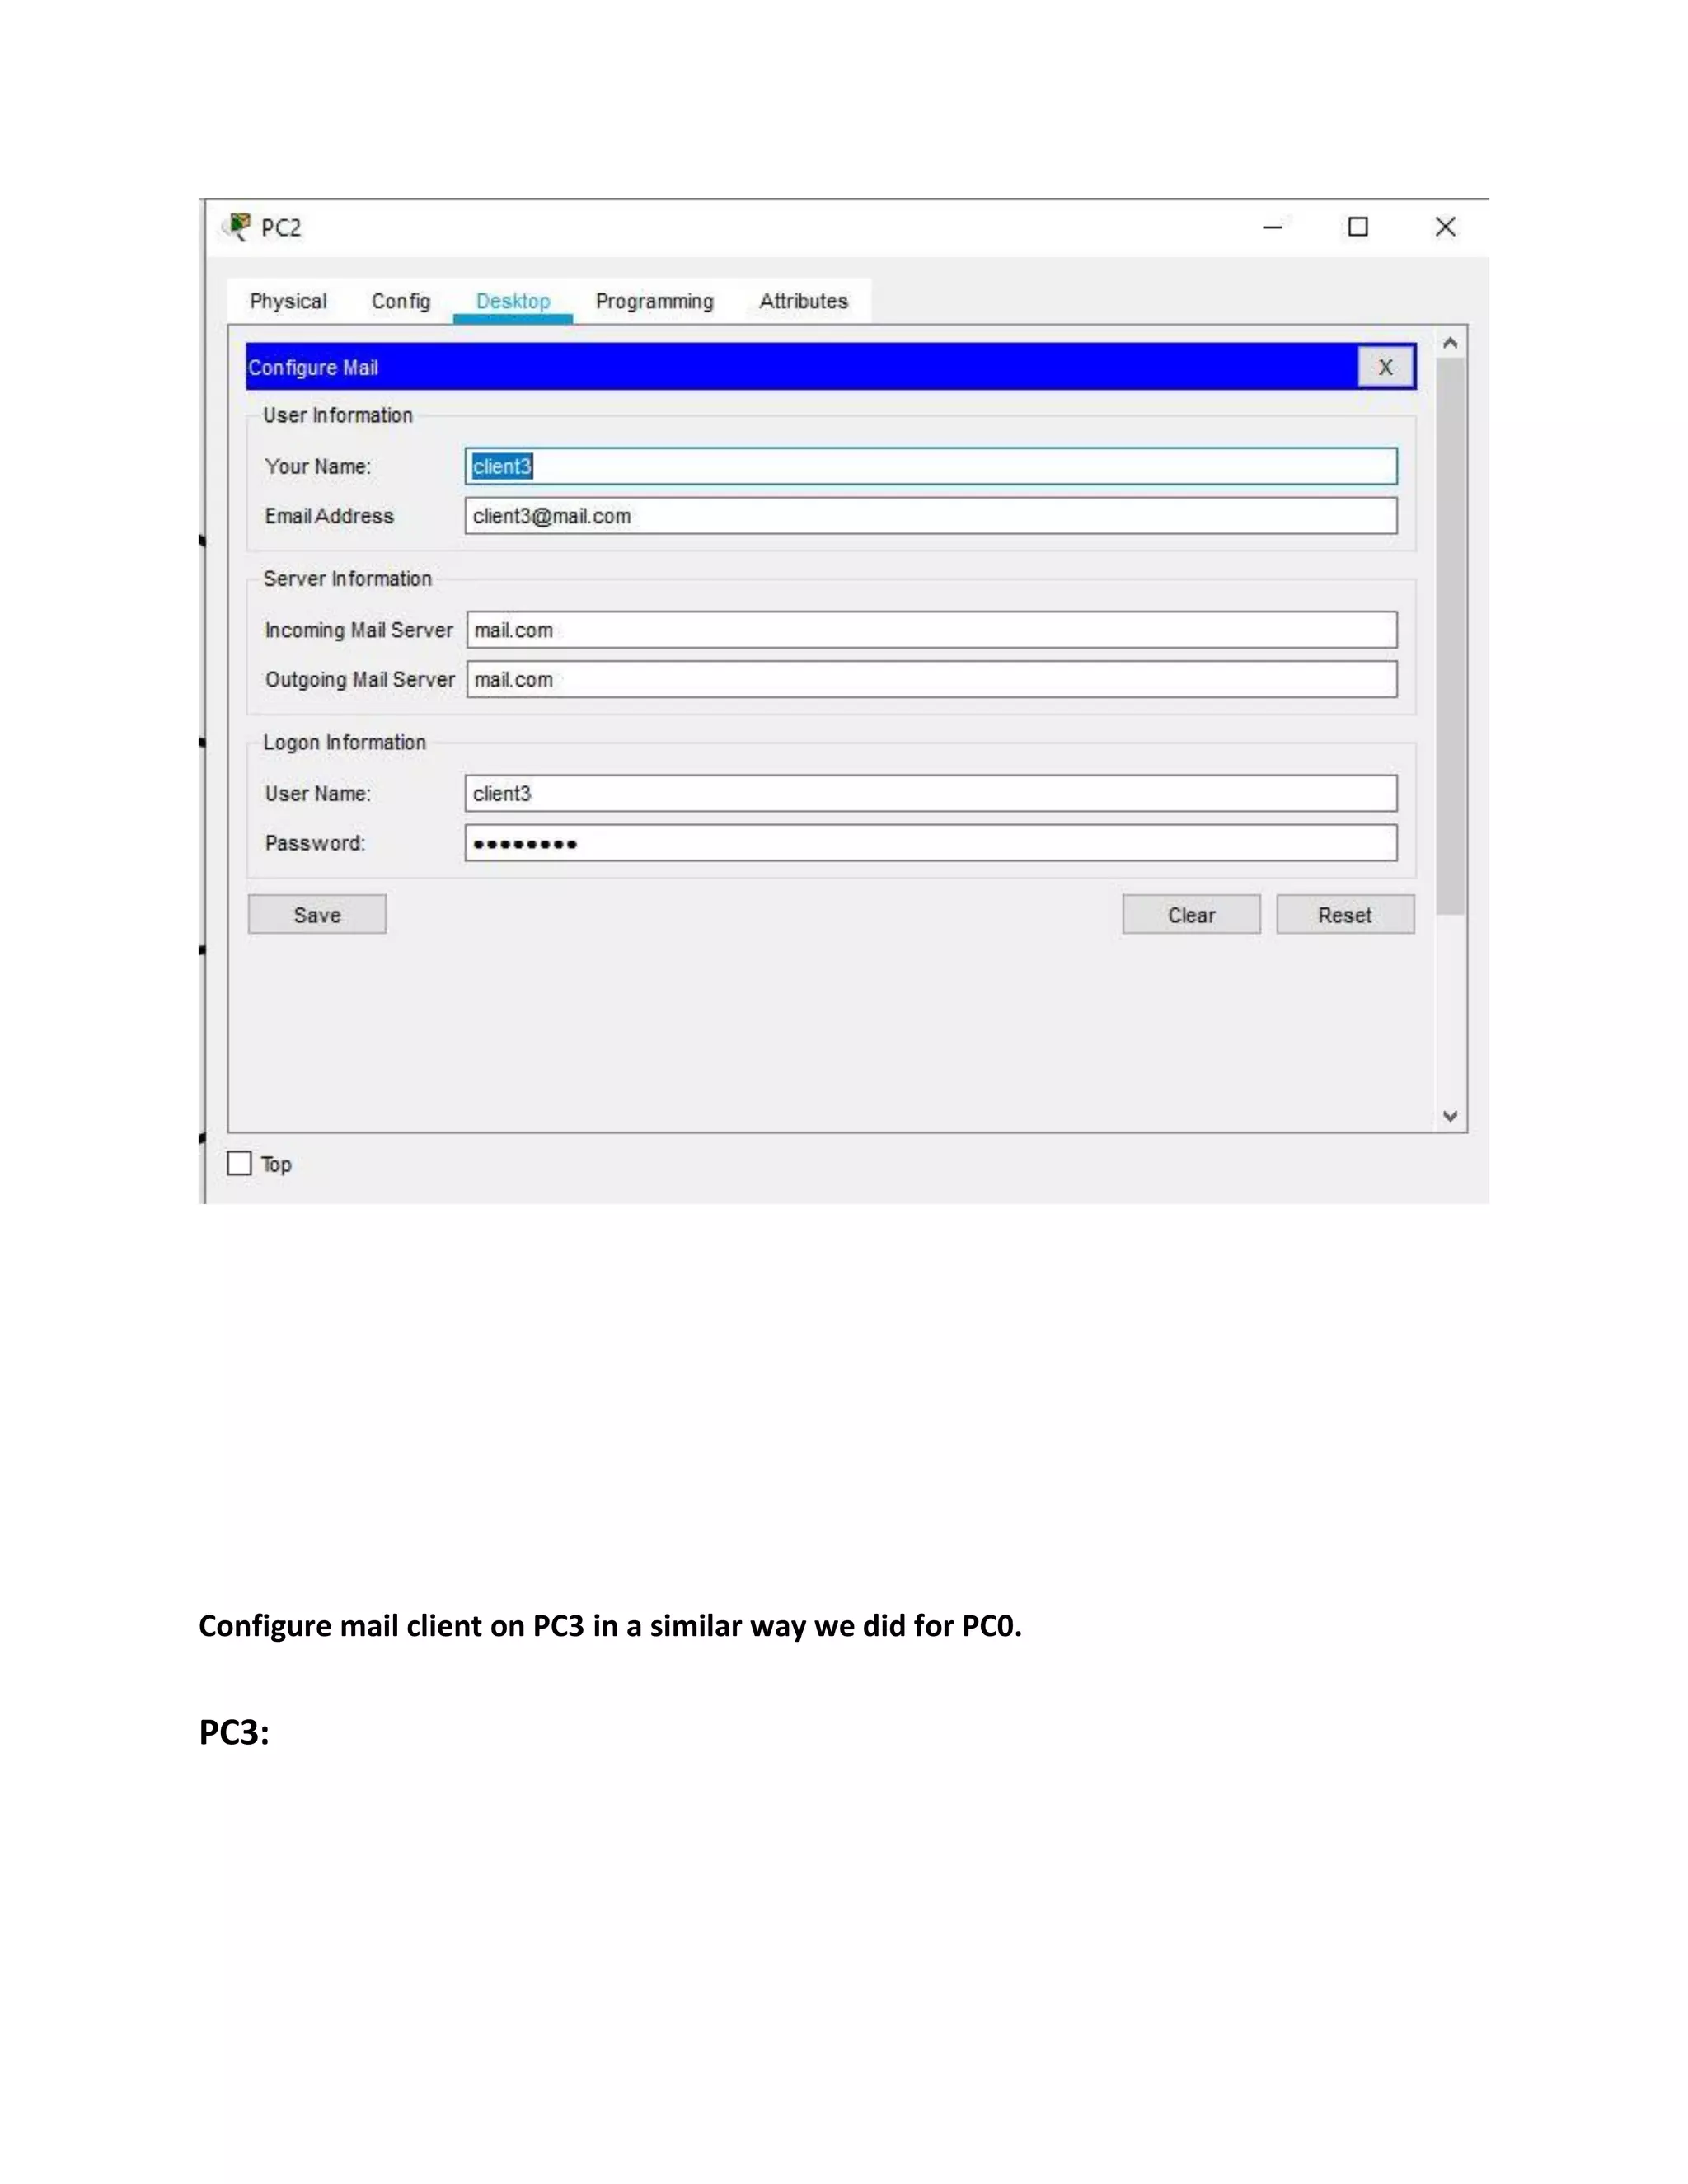
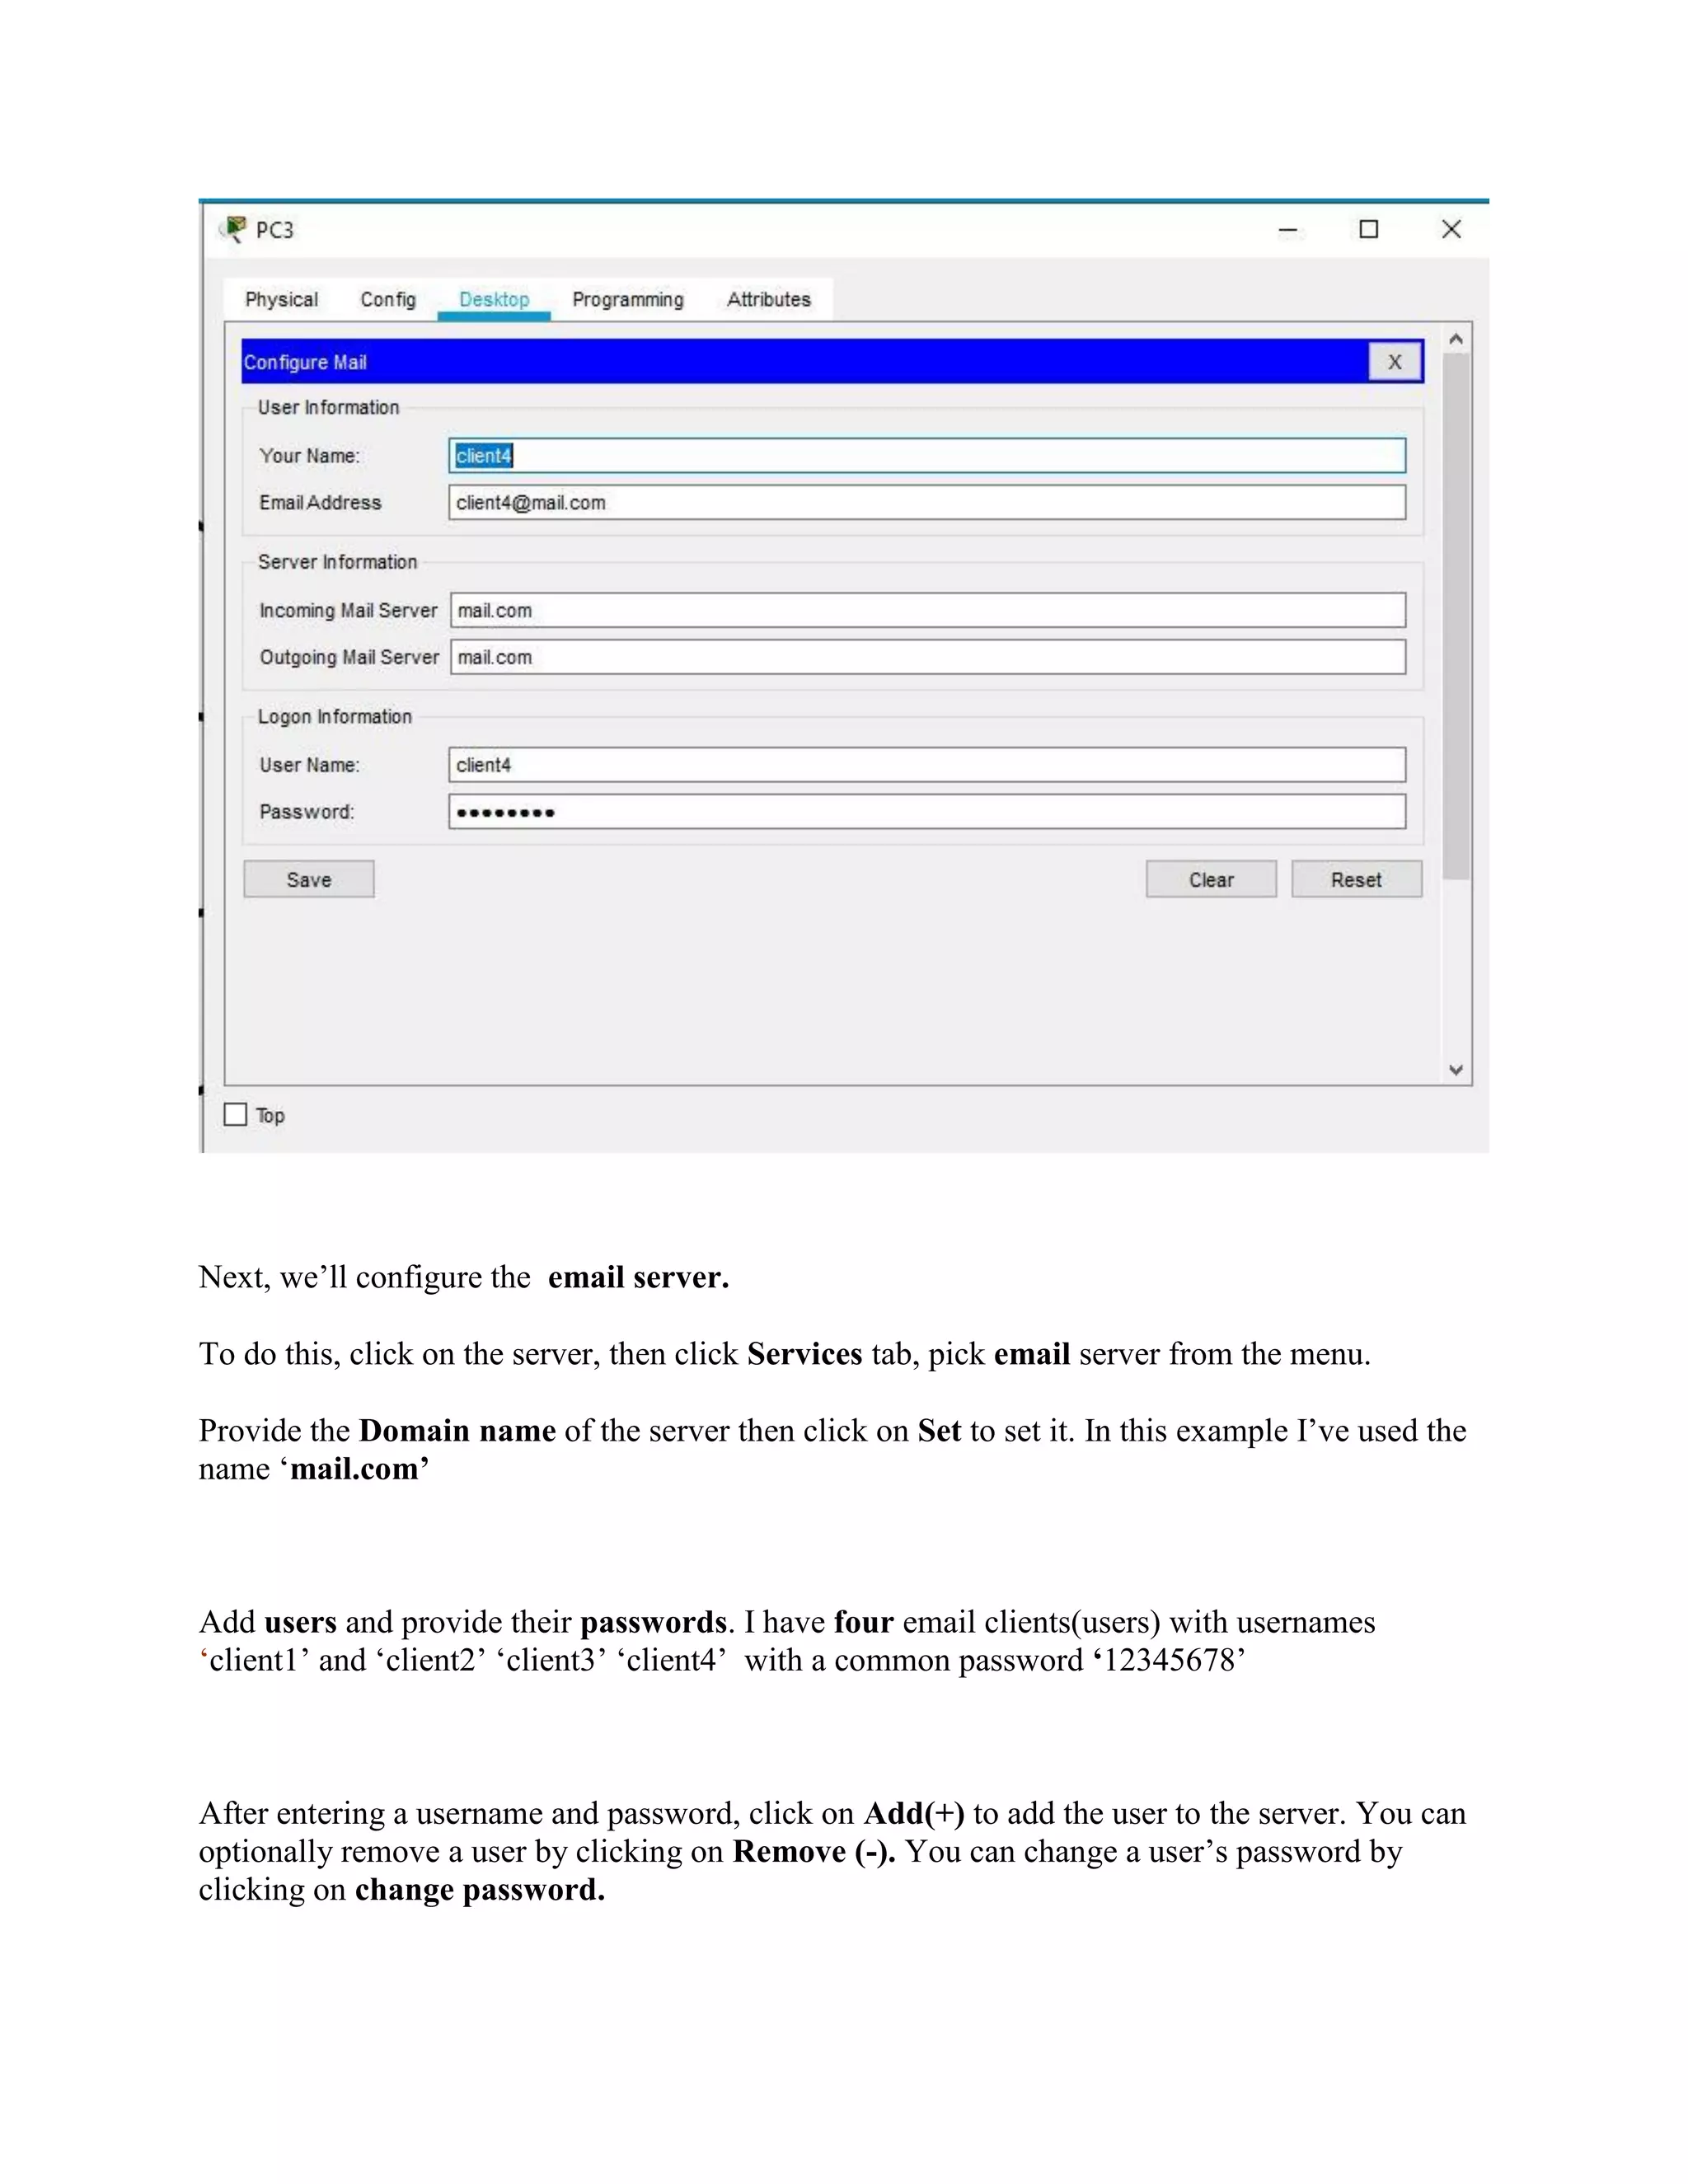
Step-by-step instructions on configuring mail clients for each PC in the network.
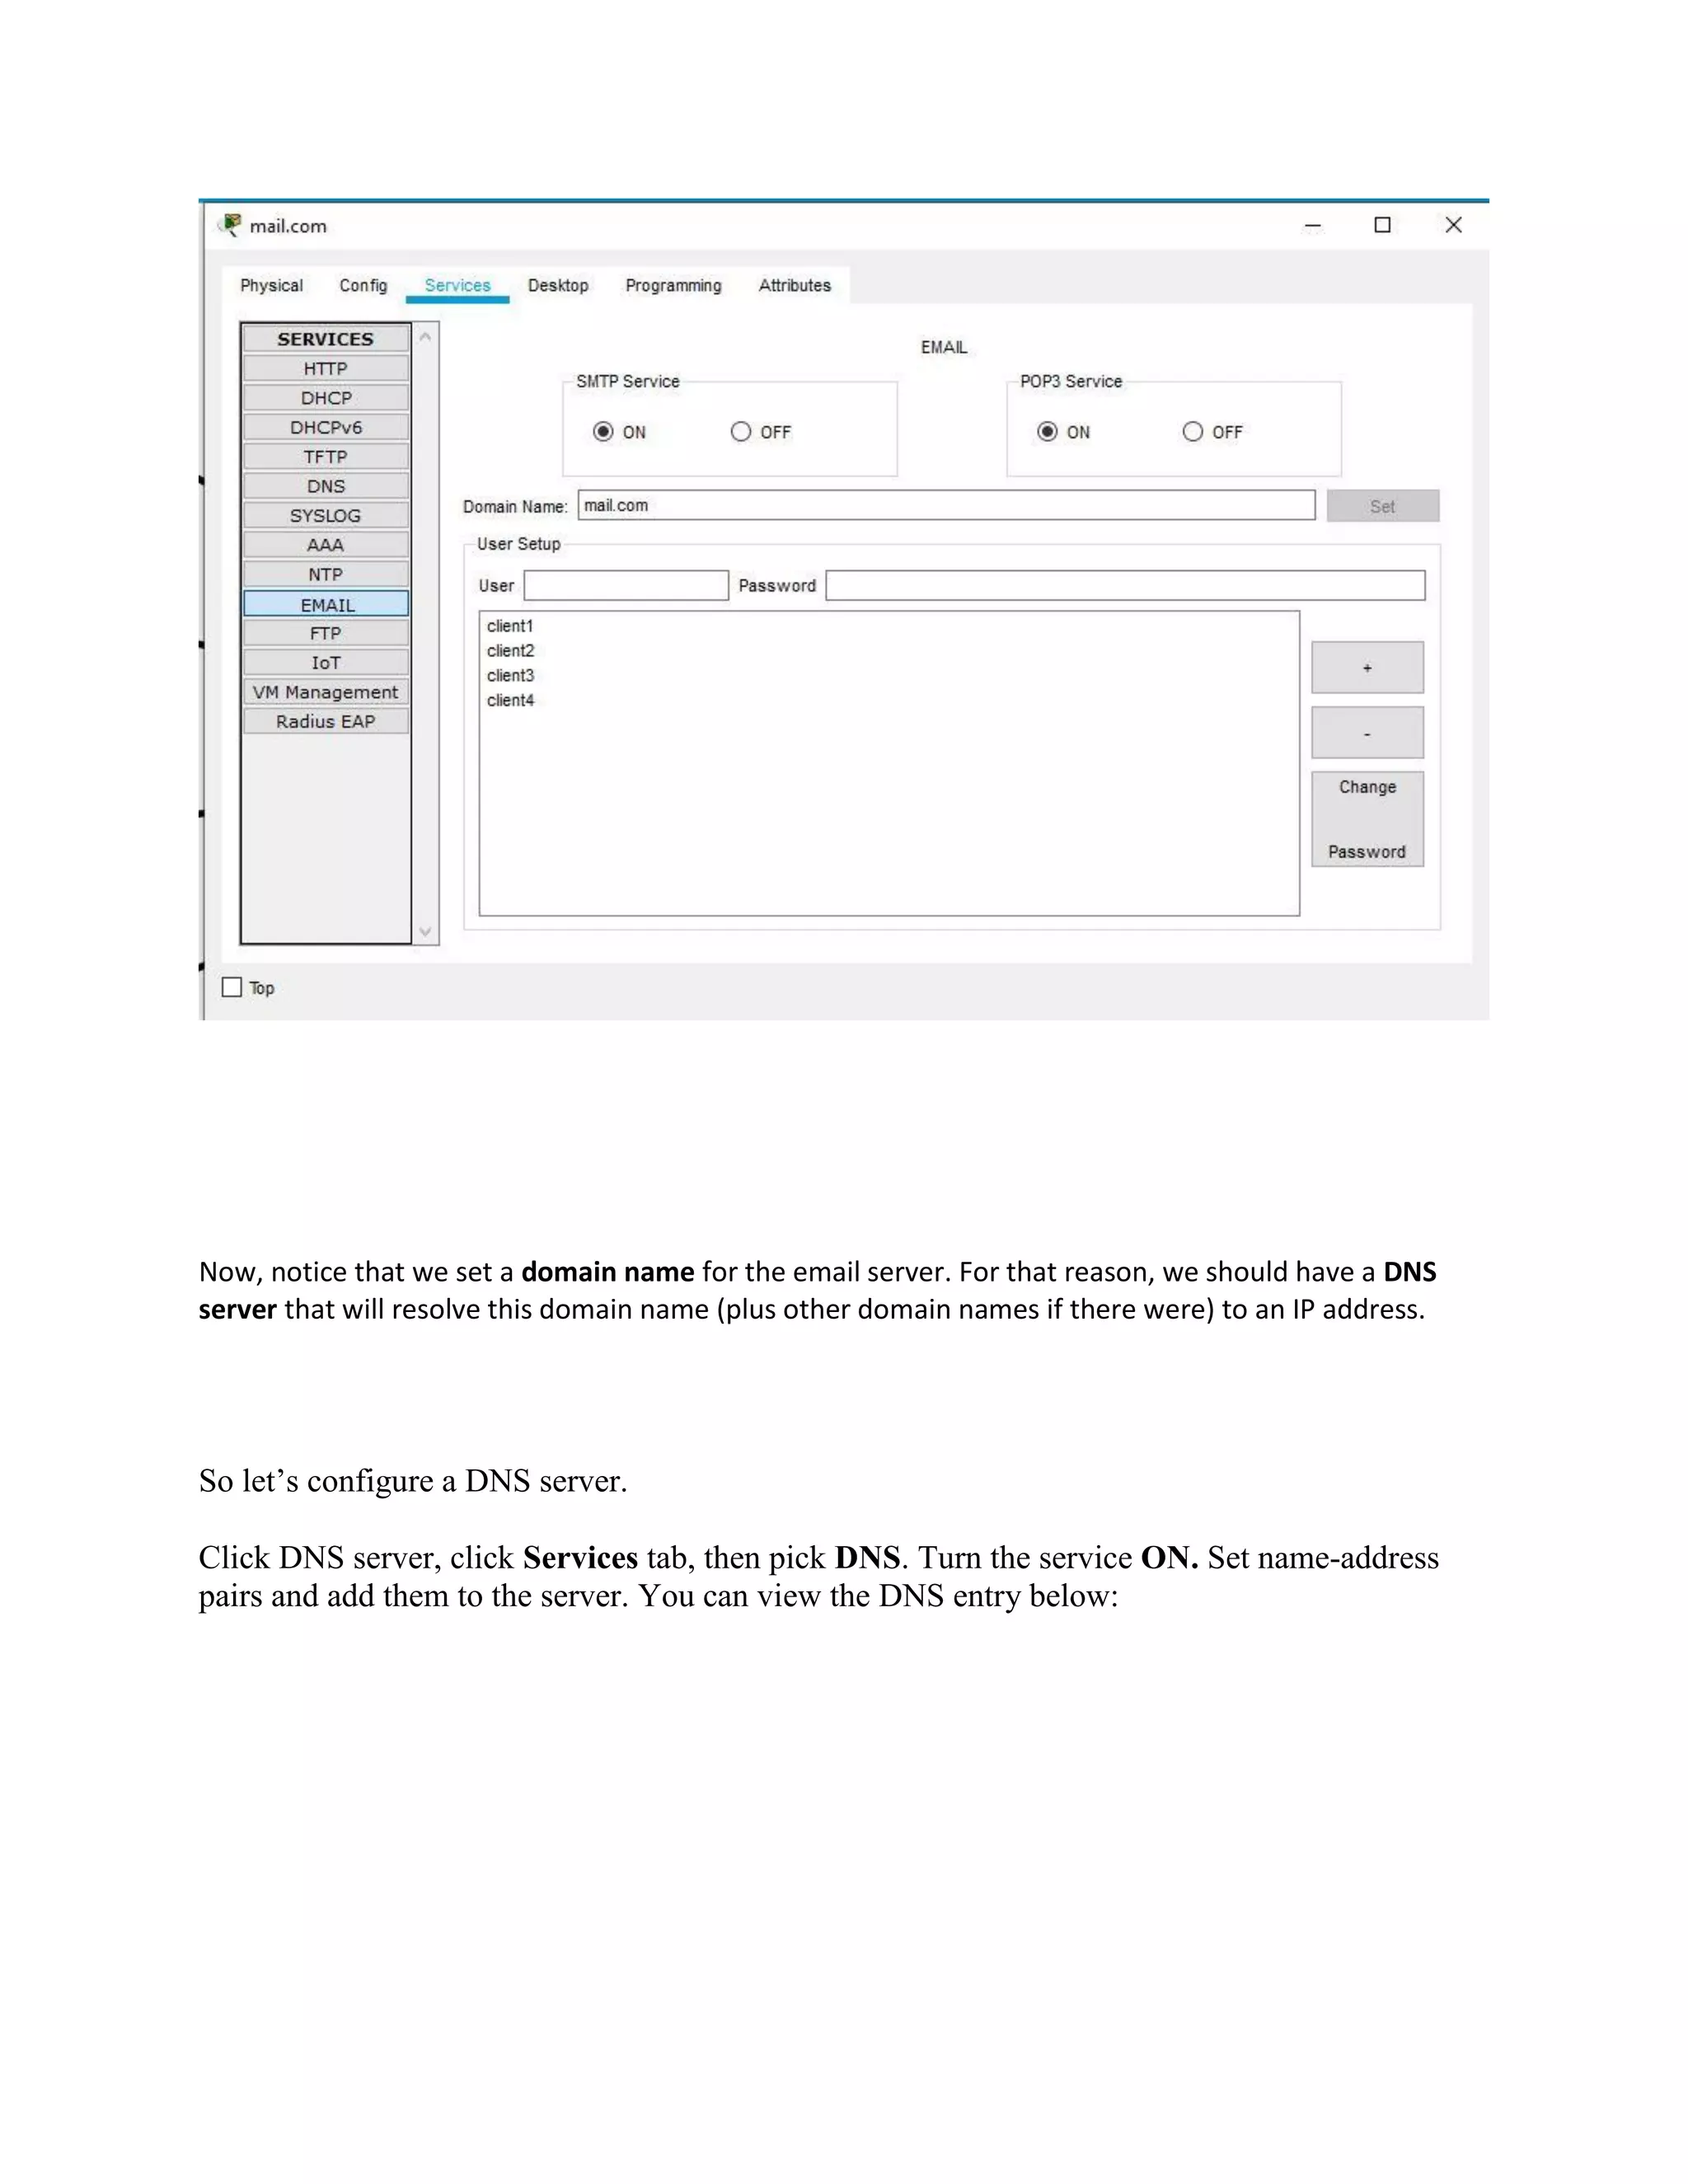
Details on setting the domain name and adding user accounts to the email server with specific passwords.
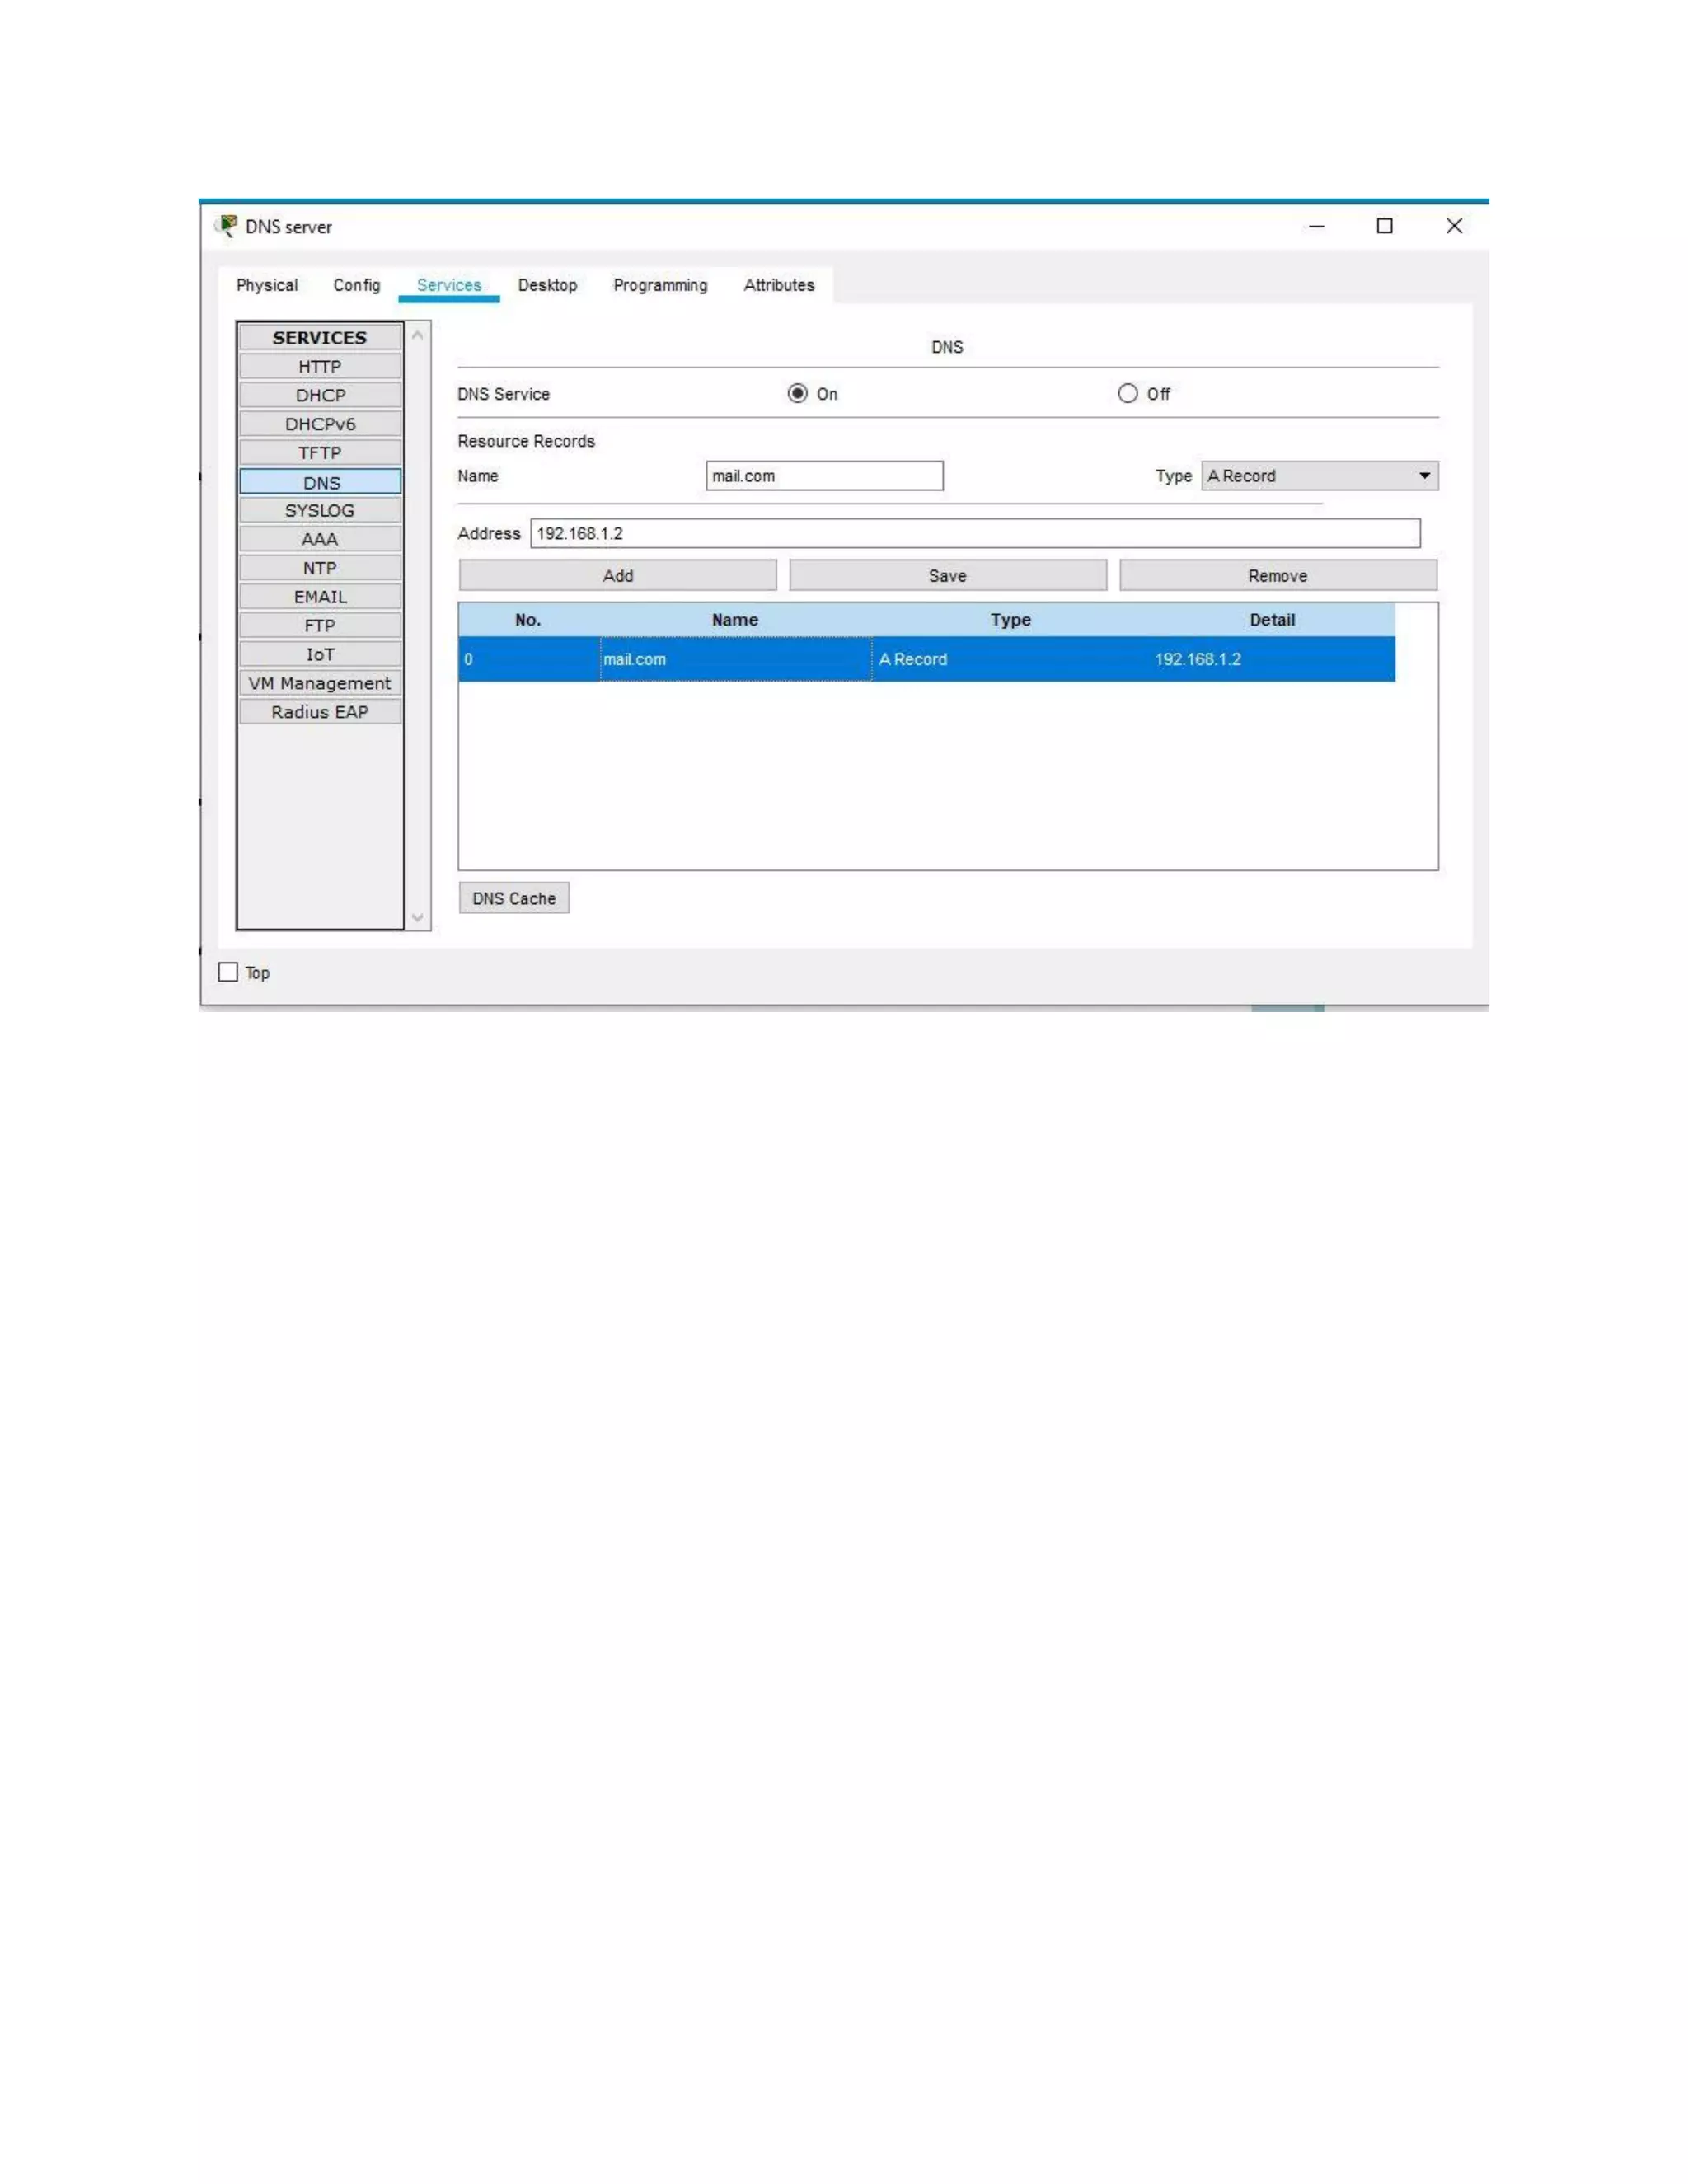
Instructions to set up a DNS server for resolving the domain name of the email server.
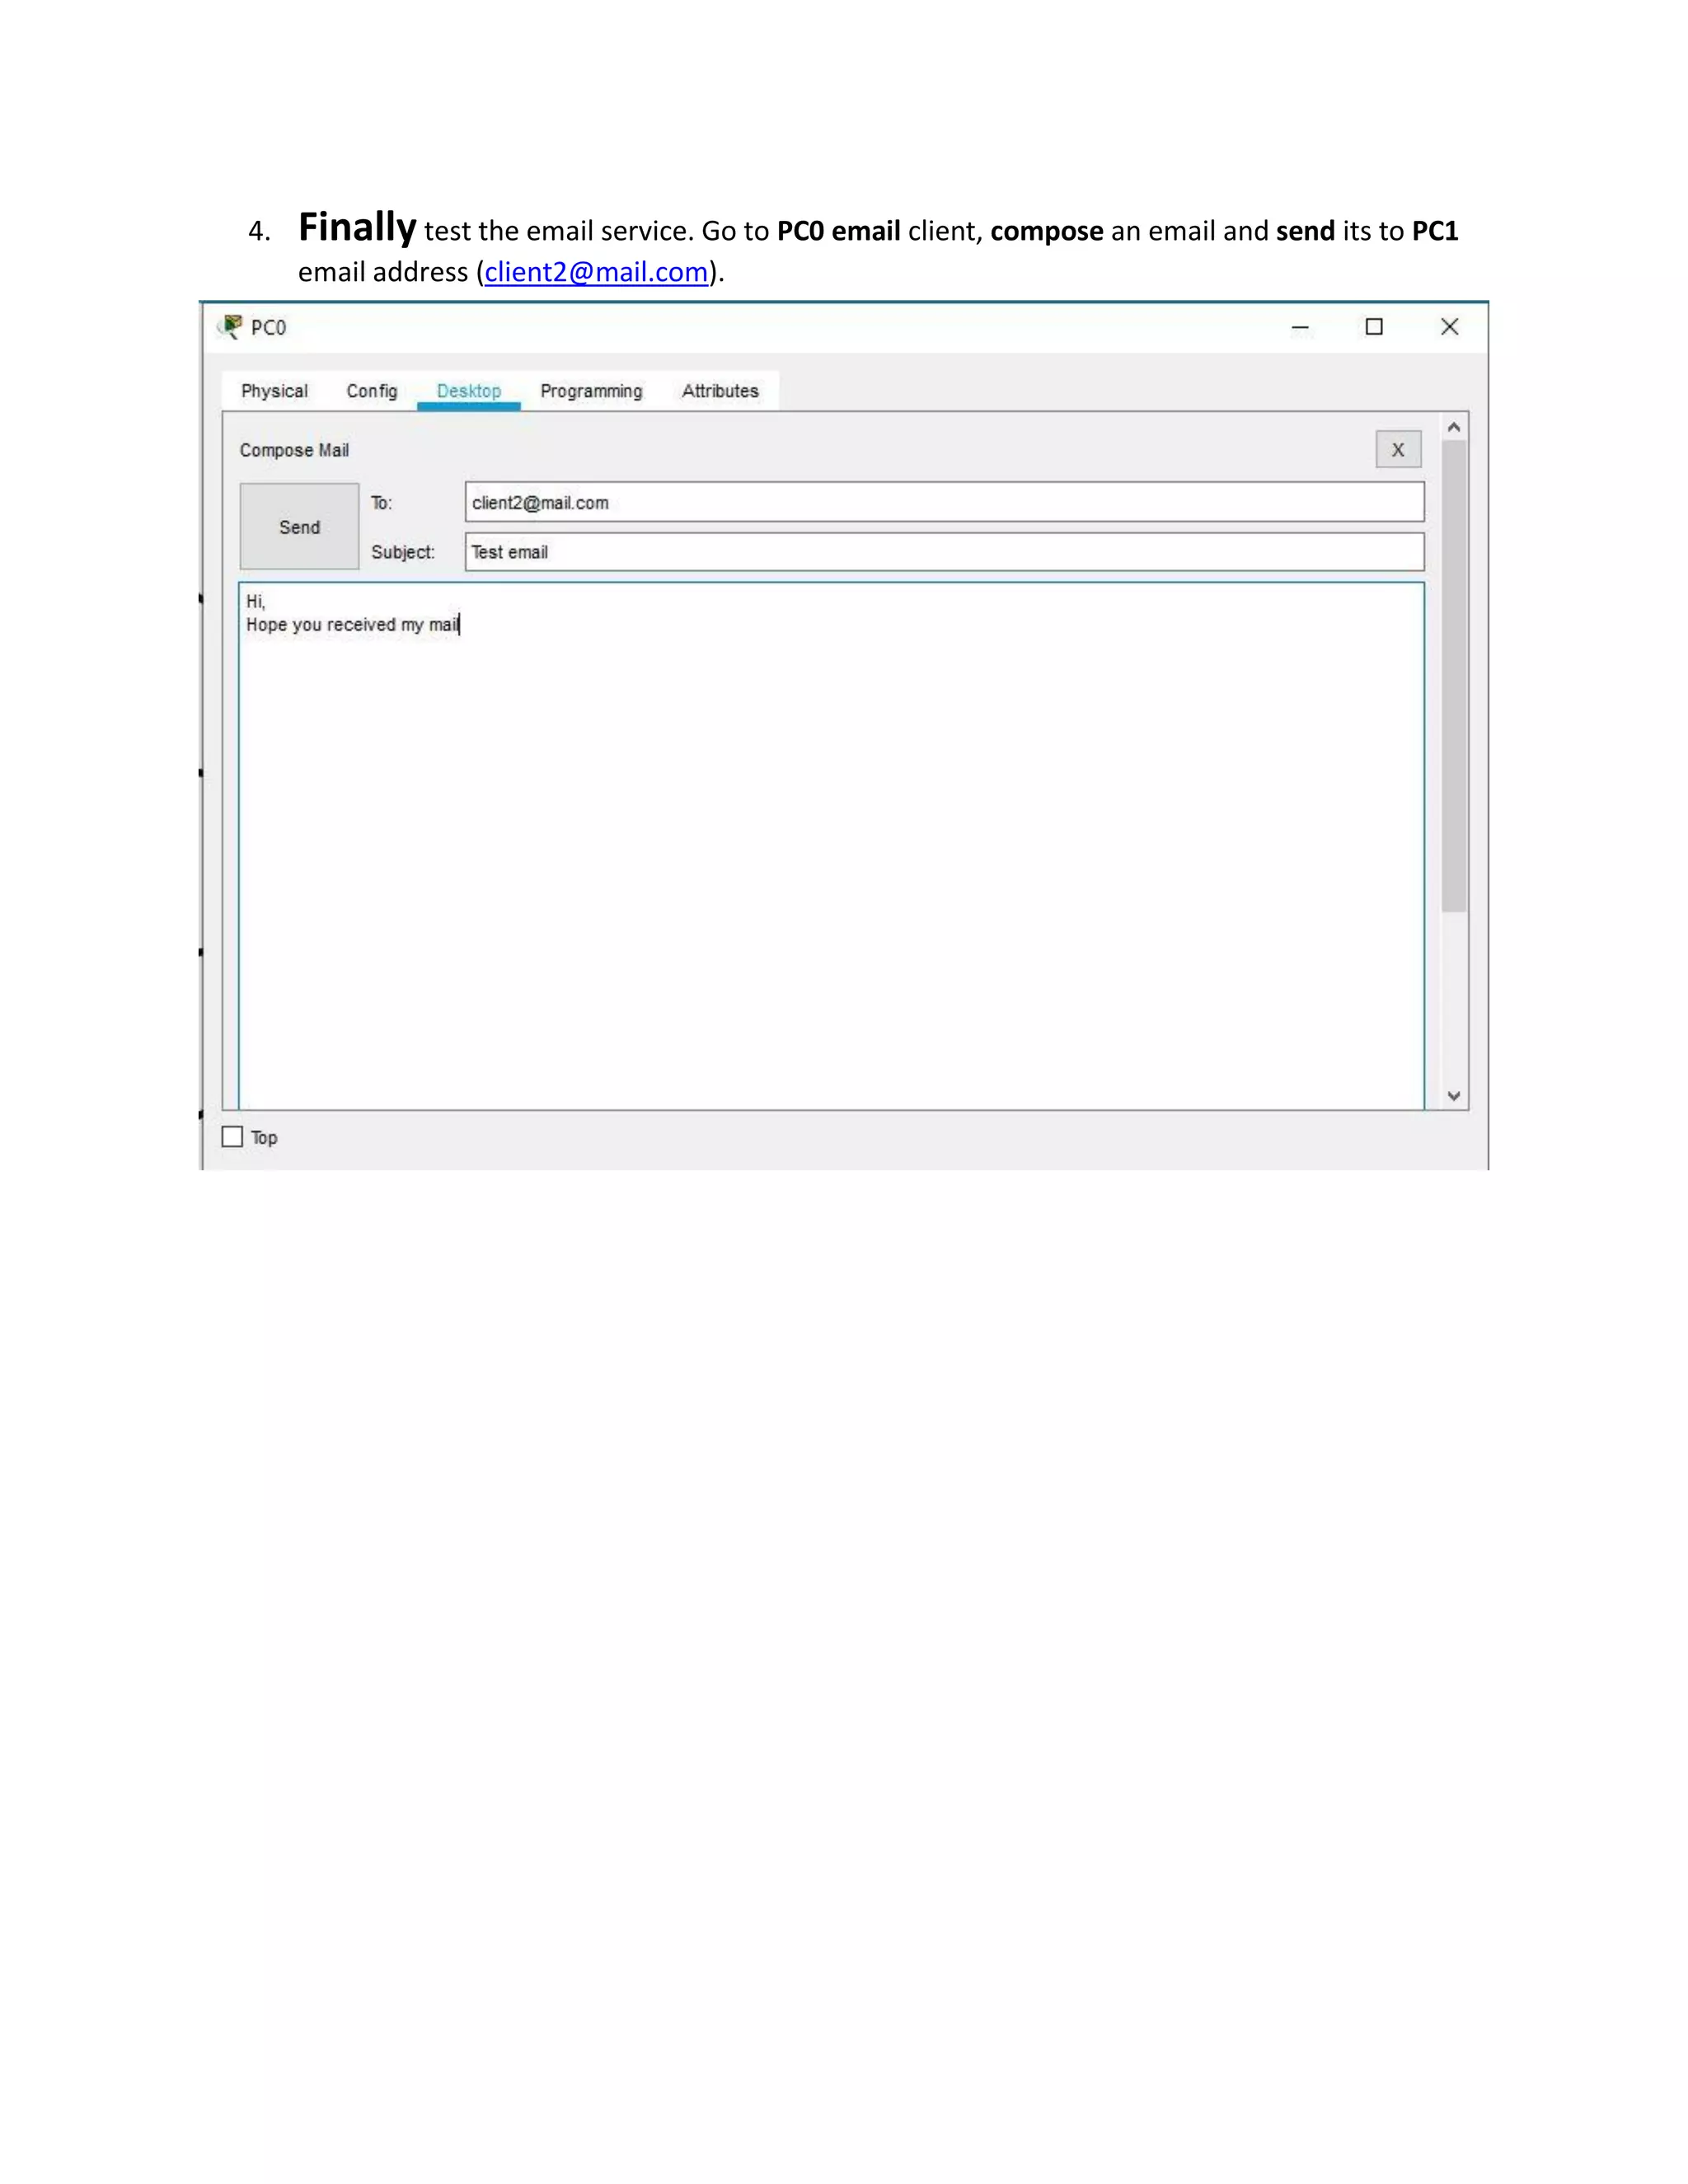
Final steps to test the email service by sending and receiving an email between PCs.