Download to read offline
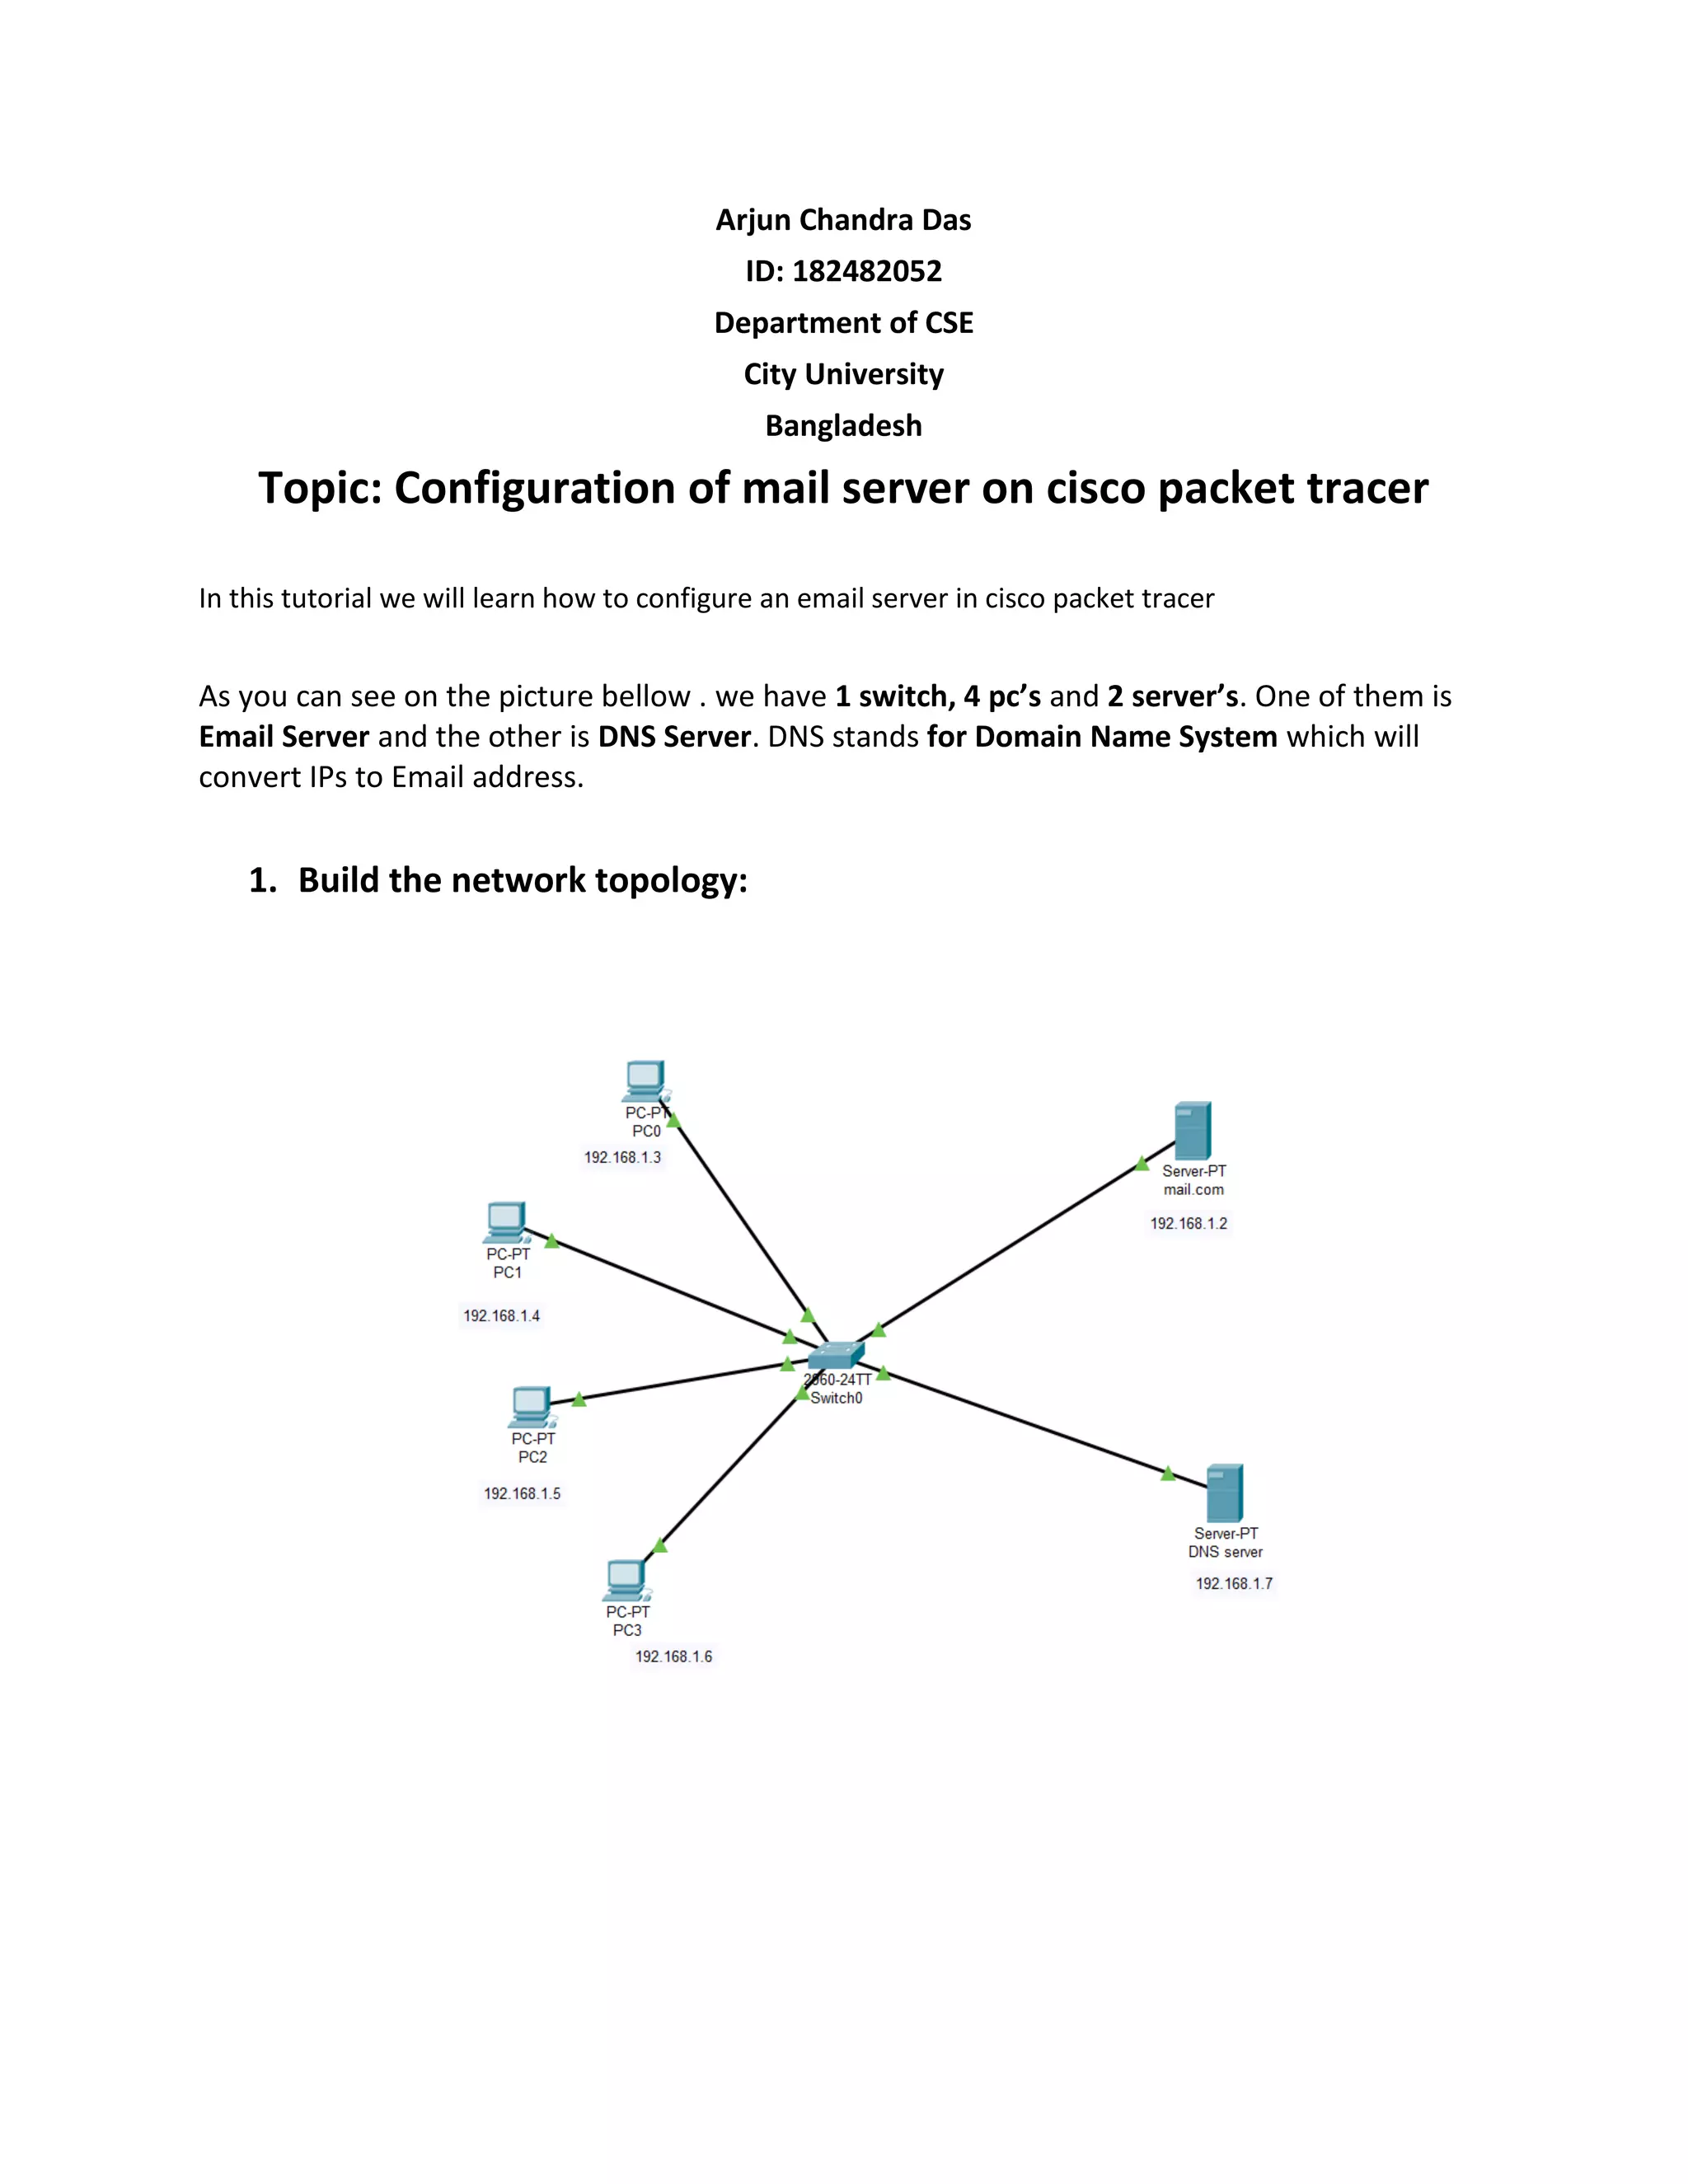
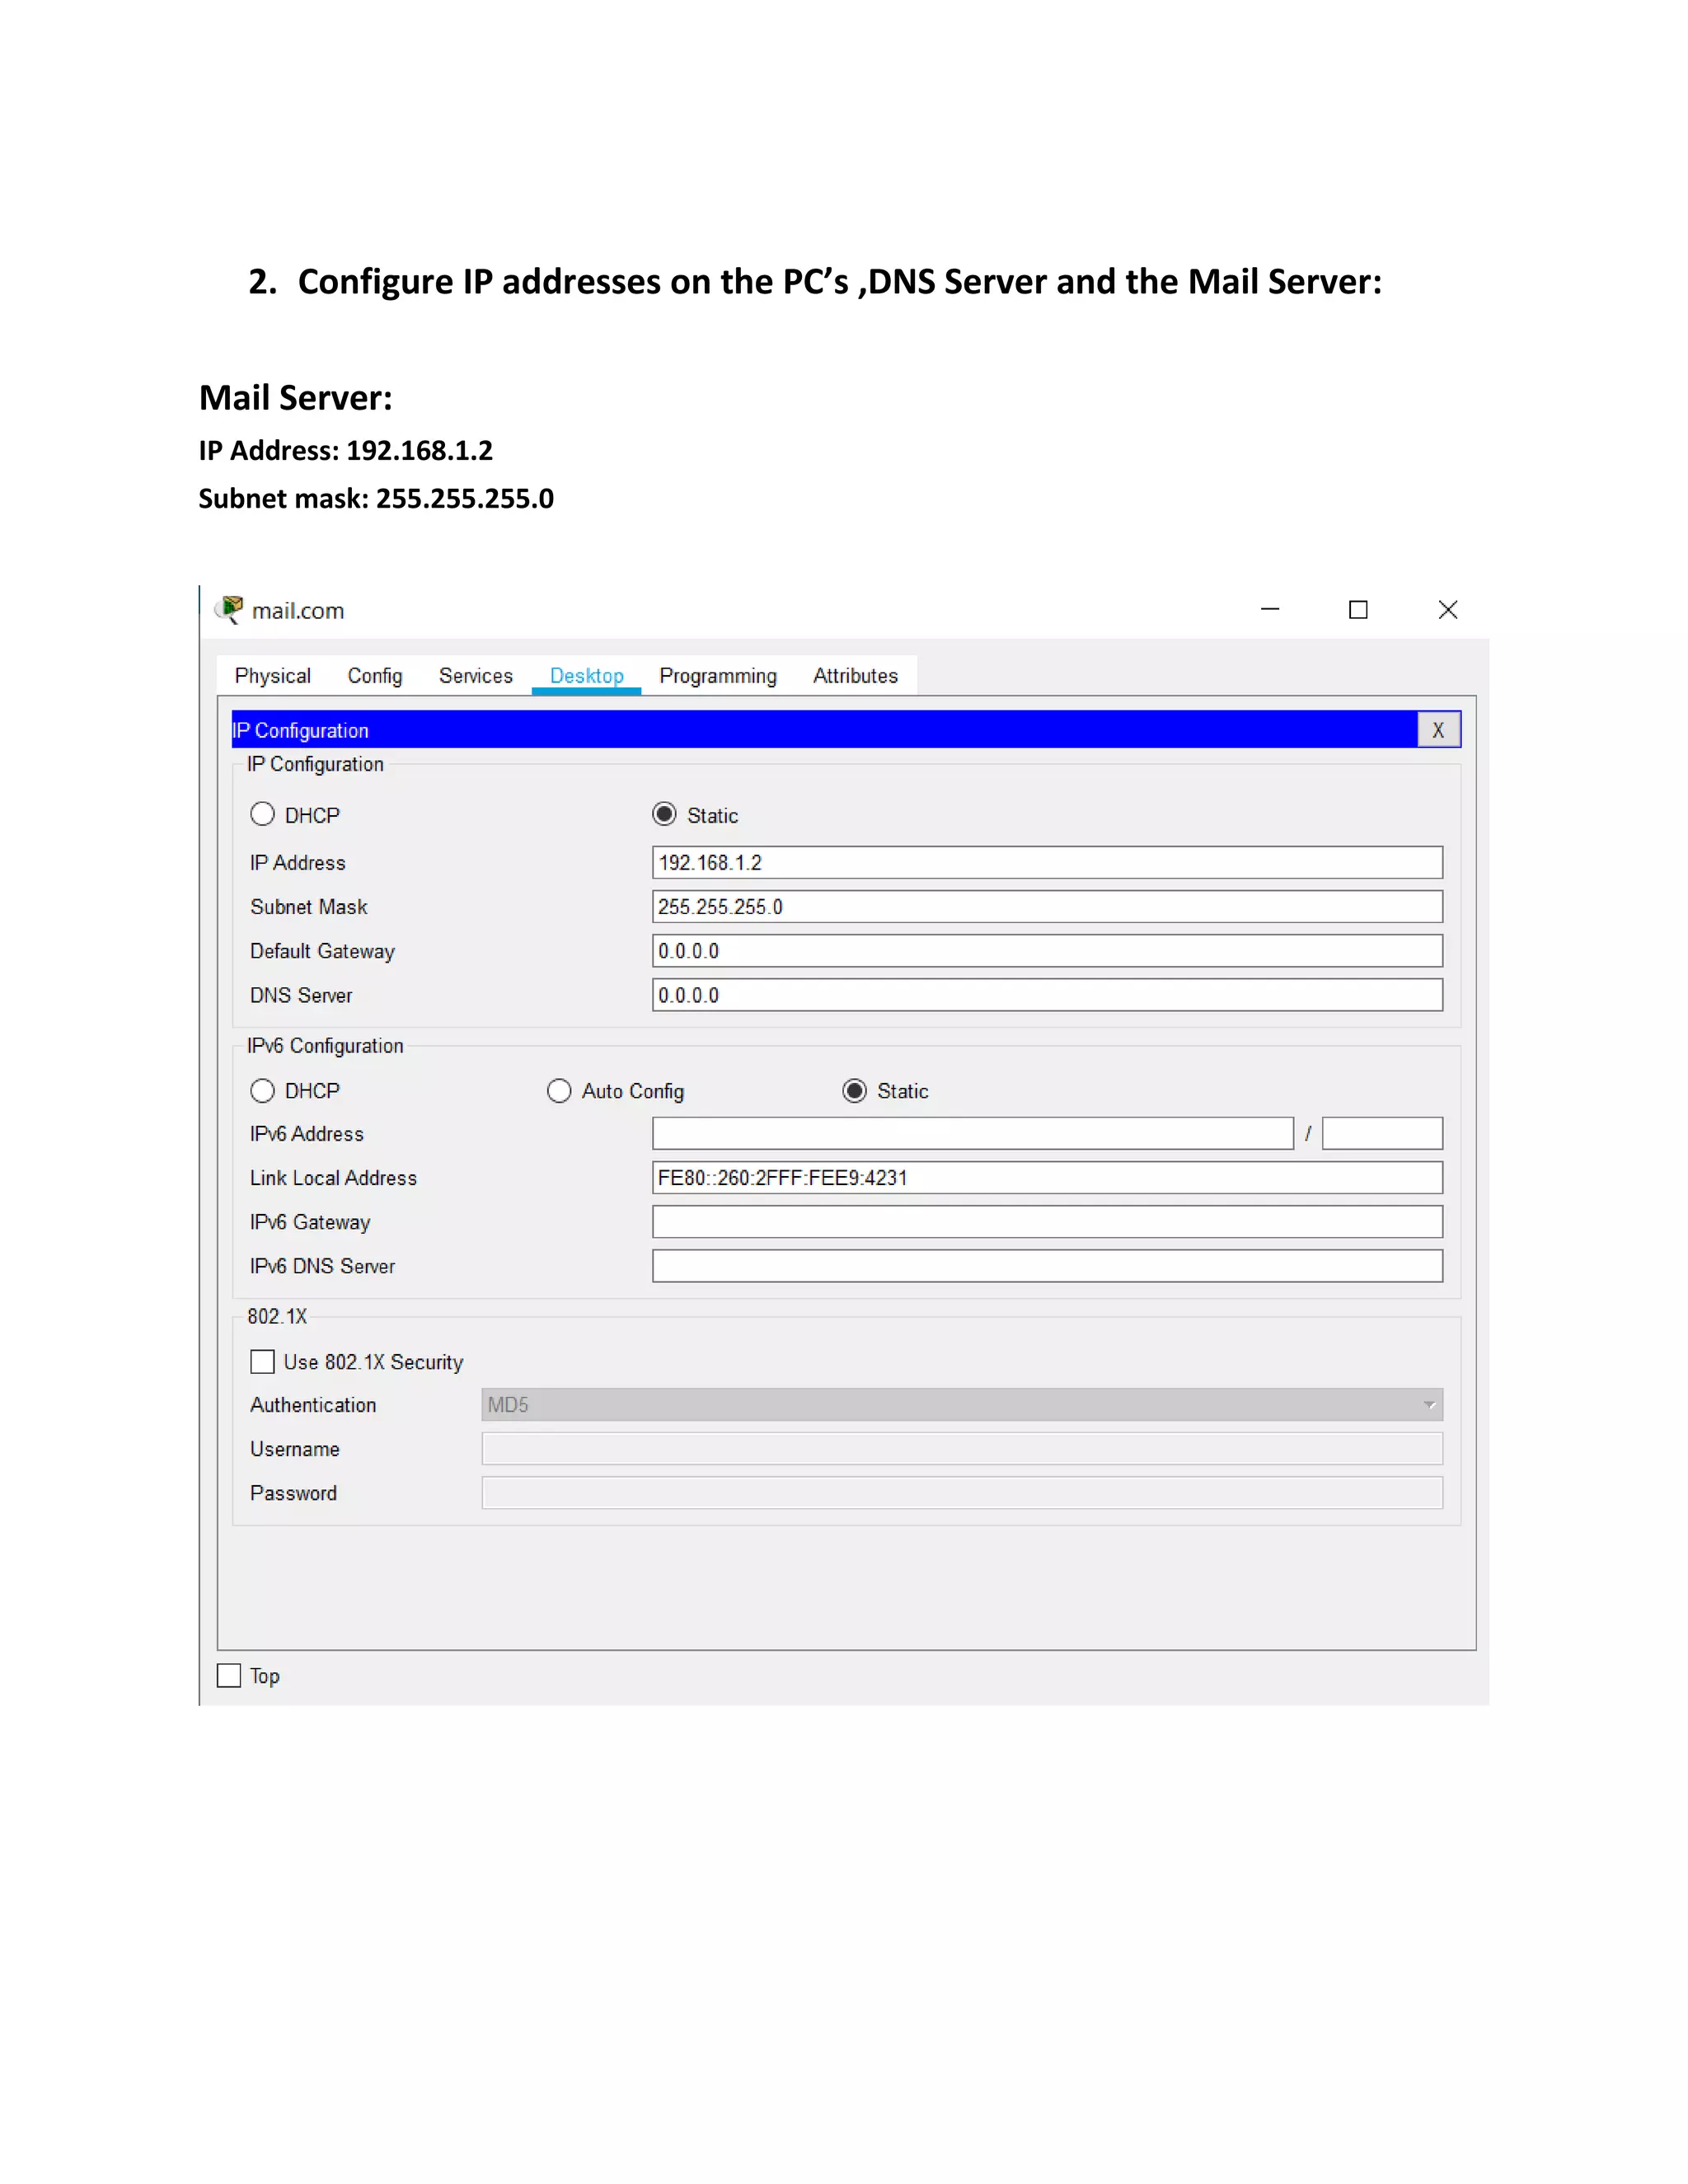
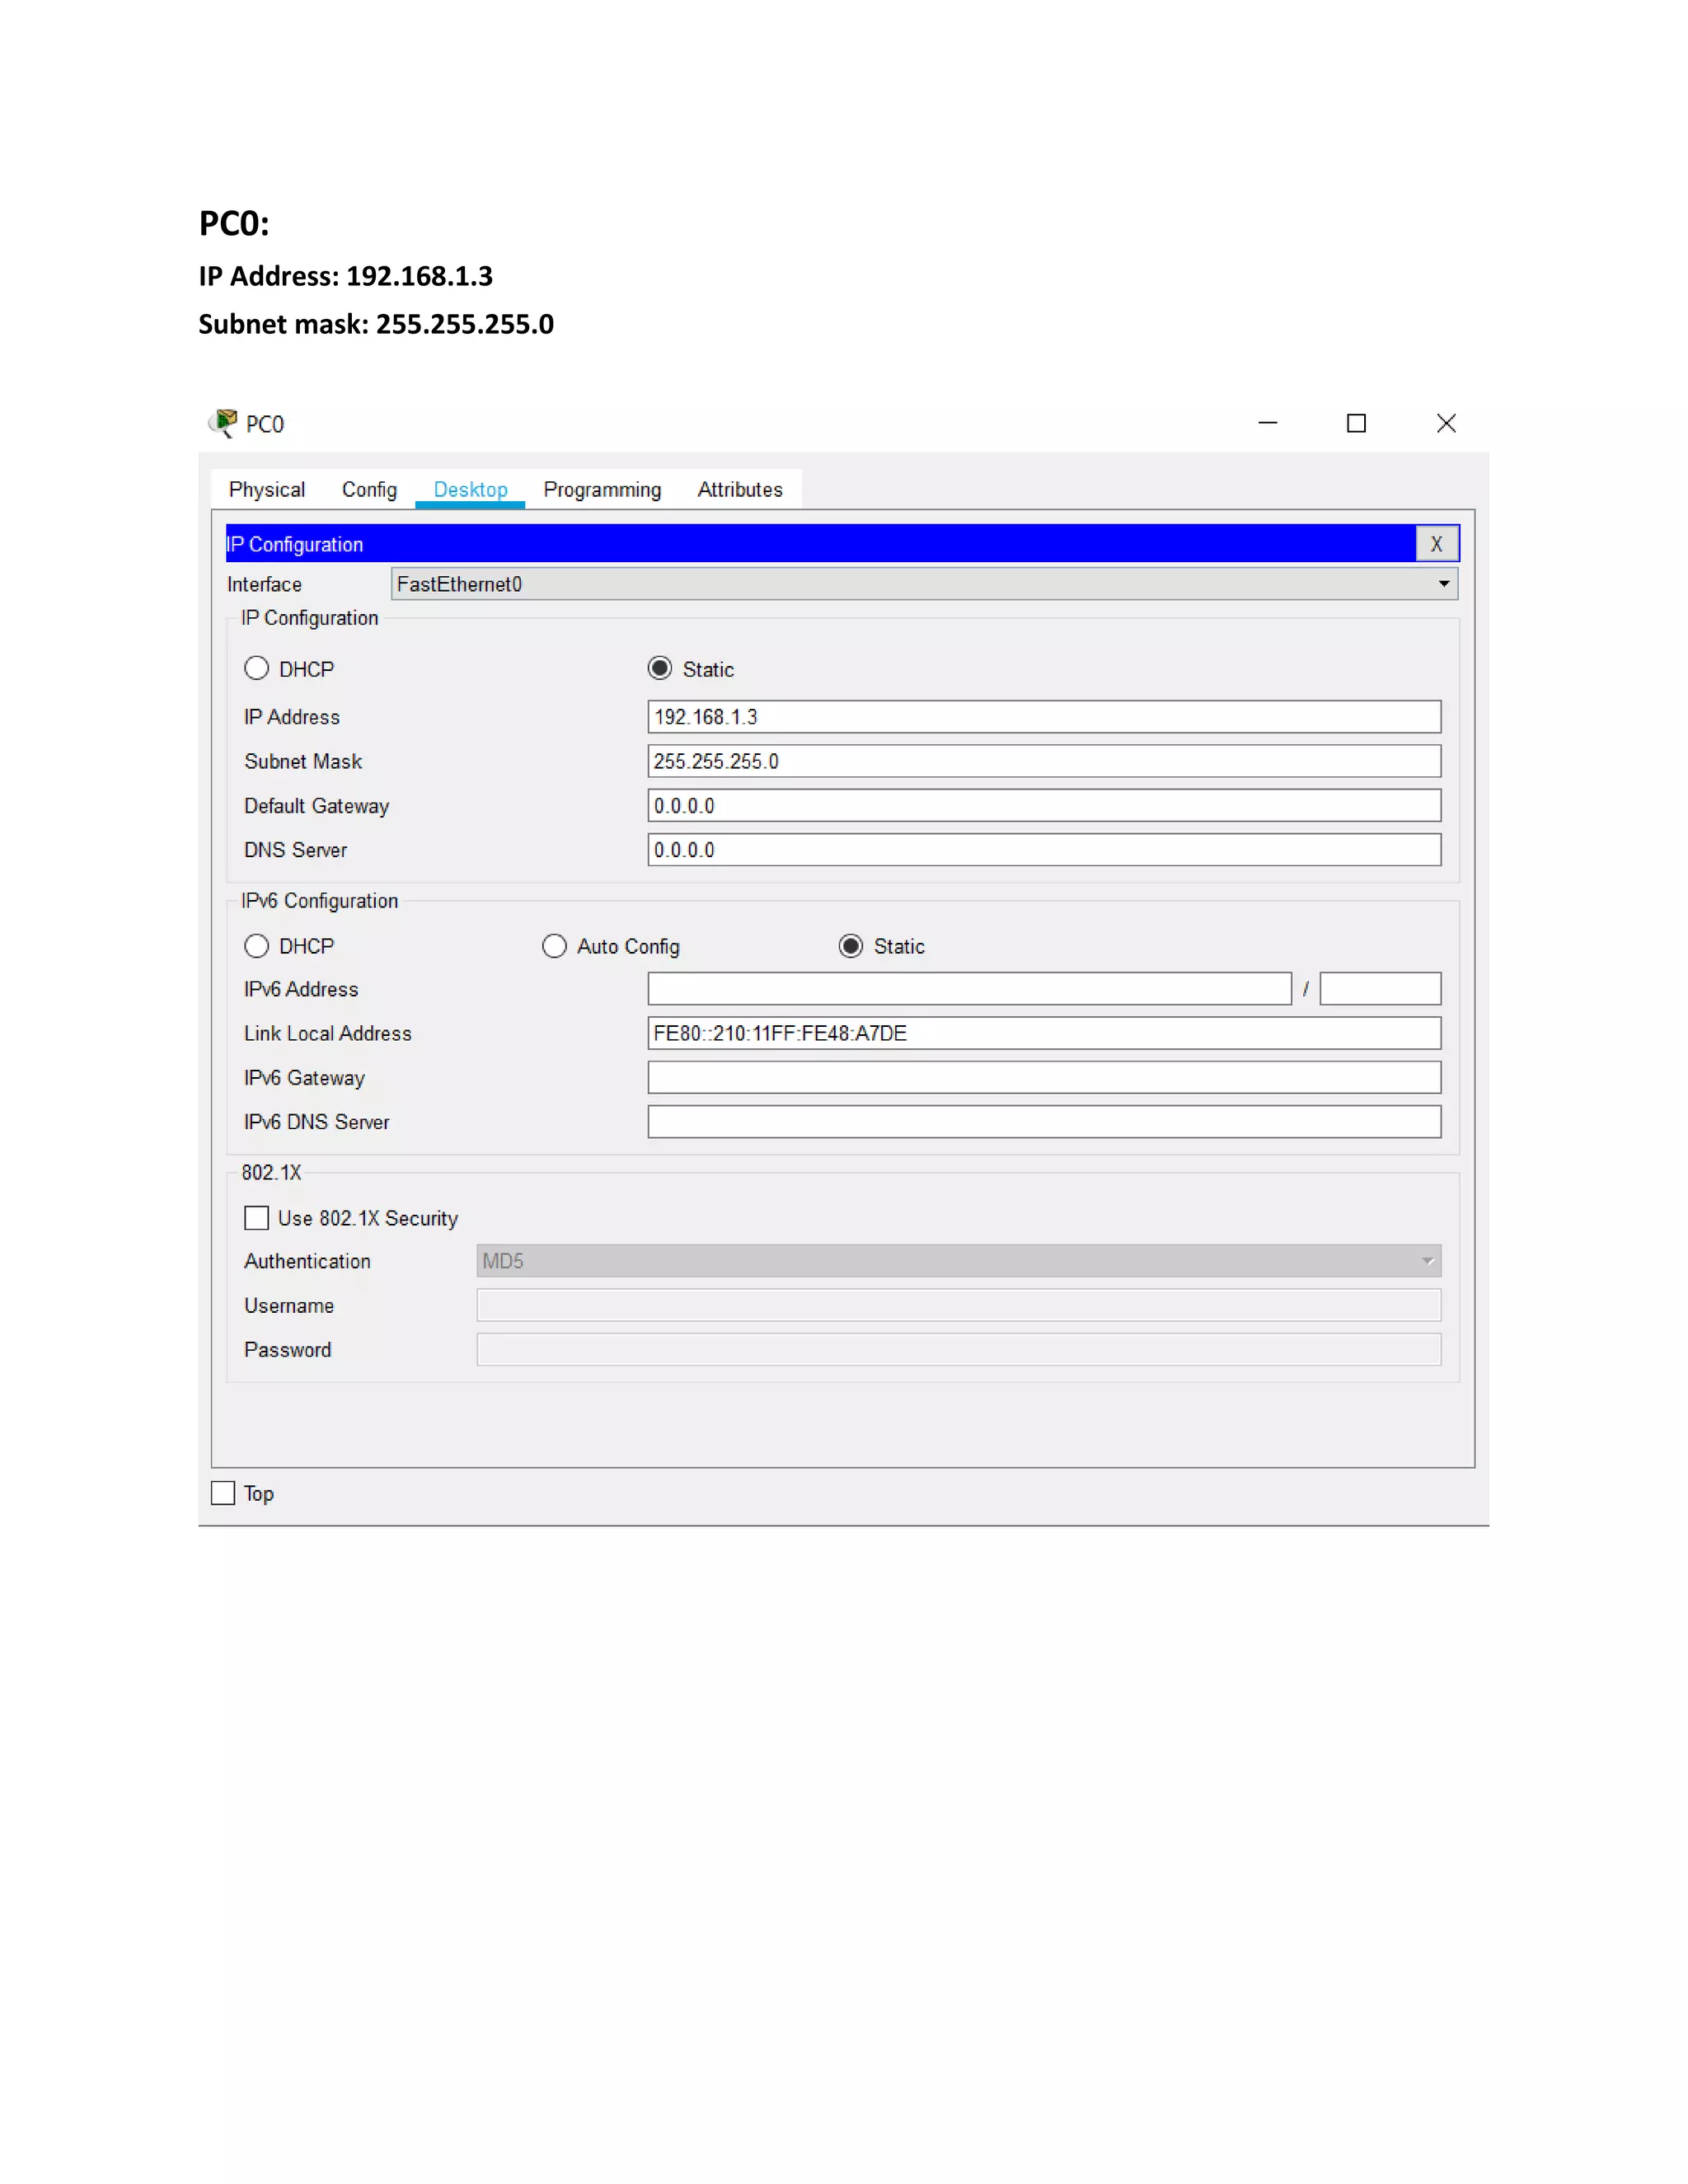
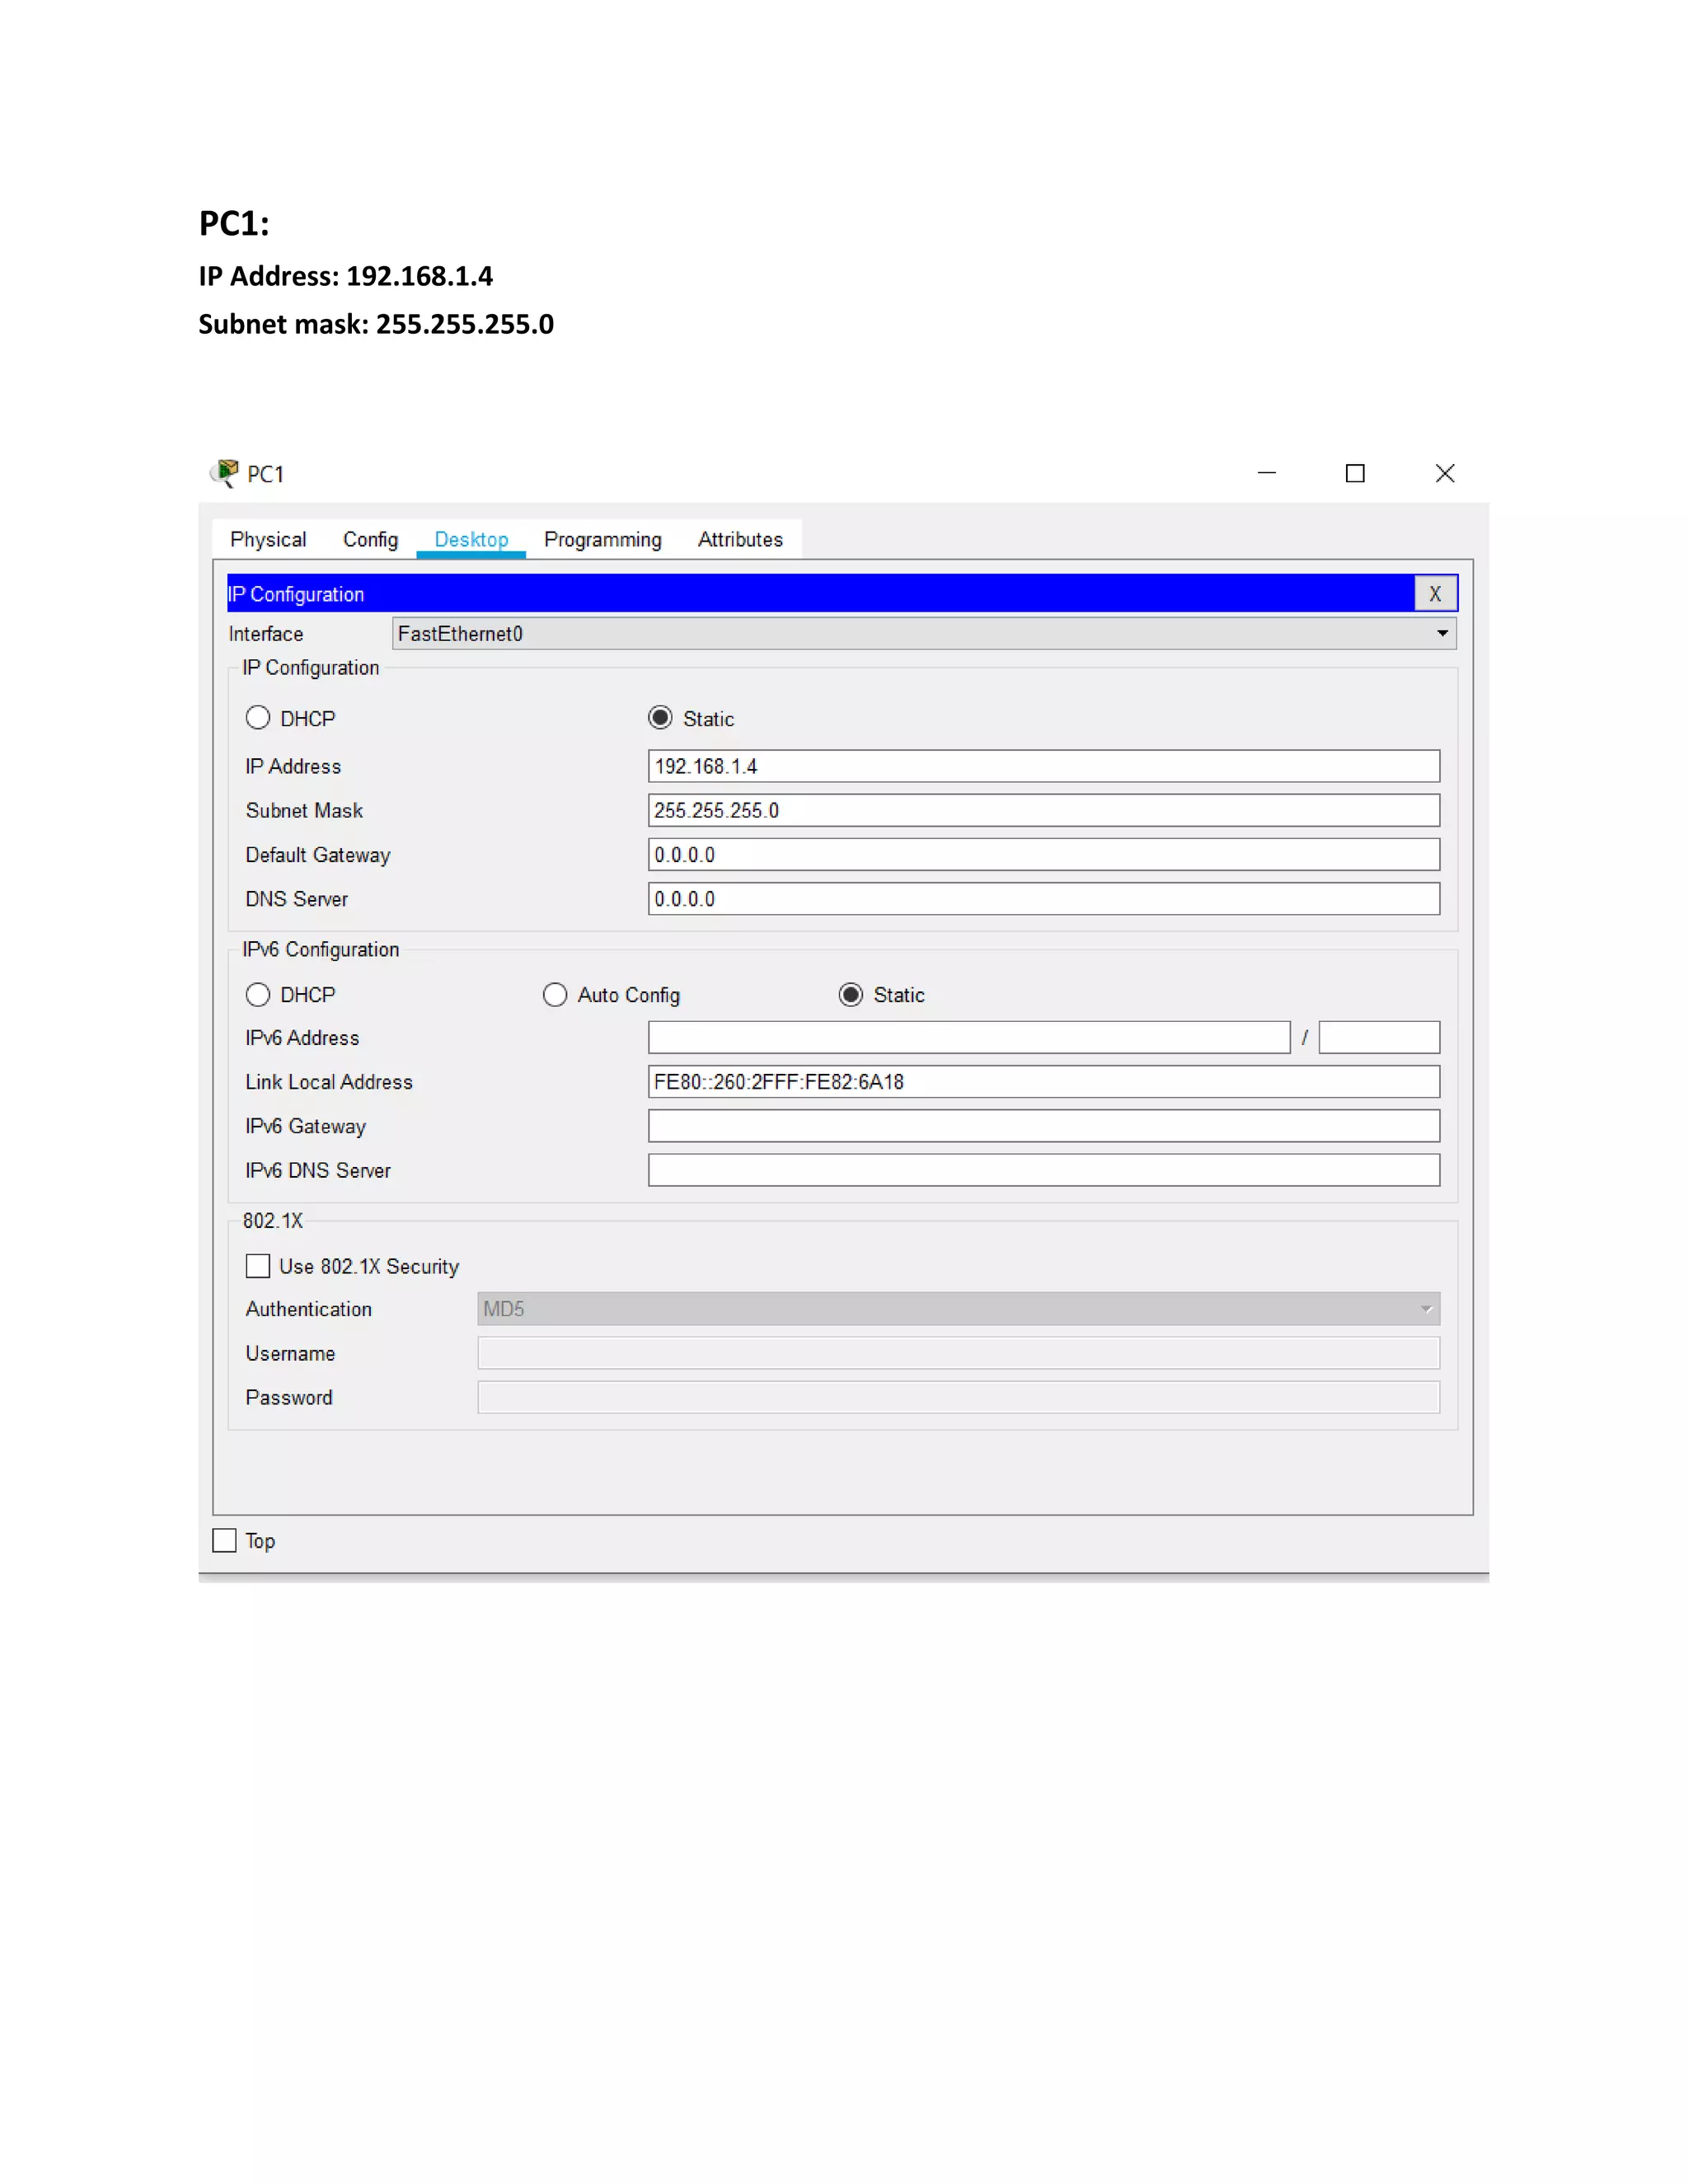
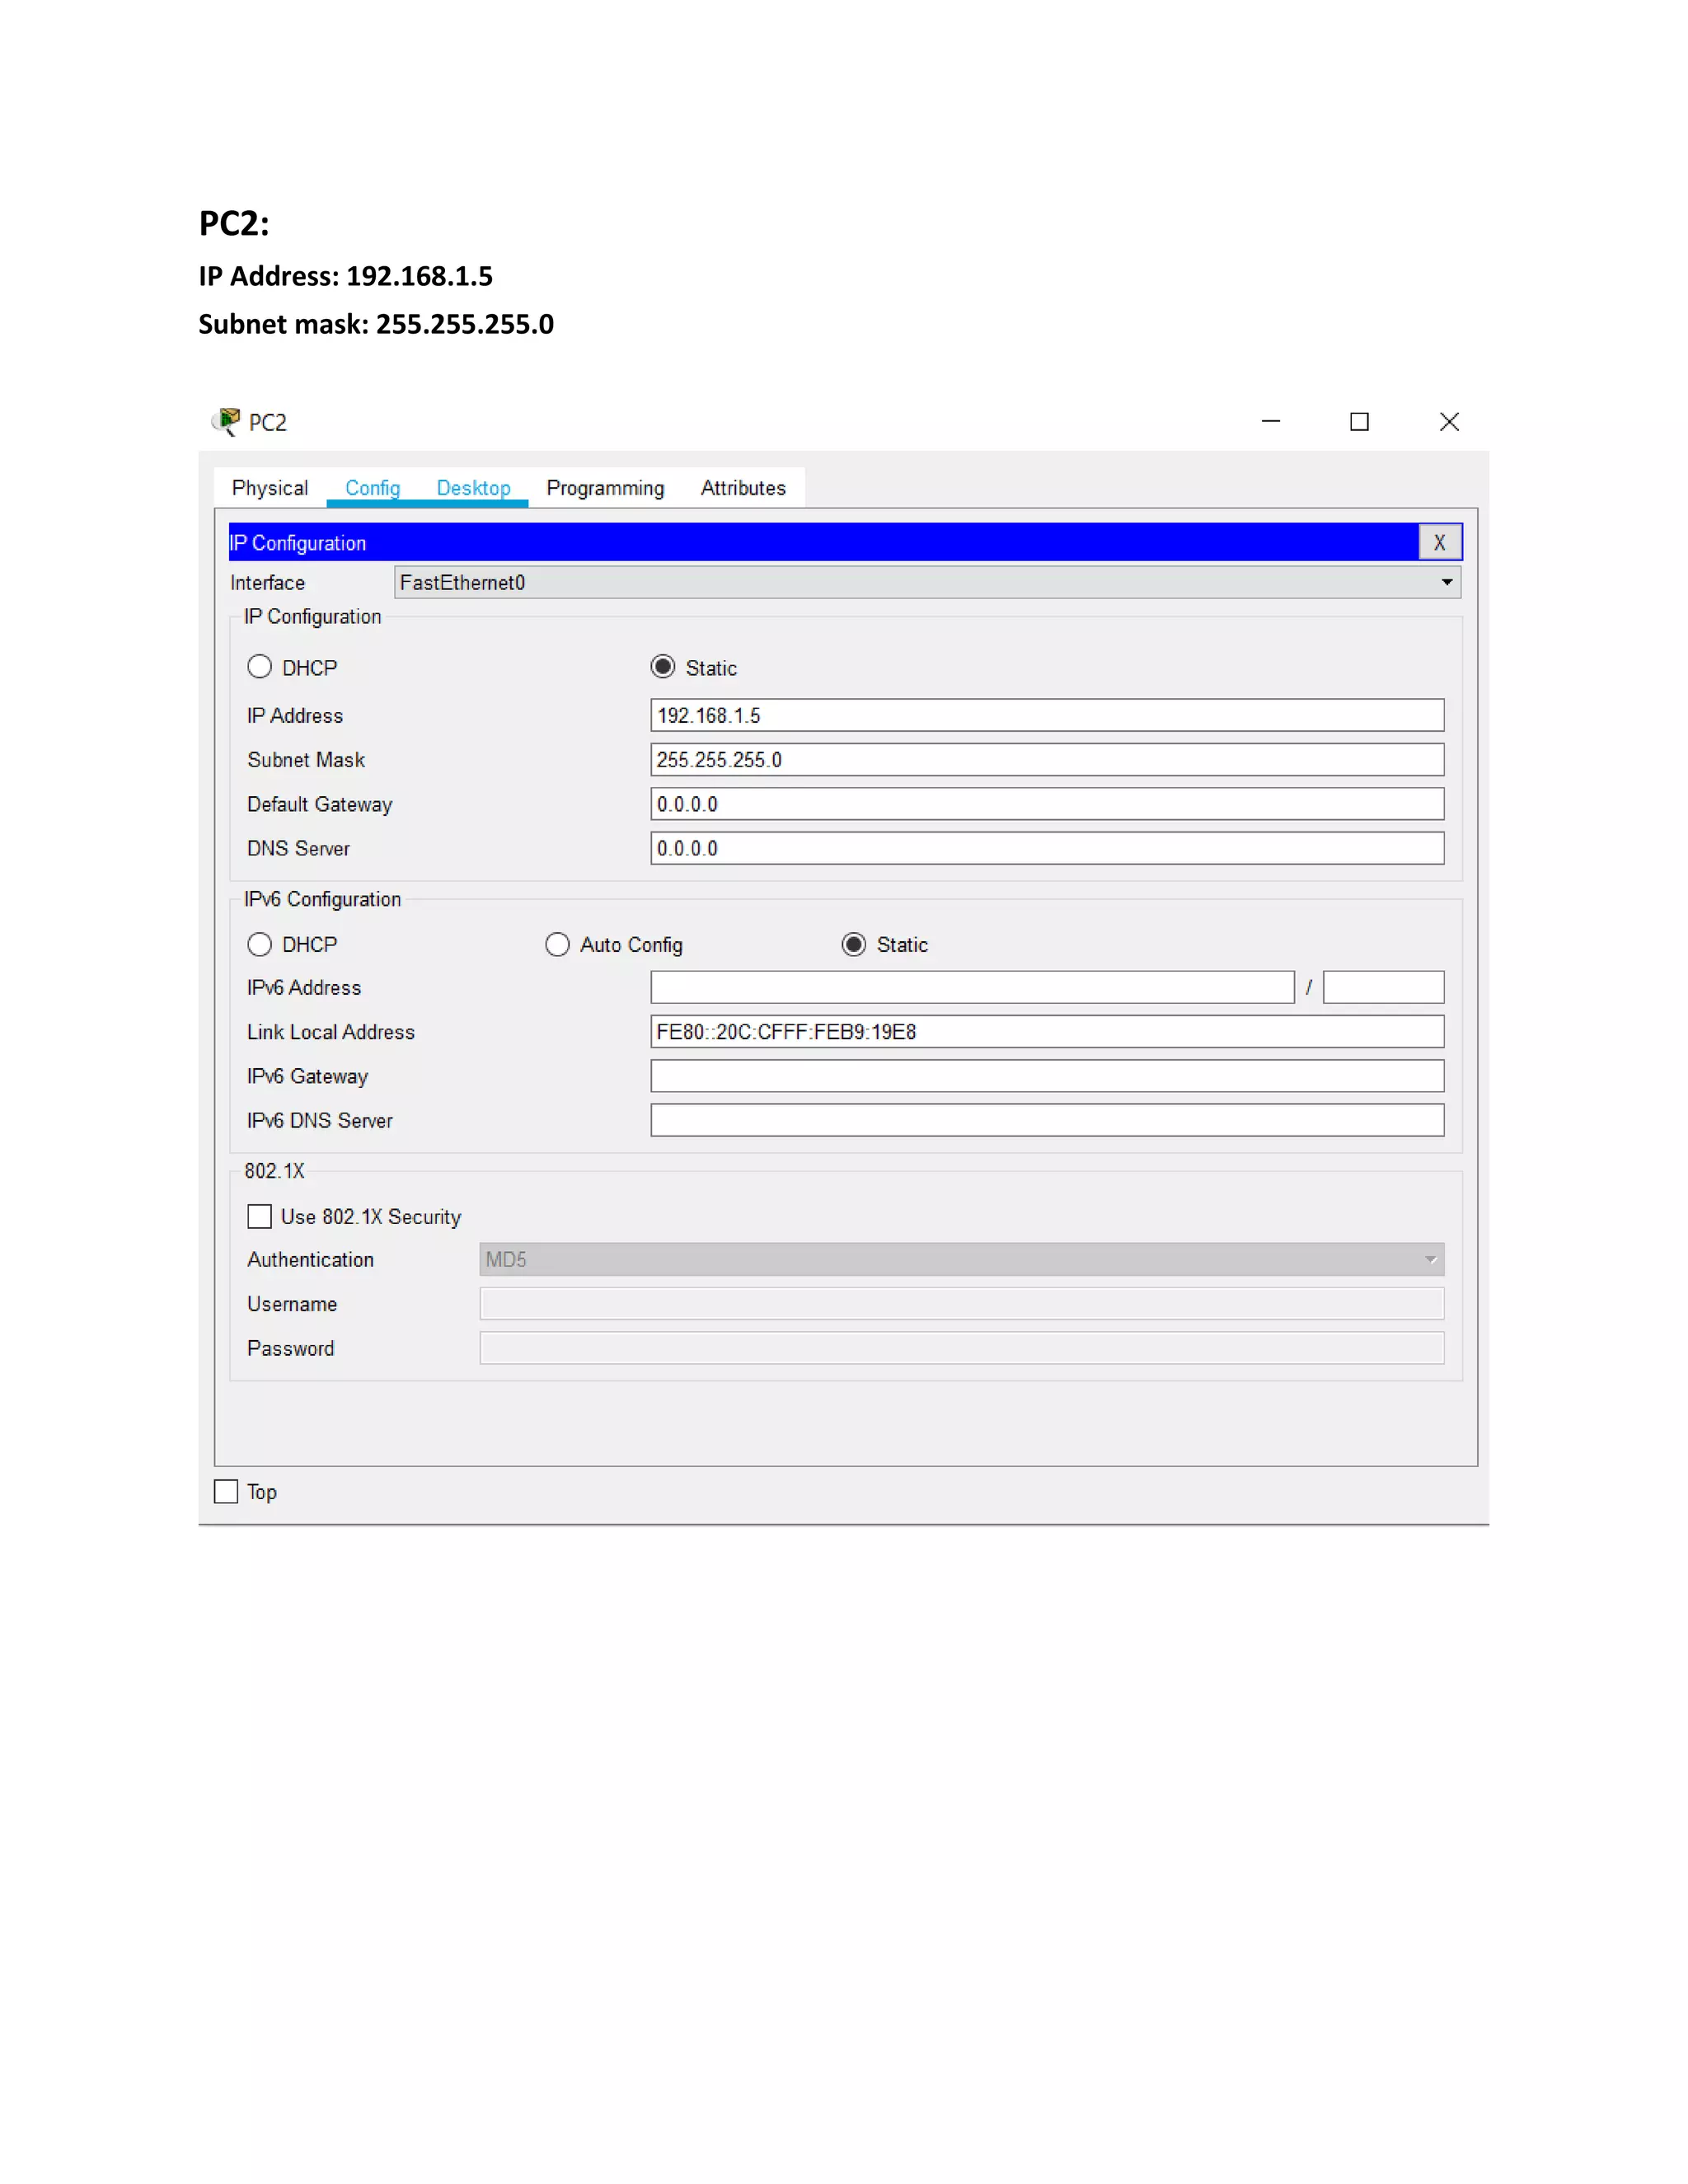
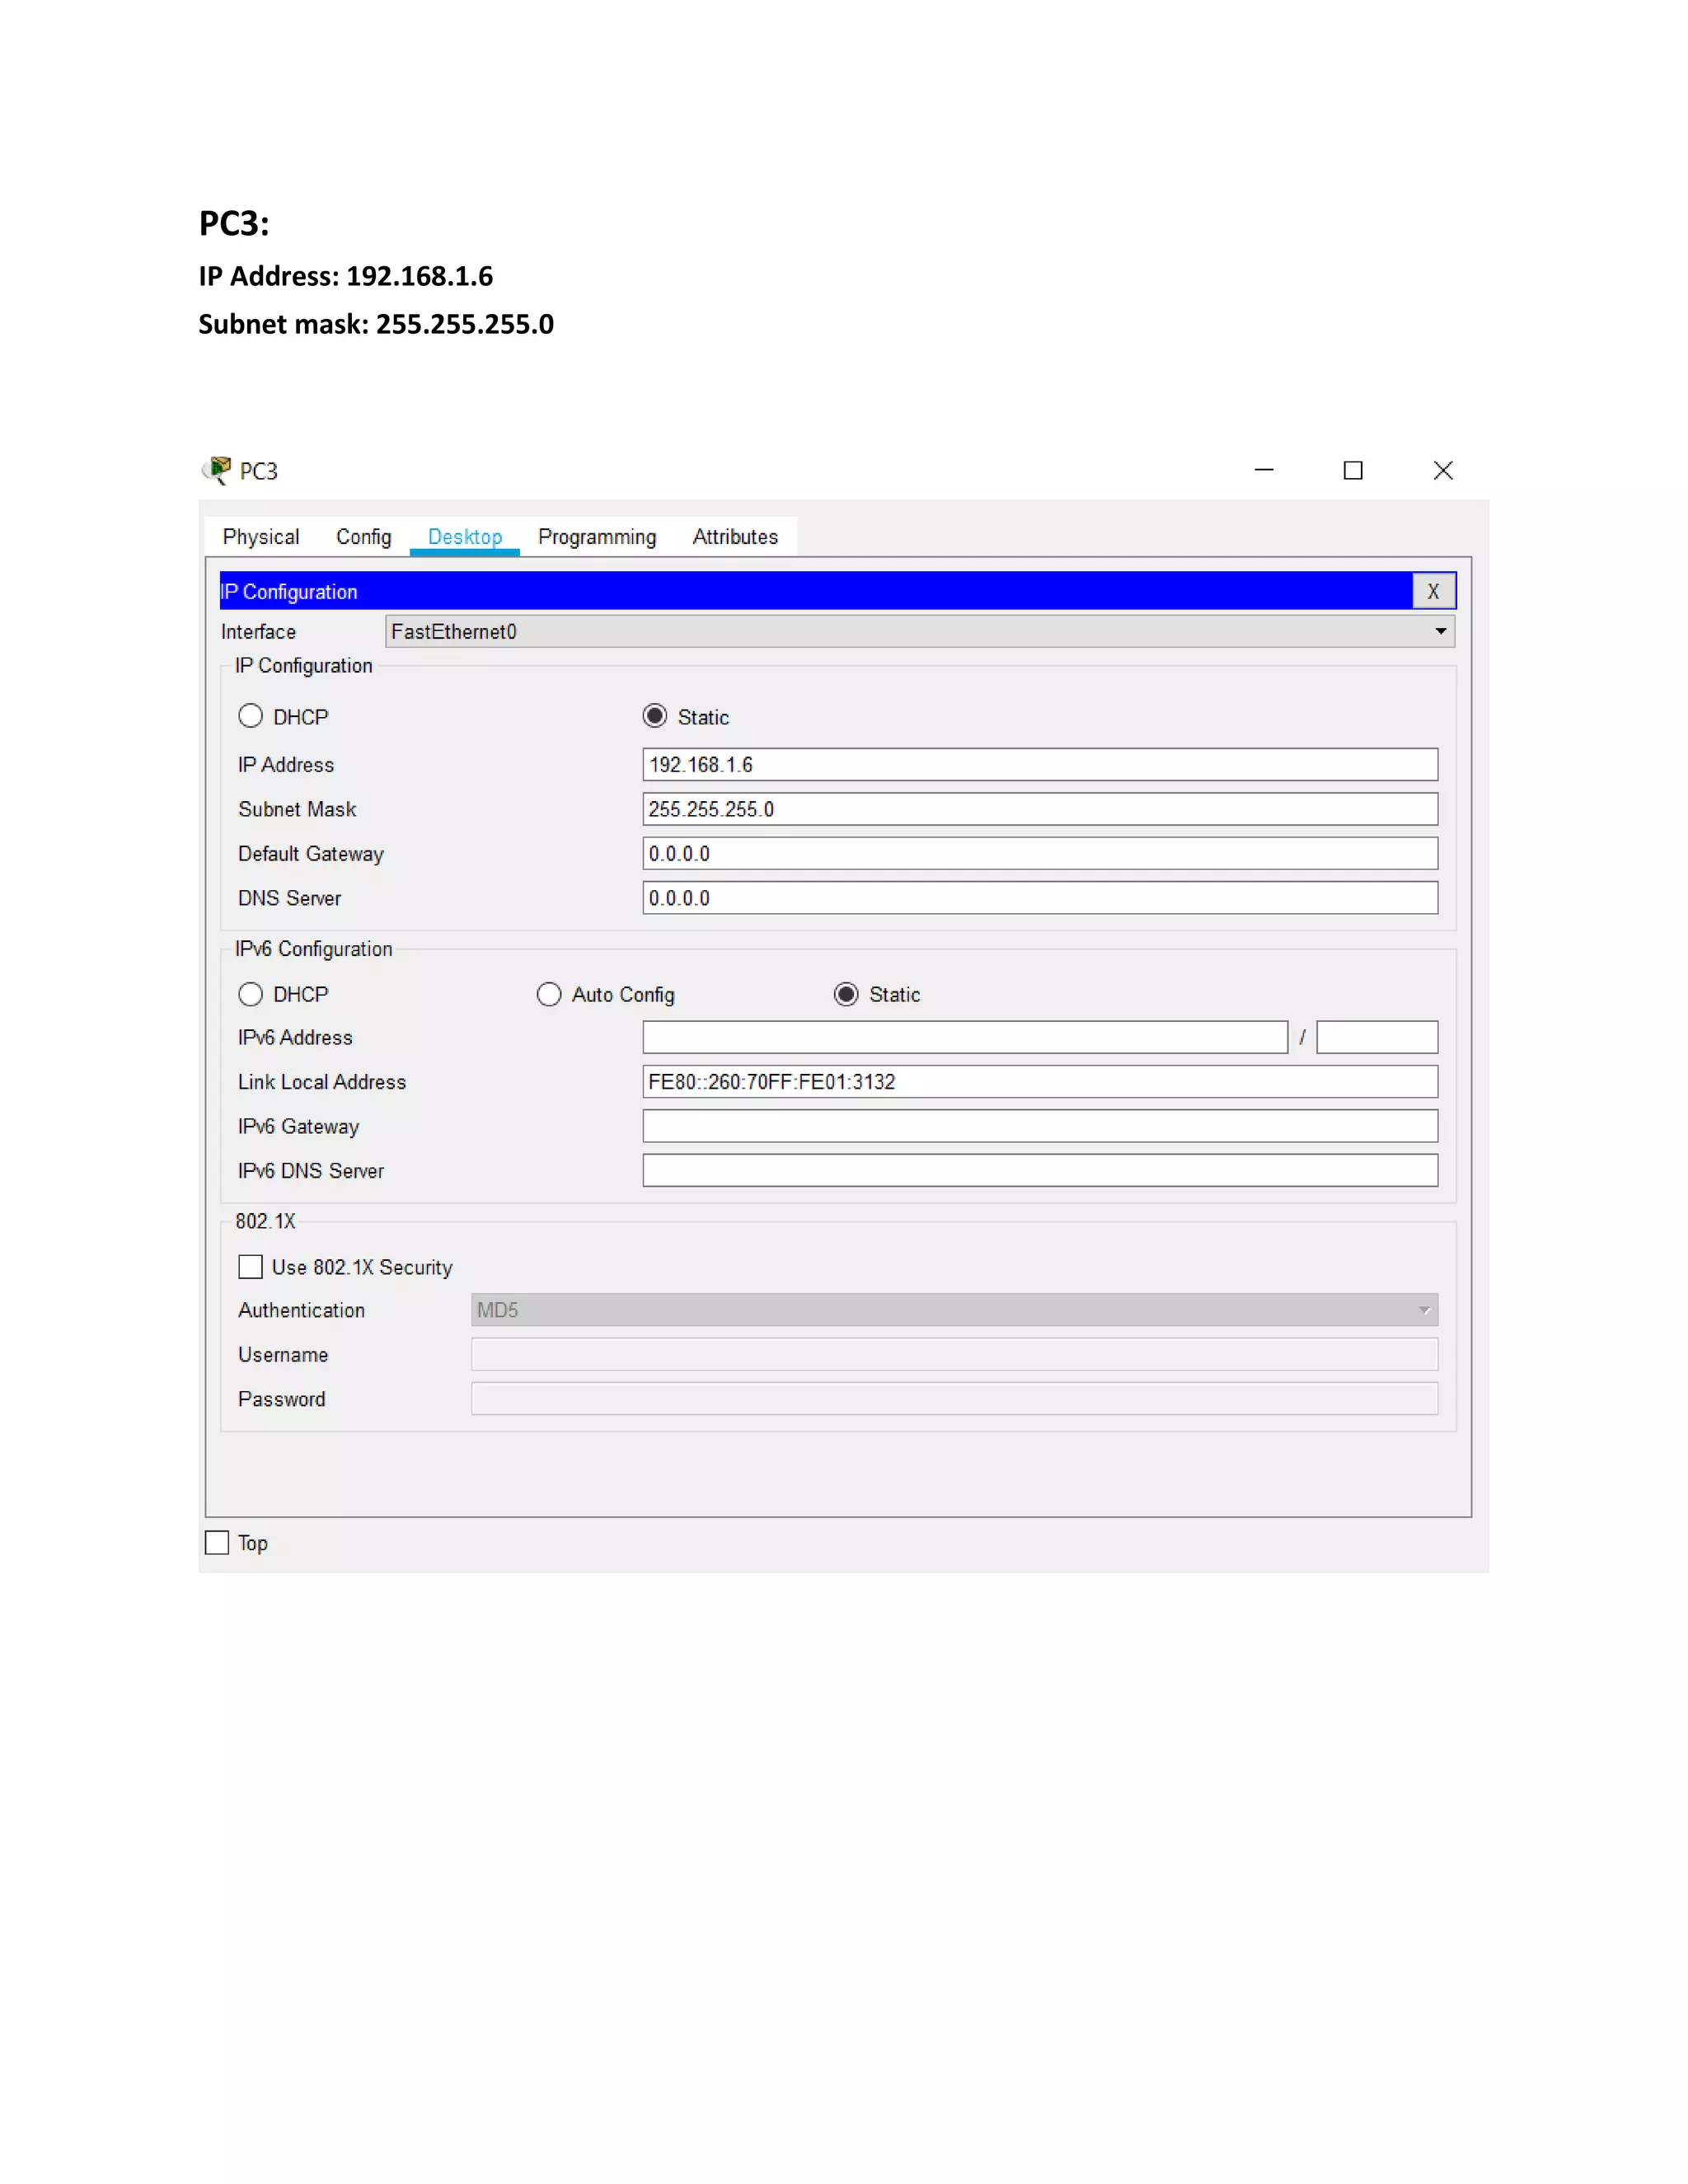
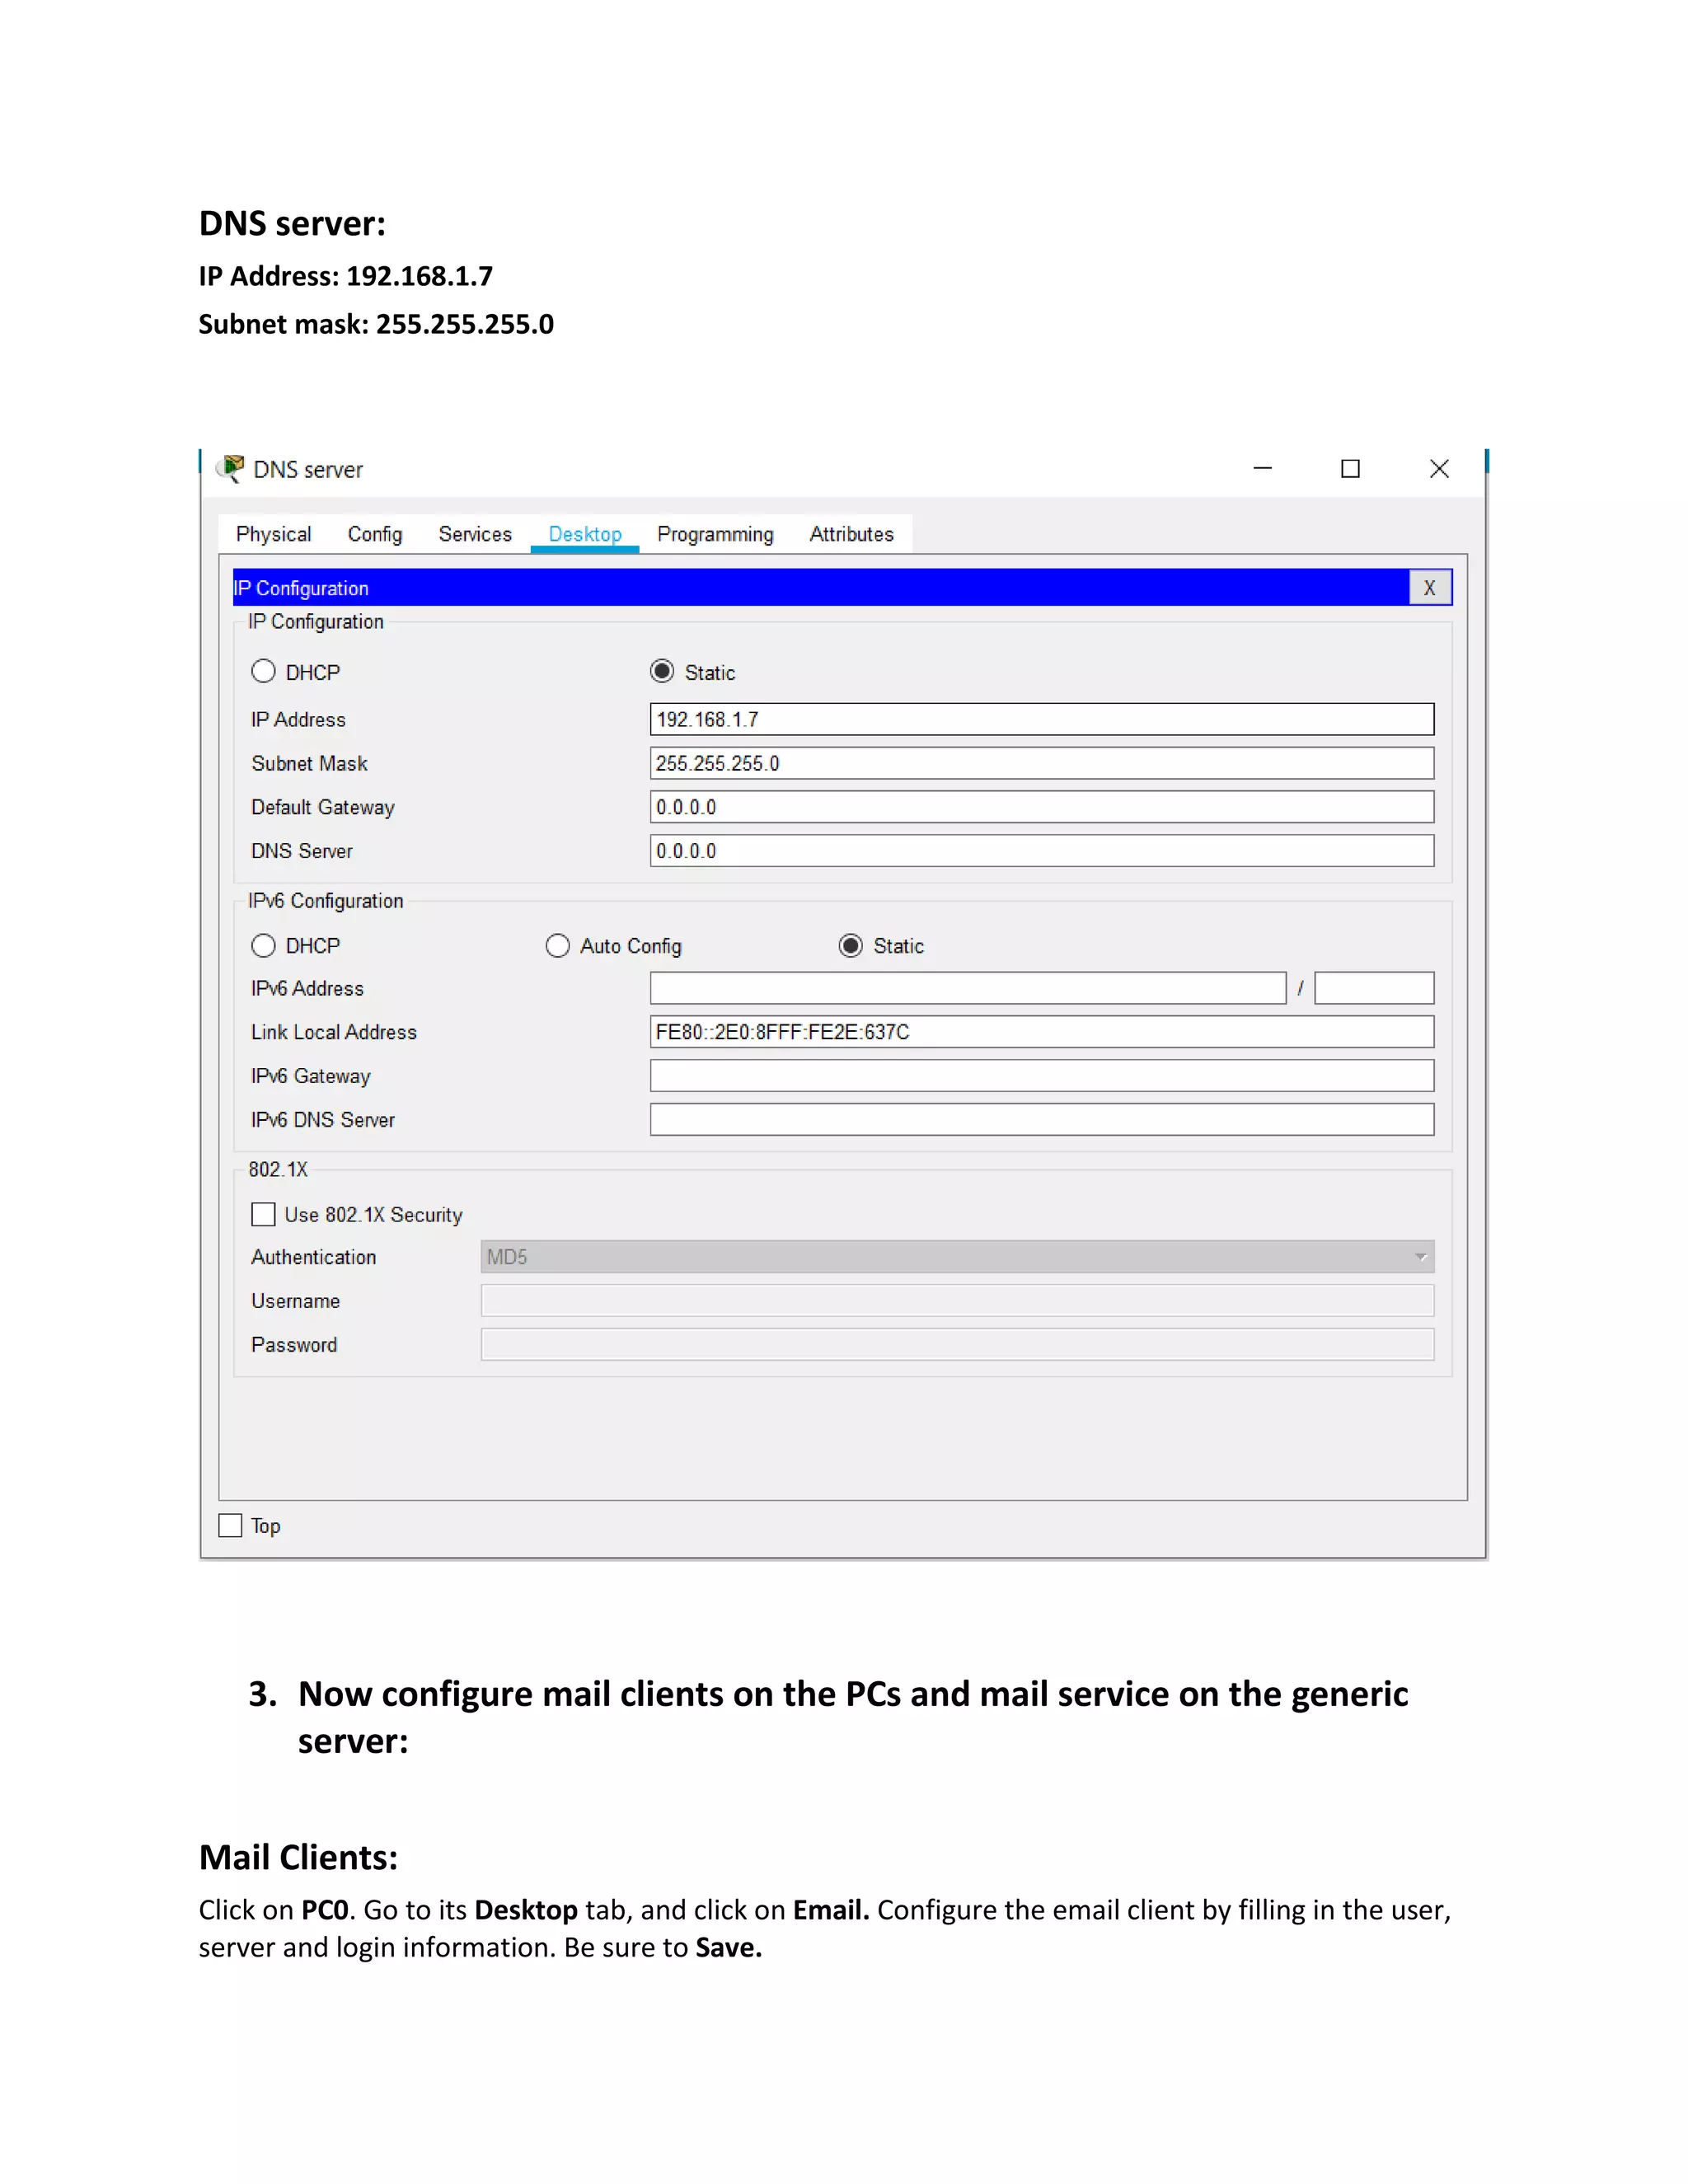
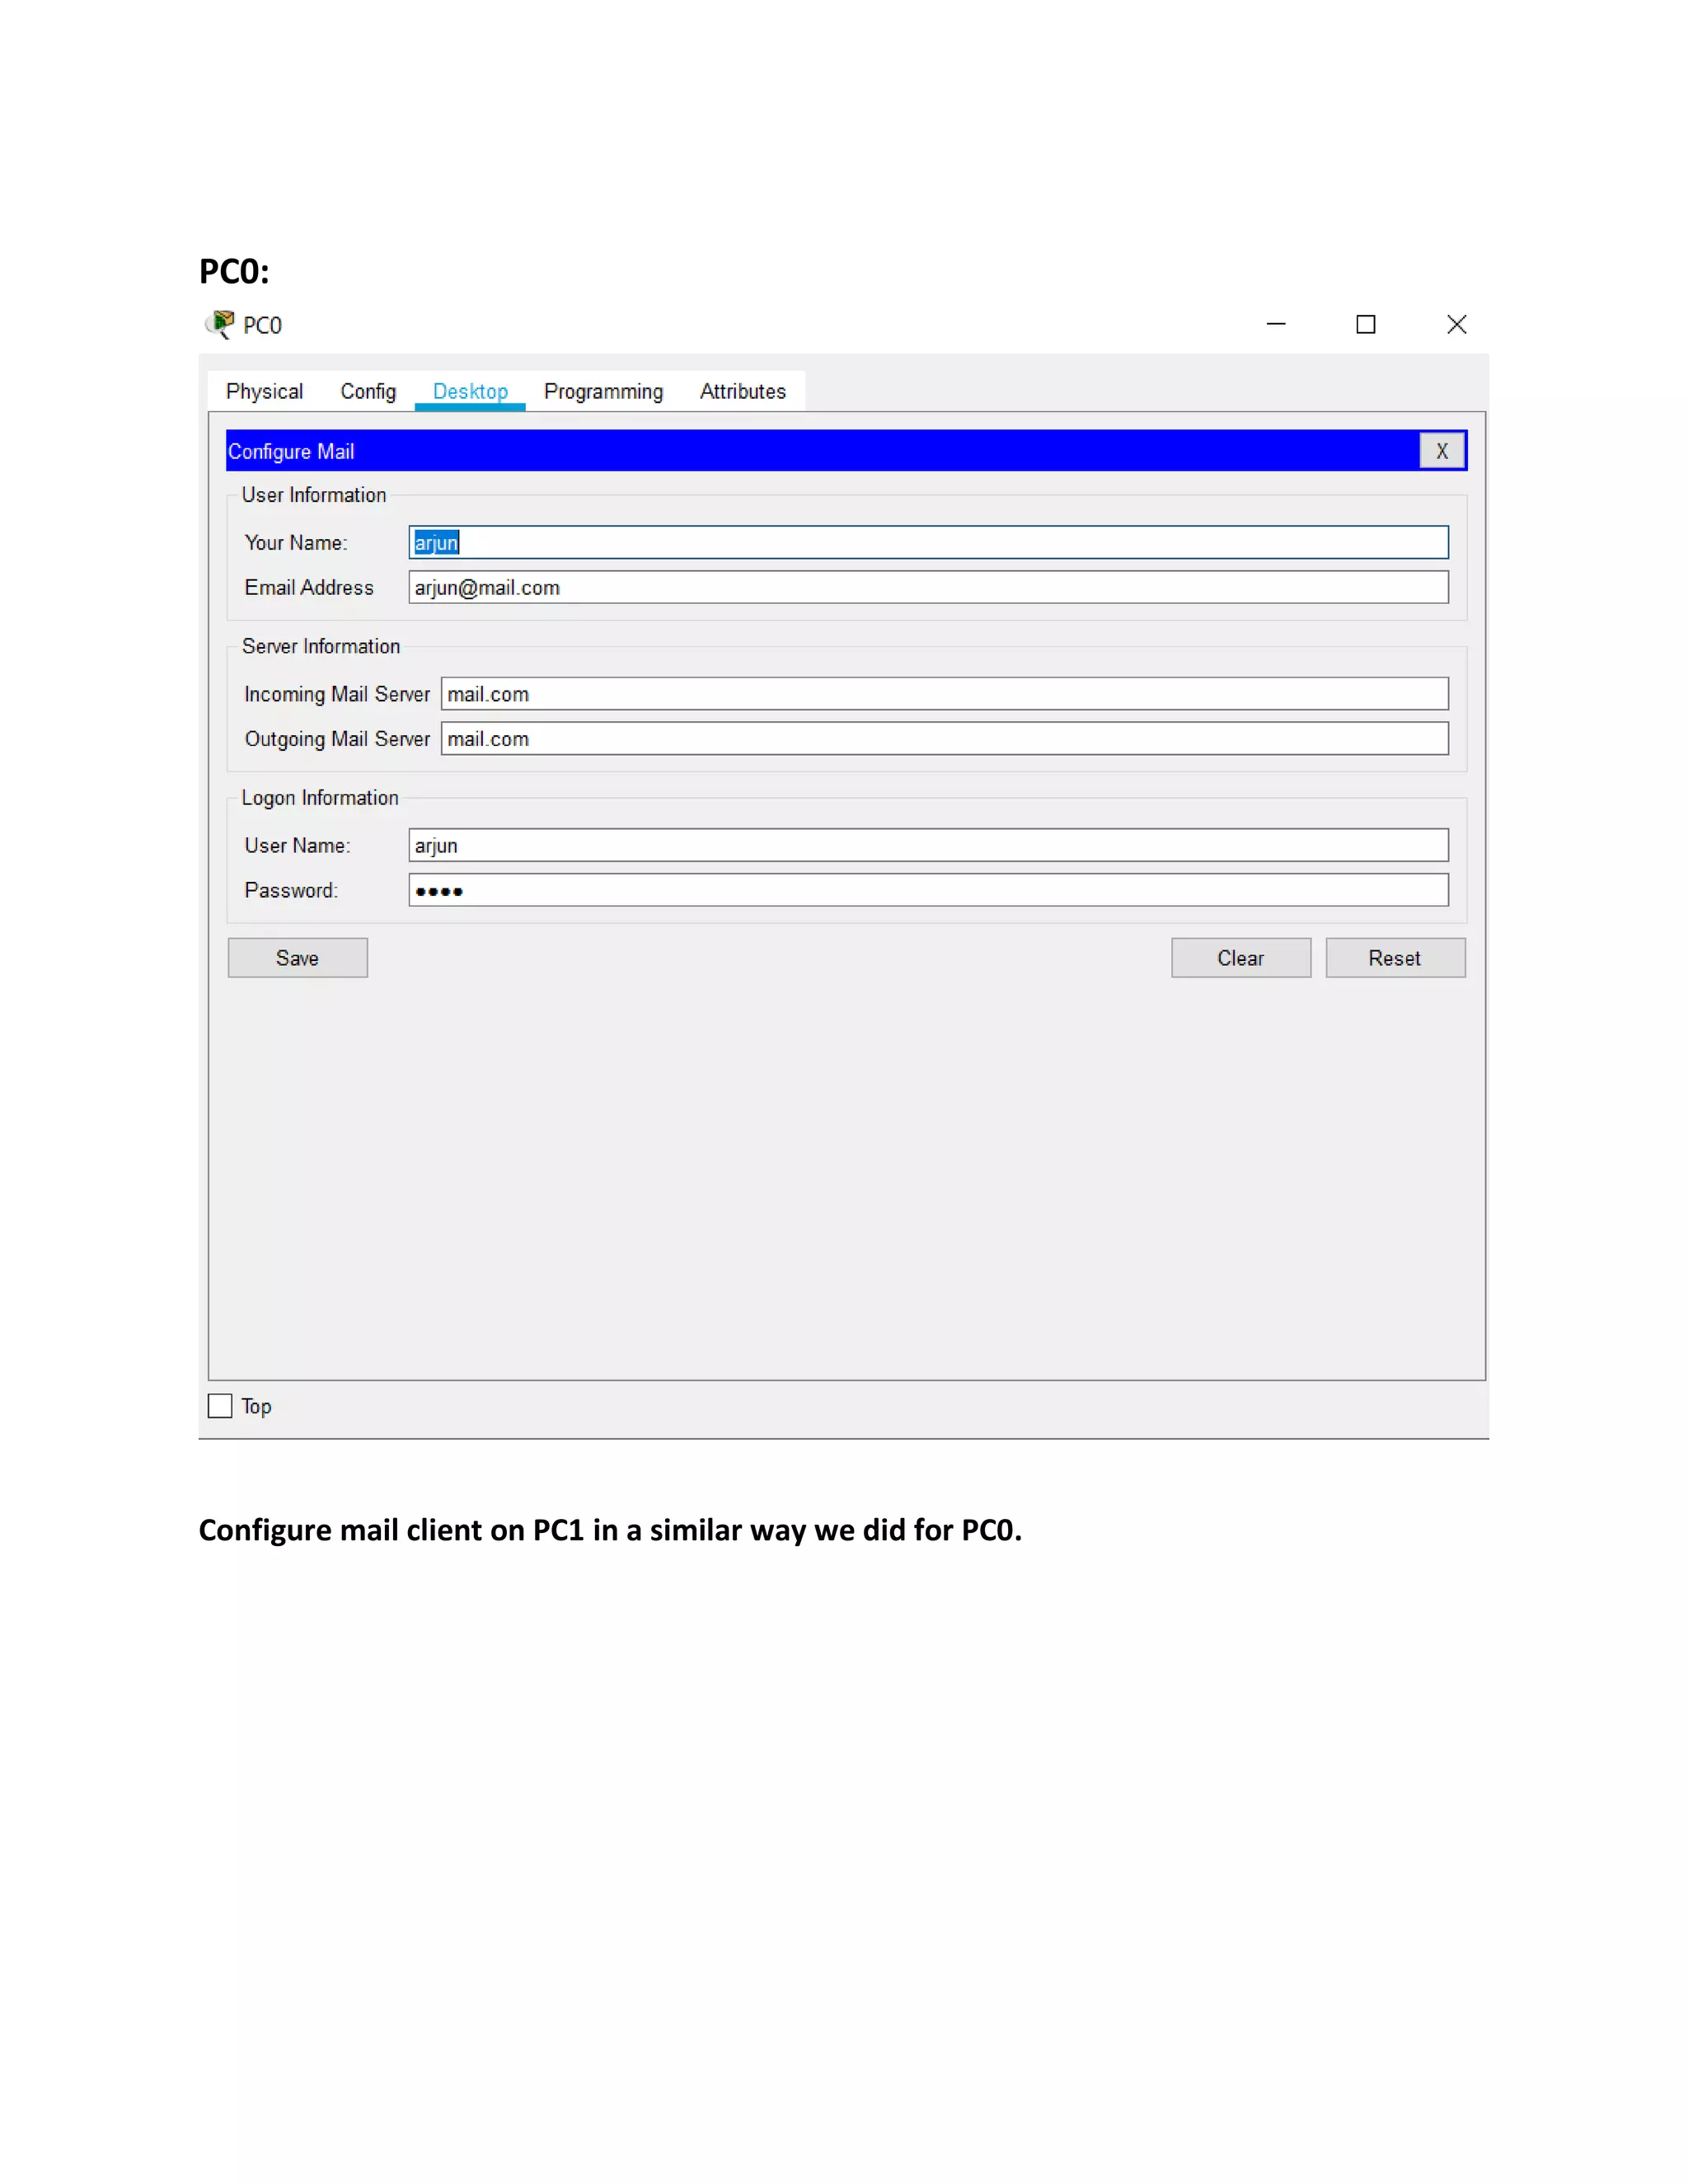
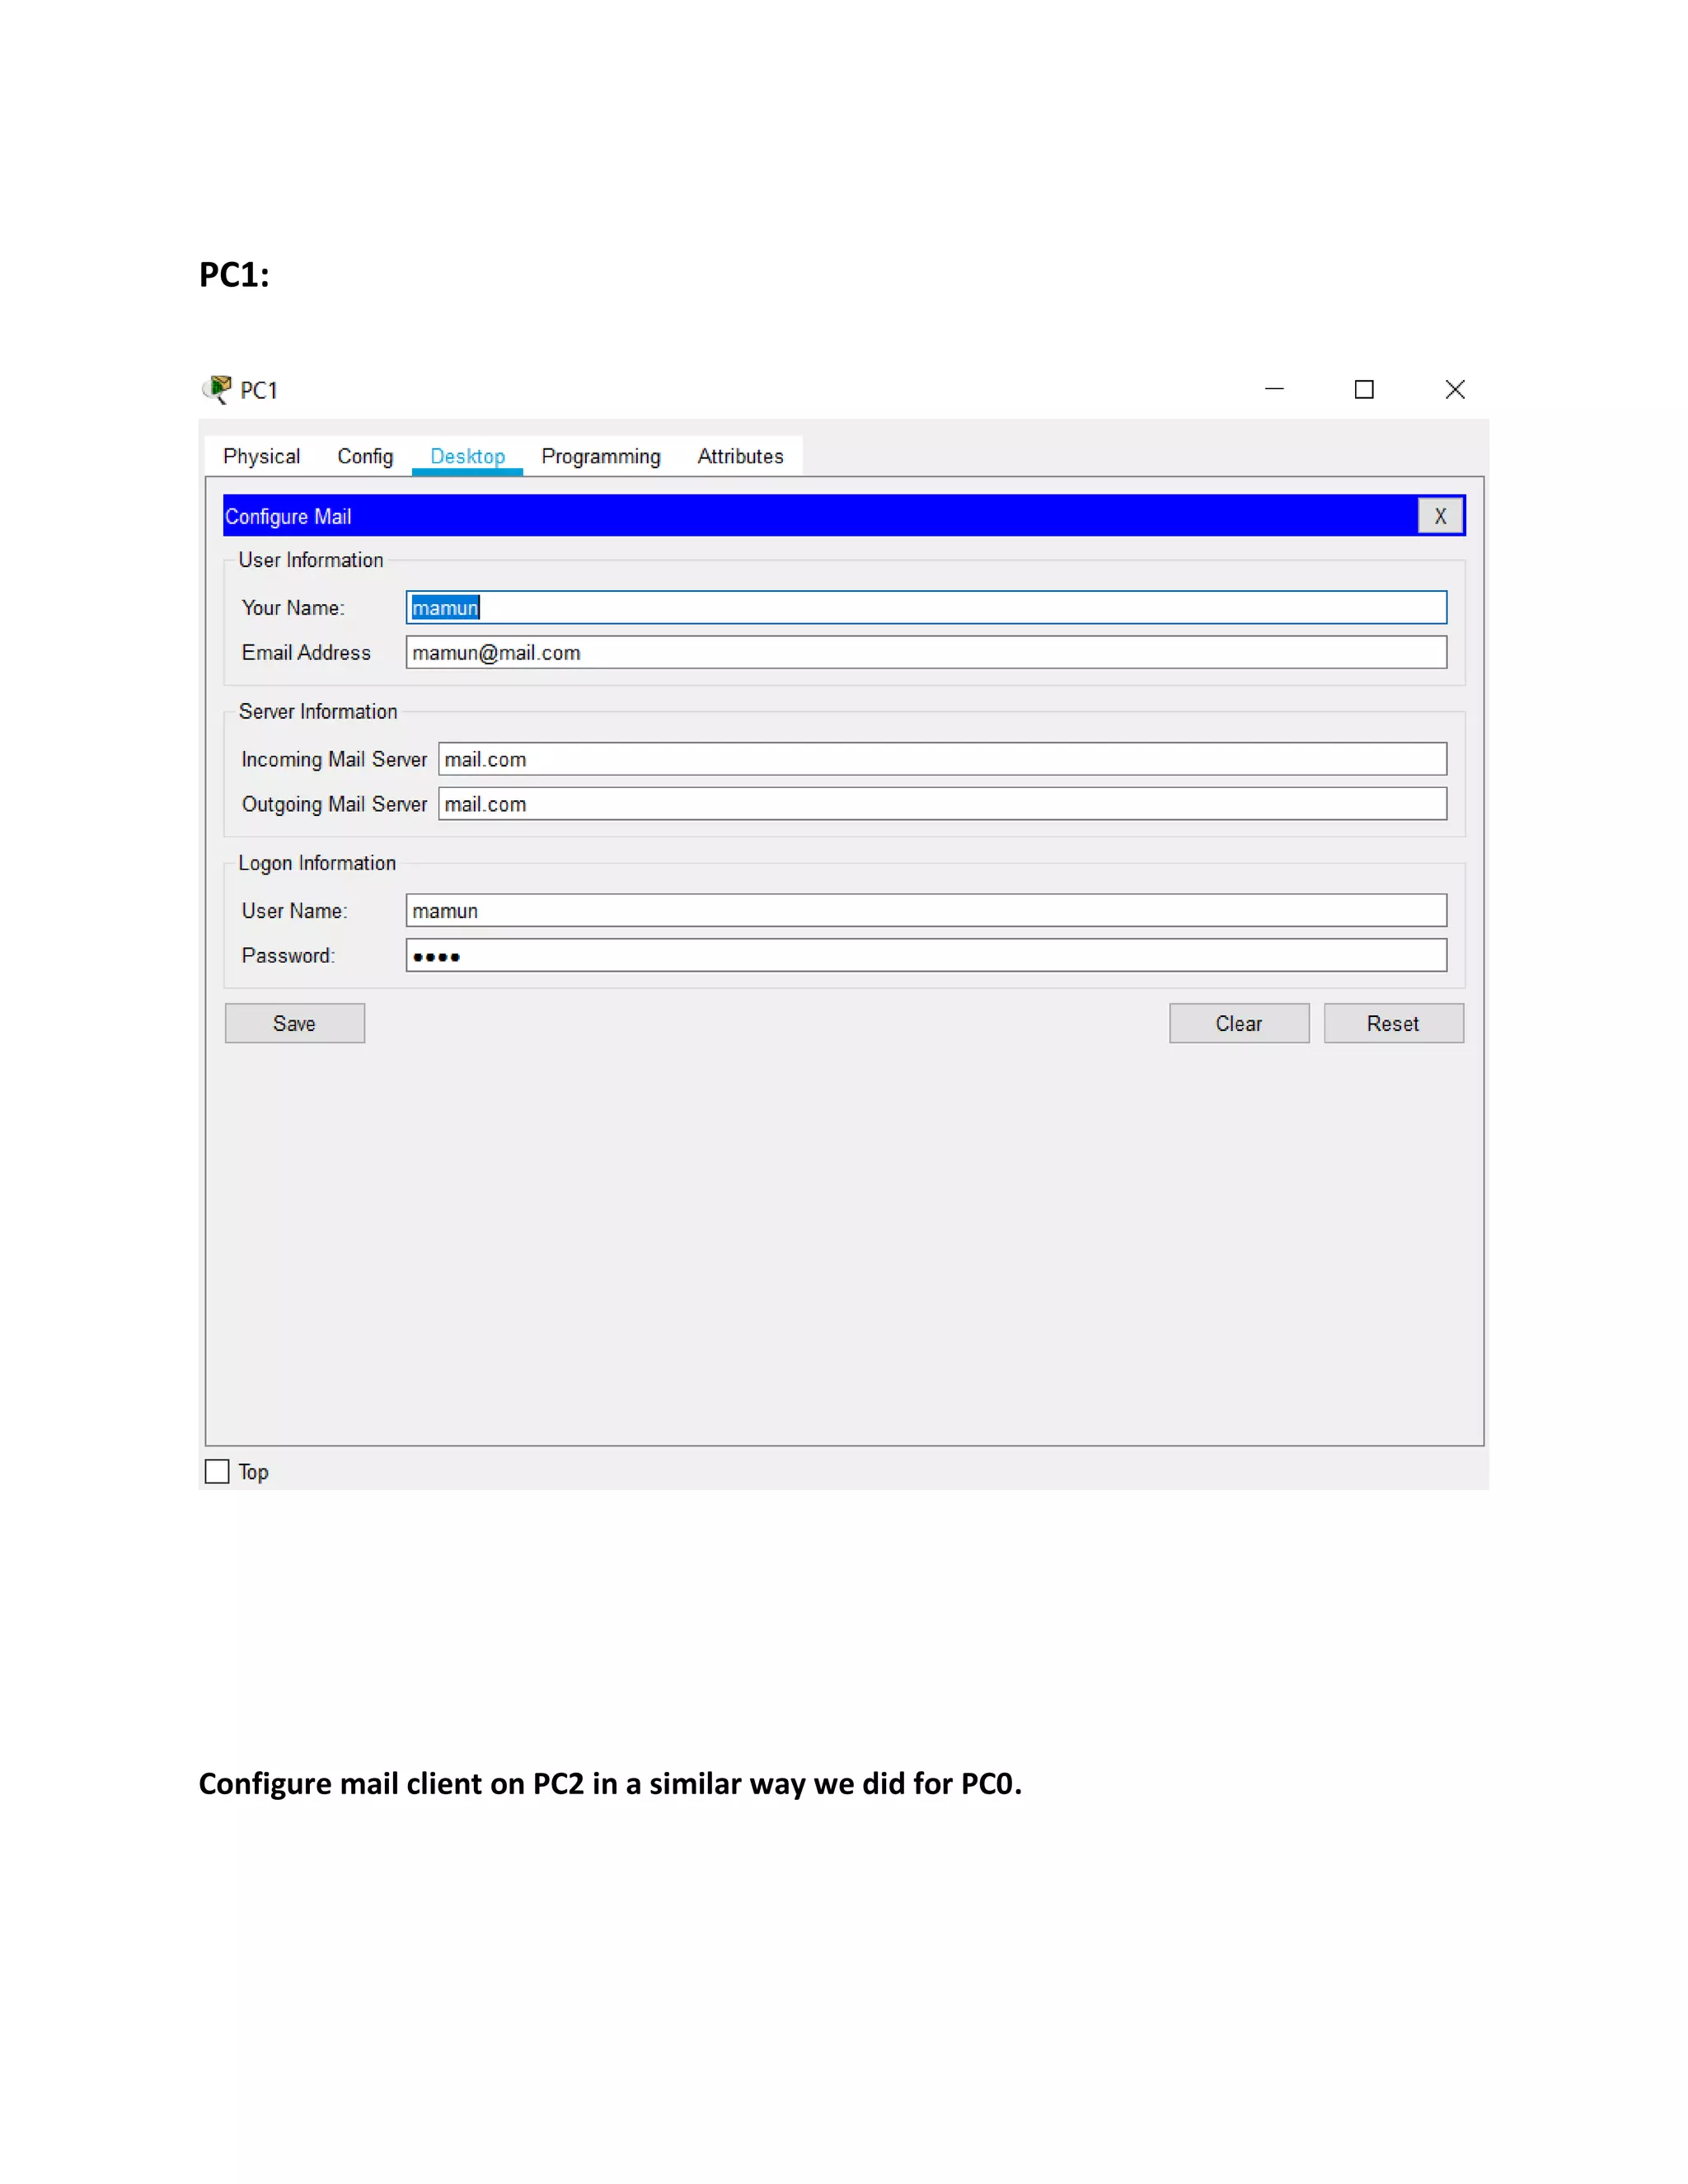
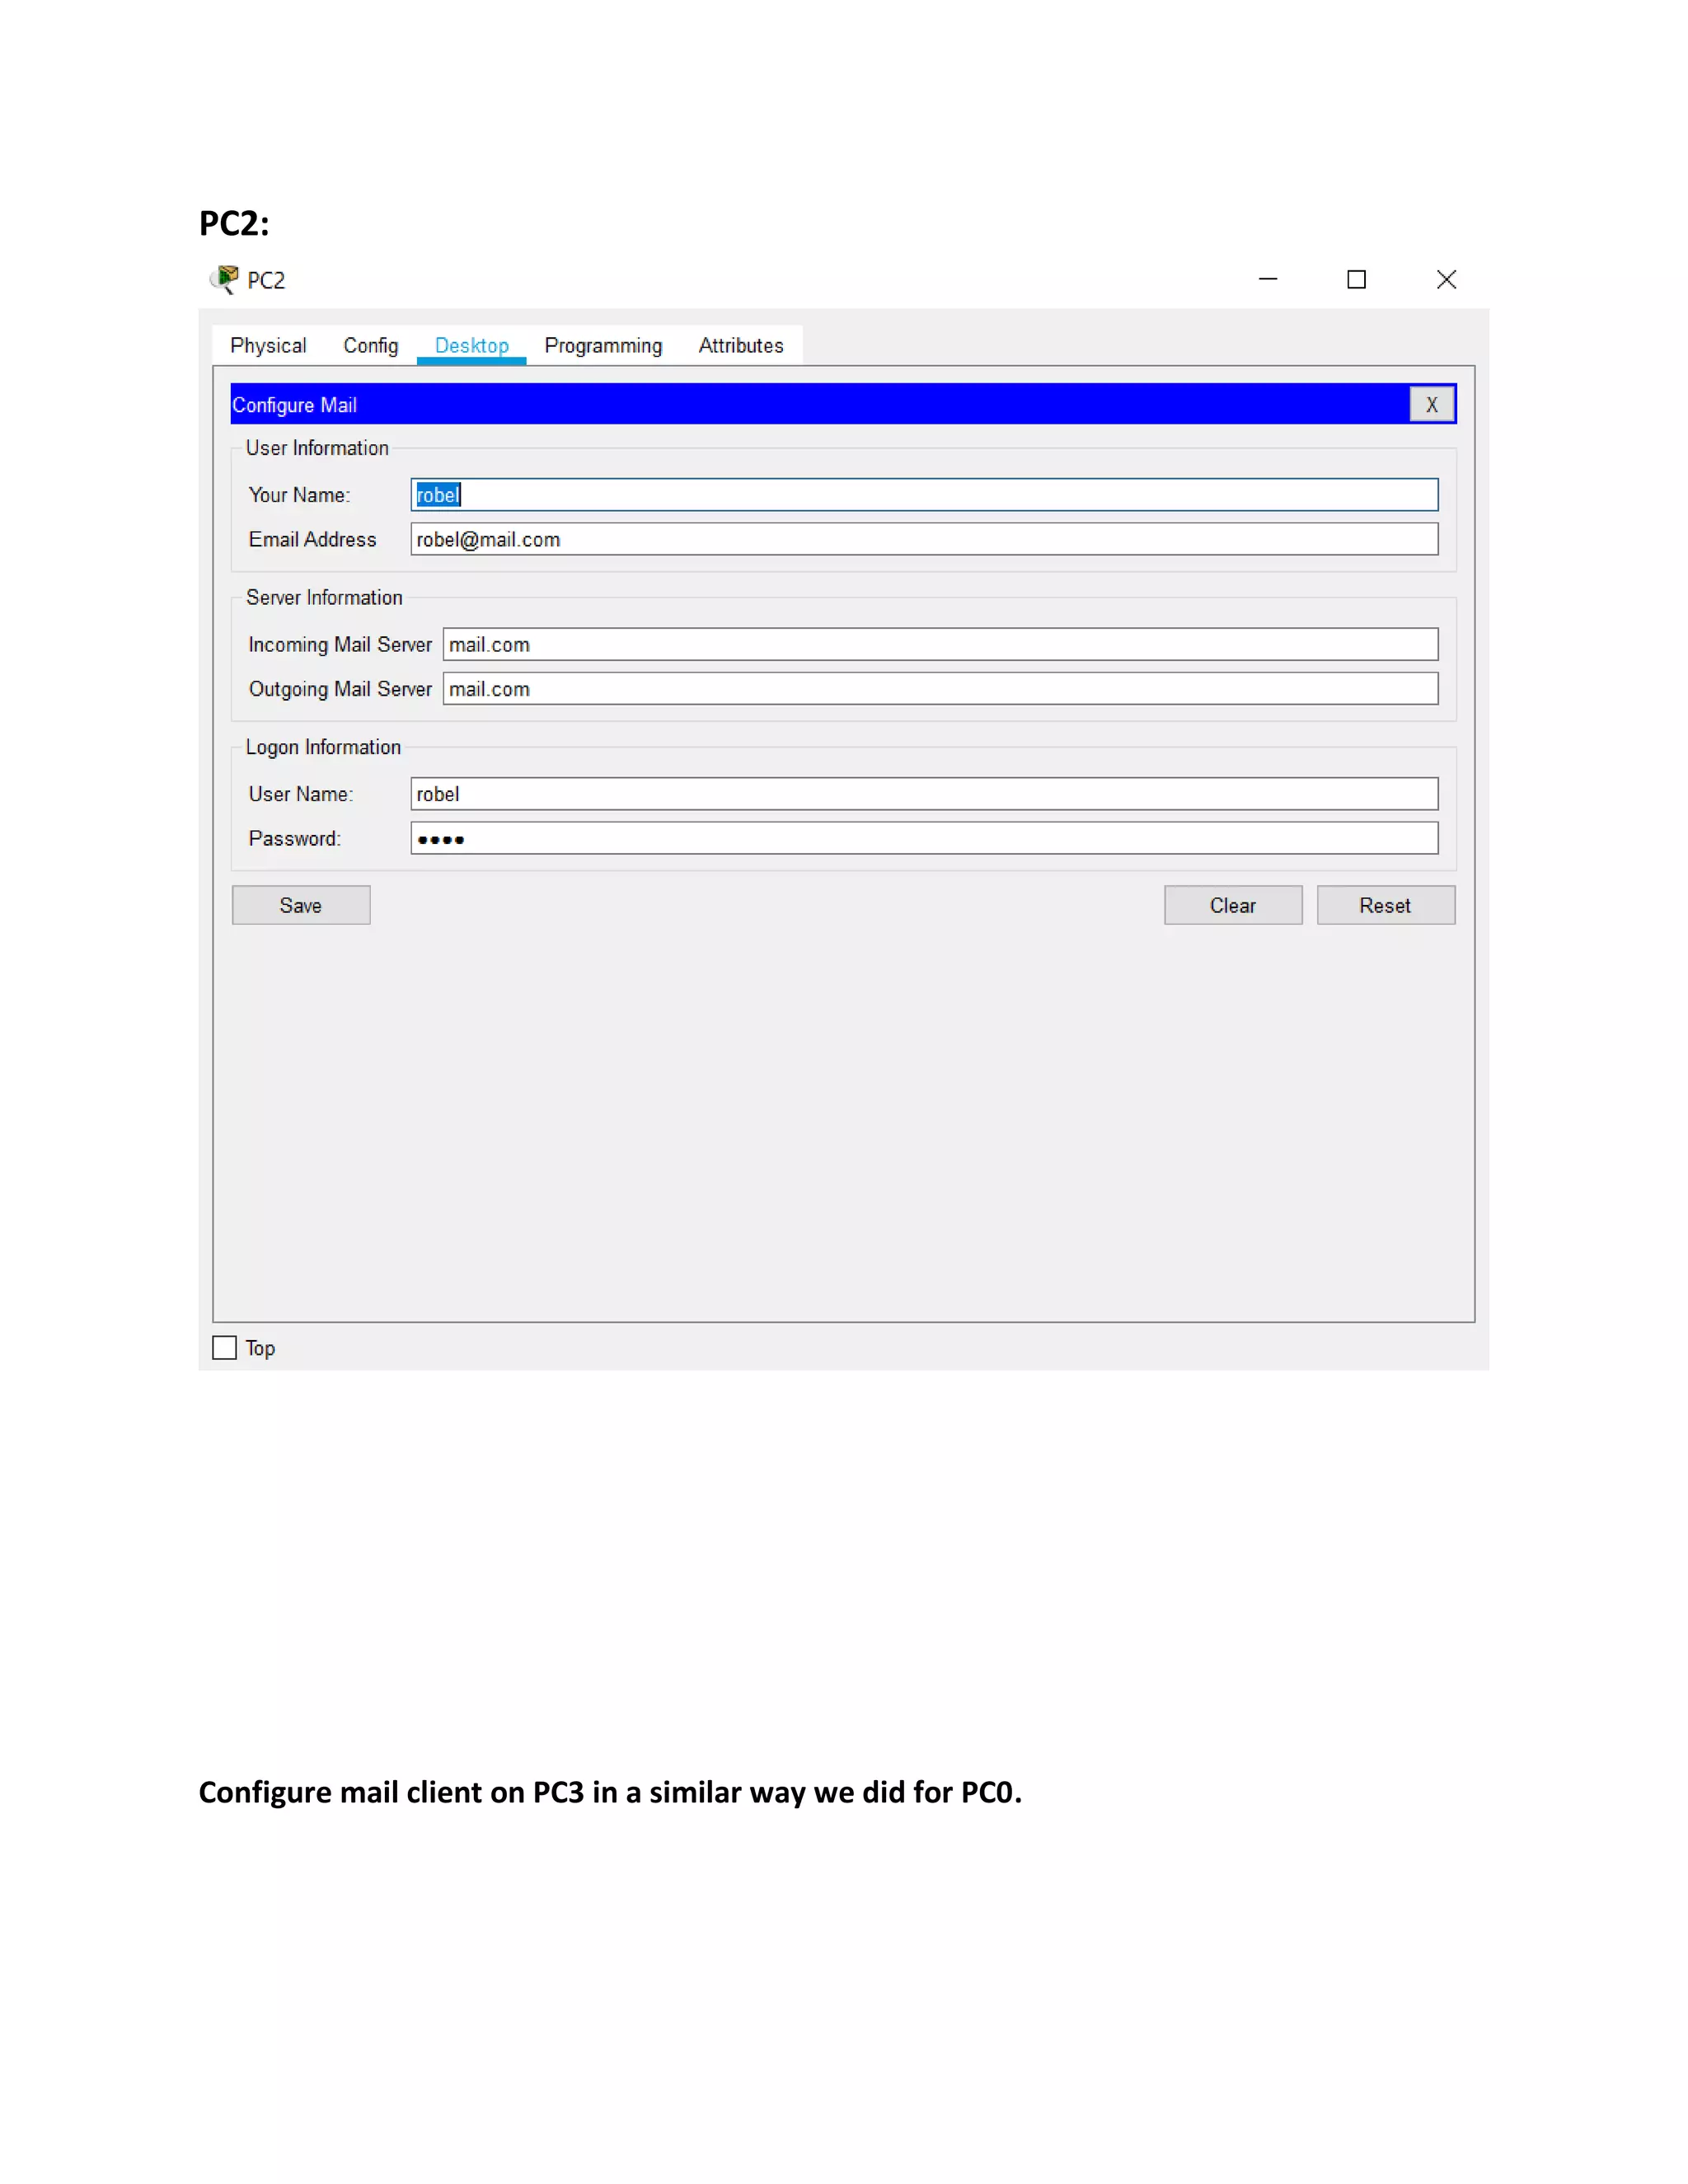
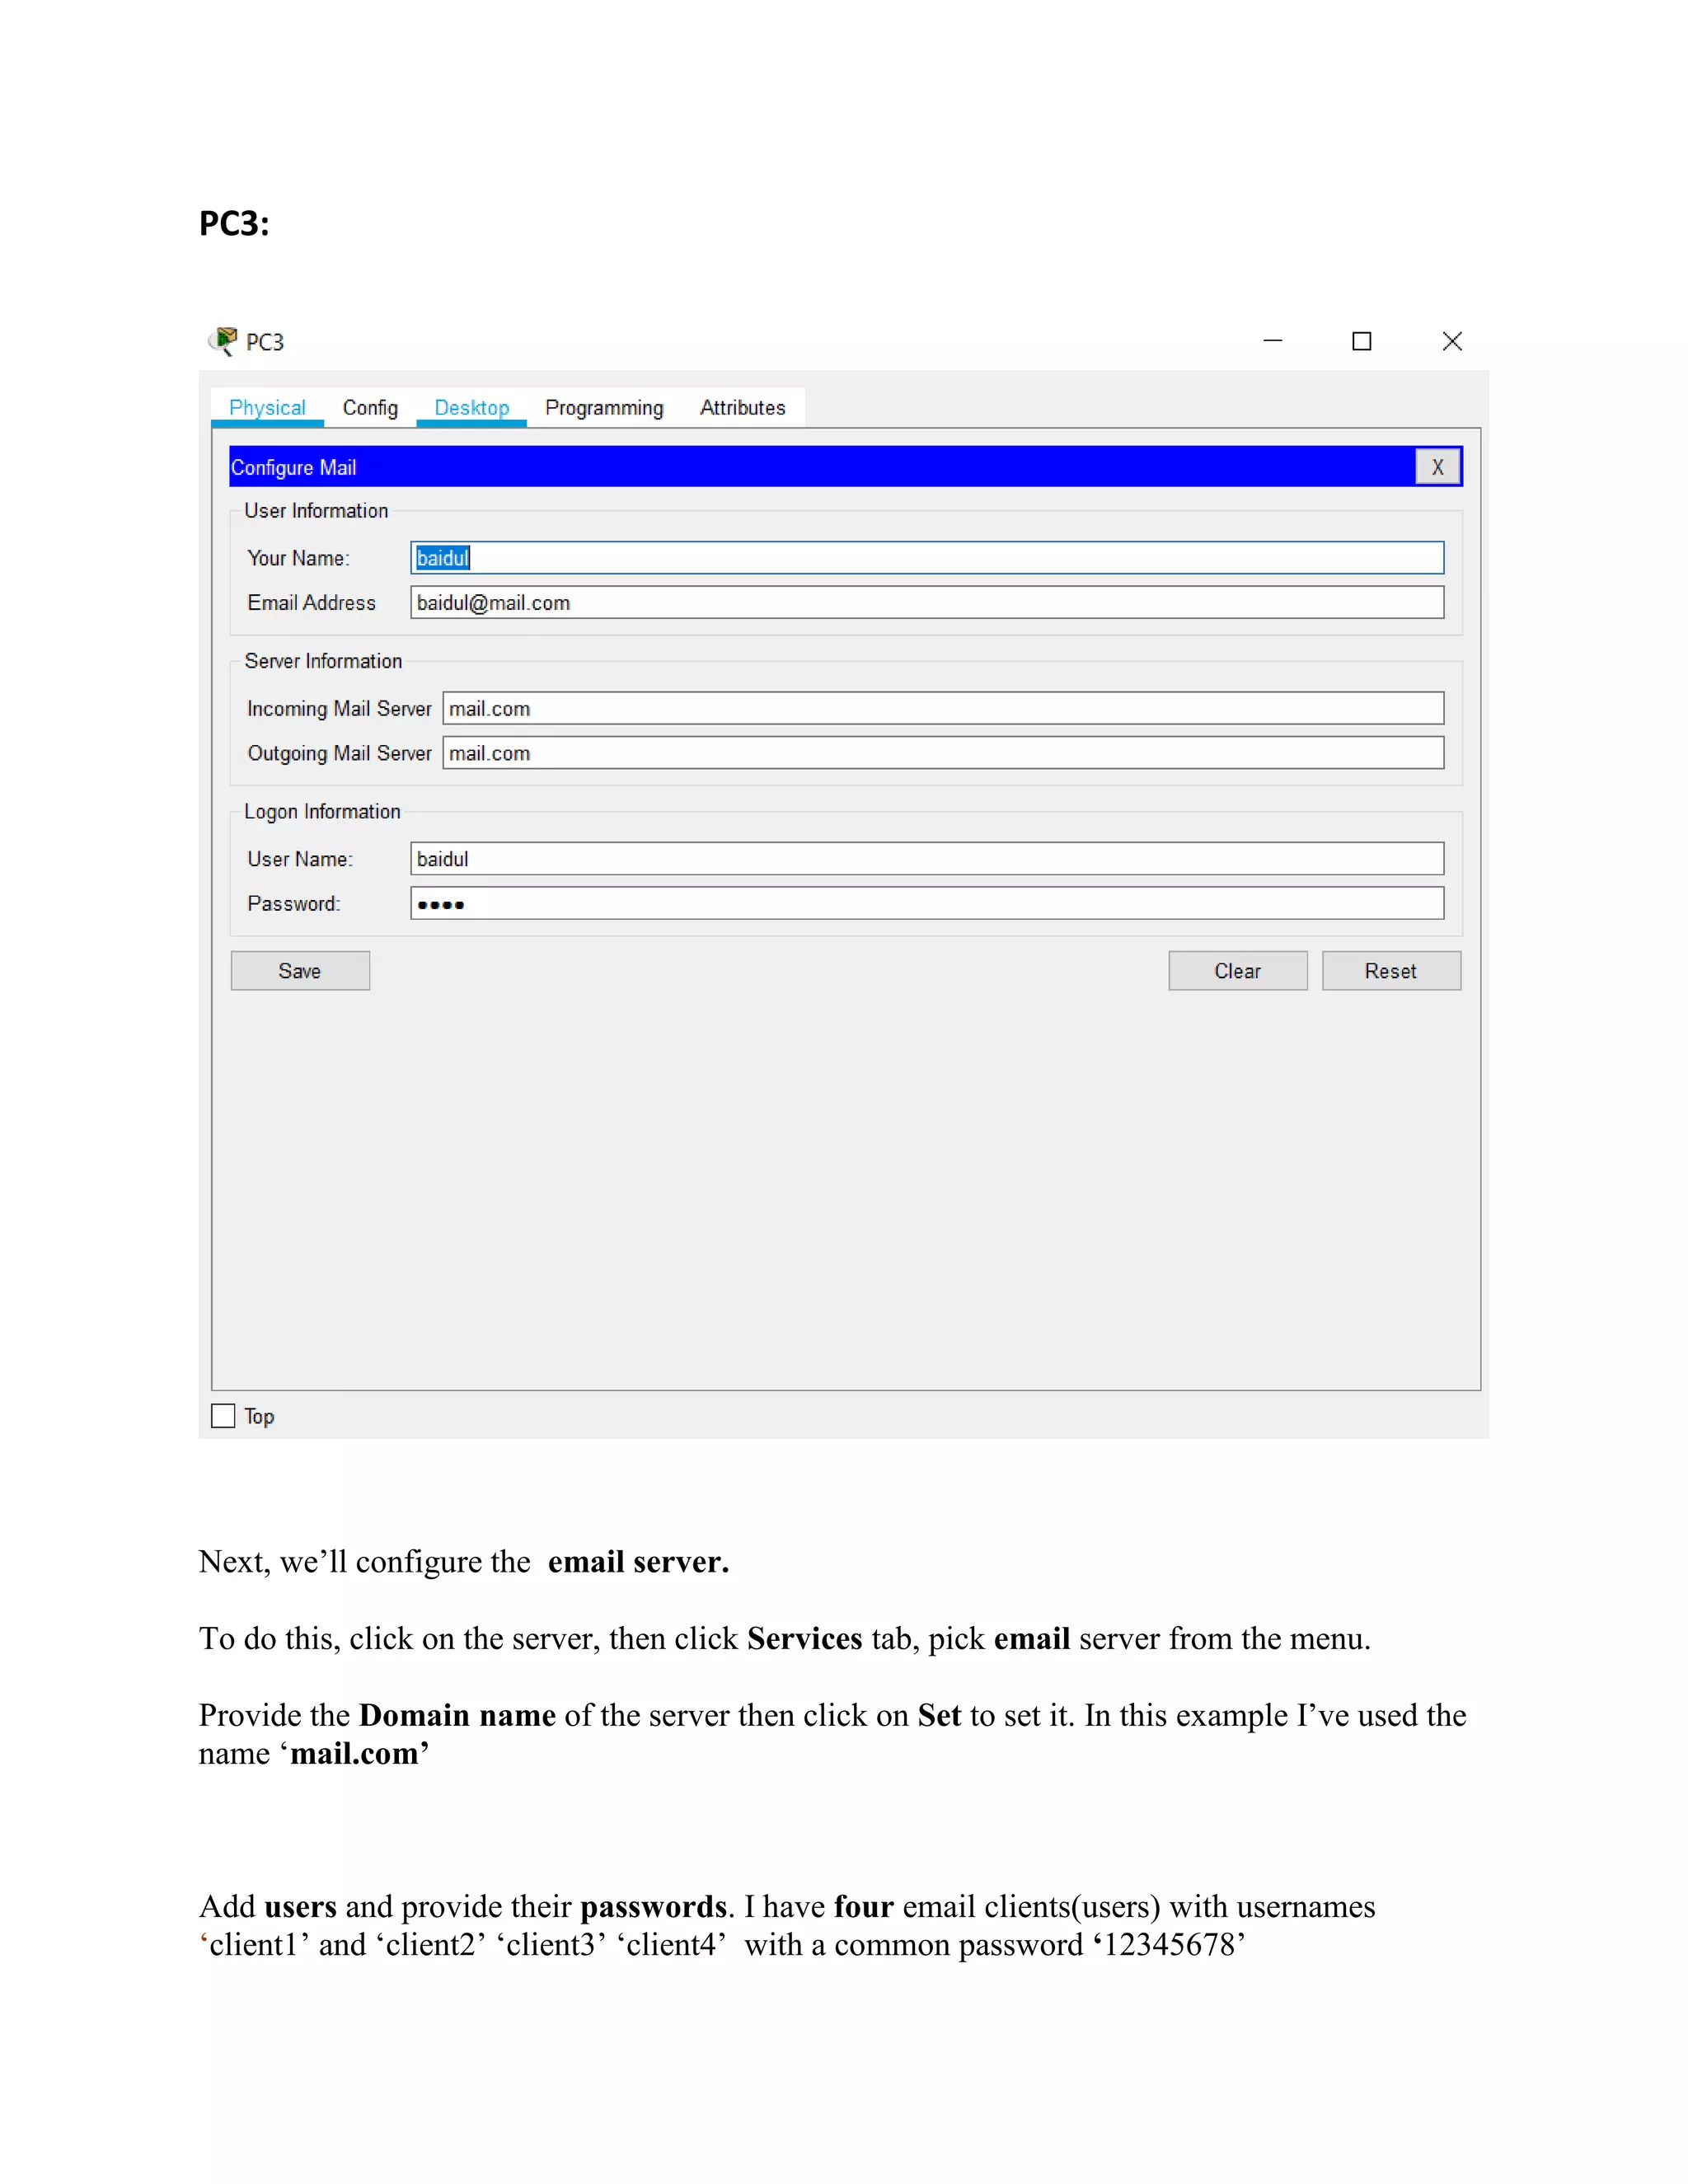
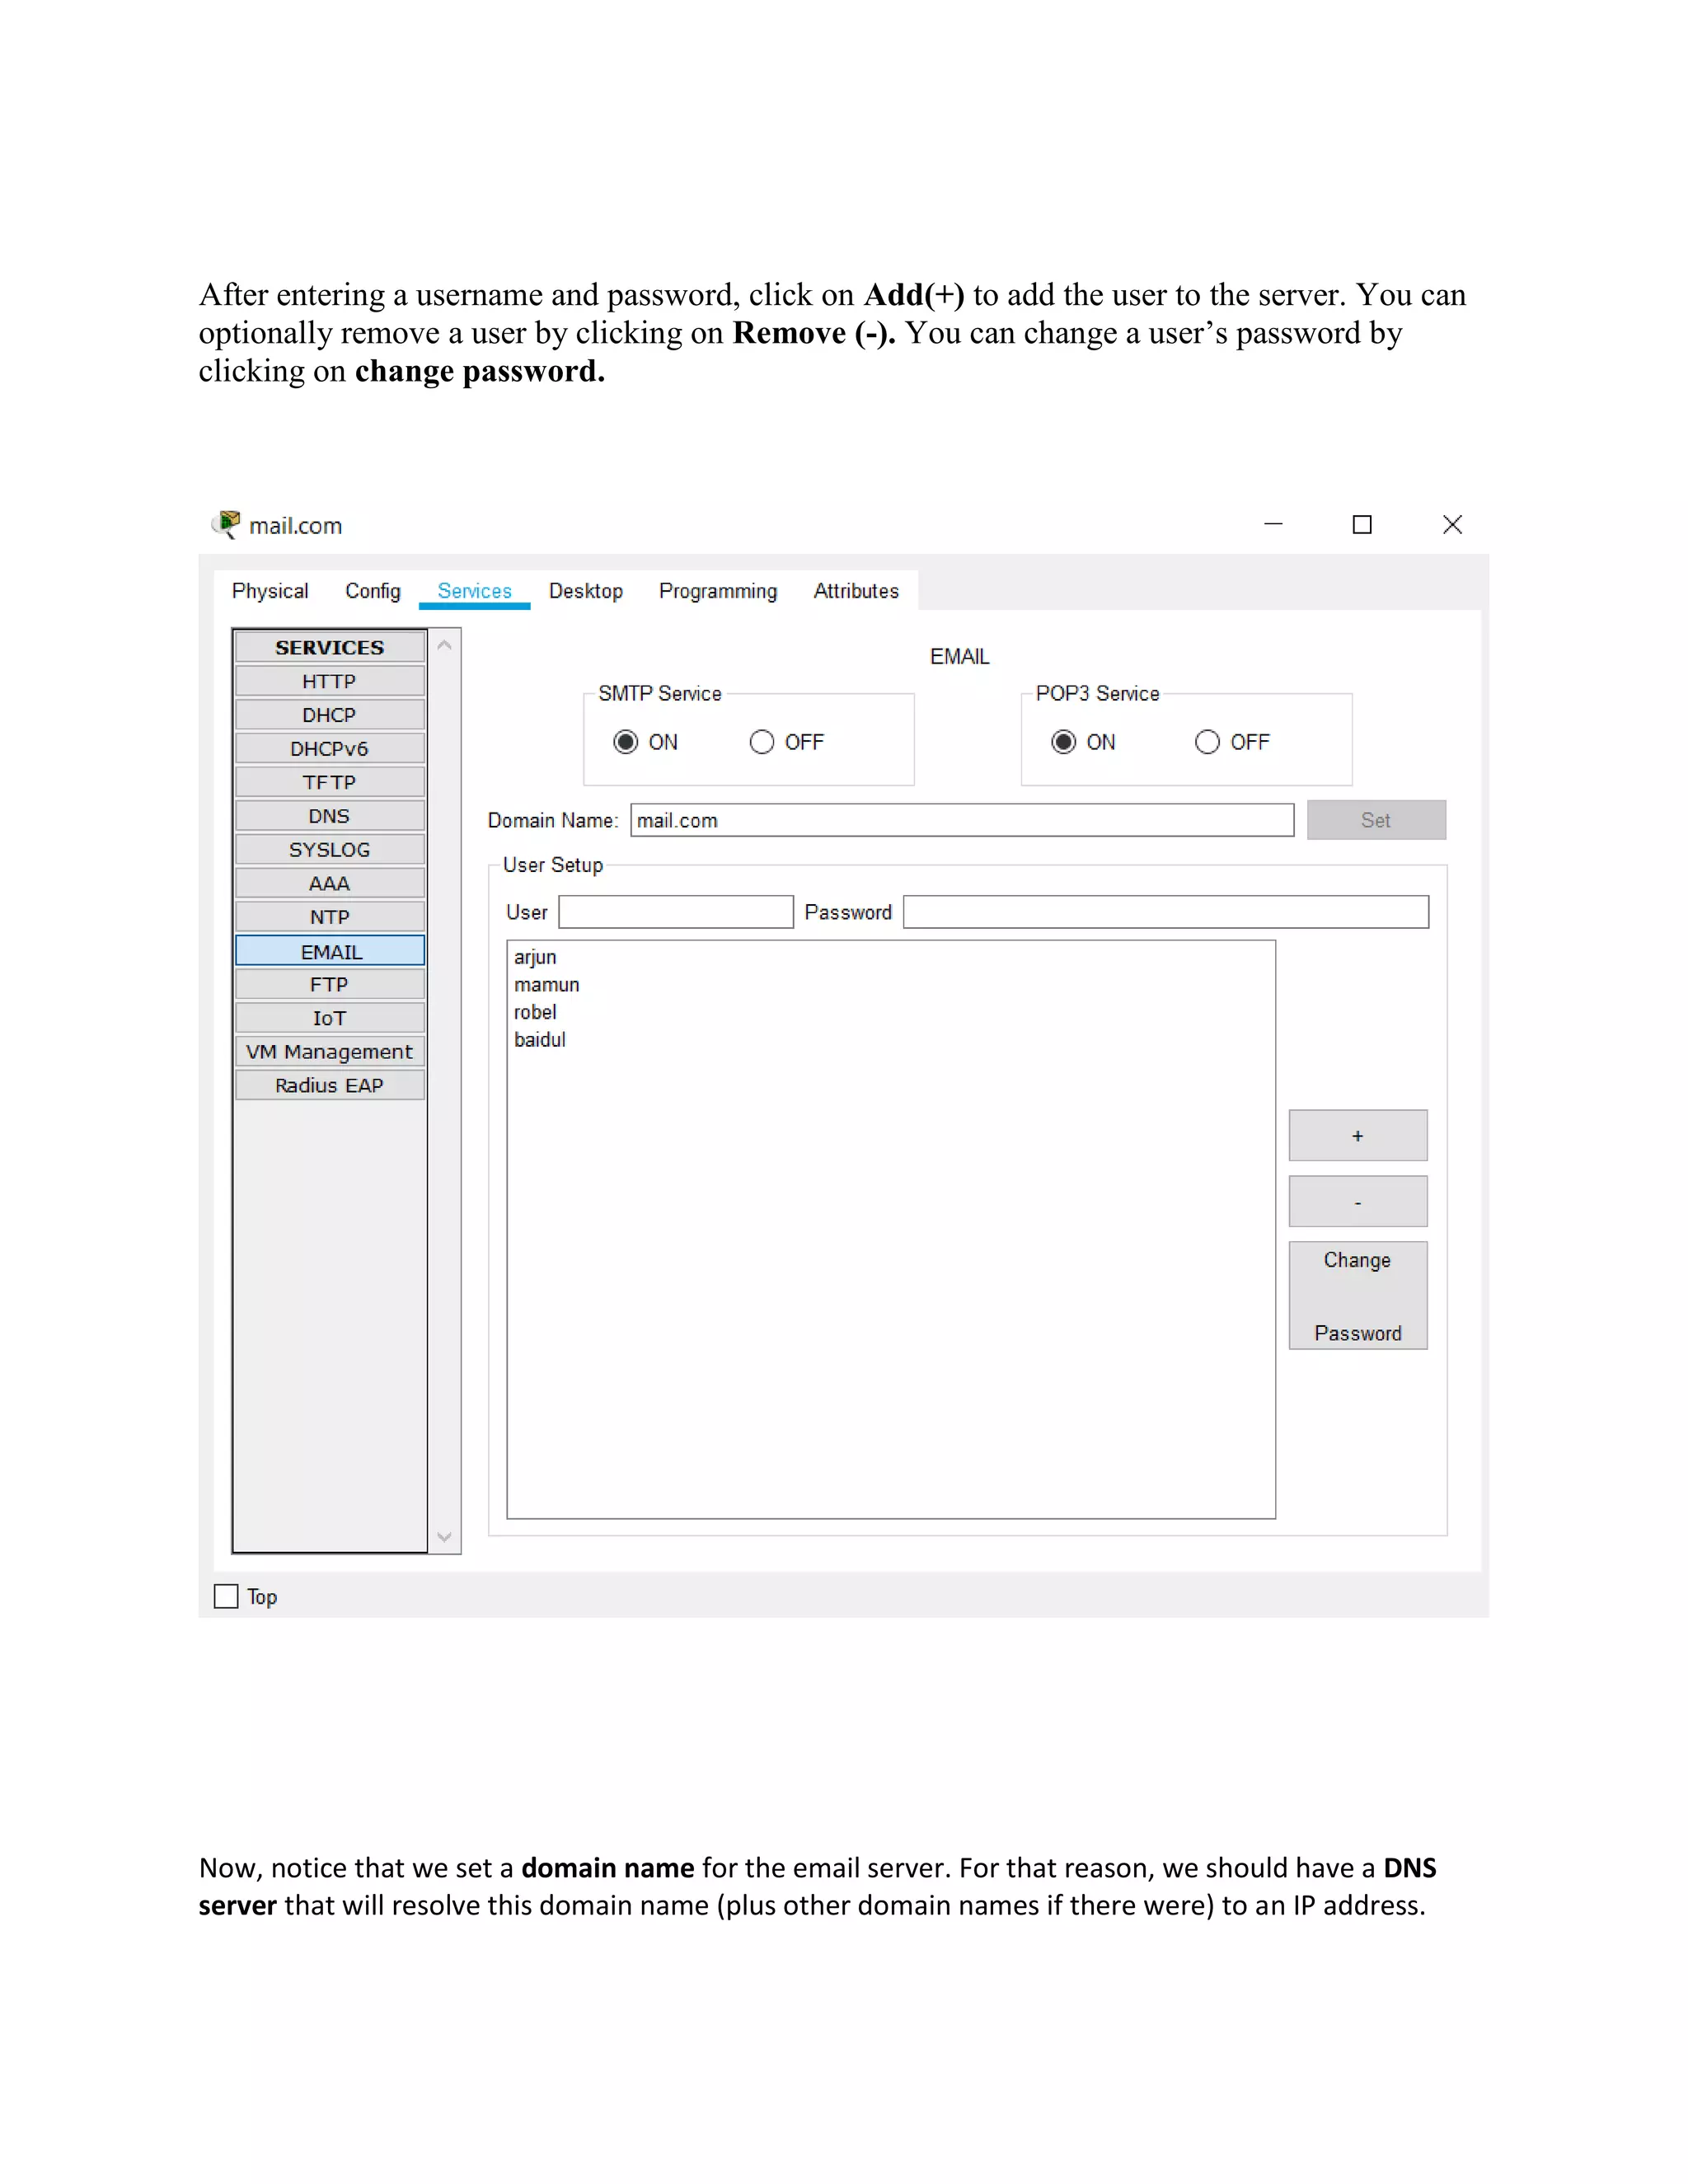
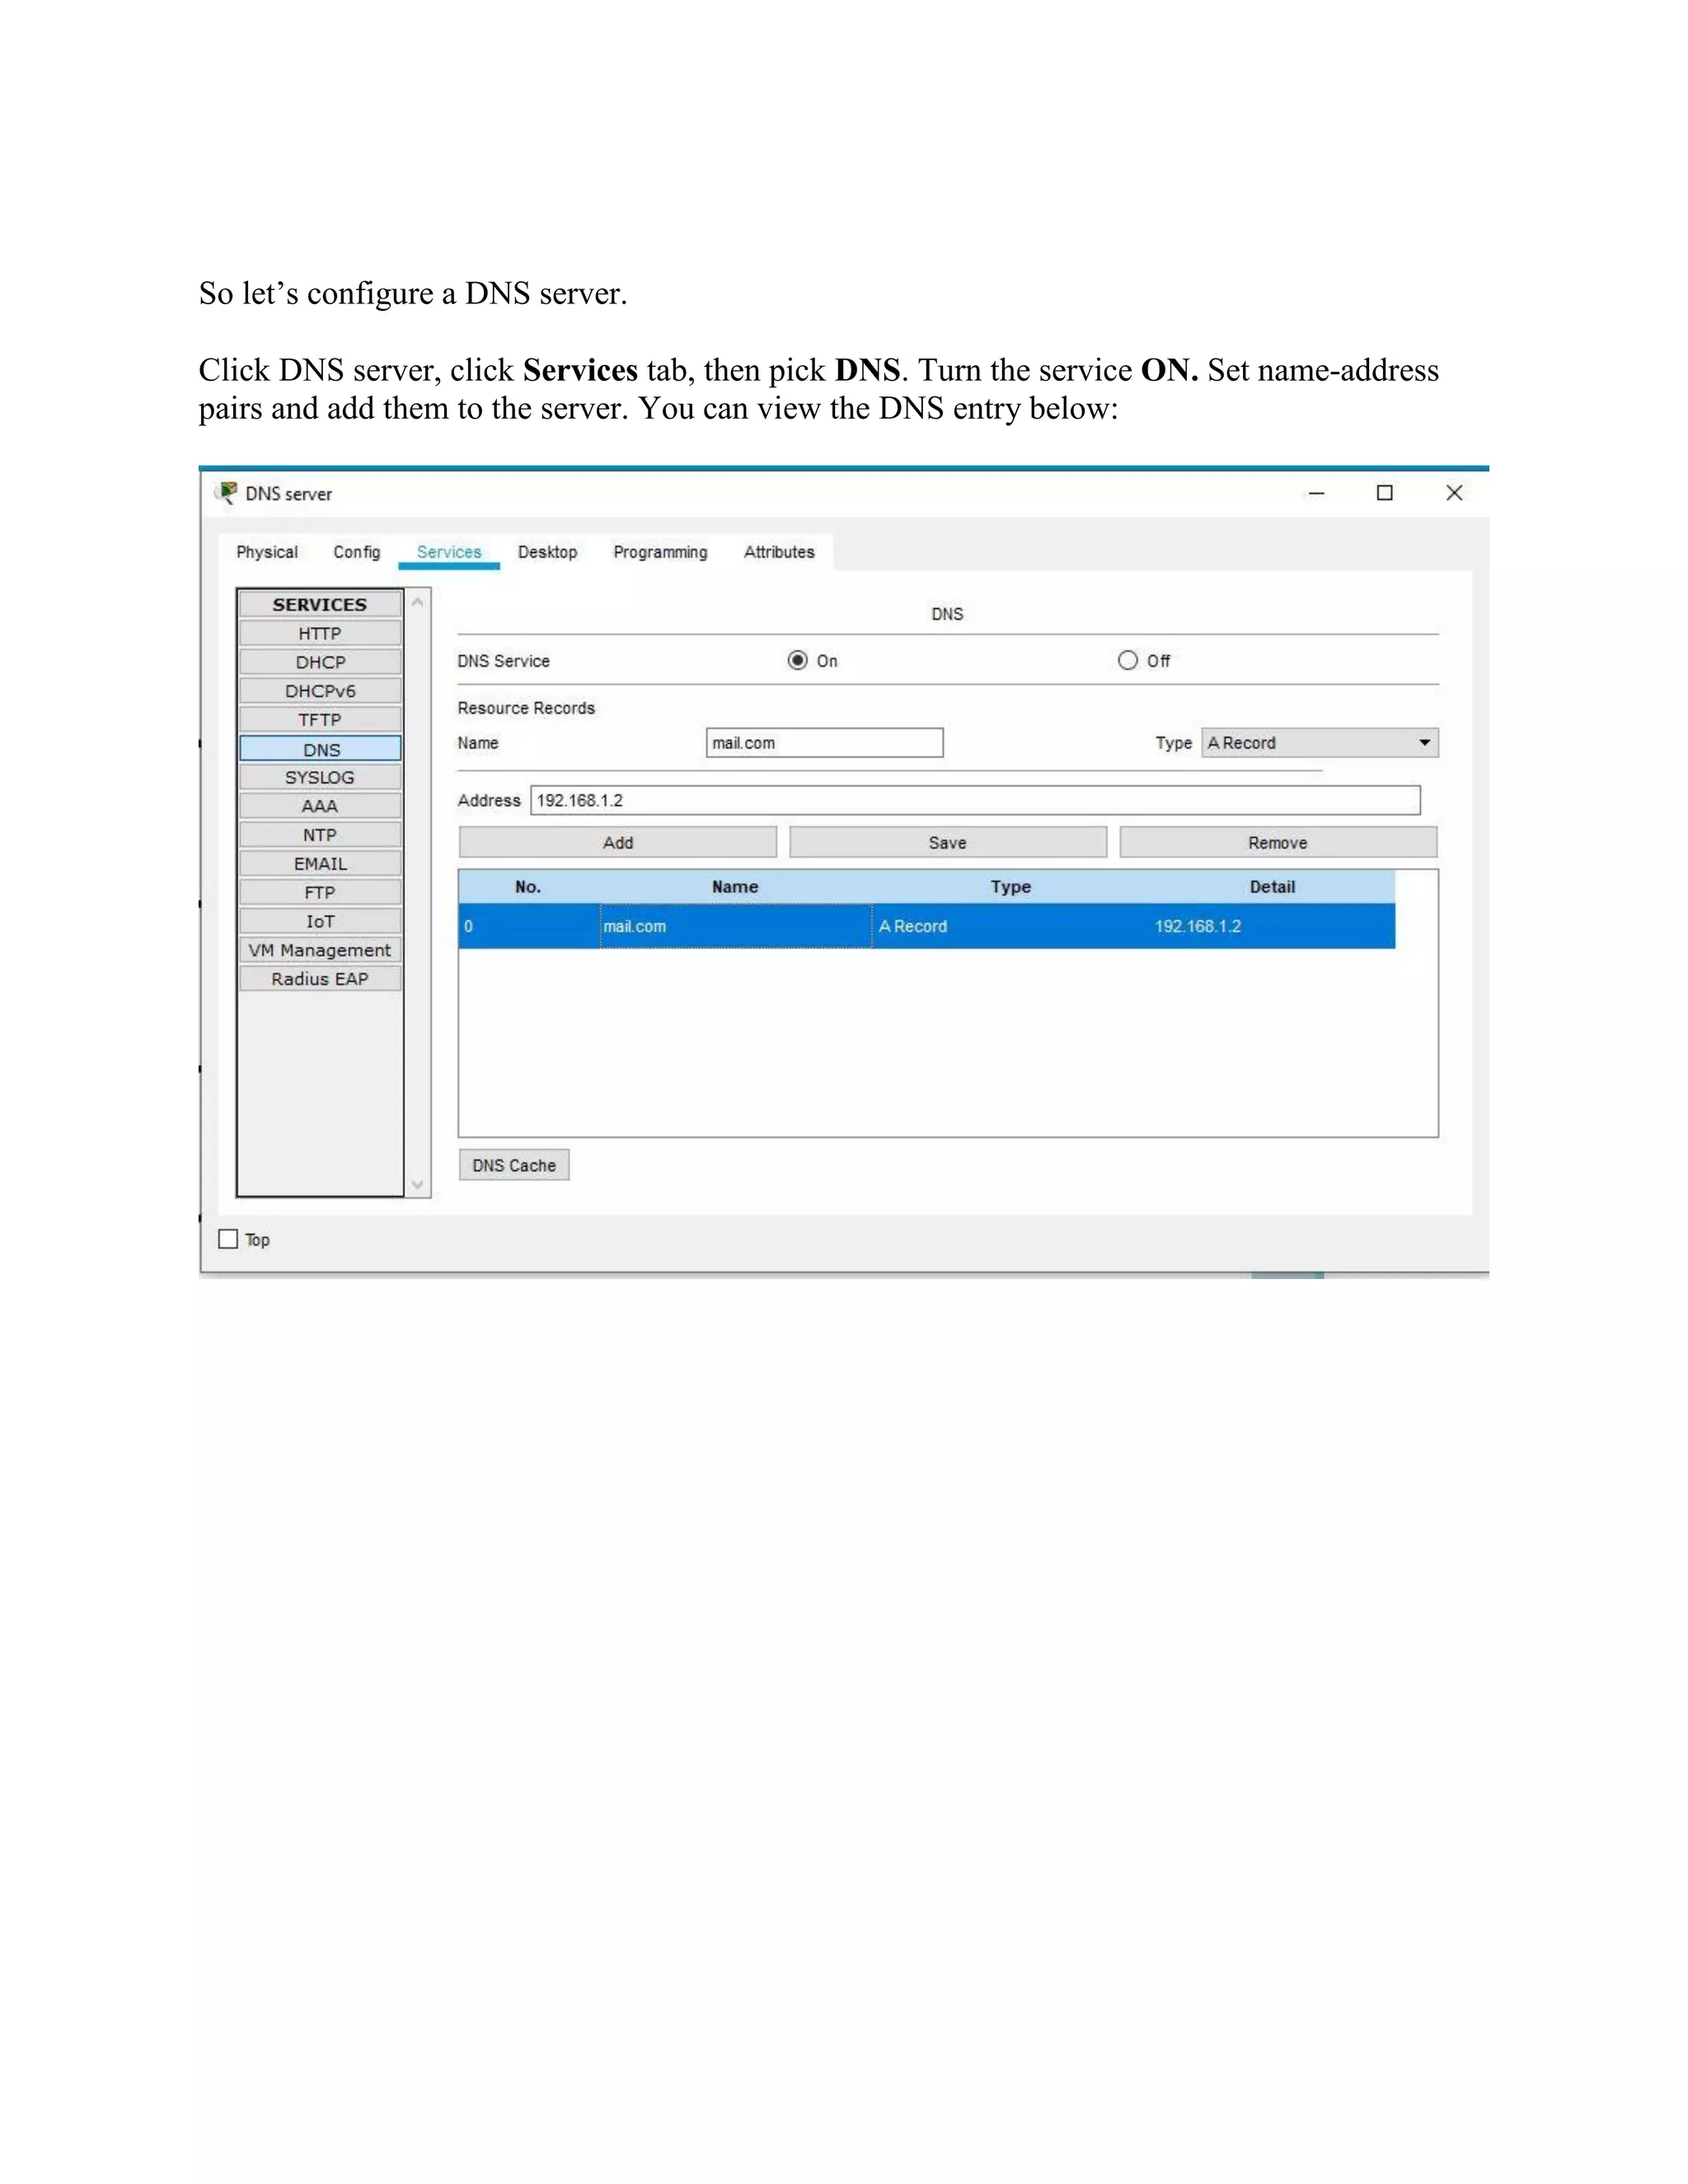
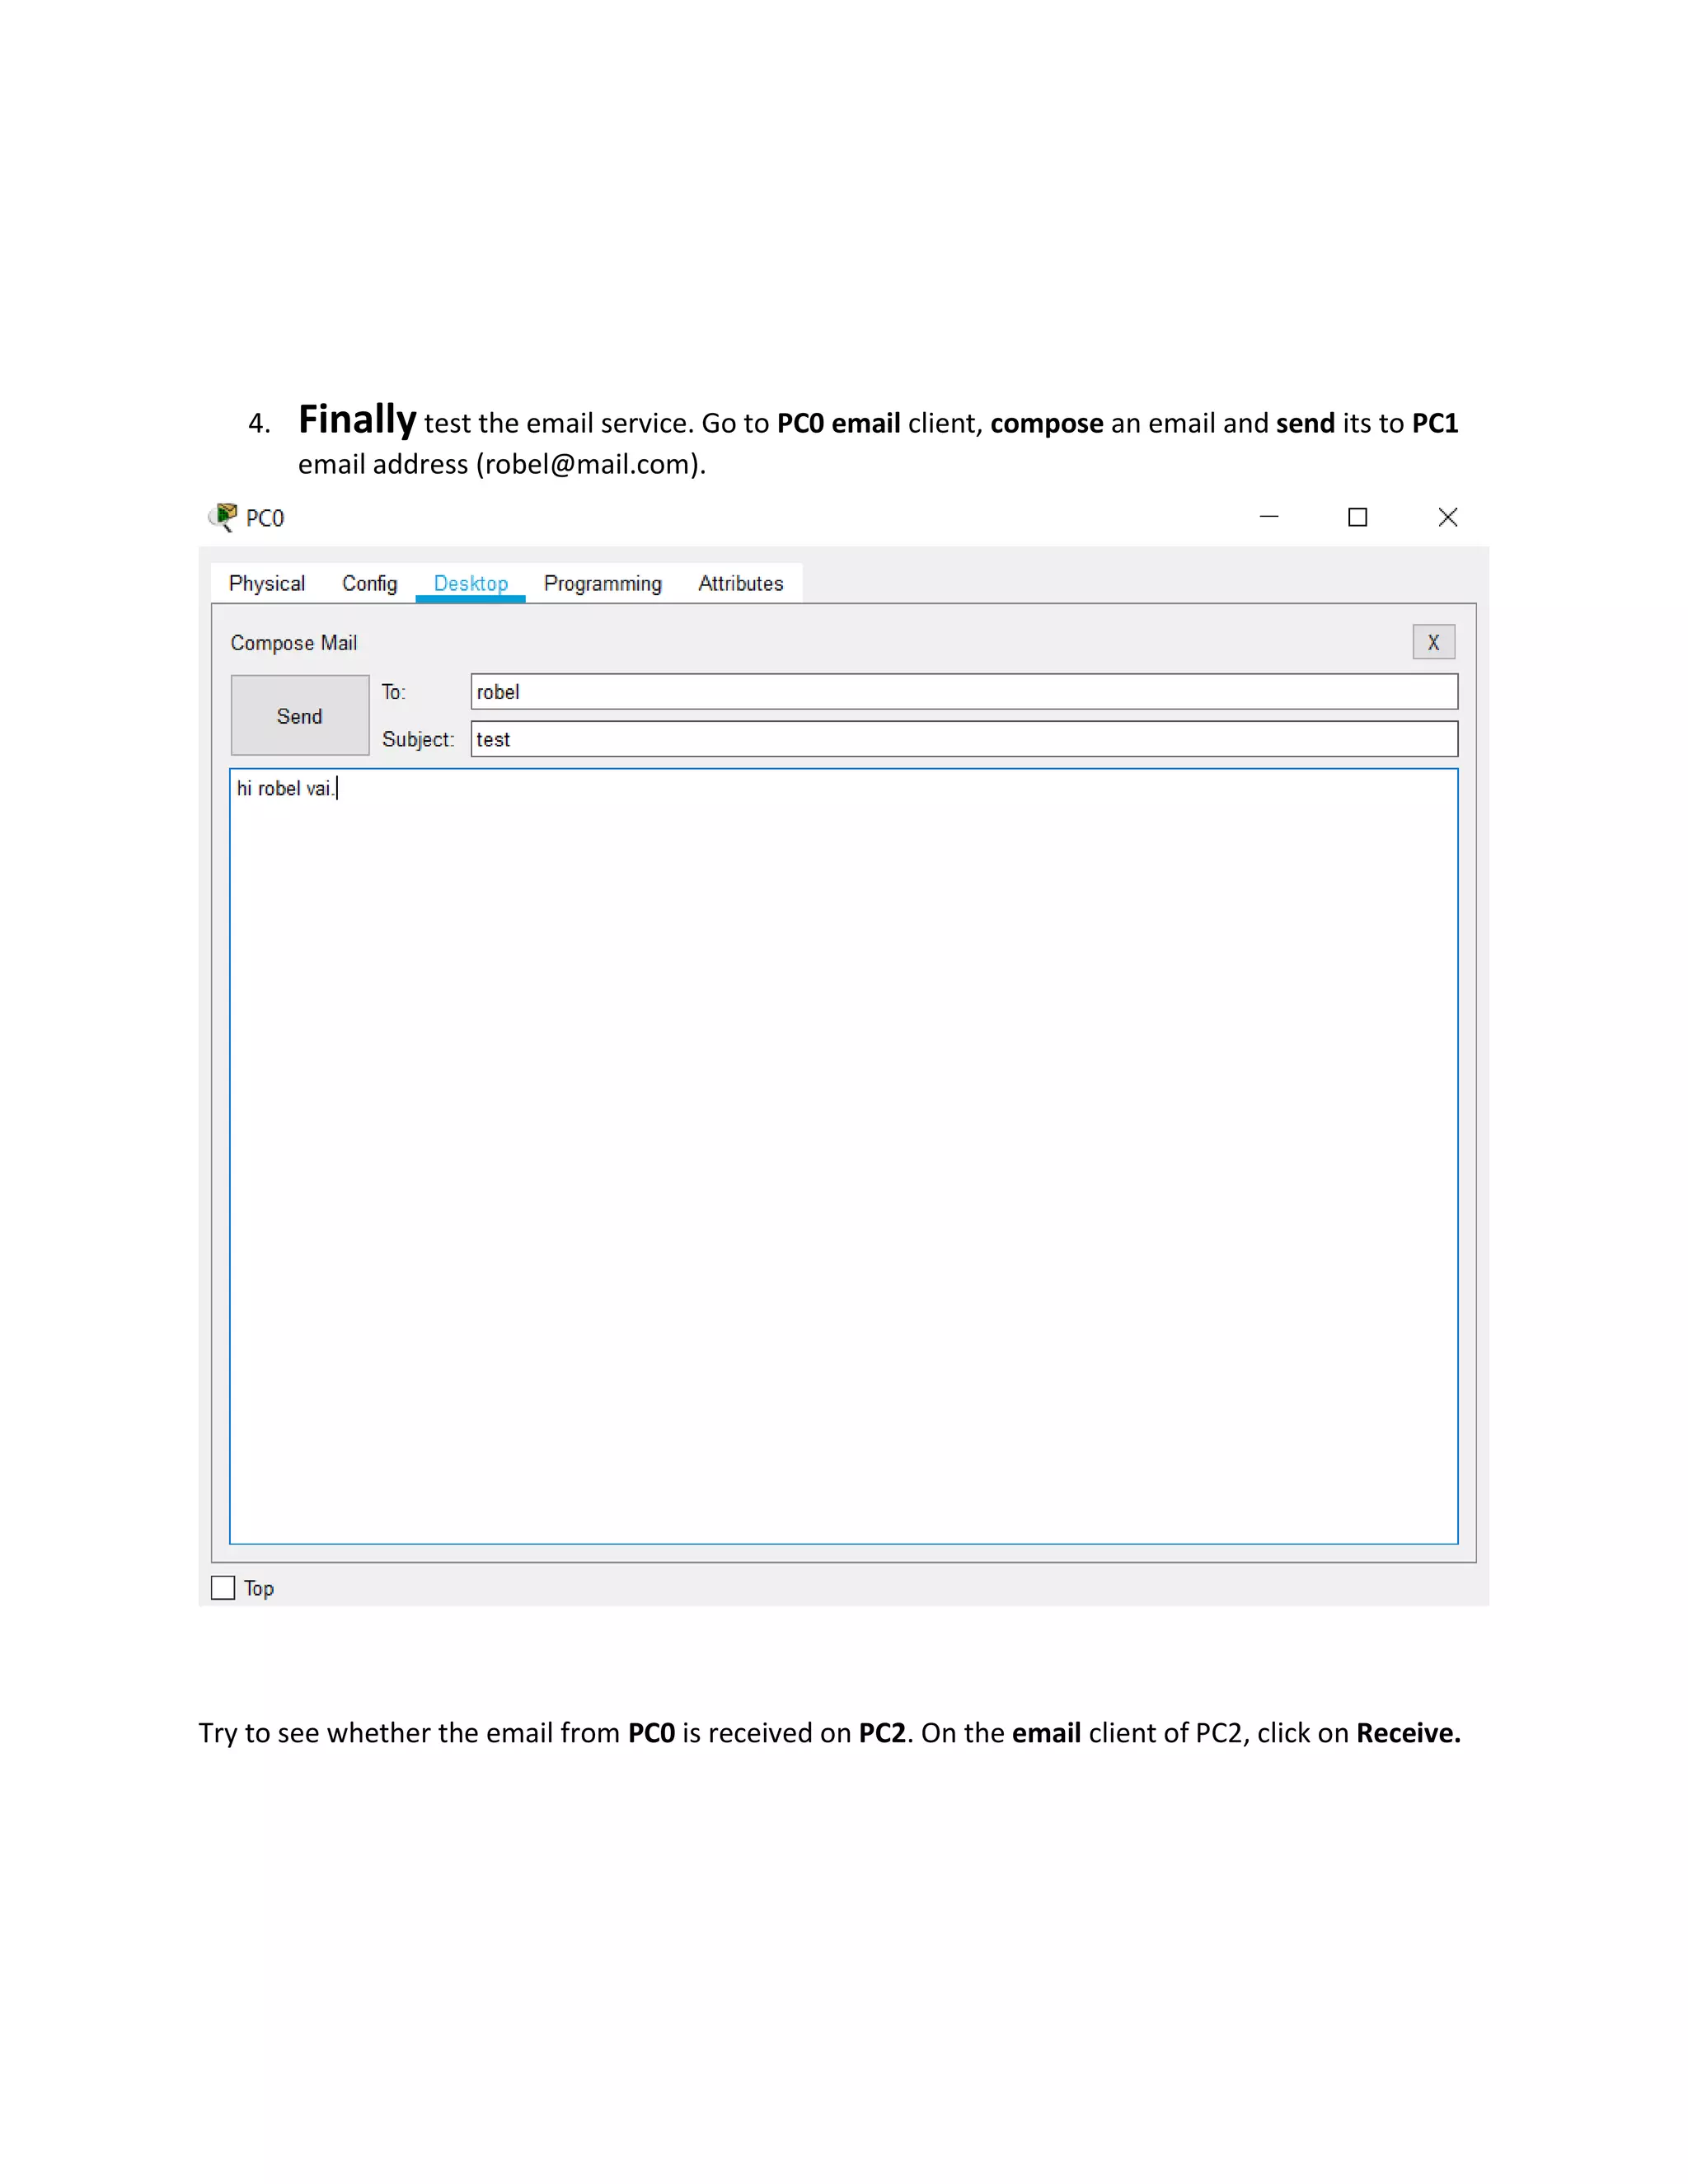


The document provides instructions for configuring an email server on Cisco Packet Tracer. It describes building a network topology with 1 switch, 4 PCs, and 2 servers - one for email and one for DNS. It then details steps to configure IP addresses, set up mail clients on the PCs and mail service on the email server, configure a DNS server, and finally test email sending between PCs. The goal is to demonstrate how to set up an email server and allow clients to communicate on the network using email addresses that are resolved by the DNS server.