
Download as PDF, PPTX
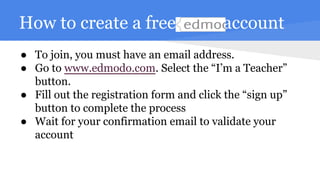
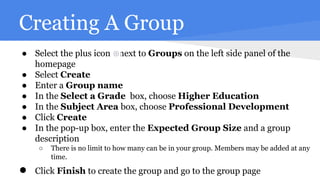

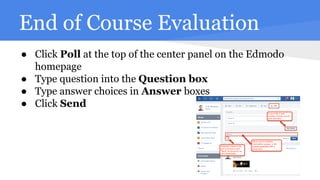
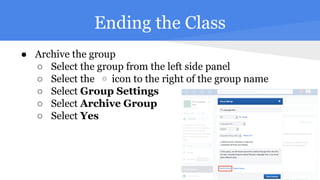
This document provides instructions for teachers on how to use Edmodo groups for online classes. It explains how to create a free Edmodo account, make a group, edit group settings, start discussions by posting notes, schedule notes to post at later times, share other media like files and links, respond to discussions, and create polls for end of course evaluations. It also describes how to archive the group after the class has ended.


