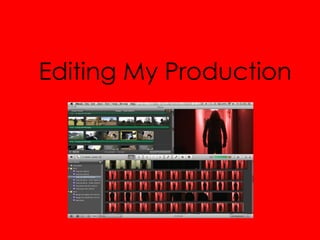
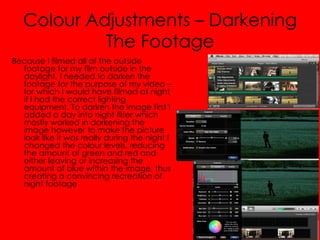
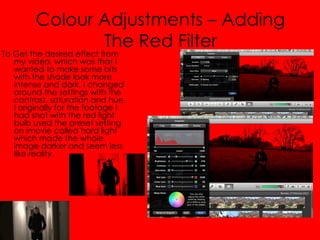
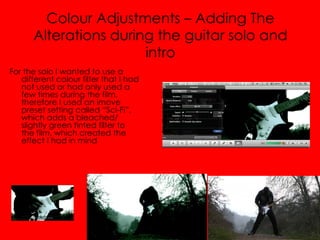
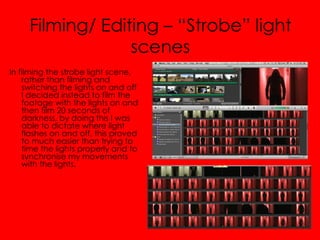
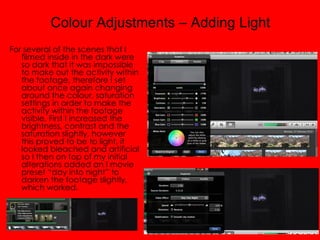
Editing My Production
Colour Adjustments – Darkening
            The Footage
Because I filmed all of the outside
  footage for my film outside in the
  daylight, I needed to darken the
  footage for the purpose of my video –
  for which I would have filmed at night
  if I had the correct lighting
  equipment. To darken the image first I
  added a day into night filter which
  mostly worked in darkening the
  image however to make the picture
  look like it was really during the night I
  changed the colour levels, reducing
  the amount of green and red and
  either leaving or increasing the
  amount of blue within the image, thus
  creating a convincing recreation of
  night footage
Colour Adjustments – Adding
                The Red Filter
To Get the desired effect from
   my video, which was that I
   wanted to make some bits
   with the shade look more
   intense and dark, I changed
   around the settings with the
   contrast, saturation and hue,
   I originally for the footage I
   had shot with the red light
   bulb used the preset setting
   on imovie called hard light
   which made the whole
   image darker and seem less
   like reality.
Colour Adjustments – Adding The
      Alterations during the guitar solo and
                       intro
For the solo I wanted to use a
   different colour filter that I had
   not used or had only used a
   few times during the film,
   therefore I used an imove
   preset setting called “Sci-Fi”,
   which adds a bleached/
   slightly green tinted filter to
   the film, which created the
   effect I had in mind
Filming/ Editing – “Strobe” light
                  scenes
In filming the strobe light scene,
    rather than filming and
    switching the lights on and off
    I decided instead to film the
    footage with the lights on and
    then film 20 seconds of
    darkness, by doing this I was
    able to dictate where light
    flashes on and off, this proved
    to much easier than trying to
    time the lights properly and to
    synchronise my movements
    with the lights.
Colour Adjustments – Adding Light
For several of the scenes that I
   filmed inside in the dark were
   so dark that it was impossible
   to make out the activity within
   the footage, therefore I set
   about once again changing
   around the colour, saturation
   settings in order to make the
   activity within the footage
   visible. First I increased the
   brightness, contrast and the
   saturation slightly, however
   this proved to be to light, it
   looked bleached and artificial
   so I then on top of my initial
   alterations added an I movie
   preset “day into night” to
   darken the footage slightly,
   which worked.
Editing My Production

Editing My Production

  • 1.
  • 2.
    Colour Adjustments –Darkening The Footage Because I filmed all of the outside footage for my film outside in the daylight, I needed to darken the footage for the purpose of my video – for which I would have filmed at night if I had the correct lighting equipment. To darken the image first I added a day into night filter which mostly worked in darkening the image however to make the picture look like it was really during the night I changed the colour levels, reducing the amount of green and red and either leaving or increasing the amount of blue within the image, thus creating a convincing recreation of night footage
  • 3.
    Colour Adjustments –Adding The Red Filter To Get the desired effect from my video, which was that I wanted to make some bits with the shade look more intense and dark, I changed around the settings with the contrast, saturation and hue, I originally for the footage I had shot with the red light bulb used the preset setting on imovie called hard light which made the whole image darker and seem less like reality.
  • 4.
    Colour Adjustments –Adding The Alterations during the guitar solo and intro For the solo I wanted to use a different colour filter that I had not used or had only used a few times during the film, therefore I used an imove preset setting called “Sci-Fi”, which adds a bleached/ slightly green tinted filter to the film, which created the effect I had in mind
  • 5.
    Filming/ Editing –“Strobe” light scenes In filming the strobe light scene, rather than filming and switching the lights on and off I decided instead to film the footage with the lights on and then film 20 seconds of darkness, by doing this I was able to dictate where light flashes on and off, this proved to much easier than trying to time the lights properly and to synchronise my movements with the lights.
  • 6.
    Colour Adjustments –Adding Light For several of the scenes that I filmed inside in the dark were so dark that it was impossible to make out the activity within the footage, therefore I set about once again changing around the colour, saturation settings in order to make the activity within the footage visible. First I increased the brightness, contrast and the saturation slightly, however this proved to be to light, it looked bleached and artificial so I then on top of my initial alterations added an I movie preset “day into night” to darken the footage slightly, which worked.