This document provides a step-by-step guide for installing DSpace on Windows, detailing necessary prerequisites like Java, Apache Maven, and PostgreSQL. It outlines the installation and configuration processes for each component, including setting environment variables and creating a database. Finally, it explains how to install DSpace itself, start the Tomcat service, and create a default system administrator.

![Prerequisites For Dspace Windows Pack
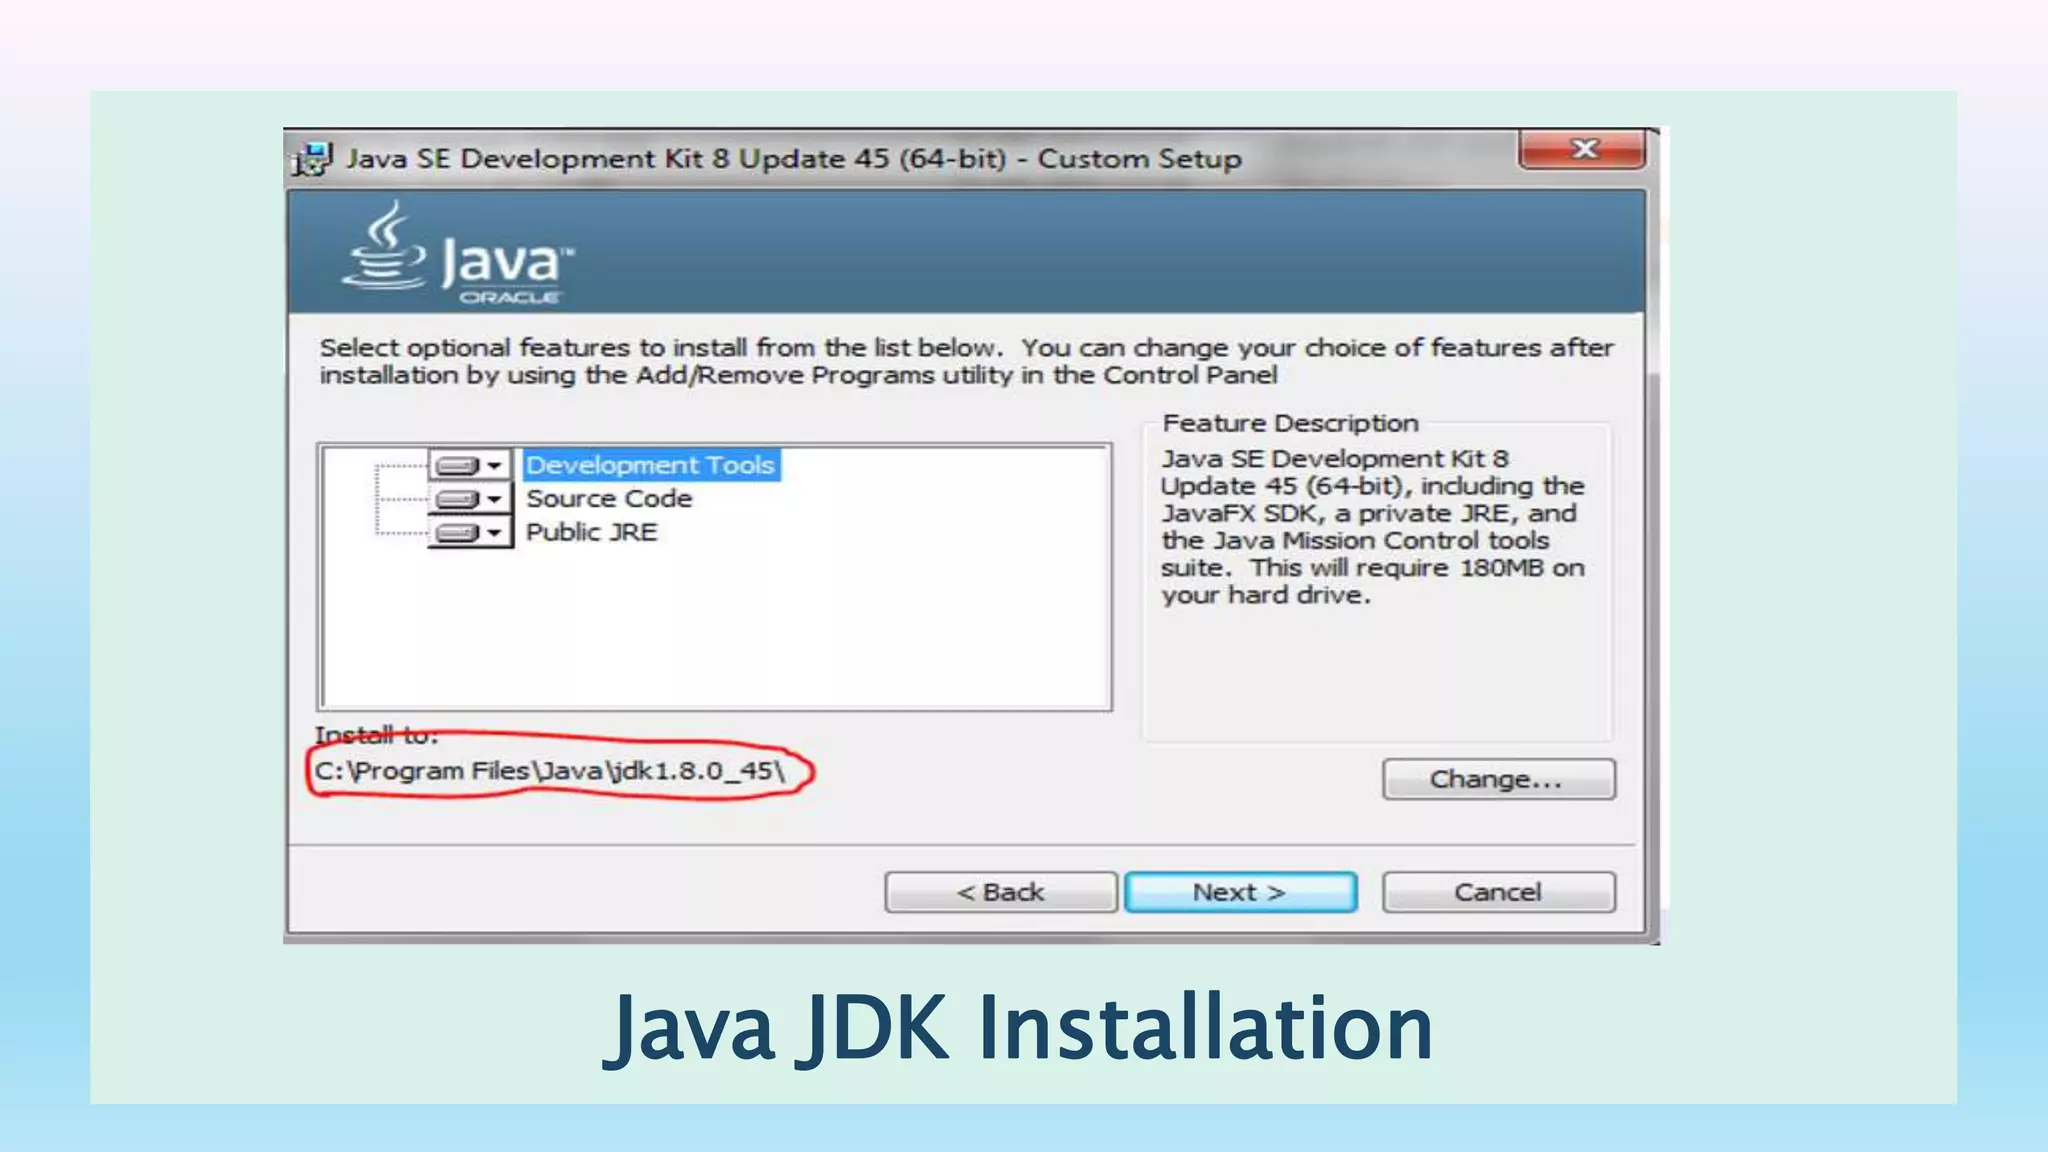
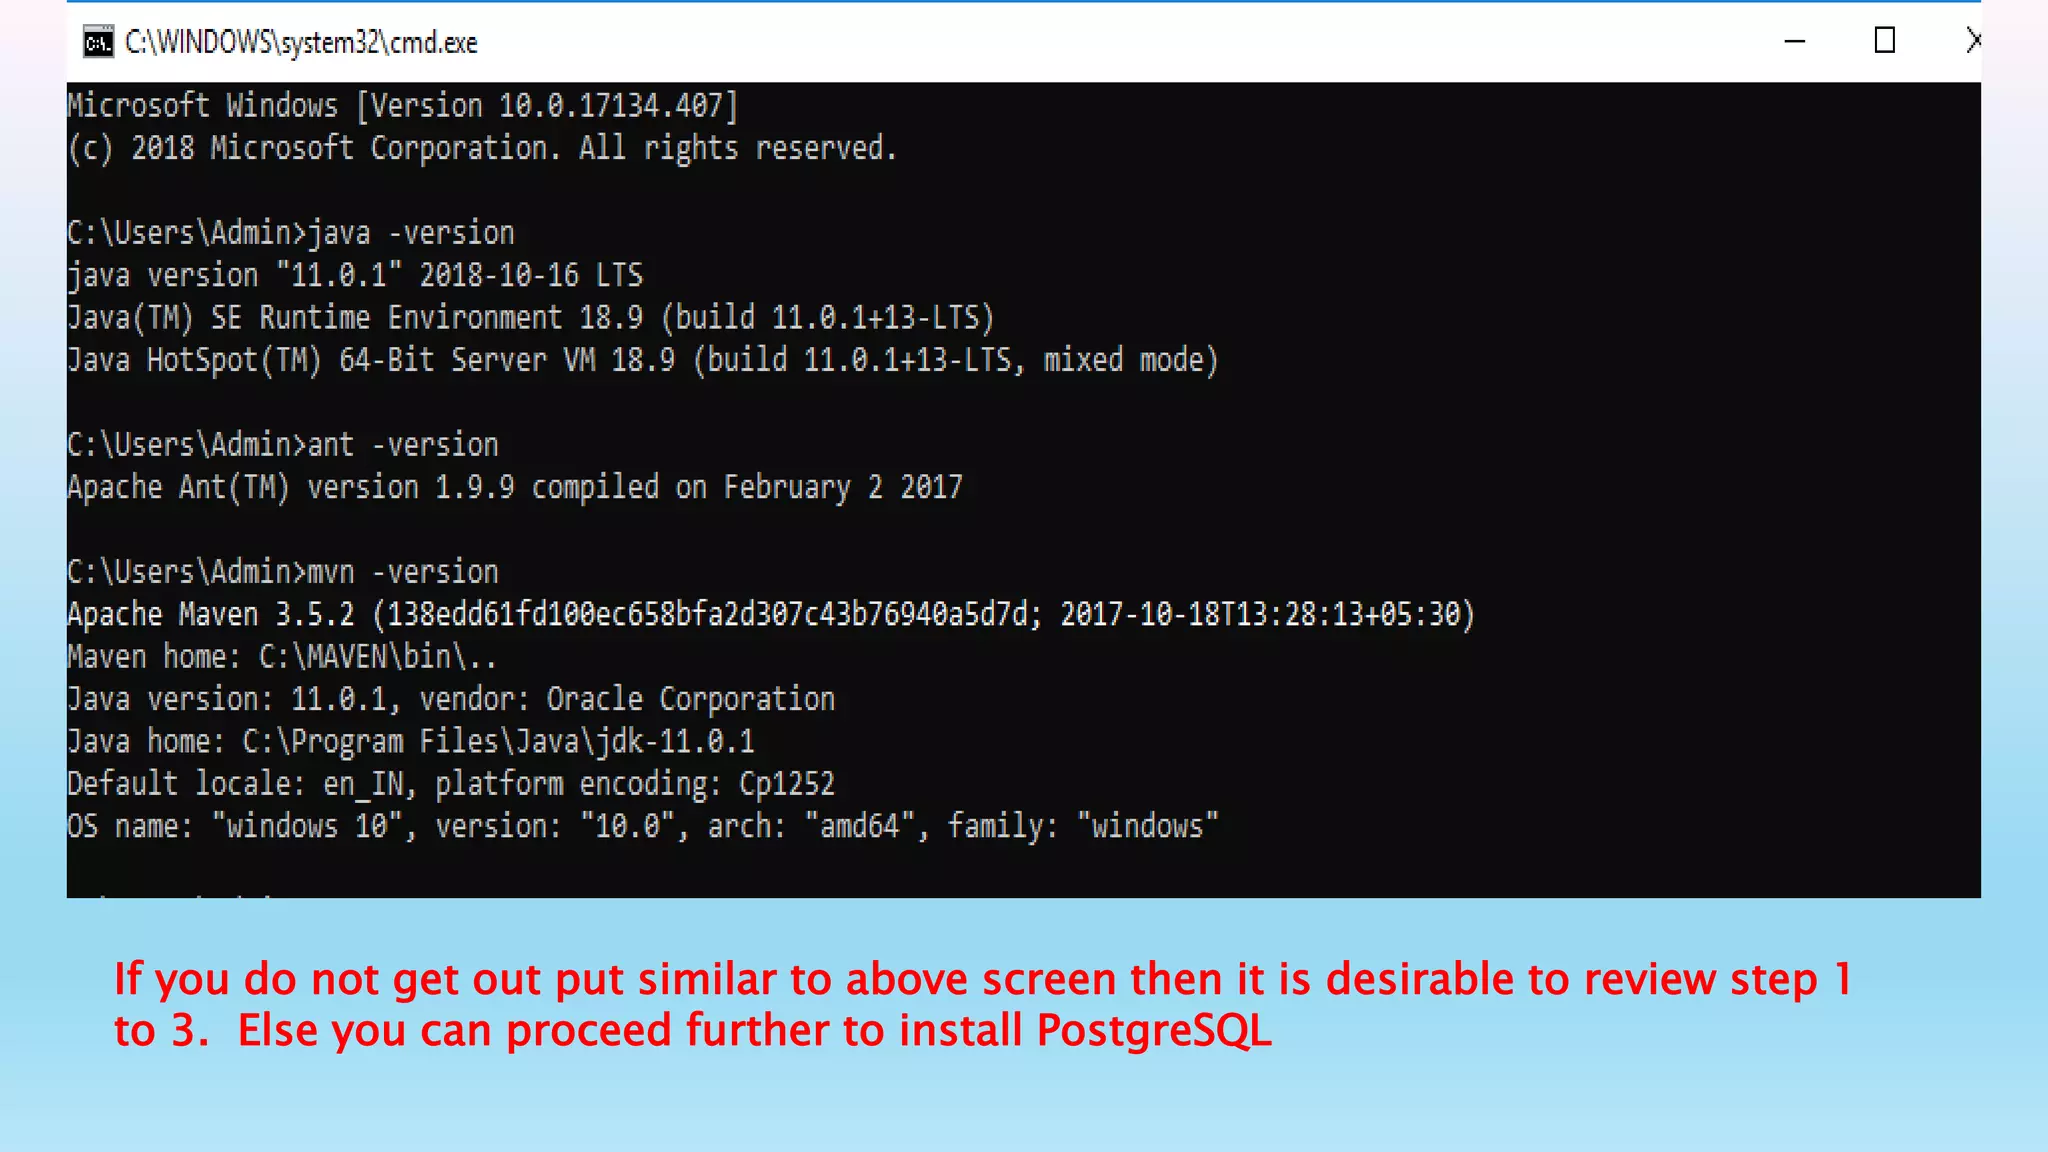
1) Oracle Java 7 or greater[JAVA SDK]
(https://www.oracle.com/technetwork/java/javase/downloads/index.html)
2)Apache MAVEN
(maven.apache.org/download.cgi)
3)Apache ANT
(http://ant.apache.org/bindownload.cgi)
4)Apache TOMCAT
(http://tomcat.apache.org/download-70.cgi)
5)POSTGRESQL
(http://www.postgresql.org/download/windows)
6)Dspace (Latest stable 5.1 version)
(http://www.dspace.org/latestrelease/)](https://image.slidesharecdn.com/dspaceforwindows-190202155806/75/Dspace-for-windows-2-2048.jpg)


![Vibe Coding vs. Spec-Driven Development [Free Meetup]](https://cdn.slidesharecdn.com/ss_thumbnails/vibecodingvsspecdrivendevelopment-251209105622-43f455e7-thumbnail.jpg?width=640&height=640&fit=bounds)


