SlideShare a Scribd company logo
Bigino per la gestione di board dati.
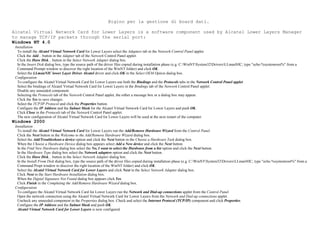
Alcatel Virtual Network Card for Lower Layers is a software component used by Alcatel Lower Layers Manager
to manage TCP/IP packets through the serial port:
Windows NT 4.0
Installation
To install the Alcatel Virtual Network Card for Lower Layers select the Adapters tab in the Network Control Panel applet.
Click the Add... button in the Adapter tab of the Network Control Panel applet.
Click the Have Disk... button in the Select Network Adapter dialog box.
In the Insert Disk dialog box, type the source path of the driver files copied during installation phase (e.g. C:WinNTSystem32DriversLLmanNIC; type "echo %systemroot%" from a
Command Prompt window to discover the right location of the WinNT folder) and click OK.
Select the LLmanNIC lower Layer Driver Alcatel driver and click OK in the Select OEM Option dialog box.
Configuration
To configure the Alcatel Virtual Network Card for Lower Layers use both the Bindings and the Protocols tabs in the Network Control Panel applet.
Select the bindings of Alcatel Virtual Network Card for Lower Layers in the Bindings tab of the Network Control Panel applet.
Disable any unneeded component.
Selecting the Protocols tab of the Network Control Panel applet, the either a message box or a dialog box may appear.
Click the Yes to save changes.
Select the TCP/IP Protocol and click the Properties button.
Configure the IP Address and the Subnet Mask for the Alcatel Virtual Network Card for Lower Layers and push OK.
Click Close in the Protocols tab of the Network Control Panel applet.
The new configuration of Alcatel Virtual Network Card for Lower Layers will be used at the next restart of the computer.
Windows 2000
Installation
To install the Alcatel Virtual Network Card for Lower Layers run the Add/Remove Hardware Wizard from the Control Panel.
Click the Next button in the Welcome to the Add/Remove Hardware Wizard dialog box.
Select the Add/Troubleshoot a device option and click the Next button in the Choose a Hardware Task dialog box.
When the Choose a Hardware Device dialog box appears select Add a New device and click the Next button.
In the Find New Hardware dialog box select the No, I want to select the Hardware from a list option and click the Next button.
In the Hardware Type dialog box select the Network adapters option and click the Next button.
Click the Have Disk... button in the Select Network Adapter dialog box.
In the Install From Disk dialog box, type the source path of the driver files copied during installation phase (e.g. C:WinNTSystem32DriversLLmanNIC; type "echo %systemroot%" from a
Command Propt window to discover the right location of the WinNT folder) and click OK.
Select the Alcatel Virtual Network Card for Lower Layers and click Next in the Select Network Adapter dialog box.
Click Next in the Start Hardware Installation dialog box.
When the Digital Signature Not Found dialog box appears click Yes.
Click Finish in the Completing the Add/Remove Hardware Wizard dialog box.
Configuration
To configure the Alcatel Virtual Network Card for Lower Layers run the Network and Dial-up connections applet from the Control Panel.
Open the network connection using the Alcatel Virtual Network Card for Lower Layers from the Network and Dial-up connections applet.
Uncheck any unneeded component in the Properties dialog box. Check and select the Internet Protocol (TCP/IP) component and click Properties.
Configure the IP Address and the Subnet Mask and push OK.
Alcatel Virtual Network Card for Lower Layers is now configured.
EC
ISABoard#1
ISABoard#2
NM
IP Gateway: 151.98.28.1
SubNetMask: 255.255.254.0
138.10.10.182
138.10.10.161
OSPF
GNE
EC
ISABoard#1
ISABoard#2
NE
1. Configurare per ogni NE l’area
OSPF.
Configuration
Comm/Routing
IP Configuration
OSPF Area Configuration
2. Configurare indirizzo IP
dell’apparato GNE e abilitarne
l’area OSPF. (SOLO PER IL GNE)
Configuration
Comm/Routing
Interface Configuration
Ethernet Configuration
( Abilitare OSPF )
3. Aggiungere una sottorete alla
tabella di routing di NM per
gestire le board ISA.
root> route add net [net IP dest.] netmask [dest. Netmask]
[IP GNE lato NM] [count]
root> netstat –rn (show the routing table)
4. Configurare l’interfaccia punto-
punto per far comunicare le board
ISA con NM per ogni NE
Configuration
Comm/Routing
IP Configuration
IP address configuration of Point-To-Point interfaces
5. Configurare per ogni NE
l’indirizzo di tutte le board ISA
Configuration
Comm/Routing
IP Configuration
ISA board IP address
6. Dichiarare per ogni coppia di NE
adiacenti (partendo da NE Gateway)
il tunneling IP over OSI per
permettere la comunicazione tra le
ISA tramite OSI. Configurare NSAP
address dell’NE adiacente e OSPF
area.
Configuration
Comm/Routing
Tunneling Configuration
IP OVER OSI
OSPF Area : 182.10.10.0
SubNetMask: 255.255.255.0
2
1
4
3
6
5
root> route add net 182.10.10.0 netmask 255.255.255.0 138.10.10.161 3
PointToPoint Address: 182.10.10.1
4 PointToPoint Address: 182.10.10.59
ISA IP Address: 182.10.10.2
ISA IP Address: 182.10.10.3
5
ISA IP Address: 182.10.10.60
ISA IP Address: 182.10.10.61
NSAP address 1/2
OSPF
Il System ID resta quello
di default – sul GNE si
possono configurare più
indirizzi remoti.
LAN Aziendale
DCN

More Related Content

What's hot

Remote login.89 to 90
Remote login.89 to 90Remote login.89 to 90
Remote login.89 to 90myrajendra
 
Escene es282 pc ip phone user manual
Escene es282 pc ip phone user manualEscene es282 pc ip phone user manual
Escene es282 pc ip phone user manualEmre Ozcan
 
Tech guides - Using the Communications Terminal
Tech guides - Using the Communications TerminalTech guides - Using the Communications Terminal
Tech guides - Using the Communications TerminalQuantum Composers
 
04 module operating & configuring ios
04  module operating & configuring ios04  module operating & configuring ios
04 module operating & configuring iosAsif
 

What's hot (8)

Remote login
Remote loginRemote login
Remote login
 
Remote login.89 to 90
Remote login.89 to 90Remote login.89 to 90
Remote login.89 to 90
 
Escene es282 pc ip phone user manual
Escene es282 pc ip phone user manualEscene es282 pc ip phone user manual
Escene es282 pc ip phone user manual
 
01 sql server_administration_creatingdc
01 sql server_administration_creatingdc01 sql server_administration_creatingdc
01 sql server_administration_creatingdc
 
Tech guides - Using the Communications Terminal
Tech guides - Using the Communications TerminalTech guides - Using the Communications Terminal
Tech guides - Using the Communications Terminal
 
04 module operating & configuring ios
04  module operating & configuring ios04  module operating & configuring ios
04 module operating & configuring ios
 
Cisco vpn
Cisco vpnCisco vpn
Cisco vpn
 
VIRDI AC 6000 Proposal
VIRDI AC 6000 ProposalVIRDI AC 6000 Proposal
VIRDI AC 6000 Proposal
 

Viewers also liked (12)

Blue Ocean Global Technology Brochure
Blue Ocean Global Technology BrochureBlue Ocean Global Technology Brochure
Blue Ocean Global Technology Brochure
 
Mapa conceptual teorias organizacionales
Mapa conceptual teorias organizacionalesMapa conceptual teorias organizacionales
Mapa conceptual teorias organizacionales
 
03 corona
03 corona03 corona
03 corona
 
Agua
AguaAgua
Agua
 
A Day in the Life of a Tudor House boy
A Day in the Life of a Tudor House boyA Day in the Life of a Tudor House boy
A Day in the Life of a Tudor House boy
 
Cyprus: Wool – Market Report. Analysis and Forecast to 2025
Cyprus: Wool – Market Report. Analysis and Forecast to 2025Cyprus: Wool – Market Report. Analysis and Forecast to 2025
Cyprus: Wool – Market Report. Analysis and Forecast to 2025
 
Lean and six segments
Lean and six segmentsLean and six segments
Lean and six segments
 
Pit cfc-2-2016
Pit cfc-2-2016Pit cfc-2-2016
Pit cfc-2-2016
 
Saml v2-OpenAM
Saml v2-OpenAMSaml v2-OpenAM
Saml v2-OpenAM
 
Acero refuerzo
Acero refuerzoAcero refuerzo
Acero refuerzo
 
El DíA De San Patricio
El DíA De San PatricioEl DíA De San Patricio
El DíA De San Patricio
 
Kkpi internet
Kkpi internetKkpi internet
Kkpi internet
 

Similar to Doc pathethernet

2.1.1.5 Packet Tracer - Create a Simple Network Using Packet Tracer (3).pdf
2.1.1.5 Packet Tracer - Create a Simple  Network Using Packet Tracer (3).pdf2.1.1.5 Packet Tracer - Create a Simple  Network Using Packet Tracer (3).pdf
2.1.1.5 Packet Tracer - Create a Simple Network Using Packet Tracer (3).pdfHaseebAli795005
 
Lab 4 Configure End Devices.pdf
Lab 4 Configure End Devices.pdfLab 4 Configure End Devices.pdf
Lab 4 Configure End Devices.pdfHaseebAli795005
 
How to set up opc with simatic net
How to set up opc with simatic netHow to set up opc with simatic net
How to set up opc with simatic nethassanaagib
 
A826 Quick Start Guide
A826 Quick Start GuideA826 Quick Start Guide
A826 Quick Start GuideLiz Jones
 
Bluetooth quick start_guide / Controlanything India
Bluetooth quick start_guide / Controlanything IndiaBluetooth quick start_guide / Controlanything India
Bluetooth quick start_guide / Controlanything IndiaDcube Tech Ventures
 
24109937 wincc flexible_kommunikation_ethernet_e
24109937 wincc flexible_kommunikation_ethernet_e24109937 wincc flexible_kommunikation_ethernet_e
24109937 wincc flexible_kommunikation_ethernet_eFercho Oe
 
75959914 vcads-user-manual-volvo
75959914 vcads-user-manual-volvo75959914 vcads-user-manual-volvo
75959914 vcads-user-manual-volvoluis felipe traipe
 
75959914 vcads-user-manual-volvo
75959914 vcads-user-manual-volvo75959914 vcads-user-manual-volvo
75959914 vcads-user-manual-volvoluis felipe traipe
 
Volvo Vcads Pro Truck Scanner User Manual OBDII365
Volvo Vcads Pro Truck Scanner User Manual OBDII365Volvo Vcads Pro Truck Scanner User Manual OBDII365
Volvo Vcads Pro Truck Scanner User Manual OBDII365OBD365
 
Wi fi ruckus config
Wi fi ruckus configWi fi ruckus config
Wi fi ruckus configtmukumba
 
Paxton Access 477-901-US Instruction Manual
Paxton Access 477-901-US Instruction ManualPaxton Access 477-901-US Instruction Manual
Paxton Access 477-901-US Instruction ManualJMAC Supply
 
Siemens Web interface PXG 3.W100
Siemens Web interface PXG 3.W100Siemens Web interface PXG 3.W100
Siemens Web interface PXG 3.W100CONTROLS & SYSTEMS
 

Similar to Doc pathethernet (20)

2.1.1.5 Packet Tracer - Create a Simple Network Using Packet Tracer (3).pdf
2.1.1.5 Packet Tracer - Create a Simple  Network Using Packet Tracer (3).pdf2.1.1.5 Packet Tracer - Create a Simple  Network Using Packet Tracer (3).pdf
2.1.1.5 Packet Tracer - Create a Simple Network Using Packet Tracer (3).pdf
 
Lab 4 Configure End Devices.pdf
Lab 4 Configure End Devices.pdfLab 4 Configure End Devices.pdf
Lab 4 Configure End Devices.pdf
 
How to set up opc with simatic net
How to set up opc with simatic netHow to set up opc with simatic net
How to set up opc with simatic net
 
A826 Quick Start Guide
A826 Quick Start GuideA826 Quick Start Guide
A826 Quick Start Guide
 
Xgt training
Xgt trainingXgt training
Xgt training
 
Bluetooth quick start_guide / Controlanything India
Bluetooth quick start_guide / Controlanything IndiaBluetooth quick start_guide / Controlanything India
Bluetooth quick start_guide / Controlanything India
 
zyz
zyzzyz
zyz
 
24109937 wincc flexible_kommunikation_ethernet_e
24109937 wincc flexible_kommunikation_ethernet_e24109937 wincc flexible_kommunikation_ethernet_e
24109937 wincc flexible_kommunikation_ethernet_e
 
Teste multikombrasil
Teste multikombrasilTeste multikombrasil
Teste multikombrasil
 
75959914 vcads-user-manual-volvo
75959914 vcads-user-manual-volvo75959914 vcads-user-manual-volvo
75959914 vcads-user-manual-volvo
 
75959914 vcads-user-manual-volvo
75959914 vcads-user-manual-volvo75959914 vcads-user-manual-volvo
75959914 vcads-user-manual-volvo
 
Volvo Vcads Pro Truck Scanner User Manual OBDII365
Volvo Vcads Pro Truck Scanner User Manual OBDII365Volvo Vcads Pro Truck Scanner User Manual OBDII365
Volvo Vcads Pro Truck Scanner User Manual OBDII365
 
Wi fi ruckus config
Wi fi ruckus configWi fi ruckus config
Wi fi ruckus config
 
Paxton Access 477-901-US Instruction Manual
Paxton Access 477-901-US Instruction ManualPaxton Access 477-901-US Instruction Manual
Paxton Access 477-901-US Instruction Manual
 
Lab7 s2
Lab7 s2Lab7 s2
Lab7 s2
 
Lab7 s1
Lab7 s1Lab7 s1
Lab7 s1
 
Siemens Web interface PXG 3.W100
Siemens Web interface PXG 3.W100Siemens Web interface PXG 3.W100
Siemens Web interface PXG 3.W100
 
Pws altboot
Pws altbootPws altboot
Pws altboot
 
Lab7 s1
Lab7 s1Lab7 s1
Lab7 s1
 
Lab7 s1
Lab7 s1Lab7 s1
Lab7 s1
 

Recently uploaded

The+Prospects+of+E-Commerce+in+China.pptx
The+Prospects+of+E-Commerce+in+China.pptxThe+Prospects+of+E-Commerce+in+China.pptx
The+Prospects+of+E-Commerce+in+China.pptxlaozhuseo02
 
History+of+E-commerce+Development+in+China-www.cfye-commerce.shop
History+of+E-commerce+Development+in+China-www.cfye-commerce.shopHistory+of+E-commerce+Development+in+China-www.cfye-commerce.shop
History+of+E-commerce+Development+in+China-www.cfye-commerce.shoplaozhuseo02
 
The Use of AI in Indonesia Election 2024: A Case Study
The Use of AI in Indonesia Election 2024: A Case StudyThe Use of AI in Indonesia Election 2024: A Case Study
The Use of AI in Indonesia Election 2024: A Case StudyDamar Juniarto
 
一比一原版UTS毕业证悉尼科技大学毕业证成绩单如何办理
一比一原版UTS毕业证悉尼科技大学毕业证成绩单如何办理一比一原版UTS毕业证悉尼科技大学毕业证成绩单如何办理
一比一原版UTS毕业证悉尼科技大学毕业证成绩单如何办理aagad
 
ER(Entity Relationship) Diagram for online shopping - TAE
ER(Entity Relationship) Diagram for online shopping - TAEER(Entity Relationship) Diagram for online shopping - TAE
ER(Entity Relationship) Diagram for online shopping - TAEHimani415946
 
How to Use Contact Form 7 Like a Pro.pptx
How to Use Contact Form 7 Like a Pro.pptxHow to Use Contact Form 7 Like a Pro.pptx
How to Use Contact Form 7 Like a Pro.pptxGal Baras
 
The AI Powered Organization-Intro to AI-LAN.pdf
The AI Powered Organization-Intro to AI-LAN.pdfThe AI Powered Organization-Intro to AI-LAN.pdf
The AI Powered Organization-Intro to AI-LAN.pdfSiskaFitrianingrum
 
1.Wireless Communication System_Wireless communication is a broad term that i...
1.Wireless Communication System_Wireless communication is a broad term that i...1.Wireless Communication System_Wireless communication is a broad term that i...
1.Wireless Communication System_Wireless communication is a broad term that i...JeyaPerumal1
 
Article writing on excessive use of internet.pptx
Article writing on excessive use of internet.pptxArticle writing on excessive use of internet.pptx
Article writing on excessive use of internet.pptxabhinandnam9997
 
Multi-cluster Kubernetes Networking- Patterns, Projects and Guidelines
Multi-cluster Kubernetes Networking- Patterns, Projects and GuidelinesMulti-cluster Kubernetes Networking- Patterns, Projects and Guidelines
Multi-cluster Kubernetes Networking- Patterns, Projects and GuidelinesSanjeev Rampal
 

Recently uploaded (12)

The Best AI Powered Software - Intellivid AI Studio
The Best AI Powered Software - Intellivid AI StudioThe Best AI Powered Software - Intellivid AI Studio
The Best AI Powered Software - Intellivid AI Studio
 
The+Prospects+of+E-Commerce+in+China.pptx
The+Prospects+of+E-Commerce+in+China.pptxThe+Prospects+of+E-Commerce+in+China.pptx
The+Prospects+of+E-Commerce+in+China.pptx
 
History+of+E-commerce+Development+in+China-www.cfye-commerce.shop
History+of+E-commerce+Development+in+China-www.cfye-commerce.shopHistory+of+E-commerce+Development+in+China-www.cfye-commerce.shop
History+of+E-commerce+Development+in+China-www.cfye-commerce.shop
 
The Use of AI in Indonesia Election 2024: A Case Study
The Use of AI in Indonesia Election 2024: A Case StudyThe Use of AI in Indonesia Election 2024: A Case Study
The Use of AI in Indonesia Election 2024: A Case Study
 
一比一原版UTS毕业证悉尼科技大学毕业证成绩单如何办理
一比一原版UTS毕业证悉尼科技大学毕业证成绩单如何办理一比一原版UTS毕业证悉尼科技大学毕业证成绩单如何办理
一比一原版UTS毕业证悉尼科技大学毕业证成绩单如何办理
 
ER(Entity Relationship) Diagram for online shopping - TAE
ER(Entity Relationship) Diagram for online shopping - TAEER(Entity Relationship) Diagram for online shopping - TAE
ER(Entity Relationship) Diagram for online shopping - TAE
 
How to Use Contact Form 7 Like a Pro.pptx
How to Use Contact Form 7 Like a Pro.pptxHow to Use Contact Form 7 Like a Pro.pptx
How to Use Contact Form 7 Like a Pro.pptx
 
Stay Ahead with 2024's Top Web Design Trends
Stay Ahead with 2024's Top Web Design TrendsStay Ahead with 2024's Top Web Design Trends
Stay Ahead with 2024's Top Web Design Trends
 
The AI Powered Organization-Intro to AI-LAN.pdf
The AI Powered Organization-Intro to AI-LAN.pdfThe AI Powered Organization-Intro to AI-LAN.pdf
The AI Powered Organization-Intro to AI-LAN.pdf
 
1.Wireless Communication System_Wireless communication is a broad term that i...
1.Wireless Communication System_Wireless communication is a broad term that i...1.Wireless Communication System_Wireless communication is a broad term that i...
1.Wireless Communication System_Wireless communication is a broad term that i...
 
Article writing on excessive use of internet.pptx
Article writing on excessive use of internet.pptxArticle writing on excessive use of internet.pptx
Article writing on excessive use of internet.pptx
 
Multi-cluster Kubernetes Networking- Patterns, Projects and Guidelines
Multi-cluster Kubernetes Networking- Patterns, Projects and GuidelinesMulti-cluster Kubernetes Networking- Patterns, Projects and Guidelines
Multi-cluster Kubernetes Networking- Patterns, Projects and Guidelines
 

Doc pathethernet

  • 1. Bigino per la gestione di board dati. Alcatel Virtual Network Card for Lower Layers is a software component used by Alcatel Lower Layers Manager to manage TCP/IP packets through the serial port: Windows NT 4.0 Installation To install the Alcatel Virtual Network Card for Lower Layers select the Adapters tab in the Network Control Panel applet. Click the Add... button in the Adapter tab of the Network Control Panel applet. Click the Have Disk... button in the Select Network Adapter dialog box. In the Insert Disk dialog box, type the source path of the driver files copied during installation phase (e.g. C:WinNTSystem32DriversLLmanNIC; type "echo %systemroot%" from a Command Prompt window to discover the right location of the WinNT folder) and click OK. Select the LLmanNIC lower Layer Driver Alcatel driver and click OK in the Select OEM Option dialog box. Configuration To configure the Alcatel Virtual Network Card for Lower Layers use both the Bindings and the Protocols tabs in the Network Control Panel applet. Select the bindings of Alcatel Virtual Network Card for Lower Layers in the Bindings tab of the Network Control Panel applet. Disable any unneeded component. Selecting the Protocols tab of the Network Control Panel applet, the either a message box or a dialog box may appear. Click the Yes to save changes. Select the TCP/IP Protocol and click the Properties button. Configure the IP Address and the Subnet Mask for the Alcatel Virtual Network Card for Lower Layers and push OK. Click Close in the Protocols tab of the Network Control Panel applet. The new configuration of Alcatel Virtual Network Card for Lower Layers will be used at the next restart of the computer. Windows 2000 Installation To install the Alcatel Virtual Network Card for Lower Layers run the Add/Remove Hardware Wizard from the Control Panel. Click the Next button in the Welcome to the Add/Remove Hardware Wizard dialog box. Select the Add/Troubleshoot a device option and click the Next button in the Choose a Hardware Task dialog box. When the Choose a Hardware Device dialog box appears select Add a New device and click the Next button. In the Find New Hardware dialog box select the No, I want to select the Hardware from a list option and click the Next button. In the Hardware Type dialog box select the Network adapters option and click the Next button. Click the Have Disk... button in the Select Network Adapter dialog box. In the Install From Disk dialog box, type the source path of the driver files copied during installation phase (e.g. C:WinNTSystem32DriversLLmanNIC; type "echo %systemroot%" from a Command Propt window to discover the right location of the WinNT folder) and click OK. Select the Alcatel Virtual Network Card for Lower Layers and click Next in the Select Network Adapter dialog box. Click Next in the Start Hardware Installation dialog box. When the Digital Signature Not Found dialog box appears click Yes. Click Finish in the Completing the Add/Remove Hardware Wizard dialog box. Configuration To configure the Alcatel Virtual Network Card for Lower Layers run the Network and Dial-up connections applet from the Control Panel. Open the network connection using the Alcatel Virtual Network Card for Lower Layers from the Network and Dial-up connections applet. Uncheck any unneeded component in the Properties dialog box. Check and select the Internet Protocol (TCP/IP) component and click Properties. Configure the IP Address and the Subnet Mask and push OK. Alcatel Virtual Network Card for Lower Layers is now configured.
  • 2. EC ISABoard#1 ISABoard#2 NM IP Gateway: 151.98.28.1 SubNetMask: 255.255.254.0 138.10.10.182 138.10.10.161 OSPF GNE EC ISABoard#1 ISABoard#2 NE 1. Configurare per ogni NE l’area OSPF. Configuration Comm/Routing IP Configuration OSPF Area Configuration 2. Configurare indirizzo IP dell’apparato GNE e abilitarne l’area OSPF. (SOLO PER IL GNE) Configuration Comm/Routing Interface Configuration Ethernet Configuration ( Abilitare OSPF ) 3. Aggiungere una sottorete alla tabella di routing di NM per gestire le board ISA. root> route add net [net IP dest.] netmask [dest. Netmask] [IP GNE lato NM] [count] root> netstat –rn (show the routing table) 4. Configurare l’interfaccia punto- punto per far comunicare le board ISA con NM per ogni NE Configuration Comm/Routing IP Configuration IP address configuration of Point-To-Point interfaces 5. Configurare per ogni NE l’indirizzo di tutte le board ISA Configuration Comm/Routing IP Configuration ISA board IP address 6. Dichiarare per ogni coppia di NE adiacenti (partendo da NE Gateway) il tunneling IP over OSI per permettere la comunicazione tra le ISA tramite OSI. Configurare NSAP address dell’NE adiacente e OSPF area. Configuration Comm/Routing Tunneling Configuration IP OVER OSI OSPF Area : 182.10.10.0 SubNetMask: 255.255.255.0 2 1 4 3 6 5 root> route add net 182.10.10.0 netmask 255.255.255.0 138.10.10.161 3 PointToPoint Address: 182.10.10.1 4 PointToPoint Address: 182.10.10.59 ISA IP Address: 182.10.10.2 ISA IP Address: 182.10.10.3 5 ISA IP Address: 182.10.10.60 ISA IP Address: 182.10.10.61 NSAP address 1/2 OSPF Il System ID resta quello di default – sul GNE si possono configurare più indirizzi remoti. LAN Aziendale DCN