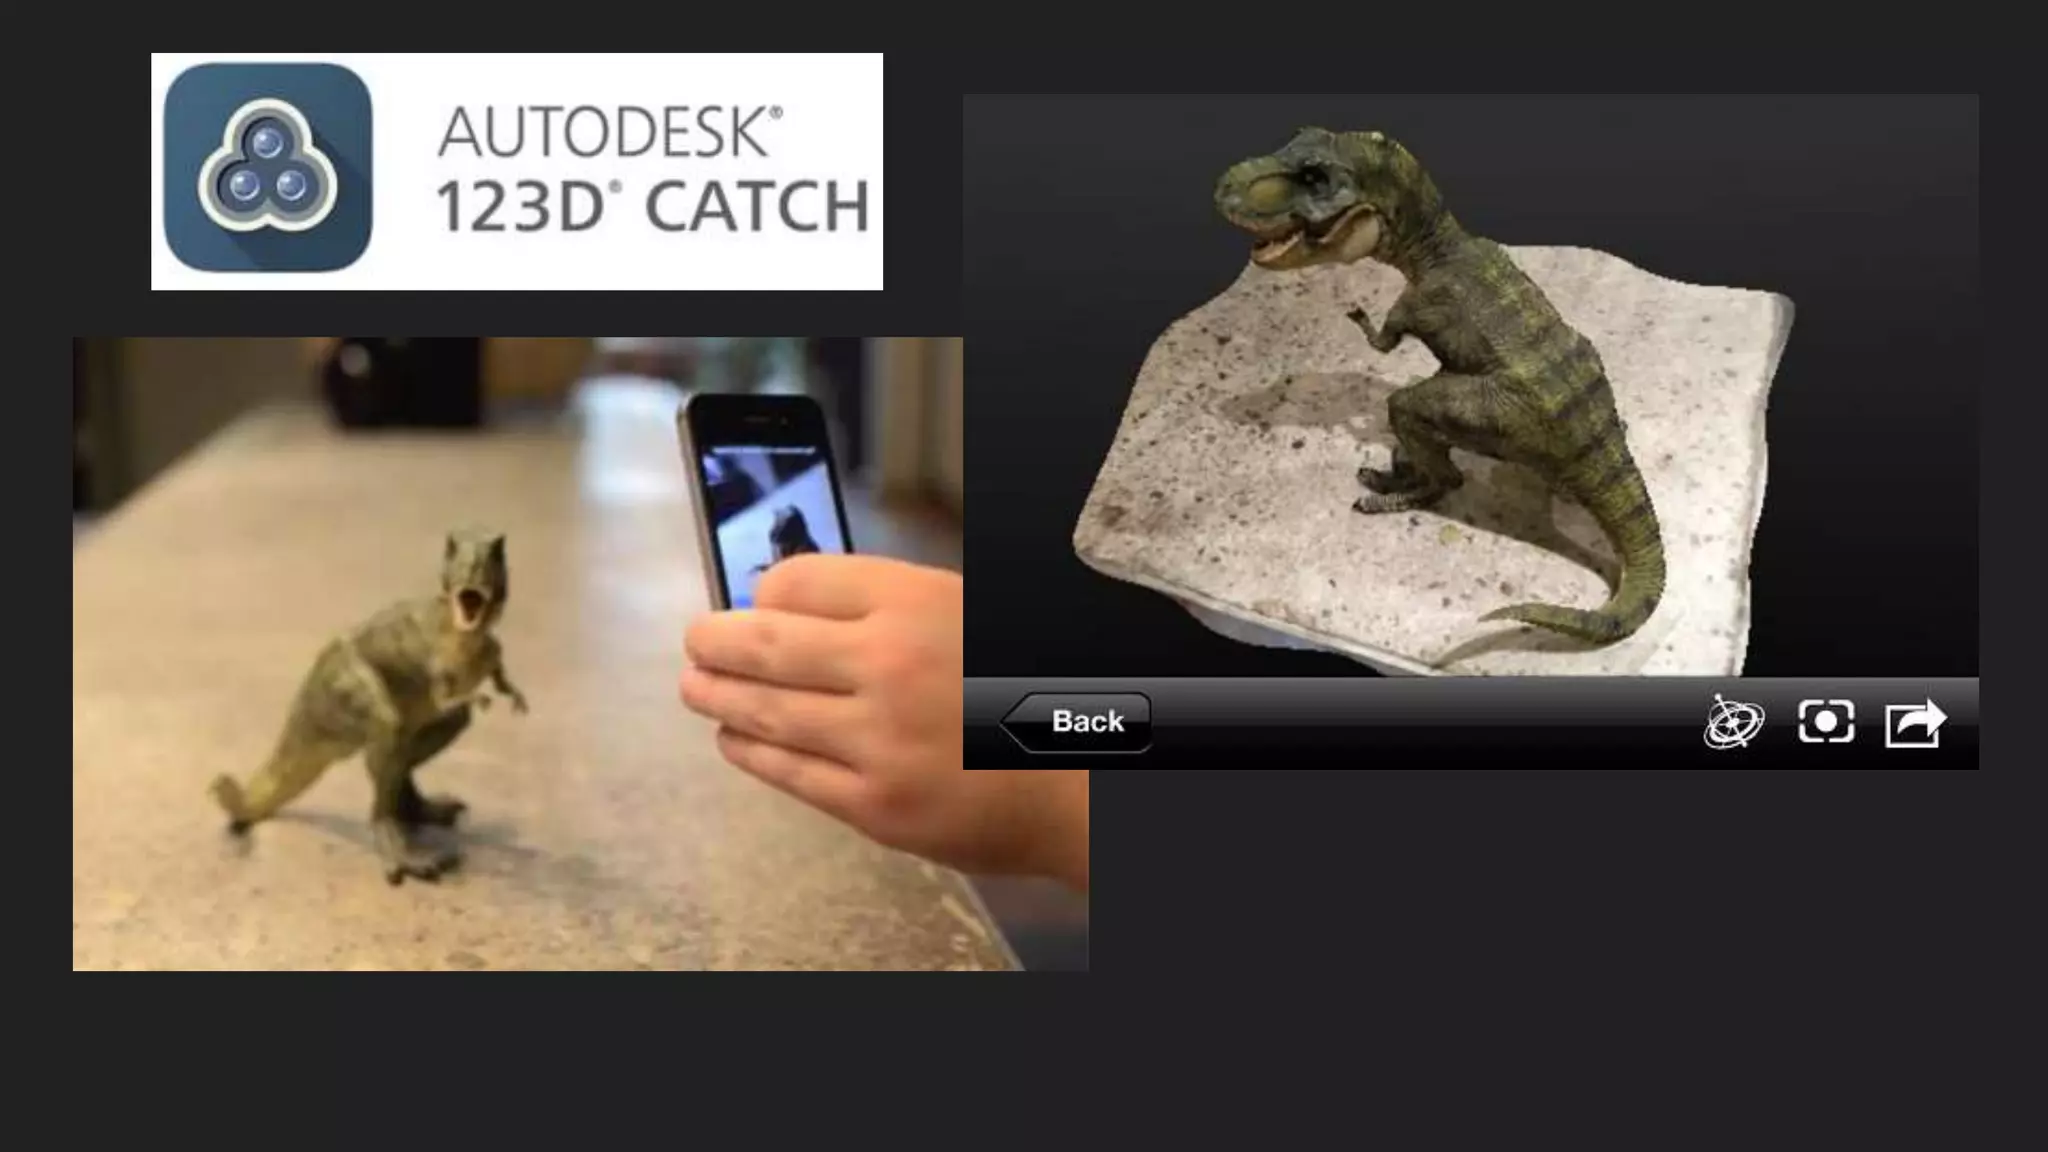
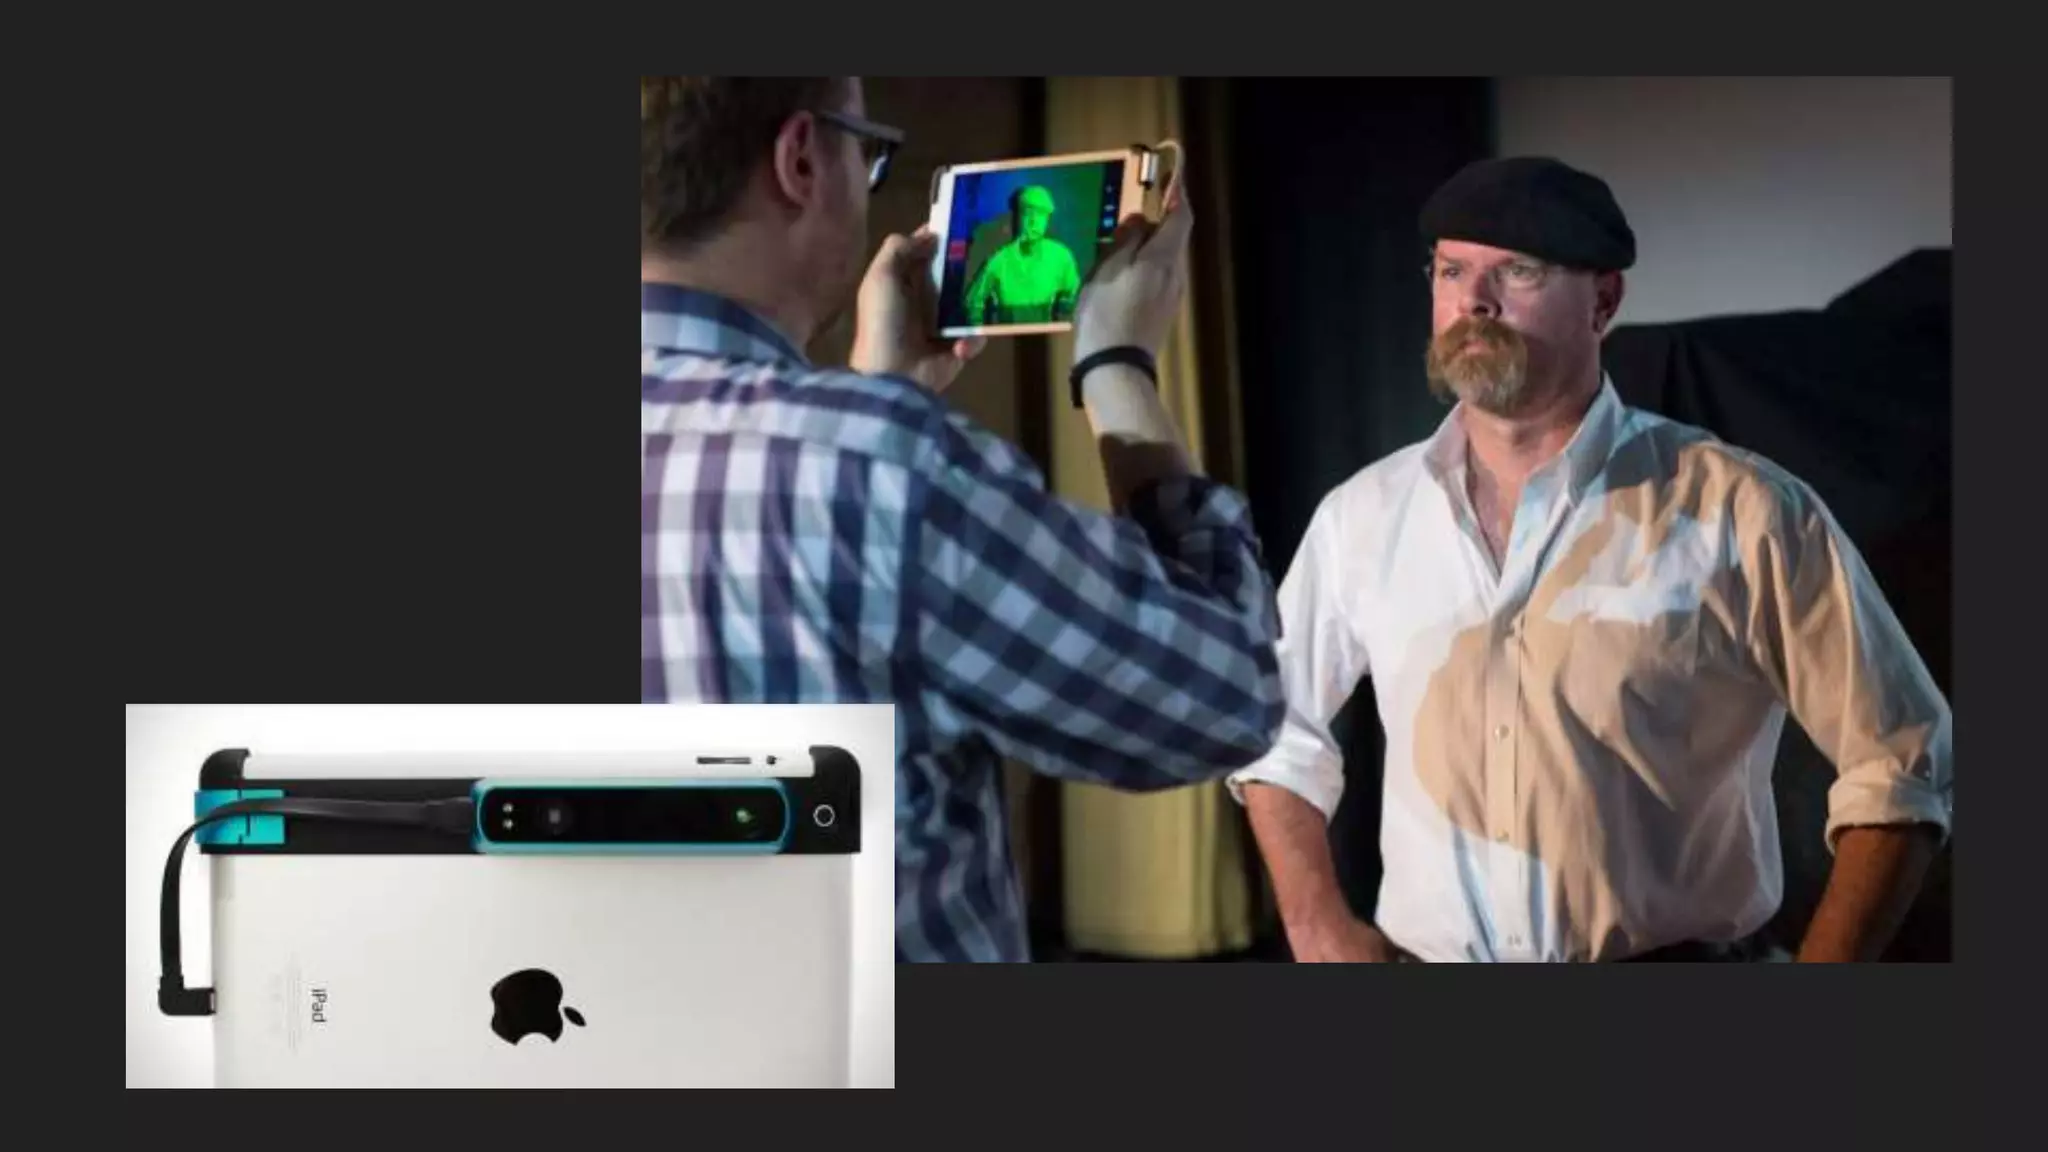
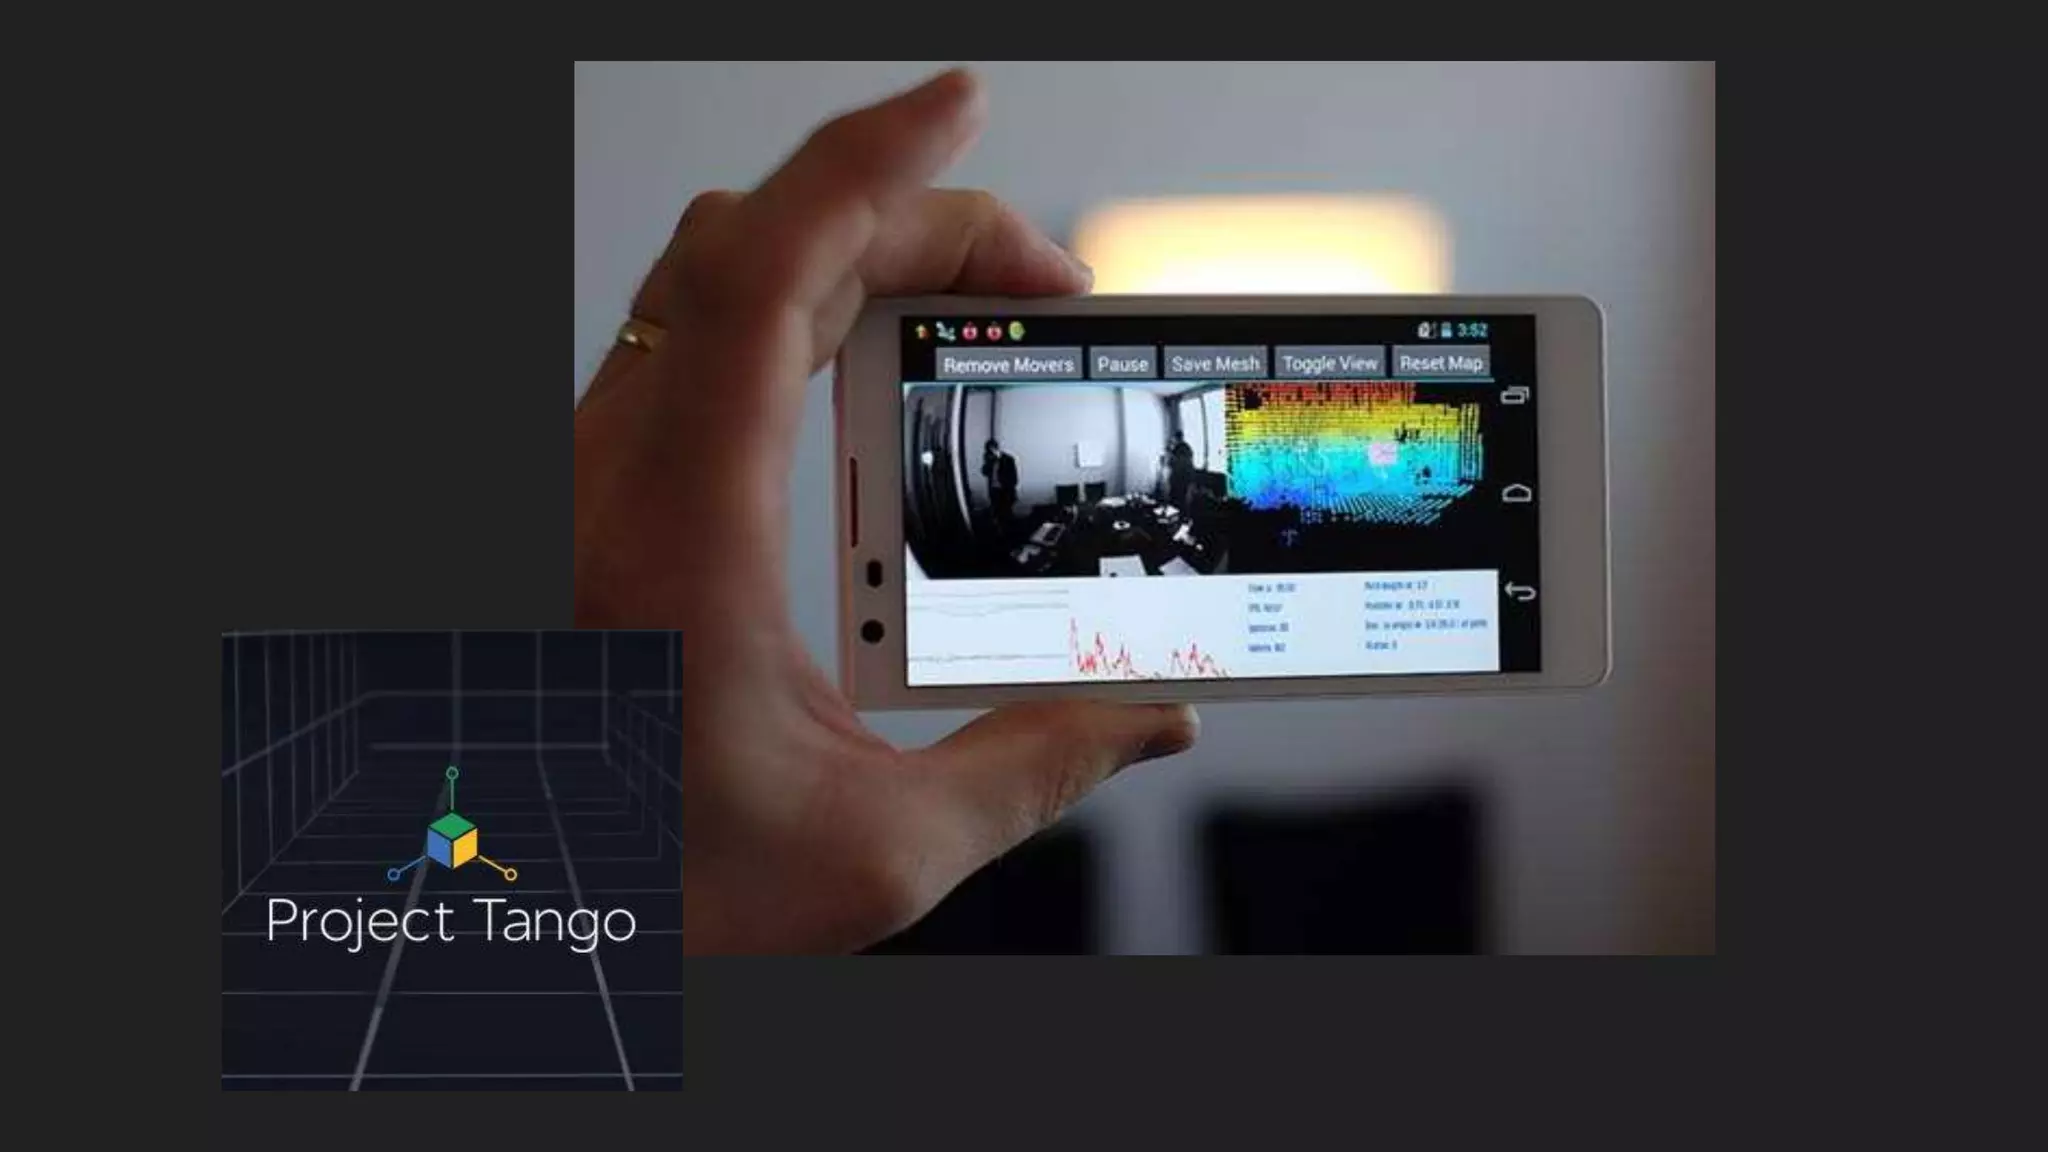
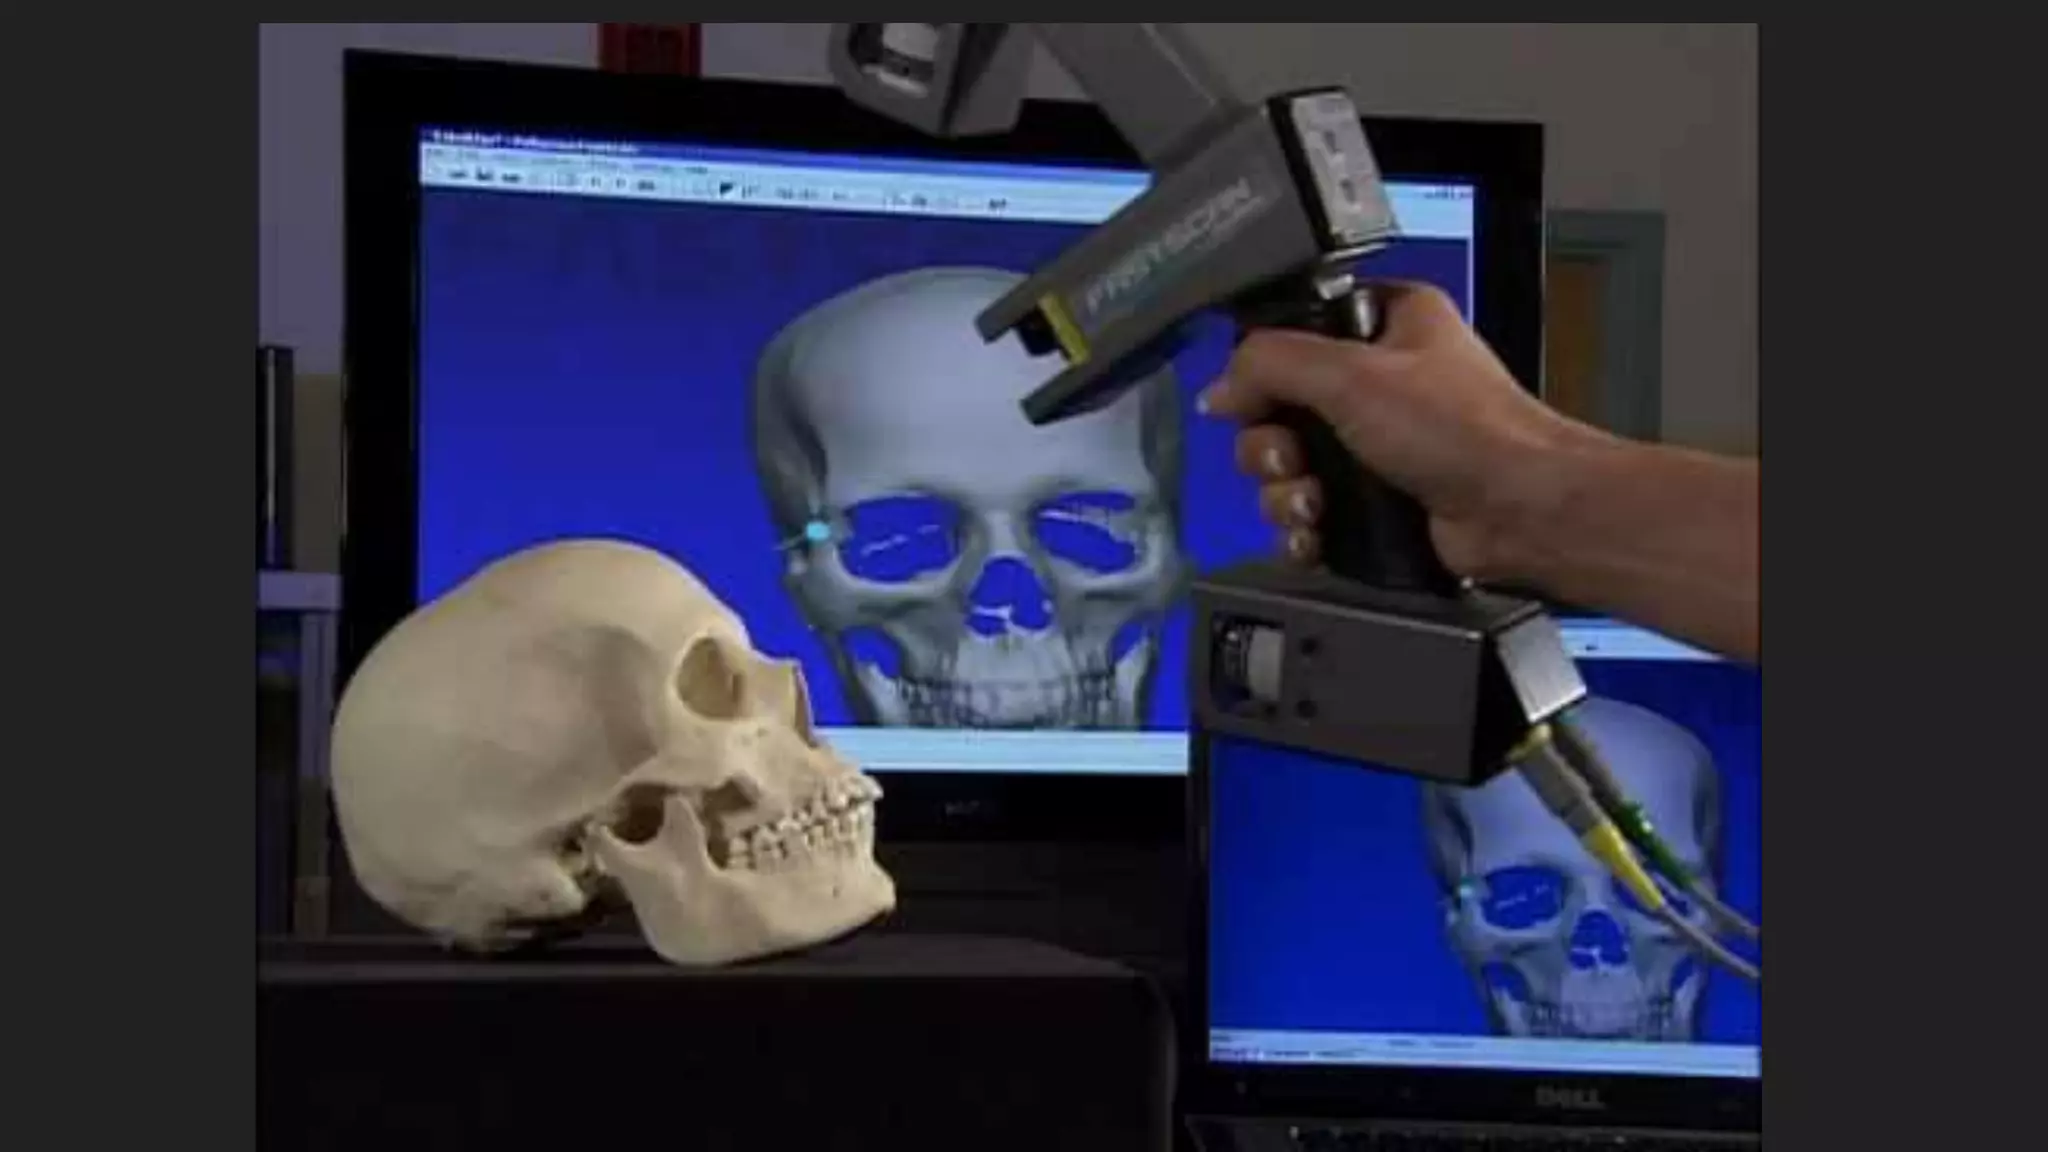
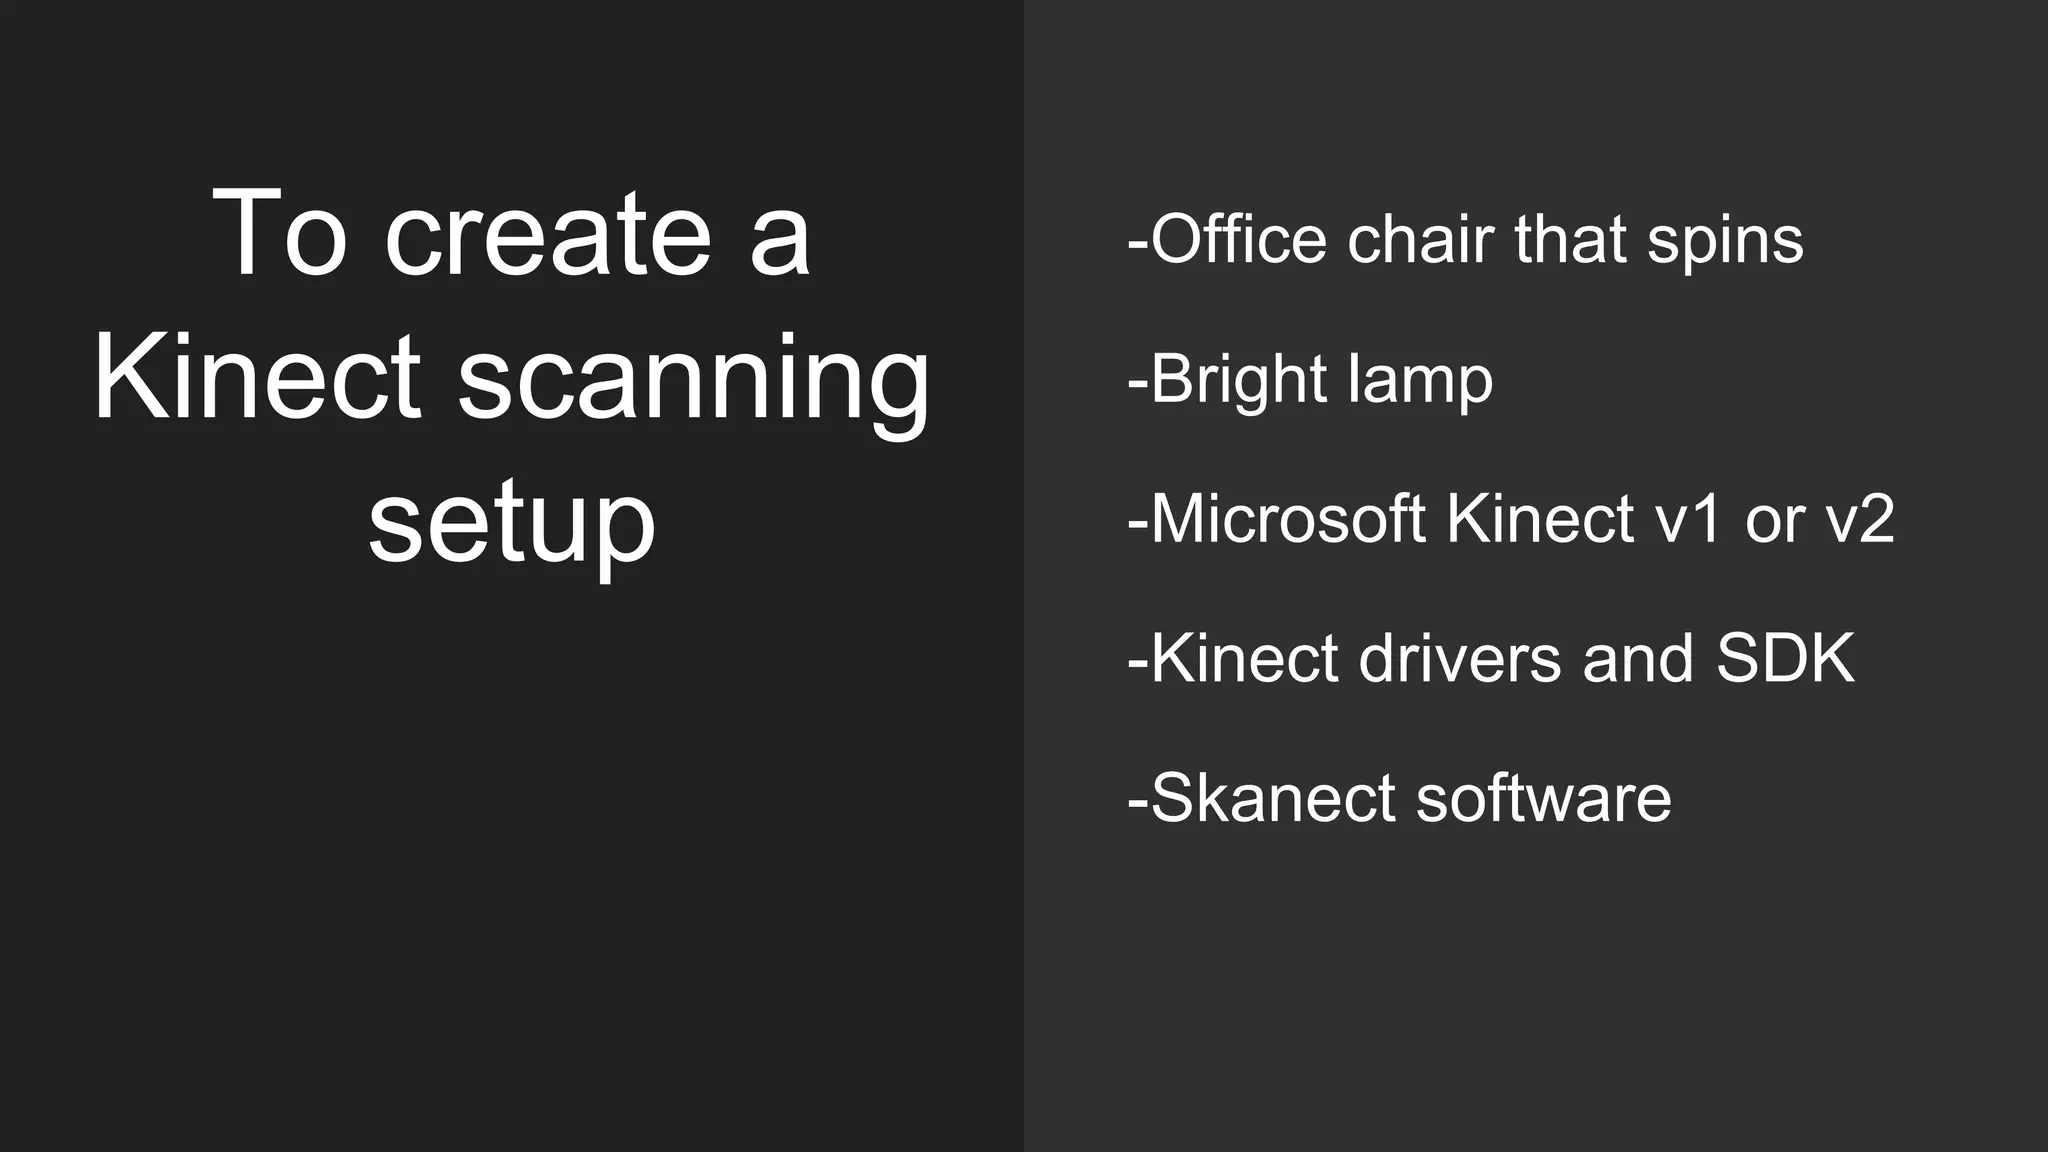
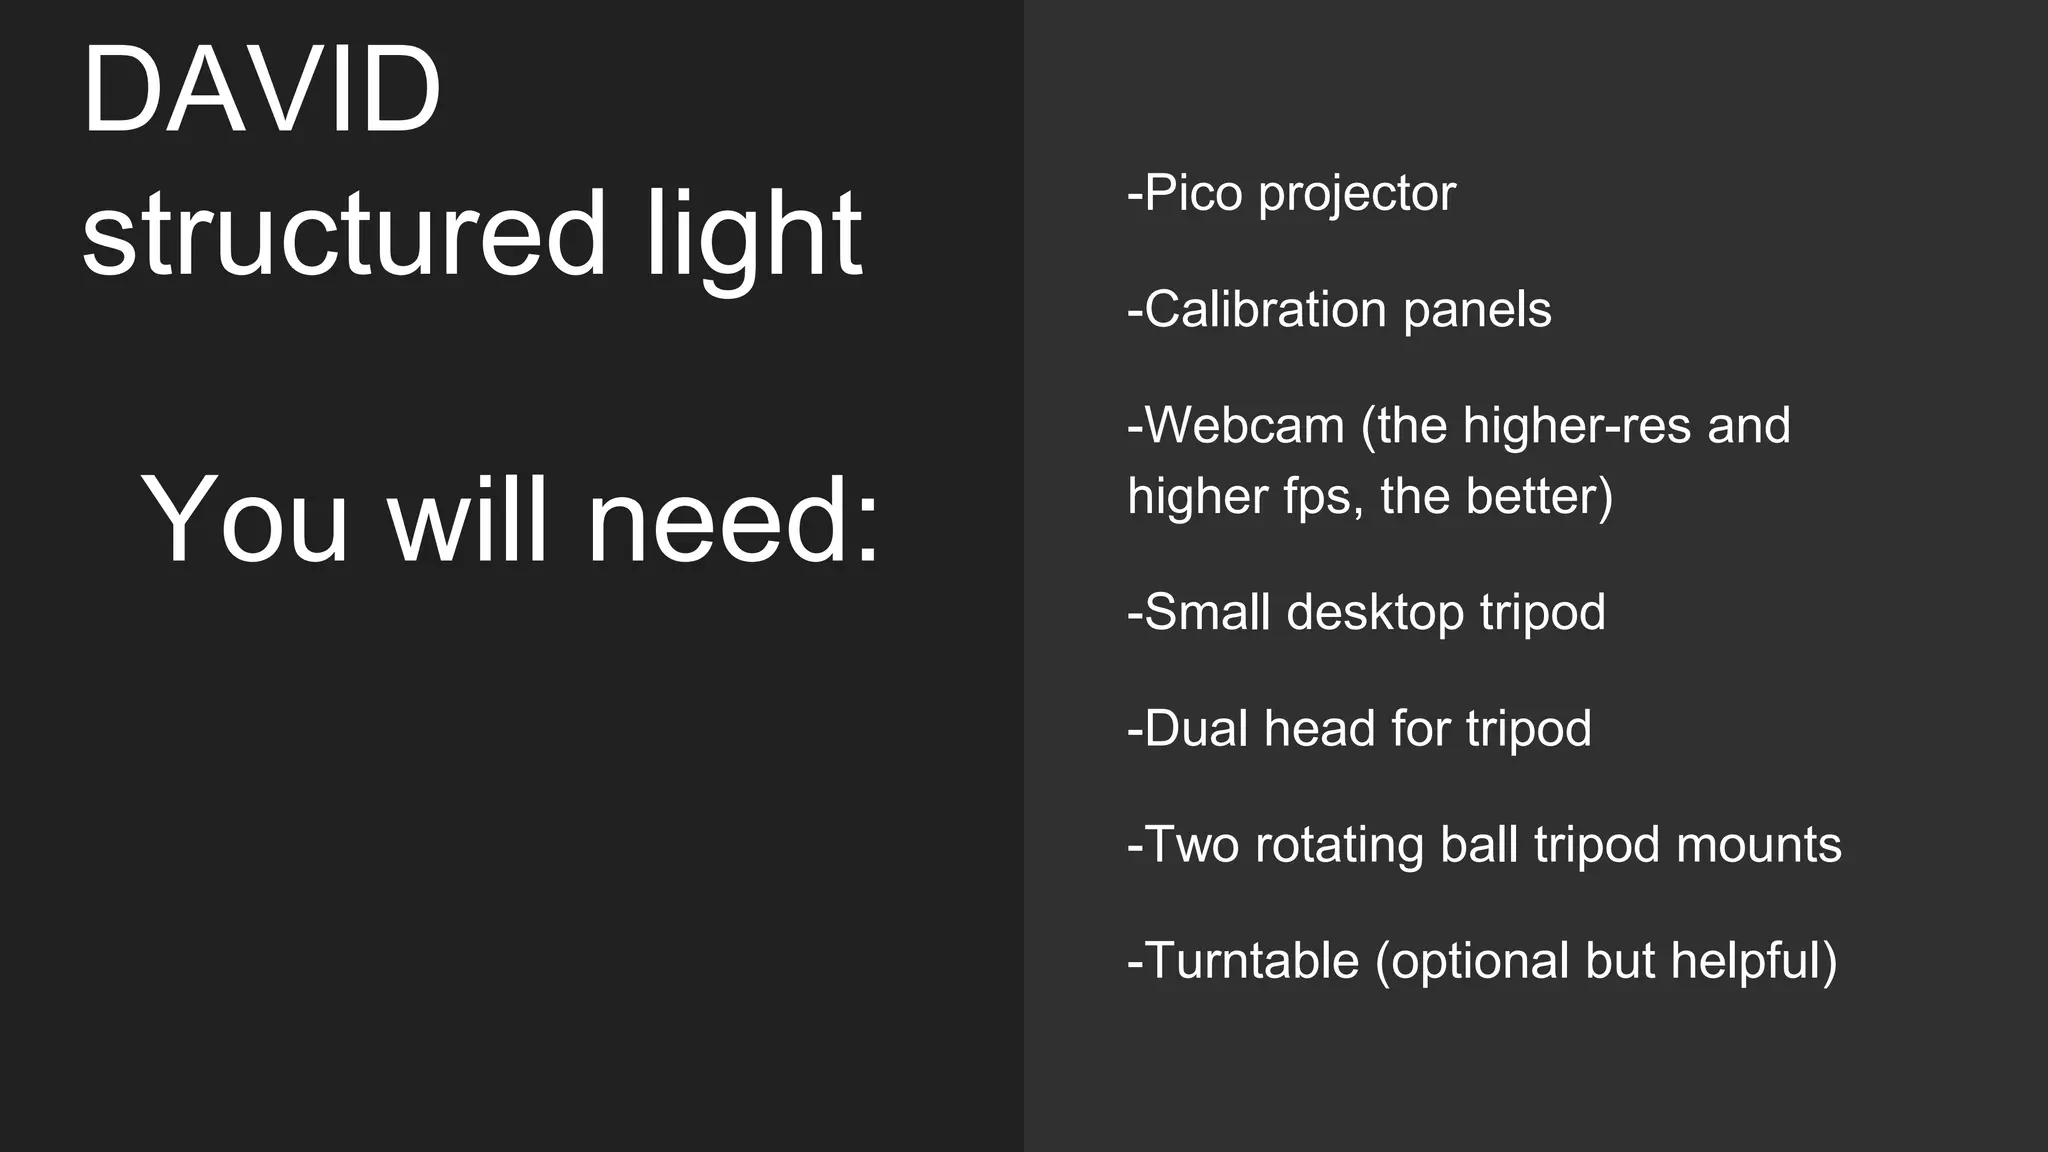
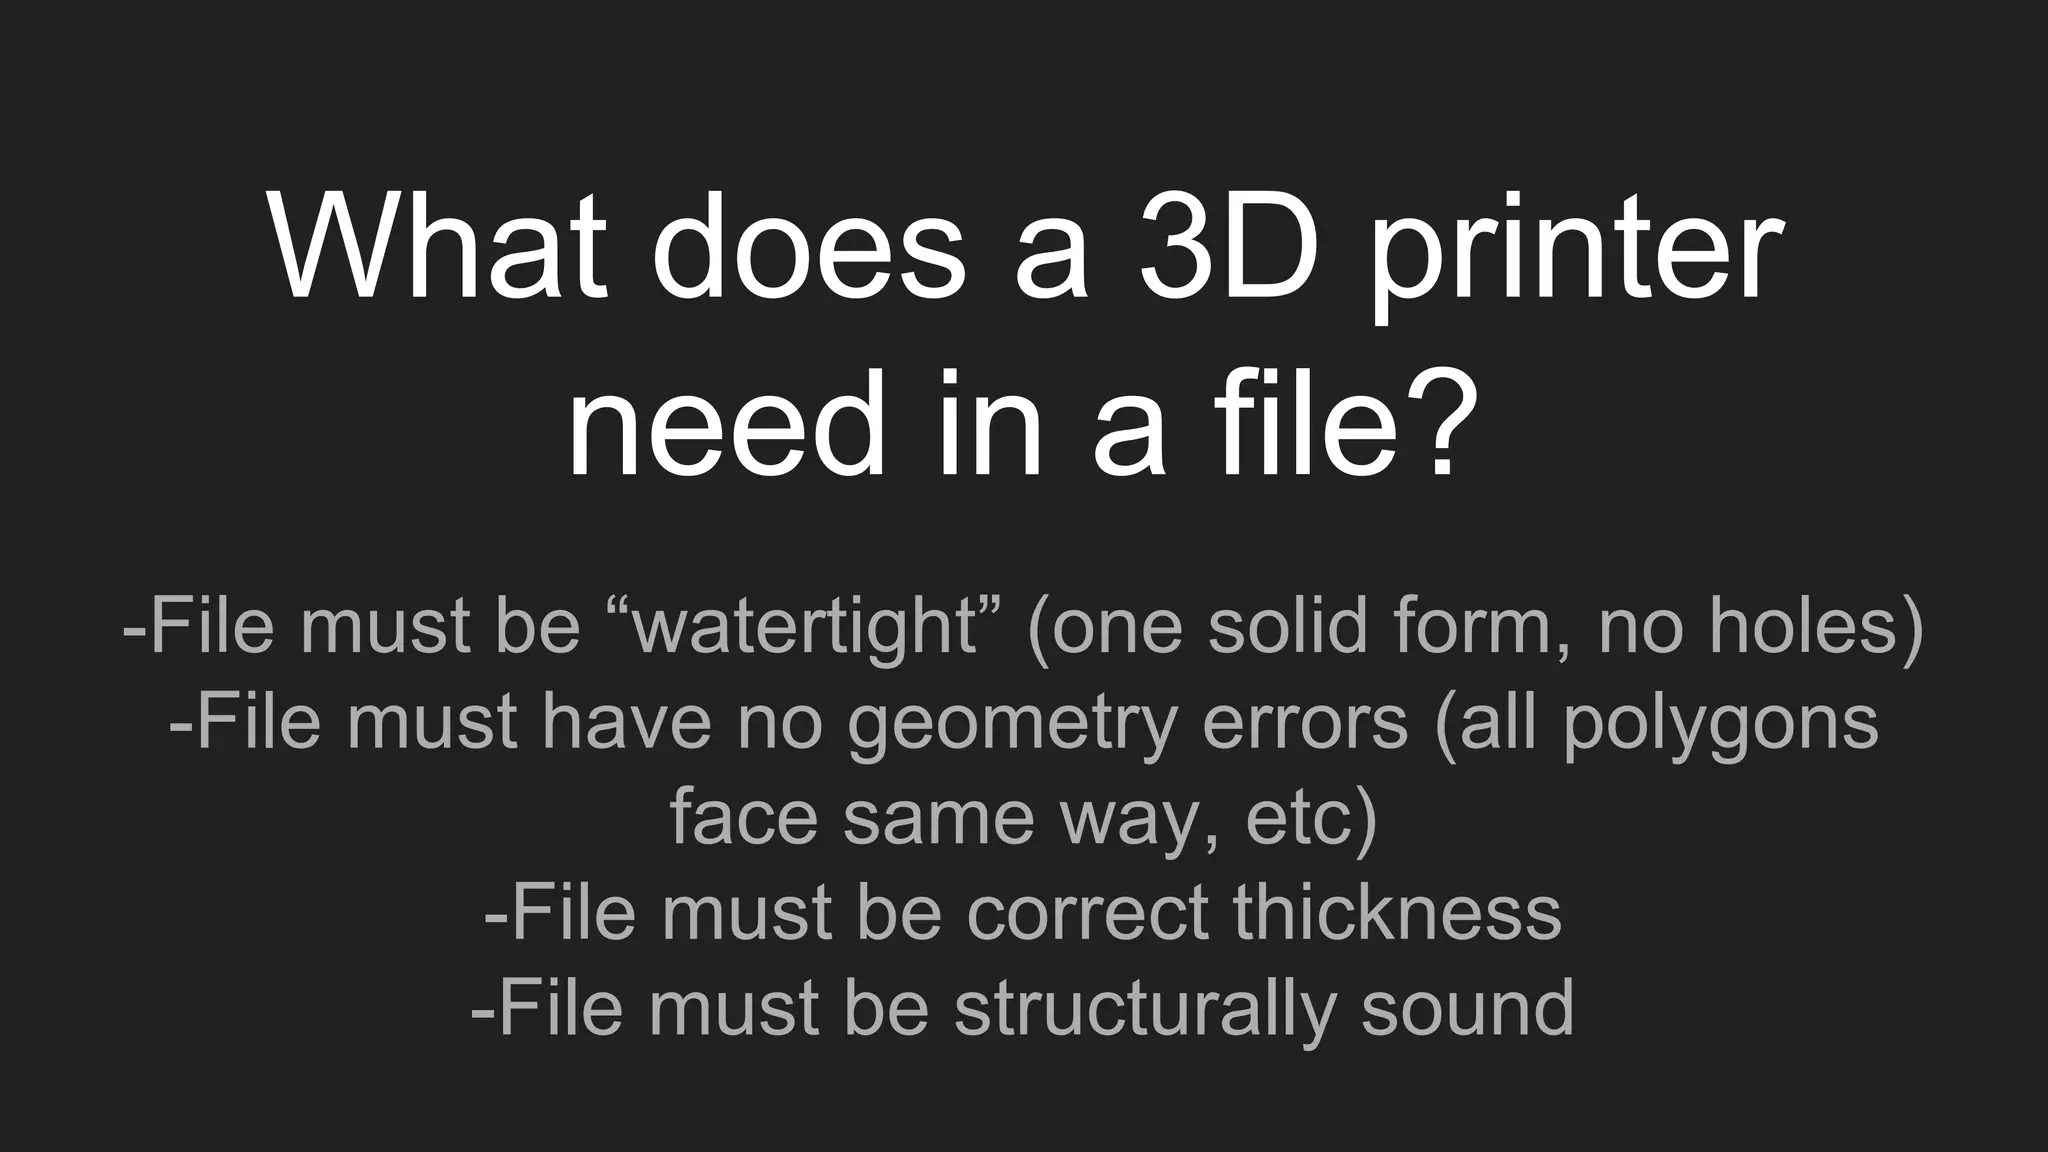
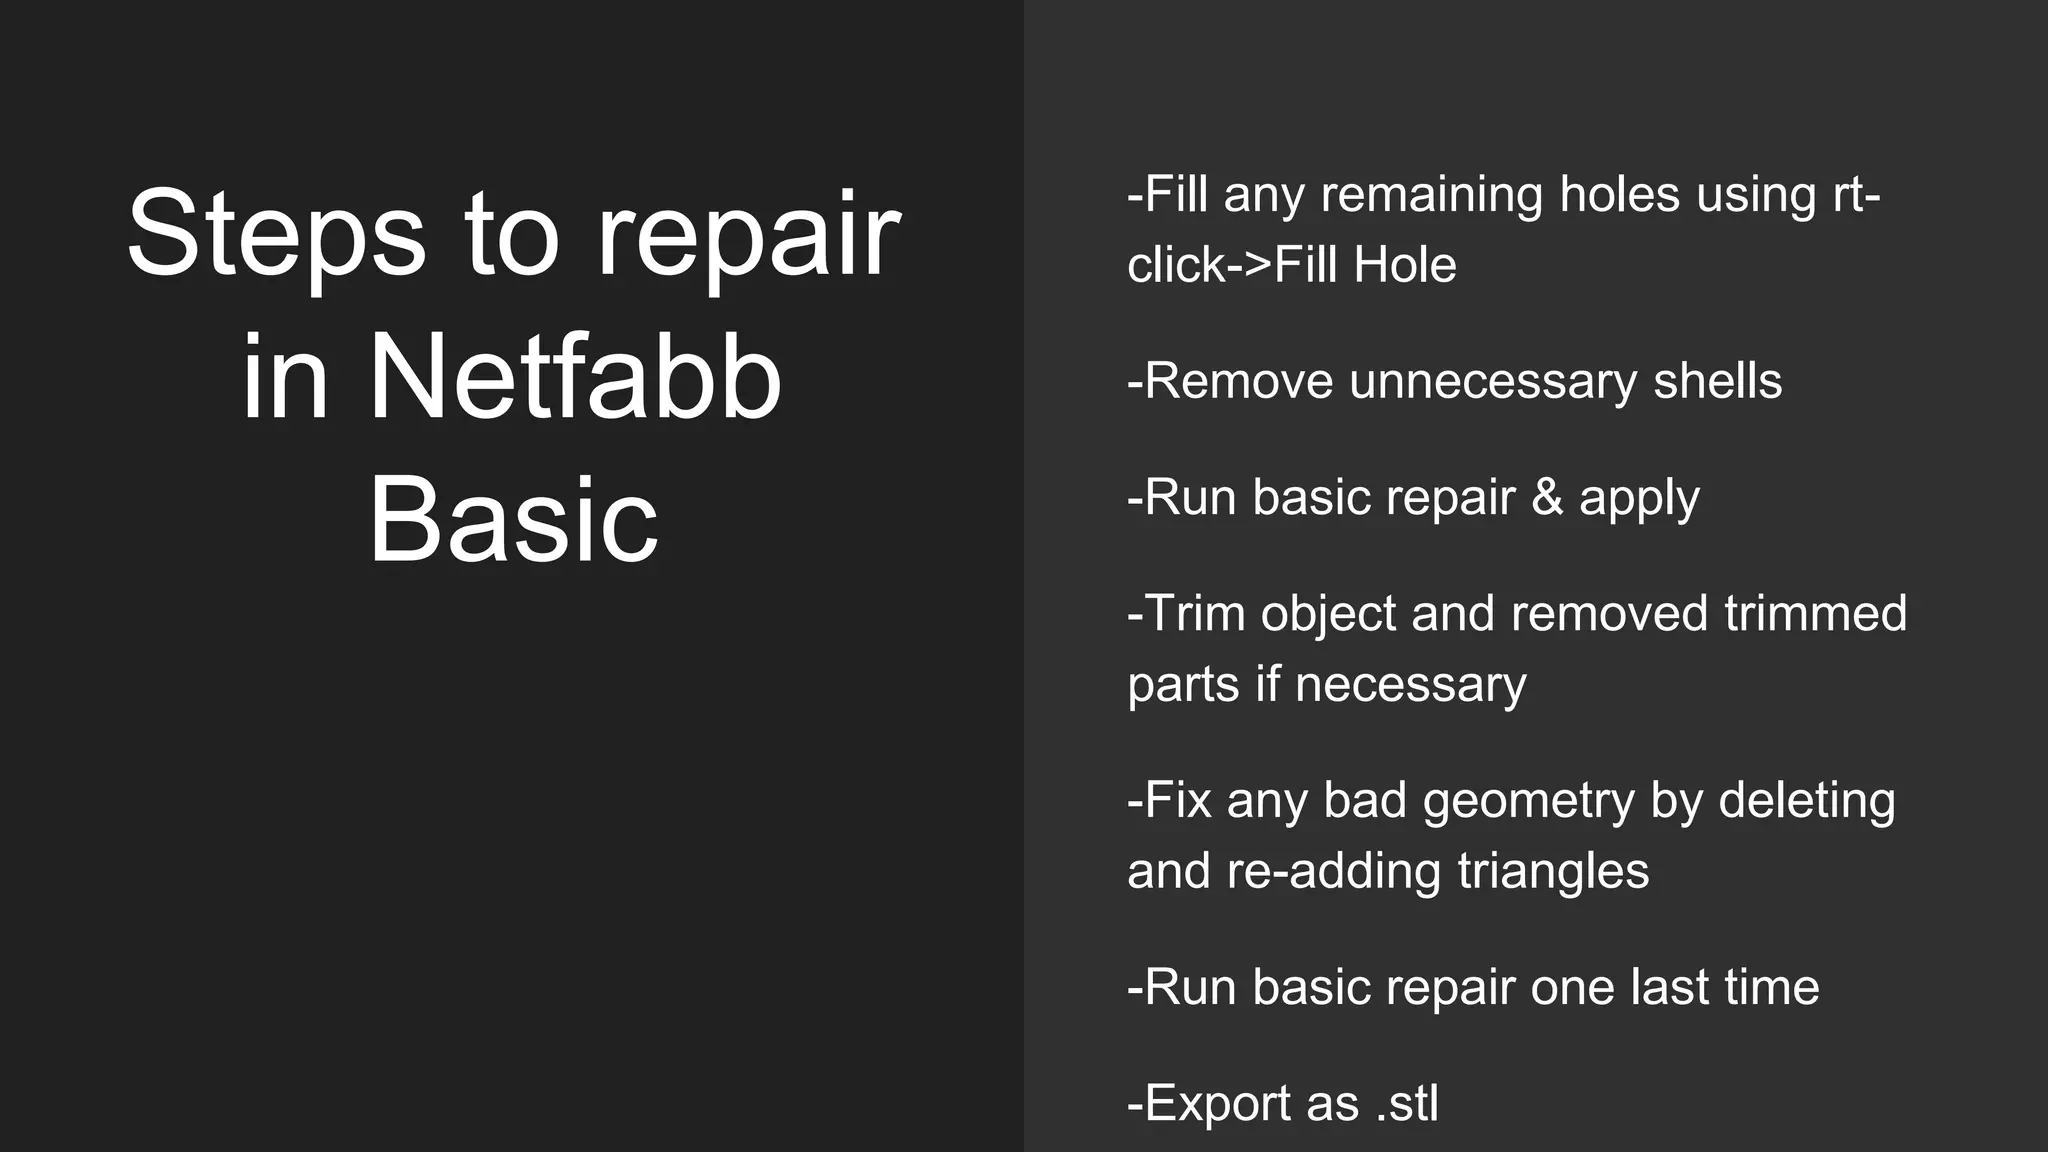
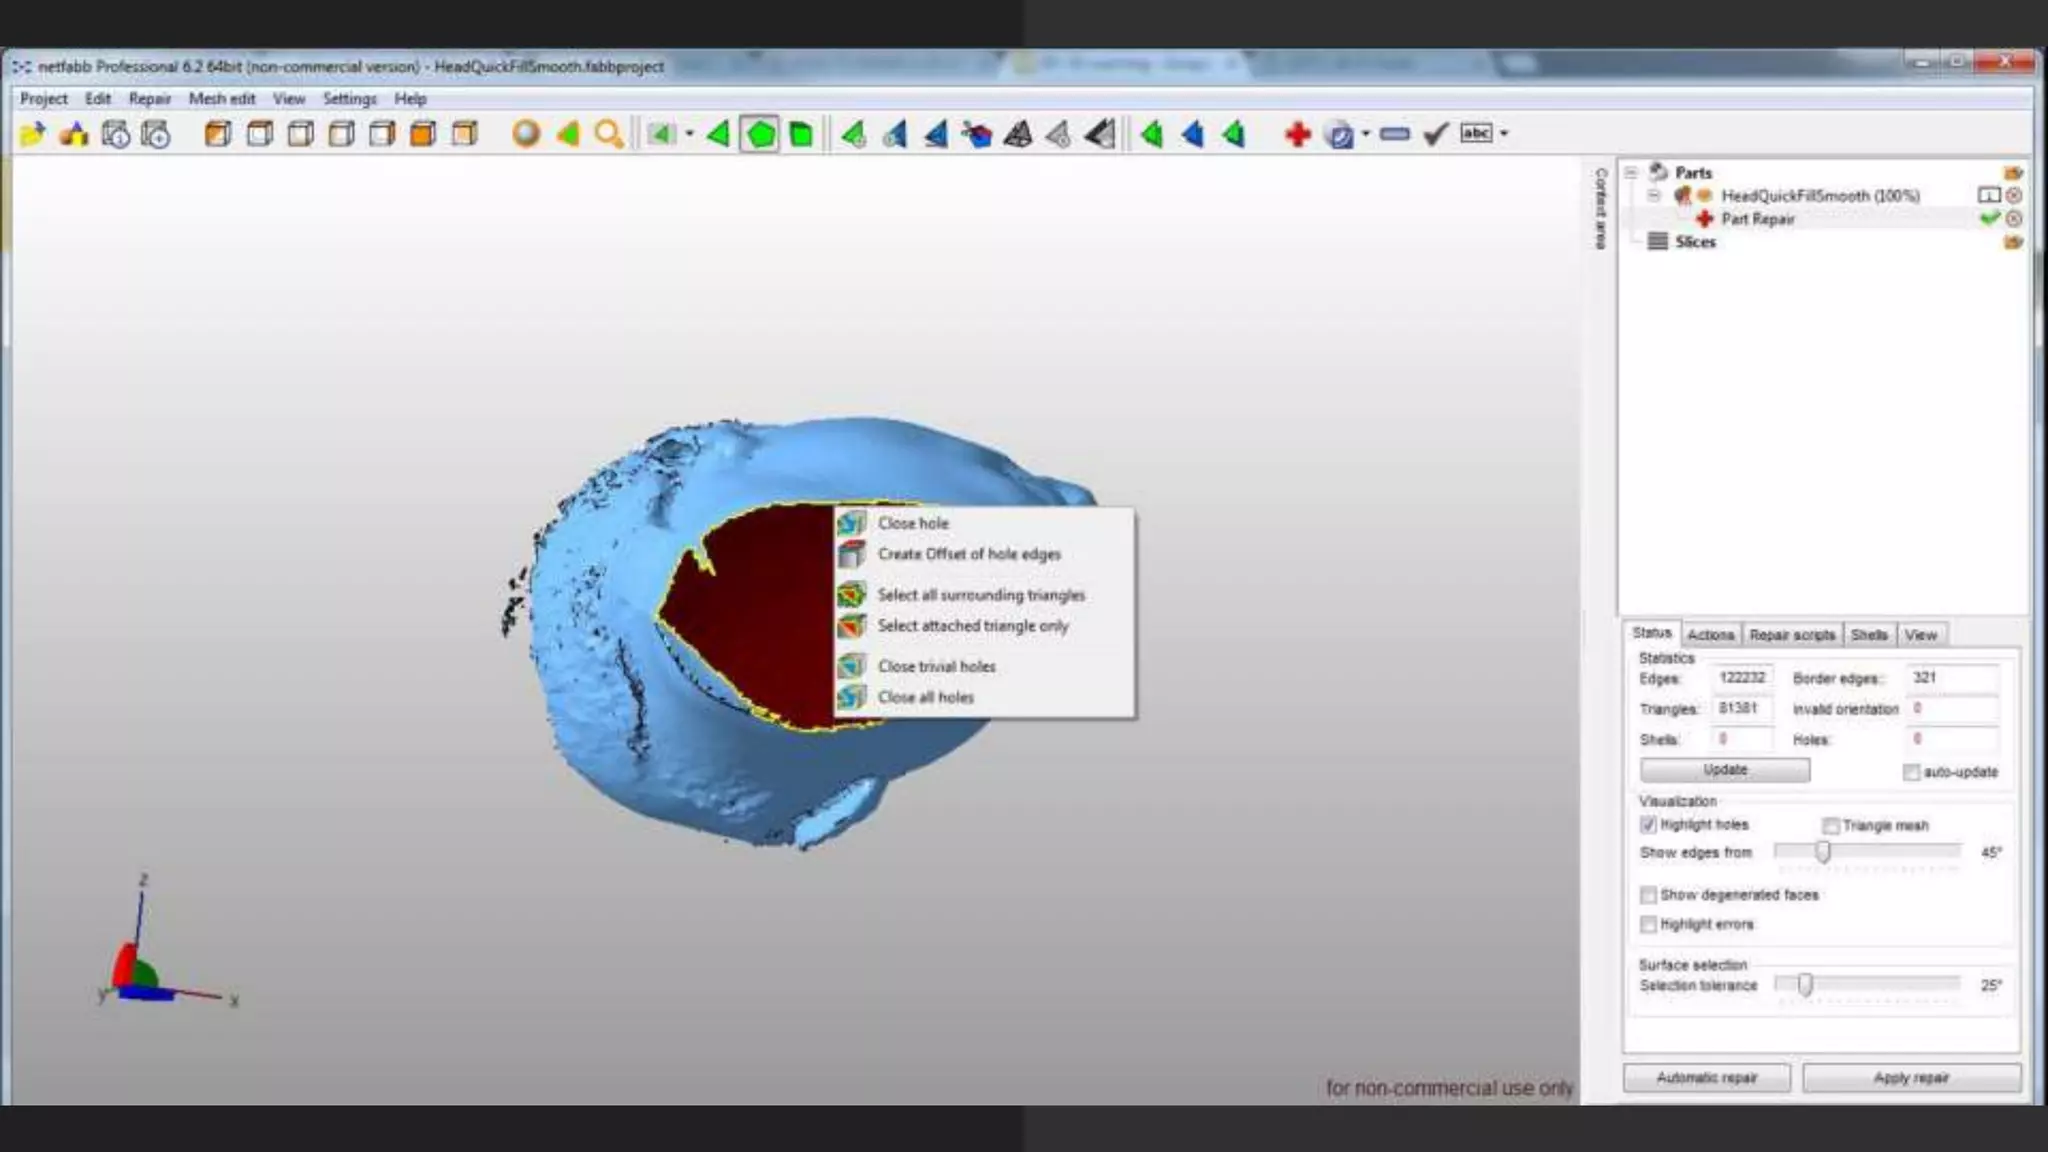
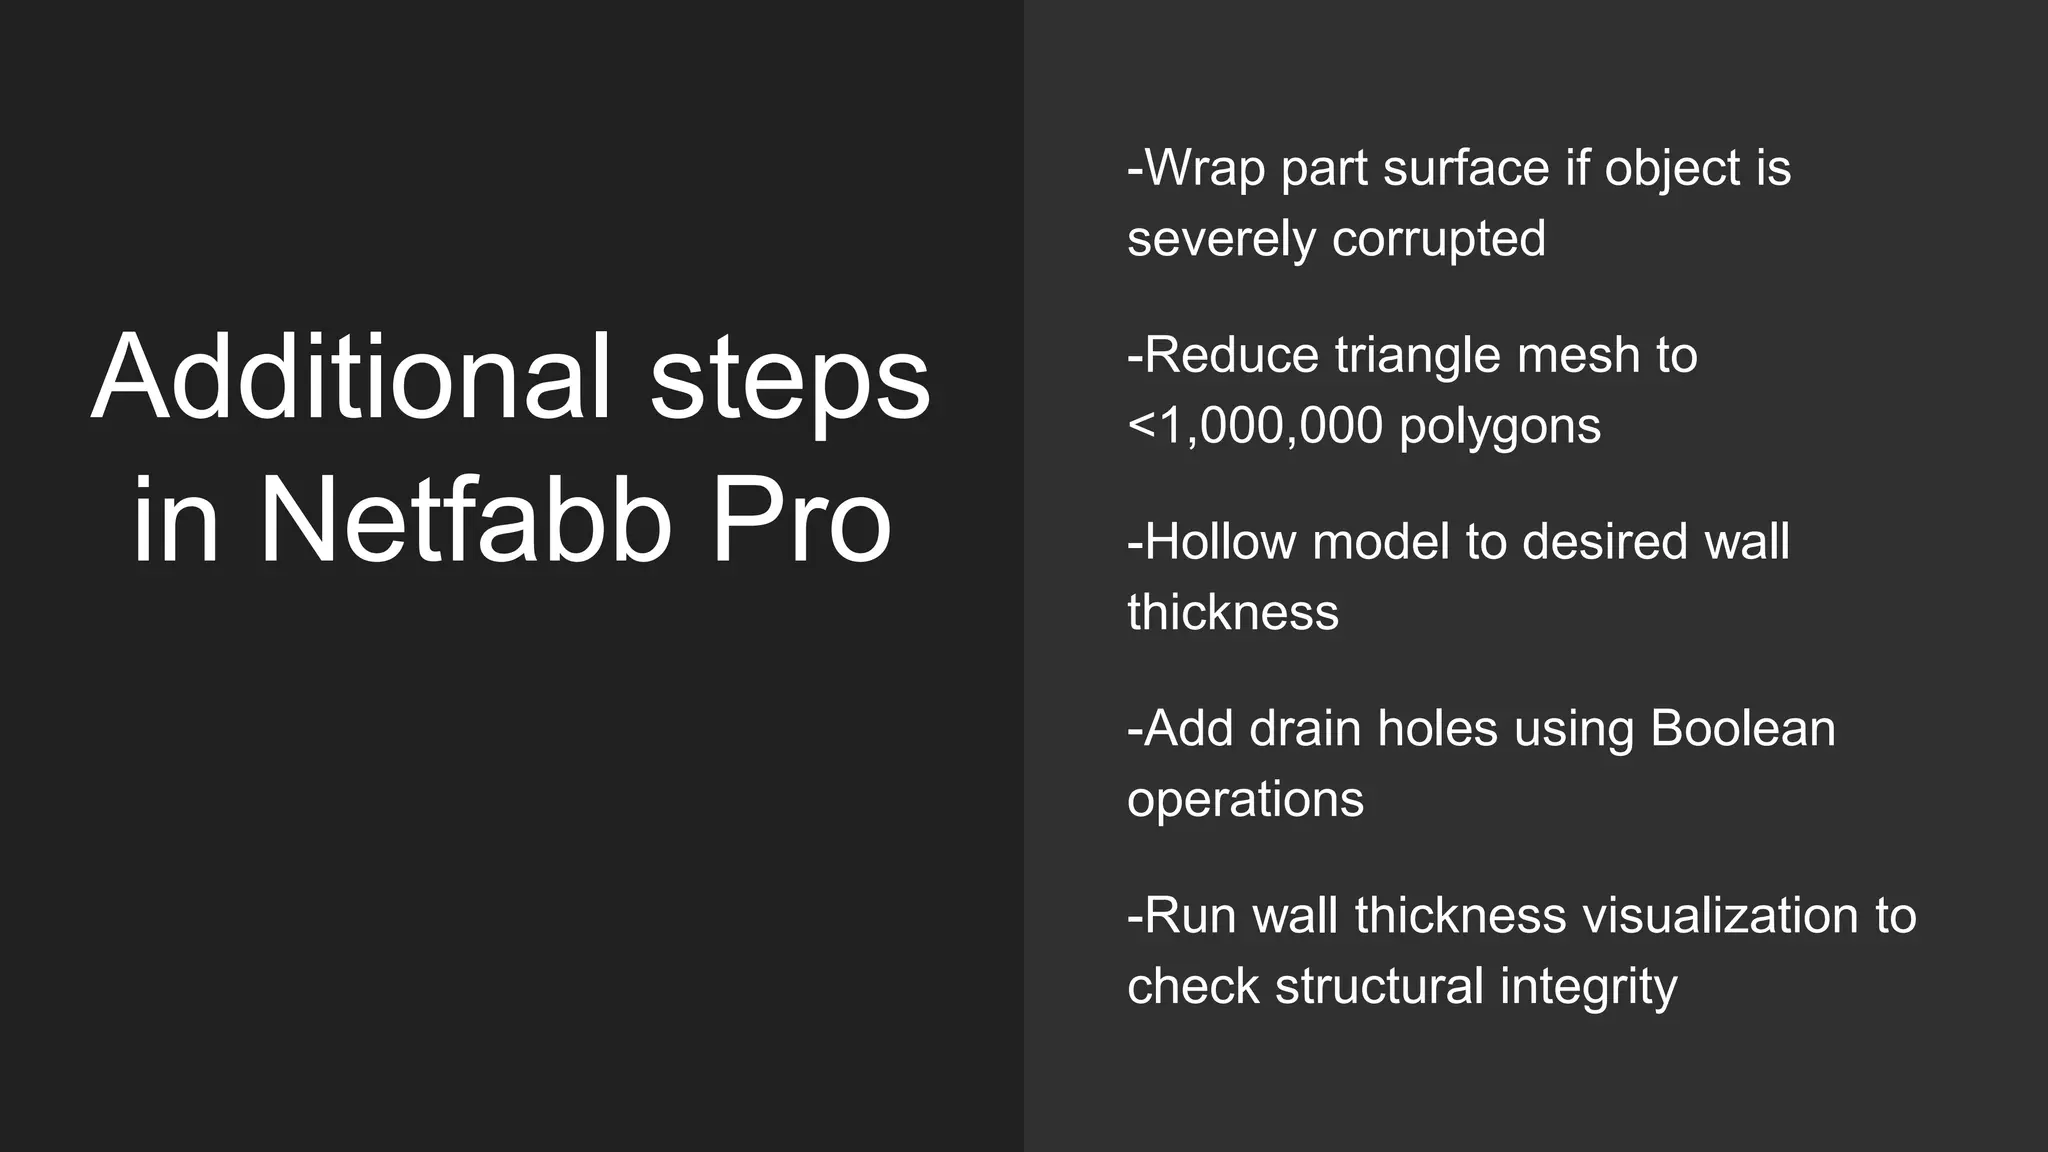
Unblocking The Main Thread Solving ANRs and Frozen Frames
Diy 3d scanning for 3D print - Makerfest India
1. DIY scanning for 3D printing: an
overview
Sophie Kahn, Natalia Krasnodebska
and Lauren Slowik
2. Why 3D scan?
3D scanning brings real-world
objects into the digital realm
-Save modeling time
-Scale up or down
-Modify or remix objects
-Output them in different
materials, using different
technologies (3D printing,
CNC milling, etc)
12. DAVID
laserscanner
You will need:
-Focusable laser diode and battery
pack, or laser level from a hardware
store
-Webcam: the higher res and faster
fps the better (I use The Imaging
Source)
-Printed calibration panels
-Cardboard/plywood
-Set square
13. DAVID
structured light
You will need:
-Pico projector
-Calibration panels
-Webcam (the higher-res and
higher fps, the better)
-Small desktop tripod
-Dual head for tripod
-Two rotating ball tripod mounts
-Turntable (optional but helpful)
14. -White spray paint or removable
spray powder (talc developing
spray, dry shampoo)
-White play-doh for registering
multiple scans
-Black spray paint
-Black painted blocks to serve as
props
-Helping hands tool
-Black velvet to mask out
background
Useful
accessories for
3D scanning
small objects:
15. Steps to make a
DAVID scan
-Set up calibration panels at 90
degrees, using a set square for
accuracy
-Calibrate camera
-Prepare and stabilize your object
-Scan in sweeps, rotating object
and flipping as needed
-Register scans in DAVID
Shapefusion
-Fuse surface and export
17. What does a 3D printer
need in a file?
-File must be “watertight” (one solid form, no holes)
-File must have no geometry errors (all polygons
face same way, etc)
-File must be correct thickness
-File must be structurally sound
18. Workflow to
prep scan for
3D print
-Fill holes in scan file &
make solid (Meshmixer)
-Smooth and sculpt
(Meshmixer)
-Repair geometry
(Netfabb)
-Export .stl for printer
(Netfabb)
23. Steps to repair
in Netfabb
Basic
-Fill any remaining holes using rt-
click->Fill Hole
-Remove unnecessary shells
-Run basic repair & apply
-Trim object and removed trimmed
parts if necessary
-Fix any bad geometry by deleting
and re-adding triangles
-Run basic repair one last time
-Export as .stl
24.
25.
26. Additional steps
in Netfabb Pro
-Wrap part surface if object is
severely corrupted
-Reduce triangle mesh to
<1,000,000 polygons
-Hollow model to desired wall
thickness
-Add drain holes using Boolean
operations
-Run wall thickness visualization to
check structural integrity