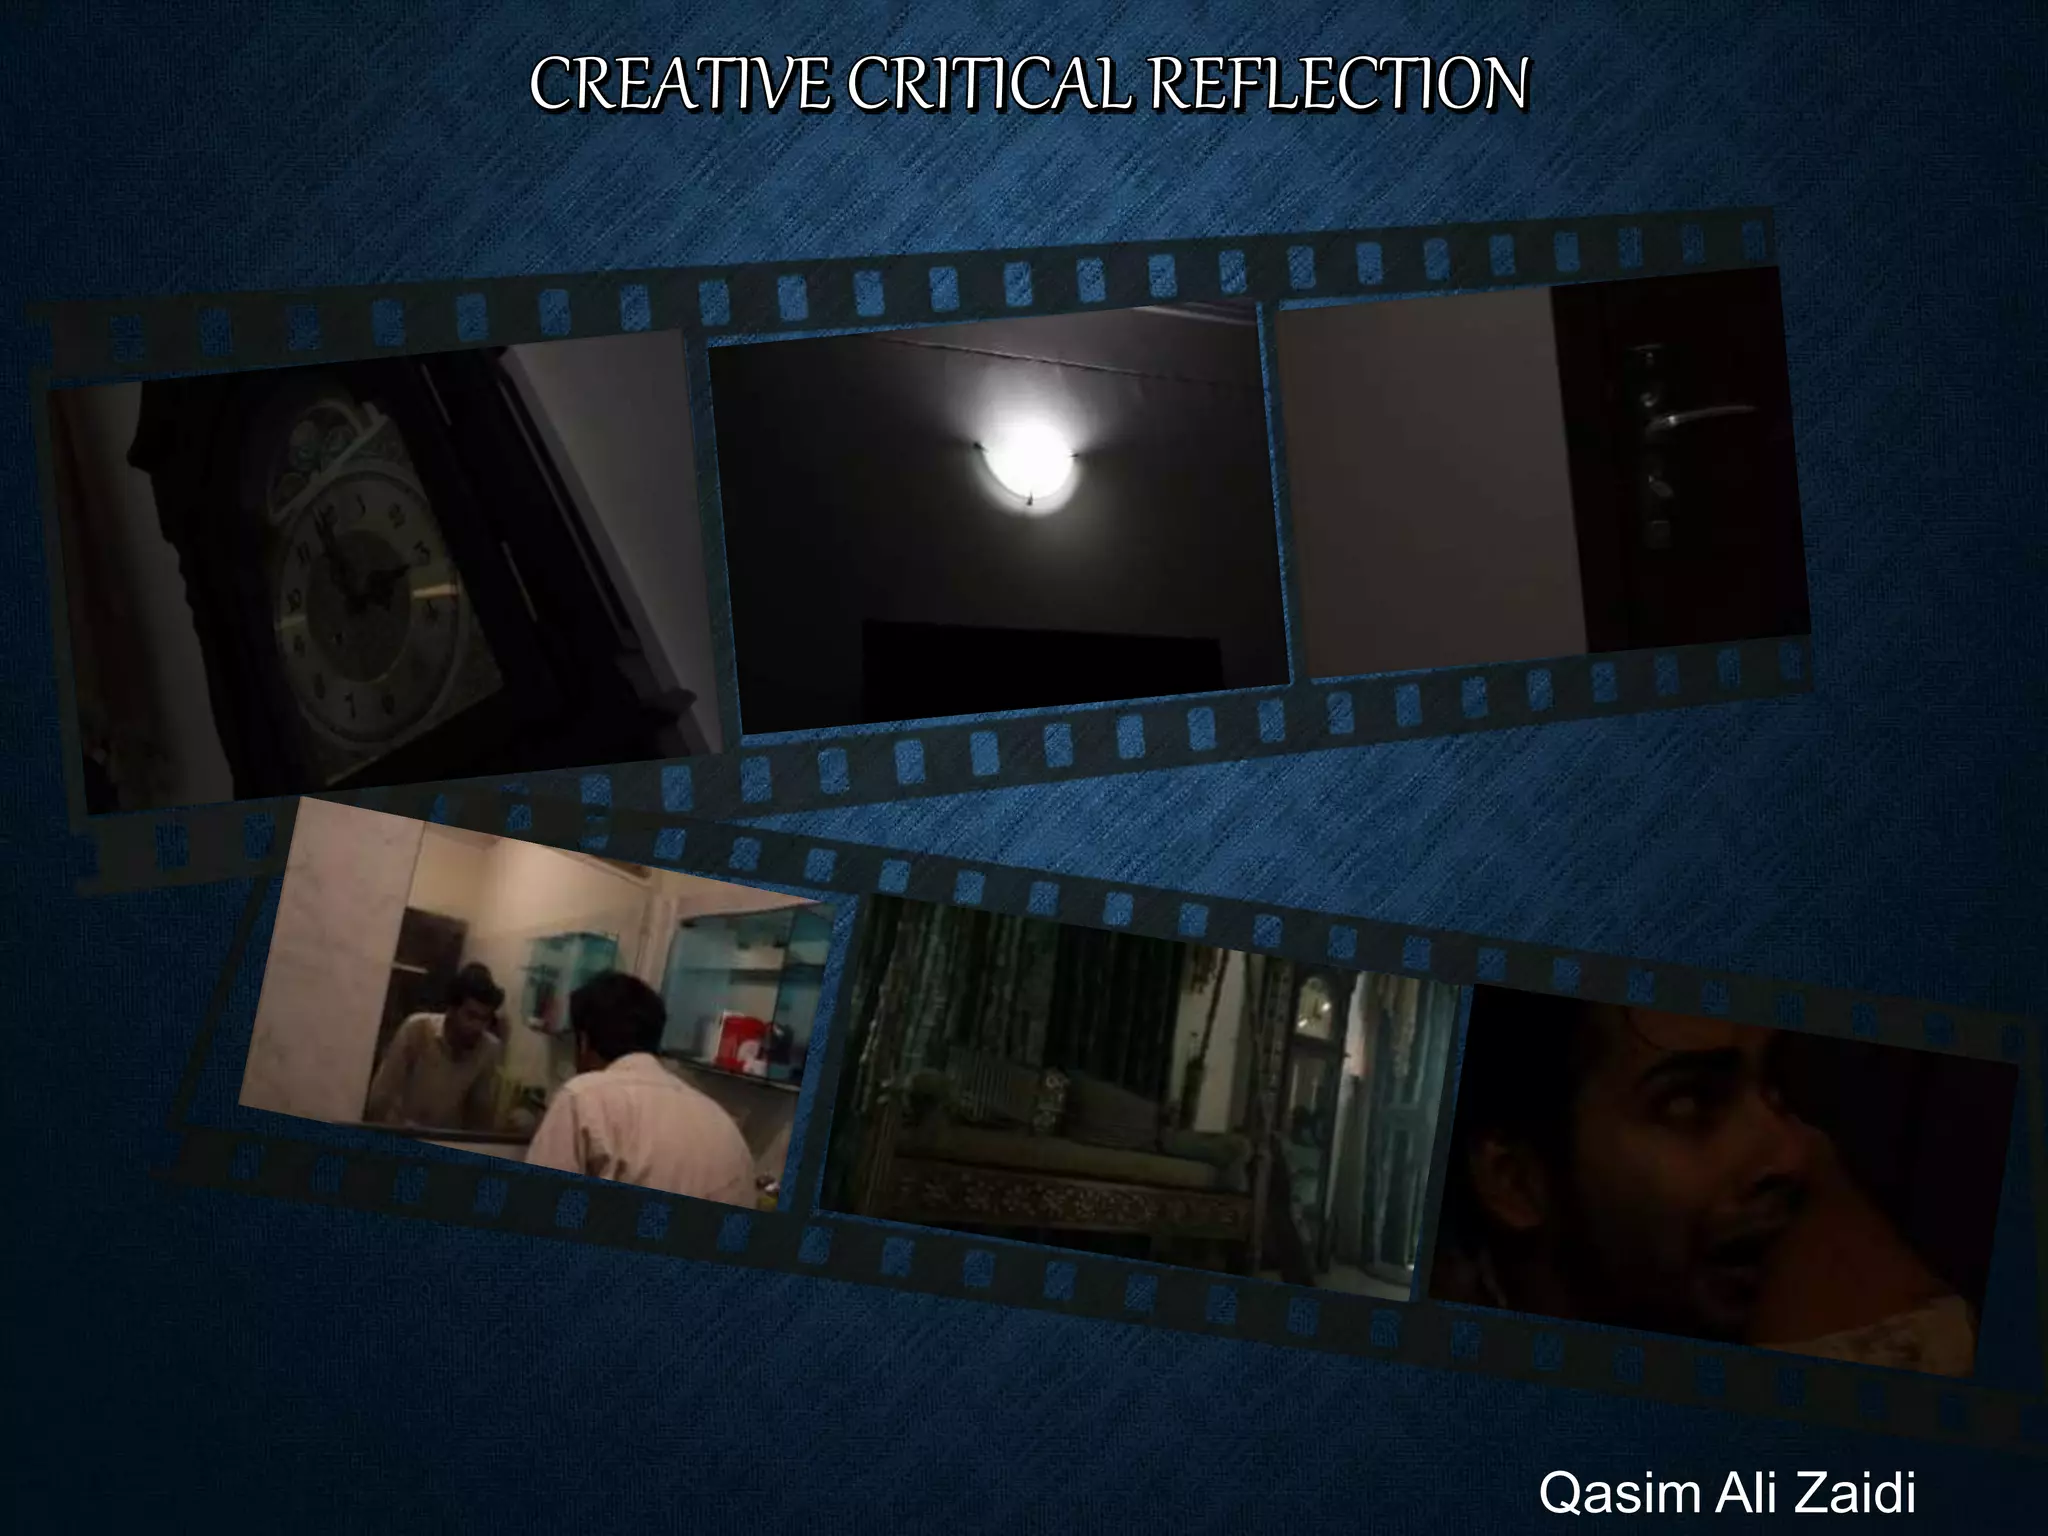
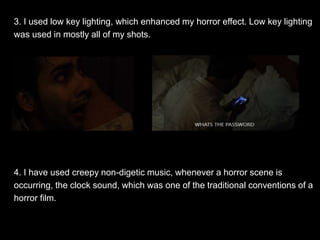
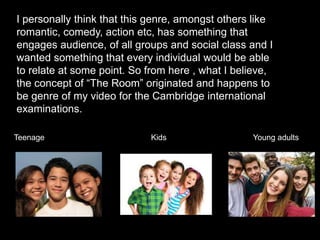
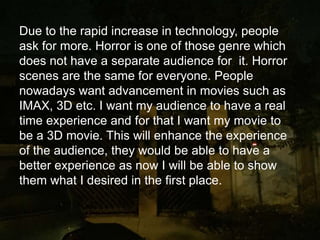
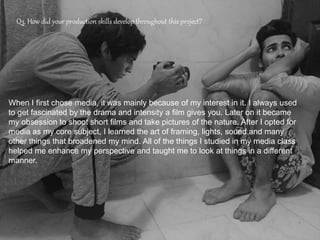
Qasim Ali Zaidi
Q1. HOW DOES YOUR PRODUCT USE OR
CHALLENGE CONVENTIONS AND HOW DO
THEY REPRESENT SOCIAL GROUPS OR
ISSUES?
The genre of my horror film opening “The Room” is horror/Thriller,
and has not challenged any conventions.
I have named my film The Room to
describe it in a vague manner, basing
the teenage boy being haunted by a
female ghost who lives in the bed room
I think the name will attract
audience as the name itself is catchy.
I decided to create a horror film as I was into horror/thrillers from
the start. Some of my shots were inspired from a well known
movie, “The Conjuring”, as shown below:
Shots from The Conjuring
Shots from The Room
The Conventions used in my horror film are:
1. A ghost, which is a must. I wanted to create a feeling of
suspense and thus did not disclose the face of the ghost. I
showed the ghost as a female as in most horror films, the
ghost/creatures are mostly females for example, The conjuring,
The nun, The ring etc.
2. Haunting occurring in night time and hence I showed the time
around 3AM.
3. I used low key lighting, which enhanced my horror effect. Low key lighting
was used in mostly all of my shots.
4. I have used creepy non-digetic music, whenever a horror scene is
occurring, the clock sound, which was one of the traditional conventions of a
horror film.
I personally think that this genre, amongst others like
romantic, comedy, action etc, has something that
engages audience, of all groups and social class and I
wanted something that every individual would be able
to relate at some point. So from here , what I believe,
the concept of “The Room” originated and happens to
be genre of my video for the Cambridge international
examinations.
Teenage Kids Young adults
Q2. HOW DOES YOUR
PRODUCT ENGAGE WITH
AUDIENCES AND HOW WOULD
IT BE DISTRIBUTED AS A REAL
MEDIA TEXT
TARGETED AUDIENCE:
• “The Room” targets a wide range of audience from every social
class and ethnicity.
• Age varies from 15-50
• I kept my age limit 15 as some horror scenes may leave a bad
impact on children.
• Not more than 50 because people loose interest at this age and
some horror scenes may leave to serious medical conditions.
Due to the rapid increase in technology, people
ask for more. Horror is one of those genre which
does not have a separate audience for it. Horror
scenes are the same for everyone. People
nowadays want advancement in movies such as
IMAX, 3D etc. I want my audience to have a real
time experience and for that I want my movie to
be a 3D movie. This will enhance the experience
of the audience, they would be able to have a
better experience as now I will be able to show
them what I desired in the first place.
DISTRIBUTION COMPANIES
WARNER BROS.
• American Film studio
• Since April 4th 1923
• Located in Hollywood at sunset Boulevard
• Founded by Sam Warner, Jack L. Warner, Harry Warner, Albert Warner
• Members of motion pictures
For distribution I would like to join hand with
Warner Bros. Reason for that is that, the type
of movie The Room is, it needs distributors
to have interest to promote and distribute this
kind of movie. WarnerBros is known for
promoting various different kinds of movies
and genre. Moreover, this distribution
company is famous for introducing new
directors to the world of , movies and
promoting low budget movies to a large
number of audience. For these reasons I
would prefer WarnerBros over other
production companies.
Q3. How did your production skills develop throughout this project?
When I first chose media, it was mainly because of my interest in it. I always used
to get fascinated by the drama and intensity a film gives you. Later on it became
my obsession to shoot short films and take pictures of the nature. After I opted for
media as my core subject, I learned the art of framing, lights, sound and many
other things that broadened my mind. All of the things I studied in my media class
helped me enhance my perspective and taught me to look at things in a different
manner.
HEADROOM
The first thing we learned in our media class was headroom.
Headroom refers specifically to the distance between the top of the
subject’s head and the top of the frame. I never knew what a
headroom was and after learning about the headroom I noticed that
my framing looked more enhanced and better. Headroom is one of
the most basic and important things in framing. This was the first
step I took towards my media career.
THE RULE OF THIRD
The next new thing I learned after the headroom was the
rule of third. The rule of third is applied by aligning a
subject with the guide lines and their intersection points,
placing the horizon on the top or bottom line, or allowing
linear features in the image to flow from section to section.
The rule of third helped me capture my object along with the
scenario. The use of the rule of third helped me in many of
my projects, creating a talk show was one of them.
TYPES OF CAMERA ANGLES.
Firstly there is the extreme wide shot. In the extreme wide shot, the view is so far from the subject that she/he
isn't even visible. The point of this shot is to show the subject's surroundings. This shot is often used as an
"establishing shot" - the first shot of a new scene, designed to show the audience where the action is taking
place.
Following it is the Dutch angle. The Dutch angle, also known as Dutch tilt, is a type of camera shot where the
camera is set at an angle on its roll axis so that the shot is composed with vertical lines at an angle to the side of
the frame
Next comes the mid shot. The mid shot is a shot taken from a medium distance. Headroom and the rule of third
is used in this shot.
Another important angle is the high angle. A high-angle shot is a cinematic technique where the camera looks
down on the subject from a high angle and the point of focus often gets "swallowed up." High-angle shots can
make the subject seem vulnerable or powerless when applied with the correct mood, setting, and effects.
Following the high angle is low angle. A low-angle shot, is a shot from a camera angle positioned low on the
vertical axis, anywhere below the eye line, looking up. Sometimes, it is even directly below the subject's feet.
Psychologically, the effect of the low-angle shot is that it makes the subject look strong and powerful.
Dutch Angle Low Angle
Point of view (POV)
Mid shot(rule of third applied)
High angle
LIGHTING
• After learning different camera angles we started learning about
lighting. Lighting is one of the main aspects for creating an effect.
Lighting can either make your or break your product. There are
many different ways to produce an effect using the lights. There are
low key lightings and high key lightings.
• Low key lighting is mostly used in horror movies and thus I used low
key lighting. It helped me create my effect of a scary movie.
• High key lighting is used mostly in adventures, romantic and action
films.
Q4. HOW DID YOU INTEGRATE
TECHNOLOGIES IN THIS PROJECT?
After receiving our media course for the cie, we started working on
our projects. The first thing we were asked was to create a blog on
any site that we find user friendly. This was the first time I worked
on a blog. To be honest, I was really concerned because I had
never made a blog, I had to shoot and edit on my own. When I
started my research I figured out that Tumblr is my type of blog as it
is user friendly and hence I worked on Tumblr. I believe that Tumblr
should be used by other students as well, as it is easy to use, can
upload mass of data and can be shared globally.
MUSIC
Music is one of the key elements that helped me create my horror
film effect. The music I have used in my horror film was inspired
from a very popular film “The Conjuring”. The music was
downloaded from YouTube and other sounds such as the
Grandfather clock sound was downloaded from Dailymotion.
EDITING
The software I used to edit my movie was Windows Movie maker.
Windows Movie maker is the software that I found most user
friendly along with all the effects and animation I needed. I started
my video with the Warnerbros opening theme which I downloaded
from Youtube. The animations I mostly used in my shots were
“cross fade”, “ fade through white” and “fade through black”.
Making of “The Room”
HARDWARE
As I already had the passion do to photography and make short
films, I did not face many problems while using the hardware and
they were easily available for me. I used a tripod, my Canon 600D
and my iphone to shoot my film. The point of view shot (POV) was
taken from my phone while all the other ones were taken from my
camera.

Creative critical reflection zaidi

  • 1.
  • 2.
    Q1. HOW DOESYOUR PRODUCT USE OR CHALLENGE CONVENTIONS AND HOW DO THEY REPRESENT SOCIAL GROUPS OR ISSUES? The genre of my horror film opening “The Room” is horror/Thriller, and has not challenged any conventions. I have named my film The Room to describe it in a vague manner, basing the teenage boy being haunted by a female ghost who lives in the bed room I think the name will attract audience as the name itself is catchy.
  • 3.
    I decided tocreate a horror film as I was into horror/thrillers from the start. Some of my shots were inspired from a well known movie, “The Conjuring”, as shown below: Shots from The Conjuring Shots from The Room
  • 4.
    The Conventions usedin my horror film are: 1. A ghost, which is a must. I wanted to create a feeling of suspense and thus did not disclose the face of the ghost. I showed the ghost as a female as in most horror films, the ghost/creatures are mostly females for example, The conjuring, The nun, The ring etc. 2. Haunting occurring in night time and hence I showed the time around 3AM.
  • 5.
    3. I usedlow key lighting, which enhanced my horror effect. Low key lighting was used in mostly all of my shots. 4. I have used creepy non-digetic music, whenever a horror scene is occurring, the clock sound, which was one of the traditional conventions of a horror film.
  • 6.
    I personally thinkthat this genre, amongst others like romantic, comedy, action etc, has something that engages audience, of all groups and social class and I wanted something that every individual would be able to relate at some point. So from here , what I believe, the concept of “The Room” originated and happens to be genre of my video for the Cambridge international examinations. Teenage Kids Young adults
  • 7.
    Q2. HOW DOESYOUR PRODUCT ENGAGE WITH AUDIENCES AND HOW WOULD IT BE DISTRIBUTED AS A REAL MEDIA TEXT
  • 8.
    TARGETED AUDIENCE: • “TheRoom” targets a wide range of audience from every social class and ethnicity. • Age varies from 15-50 • I kept my age limit 15 as some horror scenes may leave a bad impact on children. • Not more than 50 because people loose interest at this age and some horror scenes may leave to serious medical conditions.
  • 9.
    Due to therapid increase in technology, people ask for more. Horror is one of those genre which does not have a separate audience for it. Horror scenes are the same for everyone. People nowadays want advancement in movies such as IMAX, 3D etc. I want my audience to have a real time experience and for that I want my movie to be a 3D movie. This will enhance the experience of the audience, they would be able to have a better experience as now I will be able to show them what I desired in the first place.
  • 10.
  • 11.
    WARNER BROS. • AmericanFilm studio • Since April 4th 1923 • Located in Hollywood at sunset Boulevard • Founded by Sam Warner, Jack L. Warner, Harry Warner, Albert Warner • Members of motion pictures
  • 12.
    For distribution Iwould like to join hand with Warner Bros. Reason for that is that, the type of movie The Room is, it needs distributors to have interest to promote and distribute this kind of movie. WarnerBros is known for promoting various different kinds of movies and genre. Moreover, this distribution company is famous for introducing new directors to the world of , movies and promoting low budget movies to a large number of audience. For these reasons I would prefer WarnerBros over other production companies.
  • 13.
    Q3. How didyour production skills develop throughout this project? When I first chose media, it was mainly because of my interest in it. I always used to get fascinated by the drama and intensity a film gives you. Later on it became my obsession to shoot short films and take pictures of the nature. After I opted for media as my core subject, I learned the art of framing, lights, sound and many other things that broadened my mind. All of the things I studied in my media class helped me enhance my perspective and taught me to look at things in a different manner.
  • 14.
    HEADROOM The first thingwe learned in our media class was headroom. Headroom refers specifically to the distance between the top of the subject’s head and the top of the frame. I never knew what a headroom was and after learning about the headroom I noticed that my framing looked more enhanced and better. Headroom is one of the most basic and important things in framing. This was the first step I took towards my media career.
  • 15.
    THE RULE OFTHIRD The next new thing I learned after the headroom was the rule of third. The rule of third is applied by aligning a subject with the guide lines and their intersection points, placing the horizon on the top or bottom line, or allowing linear features in the image to flow from section to section. The rule of third helped me capture my object along with the scenario. The use of the rule of third helped me in many of my projects, creating a talk show was one of them.
  • 16.
    TYPES OF CAMERAANGLES. Firstly there is the extreme wide shot. In the extreme wide shot, the view is so far from the subject that she/he isn't even visible. The point of this shot is to show the subject's surroundings. This shot is often used as an "establishing shot" - the first shot of a new scene, designed to show the audience where the action is taking place. Following it is the Dutch angle. The Dutch angle, also known as Dutch tilt, is a type of camera shot where the camera is set at an angle on its roll axis so that the shot is composed with vertical lines at an angle to the side of the frame Next comes the mid shot. The mid shot is a shot taken from a medium distance. Headroom and the rule of third is used in this shot. Another important angle is the high angle. A high-angle shot is a cinematic technique where the camera looks down on the subject from a high angle and the point of focus often gets "swallowed up." High-angle shots can make the subject seem vulnerable or powerless when applied with the correct mood, setting, and effects. Following the high angle is low angle. A low-angle shot, is a shot from a camera angle positioned low on the vertical axis, anywhere below the eye line, looking up. Sometimes, it is even directly below the subject's feet. Psychologically, the effect of the low-angle shot is that it makes the subject look strong and powerful.
  • 17.
    Dutch Angle LowAngle Point of view (POV) Mid shot(rule of third applied) High angle
  • 18.
    LIGHTING • After learningdifferent camera angles we started learning about lighting. Lighting is one of the main aspects for creating an effect. Lighting can either make your or break your product. There are many different ways to produce an effect using the lights. There are low key lightings and high key lightings. • Low key lighting is mostly used in horror movies and thus I used low key lighting. It helped me create my effect of a scary movie. • High key lighting is used mostly in adventures, romantic and action films.
  • 19.
    Q4. HOW DIDYOU INTEGRATE TECHNOLOGIES IN THIS PROJECT? After receiving our media course for the cie, we started working on our projects. The first thing we were asked was to create a blog on any site that we find user friendly. This was the first time I worked on a blog. To be honest, I was really concerned because I had never made a blog, I had to shoot and edit on my own. When I started my research I figured out that Tumblr is my type of blog as it is user friendly and hence I worked on Tumblr. I believe that Tumblr should be used by other students as well, as it is easy to use, can upload mass of data and can be shared globally.
  • 20.
    MUSIC Music is oneof the key elements that helped me create my horror film effect. The music I have used in my horror film was inspired from a very popular film “The Conjuring”. The music was downloaded from YouTube and other sounds such as the Grandfather clock sound was downloaded from Dailymotion.
  • 21.
    EDITING The software Iused to edit my movie was Windows Movie maker. Windows Movie maker is the software that I found most user friendly along with all the effects and animation I needed. I started my video with the Warnerbros opening theme which I downloaded from Youtube. The animations I mostly used in my shots were “cross fade”, “ fade through white” and “fade through black”.
  • 22.
  • 23.
    HARDWARE As I alreadyhad the passion do to photography and make short films, I did not face many problems while using the hardware and they were easily available for me. I used a tripod, my Canon 600D and my iphone to shoot my film. The point of view shot (POV) was taken from my phone while all the other ones were taken from my camera.

Editor's Notes

  • #2 Pictures series in film strip effect (Intermediate) Tip: Some shape effects on this slide are created with the Combine Shapes commands. To access this command, you must add it to the Quick Access Toolbar, located above the File tab. To customize the Quick Access Toolbar, do the following: Click the arrow next to the Quick Access Toolbar, and then under Customize Quick Access Toolbar click More Commands. In the PowerPoint Options dialog box, in the Choose commands from list, select All Commands. In the list of commands, click Combine Shapes, and then click Add. To reproduce the shape effects on this slide, do the following: On the Home tab, in the Slides group, click Layout, and then click Blank. Also on the Home tab, in the Drawing group, click Shapes, and then under Rectangles click Rectangle. On the slide, drag to draw rectangle. Select the rectangle. Under Drawing Tools, on the Format tab, in the Size group, click the Size and Position dialog box launcher. In the Format Shape dialog box, click Size in the left pane, in the Size pane, under Size and rotate, enter 2.59” in the Height box and 9” in the Width box. Also in the Format Shape dialog box, click Fill in the left pane, in the Fill pane, click Solid fill, and then do the following: Click the button next to Color, and then click More Colors. In the Colors dialog box, on the Custom tab, enter values for Red: 31, Green: 20, and Blue: 13 In the Transparency box, enter 30%. Also in the Format Shape dialog box, click Line Color in the left pane, and in the Line Color pane click No outline. On the Home tab, in the Drawing group, click Shapes, and then under Rectangles click Rectangle. On the slide, drag to draw a rectangle. Select the rectangle. Under Drawing Tools, on the Format tab, in the Size group, enter 1.94” in the Height box and 2.88” in the Width box. Also on the Format tab, in the Shape Styles group, click Shape Outline, and then click No Outline. Position the new rectangle over the dark gray rectangle, near but not touching the left edge. Select the new rectangle. On the Home tab, in the Clipboard group, click the arrow to the right of Copy, and then click Duplicate. Repeat the process once more for a total of three, smaller rectangles. Position one of the duplicate rectangles over the dark gray rectangle, near but not touching the right edge. Press and hold CTRL, and then select all three new rectangles. On the Home tab, in the Drawing group, click Arrange, point to Align, and then click Distribute Horizontally. Press and hold CTRL, and then select the rectangles in the following order: Select the dark gray rectangle Select the other three rectangles. Also on the Home tab, in the Drawing group, click Arrange, point to Align, and then click Align Middle. With all four rectangles still selected, on the Quick Access Toolbar, click Combine Shapes, and then click Shape Subtract. On the Home tab, in the Drawing group, click Shapes, and then under Rectangles, click Rectangle. Select the rectangle. Under Drawing Tools, on the Format tab, in the Size group, enter 0.21” in the Height box and 0.14” in the Width box. Also on the Format tab, in the Shape Styles group, click Shape Outline, and then click No Outline. Select the new rectangle. On the Home tab, in the Clipboard group, click the arrow to the right of Copy, and then click Duplicate. Repeat this step 22 times for a total of 24, smaller rectangles. Position one of the new rectangles over the gray rectangle, half over the left edge. Position another of the new rectangles over the gray rectangle, half over the right edge. Press and hold CTRL, and then select all of the newer, small rectangles. On the Home tab, in the Drawing group, click Arrange, point to Align, and then do the following: Click Align Middle. Click Distribute Horizontally. With all 24 rectangles selected, on the Quick Access Toolbar, click Combine Shapes, and then click Shape Union. Select the new shape. On the Home tab, in the Clipboard group, click the arrow to the right of Copy, and then click Duplicate. Position a new shapes near the top edge of the gray rectangle. Position the other new shape near the bottom edge of the gray rectangle. Press and hold CTRL, and then select the shapes in the following order: Select the dark gray rectangle. Select both of the other two shapes. On the Quick Access Toolbar, click Combine Shapes, and then click Shape Subtract. To reproduce the picture effects on this slide, do the following: On the Home tab, in the Drawing group, click Shapes, and then under Rectangles click Rectangle. On the slide, drag to draw a rectangle. Select the rectangle. Under Drawing Tools, on the Format tab, in the Size group, enter 1.94” in the Height box and 2.88” in the Width box. Select the new rectangle. Under Drawing Tools, on the Shape Styles group, click the Format Shape dialog box launcher. In the Format Shape dialog box, click Fill in the left pane, in the Fill pane, click Picture or texture fill, and then do the following: Under Insert from, click File. In the Insert Picture dialog box, select a picture and then click Insert. In the Transparency box, enter 15%. Also in the Format Shape dialog box, click Line Color in the left pane, in the Line Color pane, click Solid line, and then do the following: Click the button next to color and click More Colors, and then in the Colors dialog box, on the Custom tab, enter values for Red: 21, Green: 20, and Blue: 13. In the Transparency box, enter 30%. Also in the Format Shape dialog box, click Line Style in the left pane, and in the Line Style pane, in the Width box, enter 0.5 pt. Select the picture-filled rectangle. On the Home tab, in the Clipboard group, click the arrow to the right of Copy, and then click Duplicate. Repeat this process for a total of three rectangles. Select a duplicate picture-filled rectangles. Under Drawing Tools, on the Format tab, in the Shape Styles group, click Shape Fill, and then click Picture. In the Insert Picture dialog box, select another picture and then click Insert. Select the last duplicate picture-filled rectangle. Under Drawing Tools, on the Format tab, in the Shape Styles group, click Shape Fill, and then click Picture. In the Insert Picture dialog box, select another picture and then click Insert. Position the three picture-filled rectangles on top of the film strip and align with the rectangles with the holes in the gray rectangle. Press and hold CTRL + A. On the Home tab, in the Drawing group, click Arrange, and then click Group. Select the group. Also on the Home tab, in the Drawing group, click Arrange, point to Rotate, and then click More Rotation Options. In the Format Shape dialog box, click Size in the left pane, in the Size pane, under Size and rotate, in the Rotation box, enter 355°. Also in the Format Shape dialog box, click 3-D Rotation in the left pane, in the 3-D Rotation pane, click the button next to Presets, and then under Perspective, click Perspective Right. To reproduce the second group of pictures, do the following: Select the first group of pictures. On the Home tab, in the Clipboard group, click the arrow to the right of Copy, and then click Duplicate. Select the duplicate group of pictures. Under Drawing Tools, on the Format tab, in the Shape Styles group, click the Format Shape dialog box launcher. In the Format Shape dialog box, click Size in the left pane, in the Size pane, under Size and rotate, in the Rotation box enter 8°. Also in the Format Shape dialog box, click 3-D Format in the left pane, in the 3-D Format pane, under Surface, click the button next to Lighting, and then, under Neutral, click Balance. Also in the Format Shape dialog box, click 3-D Rotation in the left pane, in the 3-D Rotation pane, click the button next to Presets, and then click Perspective Relaxed Moderately. Select the first picture in the duplicate group. Under Drawing Tools, on the Format tab, in the Shape Styles group, click the Format Shape dialog box launcher. In the Format Shape dialog box, click Fill in the left pane, in the Fill pane, under Insert from, click File. In the Insert Picture dialog box, select another picture and then click Insert. Repeat this process for each of the pictures in the duplicate group. Position the first group toward the top of the slide, with the left side slightly off the left side of the slide. With the first group still selected, on the Home tab, in the Drawing group, click Arrange, and then click Bring to Front. Position the second group toward the middle of the slide, with the right side slightly off the right side of the slide. To reproduce the background effects on this slide, do the following: On the Design tab, in the Background group, click Background Styles, and then click Style 6 (second row).