CodeZipButtonDemo.javaCodeZipButtonDemo.java Demonstrate a p.docxmary772
CodeZip/ButtonDemo.javaCodeZip/ButtonDemo.java// Demonstrate a push button and handle action events.
import java.awt.*;
import java.awt.event.*;
import javax.swing.*;
publicclassButtonDemoimplementsActionListener{
JLabel jlab;
JTextField jtf;
ButtonDemo(){
// Create a new JFrame container.
JFrame jfrm =newJFrame("A Button Example");
// Specify FlowLayout for the layout manager.
jfrm.setLayout(newFlowLayout());
// Give the frame an initial size.
jfrm.setSize(220,90);
// Terminate the program when the user closes the application.
jfrm.setDefaultCloseOperation(JFrame.EXIT_ON_CLOSE);
// Make two buttons.
JButton jbtnUp =newJButton("Up");
JButton jbtnDown =newJButton("Down");
// Create a text field.
jtf =newJTextField(10);
// Add action listeners.
jbtnUp.addActionListener(this);
jbtnDown.addActionListener(this);
// Add the buttons to the content pane.
jfrm.add(jbtnUp);
jfrm.add(jbtnDown);
jfrm.add(jtf);
// Create a label.
jlab =newJLabel("Press a button.");
// Add the label to the frame.
jfrm.add(jlab);
// Display the frame.
jfrm.setVisible(true);
}
// Handle button events.
publicvoid actionPerformed(ActionEvent ae){
if(ae.getActionCommand().equals("Up")){
jlab.setText("You pressed Up.");
FileClock clock1=newFileClock(jtf);
Thread thread1=newThread(clock1);
thread1.start();
}
else
jlab.setText("You pressed down. ");
}
publicstaticvoid main(String args[]){
// Create the frame on the event dispatching thread.
SwingUtilities.invokeLater(newRunnable(){
publicvoid run(){
newButtonDemo();
}
});
}
}
CodeZip/CBDemo.javaCodeZip/CBDemo.java// Demonstrate check boxes.
import java.awt.*;
import java.awt.event.*;
import javax.swing.*;
publicclassCBDemoimplementsItemListener{
JLabel jlabSelected;
JLabel jlabChanged;
JCheckBox jcbAlpha;
JCheckBox jcbBeta;
JCheckBox jcbGamma;
CBDemo(){
// Create a new JFrame container.
JFrame jfrm =newJFrame("Demonstrate Check Boxes");
// Specify FlowLayout for the layout manager.
jfrm.setLayout(newFlowLayout());
// Give the frame an initial size.
jfrm.setSize(280,120);
// Terminate the program when the user closes the application.
jfrm.setDefaultCloseOperation(JFrame.EXIT_ON_CLOSE);
// Create empty labels.
jlabSelected =newJLabel("");
jlabChanged =newJLabel("");
// Make check boxes.
jcbAlpha =newJCheckBox("Alpha");
jcbBeta =newJCheckBox("Beta");
jcbGamma =newJCheckBox("Gamma");
// Events generated by the check boxes
// are handled in common by the itemStateChanged()
// method implemented by CBDemo.
jcbAlpha.addItemListener(this);
jcbBeta.addItemListener(this);
jcbGamma.addItemListener(this);
// Add checkboxes and labels to the content pane.
jfrm.add(jcbAlpha);
jfrm.add(jcbBeta);
jfrm.add(jcbGamma);
jfrm.add(jlabChanged);
jfrm.add(jlabSelected);
// Display the frame.
jfrm.setVisible(true);
}
// This is the handler for the check boxes..
CodeZipButtonDemo.javaCodeZipButtonDemo.java Demonstrate a p.docxmccormicknadine86
CodeZip/ButtonDemo.javaCodeZip/ButtonDemo.java// Demonstrate a push button and handle action events.
import java.awt.*;
import java.awt.event.*;
import javax.swing.*;
publicclassButtonDemoimplementsActionListener{
JLabel jlab;
JTextField jtf;
ButtonDemo(){
// Create a new JFrame container.
JFrame jfrm =newJFrame("A Button Example");
// Specify FlowLayout for the layout manager.
jfrm.setLayout(newFlowLayout());
// Give the frame an initial size.
jfrm.setSize(220,90);
// Terminate the program when the user closes the application.
jfrm.setDefaultCloseOperation(JFrame.EXIT_ON_CLOSE);
// Make two buttons.
JButton jbtnUp =newJButton("Up");
JButton jbtnDown =newJButton("Down");
// Create a text field.
jtf =newJTextField(10);
// Add action listeners.
jbtnUp.addActionListener(this);
jbtnDown.addActionListener(this);
// Add the buttons to the content pane.
jfrm.add(jbtnUp);
jfrm.add(jbtnDown);
jfrm.add(jtf);
// Create a label.
jlab =newJLabel("Press a button.");
// Add the label to the frame.
jfrm.add(jlab);
// Display the frame.
jfrm.setVisible(true);
}
// Handle button events.
publicvoid actionPerformed(ActionEvent ae){
if(ae.getActionCommand().equals("Up")){
jlab.setText("You pressed Up.");
FileClock clock1=newFileClock(jtf);
Thread thread1=newThread(clock1);
thread1.start();
}
else
jlab.setText("You pressed down. ");
}
publicstaticvoid main(String args[]){
// Create the frame on the event dispatching thread.
SwingUtilities.invokeLater(newRunnable(){
publicvoid run(){
newButtonDemo();
}
});
}
}
CodeZip/CBDemo.javaCodeZip/CBDemo.java// Demonstrate check boxes.
import java.awt.*;
import java.awt.event.*;
import javax.swing.*;
publicclassCBDemoimplementsItemListener{
JLabel jlabSelected;
JLabel jlabChanged;
JCheckBox jcbAlpha;
JCheckBox jcbBeta;
JCheckBox jcbGamma;
CBDemo(){
// Create a new JFrame container.
JFrame jfrm =newJFrame("Demonstrate Check Boxes");
// Specify FlowLayout for the layout manager.
jfrm.setLayout(newFlowLayout());
// Give the frame an initial size.
jfrm.setSize(280,120);
// Terminate the program when the user closes the application.
jfrm.setDefaultCloseOperation(JFrame.EXIT_ON_CLOSE);
// Create empty labels.
jlabSelected =newJLabel("");
jlabChanged =newJLabel("");
// Make check boxes.
jcbAlpha =newJCheckBox("Alpha");
jcbBeta =newJCheckBox("Beta");
jcbGamma =newJCheckBox("Gamma");
// Events generated by the check boxes
// are handled in common by the itemStateChanged()
// method implemented by CBDemo.
jcbAlpha.addItemListener(this);
jcbBeta.addItemListener(this);
jcbGamma.addItemListener(this);
// Add checkboxes and labels to the content pane.
jfrm.add(jcbAlpha);
jfrm.add(jcbBeta);
jfrm.add(jcbGamma);
jfrm.add(jlabChanged);
jfrm.add(jlabSelected);
// Display the frame.
jfrm.setVisible(true);
}
// This is the handler for the check boxes. ...
please code in c#- please note that im a complete beginner- northwind.docxAustinaGRPaigey
please code in c#.
please note that im a complete beginner.
northwind.mdf.
northwind_log.ldf
OrderDetailsMaintenance.zip
1. Include the two above files in the root of your OrderDetailsMaintenance project.
2. Make sure to mark them as "Content" and "Copy Always" or "Copy if newer" in the properties window of those two files.
3. Run the Scaffold-DbContext command to create a context class as well as a class to encapsulate the Orders objects from the associated table in the mdf file. Make sure to include the parameters for -Tables Customers (only worry about the attributes associated with the text boxes, you don't need to worry about any other rows from the table)
4. Once you have ran the command, include an app.config file and add a connection string element. Make sure to copy the connection string from your Context class to your app.config. Then edit your context to grab the connection string from the app.config (ConfigurationManager.ConnectionString["Northwind"].ConnectionString)
5. Code the Find button to Find the customer id and populate the details in the below text boxes.
1. If no order is found, display a message box.
6. Code the exit button
7. Code the Save button to update its attributes and call Update and SaveChanges() on that particular entity.
1. Note: If you close the program, reopen it, and search for the entity you recently updated. You may not see the changes depending on how you setup the mdf file in your project (because it copies a new version to the bin directory each time you run the program). So, if you don't see your changes, don't be alarmed.
============
HERE IS WHAT I HAVE SO FAR
frmCustomerMaintenance.cs
namespace OrderDetailsMaintenance
{
public partial class frmCustomerMaintenance : Form
{
public frmCustomerMaintenance()
{
InitializeComponent();
}
}
}
frmCustomerMaintenance.resx
<root>
<xsd:schema id="root" xmlns="" xmlns:xsd="http://www.w3.org/2001/XMLSchema" xmlns:msdata="urn:schemas-microsoft-com:xml-msdata">
<xsd:import namespace="http://www.w3.org/XML/1998/namespace" />
<xsd:element name="root" msdata:IsDataSet="true">
<xsd:complexType>
<xsd:choice maxOccurs="unbounded">
<xsd:element name="metadata">
<xsd:complexType>
<xsd:sequence>
<xsd:element name="value" type="xsd:string" minOccurs="0" />
</xsd:sequence>
<xsd:attribute name="name" use="required" type="xsd:string" />
<xsd:attribute name="type" type="xsd:string" />
<xsd:attribute name="mimetype" type="xsd:string" />
<xsd:attribute ref="xml:space" />
</xsd:complexType>
</xsd:element>
<xsd:element name="assembly">
<xsd:complexType>
<xsd:attribute name="alias" type="xsd:string" />
<xsd:attribute name="name" type="xsd:string" />
</xsd:complexType>
</xsd:element>
<xsd:element name="data">
<xsd:complexType>
<xsd:sequence>
<xsd:element name="value" type="xsd:string" minOccurs="0" msdata:Ordinal="1" />
<xsd:element name="comment" type="xsd:string" minOccurs="0" msdata:Ordinal="2" />
</xsd:sequence>
<xsd:attribute name="name".
With Launchers and Choosers in Windows Phone, 3rd party apps integrate more closely into the underlying operating system while allowing end-users to perform common tasks. With Launchers and Choosers you will provide more functionality to your end-users while still maintaining that consistent user experience that will make your app feel like a native app. In this session we’ll cover how to use Windows Phone resources including camera, video and Bing maps. We’ll also cover accessing contacts and calendar as well as sensors (including accelerometer, compass, gyroscope and motion).
Refactoring can either completely disrupt your project or make you go faster. This presentation will help you to avoid some pitfalls.
It also demonstrates refactorings that you could apply straight away to make your code better.
The War is Over, and JavaScript has won: Living Under the JS Regimematthoneycutt
You fought the good fight. You screamed to the heavens. You held fast and faced the dying of the light. But it's over now: JavaScript has won.
No longer confined to web apps, it's on the server. It's on IoT devices. It's on your phone. It's on your desktop. It's everywhere now. But, that doesn't have to be a bad thing! The JavaScript World isn't perfect, but if you can get past "THE SKY IS FALLING!", there's plenty to like about it. In this talk, you will learn about the essential tools and techniques that will make your developer life a happy one in this brave new world.
Essentials of Automations: Optimizing FME Workflows with ParametersSafe Software
Are you looking to streamline your workflows and boost your projects’ efficiency? Do you find yourself searching for ways to add flexibility and control over your FME workflows? If so, you’re in the right place.
Join us for an insightful dive into the world of FME parameters, a critical element in optimizing workflow efficiency. This webinar marks the beginning of our three-part “Essentials of Automation” series. This first webinar is designed to equip you with the knowledge and skills to utilize parameters effectively: enhancing the flexibility, maintainability, and user control of your FME projects.
Here’s what you’ll gain:
- Essentials of FME Parameters: Understand the pivotal role of parameters, including Reader/Writer, Transformer, User, and FME Flow categories. Discover how they are the key to unlocking automation and optimization within your workflows.
- Practical Applications in FME Form: Delve into key user parameter types including choice, connections, and file URLs. Allow users to control how a workflow runs, making your workflows more reusable. Learn to import values and deliver the best user experience for your workflows while enhancing accuracy.
- Optimization Strategies in FME Flow: Explore the creation and strategic deployment of parameters in FME Flow, including the use of deployment and geometry parameters, to maximize workflow efficiency.
- Pro Tips for Success: Gain insights on parameterizing connections and leveraging new features like Conditional Visibility for clarity and simplicity.
We’ll wrap up with a glimpse into future webinars, followed by a Q&A session to address your specific questions surrounding this topic.
Don’t miss this opportunity to elevate your FME expertise and drive your projects to new heights of efficiency.
Search and Society: Reimagining Information Access for Radical FuturesBhaskar Mitra
The field of Information retrieval (IR) is currently undergoing a transformative shift, at least partly due to the emerging applications of generative AI to information access. In this talk, we will deliberate on the sociotechnical implications of generative AI for information access. We will argue that there is both a critical necessity and an exciting opportunity for the IR community to re-center our research agendas on societal needs while dismantling the artificial separation between the work on fairness, accountability, transparency, and ethics in IR and the rest of IR research. Instead of adopting a reactionary strategy of trying to mitigate potential social harms from emerging technologies, the community should aim to proactively set the research agenda for the kinds of systems we should build inspired by diverse explicitly stated sociotechnical imaginaries. The sociotechnical imaginaries that underpin the design and development of information access technologies needs to be explicitly articulated, and we need to develop theories of change in context of these diverse perspectives. Our guiding future imaginaries must be informed by other academic fields, such as democratic theory and critical theory, and should be co-developed with social science scholars, legal scholars, civil rights and social justice activists, and artists, among others.
Let's dive deeper into the world of ODC! Ricardo Alves (OutSystems) will join us to tell all about the new Data Fabric. After that, Sezen de Bruijn (OutSystems) will get into the details on how to best design a sturdy architecture within ODC.
Smart TV Buyer Insights Survey 2024 by 91mobiles.pdf91mobiles
91mobiles recently conducted a Smart TV Buyer Insights Survey in which we asked over 3,000 respondents about the TV they own, aspects they look at on a new TV, and their TV buying preferences.
DevOps and Testing slides at DASA ConnectKari Kakkonen
My and Rik Marselis slides at 30.5.2024 DASA Connect conference. We discuss about what is testing, then what is agile testing and finally what is Testing in DevOps. Finally we had lovely workshop with the participants trying to find out different ways to think about quality and testing in different parts of the DevOps infinity loop.
Dev Dives: Train smarter, not harder – active learning and UiPath LLMs for do...UiPathCommunity
💥 Speed, accuracy, and scaling – discover the superpowers of GenAI in action with UiPath Document Understanding and Communications Mining™:
See how to accelerate model training and optimize model performance with active learning
Learn about the latest enhancements to out-of-the-box document processing – with little to no training required
Get an exclusive demo of the new family of UiPath LLMs – GenAI models specialized for processing different types of documents and messages
This is a hands-on session specifically designed for automation developers and AI enthusiasts seeking to enhance their knowledge in leveraging the latest intelligent document processing capabilities offered by UiPath.
Speakers:
👨🏫 Andras Palfi, Senior Product Manager, UiPath
👩🏫 Lenka Dulovicova, Product Program Manager, UiPath
GraphRAG is All You need? LLM & Knowledge GraphGuy Korland
Guy Korland, CEO and Co-founder of FalkorDB, will review two articles on the integration of language models with knowledge graphs.
1. Unifying Large Language Models and Knowledge Graphs: A Roadmap.
https://arxiv.org/abs/2306.08302
2. Microsoft Research's GraphRAG paper and a review paper on various uses of knowledge graphs:
https://www.microsoft.com/en-us/research/blog/graphrag-unlocking-llm-discovery-on-narrative-private-data/
Epistemic Interaction - tuning interfaces to provide information for AI supportAlan Dix
Paper presented at SYNERGY workshop at AVI 2024, Genoa, Italy. 3rd June 2024
https://alandix.com/academic/papers/synergy2024-epistemic/
As machine learning integrates deeper into human-computer interactions, the concept of epistemic interaction emerges, aiming to refine these interactions to enhance system adaptability. This approach encourages minor, intentional adjustments in user behaviour to enrich the data available for system learning. This paper introduces epistemic interaction within the context of human-system communication, illustrating how deliberate interaction design can improve system understanding and adaptation. Through concrete examples, we demonstrate the potential of epistemic interaction to significantly advance human-computer interaction by leveraging intuitive human communication strategies to inform system design and functionality, offering a novel pathway for enriching user-system engagements.
Kubernetes & AI - Beauty and the Beast !?! @KCD Istanbul 2024Tobias Schneck
As AI technology is pushing into IT I was wondering myself, as an “infrastructure container kubernetes guy”, how get this fancy AI technology get managed from an infrastructure operational view? Is it possible to apply our lovely cloud native principals as well? What benefit’s both technologies could bring to each other?
Let me take this questions and provide you a short journey through existing deployment models and use cases for AI software. On practical examples, we discuss what cloud/on-premise strategy we may need for applying it to our own infrastructure to get it to work from an enterprise perspective. I want to give an overview about infrastructure requirements and technologies, what could be beneficial or limiting your AI use cases in an enterprise environment. An interactive Demo will give you some insides, what approaches I got already working for real.
Neuro-symbolic is not enough, we need neuro-*semantic*Frank van Harmelen
Neuro-symbolic (NeSy) AI is on the rise. However, simply machine learning on just any symbolic structure is not sufficient to really harvest the gains of NeSy. These will only be gained when the symbolic structures have an actual semantics. I give an operational definition of semantics as “predictable inference”.
All of this illustrated with link prediction over knowledge graphs, but the argument is general.
Key Trends Shaping the Future of Infrastructure.pdfCheryl Hung
Keynote at DIGIT West Expo, Glasgow on 29 May 2024.
Cheryl Hung, ochery.com
Sr Director, Infrastructure Ecosystem, Arm.
The key trends across hardware, cloud and open-source; exploring how these areas are likely to mature and develop over the short and long-term, and then considering how organisations can position themselves to adapt and thrive.
Slack (or Teams) Automation for Bonterra Impact Management (fka Social Soluti...Jeffrey Haguewood
Sidekick Solutions uses Bonterra Impact Management (fka Social Solutions Apricot) and automation solutions to integrate data for business workflows.
We believe integration and automation are essential to user experience and the promise of efficient work through technology. Automation is the critical ingredient to realizing that full vision. We develop integration products and services for Bonterra Case Management software to support the deployment of automations for a variety of use cases.
This video focuses on the notifications, alerts, and approval requests using Slack for Bonterra Impact Management. The solutions covered in this webinar can also be deployed for Microsoft Teams.
Interested in deploying notification automations for Bonterra Impact Management? Contact us at sales@sidekicksolutionsllc.com to discuss next steps.
Empowering NextGen Mobility via Large Action Model Infrastructure (LAMI): pav...
Creating a Whatsapp Clone - Part V - Transcript.pdf
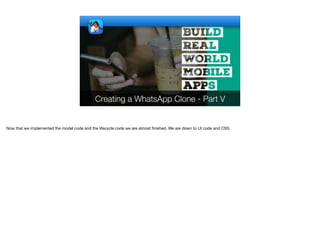
1. Creating a WhatsApp Clone - Part V
Now that we implemented the model code and the lifecycle code we are almost finished. We are down to UI code and CSS.
2. public class MainForm extends Form {
private Tabs tabs = new Tabs();
private CameraKit ck;
private Container chats;
private Container status;
private Container calls;
private static MainForm instance;
public MainForm() {
super("WhatsApp Clone", new BorderLayout());
instance = this;
add(CENTER, tabs);
tabs.hideTabs();
ck = CameraKit.create();
tabs.addTab("", createCameraView());
tabs.addTab("", createChatsContainer());
tabs.addTab("", createStatusContainer());
tabs.addTab("", createCallsContainer());
MainForm
We start with the main form which covers the list of chat elements.
As is the case with all the forms in this app we derive from Form for simplicity.
3. public class MainForm extends Form {
private Tabs tabs = new Tabs();
private CameraKit ck;
private Container chats;
private Container status;
private Container calls;
private static MainForm instance;
public MainForm() {
super("WhatsApp Clone", new BorderLayout());
instance = this;
add(CENTER, tabs);
tabs.hideTabs();
ck = CameraKit.create();
tabs.addTab("", createCameraView());
tabs.addTab("", createChatsContainer());
tabs.addTab("", createStatusContainer());
tabs.addTab("", createCallsContainer());
MainForm
The main body of the form is a tabs component that allows us to switch between camera, status and calls
4. public class MainForm extends Form {
private Tabs tabs = new Tabs();
private CameraKit ck;
private Container chats;
private Container status;
private Container calls;
private static MainForm instance;
public MainForm() {
super("WhatsApp Clone", new BorderLayout());
instance = this;
add(CENTER, tabs);
tabs.hideTabs();
ck = CameraKit.create();
tabs.addTab("", createCameraView());
tabs.addTab("", createChatsContainer());
tabs.addTab("", createStatusContainer());
tabs.addTab("", createCallsContainer());
MainForm
Camera kit is used to implement the camera UI but due to a regression in the native library this code is currently commented out.
5. public class MainForm extends Form {
private Tabs tabs = new Tabs();
private CameraKit ck;
private Container chats;
private Container status;
private Container calls;
private static MainForm instance;
public MainForm() {
super("WhatsApp Clone", new BorderLayout());
instance = this;
add(CENTER, tabs);
tabs.hideTabs();
ck = CameraKit.create();
tabs.addTab("", createCameraView());
tabs.addTab("", createChatsContainer());
tabs.addTab("", createStatusContainer());
tabs.addTab("", createCallsContainer());
MainForm
These are the 3 tab containers, we make use of them in the scrolling logic later
6. public class MainForm extends Form {
private Tabs tabs = new Tabs();
private CameraKit ck;
private Container chats;
private Container status;
private Container calls;
private static MainForm instance;
public MainForm() {
super("WhatsApp Clone", new BorderLayout());
instance = this;
add(CENTER, tabs);
tabs.hideTabs();
ck = CameraKit.create();
tabs.addTab("", createCameraView());
tabs.addTab("", createChatsContainer());
tabs.addTab("", createStatusContainer());
tabs.addTab("", createCallsContainer());
MainForm
The main form is a singleton as we need a way to refresh it when we are in a different form
7. private Container status;
private Container calls;
private static MainForm instance;
public MainForm() {
super("WhatsApp Clone", new BorderLayout());
instance = this;
add(CENTER, tabs);
tabs.hideTabs();
ck = CameraKit.create();
tabs.addTab("", createCameraView());
tabs.addTab("", createChatsContainer());
tabs.addTab("", createStatusContainer());
tabs.addTab("", createCallsContainer());
tabs.setSelectedIndex(1);
Toolbar tb = getToolbar();
tb.setTitleComponent(createTitleComponent(chats, status, calls));
setBackCommand("", null, e -> {
if(tabs.getSelectedIndex() != 1) {
tabs.setSelectedIndex(1);
} else {
MainForm
The form itself uses a border layout to place the tabs in the center. We also save the form instance for later use
8. private Container status;
private Container calls;
private static MainForm instance;
public MainForm() {
super("WhatsApp Clone", new BorderLayout());
instance = this;
add(CENTER, tabs);
tabs.hideTabs();
ck = CameraKit.create();
tabs.addTab("", createCameraView());
tabs.addTab("", createChatsContainer());
tabs.addTab("", createStatusContainer());
tabs.addTab("", createCallsContainer());
tabs.setSelectedIndex(1);
Toolbar tb = getToolbar();
tb.setTitleComponent(createTitleComponent(chats, status, calls));
setBackCommand("", null, e -> {
if(tabs.getSelectedIndex() != 1) {
tabs.setSelectedIndex(1);
} else {
MainForm
We hide the tabs, it generally means that
These aren't actually tabs, they are buttons we draw ourselves. The reason for that is the special animation we need in the title area
9. private Container status;
private Container calls;
private static MainForm instance;
public MainForm() {
super("WhatsApp Clone", new BorderLayout());
instance = this;
add(CENTER, tabs);
tabs.hideTabs();
ck = CameraKit.create();
tabs.addTab("", createCameraView());
tabs.addTab("", createChatsContainer());
tabs.addTab("", createStatusContainer());
tabs.addTab("", createCallsContainer());
tabs.setSelectedIndex(1);
Toolbar tb = getToolbar();
tb.setTitleComponent(createTitleComponent(chats, status, calls));
setBackCommand("", null, e -> {
if(tabs.getSelectedIndex() != 1) {
tabs.setSelectedIndex(1);
} else {
MainForm
We add the tabs and select the second one as the default as we don’t want to open with the camera view
10. tabs.addTab("", createCameraView());
tabs.addTab("", createChatsContainer());
tabs.addTab("", createStatusContainer());
tabs.addTab("", createCallsContainer());
tabs.setSelectedIndex(1);
Toolbar tb = getToolbar();
tb.setTitleComponent(createTitleComponent(chats, status, calls));
setBackCommand("", null, e -> {
if(tabs.getSelectedIndex() != 1) {
tabs.setSelectedIndex(1);
} else {
minimizeApplication();
}
});
}
public static MainForm getInstance() {
return instance;
}
private Container createCallsContainer() {
Container cnt = new Container(BoxLayout.y());
MainForm
Instead of using the title we use a title component which takes over the entire title area and lets us build whatever we want up there. I’ll discuss it more when covering
that method
11. tabs.addTab("", createCameraView());
tabs.addTab("", createChatsContainer());
tabs.addTab("", createStatusContainer());
tabs.addTab("", createCallsContainer());
tabs.setSelectedIndex(1);
Toolbar tb = getToolbar();
tb.setTitleComponent(createTitleComponent(chats, status, calls));
setBackCommand("", null, e -> {
if(tabs.getSelectedIndex() != 1) {
tabs.setSelectedIndex(1);
} else {
minimizeApplication();
}
});
}
public static MainForm getInstance() {
return instance;
}
private Container createCallsContainer() {
Container cnt = new Container(BoxLayout.y());
MainForm
The back command of the form respects the hardware back buttons in some devices and the Android native back arrow. Here we have custom behavior for the form. If
we are in a tab other than the first tab we need to return to that tab. Otherwise the app is minimized. This seems to be the behavior of the native app.
12. }
public static MainForm getInstance() {
return instance;
}
private Container createCallsContainer() {
Container cnt = new Container(BoxLayout.y());
calls = cnt;
cnt.setScrollableY(true);
MultiButton chat = new MultiButton("Person");
chat.setTextLine2("Date & time");
cnt.add(chat);
FloatingActionButton fab = FloatingActionButton.
createFAB(FontImage.MATERIAL_CALL);
return fab.bindFabToContainer(cnt);
}
private Container createStatusContainer() {
Container cnt = new Container(BoxLayout.y());
status = cnt;
cnt.setScrollableY(true);
MainForm
The calls container is a Y scrollable container.
13. }
public static MainForm getInstance() {
return instance;
}
private Container createCallsContainer() {
Container cnt = new Container(BoxLayout.y());
calls = cnt;
cnt.setScrollableY(true);
MultiButton chat = new MultiButton("Person");
chat.setTextLine2("Date & time");
cnt.add(chat);
FloatingActionButton fab = FloatingActionButton.
createFAB(FontImage.MATERIAL_CALL);
return fab.bindFabToContainer(cnt);
}
private Container createStatusContainer() {
Container cnt = new Container(BoxLayout.y());
status = cnt;
cnt.setScrollableY(true);
MainForm
This is simply a placeholder, I placed here a multibutton representing incoming/outgoing calls and a floating action button
14. FloatingActionButton fab = FloatingActionButton.
createFAB(FontImage.MATERIAL_CALL);
return fab.bindFabToContainer(cnt);
}
private Container createStatusContainer() {
Container cnt = new Container(BoxLayout.y());
status = cnt;
cnt.setScrollableY(true);
MultiButton chat = new MultiButton("My Status");
chat.setTextLine2("Tap to add status update");
cnt.add(chat);
FloatingActionButton fab = FloatingActionButton.
createFAB(FontImage.MATERIAL_CAMERA_ALT);
return fab.bindFabToContainer(cnt);
}
public void refreshChatsContainer() {
Server.fetchChatList(contacts -> {
chats.removeAll();
for(ChatContact c : contacts) {
MainForm
The same is true for the status container. This isn't an important part of the functionality with this tutorial
15. return fab.bindFabToContainer(cnt);
}
public void refreshChatsContainer() {
Server.fetchChatList(contacts -> {
chats.removeAll();
for(ChatContact c : contacts) {
MultiButton chat = new MultiButton(c.name.get());
chat.setTextLine2(c.tagline.get());
if(chat.getTextLine2() == null ||
chat.getTextLine2().length() == 0) {
chat.setTextLine2("...");
}
chat.setIcon(c.getLargeIcon());
chats.add(chat);
chat.addActionListener(e -> new ChatForm(c, this).show());
}
chats.revalidate();
});
}
private Container createChatsContainer() {
MainForm
You might recall that we invoke this method from the main UI to refresh the ongoing chat status.
16. return fab.bindFabToContainer(cnt);
}
public void refreshChatsContainer() {
Server.fetchChatList(contacts -> {
chats.removeAll();
for(ChatContact c : contacts) {
MultiButton chat = new MultiButton(c.name.get());
chat.setTextLine2(c.tagline.get());
if(chat.getTextLine2() == null ||
chat.getTextLine2().length() == 0) {
chat.setTextLine2("...");
}
chat.setIcon(c.getLargeIcon());
chats.add(chat);
chat.addActionListener(e -> new ChatForm(c, this).show());
}
chats.revalidate();
});
}
private Container createChatsContainer() {
MainForm
We fetch up to date data from the storage. This is an asynchronous call that returns on the EDT so the rest of the code goes into the lambda.
17. return fab.bindFabToContainer(cnt);
}
public void refreshChatsContainer() {
Server.fetchChatList(contacts -> {
chats.removeAll();
for(ChatContact c : contacts) {
MultiButton chat = new MultiButton(c.name.get());
chat.setTextLine2(c.tagline.get());
if(chat.getTextLine2() == null ||
chat.getTextLine2().length() == 0) {
chat.setTextLine2("...");
}
chat.setIcon(c.getLargeIcon());
chats.add(chat);
chat.addActionListener(e -> new ChatForm(c, this).show());
}
chats.revalidate();
});
}
private Container createChatsContainer() {
MainForm
We remove the old content as we’ll just re-add it
18. return fab.bindFabToContainer(cnt);
}
public void refreshChatsContainer() {
Server.fetchChatList(contacts -> {
chats.removeAll();
for(ChatContact c : contacts) {
MultiButton chat = new MultiButton(c.name.get());
chat.setTextLine2(c.tagline.get());
if(chat.getTextLine2() == null ||
chat.getTextLine2().length() == 0) {
chat.setTextLine2("...");
}
chat.setIcon(c.getLargeIcon());
chats.add(chat);
chat.addActionListener(e -> new ChatForm(c, this).show());
}
chats.revalidate();
});
}
private Container createChatsContainer() {
MainForm
We loop over the contacts and for every new contact we create a chat multi-button with the given name
19. return fab.bindFabToContainer(cnt);
}
public void refreshChatsContainer() {
Server.fetchChatList(contacts -> {
chats.removeAll();
for(ChatContact c : contacts) {
MultiButton chat = new MultiButton(c.name.get());
chat.setTextLine2(c.tagline.get());
if(chat.getTextLine2() == null ||
chat.getTextLine2().length() == 0) {
chat.setTextLine2("...");
}
chat.setIcon(c.getLargeIcon());
chats.add(chat);
chat.addActionListener(e -> new ChatForm(c, this).show());
}
chats.revalidate();
});
}
private Container createChatsContainer() {
MainForm
If there’s a tagline defined we set that tagline. We also use the large icon for that person
20. return fab.bindFabToContainer(cnt);
}
public void refreshChatsContainer() {
Server.fetchChatList(contacts -> {
chats.removeAll();
for(ChatContact c : contacts) {
MultiButton chat = new MultiButton(c.name.get());
chat.setTextLine2(c.tagline.get());
if(chat.getTextLine2() == null ||
chat.getTextLine2().length() == 0) {
chat.setTextLine2("...");
}
chat.setIcon(c.getLargeIcon());
chats.add(chat);
chat.addActionListener(e -> new ChatForm(c, this).show());
}
chats.revalidate();
});
}
private Container createChatsContainer() {
MainForm
If the button is clicked we show the chat form for this user
21. chat.addActionListener(e -> new ChatForm(c, this).show());
}
chats.revalidate();
});
}
private Container createChatsContainer() {
chats = new Container(BoxLayout.y());
chats.setScrollableY(true);
refreshChatsContainer();
FloatingActionButton fab = FloatingActionButton.
createFAB(FontImage.MATERIAL_CHAT);
fab.addActionListener(e -> new NewMessageForm().show());
return fab.bindFabToContainer(chats);
}
private Container createCameraView() {
if(ck != null) {
Container cameraCnt = new Container(new LayeredLayout());
MainForm
The chats container is the same as the other containers we saw but it’s actually fully implemented
22. chat.addActionListener(e -> new ChatForm(c, this).show());
}
chats.revalidate();
});
}
private Container createChatsContainer() {
chats = new Container(BoxLayout.y());
chats.setScrollableY(true);
refreshChatsContainer();
FloatingActionButton fab = FloatingActionButton.
createFAB(FontImage.MATERIAL_CHAT);
fab.addActionListener(e -> new NewMessageForm().show());
return fab.bindFabToContainer(chats);
}
private Container createCameraView() {
if(ck != null) {
Container cameraCnt = new Container(new LayeredLayout());
MainForm
It invokes the refresh chats container method we previously saw in order to fill up the container
23. chat.addActionListener(e -> new ChatForm(c, this).show());
}
chats.revalidate();
});
}
private Container createChatsContainer() {
chats = new Container(BoxLayout.y());
chats.setScrollableY(true);
refreshChatsContainer();
FloatingActionButton fab = FloatingActionButton.
createFAB(FontImage.MATERIAL_CHAT);
fab.addActionListener(e -> new NewMessageForm().show());
return fab.bindFabToContainer(chats);
}
private Container createCameraView() {
if(ck != null) {
Container cameraCnt = new Container(new LayeredLayout());
MainForm
The floating action button here is actually implemented by showing the new message form
24. }
private Container createCameraView() {
if(ck != null) {
Container cameraCnt = new Container(new LayeredLayout());
tabs.addSelectionListener((oldSelected, newSelected) -> {
if(newSelected == 0) {
//ck.start();
//cameraCnt.add(ck.getView());
getToolbar().setHidden(true);
} else {
if(oldSelected == 0) {
//cameraCnt.removeAll();
//ck.stop();
getToolbar().setHidden(false);
}
}
});
return cameraCnt;
}
return BorderLayout.center(new Label("Camera Unsupported"));
}
MainForm
Camera support is currently commented out due to a regression in the native library. However, the concept is relatively simple. We use the tab selection listener to
activate the camera as we need it
25. }
return BorderLayout.center(new Label("Camera Unsupported"));
}
private void showOverflowMenu() {
Button newGroup = new Button("New group", "Command");
Button newBroadcast = new Button("New broadcast", "Command");
Button whatsappWeb = new Button("WhatsApp Web", "Command");
Button starred = new Button("Starred Messages", "Command");
Button settings = new Button("Settings", "Command");
Container cnt = BoxLayout.encloseY(newGroup, newBroadcast,
whatsappWeb, starred, settings);
cnt.setUIID("CommandList");
Dialog dlg = new Dialog(new BorderLayout());
dlg.setDialogUIID("Container");
dlg.add(CENTER, cnt);
dlg.setDisposeWhenPointerOutOfBounds(true);
dlg.setTransitionInAnimator(CommonTransitions.createEmpty());
dlg.setTransitionOutAnimator(CommonTransitions.createEmpty());
dlg.setBackCommand("", null, e -> dlg.dispose());
int top = getUIManager().getComponentStyle("StatusBar").
getVerticalPadding();
setTintColor(0);
int bottom = getHeight() - cnt.getPreferredH() - top -
MainForm
The overflow menu is normally implemented in the toolbar but since I wanted more control over the toolbar area I chose to implement i manually in the code.
26. }
return BorderLayout.center(new Label("Camera Unsupported"));
}
private void showOverflowMenu() {
Button newGroup = new Button("New group", "Command");
Button newBroadcast = new Button("New broadcast", "Command");
Button whatsappWeb = new Button("WhatsApp Web", "Command");
Button starred = new Button("Starred Messages", "Command");
Button settings = new Button("Settings", "Command");
Container cnt = BoxLayout.encloseY(newGroup, newBroadcast,
whatsappWeb, starred, settings);
cnt.setUIID("CommandList");
Dialog dlg = new Dialog(new BorderLayout());
dlg.setDialogUIID("Container");
dlg.add(CENTER, cnt);
dlg.setDisposeWhenPointerOutOfBounds(true);
dlg.setTransitionInAnimator(CommonTransitions.createEmpty());
dlg.setTransitionOutAnimator(CommonTransitions.createEmpty());
dlg.setBackCommand("", null, e -> dlg.dispose());
int top = getUIManager().getComponentStyle("StatusBar").
getVerticalPadding();
setTintColor(0);
int bottom = getHeight() - cnt.getPreferredH() - top -
MainForm
I used buttons with the Command UIID and a Container with the CommandList UIID to create this UI. I used buttons with the Command UIID and a Container with the
CommandList UIID to create this UI. I’ll discuss the CSS that created this in the next lesson.
27. Button whatsappWeb = new Button("WhatsApp Web", "Command");
Button starred = new Button("Starred Messages", "Command");
Button settings = new Button("Settings", "Command");
Container cnt = BoxLayout.encloseY(newGroup, newBroadcast,
whatsappWeb, starred, settings);
cnt.setUIID("CommandList");
Dialog dlg = new Dialog(new BorderLayout());
dlg.setDialogUIID("Container");
dlg.add(CENTER, cnt);
dlg.setDisposeWhenPointerOutOfBounds(true);
dlg.setTransitionInAnimator(CommonTransitions.createEmpty());
dlg.setTransitionOutAnimator(CommonTransitions.createEmpty());
dlg.setBackCommand("", null, e -> dlg.dispose());
int top = getUIManager().getComponentStyle("StatusBar").
getVerticalPadding();
setTintColor(0);
int bottom = getHeight() - cnt.getPreferredH() - top -
cnt.getUnselectedStyle().getVerticalPadding() -
cnt.getUnselectedStyle().getVerticalMargins();
int w = getWidth();
int left = w - cnt.getPreferredW() -
cnt.getUnselectedStyle().getHorizontalPadding() -
cnt.getUnselectedStyle().getHorizontalMargins();
dlg.show(top, bottom, left, 0);
MainForm
I create a transparent dialog by giving it the Container UIID. I place the menu in the center
28. Button whatsappWeb = new Button("WhatsApp Web", "Command");
Button starred = new Button("Starred Messages", "Command");
Button settings = new Button("Settings", "Command");
Container cnt = BoxLayout.encloseY(newGroup, newBroadcast,
whatsappWeb, starred, settings);
cnt.setUIID("CommandList");
Dialog dlg = new Dialog(new BorderLayout());
dlg.setDialogUIID("Container");
dlg.add(CENTER, cnt);
dlg.setDisposeWhenPointerOutOfBounds(true);
dlg.setTransitionInAnimator(CommonTransitions.createEmpty());
dlg.setTransitionOutAnimator(CommonTransitions.createEmpty());
dlg.setBackCommand("", null, e -> dlg.dispose());
int top = getUIManager().getComponentStyle("StatusBar").
getVerticalPadding();
setTintColor(0);
int bottom = getHeight() - cnt.getPreferredH() - top -
cnt.getUnselectedStyle().getVerticalPadding() -
cnt.getUnselectedStyle().getVerticalMargins();
int w = getWidth();
int left = w - cnt.getPreferredW() -
cnt.getUnselectedStyle().getHorizontalPadding() -
cnt.getUnselectedStyle().getHorizontalMargins();
dlg.show(top, bottom, left, 0);
MainForm
The dialog has no transition and disposed if the user taps outside of it or uses the back button
29. whatsappWeb, starred, settings);
cnt.setUIID("CommandList");
Dialog dlg = new Dialog(new BorderLayout());
dlg.setDialogUIID("Container");
dlg.add(CENTER, cnt);
dlg.setDisposeWhenPointerOutOfBounds(true);
dlg.setTransitionInAnimator(CommonTransitions.createEmpty());
dlg.setTransitionOutAnimator(CommonTransitions.createEmpty());
dlg.setBackCommand("", null, e -> dlg.dispose());
int top = getUIManager().getComponentStyle("StatusBar").
getVerticalPadding();
setTintColor(0);
int bottom = getHeight() - cnt.getPreferredH() - top -
cnt.getUnselectedStyle().getVerticalPadding() -
cnt.getUnselectedStyle().getVerticalMargins();
int w = getWidth();
int left = w - cnt.getPreferredW() -
cnt.getUnselectedStyle().getHorizontalPadding() -
cnt.getUnselectedStyle().getHorizontalMargins();
dlg.show(top, bottom, left, 0);
}
private Container createTitleComponent(Container... scrollables) {
Label title = new Label("WhatsApp", "Title");
MainForm
This disables the default darkening of the form when a dialog is shown
30. whatsappWeb, starred, settings);
cnt.setUIID("CommandList");
Dialog dlg = new Dialog(new BorderLayout());
dlg.setDialogUIID("Container");
dlg.add(CENTER, cnt);
dlg.setDisposeWhenPointerOutOfBounds(true);
dlg.setTransitionInAnimator(CommonTransitions.createEmpty());
dlg.setTransitionOutAnimator(CommonTransitions.createEmpty());
dlg.setBackCommand("", null, e -> dlg.dispose());
int top = getUIManager().getComponentStyle("StatusBar").
getVerticalPadding();
setTintColor(0);
int bottom = getHeight() - cnt.getPreferredH() - top -
cnt.getUnselectedStyle().getVerticalPadding() -
cnt.getUnselectedStyle().getVerticalMargins();
int w = getWidth();
int left = w - cnt.getPreferredW() -
cnt.getUnselectedStyle().getHorizontalPadding() -
cnt.getUnselectedStyle().getHorizontalMargins();
dlg.show(top, bottom, left, 0);
}
private Container createTitleComponent(Container... scrollables) {
Label title = new Label("WhatsApp", "Title");
MainForm
This version of the show method places the dialog with a fixed distance from the edges. We give it a small margin on the top to take the status bar into account. Then use
left and bottom margin to push the dialog to the top right side.
This gives us a lot of flexibility and allows us to show the dialog in any way we want.
31. cnt.getUnselectedStyle().getVerticalPadding() -
cnt.getUnselectedStyle().getVerticalMargins();
int w = getWidth();
int left = w - cnt.getPreferredW() -
cnt.getUnselectedStyle().getHorizontalPadding() -
cnt.getUnselectedStyle().getHorizontalMargins();
dlg.show(top, bottom, left, 0);
}
private Container createTitleComponent(Container... scrollables) {
Label title = new Label("WhatsApp", "Title");
Container titleArea;
if(title.getUnselectedStyle().getAlignment() == LEFT) {
titleArea = BorderLayout.center(title);
} else {
// for iOS we want the title to center properly
titleArea = BorderLayout.centerAbsolute(title);
}
Button search = new Button("", FontImage.MATERIAL_SEARCH, "Title");
Button overflow = new Button("", FontImage.MATERIAL_MORE_VERT,
"Title");
overflow.addActionListener(e -> showOverflowMenu());
titleArea.add(EAST, GridLayout.encloseIn(2, search, overflow));
MainForm
This method creates the title component for the form
which is this region. The method accepts the scrollable containers in the tabs container. This allows us to track scrolling and seamlessly fold the title area
32. cnt.getUnselectedStyle().getVerticalPadding() -
cnt.getUnselectedStyle().getVerticalMargins();
int w = getWidth();
int left = w - cnt.getPreferredW() -
cnt.getUnselectedStyle().getHorizontalPadding() -
cnt.getUnselectedStyle().getHorizontalMargins();
dlg.show(top, bottom, left, 0);
}
private Container createTitleComponent(Container... scrollables) {
Label title = new Label("WhatsApp", "Title");
Container titleArea;
if(title.getUnselectedStyle().getAlignment() == LEFT) {
titleArea = BorderLayout.center(title);
} else {
// for iOS we want the title to center properly
titleArea = BorderLayout.centerAbsolute(title);
}
Button search = new Button("", FontImage.MATERIAL_SEARCH, "Title");
Button overflow = new Button("", FontImage.MATERIAL_MORE_VERT,
"Title");
overflow.addActionListener(e -> showOverflowMenu());
titleArea.add(EAST, GridLayout.encloseIn(2, search, overflow));
MainForm
The title itself is just a label with the “Title” UIID. It’s placed in the center of the title area border layout. If we are on iOS we want the title to be centered, in that case we
need to use the center version of the border layout. The reason for this is that center alignment doesn’t know about the full layout and would center based on available
space. It would ignore the search and overflow buttons on the right when centering since it isn’t aware of other components.
However, using the center alignment and placing these buttons in the east solves that problem and gives us the correct title position.
33. if(title.getUnselectedStyle().getAlignment() == LEFT) {
titleArea = BorderLayout.center(title);
} else {
// for iOS we want the title to center properly
titleArea = BorderLayout.centerAbsolute(title);
}
Button search = new Button("", FontImage.MATERIAL_SEARCH, "Title");
Button overflow = new Button("", FontImage.MATERIAL_MORE_VERT,
"Title");
overflow.addActionListener(e -> showOverflowMenu());
titleArea.add(EAST, GridLayout.encloseIn(2, search, overflow));
ButtonGroup bg = new ButtonGroup();
RadioButton camera = RadioButton.createToggle("", bg);
camera.setUIID("SubTitle");
FontImage.setMaterialIcon(camera, FontImage.MATERIAL_CAMERA_ALT);
RadioButton chats = RadioButton.createToggle("Chats", bg);
RadioButton status = RadioButton.createToggle("Status", bg);
RadioButton calls = RadioButton.createToggle("Calls", bg);
chats.setUIID("SubTitle");
status.setUIID("SubTitle");
calls.setUIID("SubTitle");
RadioButton[] buttons = new RadioButton[] {
MainForm
The search and overflow commands are just buttons with the “Title” UIID. We already discussed the showOverflowMenu() method so this should be pretty obvious. We
just place the two buttons in the grid. I chose not to use a Command as this might create a misalignment for this use case and wouldn’t have saved on the amount of
code I had to write.
34. Button search = new Button("", FontImage.MATERIAL_SEARCH, "Title");
Button overflow = new Button("", FontImage.MATERIAL_MORE_VERT,
"Title");
overflow.addActionListener(e -> showOverflowMenu());
titleArea.add(EAST, GridLayout.encloseIn(2, search, overflow));
ButtonGroup bg = new ButtonGroup();
RadioButton camera = RadioButton.createToggle("", bg);
camera.setUIID("SubTitle");
FontImage.setMaterialIcon(camera, FontImage.MATERIAL_CAMERA_ALT);
RadioButton chats = RadioButton.createToggle("Chats", bg);
RadioButton status = RadioButton.createToggle("Status", bg);
RadioButton calls = RadioButton.createToggle("Calls", bg);
chats.setUIID("SubTitle");
status.setUIID("SubTitle");
calls.setUIID("SubTitle");
RadioButton[] buttons = new RadioButton[] {
camera, chats, status, calls
};
TableLayout tb = new TableLayout(2, 4);
Container toggles = new Container(tb);
MainForm
These are the tabs for selecting camera, chat etc… They are just toggle buttons which in this case are classified as radio buttons. This means only one of the radio
buttons within the button group can be selected. We give them all the SubTitle UIID which again I’ll discuss in the next lesson.
35. chats.setUIID("SubTitle");
status.setUIID("SubTitle");
calls.setUIID("SubTitle");
RadioButton[] buttons = new RadioButton[] {
camera, chats, status, calls
};
TableLayout tb = new TableLayout(2, 4);
Container toggles = new Container(tb);
toggles.add(tb.createConstraint().widthPercentage(10), camera);
toggles.add(tb.createConstraint().widthPercentage(30), chats);
toggles.add(tb.createConstraint().widthPercentage(30), status);
toggles.add(tb.createConstraint().widthPercentage(30), calls);
Label whiteLine = new Label("", "SubTitleUnderline");
whiteLine.setShowEvenIfBlank(true);
toggles.add(tb.createConstraint(1, 1) ,whiteLine);
final Container finalTitle = titleArea;
for(int iter = 0 ; iter < buttons.length ; iter++) {
final int current = iter;
buttons[iter].addActionListener(e -> {
tabs.setSelectedIndex(current);
MainForm
We use table layout to place the tabs into the UI, this allows us to explicitly determine the width of the columns.
Notice that the table layout has 2 rows…
36. TableLayout tb = new TableLayout(2, 4);
Container toggles = new Container(tb);
toggles.add(tb.createConstraint().widthPercentage(10), camera);
toggles.add(tb.createConstraint().widthPercentage(30), chats);
toggles.add(tb.createConstraint().widthPercentage(30), status);
toggles.add(tb.createConstraint().widthPercentage(30), calls);
Label whiteLine = new Label("", "SubTitleUnderline");
whiteLine.setShowEvenIfBlank(true);
toggles.add(tb.createConstraint(1, 1) ,whiteLine);
final Container finalTitle = titleArea;
for(int iter = 0 ; iter < buttons.length ; iter++) {
final int current = iter;
buttons[iter].addActionListener(e -> {
tabs.setSelectedIndex(current);
whiteLine.remove();
toggles.add(tb.createConstraint(1, current) ,whiteLine);
finalTitle.setPreferredSize(null);
toggles.animateLayout(100);
});
}
MainForm
The second row of the table contains a white line using the “SideTitleUnderline” UIID. This line is placed in row one and column one so it’s under the chats entry. When
we move between the tabs this underline needs to animate to the new position.
37. Label whiteLine = new Label("", "SubTitleUnderline");
whiteLine.setShowEvenIfBlank(true);
toggles.add(tb.createConstraint(1, 1) ,whiteLine);
final Container finalTitle = titleArea;
for(int iter = 0 ; iter < buttons.length ; iter++) {
final int current = iter;
buttons[iter].addActionListener(e -> {
tabs.setSelectedIndex(current);
whiteLine.remove();
toggles.add(tb.createConstraint(1, current) ,whiteLine);
finalTitle.setPreferredSize(null);
toggles.animateLayout(100);
});
}
tabs.addSelectionListener((oldSelected, newSelected) -> {
if(!buttons[newSelected].isSelected()) {
finalTitle.setPreferredSize(null);
buttons[newSelected].setSelected(true);
whiteLine.remove();
toggles.add(tb.createConstraint(1, newSelected) ,whiteLine);
toggles.animateLayout(100);
MainForm
Here we bind listeners to all the four buttons mapping to each tab.
38. Label whiteLine = new Label("", "SubTitleUnderline");
whiteLine.setShowEvenIfBlank(true);
toggles.add(tb.createConstraint(1, 1) ,whiteLine);
final Container finalTitle = titleArea;
for(int iter = 0 ; iter < buttons.length ; iter++) {
final int current = iter;
buttons[iter].addActionListener(e -> {
tabs.setSelectedIndex(current);
whiteLine.remove();
toggles.add(tb.createConstraint(1, current) ,whiteLine);
finalTitle.setPreferredSize(null);
toggles.animateLayout(100);
});
}
tabs.addSelectionListener((oldSelected, newSelected) -> {
if(!buttons[newSelected].isSelected()) {
finalTitle.setPreferredSize(null);
buttons[newSelected].setSelected(true);
whiteLine.remove();
toggles.add(tb.createConstraint(1, newSelected) ,whiteLine);
toggles.animateLayout(100);
MainForm
When a button is clicked we select the appropriate tab
39. Label whiteLine = new Label("", "SubTitleUnderline");
whiteLine.setShowEvenIfBlank(true);
toggles.add(tb.createConstraint(1, 1) ,whiteLine);
final Container finalTitle = titleArea;
for(int iter = 0 ; iter < buttons.length ; iter++) {
final int current = iter;
buttons[iter].addActionListener(e -> {
tabs.setSelectedIndex(current);
whiteLine.remove();
toggles.add(tb.createConstraint(1, current) ,whiteLine);
finalTitle.setPreferredSize(null);
toggles.animateLayout(100);
});
}
tabs.addSelectionListener((oldSelected, newSelected) -> {
if(!buttons[newSelected].isSelected()) {
finalTitle.setPreferredSize(null);
buttons[newSelected].setSelected(true);
whiteLine.remove();
toggles.add(tb.createConstraint(1, newSelected) ,whiteLine);
toggles.animateLayout(100);
MainForm
The next two lines implement the underline animation effect that we see when we click a button. Notice how the line animates to the right tab button.
To achieve this we remove the current white line and add it back to the toggle container in the right position.
40. Label whiteLine = new Label("", "SubTitleUnderline");
whiteLine.setShowEvenIfBlank(true);
toggles.add(tb.createConstraint(1, 1) ,whiteLine);
final Container finalTitle = titleArea;
for(int iter = 0 ; iter < buttons.length ; iter++) {
final int current = iter;
buttons[iter].addActionListener(e -> {
tabs.setSelectedIndex(current);
whiteLine.remove();
toggles.add(tb.createConstraint(1, current) ,whiteLine);
finalTitle.setPreferredSize(null);
toggles.animateLayout(100);
});
}
tabs.addSelectionListener((oldSelected, newSelected) -> {
if(!buttons[newSelected].isSelected()) {
finalTitle.setPreferredSize(null);
buttons[newSelected].setSelected(true);
whiteLine.remove();
toggles.add(tb.createConstraint(1, newSelected) ,whiteLine);
toggles.animateLayout(100);
MainForm
We reset the height of the title in case it was shrunk during scrolling
41. Label whiteLine = new Label("", "SubTitleUnderline");
whiteLine.setShowEvenIfBlank(true);
toggles.add(tb.createConstraint(1, 1) ,whiteLine);
final Container finalTitle = titleArea;
for(int iter = 0 ; iter < buttons.length ; iter++) {
final int current = iter;
buttons[iter].addActionListener(e -> {
tabs.setSelectedIndex(current);
whiteLine.remove();
toggles.add(tb.createConstraint(1, current) ,whiteLine);
finalTitle.setPreferredSize(null);
toggles.animateLayout(100);
});
}
tabs.addSelectionListener((oldSelected, newSelected) -> {
if(!buttons[newSelected].isSelected()) {
finalTitle.setPreferredSize(null);
buttons[newSelected].setSelected(true);
whiteLine.remove();
toggles.add(tb.createConstraint(1, newSelected) ,whiteLine);
toggles.animateLayout(100);
MainForm
And we finally update the layout with an animation which performs the actual line move animation
42. whiteLine.remove();
toggles.add(tb.createConstraint(1, current) ,whiteLine);
finalTitle.setPreferredSize(null);
toggles.animateLayout(100);
});
}
tabs.addSelectionListener((oldSelected, newSelected) -> {
if(!buttons[newSelected].isSelected()) {
finalTitle.setPreferredSize(null);
buttons[newSelected].setSelected(true);
whiteLine.remove();
toggles.add(tb.createConstraint(1, newSelected) ,whiteLine);
toggles.animateLayout(100);
}
});
bindFolding(titleArea, titleArea.getPreferredH(), scrollables);
return BoxLayout.encloseY(titleArea, toggles);
}
private void bindFolding(Container titleArea, int titleHeight,
Container... scrollables) {
MainForm
The previous block updated the tab selection when we select a button. This block does the opposite. It updates the button selection when we swipe the tabs. It uses a
tab selection listener
46. tabs.addSelectionListener((oldSelected, newSelected) -> {
if(!buttons[newSelected].isSelected()) {
finalTitle.setPreferredSize(null);
buttons[newSelected].setSelected(true);
whiteLine.remove();
toggles.add(tb.createConstraint(1, newSelected) ,whiteLine);
toggles.animateLayout(100);
}
});
bindFolding(titleArea, titleArea.getPreferredH(), scrollables);
return BoxLayout.encloseY(titleArea, toggles);
}
private void bindFolding(Container titleArea, int titleHeight,
Container... scrollables) {
addPointerReleasedListener(e -> {
if(titleArea.getHeight() != titleHeight &&
titleArea.getHeight() != 0) {
if(titleHeight - titleArea.getHeight() > titleHeight / 2) {
titleArea.setPreferredSize(null);
MainForm
Finally we perform the animation of moving the underline between the tabs. Notice that this is almost identical to the previous animation code only in this case it’s
triggered by a dragging of the tabs instead of the button click event.
47. tabs.addSelectionListener((oldSelected, newSelected) -> {
if(!buttons[newSelected].isSelected()) {
finalTitle.setPreferredSize(null);
buttons[newSelected].setSelected(true);
whiteLine.remove();
toggles.add(tb.createConstraint(1, newSelected) ,whiteLine);
toggles.animateLayout(100);
}
});
bindFolding(titleArea, titleArea.getPreferredH(), scrollables);
return BoxLayout.encloseY(titleArea, toggles);
}
private void bindFolding(Container titleArea, int titleHeight,
Container... scrollables) {
addPointerReleasedListener(e -> {
if(titleArea.getHeight() != titleHeight &&
titleArea.getHeight() != 0) {
if(titleHeight - titleArea.getHeight() > titleHeight / 2) {
titleArea.setPreferredSize(null);
MainForm
The last two lines in this method are the bindFolding call which we will discuss soon and the box layout Y which wraps the two containers as one.
48. bindFolding(titleArea, titleArea.getPreferredH(), scrollables);
return BoxLayout.encloseY(titleArea, toggles);
}
private void bindFolding(Container titleArea, int titleHeight,
Container... scrollables) {
addPointerReleasedListener(e -> {
if(titleArea.getHeight() != titleHeight &&
titleArea.getHeight() != 0) {
if(titleHeight - titleArea.getHeight() > titleHeight / 2) {
titleArea.setPreferredSize(null);
} else {
titleArea.setPreferredH(0);
}
titleArea.getParent().animateLayout(100);
}
});
for(Container c : scrollables) {
c.addScrollListener((scrollX, scrollY, oldscrollX,
oldscrollY) -> {
// special case for tensile drag
if(scrollY <= 10) {
titleArea.setPreferredSize(null);
MainForm
The bindFolding method implements this animation of folding title. It's implemented by tracking pointer drag events and shrinking the title.
49. bindFolding(titleArea, titleArea.getPreferredH(), scrollables);
return BoxLayout.encloseY(titleArea, toggles);
}
private void bindFolding(Container titleArea, int titleHeight,
Container... scrollables) {
addPointerReleasedListener(e -> {
if(titleArea.getHeight() != titleHeight &&
titleArea.getHeight() != 0) {
if(titleHeight - titleArea.getHeight() > titleHeight / 2) {
titleArea.setPreferredSize(null);
} else {
titleArea.setPreferredH(0);
}
titleArea.getParent().animateLayout(100);
}
});
for(Container c : scrollables) {
c.addScrollListener((scrollX, scrollY, oldscrollX,
oldscrollY) -> {
// special case for tensile drag
if(scrollY <= 10) {
titleArea.setPreferredSize(null);
MainForm
When the pointer is released we need to check if the title shrunk enough to minimize or not enough so it would go back to the full size.
50. bindFolding(titleArea, titleArea.getPreferredH(), scrollables);
return BoxLayout.encloseY(titleArea, toggles);
}
private void bindFolding(Container titleArea, int titleHeight,
Container... scrollables) {
addPointerReleasedListener(e -> {
if(titleArea.getHeight() != titleHeight &&
titleArea.getHeight() != 0) {
if(titleHeight - titleArea.getHeight() > titleHeight / 2) {
titleArea.setPreferredSize(null);
} else {
titleArea.setPreferredH(0);
}
titleArea.getParent().animateLayout(100);
}
});
for(Container c : scrollables) {
c.addScrollListener((scrollX, scrollY, oldscrollX,
oldscrollY) -> {
// special case for tensile drag
if(scrollY <= 10) {
titleArea.setPreferredSize(null);
MainForm
If the title area height is different from the original height it means we are in the process of shrinking the title.
51. bindFolding(titleArea, titleArea.getPreferredH(), scrollables);
return BoxLayout.encloseY(titleArea, toggles);
}
private void bindFolding(Container titleArea, int titleHeight,
Container... scrollables) {
addPointerReleasedListener(e -> {
if(titleArea.getHeight() != titleHeight &&
titleArea.getHeight() != 0) {
if(titleHeight - titleArea.getHeight() > titleHeight / 2) {
titleArea.setPreferredSize(null);
} else {
titleArea.setPreferredH(0);
}
titleArea.getParent().animateLayout(100);
}
});
for(Container c : scrollables) {
c.addScrollListener((scrollX, scrollY, oldscrollX,
oldscrollY) -> {
// special case for tensile drag
if(scrollY <= 10) {
titleArea.setPreferredSize(null);
MainForm
In that case we need to decide whether the process is closer to the finish line or to the start
52. bindFolding(titleArea, titleArea.getPreferredH(), scrollables);
return BoxLayout.encloseY(titleArea, toggles);
}
private void bindFolding(Container titleArea, int titleHeight,
Container... scrollables) {
addPointerReleasedListener(e -> {
if(titleArea.getHeight() != titleHeight &&
titleArea.getHeight() != 0) {
if(titleHeight - titleArea.getHeight() > titleHeight / 2) {
titleArea.setPreferredSize(null);
} else {
titleArea.setPreferredH(0);
}
titleArea.getParent().animateLayout(100);
}
});
for(Container c : scrollables) {
c.addScrollListener((scrollX, scrollY, oldscrollX,
oldscrollY) -> {
// special case for tensile drag
if(scrollY <= 10) {
titleArea.setPreferredSize(null);
MainForm
If it’s less than half way to the height of the title we reset the preferred size of the title area. That means the title area will take up it’s original preferred size and grow back
to full height
53. bindFolding(titleArea, titleArea.getPreferredH(), scrollables);
return BoxLayout.encloseY(titleArea, toggles);
}
private void bindFolding(Container titleArea, int titleHeight,
Container... scrollables) {
addPointerReleasedListener(e -> {
if(titleArea.getHeight() != titleHeight &&
titleArea.getHeight() != 0) {
if(titleHeight - titleArea.getHeight() > titleHeight / 2) {
titleArea.setPreferredSize(null);
} else {
titleArea.setPreferredH(0);
}
titleArea.getParent().animateLayout(100);
}
});
for(Container c : scrollables) {
c.addScrollListener((scrollX, scrollY, oldscrollX,
oldscrollY) -> {
// special case for tensile drag
if(scrollY <= 10) {
titleArea.setPreferredSize(null);
MainForm
Otherwise we set the title area height to 0 so it’s effectively hidden
54. bindFolding(titleArea, titleArea.getPreferredH(), scrollables);
return BoxLayout.encloseY(titleArea, toggles);
}
private void bindFolding(Container titleArea, int titleHeight,
Container... scrollables) {
addPointerReleasedListener(e -> {
if(titleArea.getHeight() != titleHeight &&
titleArea.getHeight() != 0) {
if(titleHeight - titleArea.getHeight() > titleHeight / 2) {
titleArea.setPreferredSize(null);
} else {
titleArea.setPreferredH(0);
}
titleArea.getParent().animateLayout(100);
}
});
for(Container c : scrollables) {
c.addScrollListener((scrollX, scrollY, oldscrollX,
oldscrollY) -> {
// special case for tensile drag
if(scrollY <= 10) {
titleArea.setPreferredSize(null);
MainForm
Regardless of the choice we made above we show it using an animation
55. titleArea.setPreferredH(0);
}
titleArea.getParent().animateLayout(100);
}
});
for(Container c : scrollables) {
c.addScrollListener((scrollX, scrollY, oldscrollX,
oldscrollY) -> {
// special case for tensile drag
if(scrollY <= 10) {
titleArea.setPreferredSize(null);
return;
}
int diff = oldscrollY - scrollY;
if(diff > 0) {
if(titleArea.getHeight() < titleHeight) {
titleArea.setPreferredH(Math.min(titleHeight,
titleArea.getPreferredH() + diff));
titleArea.setHeight(titleArea.getPreferredH());
titleArea.getParent().revalidate();
}
} else {
if(diff < 0) {
if(titleArea.getHeight() > 0) {
MainForm
We detect the drag operation by binding a scroll listener to the three scrollable containers. I could have used pointer dragged listeners but they might generate too much
noise that isn't applicable.
56. titleArea.setPreferredH(0);
}
titleArea.getParent().animateLayout(100);
}
});
for(Container c : scrollables) {
c.addScrollListener((scrollX, scrollY, oldscrollX,
oldscrollY) -> {
// special case for tensile drag
if(scrollY <= 10) {
titleArea.setPreferredSize(null);
return;
}
int diff = oldscrollY - scrollY;
if(diff > 0) {
if(titleArea.getHeight() < titleHeight) {
titleArea.setPreferredH(Math.min(titleHeight,
titleArea.getPreferredH() + diff));
titleArea.setHeight(titleArea.getPreferredH());
titleArea.getParent().revalidate();
}
} else {
if(diff < 0) {
if(titleArea.getHeight() > 0) {
MainForm
I chose to make a special case for the tensile drag effect. The tensile effect is the iOS scroll behavior where a drag extends beyond the top most part then bounces back
like a rubber band. This can cause a problem with the logic below so I decided that any scroll position above 10 pixels should probably show the full title
57. if(scrollY <= 10) {
titleArea.setPreferredSize(null);
return;
}
int diff = oldscrollY - scrollY;
if(diff > 0) {
if(titleArea.getHeight() < titleHeight) {
titleArea.setPreferredH(Math.min(titleHeight,
titleArea.getPreferredH() + diff));
titleArea.setHeight(titleArea.getPreferredH());
titleArea.getParent().revalidate();
}
} else {
if(diff < 0) {
if(titleArea.getHeight() > 0) {
titleArea.setPreferredH(Math.max(0,
titleArea.getPreferredH() + diff));
titleArea.setHeight(titleArea.getPreferredH());
titleArea.getParent().revalidate();
}
}
}
});
MainForm
Now that all of that is out of the way we can calculate the direction of the scroll and shrink/grow the title area appropriately
58. if(scrollY <= 10) {
titleArea.setPreferredSize(null);
return;
}
int diff = oldscrollY - scrollY;
if(diff > 0) {
if(titleArea.getHeight() < titleHeight) {
titleArea.setPreferredH(Math.min(titleHeight,
titleArea.getPreferredH() + diff));
titleArea.setHeight(titleArea.getPreferredH());
titleArea.getParent().revalidate();
}
} else {
if(diff < 0) {
if(titleArea.getHeight() > 0) {
titleArea.setPreferredH(Math.max(0,
titleArea.getPreferredH() + diff));
titleArea.setHeight(titleArea.getPreferredH());
titleArea.getParent().revalidate();
}
}
}
});
MainForm
If the diff is larger than 0 then the title area should grow. We’re setting the preferred height to the diff plus the preferred height but we make sure not to cross the
maximum height value. We then revalidate to refresh the UI
59. }
int diff = oldscrollY - scrollY;
if(diff > 0) {
if(titleArea.getHeight() < titleHeight) {
titleArea.setPreferredH(Math.min(titleHeight,
titleArea.getPreferredH() + diff));
titleArea.setHeight(titleArea.getPreferredH());
titleArea.getParent().revalidate();
}
} else {
if(diff < 0) {
if(titleArea.getHeight() > 0) {
titleArea.setPreferredH(Math.max(0,
titleArea.getPreferredH() + diff));
titleArea.setHeight(titleArea.getPreferredH());
titleArea.getParent().revalidate();
}
}
}
});
}
}
MainForm
A negative diff is practically identical with the exception of making it 0 or larger instead of using the minimum value we use the max method. And with that the title folding
is implemented
60. }
} else {
if(diff < 0) {
if(titleArea.getHeight() > 0) {
titleArea.setPreferredH(Math.max(0,
titleArea.getPreferredH() + diff));
titleArea.setHeight(titleArea.getPreferredH());
titleArea.getParent().revalidate();
}
}
}
});
}
}
@Override
protected void initGlobalToolbar() {
Toolbar tb = new Toolbar();
tb.setTitleCentered(false);
setToolbar(tb);
}
}
MainForm
The one last method in the class is this. We use a custom toolbar that disables centered title. The centered title places the title area in the center of the UI and it doesn’t
work for folding. We need to disable it for this form so the title acts correctly on iOS.