The document provides instructions for creating a banner in PowerPoint:
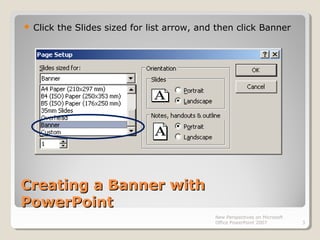
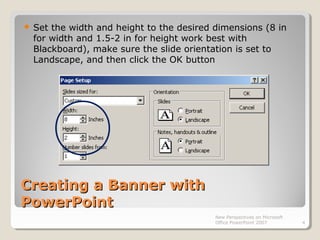
1. Start a new PowerPoint presentation and select the banner slide size and landscape orientation.
2. Adjust the title and subtitle placeholders and fonts so the text fits in the banner.
3. Add text, graphics, and other content to the banner.
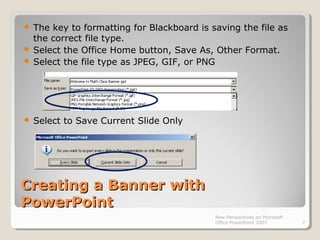
4. Save the banner slide as a JPEG, GIF, or PNG file.