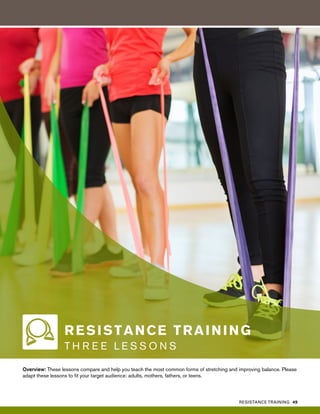
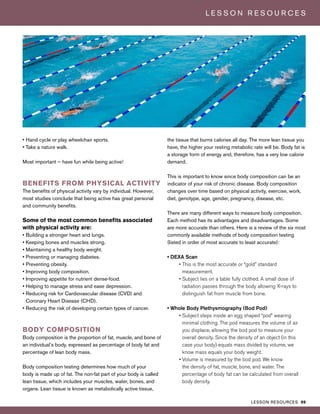
A N A C T I V E L I F E S T Y L E
AUTHORS
Joshua LeFevre, Food $ense Student Intern
Mateja Savoie Roskos, Food $ense Evaluation Coordinator
EDITORS/CONTRIBUTORS
Heidi LeBlanc, Food $ense Director, Extension Associate Professor, MS, CFCS
Rashel Clark, Student Intern
Gayla M. Johnson, Food $ense Payroll/Human Resources/Travel Coordinator
Jocelin Gibson, Food $ense Media, Communications, & Technology Coordinator
Julene Reese, USU Extension Public Relations Specialist
Donna Falkenborg, USU Extension Editor & Writer
Tayla Lambright, Food $ense Nutrition Education Assistant
GRAPHIC DESIGN & LAYOUT
Olivia Yeip, USU Extension Graphic Designer
FN/Food$ense/2015-01pr
Copyright ©2015 USU Extension
This material was funded by USDA’s Supplemental Nutrition Assistance Program – SNAP. The Supplemental Nutrition Assistance Program (SNAP) provides nutrition assistance
to people with low income. It can help you buy nutritious foods for a better diet. To find out more, contact 1-800-221-5689 or visit online at http://www.fns.usda.gov/snap/. In
accordance with Federal Law and U.S. Department of Agriculture policy, this institution is prohibited from discriminating on the basis of race, color, national origin, sex, age,
religion, political beliefs or disability. To file a complaint of discrimination, write USDA, Director, Office of Civil Rights, 1400 Independence Avenue, S.W., Washington, D.C.
20250-9410 or call (800)795-3572.
Utah State University is committed to providing an environment free from harassment and other forms of illegal discrimination based on race, color, religion, sex, national origin,
age (40 and older), disability, and veteran’s status. USU’s policy also prohibits discrimination on the basis of sexual orientation in employment and academic related practices
and decisions. Utah State University employees and students cannot, because of race, color, religion, sex, national origin, age, disability, or veteran’s status, refuse to hire;
discharge; promote; demote; terminate; discriminate in compensation; or discriminate regarding terms, privileges, or conditions of employment, against any person otherwise
qualified. Employees and students also cannot discriminate in the classroom, residence halls, or in on/off campus, USU-sponsored events and activities. This publication is
issued in furtherance of Cooperative Extension work, acts of May 8 and June 30, 1914, in cooperation with the U.S. Department of Agriculture, Kenneth L. White, Vice President
for Extension and Agriculture, Utah State University.
The U.S. Department of Agriculture (USDA) prohibits discrimination against its customers, employees, and applicants for employment on the bases of race, color, national
origin, age, disability, sex, gender identity, religion, reprisal and, where applicable, political beliefs, marital status, familial or parental status, sexual orientation, or all or part of
an individual’s income is derived from any public assistance program, or protected genetic information in employment or in any program or activity conducted or funded by the
Department. (Not all prohibited bases will apply to all programs and/or employment activities.)
If you wish to file a Civil Rights program complaint of discrimination, complete the USDA Program Discrimination Complaint Form, found online at http://www.ascr.usda.gov/
complaint_filing_cust.html, or at any USDA office, or call (866) 632-9992 to request the form.You may also write a letter containing all of the information requested in the form.
Send your completed complaint form or letter to us by mail at U.S. Department of Agriculture, Director, Office of Adjudication, 1400 Independence Avenue, S.W., Washington,
D.C. 20250-9410, by fax (202) 690-7442 or email at program.intake@usda.gov.
Individuals who are deaf, hard of hearing, or have speech disabilities and wish to file either an EEO or program complaint please contact USDA through the Federal Relay Service
at (800) 877-8339 or (800) 845-6136 (in Spanish).
Persons with disabilities who wish to file a program complaint, please see information above on how to contact us by mail directly or by email. If you require alternative means
of communication for program information (e.g., Braille, large print, audiotape, etc.) please contact USDA’s TARGET Center at (202) 720-2600 (voice and TDD).
USDA is an equal opportunity provider and employer.
T A B L E O F
C O N T E N T S
INTRODUCTION
PHYSICAL ACTIVITY
PRE-ASSESSMENT
STRETCHING
BODY
WEIGHT
AEROBICS
RESISTANCE
TRAINING
STRENGTH
TRAINING
CIRCUIT
TRAINING
APPLIED
LESSONS
POST PHYSICAL
ASSESSMENT
LESSON
RESOURCES
3
1
7
41
61
77
25
49
69
89
93
TO THE NEA
America, we have a problem! How did our nation get here?
We have more overweight and obese people in our country
than people of normal weight. For the first time in American
history, our nation’s children will have a shorter lifespan than
their parents because they are growing up surrounded by
the diseases of affluence. Our cushy lifestyle of office jobs,
motorized vehicles and convenience stores have led us to a
state of severe physical inactivity. We now perceive physical
activity as “extra” work and something that we must make
time for to fit into our lives because we are “too busy.” This is
a false assumption; we go through life missing the minutes
and activities that will keep us active AND healthy. Americans
have come to believe and even expect that we will deal with
diseases such as high blood pressure, high cholesterol, heart
disease, and diabetes and there is nothing we can do about
it. But that way of thinking is wrong. We can do something
about it. We can change the beliefs and the behaviors that
got us to this point. We can bypass the 1-minute drive to the
convenience store and take a walk. We can stop eating during
commercial breaks and do a few push-ups. We can stop
playing sports on our gaming system and go outside to play.
All this can be done on tight schedules and limited budgets.
We can move a little more. In fact, we can move a LOT more.
We can change our future as we change our beliefs and our
behaviors—one activity at a time!
TEACHING TIPS
The “Food $ense Creates” curriculum focuses on giving
participants the courage and confidence to become physically
active, no matter their current health level. As they participate
in this series, they will learn the basics of how to develop an
active lifestyle without spending lots of money. The curriculum
should be taught as a series where participants complete
several physical activity sections. The lessons in each section
should be taught in order. This book provides an overview for
many types of physical activity.
This curriculum is written in outline form with a suggested
order and key words to help you remember what to discuss;
however, you have the liberty to decide how to teach the
material. This method will allow you to develop your own
teaching style and to have the freedom to just be you!
You should provide a participant friendly and “hands-on”
learning environment. Involve participants as much as possible
in the physical activities and explanation of concepts or
benefits. Adults feel more engaged in learning when they are
allowed to share what they already know about a subject.
They should be invited to contribute to group discussions and
should be encouraged to participate in the class activities.
This will give them experience and confidence to go home and
create a personal or family physical activity routine. They will
be more willing to try new things when given some ownership
in the lesson. The more invested they become in the lesson,
the more they will learn.
I N T R O D U C T I O N
INTRODUCTION 1
2 INTRODUCTION
I N T R O D U C T I O N
There are significant concepts or habits taught in every lesson
in this curriculum. It will be important for you to understand
the habits well so you can discuss them from memory as
they come up in the lesson. You must become an example of
physical activity and consistency. This will help demonstrate
the importance of creating a healthy lifestyle. These habits
are important. Please do not make the mistake of thinking
that if you cover a concept once, you don’t need to talk about
it again. Review the habits by asking participants to give
feedback as they practice them at home. Allow class members
to discuss their successes and frustrations with you and with
each other. Ask them to provide solutions to their problems
and work through issues together.
Be supportive and encouraging. Make sure you are positive
about even the smallest step in the right direction. The more
participants discuss the reasons to try something new and
the more they understand how to overcome obstacles and
barriers, the more positive habits and healthy behaviors they
will be willing and able to incorporate into their daily lives.
Be sensitive to your participants and their current conditions
and reality. This curriculum focuses extensively on increasing
physical activity, when possible. However, some individuals
may struggle more than others. Do not make them feel
awkward or embarrassed about their limitations.
Overview: This section is meant to create a baseline for personal awareness and comparison for participants to measure the
change from the beginning to the end of the program.
PHYSICAL ACTIVITY/ PRE-
ASSESSMENT O N E L E S S O N
PHYSICAL ACTIVITY PRE-ASSESSMENT 3
4 PHYSICAL ACTIVITY PRE-ASSESSMENT
P H Y S I C A L A C T I V I T Y P R E - A S S E S S M E N T
Introduction – This lesson teaches how to do a personal physical assessment. Please review points a-c and include
d-g as applicable.
A. Choose one physical education lesson (from the lesson resources in the back) to teach before doing this
activity. Then ask questions such as:
i. Why is physical activity important?
ii. When was a time you were very active? How did you feel?
B. Discuss the necessity of physical activity
C. Follow up on previous activities or assignments
D. Define the difference between physical activity and exercise
i. Physical activity
• Bodily movement produced by skeletal muscles that requires energy expenditure such as walking to work,
doing chores, etc.
ii. Exercise
• Activity requiring physical effort, carried out especially to sustain or improve health and fitness. Typically,
exercise is a planned activity to enhance health or meet our goals.
E. Discuss the importance of positive body image
i. Body image is a term used to describe how people, men or women, feel about themselves and their body. This
includes what they see when they look in a mirror or when they think of themselves in their mind. Body image
includes how people feel about their height, weight, appearance, and overall, how they feel about their body.
People with a positive body image have an accurate perception of what they look like and demonstrate happiness
and confidence in their body. Many people struggle with negative body image, meaning they have a distorted or
negative sense of their body and/or appearance.
F. Discuss the components of maintaining physical activity
i. How to set goals
ii. The importance of regular and consistent activity
iii. The benefit of personal responsibility
iv. The benefit of group physical activity
G. Discuss how to track physical activity
i. Personal Activity Journal (personal)
ii. Local (website)
iii. Statewide (website)
CREATE a personal assessment (adult, etc.)
A. Equipment needed
i. Physical activity log to record results
ii. Scale
GOAL: Assess and obtain participants’ current fitness level.
BEST FOR: All
LESSON OBJECTIVES
• Become aware of one’s current physical well-being
• Measure vitals
• Instill the importance of physical activity
1
2
PHYSICAL ACTIVITY PRE-ASSESSMENT 5
P H Y S I C A L A C T I V I T Y P R E - A S S E S S M E N T
iii. Measuring tape
iv. Stopwatch
v. Blood pressure cuff
B. Steps (demo)
i. Write out goal
ii. Exercise plan
iii. Fill out personal health report
iv. Collect waivers
v. Take measurements
vi. Input results into a fitness journal
Practice
A. Write physical activity goal
B. Exercise plan
C. Take resting heart rate
D. Height/weight
E. BMI
F. Waist circumference
G. Blood pressure
H. Presidential tests
i. Sit and reach or V-sit and reach
ii. 1 mile run
iii. Pull-up test
iv. Curl-ups
v. Shuttle run
Incorporate into your daily life
A. Class
B. School
C. Work
D. Personal life
Conclusion and assignment
A. Hand out fitness journal/tracker with information from this session
B. Ask participants to track how many minutes of moderate or vigorous exercise they do within the next week
Update fitness plan/record and answer questions
Schedule/remind of next appointment
5
3
4
7
6
For this lesson, reference the muscular
system handout shown above. For copies of
this handout, please visit: extension.usu.edu/
fscreate/htm/staff-menu. You can find the
handouts under Lessons for Adults.
6 PHYSICAL ACTIVITY PRE-ASSESSMENT
P H Y S I C A L A C T I V I T Y P R E - A S S E S S M E N T
Trapezius
Deltoid
Rhomboideus major
Triceps
Latissimus dorsi
Gluteus medius
Gluteus maximus
Biceps femoris
Semitendinosus
Semimembranosus
Gastrocnemuis
Peroneus brevis
Masseter
Orbicularis oris
Sternomastoid
Deltoid
Pectoralis major
Latissimus dorsi
Serratus anterior
Biceps
Rectus abdominis
Brachioradialis
Flexor carpi radialis
Tensor fasciae latae
Pectineus
Adductor longus
Gracilis
Sartorius
Rectus femoris
Vastus lateralis
Vastus medialis
Peroneus longus
Tibialis anterior
Extensor digitorum longus
Soleus
STRETCHING EXERCISES
The muscular system is an organ system consisting of skeletal, smooth, and cardiac muscles. It permits movement of the
body, maintains posture, and circulates blood throughout the body. The muscular system in vertebrates is controlled through
the nervous system, although some muscles (such as the cardiac muscle) can be completely autonomous. Together with the
skeletal system it forms the musculoskeletal system, which is responsible for movement of the human body.
Orbicularis aculi
Overview: These lessons compare and help you teach the most common forms of stretching and improving balance. Please
adapt these lessons to fit your target audience: adults, mothers, fathers, or teens.
STRETCHING
T H R E E L E S S O N S
STRETCHING 7
8 STRETCHING
S T R E T C H I N G
Introduction – This lesson teaches how to perform basic static and dynamic stretches. Please review points a-c and
include d-g as applicable.
A. Choose one physical education lesson (from the lesson resources in the back) to teach before doing this
activity. Then ask questions such as:
i. Why is physical activity important?
ii. When was a time you were very active? How did you feel?
B. Discuss the necessity of physical activity
C. Follow up on previous activities or assignments
D. Define the difference between physical activity and exercise
i. Physical activity
• Bodily movement produced by skeletal muscles that requires energy expenditure, such as walking to work,
doing chores, etc.
ii. Exercise
• Activity requiring physical effort, carried out especially to sustain or improve health and fitness. Typically,
exercise is a planned activity to enhance health or meet our goals.
E. Discuss the importance of positive body image
i. Body image is a term used to describe how people, men or women, feel about themselves and their body. This
includes what they see when they look in a mirror or when they think of themselves in their mind. Body image
includes how people feel about their height, weight, appearance, and overall, how people feel about their body.
People with a positive body image have an accurate perception of what they look like and demonstrate happiness
and confidence in their body. Many people struggle with negative body image, meaning they have a distorted or
negative sense of their body and/or appearance.
F. Discuss the components of maintaining physical activity
i. How to set goals
ii. The importance of regular and consistent activity
iii. The benefit of personal responsibility
iv. The benefit of group physical activity
G. Discuss how to track physical activity
i. Personal activity Journal (personal)
ii. Local (website)
iii. Statewide (website)
GOAL: Understand the importance of stretching and its benefits.
BEST FOR: All
LESSON OBJECTIVES
• Know the difference between dynamic and static stretching
• Learn the importance of dynamic stretching
• Increase flexibility
• Learn the benefits of stretching
• Gain the knowledge to stretch on your own
1
DYNAMIC VS. STATIC STRETCHING
STRETCHING 9
S T R E T C H I N G
2
Benefits of dynamic and static stretching
A. Dynamic Stretching
i. Decrease muscle stiffness
ii. Improve speed
iii. Improve agility
iv. Increase flexibility
v. Increase mobility
B. Static Stretching
i. Increase flexibility
ii. Increase mobility
iii. Prevent injury
v. Improve gait
CREATE a stretch routine
A. Equipment needed (all optional)
i. Stretch band
ii. Broomstick, PVC pipe or similar
B. Steps (demo)
i. Demonstrate all dynamic stretches to be taught
ii. Give an example of static stretching
Practice (do)
A. Write goal
B. Plan
C. Perform five to eight dynamic stretches
Incorporate into your daily life
A. Class
B. School
C. Work
D. Personal life
Conclusion and assignment
A. Stretch at least 5-10 min a day
B. Track your physical activity
C. Write in your journal how your body responds to dynamic and static stretches
Update fitness plan/record and answer questions
Schedule/remind of next appointment
5
3
4
7
8
6
For this lesson, reference the stretching handout
shown above. For copies of this handout, please
visit: extension.usu.edu/fscreate/htm/staff-
menu. You can find the handouts under Lessons
for Adults.
10 STRETCHING
S T R E T C H I N G
STRETCHES
DYNAMIC STRETCHING
• Dynamic stretching consists of controlled leg and arm swings that take you (gently!) to the limits of your range of motion. Ballistic
stretches involve trying to force a part of the body beyond its range of motion. In dynamic stretches, there are no bounces or
“jerky” movements. An example of dynamic stretching would be slow, controlled leg swings, arm swings, or torso twists.
• This is most beneficial for warming up BEFORE exercising and to increase one’s range of motion.
HURDLER’S KNEE RAISE
While moving forward, raise your leg as if
stepping over an object just below waist
height, then return to normal walking stride.
Repeat 10 times. (For groin muscles.)
MULTI-PLANER LUNGES
Spread legs wide and lean side to side.
Repeat 10 times. (For hip flexors
and obliques.)
INCH WORM
Stand up, legs together. Bend over, stretch
hands in front and place them on ground.
Walk your feet toward your hands, then
back. Repeat 10 times. (For back and
hamstring muscles.)
TIP-TOE WALKING
Walk on toes for 45 sec. (For lower leg,
calf and foot muscles.)
LEG SWINGS
With one arm outstretched to the side
and the other against the wall, swing your
outside leg in front and then behind you.
Repeat 10 times. (For hip flexors.)
HEEL-UPS
Rapidly kick heels toward
buttocks while moving forward.
(For quadriceps.)
SCORPION
Lie on your stomach with arms outstretched
and toes pointed. Kick left foot toward right
arm and vice versa. Repeat 10 times. (For
quadriceps, back and abdominals.)
PRISONER SQUAT
Place feet at shoulder width apart and
place hands behind head. Then sit down as
if you were going to sit on a chair. Repeat
10 times. (For lower body muscles.)
WALKING LUNGES
Walk forward leaving one foot in place
and bring the other to a 90 degree angle
in front of you. Alternate legs. Repeat 10
times. (For hips and lower leg.)
AIRPLANES
Stretch your arms out straight to the
sides and spin them in circles. Alternate
directions. Do for 45 sec. (For rotator cuff
and shoulders.)
STRETCHING 11
S T R E T C H I N G
STATIC STRETCHING
• Static stretching consists of stretching a muscle (or group of muscles) to its farthest point and then maintaining or holding that
position, whereas passive stretching consists of a person who is relaxed (passive) while some external force (either a person or
an apparatus) brings the joint through its range of motion.
• This is most beneficial for post workout stretches AFTER exercising when the muscles are all warmed up.
NECK FLEXION/EXTENSION
STRETCH
Gently rotate your head forward then
backward, like an exaggerated nod
for yes.
TRICEPS STRETCH
Gently bend arm behind head as if
scratching back. Then, place the opposite
hand on elbow and pull down, hold, repeat.
BUDDHA STRETCH
Place palms together, as if praying. Then
rotate your fingers toward the body. Repeat
10 times. (For forearms, and wrists.)
ABC STRETCH
Sitting on the floor, place the back of your
right ankle on top of your left toes. Trace
the A-B-C’s with your foot, moving only the
ankle and foot. When finished, repeat with
your other foot.
JUMPING JACKS
Begin standing with hands at side. Jump
into the air and widen legs shoulder-width
apart while bringing palms together above
head (clap). Jump to return to standing
position.
NECK LATERAL FLEXION
STRETCH
Gently rotate your head from side to side,
like an exaggerated nod for no.
BICEP STRETCH
Extend arms, palms up and “push” your
bicep upward. Make this stretch easier
by putting palms of hands on bottom
of a table.
SWIMMER’S STRETCH
Swing your arms out wide and then bring
them in, giving yourself a big hug. Repeat
10 times. (For shoulders, biceps
and trapezoids.)
PUSHUP WITH ROTATION
Start in pushup position. Push up until
arms and back are straight. Rotate left
hand into the air and lift left foot off the
floor and place it on right foot. Repeat on
the other side.
12 STRETCHING
S T R E T C H I N G
LUMBAR EXTENSION
STRETCH
Lie face down on the floor. Lift your upper
body upwards while your lower body stays
touching the floor. Be gentle if sore.
HAMSTRING STRETCH
Lie flat on back. Lift and straighten leg with
foot pointed. Place hands on back of knee
and gently pull leg toward your chest.
ADDUCTOR STRETCH
Sit on the floor. Place the bottoms of your
feet together. Next, push down with elbows
on knees very gently, keep back straight.
QUADRICEPS STRETCH
Stand on one leg, balance, and pull foot
toward buttocks.
HIP FLEXOR STRETCH
Keep back straight, tuck bottom under, and
lunge forward on front leg.
LUMBAR FLEX ON STRETCH
Lie flat on floor. Lift your knees toward your
chest. Place your hands on shin/knee and
gently pull knees toward your chest.
HAMSTRING STRETCH
Start with knee slightly bent, then push
knee straight as tension allows, push chest
toward foot and try to touch your toes.
QUADRICEPS STRETCH
Lie flat on the floor, stomach-side down.
Bend knee toward buttocks then grab foot
with hand and gently tug on the foot.
ADDUCTOR STRETCH
Keep foot pointing forward. Lunge
sideways on bent knee, keep back straight.
GASTROCNEMIUS STRETCH
Keep knee straight and heel down, feet
facing forward.
CROSSOVER ARM STRETCH
Bring the right arm across the body. Use
the left hand or forearm to hold the right
arm against the chest.
THORACIC EXTENSION
STRETCH
Reach forward with arms, push with
chest toward floor, arch back down with,
backside behind knees.
STRETCHING 13
S T R E T C H I N G
14 STRETCHING
S T R E T C H I N G
Introduction – This lesson teaches how to perform basic yoga poses. Please review points a-c and include d-g as
applicable.
A. Choose one physical education lesson (from the lesson resources in the back) to teach before doing this
activity. Then ask questions such as:
i. Why is physical activity important?
ii. When was a time you were very active? How did you feel?
B. Discuss the necessity of physical activity
C. Follow up on previous activities or assignments
D. Define the difference between physical activity and exercise
i. Physical activity
• Bodily movement produced by skeletal muscles that requires energy expenditure. Such as walking to work,
doing chores, etc.
ii. Exercise
• Activity requiring physical effort, carried out especially to sustain or improve health and fitness. Typically,
exercise is a planned activity to enhance health or meet goals.
E. Discuss the importance of positive body image
i. Body image is a term used to describe how people, men or women, feel about themselves and their body. This
includes what they see when they look in a mirror or when they think of themselves in their mind. Body image includes
how people feel about their height, weight, appearance, and overall, how they feel about their body. People with a
positive body image have an accurate perception of what they look like and demonstrate happiness and confidence in
their body. Many people struggle with negative body image, meaning they have a distorted or negative sense of their
body and/or appearance.
F. Discuss the components of maintaining physical activity
i. How to set goals
ii. The importance of regular and consistent activity
iii. The benefit of personal responsibility
iv. The benefit of group physical activity
G. Discuss how to track physical activity
i. Personal activity journal (personal)
ii. Local (website)
iii. Statewide (website)
GOAL: Comfortably perform basic yoga stretches on your own.
BEST FOR: All
LESSON OBJECTIVES
• Increase flexibility
• Introduce participants to yoga
• Learn the benefits of stretching
• Gain the knowledge to stretch on your own
YOGA
1
STRETCHING 15
S T R E T C H I N G
Benefits of yoga
A. Reduce stress and anxiety
B. Enhance mood and decrease depression
C. Improve balance and flexibility
D. Reduce blood pressure
E. Weight reduction
F. Lower harmful LDL cholesterol
G. Increase insulin sensitivity
H. Decrease insomnia
CREATE a yoga pose
A. Equipment needed (all optional)
i. Yoga mat
ii. Yoga blocks
iii. Yoga straps
B. Steps (demo)
i. Write out goal
ii. Plan
iii. Stretch
iv. Demonstrate all yoga poses to be taught
Practice (do)
A. Write out goal
B. Plan
C. Stretch
D. Perform five to eight yoga poses
Incorporate into your daily life
A. Class
B. School
C. Work
D. Personal life
Conclusion and assignment
A. Perform yoga at least 20-30 min a day
B. Track your physical activity
C. Write in your journal how your body responds to yoga
Update fitness plan/record and answer questions
Schedule/remind of next appointment
2
5
3
4
7
8
6
For this lesson, reference the yoga handout
shown above. For copies of this handout, please
visit: extension.usu.edu/fscreate/htm/staff-
menu. You can find the handouts under Lessons
for Adults.
16 STRETCHING
S T R E T C H I N G
YOGA POSES
BEGINNER POSES
CAT POSE
Start on your hands and knees in tabletop
position. Make sure your knees are directly
below your hips and wrists are directly
below your shoulders. Exhale and round
your back toward the ceiling, inhale and return to tabletop
position.
UPWARD-FACING DOG POSE
Lie face-down on the floor. Place palms
on the floor next to your waist. Inhale
and press your palms into the floor and
slightly back while picking up your torso
perpendicular to the floor. Look straight ahead. Exhale
slowly and return torso to floor.
HALF DOWNWARD-FACING
DOG POSE
Start in downward-facing dog pose, then
continue lifting one leg above the pelvis
and make a straight line with your arms.
Flex your toes toward the floor. Hold. Exhale and return to
floor, repeat with other leg.
SEATED ANGLE POSE
Sit. Spread legs as far apart as possible.
Lean forward and pull buttocks forward,
widening legs slightly. Then rotate
thighs and press them into the floor.
Lean forward. Breathe slowly, increase stretching until
your hands are able to grab your feet. Breathe out as you
increase your stretch and inhale when holding stretch.
EASY POSE
Sit on the floor with your legs crossed but
not touching. Press your hands against the
floor and lift your buttocks slightly off the
floor. Hang there for a few breaths. Then
slowly lower yourself back onto the floor. Place your hands
on your knees, palms down. Straighten your back and keep
your chin parallel with the ground. Sit there as long as you
would like. Breathe deeply.
COW POSE
Start in tabletop position. Inhale and allow
your belly to sag toward the floor while
lifting your shoulders and pelvis toward
the ceiling. Exhale and return to tabletop
position.
DOWNWARD-FACING
DOG POSE
Begin with your hands and knees below
your shoulders and hips respectively,
inhale and push your pelvis toward the
ceiling while raising and straightening your knees. Shift your
weight to your feet while lengthening your arms out straight.
Keep your head between your arms and look at your toes.
Hold, then exhale as you reverse this movement.
HALF SHOULDER
STAND POSE
Lie on your back with your arms at your
side. Bend your knees with your feet
flat on the floor. Exhale, press your arms
against the floor, and push your feet upward. Continue to lift
by curling the pelvis and then your back away from the floor
(bringing your knees toward your face). Lay the backs of
your upper arms on the mat and place your palms against
your back for support. Raise your pelvis over your shoulders
(the legs are relatively parallel to the floor). Exhale. Inhale
and return to starting position.
STRETCHING 17
S T R E T C H I N G
INTERMEDIATE POSES
STANDING FORWARD
BEND POSE
Stand up straight with feet shoulder width
apart and with hands loosely at your side.
Slowly rotate pelvis forward and reach
down to place your hands on the floor or on your shins.
Hold. As you exhale, slowly return to starting position then
inhale and stretch further than the initial stretch. Repeat.
SUNBIRD POSE
Start in the tabletop position. As you
inhale, lift one leg off the floor, fully
extend it and keep toes pointing toward
the floor (pretend your are pushing your
foot through a wall). Raise the opposite arm to be parallel
with the floor, fingers extended and palm facing the floor.
Hold. Exhale and return to tabletop position. Switch sides.
Repeat.
LOW-WARRIOR POSE
Start in downward dog position. As you
exhale, jump and spread your legs out—
one in front and one in back. The back
foot should be at a 45 degree angle and
the front foot should have the toes pointing forward. Lunge
gently into the front knee. Inhale and straighten your spine.
Bring arms up straight above your head with the arms
nearly touching your ears and palms facing each other.
Exhale back into downward dog and switch feet.
INCLINED PLANE POSE
Begin as if you were doing a pushup with
your hands directly below your shoulders.
Keep your legs shoulder width apart. Place
the tops of your feet on the floor. Inhale,
push up until your arms are perpendicular with the floor.
Straighten your legs and back. Hold. Exhale allowing your
stomach to sag toward the floor. Inhale and return to plane
pose. Exhale into child’s pose. Repeat.
CHILD POSE
Start sitting with your knees and hips bent
and shins parallel to the floor. Your chest
can rest on your knees or your knees
can be spread to about the width of your
mat, allowing your chest to go between your knees. Rest
forehead on the floor with arms stretched forward in front of
your head or backward toward your feet. Hold.
PLOUGH POSE
Begin lying on your back. Exhale and bend
from the hip joints to slowly lower your
toes to the floor above and beyond your
head. Keep your torso perpendicular to the
floor with your legs fully extended. Toes on the floor, lift your
top thighs and tailbone toward the ceiling. Press down on
thighs with arms, as you lift the thighs toward the ceiling.
Exhale. Roll onto your back or simply roll out of the pose.
18 STRETCHING
S T R E T C H I N G
CROW POSE
Bend down into a low squat, with elbows
pressing against inner thighs. Bend at the
waist until your palms are touching the
floor. Spread your fingers wide. Lift up
onto your toes and position your knees onto your triceps,
as high above the elbows as possible. Gaze forward. Shift
your weight forward by leaning your knees into your triceps
and lifting up onto the balls of the feet. Shift your weight
forward, gradually until your feet come off the ground.
Exhale and return to frog pose.
LEG STRETCHES
WARRIOR I POSE
Begin in downward-facing dog pose.
Exhaling, step or lightly jump your feet
3 1/2 to 4 feet apart. Raise your arms
perpendicular to the floor (and parallel to
each other). Turn your back foot 45-60 degrees. Exhale and
square the front of your pelvis as much as possible with the
front edge of your mat. Reach strongly through your arms,
lifting the ribcage away from the pelvis. Straighten the right
knee. Turn the feet forward and release the arms with an
exhalation. Switch sides.
TRIANGLE POSE
Begin standing, then take a big step
outward with your right foot, turn outward
to face the top of your mat. Align your right
heel with your left heel then turn your back
foot in about 15-20 degrees. Keep knees straight. Then
slowly bend over your right foot touching the floor with your
fingers. Hold. Exhale back to standing position, switch legs.
WARRIOR II POSE
Begin in downward-facing dog pose. With
an exhalation, step or lightly jump your
feet 3 1/2 to 4 feet apart. Raise your arms
parallel to the floor, palms down. Turn
your right foot slightly to the right and your left foot out to
the left 90 degrees. Exhale and bend your left knee over
the left ankle, so that the shin is perpendicular to the floor.
If possible, bring the left thigh parallel to the floor. Hold.
Exhale as you reverse the pose. Switch sides.
CHAIR POSE
Begin standing with your arms loosely
at your side. Inhale and raise your arms
perpendicular to the floor with palms
facing inward. Exhale and bend your
knees, as if sitting on a chair. Try to bring your thighs
parallel with the floor. Exhale and release your arms to your
sides and return to standing position.
CAMEL POSE
Kneel on the floor with your knees hip
width apart and thighs perpendicular to
the floor. Keep the top of your feet flat
against the floor. Press your shins and the
tops of your feet firmly into floor. Slowly, lean back against
the firmness of the tailbone and shoulder.
STRETCHING 19
S T R E T C H I N G
CORE MUSCLES
HIP OPENERS
PIGEON POSE
Kneel on the ground. Stretch your right leg
out behind you, and bend your left knee so
that your left foot is near your right pelvic
bone with your toes pointed. Lean forward
so that your chest is puffed out. Place your hands on the
ground for balance. Turn your torso and head toward the
right. Bend your right leg so that your foot is pointed toward
the ceiling. Hold your foot with your right hand. Hold the
pose for 3 to 5 breaths, then release. Repeat with opposite
leg.
GODDESS POSE
Begin standing with arms at your sides.
Step your feet wide apart, about 4
feet. Turn your toes out slightly. On an
exhalation, bend your knees and lower your
hips into a squat. Work toward bringing your thighs parallel
to the floor. Bend your elbows and point your fingertips
toward the ceiling; your upper arms and forearms should be
at a 90 degree angle. To release, slowly return your hands
to your hips. Exhale and step your feet together.
PLANK POSE
Start on hands and knees with wrists and
knees just below your shoulders and hips,
respectively. Inhale and draw your torso
forward until the arms are perpendicular
to the floor and the shoulders directly over the wrists, torso
parallel to the floor. Firm your shoulder blades against your
back, then spread them away from the spine. Spread your
collarbone away from the sternum. Exhale to release.
BOAT POSE
Sit on the floor with your legs straight in
front of you. Press your hands on the
floor a little behind your hips, fingers
pointing toward the feet, and straighten
your arms. Exhale and bend your knees then lift your feet
off the floor, so that the thighs are angled about 45-50
degrees relative to the floor. If possible, straighten your
knees, raising your toes above the level of your eyes.
Stretch your arms alongside the legs, parallel to each
other and the floor. Remember to keep your back straight.
Release the legs with an exhalation and sit upright on an
inhalation.
HAPPY BABY POSE
Lie on your back. Exhale and bring your
knees to your chest. Clasp the outside
of each foot with your hands. Swing your
knees outward creating extra distance
between them. Inhale and push your feet up toward your
hands while gently resisting with your hands. Hold for 3 to
5 breaths. Release on exhale.
COW FACE POSE
Sit on the floor with your legs straight in
front of you. Slide your left foot under the
right knee toward the outside of the right
hip. Then cross your right leg over the left,
stacking the right knee on top of the left. Inhale and stretch
your right arm behind your back. Inhale and stretch your left
arm over your shoulder. If possible, hook the right and left
fingers. Release the arms, uncross the legs, and repeat with
the arms and legs reversed.
20 STRETCHING
S T R E T C H I N G
DOLPHIN POSE
Begin on your hands and knees. Set your
knees directly below your hips and your
forearms on the floor with your shoulders
directly above your wrists. Firmly press
your palms together and your forearms into the floor. Exhale
and lift your knees away from the floor. Lift your buttocks
toward the ceiling. Continue to press the forearms actively
into the floor. Then release your knees to the floor with
an exhale.
BOW POSE
Lie on your belly with arms alongside
your torso, palms up. Exhale and bend
your knees, bring your heels toward your
buttocks. With your hands, take hold
of your ankles. Make sure your knees aren’t wider than
the width of your hips. Inhale and strongly lift your heels
away from your buttocks and lift your thighs away from the
floor. This will pull your upper torso and head off the floor.
Release as you exhale and lie quietly for a few breaths.
BALANCE
TREE POSE
Stand. Shift your weight gradually from
your left foot to your right foot. Fix your
gaze on a point a few feet away. Shifting
your weight slowly onto your right leg,
keep it strong as you place the sole of your left foot on your
upper inner right thigh (toes pointing to the floor). Press
your palms together and raise above your head. Exhale and
straighten your leg then slowly lower it to the floor. Repeat
on the other side.
DANCER POSE
Stand. Inhale, shift your weight onto your
right foot and lift your left heel toward your
left buttock as you bend the knee. Begin
to lift your left foot up, away from the floor,
and back, away from your torso. Extend the left thigh behind
you and parallel to the floor. Stretch your right arm forward,
in front of your torso, parallel to the floor. Exhale back to
starting position and switch sides.
WARRIOR III POSE
Stand with your feet hip-distance apart
and arms at your side. Turn your right foot
out 90 degrees. Slightly bend your right
knee. Raise your arms, palms facing each
other. Lift your left leg as you lower your torso, bringing
your body parallel to the ground. Your arms will now reach
forward. Gaze at the floor in front of you. Exhale. Lower your
left foot to the floor. Repeat with other side.
SIDE PLANK POSE
Start in downward facing dog. Shift onto
the outside edge of your left foot, and
stack your right foot on top of the left.
Swing your right hand onto your right
hip, turn your torso to the right as you do, and support the
weight of your body on the outer left foot and left hand.
Align your entire body into one long diagonal line from the
heels to the crown. Gaze at your top hand. Hold. Exhale
into downward dog and switch sides.
STRETCHING 21
S T R E T C H I N G
22 STRETCHING
S T R E T C H I N G
Introduction – This lesson teaches the basics of learning proper exercises to improve one’s balance. Please review
points a-c and include d-g as applicable.
A. Choose one physical education lesson (from the lesson resources in the back) to teach before doing this
activity. Then ask questions such as:
i. Why is physical activity important?
ii. When was a time you were very active? How did you feel?
B. Discuss the necessity of physical activity
C. Follow up on previous activities or assignments
D. Define the difference between physical activity and exercise
i. Physical activity
• Bodily movement produced by skeletal muscles that requires energy expenditure, such as walking to work,
doing chores, etc.
ii. Exercise
• Activity requiring physical effort, carried out especially to sustain or improve health and fitness. Typically,
exercise is a planned activity to enhance health or meet goals.
E. Discuss the importance of positive body image
i. Body image is a term used to describe how people, men or women, feel about themselves and their body. This
includes what they see when they look in a mirror or when they think of themselves in their mind. Body image
includes how people feel about their height, weight, appearance, and overall, how they feel about their body.
People with a positive body image have an accurate perception of what they look like and demonstrate happiness
and confidence in their body. Many people struggle with negative body image, meaning they have a distorted or
negative sense of their body and/or appearance.
F. Discuss the components of maintaining physical activity
i. How to set goals
ii. The importance of regular and consistent activity
iii. The benefit of personal responsibility
iv. The benefit of group physical activity
G. Discuss how to track physical activity
i. Personal activity journal (personal)
ii. Local (website)
iii. Statewide (website)
GOAL: Understand the importance of balance and become comfortable to perform balancing exercises on
your own.
BEST FOR: All
LESSON OBJECTIVES
• Improve balance
• Increase stability
• Increase muscle tone
BALANCE
1
STRETCHING 23
S T R E T C H I N G
Benefits of balance
A. Help prevent falls, especially in seniors
B. Help those with obesity who have unevenly distributed weight
C. Improve ability to control and maintain body’s position
D. Prevent injuries, especially in seniors
CREATE a balance routine
A. Equipment needed (all optional)
i. Stretch band
ii. Broomstick, PVC pipe or similar
B. Steps (demo)
i. Demonstrate five to eight balancing exercises
Practice (do)
A. Write goal
B. Plan
C. Perform five to eight balancing exercises
Incorporate into your daily life
A. Class
B. School
C. Work
D. Personal life
Conclusion and assignment
A. Perform balance exercises at least 5-10 min a day
B. Track your physical activity
C. Write in your journal how your body responds to the balancing exercises
Update fitness plan/record and answer questions
Schedule/remind of next appointment
2
5
3
4
7
8
6
24 STRETCHING
S T R E T C H I N G
Overview: These lessons compare and help you teach the most common forms of exercise using one’s body weight. Please
adapt these lessons to fit your target audience: adults, mothers, fathers, or teens.
BODY WEIGHT
T H R E E L E S S O N S
BODY WEIGHT 25
26 BODY WEIGHT
B O DY W E I G H T
Introduction – This lesson teaches the basic principles of High Intensity Interval Training (HIIT). Please review points
a-c and include d-g as applicable.
A. Choose one physical education lesson (from the lesson resources in the back) to teach before doing this
activity. Then ask questions such as:
i. Why is physical activity important?
ii. When was a time you were very active? How did you feel?
B. Discuss the necessity of physical activity
C. Follow up on previous activities or assignments
D. Define the difference between physical activity and exercise
i. Physical activity
• Bodily movement produced by skeletal muscles that requires energy expenditure, such as walking to work,
doing chores, etc.
ii. Exercise
• Activity requiring physical effort, carried out especially to sustain or improve health and fitness. Typically,
exercise is a planned activity to enhance health or meet goals.
E. Discuss the importance of positive body image
i. Body image is a term used to describe how people, men or women, feel about themselves and their body. This
includes what they see when they look in a mirror or when they think of themselves in their mind. Body image
includes how people feel about their height, weight, appearance, and overall, how they feel about their body.
People with a positive body image have an accurate perception of what they look like and demonstrate happiness
and confidence in their body. Many people struggle with negative body image, meaning they have a distorted or
negative sense of their body and/or appearance.
F. Discuss the components of maintaining physical activity
i. How to set goals
ii. The importance of regular and consistent activity
iii. The benefit of personal responsibility
iv. The benefit of group physical activity
G. Discuss how to track physical activity
i. Personal activity journal (personal)
ii. Local (website)
iii. Statewide (website)
GOAL: Understand and become comfortable performing HIIT exercises on your own.
BEST FOR: Men, women (not pregnant)
LESSON OBJECTIVES
• Learn the benefits of HIIT
• Gain the knowledge to perform HIIT on your own
• Understand proper technique
HIGH INTENSITY INTERVAL TRAINING (HIIT)
1
BODY WEIGHT 27
B O DY W E I G H T
Benefits of HIIT
A. Improve blood pressure
B. Reduce risk of stroke
C. Reduce risk of cardiovascular disease
D. Burn more calories in a shorter amount of time
E. Improve aerobic capacity
F. Add fun and variety to exercise
G. Dosen’t require special equipment
CREATE a HIIT work out
A. Equipment needed (all optional)
i. Box/stairs or other sturdy platform
ii. Resistance band
B. Steps (demo)
i. Write out goal
ii. Plan
iii. Demonstrate five to eight HIIT exercises
Practice (do)
A. Write out goal
B. Plan
C. Stretch
D. Perform five to eight HIIT exercises
Incorporate into your daily life
A. Class
B. School
C. Work
D. Personal life
Conclusion and assignment
A. Perform HIIT exercises at least 15-30 min a day
B. Track your physical activity
C. Write in your journal how your body responds to HIIT exercises
Update fitness plan/record and answer questions
Schedule/remind of next appointment
2
5
3
4
7
8
6
For this lesson, reference the high intensity
interval training handout shown above. For
copies of this handout, please visit: extension.
usu.edu/fscreate/htm/staff-menu. You can find
the handouts under Lessons for Adults.
28 BODY WEIGHT
B O DY W E I G H T
HIIT WORKOUTS
Set your clock for 60 seconds. Starting with the first workout, do as many as possible. Give yourself a 10-second break.
Repeat for the remaining five workouts.
Set your clock for 60 seconds. Starting with the first workout, do as many as possible. Give yourself a 10-second break.
Repeat for the remaining five workouts.
1. JUMP
LUNGES
1. PUSHUP
AND THREE
POINT
JUMP
2. SQUATS
2. HIGH
KNEES
3. TRICEP
DIPS
3. SIDE
PLANK
KNEE TO
ELBOW
LEFT SIDE
4. BURPEES
4. SIDE
PLANK
KNEE TO
ELBOW
RIGHT SIDE
5. RUSSIAN
TWISTS
5. TRICEP
DIPS
6. PUSHUP
AND PLANK
KNEE
6. BICYCLE
CRUNCHES
BODY WEIGHT 29
B O DY W E I G H T
Set your clock for 60 seconds. Starting with the first workout, do as many as possible. Give yourself a 10-second break.
Repeat for the remaining three workouts.
Set your clock for 60 seconds. Starting with the first workout, do as many as possible. Give yourself a 10-second break.
Repeat for the remaining three workouts.
1. PUSHUP +
SUPERMAN
1. PUSHUP +
BURPEE +
TUCK JUMP
2. MOUNTAIN
CLIMBERS
2. IN AND OUT
ABS
3. PLANK
AND SPIDER
KNEES
3. SIDE
BURPEES
4. CURTSY
LUNGES
(ALTERNATE)
4. PLANK
JACKS
20-MINUTE HIIT
Repeat set twice through for the complete 20-minute workout.
60 seconds
30 seconds
30 seconds
60 seconds
30 seconds
30 seconds
60 seconds
30 seconds
JUMPING JACKS
SIDE LUNGES
SQUATS
JOG IN PLACE
BURPEES
LUNGES
JUMP ROPE
MOUNTAIN CLIMBERS
SPEED SKATERS
BUTT KICKERS
LUNGE KICKS
SQUATS
MARCH IN PLACE
SIDE LUNGES
PUSHUPS
30 seconds
60 seconds
30 seconds
30 seconds
60 seconds
30 seconds
30 seconds
30 BODY WEIGHT
B O DY W E I G H T
MY HIIT PLANNER: LEVEL 1
MY HIIT PLANNER: LEVEL 3
MY HIIT PLANNER: LEVEL 2
JUST CONVERTED 15-20 MINS
Set your clock for 40 seconds. Complete the first workout.
Give yourself a 10-second break. Repeat for the remaining
workouts. Do one to two times a week.
LONG TIME HIIT LOVER 10-25 MINS
Set your clock for 40 seconds. Complete the first workout.
Give yourself a 10 second break. Repeat for the remaining
workouts. Do three to four times a week.
INTERMEDIATE HIIT LOVER 18-22 MINS
Set your clock for 40 seconds. Complete the first workout.
Give yourself a 10-second break. Repeat for the remaining
workouts. Do two to three times a week.
Squats (20x)
At a fast tempo
Lunges each leg (20x)
Stepping back/forward instead of jumping
Step out burpees (10x)
At a fast tempo
Pushups on knees (10x)
At a fast tempo
Mountain climbers each side (20x)
Steps of high knees running (40x)
50 m sprints and walk back (3x)
Prisoner squat jumps (20x)
Hands placed behind the head as you jump
Lunge jumps each leg (30x)
Chest to ground burpees (20x)
Clapping pushups on feet (10x)
Mountain climbers each side (40x)
Tuck jumps (20x)
50 m hill sprints and wall back (5x)
Squat jumps (20x)
Lunge jumps each leg (20x)
Burpees (15x)
Pushups on feet (10x)
At a fast tempo
Mountain climbers each side (30x)
Tuck jumps (15x)
50 m sprints and walk back (4x)
BODY WEIGHT 31
B O DY W E I G H T
32 BODY WEIGHT
B O DY W E I G H T
Introduction – This lesson teaches the basic principles of plyometric exercises. Please review points a-c and include
d-g as applicable.
A. Choose one physical education lesson (from the lesson resources in the back) to teach before doing this
activity. Then ask questions such as:
i. Why is physical activity important?
ii. When was a time you were very active? How did you feel?
B. Discuss the necessity of physical activity
C. Follow up on previous activities or assignments
D. Define the difference between physical activity and exercise
i. Physical activity
• Bodily movement produced by skeletal muscles that requires energy expenditure, such as walking to work,
doing chores, etc.
ii. Exercise
• Activity requiring physical effort, carried out especially to sustain or improve health and fitness. Typically,
exercise is a planned activity to enhance health or meet goals.
E. Discuss the importance of positive body image
i. Body image is a term used to describe how people, men or women, feel about themselves and their body. This
includes what they see when they look in a mirror or when they think of themselves in their mind. Body image
includes how people feel about their height, weight, appearance, and overall, how they feel about their body.
People with a positive body image have an accurate perception of what they look like and demonstrate happiness
and confidence in their body. Many people struggle with negative body image, meaning they have a distorted or
negative sense of their body and/or appearance.
F. Discuss the components of maintaining physical activity
i. How to set goals
ii. The importance of regular and consistent activity
iii. The benefit of personal responsibility
iv. The benefit of group physical activity
G. Discuss how to track physical activity
i. Personal activity journal (personal)
ii. Local (website)
iii. Statewide (website)
GOAL: Understand and become comfortable performing plyometric exercises on your own.
BEST FOR: Men, non-pregnant women
LESSON OBJECTIVES
• Learn the benefits of pylometrics
• Gain the knowledge to perform pylometrics on your own
PLYOMETRICS
1
BODY WEIGHT 33
B O DY W E I G H T
2
Benefits of plyometrics
A. Increase force production (strength)
B. Prevent or rehabilitate certain injuries
C. Improve reaction time
CREATE a plyometrics work out
A. Equipment needed (all optional)
i. Box/stairs or other sturdy platform
ii. Resistance band
B. Steps (demo)
i. Write out goal
ii. Plan
iii. Demonstrate five to eight plyometric exercises
Practice (do)
A. Write out goal
B. Plan
C. Stretch
D. Perform five to eight plyometric exercises
Incorporate into your daily life
A. Class
B. School
C. Work
D. Personal life
Conclusion and assignment
A. Perform plyometric exercises at least 15-30 min a day
B. Track your physical activity
C. Write in your journal how your body responds to plyometric exercises
Update fitness plan/record and answer questions
Schedule/remind of next appointment
5
3
4
7
8
6
For this lesson, reference the plyometrics
handout shown above. For copies of this handout,
please visit: extension.usu.edu/fscreate/htm/
staff-menu. You can find the handouts under
Lessons for Adults.
34 BODY WEIGHT
B O DY W E I G H T
PLIE SQUAT JUMP
Stand with feet slightly wider than shoulder
width apart, toes pointed out. Lower into a
deep plie squat with hands clasped in front
of chest. Jump as high as you can, tapping
heels together in midair. Land with knees
soft in plie squat position. Repeat for 45
seconds.
DOUBLE JUMP
Lower into a deep squat and bring hands
together in front of chest. Jump as high as
you can and land in lunge position with left
leg forward (bend both knees 90 degrees).
Jump as high as you can again and land
in squat position. Repeat the lunge-squat
jump combo, landing with right leg forward.
Continue for 45 seconds, alternating sides.
POP-UP
Lie facedown on floor, palms next to chest,
toes turned under. Do a pushup, using
upward momentum to jump left foot in
between hands and quickly stand up into a
plie squat as you bring hands beside chest.
Reverse motion to start. Continue for 45
seconds, alternating legs.
ONE-LEGGED DEAD LIFT HOP
Stand on left leg, right knee lifted to hip
height; stretch arms out in front of you.
Hinge forward; extend right leg behind
you (body is parallel to floor). Reverse
motion, returning upright, and as right knee
lifts forward, push off left leg to jump up.
Stretch arms toward the sky. Land softly on
left leg and repeat for 30 seconds. Switch
sides and repeat.
LATERAL LUNGE
Step left leg out to left side, bending knee
while keeping right leg straight; hinge
body forward from waist. Touch right hand
to floor and place left hand on top of left
thigh. Pushing off left heel, shuffle to right
two times, ending in side lunge to right
with right knee bent and left leg straight.
Repeat movement to left side. Continue for
45 seconds.
PLANK-STRADDLE HOP
Start on floor in plank position with feet
hip-width apart, balancing on forearms and
toes, palms flat on floor. Hop feet out to
sides into a wide V, then hop feet back to
start position. Straighten arms, pressing
palms into floor (hands will be slightly in
front of shoulders on floor).
Reverse motion, lowering forearms to floor.
Repeat for 30 to 45 seconds.
PLYOMETRICS WORKOUTS
BODY WEIGHT 35
B O DY W E I G H T
HAND TOUCHES
Start in a pushup position with your feet
hip-width apart and your hands just outside
your shoulders. Quickly touch your left
hand to the top of your right hand, then
quickly return to the starting position.
Immediately repeat to the opposite side,
touching your right hand to the top of your
left hand. That’s one rep. Do 10.
CLOCK WALK WITH HANDS
From a pushup position, step your right
hand out to the side to create a wide upper-
body stance; follow with your left hand to
return to a shoulder-width stance. Continue
this pattern to complete one full rotation
leading with your right arm. Then do one full
rotation leading with your left arm.
ANKLE HOPS
Stand with your feet shoulder width apart
and raise up on your toes. Jump 3-6
inches off the ground and as soon as you
land, jump back up again. Keep your legs
straight as you jump and don’t let your
heels touch the ground. Repeat 10 times.
SKATERS
Cross your right leg behind your left leg as
you bend your left knee into a half-squat
position. Extend your left arm out to the
side, and swing your right arm across your
hips. Hop a few feet directly to the right,
switching the position of your legs and arms.
That’s one rep. Continue hopping from side
to side without pausing. Do 10 reps.
SPLIT JUMPS
Stand with your feet in a staggered stance,
left foot in front of your right, two or three
feet apart. Lower your body into a split
squat. Quickly jump up and scissor-kick
your legs so that you land with your right
leg forward. As soon as your feet land,
lower your body into a split squat. That’s
one rep. Do six.
LOW BOX LATERAL SHUFFLE
Stand with your left foot on a low box and
your right foot on the floor, 2 feet to the
right of the box. Bend your knees slightly
and bend your arms 90 degrees. Push off
your left foot and jump to your left, landing
with your right foot on the box and your left
foot on the floor. Push off your right foot to
jump back to the starting position. Repeat
10 times.
TUCK JUMPS
Begin in a standing position with your
knees slightly bent. Hold your hands
in front of you, palms down with your
fingertips together at chest height. Dip
down into a quarter squat and immediately
jump upward. Drive knees toward the
chest, attempting to touch them to the
palms of the hands. Ensure a good landing.
Repeat five times.
SEAL JUMPING JACKS
Start with your feet about hip-width apart,
arms straight out to the sides at shoulder
height. Clap your hands in front of your
chest and jump just high enough to spread
your feet wide. Without pausing, quickly
return to the starting position. That’s one
rep. Do 20 as quickly as you can with
control.
36 BODY WEIGHT
B O DY W E I G H T
Introduction – This lesson teaches the basic principles of pilates. Please review points a-c and include d-g as
applicable.
A. Choose one physical education lesson (from the lesson resources in the back) to teach before doing this
activity. Then ask questions such as:
i. Why is physical activity important?
ii. When was a time you were very active? How did you feel?
B. Discuss the necessity of physical activity
C. Follow up on previous activities or assignments
D. Define the difference between physical activity and exercise
i. Physical activity
• Bodily movement produced by skeletal muscles that requires energy expenditure, such as walking to work,
doing chores, etc.
ii. Exercise
• Activity requiring physical effort, carried out especially to sustain or improve health and fitness. Typically,
exercise is a planned activity to enhance health or meet our goals.
E. Discuss the importance of positive body image
i. Body image is a term used to describe how people, men or women, feel about themselves and their body. This
includes what they see when they look in a mirror or when they think of themselves in their mind. Body image
includes how people feel about their height, weight, appearance, and overall, how they feel about their body.
People with a positive body image have an accurate perception of what they look like and demonstrate happiness
and confidence in their body. Many people struggle with negative body image, meaning they have a distorted or
negative sense of their body and/or appearance.
F. Discuss the components of maintaining physical activity
i. How to set goals
ii. The importance of regular and consistent activity
iii. The benefit of personal responsibility
iv. The benefit of group physical activity
G. Discuss how to track physical activity
i. Personal activity journal (personal)
ii. Local (website)
iii. Statewide (website)
Benefits of pilates
A. Improve core strength and stability
B. Improve posture and balance
C. Improve flexibility
GOAL: Understand and become comfortable performing basic pilates exercises on your own.
BEST FOR: All
LESSON OBJECTIVES
•	 Learn the benefits of pilates
•	 Gain the knowledge to perform pilates on your own
PILATES
1
2
BODY WEIGHT 37
B O DY W E I G H T
D. Prevention and treatment of back pain
E. Increase stamina
F. Improve concentration
G. Improve body awareness
CREATE a pilates workout
A. Equipment needed (all optional)
i. Pilates roll
ii. Yoga mat
B. Steps (demo)
i. Write out goal
ii. Plan
iii. Demonstrate five to eight pilate exercises/poses
Practice (do)
A. Write out goal
B. Plan
C. Stretch
D. Perform five to eight pilates
Incorporate into your daily life
A. Class
B. School
C. Work
D. Personal life
Conclusion and assignment
a. Perform pilates exercises at least 15-30 min a day
b. Track your physical activity
c. Write in your journal how your body responds to pilates
Update fitness plan/record and answer questions
Schedule/remind of next appointment
5
3
4
7
8
6
For this lesson, reference the fundamental
pilates handout shown above. For copies of
this handout, please visit: extension.usu.edu/
fscreate/htm/staff-menu. You can find the
handouts under Lessons for Adults.
38 BODY WEIGHT
B O DY W E I G H T
CRISS CROSS
Lie flat on back with hands placed at the
base of the neck. Bring knees into the
chest and curl the head and shoulders
off the mat. Extend your right leg to a 45
degree angle. Bring the right shoulder to the left knee.
Switch to bring the left shoulder to the right knee.
DOUBLE LEG STRETCH
Lie on stomach and turn head to place one
cheek on the mat. Place hands high up
on back. Kick both heels to the seat three
times. Extend both legs straight as the
hands reach to the feet. Lower the torso and turn the head
to place the opposite cheek on the mat. Repeat.
DOUBLE LEG STRETCH
Bring head off the mat, bring knees
into your chest, and place one hand on
each shin. Reach yours arms and legs in
opposite directions on a diagonal. Circle
the arms around, drawing the knees into your chest and
catching onto your shins to return to start position.
HUNDRED
Lie flat on the mat with legs together.
Exhale as you curl your head and
shoulders up, lift and hover arms off the
mat, and float both legs off the mat to
desired height. Begin to pump your arms. Inhale for five arm
pumps and exhale for five arm pumps.
NECK PULL
Lie on your back and place hands at the
base of neck. Inhale, lift your head up,
exhale, roll off the mat bringing the crown
of your head to your knees, inhale, stack
your spine straight to the ceiling and hinge back on a
diagonal, exhale, round the spine down to the mat.
ONE LEG CIRCLE
Lie on back with arms by side, one leg
straight on the mat with the foot flexed and
the other leg straight up. Circle the top leg
across the body, down, and around for five
circles. Reverse the circle in the other direction, circling the
leg away from the body, down, and around. Repeat.
ONE LEG KICK
Lie on your stomach with your legs straight
and together and prop yourself onto your
forearms, bringing the elbows underneath
the shoulders. Kick one heel into your seat
two times, reach the leg straight, and place it on the mat.
Switch legs.
OPEN LEG ROCKER
Lean back on sacrum, bend knees, grasp
one ankle in each hand, extend legs
straight and shoulder distance apart, draw
abdominals in as far as possible. Inhale as
you roll back to your shoulder blades, exhale, roll up to
start position.
PUSHUP
Stand at the back of the mat. Place the
hands on the mat. Walk the hands out until
the body is in a plank position. Bend the
elbows in a tricep pushup three times. Pike
the pelvis toward the ceiling and walk the hands back to the
feet in four steps. Roll up through the spine to standing.
ROLL UP
Lie on your back, legs together. Arms
are reaching overhead, with palms facing
forward. Reach arms overhead and curl
your head and shoulders off the mat. Peel
your spine off the mat, rounding forward and bring your
head toward your knees. Inhale and roll back down.
PILATES WORKOUTS
BODY WEIGHT 39
B O DY W E I G H T
ROLLING LIKE A BALL
Come to seated, hug your shins into your
chest, balance on your sacrum to lift feet
off the mat and hold the body in a ball
shape. Knees stay shoulder distance
apart with ankles close together. Roll back to your shoulder
blades, roll up to start position.
SAW
Sit tall with legs extended straight and feet
flexed. Arms reach straight to the side.
Rotate your torso to the right, dive forward
reaching the outside of your left hand to
the outside of your right foot. Stack your spine staying in
rotation, unwind to center. Repeat on the other side.
SWAN PREP
Begin lying down with legs extended.
Place hands beneath shoulders. Press
pubic bone and tops of feet into the
mat. Lift shoulders upward and squeeze
shoulder blades together - do not crunch your neck. Hold,
then gently reverse what you did until lying on the floor.
SHOULDER BRIDGE
Lie on back with knees bent. Peel your
tailbone and spine off mat to create a
straight line. Extend your right leg to the
ceiling with foot pointed. Lower the right
leg toward the ground, flex the foot, and bring the leg back
up. Repeat five times. Repeat with the left leg.
SIDE KICK
Lie on right side in a straight line. Prop your
head on right hand and place your left palm
on the mat in front of your chest. Move
both legs in front of your hips on a slight
diagonal. Lift the top leg and kick it forward two times. Now
kick back. Do five times and repeat on the other side.
SINGLE LEG STRETCH
Curl your head and shoulders off the mat,
bend both knees into your chest, and
extend one leg straight as you place both
hands on the opposite shin. Outside hand
place near your ankle, inside hand place near your knee.
Switch your legs.
SPINE STRETCH
Sitting tall, straighten legs on mat, feet
flexed. Arms reach forward, with palms
facing down. Exhale as you roll forward
through the spine, drawing the abdominals
in, and keeping the arms parallel to the mat. Inhale as you
roll up, stacking the spine to return to start position.
SPINE TWIST
Sit with legs together in front and feet
flexed. Raise arms to the side. Sit tall.
Reach your head to the ceiling. Twist the
torso to the right, growing taller on the twist
and pulsing two times. Return torso to center. Twist the torso
to the left, pulsing two times. Inhale, return to center. Repeat.
SEAL
Sit with hips close to feet, knees bent. Lace your hands between your legs and hold on to the outsides of your
ankles with your feet together and knees shoulder distance apart. Make a C-curve with the spine and gaze into
your abdominals. Balance just behind the sits bones with your feet floating off the mat. Clap your feet together
three times. While maintaining the C-curve shape, inhale roll back to balance on the shoulder blades with the hips
over shoulders and clap the feet three times. Exhale, roll through the spine to return to start position with feet floating off the mat.
40 BODY WEIGHT
B O DY W E I G H T
Overview: These lessons compare and help you teach common forms of aerobic exercise. Please adapt these lessons to fit
your target audience: adults, mothers, fathers, or teens.
AEROBICS
T H R E E L E S S O N S
AEROBICS 41
42 AEROBICS
A E R O B I C S
Introduction – This lesson teaches moderate aerobic exercise. Please review points a-c and include d-g as
applicable.
A. Choose one physical education lesson (from the lesson resources in the back) to teach before doing this
activity. Then ask questions such as:
i. Why is physical activity important?
ii. When was a time you were very active? How did you feel?
B. Discuss the necessity of physical activity
C. Follow up on previous activities or assignments
D. Define the difference between physical activity and exercise
i. Physical activity
• Bodily movement produced by skeletal muscles that requires energy expenditure, such as walking to work,
doing chores, etc.
ii. Exercise
• Activity requiring physical effort, carried out especially to sustain or improve health and fitness. Typically,
exercise is a planned activity to enhance health or meet goals.
E. Discuss the importance of positive body image
i. Body image is a term used to describe how people, men or women, feel about themselves and their body. This
includes what they see when they look in a mirror or when they think of themselves in their mind. Body image
includes how people feel about their height, weight, appearance, and overall, how they feel about their body.
People with a positive body image have an accurate perception of what they look like and demonstrate happiness
and confidence in their body. Many people struggle with negative body image, meaning they have a distorted or
negative sense of their body and/or appearance.
F. Discuss the components of maintaining physical activity
i. How to set goals
ii. The importance of regular and consistent activity
iii. The benefit of personal responsibility
iv. The benefit of group physical activity
G. Discuss how to track physical activity
i. Personal activity journal (personal)
ii. Local (website)
iii. Statewide (website)
Benefits of moderate intensity aerobics
A. Lower blood pressure
B. Improve cholesterol
GOAL: Know how to safely participate in moderate intensity aerobic exercise.
BEST FOR: All
LESSON OBJECTIVES
• Learn the benefits of aerobic activity
• Gain the knowledge to perform moderate intensity aerobic exercises on your own
• Understand the difference between various aerobic activities
MODERATE INTENSITY AEROBIC EXERCISE
1
2
AEROBICS 43
A E R O B I C S
C. Prevent Type 2 Diabetes
D. Prevent cancer
E. Increase energy and stamina
F. Maintain mental well-being
CREATE a moderate intensity aerobic workout
A. Equipment needed
i. None
B. Steps (demo)
i. Write out goal
ii. Plan
iii. Stretch
iv. Demonstrate four to six aerobic activities
Practice (do)
A. Write out goal
B. Plan
C. Stretch
D. Perform four to six aerobic activities (40 min minimum)
Incorporate into your daily life
A. Class
B. School
C. Work
D. Personal life
Conclusion and assignment
A. Perform moderate aerobic exercises at least 20-30 min a day
B. Track your physical activity
C. Write in your journal how your body responds to aerobic exercise
Update fitness plan/record and answer questions
Schedule/remind of next appointment
5
3
4
7
8
6 For the following three lessons,
reference the aerobics handout
shown above. For copies of this
handout, please visit: extension.
usu.edu/fscreate/htm/staff-
menu. You can find the handouts
under Lessons for Adults.
44 AEROBICS
A E R O B I C S
Introduction – This lesson teaches high intensity aerobic exercise. Please review points a-c and include d-g as
applicable.
A. Choose one Physical educational lesson (from the back) to teach before doing this activity. Then ask
questions such as:
i. Why is physical activity important?
ii. When was a time you were very active? How did you feel?
B. Discuss the necessity of physical activity
C. Follow up on previous activities or assignments
D. Define the difference between physical activity and exercise
i. Physical activity
• Bodily movement produced by skeletal muscles that requires energy expenditure, such as walking to work,
doing chores, etc.
ii. Exercise
• Activity requiring physical effort, carried out especially to sustain or improve health and fitness. Typically,
exercise is a planned activity to enhance health or meet goals.
E. Discuss the importance of positive body image
i. Body image is a term used to describe how people, men or women, feel about themselves and their body. This
includes what they see when they look in a mirror or when they think of themselves in their mind. Body image
includes how people feel about their height, weight, appearance, and overall, how they feel about their body.
People with a positive body image have an accurate perception of what they look like and demonstrate happiness
and confidence in their body. Many people struggle with negative body image, meaning they have a distorted or
negative sense of their body and/or appearance.
F. Discuss the components of maintaining physical activity
i. How to set goals
ii. The importance of regular and consistent activity
iii. The benefit of personal responsibility
iv. The benefit of group physical activity
G. Discuss how to track physical activity
i. Personal Activity Journal (personal)
ii. Local (website)
iii. Statewide (website)
Benefits of high intensity aerobics
A. Cardioprotective effects
B. Increase aerobic capacity
C. Decrease pain and disability
GOAL: Know how to safely participate in high intensity aerobic exercise.
BEST FOR: All
LESSON OBJECTIVES
• Learn the benefits of aerobic activity
• Gain the knowledge to perform high-intensity aerobic exercises on your own
• Understand the difference between various aerobic activities
HIGH INTENSITY AEROBIC EXERCISE
1
2
AEROBICS 45
A E R O B I C S
D. Decrease psychological strain
E. Burn more calories in a shorter amount of time
CREATE a high intensity aerobics workout
A. Equipment needed (all optional)
i. None
B. Steps (demo)
i. Write out goal
ii. Plan
iii. Demonstrate four to six aerobic activities
Practice (do)
A. Write out goal
B. Plan
C. Stretch
D. Perform four to six aerobic exercises (40 min minimum)
Incorporate into your daily life
A. Class
B. School
C. Work
D. Personal life
Conclusion and assignment
A. Encourage participants to perform high intensity aerobic exercises at least 20-30 min a day
B. Track your physical activity
C. Write in your journal how your body responds to aerobic exercise
Update fitness plan/record and answer questions
Schedule/remind of next appointment
5
3
4
7
8
6
46 AEROBICS
A E R O B I C S
Introduction – This lesson reviews the breadth of aerobic exercises. Please review points a-c and include d-g as
applicable.
A. Choose one physical education lesson (from the lesson resources in the back) to teach before doing this
activity. Then ask questions such as:
i. Why is physical activity important?
ii. When was a time you were very active? How did you feel?
B. Discuss the necessity of physical activity
C. Follow up on previous activities or assignments
D. Define the difference between physical activity and exercise
i. Physical activity
• Bodily movement produced by skeletal muscles that requires energy expenditure, such as walking to work,
doing chores, etc.
ii. Exercise
• Activity requiring physical effort, carried out especially to sustain or improve health and fitness. Typically,
exercise is a planned activity to enhance health or meet goals.
E. Discuss the importance of positive body image
i. Body image is a term used to describe how people, men or women, feel about themselves and their body. This
includes what they see when they look in a mirror or when they think of themselves in their mind. Body image
includes how people feel about their height, weight, appearance, and overall, how they feel about their body.
People with a positive body image have an accurate perception of what they look like and demonstrate happiness
and confidence in their body. Many people struggle with negative body image, meaning they have a distorted or
negative sense of their body and/or appearance.
F. Discuss the components of maintaining physical activity
i. How to set goals
ii. The importance of regular and consistent activity
iii. The benefit of personal responsibility
iv. The benefit of group physical activity
G. Discuss how to track physical activity
i. Personal Activity Journal (personal)
ii. Local (website)
iii. Statewide (website)
Benefits of various other aerobic workouts
A. Bootcamp
i. More challenging and varied workout
ii. Requires little to no special equipment
GOAL: Gain the understanding of various aerobic workouts and be comfortable planning your own workout.
BEST FOR: All
LESSON OBJECTIVES
• Learn the benefits of aerobic activity
• Gain the knowledge to perform a variety of aerobic exercises on your own
• Understand the difference between various aerobic activities
OTHER: BOOTCAMP, CROSSFIT, WATER AEROBICS, ETC.
1
2
AEROBICS 47
A E R O B I C S
iii. Social support from other participants
B. Crossfit
i. Burn more calories in a shorter amount of time
ii. Promote anabolic hormones such as testosterone
iii. Opportunity to learn new skills
iv. Support from others within Crossfit
C. Water Aerobics
i. Decrease symptoms of arthritis
ii. Decrease depression and anxiety
iii. Stress release
iv. Improve flexibility and strength
v. Muscular balance
vi. Improve physique
vii. Improve ability to control and maintain weight
viii. Increase circulation
ix. Build endurance
CREATE an aerobics workout
A. Equipment needed (all optional)
i. Pilates roll
B. Steps (demo)
i. Write out goal
ii. Plan
iii. Demonstrate five to eight aerobic workouts
Practice (do)
A. Write out goal
B. Plan
C. Stretch
D. Perform 5-8 aerobic workouts
Incorporate into your daily life
A. Class
B. School
C. Work
D. Personal life
Conclusion and assignment
A. Ceate a 20-30 min aerobic exercise program for yourself
B. Track your physical activity
C. Write in your journal how your body responds to aerobic exercise
Update fitness plan/record and answer questions
Schedule/remind of next appointment
5
3
4
7
8
6
48 AEROBICS
A E R O B I C S
Overview: These lessons compare and help you teach the most common forms of stretching and improving balance. Please
adapt these lessons to fit your target audience: adults, mothers, fathers, or teens.
RESISTANCE TRAINING
T H R E E L E S S O N S
RESISTANCE TRAINING 49
50 RESISTANCE TRAINING
R E S I S TA N C E T R A I N I N G
Introduction – This lesson teaches how to perform upper body resistance training. Please review points a-c and
include d-g as applicable.
A. Choose one physical education lesson (from the lesson resources in the back) to teach before doing this
activity. Then ask questions such as:
i. Why is physical activity important?
ii. When was a time you were very active? How did you feel?
B. Discuss the necessity of physical activity
C. Follow up on previous activities or assignments
D. Define the difference between physical activity and exercise
i. Physical activity
• Bodily movement produced by skeletal muscles that requires energy expenditure, such as walking to work,
doing chores, etc.
ii. Exercise
• Activity requiring physical effort, carried out especially to sustain or improve health and fitness. Typically,
exercise is a planned activity to enhance health or meet goals.
E. Discuss the importance of positive body image
i. Body image is a term used to describe how people, men or women, feel about themselves and their body. This
includes what they see when they look in a mirror or when they think of themselves in their mind. Body image
includes how people feel about their height, weight, appearance, and overall, how they feel about their body.
People with a positive body image have an accurate perception of what they look like and demonstrate happiness
and confidence in their body. Many people struggle with negative body image, meaning they have a distorted or
negative sense of their body and/or appearance.
F. Discuss the components of maintaining physical activity
i. How to set goals
ii. The importance of regular and consistent activity
iii. The benefit of personal responsibility
iv. The benefit of group physical activity
G. Discuss how to track physical activity
i. Personal activity journal (personal)
ii. Local (website)
iii. Statewide (website)
Benefits of upper body resistance training
A. Increase posture and form
B. Prevent injury
C. Strengthen bones
GOAL: Become comfortable performing basic resistance training on your own.
BEST FOR: All
LESSON OBJECTIVES
• Learn the benefits of resistance training
• Gain the knowledge to perform resistance training on your own
UPPER BODY RESISTANCE TRAINING
1
2
RESISTANCE TRAINING 51
R E S I S TA N C E T R A I N I N G
D. Weight loss and maintenance
E. Improve mental status
F. Improve sleep
G. Increase heart health
CREATE an upper body resistance training workout
A. Equipment needed (all optional)
i. Resistance bands
ii. Stability ball
iii. Wall
iv. Table
B. Steps (demo)
i. Write out goal
ii. Plan
iii. Demonstrate five to eight upper body
resistance training exercises
Practice (do)
A. Write out goal
B. Plan
C. Stretch
D. Perform five to eight upper body resistance
training exercises
Incorporate into your daily life
A. Class
B. School
C. Work
D. Personal life
Conclusion and assignment
A. Participate in 15-30 min of resistance training exercises per day
B. Track your physical activity
C. Write in your journal how your body responds to resistance training
Update fitness plan/record and answer questions
Schedule/remind of next appointment
5
3
4
7
8
6
For the following three lessons, reference the
resistance handout shown above. For copies of
this handout, please visit: extension.usu.edu/
fscreate/htm/staff-menu. You can find the
handouts under Lessons for Adults.
52 RESISTANCE TRAINING
R E S I S TA N C E T R A I N I N G
RESISTANCE TRAINING WORKOUTS
CHEST PULL W/BAND
Sit tall in a chair with your abs engaged.
Fold your resistance band in half and grip
each end in front of your chest, elbows
bent. Pull the band, bringing it closer to
your chest and straightening your arms, and then slowly
release it back to the start position. Exhale as you pull and
inhale as you release. Do 15 reps.
SHOULDER RAISES W/BAND
Place the resistance band under your feet
and grasp each handle. Sit tall
with your abs engaged and arms slightly
bent at the elbows. Lift the arms up to
shoulder level and slowly release back down to the start
position. Keep your wrists in line with forearms, not bent.
Move your feet closer to the handles to make it harder.
Exhale as you pull up and inhale as you release. Do 15
reps.
OVERHEAD TRICEP
EXTENSIONS W/BAND
Place one end of the resistance band
under your feet and grasp the opposite
end overhead with both hands. Sit tall
and pull the arms close to the sides of your head, elbows
pointing forward. Extend the arms up and slowly release
back down to the start position. The only movement should
be the elbows bending and straightening. Keep the elbows
pointed forward. Exhale as you lift up and inhale as you
release. Do 15 reps.
OVERHEAD
TRICEPS STRETCH
Sit tall on a chair, feet flat on the floor,
without leaning into the chair back. Engage
the abs and bring your right arm overhead,
placing the palm on the center of your back and supporting
the elbow in your left hand. Breathe deeply. Repeat on
opposite side. Hold for 10-30 seconds.
BENT OVER ROW W/BAND
Place the resistance band under your feet
and grasp each handle. Bend forward from
the waist until your back is parallel to the
floor, releasing your arms down toward
the floor. Pull the handles upward, drawing your shoulder
blades together and slowly release back down to the start
position. Keep your abs engaged to protect your lower
back. Exhale as you pull up and inhale as you release. Do
15 reps.
BICEP CURLS W/BAND
Place the resistance band under your feet
and grasp each handle. Sit tall with your
abs engaged and your elbows tucked to
the sides of your waist. Curl the hands up
toward the shoulders and slowly release back down to the
start position. Keep your wrists in line with the forearms,
not bent. Move your feet closer to the handles to make it
harder. Exhale as you lift up and inhale as you release. Do
15 reps.
SHOULDER STRETCH
Sit tall on your chair, feet flat on the floor,
without leaning into your chair back.
Engage the abs and bring your left arm
across your chest, holding it below the
elbow. Keep the shoulders down and relaxed. Breathe
deeply. Repeat on opposite side. Hold for 10-30 seconds.
UPPER BACK STRETCH
Sit tall on your chair, feet flat on the floor,
without leaning into your chair back.
Engage the abs and extend your arms
toward the ceiling. As you squeeze your
shoulder blades together, pull the elbows down and back.
Hold the stretch and breathe deeply. Repeat one more time.
Hold for 10-30 seconds.
RESISTANCE TRAINING 53
R E S I S TA N C E T R A I N I N G
CHEST STRETCH
Sit tall on your chair, feet flat on the floor,
without leaning into the back of the chair.
Lace your fingers behind your back,
straightening the arms the best you can
and opening up the chest. Relax your shoulders down.
Breathe deeply. Hold for 10-30 seconds.
LOWER BACK
EXTENSIONS W/BAND
Place the resistance band under your feet
and grasp each handle. Engage your abs
and bend forward from the waist until your
back is parallel to the floor. Keep your elbows bent and
tucked in to the sides of the waist. Keeping your spine
perfectly straight, hinge from the waist to sit back up. Keep
your abs and your spine lengthened. Exhale as you sit up
and inhale as you release. Do 15 reps.
SEATED TWIST
Sit at the edge of your chair, feet flat on
the floor. Place your left hand on your
right knee and your right hand behind you.
Twist (from the waist) to the right and hold,
keeping the shoulders relaxed down. Breathe deeply and
repeat on the opposite side. Hold for 10 to 30 seconds.
INNER THIGH
ABDUCTION W/BAND
Sit tall on your chair without leaning into
your chair back, placing your right foot on
the band for resistance. Extend your left
leg. Slowly sweep your left leg toward the midline of the
body and then return back to the starting position. Exhale
as you move your leg across the body and inhale as you
bring it back in line with the hip. Keep the band on your left
foot and move to the next exercise. Do 15 reps.
SINGLE KNEE LIFTS
Sit at the front edge of your chair, hands
grasping the sides of the chair. Keeping
the spine straight, lean back until you feel
your abs engage. Keeping the knees bent,
lift your left knee up toward your chest and slowly lower
it back down. Switch sides to complete one rep. Make
sure you’re not leaning into your chair back. Keep your abs
pulled in tight. Exhale as you lift your leg up and inhale as
you lower it down. Do 15 reps.
SEATED ABS STRETCH
Sit at the edge of your chair. Extend your
legs out and your arms up overhead,
stretching through the abs. Breathe
deeply. Repeat one more time. Hold for 10
to 30 seconds.
SEATED LEG
EXTENSIONS W/BAND
Place the band’s handle on your left foot,
making sure it’s secure. Step on the band
itself with your right foot for resistance,
holding the remaining band in your right hand. Sit tall on
your chair without leaning into your chair back. Lift your left
leg up so that the back of your thigh comes off the chair.
Extend your leg out, straightening at the knee and then
bend the knee. Keep the band on your left foot and move to
the next exercise. Do 15 reps.
OUTER THIGH
ABDUCTION W/ BAND
Sit tall on your chair without leaning into
the chair back, placing your right foot on
the band for resistance. Extend your left
leg. Slowly sweep your left leg outward and then return
to the starting position. Keep your toes pointed toward
the ceiling. Exhale as you move your leg out and inhale as
you bring it back in line with the hip. Repeat these three
exercises on your right side before moving to the next
exercise. Do 15 reps.
54 RESISTANCE TRAINING
R E S I S TA N C E T R A I N I N G
GLUTE AND THIGH STRETCH
Sit tall on your chair, feet flat on the floor,
without leaning into your chair back. Place
your left ankle on your right knee, gently
pushing your left knee outward and down.
Bend forward from the waist just slightly, keeping the head
up and shoulders down. Breathe deeply. Repeat on the
opposite side. Hold for 10 to 30 seconds.
STRAIGHT-LEG FORWARD
STRETCH
Sit tall on your chair, legs extended in front
of you. Engage the abs and extend your
arms up toward the ceiling. Bend forward
from the waist, reaching toward your feet and relaxing your
upper body. Breathe deeply. Slowly roll the spine back up
when finished. Hold for 10 to 30 seconds.
BENT-KNEE
FORWARD STRETCH
Sit tall on your chair, feet flat on the floor,
without leaning into your chair back.
Engage the abs and extend your arms
toward the ceiling. Bend forward from the waist, reaching
toward your feet and relaxing your torso onto your thighs.
Breathe deeply. Slowly roll the spine back up when
finished. Hold for 10 to 30 seconds.
SEATED BEND WITH TWIST
Sit tall on your chair, feet flat on the floor,
without leaning into your chair back. Bend
forward from the waist, reaching your right
hand toward your left foot. Then twist your
upper body toward the left as you extend your left arm up.
Try to look up toward your hand. Breathe deeply. Slowly
rotate back down to switch and stretch on the opposite
side. Hold for 10 to 30 seconds.
RESISTANCE TRAINING 55
R E S I S TA N C E T R A I N I N G
56 RESISTANCE TRAINING
R E S I S TA N C E T R A I N I N G
Introduction – This lesson teaches how to perform core resistance training. Please review points a-c and include d-g
as applicable.
A. Choose one physical education lesson (from the lesson resources in the back) to teach before doing this
activity. Then ask questions such as:
i. Why is physical activity important?
ii. When was a time you were very active? How did you feel?
B. Discuss the necessity of physical activity
C. Follow up on previous activities or assignments
D. Define the difference between physical activity and exercise
i. Physical activity
• Bodily movement produced by skeletal muscles that requires energy expenditure, such as walking to work,
doing chores, etc.
ii. Exercise
• Activity requiring physical effort, carried out especially to sustain or improve health and fitness. Typically,
exercise is a planned activity to enhance health or meet goals.
E. Discuss the importance of positive body image
i. Body image is a term used to describe how people, men or women, feel about themselves and their body. This
includes what they see when they look in a mirror or when they think of themselves in their mind. Body image
includes how people feel about their height, weight, appearance, and overall, how they feel about their body.
People with a positive body image have an accurate perception of what they look like and demonstrate happiness
and confidence in their body. Many people struggle with negative body image, meaning they have a distorted or
negative sense of their body and/or appearance.
F. Discuss the components of maintaining physical activity
i. How to set goals
ii. The importance of regular and consistent activity
iii. The benefit of personal responsibility
iv. The benefit of group physical activity
G. Discuss how to track physical activity
i. Personal activity journal (personal)
ii. Local (website)
iii. Statewide (website)
Benefits of core resistance training
A. Increase posture
B. Increase balance and stability
C. Help prevent falls
GOAL: Become comfortable performing basic resistance training on your own.
BEST FOR: All
LESSON OBJECTIVES
• Learn the benefits of resistance training
• Gain the knowledge to perform resistance training on your own
CORE RESISTANCE TRAINING
1
2
RESISTANCE TRAINING 57
R E S I S TA N C E T R A I N I N G
D. Decrease back pain
E. Increase power
CREATE a core resistance training workout
A. Equipment needed (all optional)
i. Resistance bands
ii. Stability ball
B. Steps (demo)
i. Write out goal
ii. Plan
iii. Demonstrate five to eight core resistance training exercises
Practice (do)
A. Write out goal
B. Plan
C. Stretch
D. Perform five to eight core resistance training exercises
Incorporate into your daily life
A. Class
B. School
C. Work
D. Personal life
Conclusion and assignment
A. Participate in 15-30 min of resistance training exercises per day
B. Track your physical activity
C. Write in your journal how your body responds to resistance training
Update fitness plan/record and answer questions
Schedule/remind of next appointment
5
3
4
7
8
6
58 RESISTANCE TRAINING
R E S I S TA N C E T R A I N I N G
Introduction – This lesson teaches how to perform core resistance training. Please review points a-c and include d-g
as applicable.
A. Choose one physical education lesson (from the lesson resources in the back) to teach before doing this
activity. Then ask questions such as:
i. Why is physical activity important?
ii. When was a time you were very active? How did you feel?
B. Discuss the necessity of physical activity
C. Follow up on previous activities or assignments
D. Define the difference between physical activity and exercise
i. Physical activity
• Bodily movement produced by skeletal muscles that requires energy expenditure, such as walking to work,
doing chores, etc.
ii. Exercise
• Activity requiring physical effort, carried out especially to sustain or improve health and fitness. Typically,
exercise is a planned activity to enhance health or meet goals.
E. Discuss the importance of positive body image
i. Body image is a term used to describe how people, men or women, feel about themselves and their body. This
includes what they see when they look in a mirror or when they think of themselves in their mind. Body image
includes how people feel about their height, weight, appearance, and overall, how they feel about their body.
People with a positive body image have an accurate perception of what they look like and demonstrate happiness
and confidence in their body. Many people struggle with negative body image, meaning they have a distorted or
negative sense of their body and/or appearance.
F. Discuss the components of maintaining physical activity
i. How to set goals
ii. The importance of regular and consistent activity
iii. The benefit of personal responsibility
iv. The benefit of group physical activity
G. Discuss how to track physical activity
i. Personal activity journal (personal)
ii. Local (website)
iii. Statewide (website)
Benefits of lower body resistance training
A. Ability to perform more intense physical activity
B. Increase metabolism
GOAL: Become comfortable performing basic resistance training on your own.
BEST FOR: All
LESSON OBJECTIVES
• Learn the benefits of resistance training
• Gain the knowledge to perform resistance training on your own
LOWER BODY RESISTANCE TRAINING
1
2
RESISTANCE TRAINING 59
R E S I S TA N C E T R A I N I N G
C. Help tone entire body
D. Improve daily life with stronger legs
CREATE a lower body resistance training workout
A. Equipment needed (all optional)
i. Resistance bands
ii. Stability ball
B. Steps (demo)
i. Write out goal
ii. Plan
iii. Demonstrate five to eight resistance training exercises
Practice (do)
A. Write out goal
B. Plan
C. Stretch
D. Perform five to eight resistance training exercises
Incorporate into your daily life
A. Class
B. School
C. Work
D. Personal life
Conclusion and assignment
A. Participate in 15-30 min of resistance training exercises per day
B. Track your physical activity
C. Write in your journal how your body responds to resistance training
Update fitness plan/record and answer questions
Schedule/remind of next appointment
5
3
4
7
8
6
60 RESISTANCE TRAINING
R E S I S TA N C E T R A I N I N G
Overview: These lessons compare and help you teach the most common forms of exercise using body weight. Please adapt
these lessons to fit your target audience: adults, mothers, fathers or teens.
STRENGTH TRAINING
T H R E E L E S S O N S
STRENGTH TRAINING 61
62 STRENGTH TRAINING
S T R E N G T H T R A I N I N G
Introduction – This lesson teaches how to perform core upper body strength training. Please review points a-c and
include d-g as applicable.
A. Choose one physical education lesson (from the lesson resources in the back) to teach before doing this
activity. Then ask questions such as:
i. Why is physical activity important?
ii. When was a time you were very active? How did you feel?
B. Discuss the necessity of physical activity
C. Follow up on previous activities or assignments
D. Define the difference between physical activity and exercise
i. Physical activity
• Bodily movement produced by skeletal muscles that requires energy expenditure, such as walking to work,
doing chores, etc.
ii. Exercise
• Activity requiring physical effort, carried out especially to sustain or improve health and fitness. Typically,
exercise is a planned activity to enhance health or meet goals.
E. Discuss the importance of positive body image
i. Body image is a term used to describe how people, men or women, feel about themselves and their body. This
includes what they see when they look in a mirror or when they think of themselves in their mind. Body image
includes how people feel about their height, weight, appearance, and overall, how they feel about their body.
People with a positive body image have an accurate perception of what they look like and demonstrate happiness
and confidence in their body. Many people struggle with negative body image, meaning they have a distorted or
negative sense of their body and/or appearance.
F. Discuss the components of maintaining physical activity
i. How to set goals
ii. The importance of regular and consistent activity
iii. The benefit of personal responsibility
iv. The benefit of group physical activity
G. Discuss how to track physical activity
i. Personal activity journal (personal)
ii. Local (website)
iii. Statewide (website)
Benefits of upper body strength training
A. Improve muscle strength and tone
B. Increase bone density and strength
GOAL: Become comfortable performing basic upper body strength training on your own.
BEST FOR: All
LESSON OBJECTIVES
• Learn the benefits of strength training
• Gain the knowledge to perform strength training on your own
• Improve health
UPPER BODY STRENGTH TRAINING
1
2
STRENGTH TRAINING 63
S T R E N G T H T R A I N I N G
C. Increase ability to perform daily activities
D. Improve balance, coordination, and mobility
E. Increase energy
F. Decrease risk of chronic diseases
G. Relieve back pain
H. Increase metabolism
I. Increase flexibility
CREATE an upper body strength training workout
A. Equipment needed (all optional)
i. Weighted bar
ii. Medicine ball
iii. Other weights (chair, books, etc.)
B. Steps (demo)
i. Write out goal
ii. Plan
iii. Stretch
iv. Demonstrate five to eight strength training exercises
Practice (do)
A. Write out goal
B. Plan
C. Stretch
D. Perform strength training
Incorporate into your daily life
A. Class
B. School
C. Work
D. Personal life
Conclusion and assignment
A. Participate in 15-30 min of strength training exercises per day
B. Track your physical activity
C. Write in your journal how your body responds to strength training
Update fitness plan/record and answer questions
Schedule/remind of next appointment
5
3
4
7
8
6
64 STRENGTH TRAINING
S T R E N G T H T R A I N I N G
Introduction – This lesson teaches how to perform core strength training. Please review points a-c and include d-g
as applicable.
A. Choose one physical education lesson (from the lesson resources in the back) to teach before doing this
activity. Then ask questions such as:
i. Why is physical activity important?
ii. When was a time you were very active? How did you feel?
B. Discuss the necessity of physical activity
C. Follow up on previous activities or assignments
D. Define the difference between physical activity and exercise
i. Physical activity
• Bodily movement produced by skeletal muscles that requires energy expenditure, such as walking to work,
doing chores, etc.
ii. Exercise
• Activity requiring physical effort, carried out especially to sustain or improve health and fitness. Typically,
exercise is a planned activity to enhance health or meet goals.
E. Discuss the importance of positive body image
i. Body image is a term used to describe how people, men or women, feel about themselves and their body. This
includes what they see when they look in a mirror or when they think of themselves in their mind. Body image
includes how people feel about their height, weight, appearance, and overall, they feel about their body. People
with a positive body image have an accurate perception of what they look like and demonstrate happiness and
confidence in their body. Many people struggle with negative body image, meaning they have a distorted or
negative sense of their body and/or appearance.
F. Discuss the components of maintaining physical activity
i. How to set goals
ii. The importance of regular and consistent activity
iii. The benefit of personal responsibility
iv. The benefit of group physical activity
G. Discuss how to track physical activity
i. Personal activity journal (personal)
ii. Local (website)
iii. Statewide (website)
Benefits of core strength training
A. Increase ability to perform daily activities
B. Relieve back pain
GOAL: Become comfortable performing basic core strength training on your own.
BEST FOR: All
LESSON OBJECTIVES
• Learn the benefits of strength training
• Gain the knowledge to perform strength training on your own
• Improve health
CORE STRENGTH TRAINING
1
2
STRENGTH TRAINING 65
S T R E N G T H T R A I N I N G
C. Increase ability to enjoy sport activities
D. Increase balance and stability
E. Improve posture
CREATE a core strength training workout
A. Equipment needed (all optional)
i. Weighted bar
ii. Medicine ball
iii. Other weights (books, chairs, etc.)
B. Steps (demo)
i. Write out goal
ii. Plan
iii. Demonstrate five to eight strength training exercises
Practice (do)
A. Write out goal
B. Plan
C. Stretch
D. Perform five to eight strength training exercises
Incorporate into your daily life
A. Class
B. School
C. Work
D. Personal life
Conclusion and assignment
A. Participate in 15-30 min of strength training exercises per day
B. Track your physical activity
C. Write in your journal how your body responds to strength training
Update fitness plan/record and answer questions
Schedule/remind of next appointment
5
3
4
7
8
6
66 STRENGTH TRAINING
S T R E N G T H T R A I N I N G
Introduction – This lesson teaches how to perform lower body strength training. Please review points a-c and
include d-g as applicable.
A. Choose one physical education lesson (from the lesson resources in the back) to teach before doing this
activity. Then ask questions such as:
i. Why is physical activity important?
ii. When was a time you were very active? How did you feel?
B. Discuss the necessity of physical activity
C. Follow up on previous activities or assignments
D. Define the difference between physical activity and exercise
i. Physical activity
• Bodily movement produced by skeletal muscles that requires energy expenditure, such as walking to work,
doing chores, etc.
ii. Exercise
• Activity requiring physical effort, carried out especially to sustain or improve health and fitness. Typically,
exercise is a planned activity to enhance health or meet goals.
E. Discuss the importance of positive body image
i. Body image is a term used to describe how people, men or women, feel about themselves and their body. This
includes what they see when they look in a mirror or when they think of themselves in their mind. Body image
includes how people feel about their height, weight, appearance, and overall, how people feel about their body.
People with a positive body image have an accurate perception of what they look like and demonstrate happiness
and confidence in their body. Many people struggle with negative body image, meaning they have a distorted or
negative sense of their body and/or appearance.
F. Discuss the components of maintaining physical activity
i. How to set goals
ii. The importance of regular and consistent activity
iii. The benefit of personal responsibility
iv. The benefit of group physical activity
G. Discuss how to track physical activity
i. Personal activity journal (personal)
ii. Local (website)
iii. Statewide (website)
Benefits of lower body strength training
A. Increase ability to perform daily activities
B. Support the rest of the body
GOAL: Become comfortable performing basic lower body strength training on your own.
BEST FOR: All
LESSON OBJECTIVES
• Learn the benefits of strength training
• Gain the knowledge to perform strength training on your own
• Improve health
LOWER BODY STRENGTH TRAINING
1
2
STRENGTH TRAINING 67
S T R E N G T H T R A I N I N G
C. Increase calorie expenditure
D. Ability to perform more intense physical activity
E. Improve balance
F. Decrease risk of chronic disease
G. Decrease risk of falls
CREATE a lower body strength training workout
A. Equipment needed (all optional)
i. Weighted bar
ii. Medicine ball
iii. Other weights (chair, books, etc.)
B. Steps (demo)
i. Write out goal
ii. Plan
iii. Stretch
iv. Demonstrate five to eight strength training exercises
Practice (do)
A. Write out goal
B. Plan
C. Stretch
D. Perform five to eight strength training exercises
Incorporate into your daily life
A. Class
B. School
C. Work
D. Personal life
Conclusion and assignment
A. Participate in 15-30 min of strength training exercises per day
B. Track your physical activity
C. Write in your journal how your body responds to strength training
Update fitness plan/record and answer questions
Schedule/remind of next appointment
5
3
4
7
8
6
68 STRENGTH TRAINING
S T R E N G T H T R A I N I N G
Overview: This lesson will help you teach the fundamentals of circuit training. Please adapt this lesson to fit your target
audience: adults, mothers, fathers or teens.
CIRCUIT TRAINING
O N E L E S S O N
CIRCUIT TRAINING 69
70 CIRCUIT TRAINING
C I R C U I T T R A I N I N G
Introduction – This lesson teaches how to create and participate in circuit training. Please review points a-c and
include d-g as applicable.
A. Choose one physical education lesson (from the lesson resources in the back) to teach before doing this
activity. Then ask questions such as:
i. Why is physical activity important?
ii. When was a time you were very active? How did you feel?
B. Discuss the necessity of physical activity
C. Follow up on previous activities or assignments
D. Define the difference between physical activity and exercise
i. Physical activity
• Bodily movement produced by skeletal muscles that requires energy expenditure, such as walking to work,
doing chores, etc.
ii. Exercise
• Activity requiring physical effort, carried out especially to sustain or improve health and fitness. Typically,
exercise is a planned activity to enhance health or meet goals.
E. Discuss the importance of positive body image
i. Body image is a term used to describe how people, men or women, feel about themselves and their body. This
includes what they see when they look in a mirror or when they think of themselves in their mind. Body image
includes how people feel about their height, weight, appearance, and overall, how they feel about their body.
People with a positive body image have an accurate perception of what they look like and demonstrate happiness
and confidence in their body. Many people struggle with negative body image, meaning they have a distorted or
negative sense of their body and/or appearance.
F. Discuss the components of maintaining physical activity
i. How to set goals
ii. The importance of regular and consistent activity
iii. The benefit of personal responsibility
iv. The benefit of group physical activity
G. Discuss how to track physical activity
i. Personal activity journal (personal)
ii. Local (website)
iii. Statewide (website)
Benefits of circuit training
A. Increase strength
B. Increase mental wellness
C. Increase cardiorespiratory function
GOAL: Become comfortable creating and participating in circuit training.
BEST FOR: All
LESSON OBJECTIVES
• Learn the benefits of circuit training
• Gain the knowledge to perform circuit training on your own
• Improve health
1
2
CIRCUIT TRAINING 71
C I R C U I T T R A I N I N G
D. Increase mental wellness
E. Improve quality of sleep
F. Improve and lower cholesterol
G. Reduce risk of injury
H. Increase flexibility
CREATE a circuit
A. Equipment needed (all optional)
i. Depends on the circuit you choose
B. Steps (demo)
i. Write out goal
ii. Plan
iii. Stretch
iv. Outline and demonstrate one to two circuits
Practice (do)
A. Write out goal
B. Plan
C. Stretch
D. Perform one to two circuits
Incorporate into your daily life
A. Class
B. School
C. Work
D. Personal life
Conclusion and assignment
A. Participate in 20-30 min of circuit training exercises per day.
B. Track your physical activity
C. Write in your journal how your body responds to circuit training
Update fitness plan/record and Answer Questions
Schedule/remind of next appointment
5
3
4
7
8
6
For this lesson, reference the circuit training
handout shown above. For copies of this handout,
please visit: extension.usu.edu/fscreate/htm/
staff-menu. You can find the handouts under
Lessons for Adults.
72 CIRCUIT TRAINING
C I R C U I T T R A I N I N G
CIRCUIT TRAINING WORKOUTS
BOOTCAMP
WARM UP
7 Minutes
Jog 30 Sec
BK 30 Sec
HK 30 Sec
Heel Touch 30 Sec
Toe Touch 30 Sec
Jumping Jacks 30 Sec
Lunge 30 Sec
(each leg)
Squat with Front
Raise 1min
Shuffle 1min
Jumping Jacks 30 Sec
Jog OH Press 30 Sec
CIRCUIT #4
Repeat 3x, Rest 30 Sec
after each round
Lunge 1 Arm Press
30 Sec (Legs/Delt)
Step Up, Ham & Bi Curl
30 Sec (Hams/Bi)
Shuffle Side Shot
30 Sec
Jump Rope
30 Sec
CIRCUIT #5
Repeat 3x, Rest 30 Sec
after each round
Jumping Jacks
30 Sec
Kneeling Pushups
30 Sec (Chest)
Squats
30 Sec (Legs)
Bicycle crunches
30 Sec
CIRCUIT #6
Repeat 3x, Rest 30 Sec
after each round
Burpees
30 Sec
Triceps Dip on Bench
30 Sec (Triceps)
Plank
30 Sec
Walking Lunges
30 Sec (Legs)
COOL DOWN
5 Minutes
All 4’s
30 Sec
(Spinal muscle)
Oblique Abs
30 Sec
Plank
All the way around
Hamstring Stretch
Quad Stretch
Back Stretch
Chest Stretch
CIRCUIT #1
Repeat 3x, Rest 30 Sec
after each round
DB Bench on Ball
30 Sec (Chest)
Pushup
30 Sec (Chest)
Plank
30 Sec (Core)
Mt. Climbers
30 Sec
CIRCUIT #2
Repeat 3x, Rest 30 Sec
after each round
DB Bicep Curls
30 Sec (Biceps)
Triceps Dip on Bench
30 Sec (Triceps)
DB Lateral Raises
30 Sec (Delts)
Jumping Jacks
30 Sec
CIRCUIT #3
Repeat 3x, Rest 30 Sec after
each round
Squat w/DB Front
Raise 30 Sec (Legs)
DB Pullover on Ball
30 Sec (Lat)
Plank Row
30 Sec (Back)
Burpees
30 Sec
CIRCUIT TRAINING 73
C I R C U I T T R A I N I N G
CIRCUIT SYSTEM
1. JUMPING JACKS 2. WALL SIT 3. PUSHUP
4. ABDOMINAL CRUNCH 5. STEP-UP ON CHAIR 6. SQUAT
7. TRICEPS DIP 8. PLANK 9. HIGH KNEES
10. LUNGE 11. PUSHUP/ROTATION 12. SIDE PLANK
74 CIRCUIT TRAINING
C I R C U I T T R A I N I N G
THE 4X4 WORKOUT
BEGINNER CIRCUIT TRAINING ADVANCED CIRCUIT TRAINING
1. CARDIO
Jump Rope
Front Kicks
Burpees
Jumping Jacks
1. Jog in Place
2. Wall Pushups or Counter Pushups
3. Chair Squats
4. Crunches
5. Jumping Jacks
6. Chair Dips with Knees Bent
7. Bridges
8. Bird Dogs
9. Straight-leg Raises (30 sec each)
1. Jumping Jacks
2. Crossover Pushups
3. Squat with Front Kick, Alternating Legs
4. Ab Chopper
5. Mountain Climbers
6. Chair Dips/One Leg Raised (30 sec each)
7. Split Squat Jump
8. Side Plank (30 sec each side)
9. Step-ups on a Chair, Alternating Leg
2. STRENGTH
10 Pushups/10 Dips
Alternating Lunges
Squat Press
Back Row
3. CARDIO
Flying Lunges
Side Shuffle
Mountain Climbers
Squat Pulses/
Squat Jumps
4. ABS
Plank
Bicycle Crunches
V-sit Hold
Reverse Crunches
Beginner: 30 seconds per exercise, 1x through, Intermediate: 45 seconds per exercise, 2x through, Advanced: 60 seconds
per exercise, 3x through Take breaks as you need them and drink water.
At the end of the circuit, rest for 1 minute and then get
ready to start again. Try to complete the circuit two to three
times during each workout.
At the end of the circuit, rest for 1 minute and then get
ready to start again. Try to complete the circuit two to three
times during each workout.
CIRCUIT TRAINING 75
C I R C U I T T R A I N I N G
CIRCUIT TRAINING
Ski Jumps
Squat
Thrusts
Bench
Step-upsFree
Squats
Press-ups
Chin-ups
Sit-ups
Back
Extensions
76 CIRCUIT TRAINING
C I R C U I T T R A I N I N G
Overview: These applied lessons help you teach and encourage participants to become more active in various locations and
during everyday activities. Please adapt these lessons to fit your target audience: adults, mothers, fathers, or teens.
APPLIED LESSONS
T H R E E L E S S O N S
APPLIED LESSONS 77
78 APPLIED LESSONS
A P P L I E D L E S S O N S
Introduction – This lesson teaches how to increase physical activity at home and in the park. Please review points
a-c and include d-g as applicable.
A. Choose one physical education lesson (from the lesson resources in the back) to teach before doing this
activity. Then ask questions such as:
i. Why is physical activity important?
ii. When was a time you were very active? How did you feel?
B. Discuss the necessity of physical activity
C. Follow up on previous activities or assignments
D. Define the difference between physical activity and exercise
i. Physical activity
• Bodily movement produced by skeletal muscles that requires energy expenditure, such as walking to work,
doing chores, etc.
ii. Exercise
• Activity requiring physical effort, carried out especially to sustain or improve health and fitness. Typically,
exercise is a planned activity to enhance health or meet goals.
E. Discuss the importance of positive body image
i. Body image is a term used to describe how people, men or women, feel about themselves and their body. This
includes what they see when they look in a mirror or when they think of themselves in their mind. Body image
includes how people feel about their height, weight, appearance, and overall, how people feel about their body.
People with a positive body image have an accurate perception of what they look like and demonstrate happiness
and confidence in their body. Many people struggle with negative body image, meaning they have a distorted or
negative sense of their body and/or appearance.
F. Discuss the components of maintaining physical activity
i. How to set goals
ii. The importance of regular and consistent activity
iii. The benefit of personal responsibility
iv. The benefit of group physical activity
G. Discuss how to track physical activity
i. Personal activity journal (personal)
ii. Local (website)
iii. Statewide (website)
Benefits of incorporating physical activity at home or in the park
A. Save money
B. Save time
GOAL: Encourage participants to increase physical activity at home and in the park.
BEST FOR: All
LESSON OBJECTIVES
• Learn how to incorporate physical activity at home and in the park
• Gain the knowledge to perform physical activities anywhere you are
• Improve health
PHYSICAL ACTIVITY AT HOME AND IN THE PARK
1
2
APPLIED LESSONS 79
A P P L I E D L E S S O N S
C. Increase privacy
D. Freedom to exercise when you want
CREATE the habit of being active at home and at the park
A. Equipment needed (all optional)
i. None
B. Steps (demo)
i. Write out goal
ii. Plan
iii. Demonstrate 10-12 activities to do at home or in the park
Practice (do)
A. Write out goal
B. Plan
C. Stretch
D. Perform 10-12 activities to do at home or in the park
Incorporate into your daily life
A. Class
B. School
C. Work
D. Personal life
Conclusion and assignment
A. Participate in 15-20 min of physical activity at home or in the park
B. Track your physical activity
C. Write in your journal about how each is incorporating physical activity into your life everyday
Update fitness plan/record and answer questions
Schedule/remind of next appointment
5
3
4
7
8
6
80 APPLIED LESSONS
A P P L I E D L E S S O N S
Introduction – This lesson teaches how to increase physical activity while at work. Please review points a-c and
include d-g as applicable.
A. Choose one physical education lesson (from the lesson resources in the back) to teach before doing this
activity. Then ask questions such as:
i. Why is physical activity important?
ii. When was a time you were very active? How did you feel?
B. Discuss the necessity of physical activity
C. Follow up on previous activities or assignments
D. Define the difference between physical activity and exercise
i. Physical activity
• Bodily movement produced by skeletal muscles that requires energy expenditure, such as walking to work,
doing chores, etc.
ii. Exercise
• Activity requiring physical effort, carried out especially to sustain or improve health and fitness. Typically,
exercise is a planned activity to enhance health or meet goals.
E. Discuss the importance of positive body image
i. Body image is a term used to describe how people, men or women, feel about themselves and their body. This
includes what they see when they look in a mirror or when they think of themselves in their mind. Body image
includes how people feel about their height, weight, appearance, and overall, how they feel about their body.
People with a positive body image have an accurate perception of what they look like and demonstrate happiness
and confidence in their body. Many people struggle with negative body image, meaning they have a distorted or
negative sense of their body and/or appearance.
F. Discuss the components of maintaining physical activity
i. How to set goals
ii. The importance of regular and consistent activity
iii. The benefit of personal responsibility
iv. The benefit of group physical activity
G. Discuss how to track physical activity
i. Personal activity journal (personal)
ii. Local (website)
iii. Statewide (website)
GOAL: Encourage participants to increase physical activity at work.
BEST FOR: All
LESSON OBJECTIVES
• Learn how to incorporate physical activity at work
• Gain the knowledge to perform physical activities anywhere you are
• Improve health
PHYSICAL ACTIVITY AT WORK
1
APPLIED LESSONS 81
A P P L I E D L E S S O N S
Benefits of incorporating physical activity at work
A. Improve memory and concentration
B. Increase mental stamina
C. Enhance creativity
D. Decrease stress
E. Increase performance
F. Increase work satisfaction
G. Reduce risk of chronic disease
H. Decrease weight
CREATE the habit of being active at work
A. Equipment needed (all optional)
i. Depends on the circuit you choose
B. Steps (demo)
i. Write out goal
ii. Plan
iii. Stretch
iv. Demonstrate 10-12 activities to do at work
Practice (do)
A. Write out goal
B. Plan
C. Stretch
D. Perform 10-12 activities to do at work
Incorporate into your daily life
A. Class
B. School
C. Work
D. Personal life
Conclusion and assignment
A. Participate in 15-20 min of physical activity at home or work
B. Track your physical activity
C. Write in your journal about how each is incorporating physical activity into their life everyday
Update fitness plan/record and answer questions
Schedule/remind of next appointment
2
5
3
4
7
8
6
For this lesson, reference the work stretches
handout shown above. For copies of this handout,
please visit: extension.usu.edu/fscreate/htm/
staff-menu. You can find the handouts under
Lessons for Adults.
82 APPLIED LESSONS
A P P L I E D L E S S O N S
WORK STRETCHES
NECK FLEXION/EXTENSION
STRETCH
Gently rotate your head forward then
backward, like an exaggerated nod
for yes.
NECK LATERAL FLEXION
STRETCH
Gently rotate your head from side to side.
like an exaggerated nod for no.
CROSSOVER ARM STRETCH
Bring the right arm across the body. Use
the left hand or forearm to hold the right
arm against the chest.
WALL PUSHUPS
Stand facing the wall and push yourself off
the wall with your arms.
TRICEPS STRETCH
Gently bend arm behind head as if
scratching back. Then, place the opposite
hand on elbow and pull down, hold, repeat.
HIP FLEXOR STRETCH
Keep back straight, tuck bottom under,
lunge forward on front leg.
WRIST STRETCH
Stand up and turn your hands so that the
wrists face your computer and touch the
desk. Lean into the wrists.
HAND AND FINGER STRETCH
Extend fingers open as far as possible and
hold for 5 seconds. Then make a fist and
hold for 5 seconds. Repeat.
LOWER BACK STRETCH
Sit forward in chair and bring knee toward
chest. Grab the back of your thigh and
gently pull it toward you.
BACK AND BICEP STRETCH
Straighten arms, place hands on desk.
Push your chair back until your head is
between your arms. Pull yourself back in.
REACH FOR THE SKY
Sit tall in your chair and stretch your arms
overhead, interlocking fingers. Hold for 10
seconds.
HAMSTRING STRETCH
Push back from your desk and put your
heel on your desk. Bend forward.
APPLIED LESSONS 83
A P P L I E D L E S S O N S
WALL SQUATS
Lean your back against a sturdy wall,
with your feet planted 1-2 feet in front of
you. Bend the knees to squat down and
straighten them to push back up. Keep the
abs engaged, your back straight, and your weight on your
heels. Make sure your knees don’t go past your toes. Exhale
as you stand back up and inhale as you lower down.
CALF RAISES
Stand tall with feet wider than the hips and
toes turned outward. Hold onto the wall
for support. Raise your heels up away from
the floor and slowly lower them back down.
Exhale as you lift your heels and inhale as you lower down.
WALL LUNGES
Step forward with your right leg, placing
your left heel up on the wall and the ball of
the left foot on the floor. Face forward and
bend the knees to lunge straight down,
then push back up. Don’t lean forward. Try to balance
your weight evenly between both feet, and keep your toes
pointed forward. Exhale as you push back up and inhale as
you lower down. Repeat on opposite leg before moving on
to the next exercise.
WALL PUSHUPS
Place your toes 2-3 feet away from the
wall and you hands shoulder-width on the
wall in front of you. Keeping the body in
a straight line, bend the elbows to lower
your body toward the wall and extend them to push back
up. Keep abs engaged and the body straight—don’t lean
forward with just your chest. Exhale as you push back up
and inhale as you lower toward the wall.
STANDING THIGH STRETCH
Stand on one leg, balance, pull foot toward
buttocks.
LEG EXTENSIONS
Grab the seat of your chair and extend your
legs out in front of you. Flex and point your
toes five times. Release and repeat.
BICEP STRETCH
Extend arms palms up and “push” your
bicep upward. Make this stretch easier
by putting palms of hands on bottom of a
table.
GASTROCNEMIUS STRETCH
Keep knee straight and heel down, feet
facing forward.
84 APPLIED LESSONS
A P P L I E D L E S S O N S
SEATED SIDE BENDS
Sit tall on your chair, feet flat on the floor,
without leaning into your chair back.
Engage the abs and place your hands next
to your ears, elbows bent. Moving from
the waist, bend down to the right, bring it back up, and
then bend down to the left, focusing on the obliques on the
sides of the waist. Keep your head and neck in line with the
spine. Exhale as you sit back up and inhale as you bend to
the side.
SEATED HIP FLEXOR
AND EXTENSION
Sit tall on your chair, feet flat on the floor,
hands grasping the sides of the chair. Lift
your right knee up (so your thigh is raised
off of the chair) and extend your leg, toes pointing toward
the ceiling. Bend at the knee and lower the thigh back
down to complete one rep. Exhale as you lift and extend
your leg and inhale as you bend and lower your leg. Repeat
all reps on the right leg and then do this exercise on your
left side.
TRICEPS DIPS WITH CHAIR
Sit at the edge of a chair and take
an overhand grip of the chair’s edge,
straightening the arms and lifting your
body off the chair and placing the feet flat
on the floor. Bend the elbows to lower your body down
toward the floor and straighten the arms to come back up.
Exhale as you straighten the arms and push up and inhale
as you bend the arms and lower down.
SEATED KNEE LIFTS
Sit at the front edge of your chair, hands
grasping the sides of the chair. Keeping
the spine straight, lean back until you feel
your abs engage. Keeping the knees bent
and legs together, lift your knees toward your chest and
slowly lower them back down. Make sure you’re not leaning
into your chair back. Keep your abs pulled in tight and your
torso still. Exhale as you lift the legs up and inhale as you
lower them down.
APPLIED LESSONS 85
A P P L I E D L E S S O N S
86 APPLIED LESSONS
A P P L I E D L E S S O N S
Introduction – This lesson teaches how to increase physical activity with your children. Please review points a-c and
include d-g as applicable.
A. Choose one physical education lesson (from the lesson resources in the back) to teach before doing this
activity. Then ask questions such as:
i. Why is physical activity important?
ii. When was a time you were very active? How did you feel?
B. Discuss the necessity of physical activity
C. Follow up on previous activities or assignments
D. Define the difference between physical activity and exercise
i. Physical activity
• Bodily movement produced by skeletal muscles that requires energy expenditure, such as walking to work,
doing chores, etc.
ii. Exercise
• Activity requiring physical effort, carried out especially to sustain or improve health and fitness. Typically,
exercise is a planned activity to enhance health or meet goals.
E. Discuss the importance of positive body image
i. Body image is a term used to describe how people, men or women, feel about themselves and their body. This
includes what they see when they look in a mirror or when they think of themselves in their mind. Body image
includes how people feel about their height, weight, appearance, and overall, how they feel about their body.
People with a positive body image have an accurate perception of what they look like and demonstrate happiness
and confidence in their body. Many people struggle with negative body image, meaning they have a distorted or
negative sense of their body and/or appearance.
F. Discuss the components of maintaining physical activity
i. How to set goals
ii. The importance of regular and consistent activity
iii. The benefit of personal responsibility
iv. The benefit of group physical activity
G. Discuss how to track physical activity
i. Personal activity journal (personal)
ii. Local (website)
iii. Statewide (website)
GOAL: Encourage participants to increase physical activity with their children.
BEST FOR: All
LESSON OBJECTIVES
• Learn how to be physically active with your own children
• Gain the knowledge to perform physical activities anywhere you are
• Improve health
PHYSICAL ACTIVITY WITH YOUR CHILDREN
1
APPLIED LESSONS 87
A P P L I E D L E S S O N S
CREATE the habit of being active with your children
A. Equipment needed (all optional)
i. None
B. Steps (demo)
i. Write out goal
ii. Plan
iii. Stretch
iv. Demonstrate 10-12 activities to do with children
Practice (do)
A. Write out goal
B. Plan
C. Stretch
D. Perform 10-12 activities with children
Incorporate into your daily life
A. Class
B. School
C. Work
D. Personal life
Conclusion and assignment
A. Participate in 15-20 min of physical activity with your children
B. Track your physical activity
C. Write in your journal about how each is incorporating physical activity into their life everyday
Update fitness plan/record and answer questions
Schedule/remind of next appointment
2
5
3
4
7
6
88 APPLIED LESSONS
A P P L I E D L E S S O N S
Overview: This section is meant to increase personal awareness and allow participants to measure the change.
POST PHYSICAL ASSESSMENT
O N E L E S S O N
POST PHYSICAL ASSESSMENT 89
90 POST PHYSICAL ASSESSMENT
P O S T P H Y S I C A L A S S E S S M E N T
Introduction – This lesson teaches how to perform a physical activity post-assessment. Please review points a-c and
include d-g as applicable.
A. Choose one physical education lesson (from the lesson resources in the back) to teach before doing this
activity. Then ask questions such as:
i. Why is physical activity important?
ii. When was a time you were very active? How did you feel?
B. Discuss the necessity of physical activity
C. Follow up on previous activities or assignments
D. Define the difference between physical activity and exercise
i. Physical activity
• Bodily movement produced by skeletal muscles that requires energy expenditure, such as walking to work,
doing chores, etc.
ii. Exercise
• Activity requiring physical effort, carried out especially to sustain or improve health and fitness. Typically,
exercise is a planned activity to enhance health or meet goals.
E. Discuss the importance of positive body image
i. Body image is a term used to describe how people, men or women, feel about themselves and their body. This
includes what they see when they look in a mirror or when they think of themselves in their mind. Body image
includes how people feel about their height, weight, appearance, and overall, how they feel about their body.
People with a positive body image have an accurate perception of what they look like and demonstrate happiness
and confidence in their body. Many people struggle with negative body image, meaning they have a distorted or
negative sense of their body and/or appearance.
F. Discuss the components of maintaining physical activity
i. How to set goals
ii. The importance of regular and consistent activity
iii. The benefit of personal responsibility
iv. The benefit of group physical activity
G. Discuss how to track physical activity
i. Personal activity journal (personal)
ii. Local (website)
iii. Statewide (website)
CREATE a personal assessment (adult, etc.)
A. Equipment needed
i. Physical activity log to record results
ii. Scale
iii. Measuring tape
GOAL: Learn how to properly give a physical activity post-assessment.
BEST FOR: All
LESSON OBJECTIVES
• Compare pre- and post-assessments to pinpoint improvement
1
2
POST PHYSICAL ASSESSMENT 91
P O S T P H Y S I C A L A S S E S S M E N T
iv. Stopwatch
v. Blood pressure cuff
B. Steps (demo)
i. Write out goal
ii. Exercise plan
iii. Take measurements
Practice (do)
A. Write physical activity goal
B. Exercise plan
C. Take resting heart rate
D. Height/weight
E. BMI
F. Waist circumference
G. Blood pressure
H. Presidential tests
i. Sit and reach or V-sit and reach
ii. 1 mile run
iii. Pull-up test
iv. Curl-ups
v. Shuttle run
Compare to pre-assessment to evaluate progress
Conclusion and assignment
A. Participate in 15-20 min of physical activity with your children
B. Track your physical activity
C. Write in your journal about how each is incorporating physical activity into his or her life everyday
Update fitness plan/record and Answer Questions
Schedule/remind of next appointment
4
3
6
7
5
92 POST PHYSICAL ASSESSMENT
P O S T P H Y S I C A L A S S E S S M E N T
EDUCATIONAL LESSON
RESOURCES
Provide ONE educational lesson before each physical activity
lesson. Each mini-lesson should take 5-15 minutes.
The Food $ense CREATE an Active Lifestyle Curriculum is
designed to get participants active and moving. These classes
are designed to help participants learn basic stretches,
exercises, have opportunities to discuss the concepts, provide
a support group and practice new habits that will help them
take control of their own nutrition and health.
You will be seen as an expert and a valuable resource to your
participants on all habits taught in the lessons. This section
provides the information you will need to be that expert.
Please study this section and become familiar with each
concept so you can have meaningful discussions about the
healthy habits during each lesson you teach. Remember, you
do not need to cover every habit extensively in every lesson.
Just become so familiar with the subject material that you
are comfortable incorporating it into your lessons in natural
conversation.
PHYSICAL ACTIVITY
Physical activity is defined as any bodily movement produced
by skeletal muscles that requires energy expenditure. Physical
inactivity has been identified as the fourth leading risk factor
for global mortality causing an estimated 3.2 million deaths
globally. Regular moderate intensity physical activity – such
as walking, cycling, or participating in sports – has significant
benefits for health. For instance, it can reduce the risk of
cardiovascular diseases, diabetes, colon and breast cancer,
and depression. Moreover adequate levels of physical activity
will decrease the risk of a hip or vertebral fracture and help
control weight.
Physical activity, “exercise,” is the most variable and
changeable factor that influences total energy expenditure.
In other words, your gender, stage of life, and other factors
have little to do with the amount of physical activity in your
life. Your physical activity depends on you and only you. It is
also important to note that physical activity plays a significant
role in weight loss. Conversely, it can be said that a lack of
physical activity plays a significant role in weight gain. Before
we dive in further, let’s watch these videos.
Links:
https://www.youtube.com/watch?v=0oEeXs4FTXU
https://www.youtube.com/watch?v=rasZGZpQsy0
https://www.youtube.com/watch?v=NLHYnRCd8sA
The amount of energy used during physical
activity depends on
• Muscle mass
• Body weight
• The chosen activity
• Duration of activity
(Duration refers to the amount of time you do the activity.)
• Frequency of activity
(Frequency means how often you do the activity.)
• Intensity of activity
L E S S O N R E S O U R C E S
LESSON RESOURCES 93
94 LESSON RESOURCES
L E S S O N R E S O U R C E S
Intensity also plays an important role in how much energy
you use. For example, running at a pace of 6 miles an hour
for 30 min will burn more calories than walking at a pace of 3
miles an hour for 30 minutes; even though it is the same time
duration, the intensity is NOT the same.
PHYSICAL ACTIVITY VS. EXERCISE
Physical activity is defined as bodily movement produced by
skeletal muscles that require energy expenditure. This includes
walking to work, doing chores, etc. Exercise is understood to
be any activity requiring physical effort, carried out especially
to sustain or improve health and fitness. Typically, exercise is a
planned activity to enhance health or meet goals.
The American lifestyle is typically very sedentary, meaning
we don’t move around much. Our goal should be to lead
active lifestyles pursuing goals and activities we love. This
will naturally lead to becoming fit. Often this “fit” ideal is set
by individuals; whether it is to be able to walk to school with
their children, run a 5k, lift a bale of hay, hike along the Great
Wall of China, go the park with their kids, grocery shop or be
able to take care of their yard/garden, etc. Notice that none
of these definitions involve the component of media body
images.
These active lifestyles are found by combining activity and a
nutritious diet. As individuals become more active they will
come to enjoy healthy food more and find fulfilment in the lives
they lead.
PHYSICAL ACTIVITY
RECOMMENDATIONS
The current physical activity recommendation for adults is
2 hours and 30 minutes each week of moderate aerobic
physical activity or 1 hour and 15 minutes of vigorous aerobic
activity. Paired with aerobic activity, it is recommended that
adults do strength straining twice a week. To lose weight, it
is recommended that you get 60 to 90 minutes of intense
physical activity daily. Children and adolescents need a
minimum of 60 minutes of physical activity daily. It is important
to note that it does not matter what activity you choose, what
matters is that you choose activities you find enjoyable and
that you strive for a physically active lifestyle.
There are three types of exercise intensities
• Low-intensity
• Ex: walking, doing household chores, etc.
• Moderate-intensity
• Jogging for 20 min or less, etc.
• High-intensity
• Swimming, cycling for 40 min or more.
“Only moderate and vigorous intensity activities count toward
meeting your physical activity needs. With vigorous activities,
you get similar health benefits in half the time it takes you
with moderate ones. You can replace some or all of your
moderate activity with vigorous activity. Although you are
moving, light intensity activities do not increase your heart
rate, so you should not count these toward meeting the
physical activity recommendations. These activities include
walking at a casual pace, such as while grocery shopping,
and doing light household chores.”
– USDA
LESSON RESOURCES 95
L E S S O N R E S O U R C E S
HOW TO CONDUCT PHYSICAL
ACTIVITY ASSESSMENTS
In the course we ask that participants perform personal
physical activity assessments. You are there to assist them
and answer questions. However, due to privacy concerns we
ask you to allow participants to remain anonymous.
Physical activity assessments are one of the best blends of
subjective and objective methods to track your progress.
Assessments range from specific qualitative data such as
heart rate, strength tests and stamina tests to more simplified
data such as saying “I did this week which was a ____
improvement from last week”.
For this course we focus on three main factors
• BMI
• Weight
• Reps/activity tracking
KEEPING AN EXERCISE
JOURNAL/CALENDAR
If you want to see results from each and every workout you do,
chart your progress in an exercise journal. Self-monitoring your
workout has proved to be a cornerstone in losing weight and
building muscle, according to Jeffrey Katula, PhD, an exercise
physiologist at Wake Forest University. While many people
jot down their weight after stepping off the bathroom scale,
researchers at Northwestern University found that those who
consistently tracked their exercise habits — especially during
holidays — lost more weight compared to those who did not.
How can you increase your chance of journal success?
“Keep it simple,” says Katula. “You’re more likely to stick with
something that’s convenient.” Westcott suggests recording
the exercises you’ve done, the weight load and the number of
repetitions. Also record the time you spent doing cardio, along
with other available measurements, including distance, for
example, or the pre-programmed treadmill or stationary bike
program you followed.
Journal Your Way to Fitness
1. It increases awareness of your behavior.
According to Katula, “a workout journal helps you become
aware of what you are and are not achieving at the gym.” An
accurate record might reveal, for example, that you are doing
only 10 minutes of cardio after lifting weights, not the 20 you
thought.
2. It reminds you to change your workout.
You have to increase your workload if you want to see
changes in your body. “Once you can lift a weight 12 times,
you should increase the weight by 5 percent and lift it 9 or 10
times,” says Wayne Westcott, PhD, CSCS, fitness research
director at the South Shore YMCA in Quincy, Mass. “Then
stick with it until you can easily lift it 12 times.” Your journal will
help you keep track of these numbers and show you when it’s
time to increase the weight.
3. It allows you to evaluate your progress.
“Write down your specific goals, like when you want to be
able to lift a certain amount of weight or run at a certain
speed,” says Westcott. “Then check to see how long it takes
you to reach them. “Set small goals that can be realistically
conquered in 2-4 weeks.”
96 LESSON RESOURCES
L E S S O N R E S O U R C E S
4. It provides a record of accomplishment over time.
“The more improvement you see on the page, the better your
physical results will be,” says Westcott. “Every day you should
see some improvement in the numbers. Maybe you can do an
extra rep or increase the weight a bit.”
FINDING YOUR
INTRINSIC MOTIVATION
There are two main types of motivation, extrinsic and intrinsic.
Extrinsic motivation is the most commonly discussed type
of motivation. The definition of extrinsic motivation means
motivation or desire to accomplish something that comes
from an external source. Examples of extrinsic motivation
may be a work bonus, a reward for accomplishment, “do this
or else…,” recognition, how you think others may perceive
your body (attractive, repulsive, etc.), losing weight to fit
into new clothes, looking good for the beach, and many
more. Basically, this type of motivation is provided to you by
someone or something outside of your control. This is the
weakest form of motivation and will eventually demotivate an
individual for accomplishing their goals.
Intrinsic motivation is just the opposite. This type of motivation
comes from within. You want to lose weight because your
body feels better, or you go to work because you enjoy
making a difference in the lives of others, or because you want
to master a skill, etc. This is the type of motivation that will
sustain an active lifestyle and empower individuals to reach
their goals.
Please help participants understand and find their intrinsic
motivation to become physically active. This is one of
the single most important concepts you can instill within
individuals throughout this course.
THE POWER OF HABIT
“Your beliefs become your thoughts,
Your thoughts become your words,
Your words become your actions,
Your actions become your HABITS,
Your habits become your values,
Your values become your destiny.”
- Mahatma Ghandi
Habit, combined with internal motivation, is where an active
lifestyle begins. Before a new habit of physical activity can
be born, individuals must believe that being active is good
for them, then they must think about the benefits and build
their intrinsic motivation. Next individuals can vocalize their
thoughts and establish goals and guiding principles for their
actions.
Then comes action. Until action occurs the belief is only a
wish. This class is designed to provide the instruction for
participants to confidently act on their beliefs, thoughts, and
words.
By maintaining an exercise journal and tracking personal
successes, the habit of physical activity will be developed.
This will in turn become a value and priority and lead to a
healthy lifestyle.
CREATE YOUR OWN PHYSICAL
ACTIVITY PLAN
When making your own physical activity plan, begin by setting
goals. Next, write down what exercises or stretches you like
and make a list of those that are difficult for you. Finally, write a
short list of exercises that will help you meet your goal.
LESSON RESOURCES 97
L E S S O N R E S O U R C E S
After you have created your list, begin to plan which days you
will do which exercises.
You can search the Internet for examples of physical activity
plans and customize them to meet your needs.
SETTING GOALS
Setting goals is a prerequisite to achieving ultimate success.
Goals must be intrinsic to be effective and serve as a guide
to success. When setting goals be sure participants use the
SMART goal method. SMART stands for:
S – Specific
• What: What do I want to accomplish?
• Why: Specific purpose of benefit of accomplishing goal
• Who: Who is involved?
• Where: Identify location.
• Which: Requirements and constrains.
M – Measurable
• How much?
• How many?
• How will I know when it is accomplished?
• Indicators should be quantifiable.
A – Attainable
• How can the goal be accomplished?
• How realistic is the goal based on other constraints?
R – Relevant
• Does this seem worthwhile?
• Is this the right time?
• Does this match your other efforts/needs?
• Is it applicable in the current socioeconomic environment?
T – Time-bound
• When?
• What can I do in 6 months from now?
• What can I do in 6 weeks from now?
• What can I do today?
• When do I expect to complete this goal?
Good Examples
• I will run a marathon at the end of 6 months to increase my
confidence and strengthen my cardiovascular system.
• By August 1, 2015, I will have developed the habit of being
active for 45 min each day by participating in vigorous
activity to increase my self-esteem and personal health.
Examples of goal fragments that can be
incorporated into the SMART goal system
• Run around the block.
• Complete a 5K.
• Complete a 10K.
• Complete a half marathon.
• Complete a marathon.
• Participate in a triathlon.
• Swim ____ meters.
• Be able to lift a bag of potatoes over your head.
• Be able to load the car without getting tired.
• Take a class at a gym.
• Be able to walk the Great Wall of China.
• Be able to play and keep up with children.
• Be able to go on a hike.
• Be able to bike to _____.
98 LESSON RESOURCES
L E S S O N R E S O U R C E S
• Park farthest from a store.
• Only take stairs.
• Be able to go up two flights of stairs without getting out
of breath.
• Take a walk during lunch at work.
• Make walking/playground a family activity.
• Walk children to school.
• Do something active while food is in the microwave or
during a commercial break.
• Decrease chance of cardiac arrest by doing something
active everyday.
• Take the time you would watch your favorite TV show and
replace it with a walk.
INCREASE PHYSICAL ACTIVITY
DURING NORMAL ACTIVITIES
Choose activities that you enjoy and can do regularly. Fitting
activity into a daily routine can be easy — such as taking a
brisk 10 minute walk to and from the parking lot, bus stop,
or subway station. Keep it interesting by trying something
different on alternate days. Every little bit adds up and doing
something is better than doing nothing.
Make sure to do at least 10 minutes of activity at a time,
shorter bursts of activity will not have the same health
benefits. For example, walking the dog for 10 minutes before
and after work or adding a 10 minute walk at lunchtime can
add to your weekly goal. Mix it up; swim, take a yoga class,
garden, or lift weights. To be ready anytime, keep comfortable
clothes and a pair of walking or running shoes in the car and
at the office.
More ways to increase physical activity
At home
• Join a walking group in the neighborhood or at the local
shopping mall.
• Recruit a partner for support and encouragement.
• Push the baby in a stroller.
• Do crunches while you microwave your dinner.
• Stretch or do pushups during commercial breaks on TV.
• Park in the farthest parking stall from the store.
• Recruit children to participate with you.
• Do 2-5 min of exercise everyday before you shower.
• Get the whole family involved — enjoy an afternoon bike ride
with your kids.
• Walk up and down the soccer or softball field sidelines while
watching the kids play.
• Walk the dog — don’t just watch the dog walk.
• Clean the house or wash the car.
• Walk, skate, or cycle more, and drive less.
• Do stretches, exercises, or pedal a stationary bike while
watching television.
• Mow the lawn with a push mower.
• Plant and care for a vegetable or flower garden.
• Play with the kids — tumble in the leaves, build a snowman,
splash in a puddle, dance to favorite music.
• Exercise to a workout video.
At work
• Get off the bus or subway one stop early and walk or skate
the rest of the way.
• Replace a coffee break with a brisk 10-minute walk. Ask a
friend to go with you.
• Take part in an exercise program at work or a nearby gym.
• Join the office softball team or walking group.
At play
• Walk, jog, skate, or cycle.
• Swim or do water aerobics.
• Take a class in martial arts, dance, or yoga.
• Golf (pull cart or carry clubs).
• Canoe, row, or kayak.
• Play racquetball, tennis, or squash.
• Ski cross-country or downhill.
• Play basketball, softball, or soccer.
LESSON RESOURCES 99
L E S S O N R E S O U R C E S
• Hand cycle or play wheelchair sports.
• Take a nature walk.
Most important — have fun while being active!
BENEFITS FROM PHYSICAL ACTIVITY
The benefits of physical activity vary by individual. However,
most studies conclude that being active has great personal
and community benefits.
Some of the most common benefits associated
with physical activity are:
• Building a stronger heart and lungs.
• Keeping bones and muscles strong.
• Maintaining a healthy body weight.
• Preventing or managing diabetes.
• Preventing obesity.
• Improving body composition.
• Improving appetite for nutrient dense-food.
• Helping to manage stress and ease depression.
• Reducing risk for Cardiovascular disease (CVD) and
Coronary Heart Disease (CHD).
• Reducing the risk of developing certain types of cancer.
BODY COMPOSITION
Body composition is the proportion of fat, muscle, and bone of
an individual’s body, expressed as percentage of body fat and
percentage of lean body mass.
Body composition testing determines how much of your
body is made up of fat. The non-fat part of your body is called
lean tissue, which includes your muscles, water, bones, and
organs. Lean tissue is known as metabolically active tissue,
the tissue that burns calories all day. The more lean tissue you
have, the higher your resting metabolic rate will be. Body fat is
a storage form of energy and, therefore, has a very low calorie
demand.
This is important to know since body composition can be an
indicator of your risk of chronic disease. Body composition
changes over time based on physical activity, exercise, work,
diet, genotype, age, gender, pregnancy, disease, etc.
There are many different ways to measure body composition.
Each method has its advantages and disadvantages. Some
are more accurate than others. Here is a review of the six most
commonly available methods of body composition testing
(listed in order of most accurate to least accurate):
• DEXA Scan
• This is the most accurate or “gold” standard
measurement.
• Subject lies on a table fully clothed. A small dose of
radiation passes through the body allowing X-rays to
distinguish fat from muscle from bone.
• Whole Body Plethysmography (Bod Pod)
• Subject steps inside an egg shaped “pod” wearing
minimal clothing. The pod measures the volume of air
you displace, allowing the bod pod to measure your
overall density. Since the density of an object (in this
case your body) equals mass divided by volume, we
know mass equals your body weight.
• Volume is measured by the bod pod. We know
the density of fat, muscle, bone, and water. The
percentage of body fat can be calculated from overall
body density.
100 LESSON RESOURCES
L E S S O N R E S O U R C E S
• Underwater/Hydrostatic Weighing
• Subjects sit on a scale inside a giant tank of water. After
exhaling all of the air from their lungs, they will pull
themselves under water completely and sit very still
for 10 seconds while the scale stabilizes. Underwater
weighing also measures a person’s overall density.
• Volume is calculated by measuring how much water your
body displaces underwater. Volume equals your weight
on land minus your weight under water. The percentage
of body fat can be calculated from overall body density.
• Skinfold Calipers
• Calipers are used to measure the thickness of two layers
of skin plus the subcutaneous (just under the skin) fat at
four to six locations around the body. The most common
locations are triceps, shoulder blade, abdomen, calf,
and just above the hip bone. These measurements are
totaled to arrive at a sum of skinfolds, which is compared
to a table that equates skinfold total to percent body fat.
• Bio-impedance
• Subject either stands on a scale-like device or holds an
apparatus in outstretched hands and pushes a button.
The button sends a very small current of electricity
through that specific part of the body. Fat acts like the
rubber insulation on a wire while muscle and bone and
water all conduct electricity well. The larger the drop in
current, the greater the body fat percentage.
• Special note: Since water and electrolytes both positively
affect current flow, dehydration will cause body fat to be
overestimated.
• Be aware that since this machine only sends current
through a specific part of the body, the accuracy of
the readings are suspect. For example, most men do
not store fat in their legs. If they are using a scale-like
device that sends the electrical current through the legs,
the overall body fat estimation will likely be low.
• Body Mass Index
• This is often calculated through a bio-impedance
mechanism but is the simplified scale.
Because BMI is popular and easy to use, we will discuss it in
more detail.
The body mass index or BMI compares weight to height. It is
used to measure overweight and obesity. The score is valid for
both men and women and is an indicator of total body weight
in relation to risk of disease and death. It only compares
weight to height and does not account for body composition.
In other words, it does not take into account percent of body
fat or muscle. While BMI may be a useful tool to assess
where you are with your weight and health, it is NOT a perfect
indicator. There are limits to using BMI and it should only be
used as an approximation.
BMI may overestimate body fat in athletes and those with a
muscular build. These individuals often have a high percentage
of lean body mass. Lean body mass, or muscle, is heavier than
fat and this leads to a higher body weight. Even though many
athletes weigh more, they are not necessarily at a higher risk
for disease. BMI may also be underestimated in the elderly
because of lost muscle mass.Thus, BMI should ONLY be used
as an approximation, not an exact measurement.
LESSON RESOURCES 101
L E S S O N R E S O U R C E S
BODY IMAGE
According to the National Eating Disorder Association
[NEDA], body image is a term used to describe how people,
men or women, feel about themselves and their body. This
includes what they see when they look in a mirror or when
they think of themselves in their mind. Body image includes
how a person feels about their height, weight, appearance,
and how people feel about their body overall. People with
a positive body image have an accurate perception of what
they look like and demonstrate happiness and confidence in
their body. Many people struggle with negative body image,
meaning they have a distorted or negative sense of their body
and/or appearance. This often leads people to feel anxious,
self-conscious, and ashamed of their body. Negative body
image can lead to disordered eating, which is defined as
a wide range of irregular eating behaviors that may not be
appropriate for a diagnosis of an eating disorder. People who
develop strong negative feelings toward their body are more
likely to develop eating disorders like Anorexia Nervosa or
Bulimia Nervosa.
Just because the focus is on women doesn’t mean men aren’t
affected.
Another issue concerning body image is exercise addiction.
Other terms associated with exercise addiction are “exercise
dependence,” “exercise compulsion,” and “obligatory exercise.”
You know the people in your community who are ALWAYS
exercising, and if they aren’t exercising, they are thinking and
talking about exercising? Anybody is susceptible, just as with
any other addiction. Since exercise is part of a healthy lifestyle,
excessive exercise can often be masked or left unaddressed.
However, such behavior can lead to disease, disordered
eating, and poor health.
EQUIPMENT LIST TO HAVE ON HAND
Just like having the essential foods stocked in your pantry
is important, so is having physical activity equipment or
resources on hand too. Here is a short list of helpful, but
optional, equipment:
• Knowing where the nearest park is
• Canned food or gallons of milk
• Chairs
• A 5-6 foot pipe or pole
• Stretch/resistance bands
• Water
• Good, sturdy shoes
HYDRATION
Proper hydration is one of the most important aspects of
healthy physical activity. Drinking the right amount of fluids
before, during, and after every physical activity is vital to
providing your body the fluids it needs to perform properly.
Hydration Goal
The overall goal is to minimize dehydration without over-
drinking. Adequate hydration varies among individuals.
Practical ways to monitor hydration are:
Urine color
The color of the first morning’s urine void after awakening is
an overall indicator of hydration status.
• Straw or lemonade colored urine is a sign of
appropriate hydration.
• Dark colored urine, the color of apple juice,
indicates dehydration.
• Dark urine is often produced soon after consuming
vitamin supplements.
Sweat loss change in body weight before and after exercise
is used to estimate sweat loss. Since an athlete’s sweat loss
during exercise is an indicator of hydration status, athletes
102 LESSON RESOURCES
L E S S O N R E S O U R C E S
are advised to follow customized fluid replacement plans that
consider thirst, urine color, fluid intake, sweat loss and body
weight changes that occur during exercise.
Minimize Dehydration
Dehydration can occur in virtually every physical activity
scenario. It doesn’t have to be hot and you don’t have to have
visible perspiration. You can become dehydrated in the water,
at a pool or lake, or skiing on a winter day.
Dehydration results when athletes fail to adequately replace
fluid lost through sweating. Since dehydration that exceeds
2 percent body weight loss harms exercise performance,
athletes are advised to begin exercise well hydrated, minimize
dehydration during exercise and replace fluid losses after
exercise.
Be alert for conditions that increase your fluid loss
through sweat.
Air Temperature
The higher the temperature, the greater your sweat loss.
Intensity
The harder you work out, the more you perspire.
Body Size and Gender
Larger people sweat more. Men generally sweat more than
women.
Duration
The longer the workout, the more fluid loss.
Fitness
Well-trained athletes perspire more than less fit people. Why?
Athletes cool their bodies through sweat more efficiently than
most people because their bodies are used to the extra stress.
Thus, fluid needs are higher for highly trained athletes than for
less fit individuals.
Remember swimmers sweat, too. Like any athletic activity,
when you swim, your body temperature rises and your body
sweats to keep from overheating. You may not notice because
you are in the water, but you can become dehydrated.
Swimmers, from competitive athletes to families splashing
around, need to drink fluids before, during, and after
swimming, even if they don’t feel thirsty.
Warning Signs. Know the signs of dehydration.
Early signs are
• Thirst
• Flushed skin
• Premature fatigue
• Increased body temperature
• Faster breathing and pulse rate
• Increased perception of effort
• Decreased exercise capacity
Later signs include
• Dizziness
• Increased weakness
• Labored breathing with exercise
LESSON RESOURCES 103
L E S S O N R E S O U R C E S
Fluid Replacement
Replace fluids during exercise to promote adequate hydration.
Drink water rather than pour it over your head. Drinking is the
only way to rehydrate and cool your body from the inside out.
Sports drinks are more appropriate than water for athletes
engaged in moderate to high intensity exercise that lasts an
hour or longer. Rehydrate after exercise by drinking enough
fluid to replace fluid lost during exercise.
BASIC ANATOMY
It is important to understand the basic anatomy of the body.
This will help you and the participants feel more confident
about the exercises they perform and will help in the
prevention or diagnosis of basic injuries.
Please review the musculoskeletal system in the first chapter
of this manual for specific muscle terms.
PREVENTING INJURY
Just like anything we do, there is a potential for injury,
especially as individuals are learning to become more active
and use muscles they have rarely used. This section does not
preclude you from the use of first aid or professional advice
in the event of an injury but provides guidelines to help avoid
injury.
Prevention
• Stretch before exercising (especially dynamic stretching).
• Don’t bounce while stretching.
• Stretch throughout the day for better range of motion
at joints.
• Learn and use proper technique.
• Consider personal limitations and injury history.
• Follow advice concerning what not to do from qualified
doctors or physical therapists.
• Start small, light, and simple.
• Increasing speed of any exercise can promote the possibility
of injury.
• Avoid or modify any exercise that causes you pain or
discomfort.
• Cross-train with other sports and/or vary the exercises
you perform.
• Have at least one recovery day each week.
• Injuries need rest, allow old injuries to heal with time and no
or light exercise.
• Gradually increase time and intensity.
• Hydrate yourself continually throughout the day.
• Listen to your body.
• Exercise regularly.
Stop exercising if
• Discomfort or sharp pain.
• Chest pain or other pain that could indicate a heart attack,
including pain in the neck and jaw, pain travelling down the
arm or pain between the shoulder blades.
• Extreme breathlessness.
• A very rapid or irregular heartbeat during exercise.
• Too sick or tired.
• Asthma flare up.
• Severe nausea or vomiting.
• Muscle cramps.
• Sudden weakness or changes in feeling in your arms
and/or legs.
104 LESSON RESOURCES
L E S S O N R E S O U R C E S
• Trouble swallowing, talking or seeing.
• Severe headache, dizziness, or lightheadedness.
• Severe joint pain.
ENDURANCE
Endurance has two important aspects. One is endurance
training. Endurance activities are focused on aerobic
activity that improves cardiovascular health. Increasing
one’s endurance will decrease body fatigue and decrease
risk for heart problems. This endurance extends past exercise
and influences one’s ability to perform daily activities.
Another important definition of endurance is that of
persistence. The only way anyone will make progress is
through consistent effort. Obviously if the activity poses risk to
your health or danger of injury to yourself and others, STOP.
However, due to human nature, we often stop or give up
before finishing hard challenges.
RESOURCES
http://www.acefitness.org/acefit/healthy-living-article/60/648/what-is-crossfit-training-and-is-it/
http://www.acsm.org/docs/current-comments/exerciseforpersonswithcopd.pdf
http://www.betterhealth.vic.gov.au/Bhcv2/bhcarticles.nsf/pages/Pilates_and_yoga_the_health_benefits?open
http://www.bucknell.edu/athletics/recreation-services/swimming-information.html
http://www.cdc.gov/healthywater/swimming/health_benefits_water_exercise.html
http://www.cdc.gov/physicalactivity/downloads/growing_stronger.pdf
http://www.cdc.gov/workplacehealthpromotion/implementation/topics/physical-activity.html
http://www.choosemyplate.gov/physical-activity/increase-physical-activity.html
http://www.eatright.org/Public/content.aspx?id=7084
http://www.exercise.wsu.edu/plyometric/default.aspx
http://www.hbr.org/2014/10/regular-exercise-is-part-of-your-job/
http://www.health.harvard.edu/blog/more-than-a-stretch-yogas-benefits-may-extend-to-the-heart-201504157868
http://www.health.harvard.edu/healthbeat/the-real-world-benefits-of-strengthening-your-core
http://www.hsph.harvard.edu/nutritionsource/staying-active-full-story/#exercise-intensity
http://www.hss.edu/conditions_stretching-tips-athletes-dynamic-static.asp#.VVJzVfnF9Cg
http://www.mayoclinic.org/healthy-lifestyle/fitness/in-depth/boot-camp-workout/art-20046363?pg=1
http://www.mayoclinic.org/healthy-lifestyle/fitness/in-depth/exercise/art-20048389
http://www.mayoclinic.org/healthy-lifestyle/fitness/in-depth/interval-training/art-20044588?pg=2
http://www.mayoclinic.org/healthy-lifestyle/fitness/in-depth/pilates-for-beginners/art-20047673
http://www.mayoclinic.org/healthy-lifestyle/stress-management/in-depth/yoga/art-20044733
http://www.myweb.facstaff.wwu.edu/chalmers/PDFs/Introduction%20to%20plyometrics.pdf
http://www.ncbi.nlm.nih.gov/pmc/articles/PMC3273886/
http://www.ncbi.nlm.nih.gov/pubmed/11323537
http://www.ncbi.nlm.nih.gov/pubmed/20040880
http://www.ncbi.nlm.nih.gov/pubmed/24866862
http://www.ncbi.nlm.nih.gov/pubmed/8326055
http://www.nccih.nih.gov/health/yoga/introduction.htm
http://www.nihseniorhealth.gov/exerciseforolderadults/benefitsforeverydaylife/01.html
http://www.osteopathic.org/osteopathic-health/about-your-health/health-conditions-library/general-health/Pages/yoga.aspx
http://www.ptjournal.apta.org/content/87/3/304.short
http://www.racgp.org.au/afp/2012/december/evidence-based-exercise/
http://www.reidhospital.org/the-benefits-of-strength-training/
http://www.ucdenver.edu/academics/colleges/medicalschool/departments/familymed/education/fellowship/sportsmedfellow/
Documents/Core%20Plyo%20article.pdf
http://www.unitypoint.org/livewell/article.aspx?id=2a771708-74b0-4955-b677-53e247c78ec4&Functional+Circuit+Training+a
nd+It%27s+Heart+Healthy+Benefits
http://www.utexas.edu/student/housing/pdfs/ctbf_lowerbody.pdf
http://www.weightwatchers.com/util/art/index_art.aspx?tabnum=1&art_id=33751
LESSON RESOURCES 105
To order printable versions of this handout, go to extension.usu.edu/fscreate/htm/staff-menu.
This material was funded by USDA’s Supplemental Nutrition Assistance Program - SNAP.
Utah State University is an affirmative action/equal opportunity institution.
AN ACTIVE
LIFESTYLE
ACCIDENT WAI V E R AND RELEASE OF LIABILIT Y FORM
I ____________________________HEREBY ASSUME ALL OF THE RISKS OF PARTICIPATING IN ANY/ALL ACTIVITIES ASSOCIATED WITH
THIS COURSE, including by way of example and not limitation, any risks that may arise from negligence or carelessness on the part of the persons
or entities being released, from dangerous or defective equipment or property owned, maintained, or controlled by them, or because of their possible
liability without fault.
I certify that I am physically fit, have sufficiently prepared or trained for participation in this activity, and have not been advised to not participate by a
qualified medical professional. I certify that there are no health-related reasons or problems which preclude my participation in this activity.
I acknowledge that this Accident Waiver and Release of Liability Form will be used by the event holders, sponsors, and organizers of the activity in
which I may participate, and that it will govern my actions and responsibilities at said activity.
(A) I WAIVE, RELEASE, AND DISCHARGE from any and all liability, including but not limited to, liability arising from the negligence or fault
of the entities or persons released, for my death, disability, personal injury, property damage, property theft, or actions of any kind which
may hereafter occur to me including my traveling to and from this activity, THE FOLLOWING ENTITIES OR PERSONS: The Soil Ecology
Society, (SES) and/or their directors, officers, employees, volunteers, representatives, and agents, and the activity holders, sponsors, and
volunteers;
(B) INDEMNIFY, HOLD HARMLESS, AND PROMISE NOT TO SUE the entities or persons mentioned in this paragraph from any and all
liabilities or claims made as a result of participation in this activity, whether caused by the negligence of release or otherwise.
I acknowledge that Utah State University (USU), USU Extension, SNAP-ED, Food $ense and their directors, officers, volunteers, representatives, and
agents are NOT responsible for the errors, omissions, acts, or failures to act of any party or entity conducting a specific activity on their behalf.
I acknowledge that this activity may involve a test of a person’s physical and mental limits and carries with it the potential for death, serious injury, and
property loss. The risks include, but are not limited to, those caused by terrain, facilities, temperature, weather, condition of participants, equipment,
vehicular traffic, lack of hydration, and actions of other people including, but not limited to, participants, volunteers, monitors, and/or producers of the
activity. These risks are not only inherent to participants, but are also present for volunteers.
I hereby consent to receive medical treatment which may be deemed advisable in the event of injury, accident, and/or illness during this activity.
I understand while participating in this activity, I may be photographed. I agree to allow my photo, video, or film likeness to be used for any legitimate
purpose by the activity holders, producers, sponsors, organizers, and assigns.
The Accident Waiver and Release of Liability Form shall be construed broadly to provide a release and waiver to the maximum extent permissible
under applicable law.
I CERTIFY THAT I HAVE READ THIS DOCUMENT AND I FULLY UNDERSTAND ITS CONTENT. I AM AWARE THAT THIS IS A RELEASE OF
LIABILITY AND A CONTRACT AND I SIGN IT OF MY OWN FREE WILL.
Participant’s Signature Date AgeParticipant’s Name
(Please print legibly)
Parent/Guardian Signature
(If under 18 years old, Parent or Guardian must also sign)
Date
Utah State University is an affirmative action/equal opportunity institution.

Create_an_Active_Lifestyle

  • 1.
    A N AC T I V E L I F E S T Y L E
  • 2.
    A N AC T I V E L I F E S T Y L E AUTHORS Joshua LeFevre, Food $ense Student Intern Mateja Savoie Roskos, Food $ense Evaluation Coordinator EDITORS/CONTRIBUTORS Heidi LeBlanc, Food $ense Director, Extension Associate Professor, MS, CFCS Rashel Clark, Student Intern Gayla M. Johnson, Food $ense Payroll/Human Resources/Travel Coordinator Jocelin Gibson, Food $ense Media, Communications, & Technology Coordinator Julene Reese, USU Extension Public Relations Specialist Donna Falkenborg, USU Extension Editor & Writer Tayla Lambright, Food $ense Nutrition Education Assistant GRAPHIC DESIGN & LAYOUT Olivia Yeip, USU Extension Graphic Designer FN/Food$ense/2015-01pr Copyright ©2015 USU Extension This material was funded by USDA’s Supplemental Nutrition Assistance Program – SNAP. The Supplemental Nutrition Assistance Program (SNAP) provides nutrition assistance to people with low income. It can help you buy nutritious foods for a better diet. To find out more, contact 1-800-221-5689 or visit online at http://www.fns.usda.gov/snap/. In accordance with Federal Law and U.S. Department of Agriculture policy, this institution is prohibited from discriminating on the basis of race, color, national origin, sex, age, religion, political beliefs or disability. To file a complaint of discrimination, write USDA, Director, Office of Civil Rights, 1400 Independence Avenue, S.W., Washington, D.C. 20250-9410 or call (800)795-3572. Utah State University is committed to providing an environment free from harassment and other forms of illegal discrimination based on race, color, religion, sex, national origin, age (40 and older), disability, and veteran’s status. USU’s policy also prohibits discrimination on the basis of sexual orientation in employment and academic related practices and decisions. Utah State University employees and students cannot, because of race, color, religion, sex, national origin, age, disability, or veteran’s status, refuse to hire; discharge; promote; demote; terminate; discriminate in compensation; or discriminate regarding terms, privileges, or conditions of employment, against any person otherwise qualified. Employees and students also cannot discriminate in the classroom, residence halls, or in on/off campus, USU-sponsored events and activities. This publication is issued in furtherance of Cooperative Extension work, acts of May 8 and June 30, 1914, in cooperation with the U.S. Department of Agriculture, Kenneth L. White, Vice President for Extension and Agriculture, Utah State University. The U.S. Department of Agriculture (USDA) prohibits discrimination against its customers, employees, and applicants for employment on the bases of race, color, national origin, age, disability, sex, gender identity, religion, reprisal and, where applicable, political beliefs, marital status, familial or parental status, sexual orientation, or all or part of an individual’s income is derived from any public assistance program, or protected genetic information in employment or in any program or activity conducted or funded by the Department. (Not all prohibited bases will apply to all programs and/or employment activities.) If you wish to file a Civil Rights program complaint of discrimination, complete the USDA Program Discrimination Complaint Form, found online at http://www.ascr.usda.gov/ complaint_filing_cust.html, or at any USDA office, or call (866) 632-9992 to request the form.You may also write a letter containing all of the information requested in the form. Send your completed complaint form or letter to us by mail at U.S. Department of Agriculture, Director, Office of Adjudication, 1400 Independence Avenue, S.W., Washington, D.C. 20250-9410, by fax (202) 690-7442 or email at program.intake@usda.gov. Individuals who are deaf, hard of hearing, or have speech disabilities and wish to file either an EEO or program complaint please contact USDA through the Federal Relay Service at (800) 877-8339 or (800) 845-6136 (in Spanish). Persons with disabilities who wish to file a program complaint, please see information above on how to contact us by mail directly or by email. If you require alternative means of communication for program information (e.g., Braille, large print, audiotape, etc.) please contact USDA’s TARGET Center at (202) 720-2600 (voice and TDD). USDA is an equal opportunity provider and employer.
  • 3.
    T A BL E O F C O N T E N T S INTRODUCTION PHYSICAL ACTIVITY PRE-ASSESSMENT STRETCHING BODY WEIGHT AEROBICS RESISTANCE TRAINING STRENGTH TRAINING CIRCUIT TRAINING APPLIED LESSONS POST PHYSICAL ASSESSMENT LESSON RESOURCES 3 1 7 41 61 77 25 49 69 89 93
  • 5.
    TO THE NEA America,we have a problem! How did our nation get here? We have more overweight and obese people in our country than people of normal weight. For the first time in American history, our nation’s children will have a shorter lifespan than their parents because they are growing up surrounded by the diseases of affluence. Our cushy lifestyle of office jobs, motorized vehicles and convenience stores have led us to a state of severe physical inactivity. We now perceive physical activity as “extra” work and something that we must make time for to fit into our lives because we are “too busy.” This is a false assumption; we go through life missing the minutes and activities that will keep us active AND healthy. Americans have come to believe and even expect that we will deal with diseases such as high blood pressure, high cholesterol, heart disease, and diabetes and there is nothing we can do about it. But that way of thinking is wrong. We can do something about it. We can change the beliefs and the behaviors that got us to this point. We can bypass the 1-minute drive to the convenience store and take a walk. We can stop eating during commercial breaks and do a few push-ups. We can stop playing sports on our gaming system and go outside to play. All this can be done on tight schedules and limited budgets. We can move a little more. In fact, we can move a LOT more. We can change our future as we change our beliefs and our behaviors—one activity at a time! TEACHING TIPS The “Food $ense Creates” curriculum focuses on giving participants the courage and confidence to become physically active, no matter their current health level. As they participate in this series, they will learn the basics of how to develop an active lifestyle without spending lots of money. The curriculum should be taught as a series where participants complete several physical activity sections. The lessons in each section should be taught in order. This book provides an overview for many types of physical activity. This curriculum is written in outline form with a suggested order and key words to help you remember what to discuss; however, you have the liberty to decide how to teach the material. This method will allow you to develop your own teaching style and to have the freedom to just be you! You should provide a participant friendly and “hands-on” learning environment. Involve participants as much as possible in the physical activities and explanation of concepts or benefits. Adults feel more engaged in learning when they are allowed to share what they already know about a subject. They should be invited to contribute to group discussions and should be encouraged to participate in the class activities. This will give them experience and confidence to go home and create a personal or family physical activity routine. They will be more willing to try new things when given some ownership in the lesson. The more invested they become in the lesson, the more they will learn. I N T R O D U C T I O N INTRODUCTION 1
  • 6.
    2 INTRODUCTION I NT R O D U C T I O N There are significant concepts or habits taught in every lesson in this curriculum. It will be important for you to understand the habits well so you can discuss them from memory as they come up in the lesson. You must become an example of physical activity and consistency. This will help demonstrate the importance of creating a healthy lifestyle. These habits are important. Please do not make the mistake of thinking that if you cover a concept once, you don’t need to talk about it again. Review the habits by asking participants to give feedback as they practice them at home. Allow class members to discuss their successes and frustrations with you and with each other. Ask them to provide solutions to their problems and work through issues together. Be supportive and encouraging. Make sure you are positive about even the smallest step in the right direction. The more participants discuss the reasons to try something new and the more they understand how to overcome obstacles and barriers, the more positive habits and healthy behaviors they will be willing and able to incorporate into their daily lives. Be sensitive to your participants and their current conditions and reality. This curriculum focuses extensively on increasing physical activity, when possible. However, some individuals may struggle more than others. Do not make them feel awkward or embarrassed about their limitations.
  • 7.
    Overview: This sectionis meant to create a baseline for personal awareness and comparison for participants to measure the change from the beginning to the end of the program. PHYSICAL ACTIVITY/ PRE- ASSESSMENT O N E L E S S O N PHYSICAL ACTIVITY PRE-ASSESSMENT 3
  • 8.
    4 PHYSICAL ACTIVITYPRE-ASSESSMENT P H Y S I C A L A C T I V I T Y P R E - A S S E S S M E N T Introduction – This lesson teaches how to do a personal physical assessment. Please review points a-c and include d-g as applicable. A. Choose one physical education lesson (from the lesson resources in the back) to teach before doing this activity. Then ask questions such as: i. Why is physical activity important? ii. When was a time you were very active? How did you feel? B. Discuss the necessity of physical activity C. Follow up on previous activities or assignments D. Define the difference between physical activity and exercise i. Physical activity • Bodily movement produced by skeletal muscles that requires energy expenditure such as walking to work, doing chores, etc. ii. Exercise • Activity requiring physical effort, carried out especially to sustain or improve health and fitness. Typically, exercise is a planned activity to enhance health or meet our goals. E. Discuss the importance of positive body image i. Body image is a term used to describe how people, men or women, feel about themselves and their body. This includes what they see when they look in a mirror or when they think of themselves in their mind. Body image includes how people feel about their height, weight, appearance, and overall, how they feel about their body. People with a positive body image have an accurate perception of what they look like and demonstrate happiness and confidence in their body. Many people struggle with negative body image, meaning they have a distorted or negative sense of their body and/or appearance. F. Discuss the components of maintaining physical activity i. How to set goals ii. The importance of regular and consistent activity iii. The benefit of personal responsibility iv. The benefit of group physical activity G. Discuss how to track physical activity i. Personal Activity Journal (personal) ii. Local (website) iii. Statewide (website) CREATE a personal assessment (adult, etc.) A. Equipment needed i. Physical activity log to record results ii. Scale GOAL: Assess and obtain participants’ current fitness level. BEST FOR: All LESSON OBJECTIVES • Become aware of one’s current physical well-being • Measure vitals • Instill the importance of physical activity 1 2
  • 9.
    PHYSICAL ACTIVITY PRE-ASSESSMENT5 P H Y S I C A L A C T I V I T Y P R E - A S S E S S M E N T iii. Measuring tape iv. Stopwatch v. Blood pressure cuff B. Steps (demo) i. Write out goal ii. Exercise plan iii. Fill out personal health report iv. Collect waivers v. Take measurements vi. Input results into a fitness journal Practice A. Write physical activity goal B. Exercise plan C. Take resting heart rate D. Height/weight E. BMI F. Waist circumference G. Blood pressure H. Presidential tests i. Sit and reach or V-sit and reach ii. 1 mile run iii. Pull-up test iv. Curl-ups v. Shuttle run Incorporate into your daily life A. Class B. School C. Work D. Personal life Conclusion and assignment A. Hand out fitness journal/tracker with information from this session B. Ask participants to track how many minutes of moderate or vigorous exercise they do within the next week Update fitness plan/record and answer questions Schedule/remind of next appointment 5 3 4 7 6 For this lesson, reference the muscular system handout shown above. For copies of this handout, please visit: extension.usu.edu/ fscreate/htm/staff-menu. You can find the handouts under Lessons for Adults.
  • 10.
    6 PHYSICAL ACTIVITYPRE-ASSESSMENT P H Y S I C A L A C T I V I T Y P R E - A S S E S S M E N T Trapezius Deltoid Rhomboideus major Triceps Latissimus dorsi Gluteus medius Gluteus maximus Biceps femoris Semitendinosus Semimembranosus Gastrocnemuis Peroneus brevis Masseter Orbicularis oris Sternomastoid Deltoid Pectoralis major Latissimus dorsi Serratus anterior Biceps Rectus abdominis Brachioradialis Flexor carpi radialis Tensor fasciae latae Pectineus Adductor longus Gracilis Sartorius Rectus femoris Vastus lateralis Vastus medialis Peroneus longus Tibialis anterior Extensor digitorum longus Soleus STRETCHING EXERCISES The muscular system is an organ system consisting of skeletal, smooth, and cardiac muscles. It permits movement of the body, maintains posture, and circulates blood throughout the body. The muscular system in vertebrates is controlled through the nervous system, although some muscles (such as the cardiac muscle) can be completely autonomous. Together with the skeletal system it forms the musculoskeletal system, which is responsible for movement of the human body. Orbicularis aculi
  • 11.
    Overview: These lessonscompare and help you teach the most common forms of stretching and improving balance. Please adapt these lessons to fit your target audience: adults, mothers, fathers, or teens. STRETCHING T H R E E L E S S O N S STRETCHING 7
  • 12.
    8 STRETCHING S TR E T C H I N G Introduction – This lesson teaches how to perform basic static and dynamic stretches. Please review points a-c and include d-g as applicable. A. Choose one physical education lesson (from the lesson resources in the back) to teach before doing this activity. Then ask questions such as: i. Why is physical activity important? ii. When was a time you were very active? How did you feel? B. Discuss the necessity of physical activity C. Follow up on previous activities or assignments D. Define the difference between physical activity and exercise i. Physical activity • Bodily movement produced by skeletal muscles that requires energy expenditure, such as walking to work, doing chores, etc. ii. Exercise • Activity requiring physical effort, carried out especially to sustain or improve health and fitness. Typically, exercise is a planned activity to enhance health or meet our goals. E. Discuss the importance of positive body image i. Body image is a term used to describe how people, men or women, feel about themselves and their body. This includes what they see when they look in a mirror or when they think of themselves in their mind. Body image includes how people feel about their height, weight, appearance, and overall, how people feel about their body. People with a positive body image have an accurate perception of what they look like and demonstrate happiness and confidence in their body. Many people struggle with negative body image, meaning they have a distorted or negative sense of their body and/or appearance. F. Discuss the components of maintaining physical activity i. How to set goals ii. The importance of regular and consistent activity iii. The benefit of personal responsibility iv. The benefit of group physical activity G. Discuss how to track physical activity i. Personal activity Journal (personal) ii. Local (website) iii. Statewide (website) GOAL: Understand the importance of stretching and its benefits. BEST FOR: All LESSON OBJECTIVES • Know the difference between dynamic and static stretching • Learn the importance of dynamic stretching • Increase flexibility • Learn the benefits of stretching • Gain the knowledge to stretch on your own 1 DYNAMIC VS. STATIC STRETCHING
  • 13.
    STRETCHING 9 S TR E T C H I N G 2 Benefits of dynamic and static stretching A. Dynamic Stretching i. Decrease muscle stiffness ii. Improve speed iii. Improve agility iv. Increase flexibility v. Increase mobility B. Static Stretching i. Increase flexibility ii. Increase mobility iii. Prevent injury v. Improve gait CREATE a stretch routine A. Equipment needed (all optional) i. Stretch band ii. Broomstick, PVC pipe or similar B. Steps (demo) i. Demonstrate all dynamic stretches to be taught ii. Give an example of static stretching Practice (do) A. Write goal B. Plan C. Perform five to eight dynamic stretches Incorporate into your daily life A. Class B. School C. Work D. Personal life Conclusion and assignment A. Stretch at least 5-10 min a day B. Track your physical activity C. Write in your journal how your body responds to dynamic and static stretches Update fitness plan/record and answer questions Schedule/remind of next appointment 5 3 4 7 8 6 For this lesson, reference the stretching handout shown above. For copies of this handout, please visit: extension.usu.edu/fscreate/htm/staff- menu. You can find the handouts under Lessons for Adults.
  • 14.
    10 STRETCHING S TR E T C H I N G STRETCHES DYNAMIC STRETCHING • Dynamic stretching consists of controlled leg and arm swings that take you (gently!) to the limits of your range of motion. Ballistic stretches involve trying to force a part of the body beyond its range of motion. In dynamic stretches, there are no bounces or “jerky” movements. An example of dynamic stretching would be slow, controlled leg swings, arm swings, or torso twists. • This is most beneficial for warming up BEFORE exercising and to increase one’s range of motion. HURDLER’S KNEE RAISE While moving forward, raise your leg as if stepping over an object just below waist height, then return to normal walking stride. Repeat 10 times. (For groin muscles.) MULTI-PLANER LUNGES Spread legs wide and lean side to side. Repeat 10 times. (For hip flexors and obliques.) INCH WORM Stand up, legs together. Bend over, stretch hands in front and place them on ground. Walk your feet toward your hands, then back. Repeat 10 times. (For back and hamstring muscles.) TIP-TOE WALKING Walk on toes for 45 sec. (For lower leg, calf and foot muscles.) LEG SWINGS With one arm outstretched to the side and the other against the wall, swing your outside leg in front and then behind you. Repeat 10 times. (For hip flexors.) HEEL-UPS Rapidly kick heels toward buttocks while moving forward. (For quadriceps.) SCORPION Lie on your stomach with arms outstretched and toes pointed. Kick left foot toward right arm and vice versa. Repeat 10 times. (For quadriceps, back and abdominals.) PRISONER SQUAT Place feet at shoulder width apart and place hands behind head. Then sit down as if you were going to sit on a chair. Repeat 10 times. (For lower body muscles.) WALKING LUNGES Walk forward leaving one foot in place and bring the other to a 90 degree angle in front of you. Alternate legs. Repeat 10 times. (For hips and lower leg.) AIRPLANES Stretch your arms out straight to the sides and spin them in circles. Alternate directions. Do for 45 sec. (For rotator cuff and shoulders.)
  • 15.
    STRETCHING 11 S TR E T C H I N G STATIC STRETCHING • Static stretching consists of stretching a muscle (or group of muscles) to its farthest point and then maintaining or holding that position, whereas passive stretching consists of a person who is relaxed (passive) while some external force (either a person or an apparatus) brings the joint through its range of motion. • This is most beneficial for post workout stretches AFTER exercising when the muscles are all warmed up. NECK FLEXION/EXTENSION STRETCH Gently rotate your head forward then backward, like an exaggerated nod for yes. TRICEPS STRETCH Gently bend arm behind head as if scratching back. Then, place the opposite hand on elbow and pull down, hold, repeat. BUDDHA STRETCH Place palms together, as if praying. Then rotate your fingers toward the body. Repeat 10 times. (For forearms, and wrists.) ABC STRETCH Sitting on the floor, place the back of your right ankle on top of your left toes. Trace the A-B-C’s with your foot, moving only the ankle and foot. When finished, repeat with your other foot. JUMPING JACKS Begin standing with hands at side. Jump into the air and widen legs shoulder-width apart while bringing palms together above head (clap). Jump to return to standing position. NECK LATERAL FLEXION STRETCH Gently rotate your head from side to side, like an exaggerated nod for no. BICEP STRETCH Extend arms, palms up and “push” your bicep upward. Make this stretch easier by putting palms of hands on bottom of a table. SWIMMER’S STRETCH Swing your arms out wide and then bring them in, giving yourself a big hug. Repeat 10 times. (For shoulders, biceps and trapezoids.) PUSHUP WITH ROTATION Start in pushup position. Push up until arms and back are straight. Rotate left hand into the air and lift left foot off the floor and place it on right foot. Repeat on the other side.
  • 16.
    12 STRETCHING S TR E T C H I N G LUMBAR EXTENSION STRETCH Lie face down on the floor. Lift your upper body upwards while your lower body stays touching the floor. Be gentle if sore. HAMSTRING STRETCH Lie flat on back. Lift and straighten leg with foot pointed. Place hands on back of knee and gently pull leg toward your chest. ADDUCTOR STRETCH Sit on the floor. Place the bottoms of your feet together. Next, push down with elbows on knees very gently, keep back straight. QUADRICEPS STRETCH Stand on one leg, balance, and pull foot toward buttocks. HIP FLEXOR STRETCH Keep back straight, tuck bottom under, and lunge forward on front leg. LUMBAR FLEX ON STRETCH Lie flat on floor. Lift your knees toward your chest. Place your hands on shin/knee and gently pull knees toward your chest. HAMSTRING STRETCH Start with knee slightly bent, then push knee straight as tension allows, push chest toward foot and try to touch your toes. QUADRICEPS STRETCH Lie flat on the floor, stomach-side down. Bend knee toward buttocks then grab foot with hand and gently tug on the foot. ADDUCTOR STRETCH Keep foot pointing forward. Lunge sideways on bent knee, keep back straight. GASTROCNEMIUS STRETCH Keep knee straight and heel down, feet facing forward. CROSSOVER ARM STRETCH Bring the right arm across the body. Use the left hand or forearm to hold the right arm against the chest. THORACIC EXTENSION STRETCH Reach forward with arms, push with chest toward floor, arch back down with, backside behind knees.
  • 17.
    STRETCHING 13 S TR E T C H I N G
  • 18.
    14 STRETCHING S TR E T C H I N G Introduction – This lesson teaches how to perform basic yoga poses. Please review points a-c and include d-g as applicable. A. Choose one physical education lesson (from the lesson resources in the back) to teach before doing this activity. Then ask questions such as: i. Why is physical activity important? ii. When was a time you were very active? How did you feel? B. Discuss the necessity of physical activity C. Follow up on previous activities or assignments D. Define the difference between physical activity and exercise i. Physical activity • Bodily movement produced by skeletal muscles that requires energy expenditure. Such as walking to work, doing chores, etc. ii. Exercise • Activity requiring physical effort, carried out especially to sustain or improve health and fitness. Typically, exercise is a planned activity to enhance health or meet goals. E. Discuss the importance of positive body image i. Body image is a term used to describe how people, men or women, feel about themselves and their body. This includes what they see when they look in a mirror or when they think of themselves in their mind. Body image includes how people feel about their height, weight, appearance, and overall, how they feel about their body. People with a positive body image have an accurate perception of what they look like and demonstrate happiness and confidence in their body. Many people struggle with negative body image, meaning they have a distorted or negative sense of their body and/or appearance. F. Discuss the components of maintaining physical activity i. How to set goals ii. The importance of regular and consistent activity iii. The benefit of personal responsibility iv. The benefit of group physical activity G. Discuss how to track physical activity i. Personal activity journal (personal) ii. Local (website) iii. Statewide (website) GOAL: Comfortably perform basic yoga stretches on your own. BEST FOR: All LESSON OBJECTIVES • Increase flexibility • Introduce participants to yoga • Learn the benefits of stretching • Gain the knowledge to stretch on your own YOGA 1
  • 19.
    STRETCHING 15 S TR E T C H I N G Benefits of yoga A. Reduce stress and anxiety B. Enhance mood and decrease depression C. Improve balance and flexibility D. Reduce blood pressure E. Weight reduction F. Lower harmful LDL cholesterol G. Increase insulin sensitivity H. Decrease insomnia CREATE a yoga pose A. Equipment needed (all optional) i. Yoga mat ii. Yoga blocks iii. Yoga straps B. Steps (demo) i. Write out goal ii. Plan iii. Stretch iv. Demonstrate all yoga poses to be taught Practice (do) A. Write out goal B. Plan C. Stretch D. Perform five to eight yoga poses Incorporate into your daily life A. Class B. School C. Work D. Personal life Conclusion and assignment A. Perform yoga at least 20-30 min a day B. Track your physical activity C. Write in your journal how your body responds to yoga Update fitness plan/record and answer questions Schedule/remind of next appointment 2 5 3 4 7 8 6 For this lesson, reference the yoga handout shown above. For copies of this handout, please visit: extension.usu.edu/fscreate/htm/staff- menu. You can find the handouts under Lessons for Adults.
  • 20.
    16 STRETCHING S TR E T C H I N G YOGA POSES BEGINNER POSES CAT POSE Start on your hands and knees in tabletop position. Make sure your knees are directly below your hips and wrists are directly below your shoulders. Exhale and round your back toward the ceiling, inhale and return to tabletop position. UPWARD-FACING DOG POSE Lie face-down on the floor. Place palms on the floor next to your waist. Inhale and press your palms into the floor and slightly back while picking up your torso perpendicular to the floor. Look straight ahead. Exhale slowly and return torso to floor. HALF DOWNWARD-FACING DOG POSE Start in downward-facing dog pose, then continue lifting one leg above the pelvis and make a straight line with your arms. Flex your toes toward the floor. Hold. Exhale and return to floor, repeat with other leg. SEATED ANGLE POSE Sit. Spread legs as far apart as possible. Lean forward and pull buttocks forward, widening legs slightly. Then rotate thighs and press them into the floor. Lean forward. Breathe slowly, increase stretching until your hands are able to grab your feet. Breathe out as you increase your stretch and inhale when holding stretch. EASY POSE Sit on the floor with your legs crossed but not touching. Press your hands against the floor and lift your buttocks slightly off the floor. Hang there for a few breaths. Then slowly lower yourself back onto the floor. Place your hands on your knees, palms down. Straighten your back and keep your chin parallel with the ground. Sit there as long as you would like. Breathe deeply. COW POSE Start in tabletop position. Inhale and allow your belly to sag toward the floor while lifting your shoulders and pelvis toward the ceiling. Exhale and return to tabletop position. DOWNWARD-FACING DOG POSE Begin with your hands and knees below your shoulders and hips respectively, inhale and push your pelvis toward the ceiling while raising and straightening your knees. Shift your weight to your feet while lengthening your arms out straight. Keep your head between your arms and look at your toes. Hold, then exhale as you reverse this movement. HALF SHOULDER STAND POSE Lie on your back with your arms at your side. Bend your knees with your feet flat on the floor. Exhale, press your arms against the floor, and push your feet upward. Continue to lift by curling the pelvis and then your back away from the floor (bringing your knees toward your face). Lay the backs of your upper arms on the mat and place your palms against your back for support. Raise your pelvis over your shoulders (the legs are relatively parallel to the floor). Exhale. Inhale and return to starting position.
  • 21.
    STRETCHING 17 S TR E T C H I N G INTERMEDIATE POSES STANDING FORWARD BEND POSE Stand up straight with feet shoulder width apart and with hands loosely at your side. Slowly rotate pelvis forward and reach down to place your hands on the floor or on your shins. Hold. As you exhale, slowly return to starting position then inhale and stretch further than the initial stretch. Repeat. SUNBIRD POSE Start in the tabletop position. As you inhale, lift one leg off the floor, fully extend it and keep toes pointing toward the floor (pretend your are pushing your foot through a wall). Raise the opposite arm to be parallel with the floor, fingers extended and palm facing the floor. Hold. Exhale and return to tabletop position. Switch sides. Repeat. LOW-WARRIOR POSE Start in downward dog position. As you exhale, jump and spread your legs out— one in front and one in back. The back foot should be at a 45 degree angle and the front foot should have the toes pointing forward. Lunge gently into the front knee. Inhale and straighten your spine. Bring arms up straight above your head with the arms nearly touching your ears and palms facing each other. Exhale back into downward dog and switch feet. INCLINED PLANE POSE Begin as if you were doing a pushup with your hands directly below your shoulders. Keep your legs shoulder width apart. Place the tops of your feet on the floor. Inhale, push up until your arms are perpendicular with the floor. Straighten your legs and back. Hold. Exhale allowing your stomach to sag toward the floor. Inhale and return to plane pose. Exhale into child’s pose. Repeat. CHILD POSE Start sitting with your knees and hips bent and shins parallel to the floor. Your chest can rest on your knees or your knees can be spread to about the width of your mat, allowing your chest to go between your knees. Rest forehead on the floor with arms stretched forward in front of your head or backward toward your feet. Hold. PLOUGH POSE Begin lying on your back. Exhale and bend from the hip joints to slowly lower your toes to the floor above and beyond your head. Keep your torso perpendicular to the floor with your legs fully extended. Toes on the floor, lift your top thighs and tailbone toward the ceiling. Press down on thighs with arms, as you lift the thighs toward the ceiling. Exhale. Roll onto your back or simply roll out of the pose.
  • 22.
    18 STRETCHING S TR E T C H I N G CROW POSE Bend down into a low squat, with elbows pressing against inner thighs. Bend at the waist until your palms are touching the floor. Spread your fingers wide. Lift up onto your toes and position your knees onto your triceps, as high above the elbows as possible. Gaze forward. Shift your weight forward by leaning your knees into your triceps and lifting up onto the balls of the feet. Shift your weight forward, gradually until your feet come off the ground. Exhale and return to frog pose. LEG STRETCHES WARRIOR I POSE Begin in downward-facing dog pose. Exhaling, step or lightly jump your feet 3 1/2 to 4 feet apart. Raise your arms perpendicular to the floor (and parallel to each other). Turn your back foot 45-60 degrees. Exhale and square the front of your pelvis as much as possible with the front edge of your mat. Reach strongly through your arms, lifting the ribcage away from the pelvis. Straighten the right knee. Turn the feet forward and release the arms with an exhalation. Switch sides. TRIANGLE POSE Begin standing, then take a big step outward with your right foot, turn outward to face the top of your mat. Align your right heel with your left heel then turn your back foot in about 15-20 degrees. Keep knees straight. Then slowly bend over your right foot touching the floor with your fingers. Hold. Exhale back to standing position, switch legs. WARRIOR II POSE Begin in downward-facing dog pose. With an exhalation, step or lightly jump your feet 3 1/2 to 4 feet apart. Raise your arms parallel to the floor, palms down. Turn your right foot slightly to the right and your left foot out to the left 90 degrees. Exhale and bend your left knee over the left ankle, so that the shin is perpendicular to the floor. If possible, bring the left thigh parallel to the floor. Hold. Exhale as you reverse the pose. Switch sides. CHAIR POSE Begin standing with your arms loosely at your side. Inhale and raise your arms perpendicular to the floor with palms facing inward. Exhale and bend your knees, as if sitting on a chair. Try to bring your thighs parallel with the floor. Exhale and release your arms to your sides and return to standing position. CAMEL POSE Kneel on the floor with your knees hip width apart and thighs perpendicular to the floor. Keep the top of your feet flat against the floor. Press your shins and the tops of your feet firmly into floor. Slowly, lean back against the firmness of the tailbone and shoulder.
  • 23.
    STRETCHING 19 S TR E T C H I N G CORE MUSCLES HIP OPENERS PIGEON POSE Kneel on the ground. Stretch your right leg out behind you, and bend your left knee so that your left foot is near your right pelvic bone with your toes pointed. Lean forward so that your chest is puffed out. Place your hands on the ground for balance. Turn your torso and head toward the right. Bend your right leg so that your foot is pointed toward the ceiling. Hold your foot with your right hand. Hold the pose for 3 to 5 breaths, then release. Repeat with opposite leg. GODDESS POSE Begin standing with arms at your sides. Step your feet wide apart, about 4 feet. Turn your toes out slightly. On an exhalation, bend your knees and lower your hips into a squat. Work toward bringing your thighs parallel to the floor. Bend your elbows and point your fingertips toward the ceiling; your upper arms and forearms should be at a 90 degree angle. To release, slowly return your hands to your hips. Exhale and step your feet together. PLANK POSE Start on hands and knees with wrists and knees just below your shoulders and hips, respectively. Inhale and draw your torso forward until the arms are perpendicular to the floor and the shoulders directly over the wrists, torso parallel to the floor. Firm your shoulder blades against your back, then spread them away from the spine. Spread your collarbone away from the sternum. Exhale to release. BOAT POSE Sit on the floor with your legs straight in front of you. Press your hands on the floor a little behind your hips, fingers pointing toward the feet, and straighten your arms. Exhale and bend your knees then lift your feet off the floor, so that the thighs are angled about 45-50 degrees relative to the floor. If possible, straighten your knees, raising your toes above the level of your eyes. Stretch your arms alongside the legs, parallel to each other and the floor. Remember to keep your back straight. Release the legs with an exhalation and sit upright on an inhalation. HAPPY BABY POSE Lie on your back. Exhale and bring your knees to your chest. Clasp the outside of each foot with your hands. Swing your knees outward creating extra distance between them. Inhale and push your feet up toward your hands while gently resisting with your hands. Hold for 3 to 5 breaths. Release on exhale. COW FACE POSE Sit on the floor with your legs straight in front of you. Slide your left foot under the right knee toward the outside of the right hip. Then cross your right leg over the left, stacking the right knee on top of the left. Inhale and stretch your right arm behind your back. Inhale and stretch your left arm over your shoulder. If possible, hook the right and left fingers. Release the arms, uncross the legs, and repeat with the arms and legs reversed.
  • 24.
    20 STRETCHING S TR E T C H I N G DOLPHIN POSE Begin on your hands and knees. Set your knees directly below your hips and your forearms on the floor with your shoulders directly above your wrists. Firmly press your palms together and your forearms into the floor. Exhale and lift your knees away from the floor. Lift your buttocks toward the ceiling. Continue to press the forearms actively into the floor. Then release your knees to the floor with an exhale. BOW POSE Lie on your belly with arms alongside your torso, palms up. Exhale and bend your knees, bring your heels toward your buttocks. With your hands, take hold of your ankles. Make sure your knees aren’t wider than the width of your hips. Inhale and strongly lift your heels away from your buttocks and lift your thighs away from the floor. This will pull your upper torso and head off the floor. Release as you exhale and lie quietly for a few breaths. BALANCE TREE POSE Stand. Shift your weight gradually from your left foot to your right foot. Fix your gaze on a point a few feet away. Shifting your weight slowly onto your right leg, keep it strong as you place the sole of your left foot on your upper inner right thigh (toes pointing to the floor). Press your palms together and raise above your head. Exhale and straighten your leg then slowly lower it to the floor. Repeat on the other side. DANCER POSE Stand. Inhale, shift your weight onto your right foot and lift your left heel toward your left buttock as you bend the knee. Begin to lift your left foot up, away from the floor, and back, away from your torso. Extend the left thigh behind you and parallel to the floor. Stretch your right arm forward, in front of your torso, parallel to the floor. Exhale back to starting position and switch sides. WARRIOR III POSE Stand with your feet hip-distance apart and arms at your side. Turn your right foot out 90 degrees. Slightly bend your right knee. Raise your arms, palms facing each other. Lift your left leg as you lower your torso, bringing your body parallel to the ground. Your arms will now reach forward. Gaze at the floor in front of you. Exhale. Lower your left foot to the floor. Repeat with other side. SIDE PLANK POSE Start in downward facing dog. Shift onto the outside edge of your left foot, and stack your right foot on top of the left. Swing your right hand onto your right hip, turn your torso to the right as you do, and support the weight of your body on the outer left foot and left hand. Align your entire body into one long diagonal line from the heels to the crown. Gaze at your top hand. Hold. Exhale into downward dog and switch sides.
  • 25.
    STRETCHING 21 S TR E T C H I N G
  • 26.
    22 STRETCHING S TR E T C H I N G Introduction – This lesson teaches the basics of learning proper exercises to improve one’s balance. Please review points a-c and include d-g as applicable. A. Choose one physical education lesson (from the lesson resources in the back) to teach before doing this activity. Then ask questions such as: i. Why is physical activity important? ii. When was a time you were very active? How did you feel? B. Discuss the necessity of physical activity C. Follow up on previous activities or assignments D. Define the difference between physical activity and exercise i. Physical activity • Bodily movement produced by skeletal muscles that requires energy expenditure, such as walking to work, doing chores, etc. ii. Exercise • Activity requiring physical effort, carried out especially to sustain or improve health and fitness. Typically, exercise is a planned activity to enhance health or meet goals. E. Discuss the importance of positive body image i. Body image is a term used to describe how people, men or women, feel about themselves and their body. This includes what they see when they look in a mirror or when they think of themselves in their mind. Body image includes how people feel about their height, weight, appearance, and overall, how they feel about their body. People with a positive body image have an accurate perception of what they look like and demonstrate happiness and confidence in their body. Many people struggle with negative body image, meaning they have a distorted or negative sense of their body and/or appearance. F. Discuss the components of maintaining physical activity i. How to set goals ii. The importance of regular and consistent activity iii. The benefit of personal responsibility iv. The benefit of group physical activity G. Discuss how to track physical activity i. Personal activity journal (personal) ii. Local (website) iii. Statewide (website) GOAL: Understand the importance of balance and become comfortable to perform balancing exercises on your own. BEST FOR: All LESSON OBJECTIVES • Improve balance • Increase stability • Increase muscle tone BALANCE 1
  • 27.
    STRETCHING 23 S TR E T C H I N G Benefits of balance A. Help prevent falls, especially in seniors B. Help those with obesity who have unevenly distributed weight C. Improve ability to control and maintain body’s position D. Prevent injuries, especially in seniors CREATE a balance routine A. Equipment needed (all optional) i. Stretch band ii. Broomstick, PVC pipe or similar B. Steps (demo) i. Demonstrate five to eight balancing exercises Practice (do) A. Write goal B. Plan C. Perform five to eight balancing exercises Incorporate into your daily life A. Class B. School C. Work D. Personal life Conclusion and assignment A. Perform balance exercises at least 5-10 min a day B. Track your physical activity C. Write in your journal how your body responds to the balancing exercises Update fitness plan/record and answer questions Schedule/remind of next appointment 2 5 3 4 7 8 6
  • 28.
    24 STRETCHING S TR E T C H I N G
  • 29.
    Overview: These lessonscompare and help you teach the most common forms of exercise using one’s body weight. Please adapt these lessons to fit your target audience: adults, mothers, fathers, or teens. BODY WEIGHT T H R E E L E S S O N S BODY WEIGHT 25
  • 30.
    26 BODY WEIGHT BO DY W E I G H T Introduction – This lesson teaches the basic principles of High Intensity Interval Training (HIIT). Please review points a-c and include d-g as applicable. A. Choose one physical education lesson (from the lesson resources in the back) to teach before doing this activity. Then ask questions such as: i. Why is physical activity important? ii. When was a time you were very active? How did you feel? B. Discuss the necessity of physical activity C. Follow up on previous activities or assignments D. Define the difference between physical activity and exercise i. Physical activity • Bodily movement produced by skeletal muscles that requires energy expenditure, such as walking to work, doing chores, etc. ii. Exercise • Activity requiring physical effort, carried out especially to sustain or improve health and fitness. Typically, exercise is a planned activity to enhance health or meet goals. E. Discuss the importance of positive body image i. Body image is a term used to describe how people, men or women, feel about themselves and their body. This includes what they see when they look in a mirror or when they think of themselves in their mind. Body image includes how people feel about their height, weight, appearance, and overall, how they feel about their body. People with a positive body image have an accurate perception of what they look like and demonstrate happiness and confidence in their body. Many people struggle with negative body image, meaning they have a distorted or negative sense of their body and/or appearance. F. Discuss the components of maintaining physical activity i. How to set goals ii. The importance of regular and consistent activity iii. The benefit of personal responsibility iv. The benefit of group physical activity G. Discuss how to track physical activity i. Personal activity journal (personal) ii. Local (website) iii. Statewide (website) GOAL: Understand and become comfortable performing HIIT exercises on your own. BEST FOR: Men, women (not pregnant) LESSON OBJECTIVES • Learn the benefits of HIIT • Gain the knowledge to perform HIIT on your own • Understand proper technique HIGH INTENSITY INTERVAL TRAINING (HIIT) 1
  • 31.
    BODY WEIGHT 27 BO DY W E I G H T Benefits of HIIT A. Improve blood pressure B. Reduce risk of stroke C. Reduce risk of cardiovascular disease D. Burn more calories in a shorter amount of time E. Improve aerobic capacity F. Add fun and variety to exercise G. Dosen’t require special equipment CREATE a HIIT work out A. Equipment needed (all optional) i. Box/stairs or other sturdy platform ii. Resistance band B. Steps (demo) i. Write out goal ii. Plan iii. Demonstrate five to eight HIIT exercises Practice (do) A. Write out goal B. Plan C. Stretch D. Perform five to eight HIIT exercises Incorporate into your daily life A. Class B. School C. Work D. Personal life Conclusion and assignment A. Perform HIIT exercises at least 15-30 min a day B. Track your physical activity C. Write in your journal how your body responds to HIIT exercises Update fitness plan/record and answer questions Schedule/remind of next appointment 2 5 3 4 7 8 6 For this lesson, reference the high intensity interval training handout shown above. For copies of this handout, please visit: extension. usu.edu/fscreate/htm/staff-menu. You can find the handouts under Lessons for Adults.
  • 32.
    28 BODY WEIGHT BO DY W E I G H T HIIT WORKOUTS Set your clock for 60 seconds. Starting with the first workout, do as many as possible. Give yourself a 10-second break. Repeat for the remaining five workouts. Set your clock for 60 seconds. Starting with the first workout, do as many as possible. Give yourself a 10-second break. Repeat for the remaining five workouts. 1. JUMP LUNGES 1. PUSHUP AND THREE POINT JUMP 2. SQUATS 2. HIGH KNEES 3. TRICEP DIPS 3. SIDE PLANK KNEE TO ELBOW LEFT SIDE 4. BURPEES 4. SIDE PLANK KNEE TO ELBOW RIGHT SIDE 5. RUSSIAN TWISTS 5. TRICEP DIPS 6. PUSHUP AND PLANK KNEE 6. BICYCLE CRUNCHES
  • 33.
    BODY WEIGHT 29 BO DY W E I G H T Set your clock for 60 seconds. Starting with the first workout, do as many as possible. Give yourself a 10-second break. Repeat for the remaining three workouts. Set your clock for 60 seconds. Starting with the first workout, do as many as possible. Give yourself a 10-second break. Repeat for the remaining three workouts. 1. PUSHUP + SUPERMAN 1. PUSHUP + BURPEE + TUCK JUMP 2. MOUNTAIN CLIMBERS 2. IN AND OUT ABS 3. PLANK AND SPIDER KNEES 3. SIDE BURPEES 4. CURTSY LUNGES (ALTERNATE) 4. PLANK JACKS 20-MINUTE HIIT Repeat set twice through for the complete 20-minute workout. 60 seconds 30 seconds 30 seconds 60 seconds 30 seconds 30 seconds 60 seconds 30 seconds JUMPING JACKS SIDE LUNGES SQUATS JOG IN PLACE BURPEES LUNGES JUMP ROPE MOUNTAIN CLIMBERS SPEED SKATERS BUTT KICKERS LUNGE KICKS SQUATS MARCH IN PLACE SIDE LUNGES PUSHUPS 30 seconds 60 seconds 30 seconds 30 seconds 60 seconds 30 seconds 30 seconds
  • 34.
    30 BODY WEIGHT BO DY W E I G H T MY HIIT PLANNER: LEVEL 1 MY HIIT PLANNER: LEVEL 3 MY HIIT PLANNER: LEVEL 2 JUST CONVERTED 15-20 MINS Set your clock for 40 seconds. Complete the first workout. Give yourself a 10-second break. Repeat for the remaining workouts. Do one to two times a week. LONG TIME HIIT LOVER 10-25 MINS Set your clock for 40 seconds. Complete the first workout. Give yourself a 10 second break. Repeat for the remaining workouts. Do three to four times a week. INTERMEDIATE HIIT LOVER 18-22 MINS Set your clock for 40 seconds. Complete the first workout. Give yourself a 10-second break. Repeat for the remaining workouts. Do two to three times a week. Squats (20x) At a fast tempo Lunges each leg (20x) Stepping back/forward instead of jumping Step out burpees (10x) At a fast tempo Pushups on knees (10x) At a fast tempo Mountain climbers each side (20x) Steps of high knees running (40x) 50 m sprints and walk back (3x) Prisoner squat jumps (20x) Hands placed behind the head as you jump Lunge jumps each leg (30x) Chest to ground burpees (20x) Clapping pushups on feet (10x) Mountain climbers each side (40x) Tuck jumps (20x) 50 m hill sprints and wall back (5x) Squat jumps (20x) Lunge jumps each leg (20x) Burpees (15x) Pushups on feet (10x) At a fast tempo Mountain climbers each side (30x) Tuck jumps (15x) 50 m sprints and walk back (4x)
  • 35.
    BODY WEIGHT 31 BO DY W E I G H T
  • 36.
    32 BODY WEIGHT BO DY W E I G H T Introduction – This lesson teaches the basic principles of plyometric exercises. Please review points a-c and include d-g as applicable. A. Choose one physical education lesson (from the lesson resources in the back) to teach before doing this activity. Then ask questions such as: i. Why is physical activity important? ii. When was a time you were very active? How did you feel? B. Discuss the necessity of physical activity C. Follow up on previous activities or assignments D. Define the difference between physical activity and exercise i. Physical activity • Bodily movement produced by skeletal muscles that requires energy expenditure, such as walking to work, doing chores, etc. ii. Exercise • Activity requiring physical effort, carried out especially to sustain or improve health and fitness. Typically, exercise is a planned activity to enhance health or meet goals. E. Discuss the importance of positive body image i. Body image is a term used to describe how people, men or women, feel about themselves and their body. This includes what they see when they look in a mirror or when they think of themselves in their mind. Body image includes how people feel about their height, weight, appearance, and overall, how they feel about their body. People with a positive body image have an accurate perception of what they look like and demonstrate happiness and confidence in their body. Many people struggle with negative body image, meaning they have a distorted or negative sense of their body and/or appearance. F. Discuss the components of maintaining physical activity i. How to set goals ii. The importance of regular and consistent activity iii. The benefit of personal responsibility iv. The benefit of group physical activity G. Discuss how to track physical activity i. Personal activity journal (personal) ii. Local (website) iii. Statewide (website) GOAL: Understand and become comfortable performing plyometric exercises on your own. BEST FOR: Men, non-pregnant women LESSON OBJECTIVES • Learn the benefits of pylometrics • Gain the knowledge to perform pylometrics on your own PLYOMETRICS 1
  • 37.
    BODY WEIGHT 33 BO DY W E I G H T 2 Benefits of plyometrics A. Increase force production (strength) B. Prevent or rehabilitate certain injuries C. Improve reaction time CREATE a plyometrics work out A. Equipment needed (all optional) i. Box/stairs or other sturdy platform ii. Resistance band B. Steps (demo) i. Write out goal ii. Plan iii. Demonstrate five to eight plyometric exercises Practice (do) A. Write out goal B. Plan C. Stretch D. Perform five to eight plyometric exercises Incorporate into your daily life A. Class B. School C. Work D. Personal life Conclusion and assignment A. Perform plyometric exercises at least 15-30 min a day B. Track your physical activity C. Write in your journal how your body responds to plyometric exercises Update fitness plan/record and answer questions Schedule/remind of next appointment 5 3 4 7 8 6 For this lesson, reference the plyometrics handout shown above. For copies of this handout, please visit: extension.usu.edu/fscreate/htm/ staff-menu. You can find the handouts under Lessons for Adults.
  • 38.
    34 BODY WEIGHT BO DY W E I G H T PLIE SQUAT JUMP Stand with feet slightly wider than shoulder width apart, toes pointed out. Lower into a deep plie squat with hands clasped in front of chest. Jump as high as you can, tapping heels together in midair. Land with knees soft in plie squat position. Repeat for 45 seconds. DOUBLE JUMP Lower into a deep squat and bring hands together in front of chest. Jump as high as you can and land in lunge position with left leg forward (bend both knees 90 degrees). Jump as high as you can again and land in squat position. Repeat the lunge-squat jump combo, landing with right leg forward. Continue for 45 seconds, alternating sides. POP-UP Lie facedown on floor, palms next to chest, toes turned under. Do a pushup, using upward momentum to jump left foot in between hands and quickly stand up into a plie squat as you bring hands beside chest. Reverse motion to start. Continue for 45 seconds, alternating legs. ONE-LEGGED DEAD LIFT HOP Stand on left leg, right knee lifted to hip height; stretch arms out in front of you. Hinge forward; extend right leg behind you (body is parallel to floor). Reverse motion, returning upright, and as right knee lifts forward, push off left leg to jump up. Stretch arms toward the sky. Land softly on left leg and repeat for 30 seconds. Switch sides and repeat. LATERAL LUNGE Step left leg out to left side, bending knee while keeping right leg straight; hinge body forward from waist. Touch right hand to floor and place left hand on top of left thigh. Pushing off left heel, shuffle to right two times, ending in side lunge to right with right knee bent and left leg straight. Repeat movement to left side. Continue for 45 seconds. PLANK-STRADDLE HOP Start on floor in plank position with feet hip-width apart, balancing on forearms and toes, palms flat on floor. Hop feet out to sides into a wide V, then hop feet back to start position. Straighten arms, pressing palms into floor (hands will be slightly in front of shoulders on floor). Reverse motion, lowering forearms to floor. Repeat for 30 to 45 seconds. PLYOMETRICS WORKOUTS
  • 39.
    BODY WEIGHT 35 BO DY W E I G H T HAND TOUCHES Start in a pushup position with your feet hip-width apart and your hands just outside your shoulders. Quickly touch your left hand to the top of your right hand, then quickly return to the starting position. Immediately repeat to the opposite side, touching your right hand to the top of your left hand. That’s one rep. Do 10. CLOCK WALK WITH HANDS From a pushup position, step your right hand out to the side to create a wide upper- body stance; follow with your left hand to return to a shoulder-width stance. Continue this pattern to complete one full rotation leading with your right arm. Then do one full rotation leading with your left arm. ANKLE HOPS Stand with your feet shoulder width apart and raise up on your toes. Jump 3-6 inches off the ground and as soon as you land, jump back up again. Keep your legs straight as you jump and don’t let your heels touch the ground. Repeat 10 times. SKATERS Cross your right leg behind your left leg as you bend your left knee into a half-squat position. Extend your left arm out to the side, and swing your right arm across your hips. Hop a few feet directly to the right, switching the position of your legs and arms. That’s one rep. Continue hopping from side to side without pausing. Do 10 reps. SPLIT JUMPS Stand with your feet in a staggered stance, left foot in front of your right, two or three feet apart. Lower your body into a split squat. Quickly jump up and scissor-kick your legs so that you land with your right leg forward. As soon as your feet land, lower your body into a split squat. That’s one rep. Do six. LOW BOX LATERAL SHUFFLE Stand with your left foot on a low box and your right foot on the floor, 2 feet to the right of the box. Bend your knees slightly and bend your arms 90 degrees. Push off your left foot and jump to your left, landing with your right foot on the box and your left foot on the floor. Push off your right foot to jump back to the starting position. Repeat 10 times. TUCK JUMPS Begin in a standing position with your knees slightly bent. Hold your hands in front of you, palms down with your fingertips together at chest height. Dip down into a quarter squat and immediately jump upward. Drive knees toward the chest, attempting to touch them to the palms of the hands. Ensure a good landing. Repeat five times. SEAL JUMPING JACKS Start with your feet about hip-width apart, arms straight out to the sides at shoulder height. Clap your hands in front of your chest and jump just high enough to spread your feet wide. Without pausing, quickly return to the starting position. That’s one rep. Do 20 as quickly as you can with control.
  • 40.
    36 BODY WEIGHT BO DY W E I G H T Introduction – This lesson teaches the basic principles of pilates. Please review points a-c and include d-g as applicable. A. Choose one physical education lesson (from the lesson resources in the back) to teach before doing this activity. Then ask questions such as: i. Why is physical activity important? ii. When was a time you were very active? How did you feel? B. Discuss the necessity of physical activity C. Follow up on previous activities or assignments D. Define the difference between physical activity and exercise i. Physical activity • Bodily movement produced by skeletal muscles that requires energy expenditure, such as walking to work, doing chores, etc. ii. Exercise • Activity requiring physical effort, carried out especially to sustain or improve health and fitness. Typically, exercise is a planned activity to enhance health or meet our goals. E. Discuss the importance of positive body image i. Body image is a term used to describe how people, men or women, feel about themselves and their body. This includes what they see when they look in a mirror or when they think of themselves in their mind. Body image includes how people feel about their height, weight, appearance, and overall, how they feel about their body. People with a positive body image have an accurate perception of what they look like and demonstrate happiness and confidence in their body. Many people struggle with negative body image, meaning they have a distorted or negative sense of their body and/or appearance. F. Discuss the components of maintaining physical activity i. How to set goals ii. The importance of regular and consistent activity iii. The benefit of personal responsibility iv. The benefit of group physical activity G. Discuss how to track physical activity i. Personal activity journal (personal) ii. Local (website) iii. Statewide (website) Benefits of pilates A. Improve core strength and stability B. Improve posture and balance C. Improve flexibility GOAL: Understand and become comfortable performing basic pilates exercises on your own. BEST FOR: All LESSON OBJECTIVES • Learn the benefits of pilates • Gain the knowledge to perform pilates on your own PILATES 1 2
  • 41.
    BODY WEIGHT 37 BO DY W E I G H T D. Prevention and treatment of back pain E. Increase stamina F. Improve concentration G. Improve body awareness CREATE a pilates workout A. Equipment needed (all optional) i. Pilates roll ii. Yoga mat B. Steps (demo) i. Write out goal ii. Plan iii. Demonstrate five to eight pilate exercises/poses Practice (do) A. Write out goal B. Plan C. Stretch D. Perform five to eight pilates Incorporate into your daily life A. Class B. School C. Work D. Personal life Conclusion and assignment a. Perform pilates exercises at least 15-30 min a day b. Track your physical activity c. Write in your journal how your body responds to pilates Update fitness plan/record and answer questions Schedule/remind of next appointment 5 3 4 7 8 6 For this lesson, reference the fundamental pilates handout shown above. For copies of this handout, please visit: extension.usu.edu/ fscreate/htm/staff-menu. You can find the handouts under Lessons for Adults.
  • 42.
    38 BODY WEIGHT BO DY W E I G H T CRISS CROSS Lie flat on back with hands placed at the base of the neck. Bring knees into the chest and curl the head and shoulders off the mat. Extend your right leg to a 45 degree angle. Bring the right shoulder to the left knee. Switch to bring the left shoulder to the right knee. DOUBLE LEG STRETCH Lie on stomach and turn head to place one cheek on the mat. Place hands high up on back. Kick both heels to the seat three times. Extend both legs straight as the hands reach to the feet. Lower the torso and turn the head to place the opposite cheek on the mat. Repeat. DOUBLE LEG STRETCH Bring head off the mat, bring knees into your chest, and place one hand on each shin. Reach yours arms and legs in opposite directions on a diagonal. Circle the arms around, drawing the knees into your chest and catching onto your shins to return to start position. HUNDRED Lie flat on the mat with legs together. Exhale as you curl your head and shoulders up, lift and hover arms off the mat, and float both legs off the mat to desired height. Begin to pump your arms. Inhale for five arm pumps and exhale for five arm pumps. NECK PULL Lie on your back and place hands at the base of neck. Inhale, lift your head up, exhale, roll off the mat bringing the crown of your head to your knees, inhale, stack your spine straight to the ceiling and hinge back on a diagonal, exhale, round the spine down to the mat. ONE LEG CIRCLE Lie on back with arms by side, one leg straight on the mat with the foot flexed and the other leg straight up. Circle the top leg across the body, down, and around for five circles. Reverse the circle in the other direction, circling the leg away from the body, down, and around. Repeat. ONE LEG KICK Lie on your stomach with your legs straight and together and prop yourself onto your forearms, bringing the elbows underneath the shoulders. Kick one heel into your seat two times, reach the leg straight, and place it on the mat. Switch legs. OPEN LEG ROCKER Lean back on sacrum, bend knees, grasp one ankle in each hand, extend legs straight and shoulder distance apart, draw abdominals in as far as possible. Inhale as you roll back to your shoulder blades, exhale, roll up to start position. PUSHUP Stand at the back of the mat. Place the hands on the mat. Walk the hands out until the body is in a plank position. Bend the elbows in a tricep pushup three times. Pike the pelvis toward the ceiling and walk the hands back to the feet in four steps. Roll up through the spine to standing. ROLL UP Lie on your back, legs together. Arms are reaching overhead, with palms facing forward. Reach arms overhead and curl your head and shoulders off the mat. Peel your spine off the mat, rounding forward and bring your head toward your knees. Inhale and roll back down. PILATES WORKOUTS
  • 43.
    BODY WEIGHT 39 BO DY W E I G H T ROLLING LIKE A BALL Come to seated, hug your shins into your chest, balance on your sacrum to lift feet off the mat and hold the body in a ball shape. Knees stay shoulder distance apart with ankles close together. Roll back to your shoulder blades, roll up to start position. SAW Sit tall with legs extended straight and feet flexed. Arms reach straight to the side. Rotate your torso to the right, dive forward reaching the outside of your left hand to the outside of your right foot. Stack your spine staying in rotation, unwind to center. Repeat on the other side. SWAN PREP Begin lying down with legs extended. Place hands beneath shoulders. Press pubic bone and tops of feet into the mat. Lift shoulders upward and squeeze shoulder blades together - do not crunch your neck. Hold, then gently reverse what you did until lying on the floor. SHOULDER BRIDGE Lie on back with knees bent. Peel your tailbone and spine off mat to create a straight line. Extend your right leg to the ceiling with foot pointed. Lower the right leg toward the ground, flex the foot, and bring the leg back up. Repeat five times. Repeat with the left leg. SIDE KICK Lie on right side in a straight line. Prop your head on right hand and place your left palm on the mat in front of your chest. Move both legs in front of your hips on a slight diagonal. Lift the top leg and kick it forward two times. Now kick back. Do five times and repeat on the other side. SINGLE LEG STRETCH Curl your head and shoulders off the mat, bend both knees into your chest, and extend one leg straight as you place both hands on the opposite shin. Outside hand place near your ankle, inside hand place near your knee. Switch your legs. SPINE STRETCH Sitting tall, straighten legs on mat, feet flexed. Arms reach forward, with palms facing down. Exhale as you roll forward through the spine, drawing the abdominals in, and keeping the arms parallel to the mat. Inhale as you roll up, stacking the spine to return to start position. SPINE TWIST Sit with legs together in front and feet flexed. Raise arms to the side. Sit tall. Reach your head to the ceiling. Twist the torso to the right, growing taller on the twist and pulsing two times. Return torso to center. Twist the torso to the left, pulsing two times. Inhale, return to center. Repeat. SEAL Sit with hips close to feet, knees bent. Lace your hands between your legs and hold on to the outsides of your ankles with your feet together and knees shoulder distance apart. Make a C-curve with the spine and gaze into your abdominals. Balance just behind the sits bones with your feet floating off the mat. Clap your feet together three times. While maintaining the C-curve shape, inhale roll back to balance on the shoulder blades with the hips over shoulders and clap the feet three times. Exhale, roll through the spine to return to start position with feet floating off the mat.
  • 44.
    40 BODY WEIGHT BO DY W E I G H T
  • 45.
    Overview: These lessonscompare and help you teach common forms of aerobic exercise. Please adapt these lessons to fit your target audience: adults, mothers, fathers, or teens. AEROBICS T H R E E L E S S O N S AEROBICS 41
  • 46.
    42 AEROBICS A ER O B I C S Introduction – This lesson teaches moderate aerobic exercise. Please review points a-c and include d-g as applicable. A. Choose one physical education lesson (from the lesson resources in the back) to teach before doing this activity. Then ask questions such as: i. Why is physical activity important? ii. When was a time you were very active? How did you feel? B. Discuss the necessity of physical activity C. Follow up on previous activities or assignments D. Define the difference between physical activity and exercise i. Physical activity • Bodily movement produced by skeletal muscles that requires energy expenditure, such as walking to work, doing chores, etc. ii. Exercise • Activity requiring physical effort, carried out especially to sustain or improve health and fitness. Typically, exercise is a planned activity to enhance health or meet goals. E. Discuss the importance of positive body image i. Body image is a term used to describe how people, men or women, feel about themselves and their body. This includes what they see when they look in a mirror or when they think of themselves in their mind. Body image includes how people feel about their height, weight, appearance, and overall, how they feel about their body. People with a positive body image have an accurate perception of what they look like and demonstrate happiness and confidence in their body. Many people struggle with negative body image, meaning they have a distorted or negative sense of their body and/or appearance. F. Discuss the components of maintaining physical activity i. How to set goals ii. The importance of regular and consistent activity iii. The benefit of personal responsibility iv. The benefit of group physical activity G. Discuss how to track physical activity i. Personal activity journal (personal) ii. Local (website) iii. Statewide (website) Benefits of moderate intensity aerobics A. Lower blood pressure B. Improve cholesterol GOAL: Know how to safely participate in moderate intensity aerobic exercise. BEST FOR: All LESSON OBJECTIVES • Learn the benefits of aerobic activity • Gain the knowledge to perform moderate intensity aerobic exercises on your own • Understand the difference between various aerobic activities MODERATE INTENSITY AEROBIC EXERCISE 1 2
  • 47.
    AEROBICS 43 A ER O B I C S C. Prevent Type 2 Diabetes D. Prevent cancer E. Increase energy and stamina F. Maintain mental well-being CREATE a moderate intensity aerobic workout A. Equipment needed i. None B. Steps (demo) i. Write out goal ii. Plan iii. Stretch iv. Demonstrate four to six aerobic activities Practice (do) A. Write out goal B. Plan C. Stretch D. Perform four to six aerobic activities (40 min minimum) Incorporate into your daily life A. Class B. School C. Work D. Personal life Conclusion and assignment A. Perform moderate aerobic exercises at least 20-30 min a day B. Track your physical activity C. Write in your journal how your body responds to aerobic exercise Update fitness plan/record and answer questions Schedule/remind of next appointment 5 3 4 7 8 6 For the following three lessons, reference the aerobics handout shown above. For copies of this handout, please visit: extension. usu.edu/fscreate/htm/staff- menu. You can find the handouts under Lessons for Adults.
  • 48.
    44 AEROBICS A ER O B I C S Introduction – This lesson teaches high intensity aerobic exercise. Please review points a-c and include d-g as applicable. A. Choose one Physical educational lesson (from the back) to teach before doing this activity. Then ask questions such as: i. Why is physical activity important? ii. When was a time you were very active? How did you feel? B. Discuss the necessity of physical activity C. Follow up on previous activities or assignments D. Define the difference between physical activity and exercise i. Physical activity • Bodily movement produced by skeletal muscles that requires energy expenditure, such as walking to work, doing chores, etc. ii. Exercise • Activity requiring physical effort, carried out especially to sustain or improve health and fitness. Typically, exercise is a planned activity to enhance health or meet goals. E. Discuss the importance of positive body image i. Body image is a term used to describe how people, men or women, feel about themselves and their body. This includes what they see when they look in a mirror or when they think of themselves in their mind. Body image includes how people feel about their height, weight, appearance, and overall, how they feel about their body. People with a positive body image have an accurate perception of what they look like and demonstrate happiness and confidence in their body. Many people struggle with negative body image, meaning they have a distorted or negative sense of their body and/or appearance. F. Discuss the components of maintaining physical activity i. How to set goals ii. The importance of regular and consistent activity iii. The benefit of personal responsibility iv. The benefit of group physical activity G. Discuss how to track physical activity i. Personal Activity Journal (personal) ii. Local (website) iii. Statewide (website) Benefits of high intensity aerobics A. Cardioprotective effects B. Increase aerobic capacity C. Decrease pain and disability GOAL: Know how to safely participate in high intensity aerobic exercise. BEST FOR: All LESSON OBJECTIVES • Learn the benefits of aerobic activity • Gain the knowledge to perform high-intensity aerobic exercises on your own • Understand the difference between various aerobic activities HIGH INTENSITY AEROBIC EXERCISE 1 2
  • 49.
    AEROBICS 45 A ER O B I C S D. Decrease psychological strain E. Burn more calories in a shorter amount of time CREATE a high intensity aerobics workout A. Equipment needed (all optional) i. None B. Steps (demo) i. Write out goal ii. Plan iii. Demonstrate four to six aerobic activities Practice (do) A. Write out goal B. Plan C. Stretch D. Perform four to six aerobic exercises (40 min minimum) Incorporate into your daily life A. Class B. School C. Work D. Personal life Conclusion and assignment A. Encourage participants to perform high intensity aerobic exercises at least 20-30 min a day B. Track your physical activity C. Write in your journal how your body responds to aerobic exercise Update fitness plan/record and answer questions Schedule/remind of next appointment 5 3 4 7 8 6
  • 50.
    46 AEROBICS A ER O B I C S Introduction – This lesson reviews the breadth of aerobic exercises. Please review points a-c and include d-g as applicable. A. Choose one physical education lesson (from the lesson resources in the back) to teach before doing this activity. Then ask questions such as: i. Why is physical activity important? ii. When was a time you were very active? How did you feel? B. Discuss the necessity of physical activity C. Follow up on previous activities or assignments D. Define the difference between physical activity and exercise i. Physical activity • Bodily movement produced by skeletal muscles that requires energy expenditure, such as walking to work, doing chores, etc. ii. Exercise • Activity requiring physical effort, carried out especially to sustain or improve health and fitness. Typically, exercise is a planned activity to enhance health or meet goals. E. Discuss the importance of positive body image i. Body image is a term used to describe how people, men or women, feel about themselves and their body. This includes what they see when they look in a mirror or when they think of themselves in their mind. Body image includes how people feel about their height, weight, appearance, and overall, how they feel about their body. People with a positive body image have an accurate perception of what they look like and demonstrate happiness and confidence in their body. Many people struggle with negative body image, meaning they have a distorted or negative sense of their body and/or appearance. F. Discuss the components of maintaining physical activity i. How to set goals ii. The importance of regular and consistent activity iii. The benefit of personal responsibility iv. The benefit of group physical activity G. Discuss how to track physical activity i. Personal Activity Journal (personal) ii. Local (website) iii. Statewide (website) Benefits of various other aerobic workouts A. Bootcamp i. More challenging and varied workout ii. Requires little to no special equipment GOAL: Gain the understanding of various aerobic workouts and be comfortable planning your own workout. BEST FOR: All LESSON OBJECTIVES • Learn the benefits of aerobic activity • Gain the knowledge to perform a variety of aerobic exercises on your own • Understand the difference between various aerobic activities OTHER: BOOTCAMP, CROSSFIT, WATER AEROBICS, ETC. 1 2
  • 51.
    AEROBICS 47 A ER O B I C S iii. Social support from other participants B. Crossfit i. Burn more calories in a shorter amount of time ii. Promote anabolic hormones such as testosterone iii. Opportunity to learn new skills iv. Support from others within Crossfit C. Water Aerobics i. Decrease symptoms of arthritis ii. Decrease depression and anxiety iii. Stress release iv. Improve flexibility and strength v. Muscular balance vi. Improve physique vii. Improve ability to control and maintain weight viii. Increase circulation ix. Build endurance CREATE an aerobics workout A. Equipment needed (all optional) i. Pilates roll B. Steps (demo) i. Write out goal ii. Plan iii. Demonstrate five to eight aerobic workouts Practice (do) A. Write out goal B. Plan C. Stretch D. Perform 5-8 aerobic workouts Incorporate into your daily life A. Class B. School C. Work D. Personal life Conclusion and assignment A. Ceate a 20-30 min aerobic exercise program for yourself B. Track your physical activity C. Write in your journal how your body responds to aerobic exercise Update fitness plan/record and answer questions Schedule/remind of next appointment 5 3 4 7 8 6
  • 52.
    48 AEROBICS A ER O B I C S
  • 53.
    Overview: These lessonscompare and help you teach the most common forms of stretching and improving balance. Please adapt these lessons to fit your target audience: adults, mothers, fathers, or teens. RESISTANCE TRAINING T H R E E L E S S O N S RESISTANCE TRAINING 49
  • 54.
    50 RESISTANCE TRAINING RE S I S TA N C E T R A I N I N G Introduction – This lesson teaches how to perform upper body resistance training. Please review points a-c and include d-g as applicable. A. Choose one physical education lesson (from the lesson resources in the back) to teach before doing this activity. Then ask questions such as: i. Why is physical activity important? ii. When was a time you were very active? How did you feel? B. Discuss the necessity of physical activity C. Follow up on previous activities or assignments D. Define the difference between physical activity and exercise i. Physical activity • Bodily movement produced by skeletal muscles that requires energy expenditure, such as walking to work, doing chores, etc. ii. Exercise • Activity requiring physical effort, carried out especially to sustain or improve health and fitness. Typically, exercise is a planned activity to enhance health or meet goals. E. Discuss the importance of positive body image i. Body image is a term used to describe how people, men or women, feel about themselves and their body. This includes what they see when they look in a mirror or when they think of themselves in their mind. Body image includes how people feel about their height, weight, appearance, and overall, how they feel about their body. People with a positive body image have an accurate perception of what they look like and demonstrate happiness and confidence in their body. Many people struggle with negative body image, meaning they have a distorted or negative sense of their body and/or appearance. F. Discuss the components of maintaining physical activity i. How to set goals ii. The importance of regular and consistent activity iii. The benefit of personal responsibility iv. The benefit of group physical activity G. Discuss how to track physical activity i. Personal activity journal (personal) ii. Local (website) iii. Statewide (website) Benefits of upper body resistance training A. Increase posture and form B. Prevent injury C. Strengthen bones GOAL: Become comfortable performing basic resistance training on your own. BEST FOR: All LESSON OBJECTIVES • Learn the benefits of resistance training • Gain the knowledge to perform resistance training on your own UPPER BODY RESISTANCE TRAINING 1 2
  • 55.
    RESISTANCE TRAINING 51 RE S I S TA N C E T R A I N I N G D. Weight loss and maintenance E. Improve mental status F. Improve sleep G. Increase heart health CREATE an upper body resistance training workout A. Equipment needed (all optional) i. Resistance bands ii. Stability ball iii. Wall iv. Table B. Steps (demo) i. Write out goal ii. Plan iii. Demonstrate five to eight upper body resistance training exercises Practice (do) A. Write out goal B. Plan C. Stretch D. Perform five to eight upper body resistance training exercises Incorporate into your daily life A. Class B. School C. Work D. Personal life Conclusion and assignment A. Participate in 15-30 min of resistance training exercises per day B. Track your physical activity C. Write in your journal how your body responds to resistance training Update fitness plan/record and answer questions Schedule/remind of next appointment 5 3 4 7 8 6 For the following three lessons, reference the resistance handout shown above. For copies of this handout, please visit: extension.usu.edu/ fscreate/htm/staff-menu. You can find the handouts under Lessons for Adults.
  • 56.
    52 RESISTANCE TRAINING RE S I S TA N C E T R A I N I N G RESISTANCE TRAINING WORKOUTS CHEST PULL W/BAND Sit tall in a chair with your abs engaged. Fold your resistance band in half and grip each end in front of your chest, elbows bent. Pull the band, bringing it closer to your chest and straightening your arms, and then slowly release it back to the start position. Exhale as you pull and inhale as you release. Do 15 reps. SHOULDER RAISES W/BAND Place the resistance band under your feet and grasp each handle. Sit tall with your abs engaged and arms slightly bent at the elbows. Lift the arms up to shoulder level and slowly release back down to the start position. Keep your wrists in line with forearms, not bent. Move your feet closer to the handles to make it harder. Exhale as you pull up and inhale as you release. Do 15 reps. OVERHEAD TRICEP EXTENSIONS W/BAND Place one end of the resistance band under your feet and grasp the opposite end overhead with both hands. Sit tall and pull the arms close to the sides of your head, elbows pointing forward. Extend the arms up and slowly release back down to the start position. The only movement should be the elbows bending and straightening. Keep the elbows pointed forward. Exhale as you lift up and inhale as you release. Do 15 reps. OVERHEAD TRICEPS STRETCH Sit tall on a chair, feet flat on the floor, without leaning into the chair back. Engage the abs and bring your right arm overhead, placing the palm on the center of your back and supporting the elbow in your left hand. Breathe deeply. Repeat on opposite side. Hold for 10-30 seconds. BENT OVER ROW W/BAND Place the resistance band under your feet and grasp each handle. Bend forward from the waist until your back is parallel to the floor, releasing your arms down toward the floor. Pull the handles upward, drawing your shoulder blades together and slowly release back down to the start position. Keep your abs engaged to protect your lower back. Exhale as you pull up and inhale as you release. Do 15 reps. BICEP CURLS W/BAND Place the resistance band under your feet and grasp each handle. Sit tall with your abs engaged and your elbows tucked to the sides of your waist. Curl the hands up toward the shoulders and slowly release back down to the start position. Keep your wrists in line with the forearms, not bent. Move your feet closer to the handles to make it harder. Exhale as you lift up and inhale as you release. Do 15 reps. SHOULDER STRETCH Sit tall on your chair, feet flat on the floor, without leaning into your chair back. Engage the abs and bring your left arm across your chest, holding it below the elbow. Keep the shoulders down and relaxed. Breathe deeply. Repeat on opposite side. Hold for 10-30 seconds. UPPER BACK STRETCH Sit tall on your chair, feet flat on the floor, without leaning into your chair back. Engage the abs and extend your arms toward the ceiling. As you squeeze your shoulder blades together, pull the elbows down and back. Hold the stretch and breathe deeply. Repeat one more time. Hold for 10-30 seconds.
  • 57.
    RESISTANCE TRAINING 53 RE S I S TA N C E T R A I N I N G CHEST STRETCH Sit tall on your chair, feet flat on the floor, without leaning into the back of the chair. Lace your fingers behind your back, straightening the arms the best you can and opening up the chest. Relax your shoulders down. Breathe deeply. Hold for 10-30 seconds. LOWER BACK EXTENSIONS W/BAND Place the resistance band under your feet and grasp each handle. Engage your abs and bend forward from the waist until your back is parallel to the floor. Keep your elbows bent and tucked in to the sides of the waist. Keeping your spine perfectly straight, hinge from the waist to sit back up. Keep your abs and your spine lengthened. Exhale as you sit up and inhale as you release. Do 15 reps. SEATED TWIST Sit at the edge of your chair, feet flat on the floor. Place your left hand on your right knee and your right hand behind you. Twist (from the waist) to the right and hold, keeping the shoulders relaxed down. Breathe deeply and repeat on the opposite side. Hold for 10 to 30 seconds. INNER THIGH ABDUCTION W/BAND Sit tall on your chair without leaning into your chair back, placing your right foot on the band for resistance. Extend your left leg. Slowly sweep your left leg toward the midline of the body and then return back to the starting position. Exhale as you move your leg across the body and inhale as you bring it back in line with the hip. Keep the band on your left foot and move to the next exercise. Do 15 reps. SINGLE KNEE LIFTS Sit at the front edge of your chair, hands grasping the sides of the chair. Keeping the spine straight, lean back until you feel your abs engage. Keeping the knees bent, lift your left knee up toward your chest and slowly lower it back down. Switch sides to complete one rep. Make sure you’re not leaning into your chair back. Keep your abs pulled in tight. Exhale as you lift your leg up and inhale as you lower it down. Do 15 reps. SEATED ABS STRETCH Sit at the edge of your chair. Extend your legs out and your arms up overhead, stretching through the abs. Breathe deeply. Repeat one more time. Hold for 10 to 30 seconds. SEATED LEG EXTENSIONS W/BAND Place the band’s handle on your left foot, making sure it’s secure. Step on the band itself with your right foot for resistance, holding the remaining band in your right hand. Sit tall on your chair without leaning into your chair back. Lift your left leg up so that the back of your thigh comes off the chair. Extend your leg out, straightening at the knee and then bend the knee. Keep the band on your left foot and move to the next exercise. Do 15 reps. OUTER THIGH ABDUCTION W/ BAND Sit tall on your chair without leaning into the chair back, placing your right foot on the band for resistance. Extend your left leg. Slowly sweep your left leg outward and then return to the starting position. Keep your toes pointed toward the ceiling. Exhale as you move your leg out and inhale as you bring it back in line with the hip. Repeat these three exercises on your right side before moving to the next exercise. Do 15 reps.
  • 58.
    54 RESISTANCE TRAINING RE S I S TA N C E T R A I N I N G GLUTE AND THIGH STRETCH Sit tall on your chair, feet flat on the floor, without leaning into your chair back. Place your left ankle on your right knee, gently pushing your left knee outward and down. Bend forward from the waist just slightly, keeping the head up and shoulders down. Breathe deeply. Repeat on the opposite side. Hold for 10 to 30 seconds. STRAIGHT-LEG FORWARD STRETCH Sit tall on your chair, legs extended in front of you. Engage the abs and extend your arms up toward the ceiling. Bend forward from the waist, reaching toward your feet and relaxing your upper body. Breathe deeply. Slowly roll the spine back up when finished. Hold for 10 to 30 seconds. BENT-KNEE FORWARD STRETCH Sit tall on your chair, feet flat on the floor, without leaning into your chair back. Engage the abs and extend your arms toward the ceiling. Bend forward from the waist, reaching toward your feet and relaxing your torso onto your thighs. Breathe deeply. Slowly roll the spine back up when finished. Hold for 10 to 30 seconds. SEATED BEND WITH TWIST Sit tall on your chair, feet flat on the floor, without leaning into your chair back. Bend forward from the waist, reaching your right hand toward your left foot. Then twist your upper body toward the left as you extend your left arm up. Try to look up toward your hand. Breathe deeply. Slowly rotate back down to switch and stretch on the opposite side. Hold for 10 to 30 seconds.
  • 59.
    RESISTANCE TRAINING 55 RE S I S TA N C E T R A I N I N G
  • 60.
    56 RESISTANCE TRAINING RE S I S TA N C E T R A I N I N G Introduction – This lesson teaches how to perform core resistance training. Please review points a-c and include d-g as applicable. A. Choose one physical education lesson (from the lesson resources in the back) to teach before doing this activity. Then ask questions such as: i. Why is physical activity important? ii. When was a time you were very active? How did you feel? B. Discuss the necessity of physical activity C. Follow up on previous activities or assignments D. Define the difference between physical activity and exercise i. Physical activity • Bodily movement produced by skeletal muscles that requires energy expenditure, such as walking to work, doing chores, etc. ii. Exercise • Activity requiring physical effort, carried out especially to sustain or improve health and fitness. Typically, exercise is a planned activity to enhance health or meet goals. E. Discuss the importance of positive body image i. Body image is a term used to describe how people, men or women, feel about themselves and their body. This includes what they see when they look in a mirror or when they think of themselves in their mind. Body image includes how people feel about their height, weight, appearance, and overall, how they feel about their body. People with a positive body image have an accurate perception of what they look like and demonstrate happiness and confidence in their body. Many people struggle with negative body image, meaning they have a distorted or negative sense of their body and/or appearance. F. Discuss the components of maintaining physical activity i. How to set goals ii. The importance of regular and consistent activity iii. The benefit of personal responsibility iv. The benefit of group physical activity G. Discuss how to track physical activity i. Personal activity journal (personal) ii. Local (website) iii. Statewide (website) Benefits of core resistance training A. Increase posture B. Increase balance and stability C. Help prevent falls GOAL: Become comfortable performing basic resistance training on your own. BEST FOR: All LESSON OBJECTIVES • Learn the benefits of resistance training • Gain the knowledge to perform resistance training on your own CORE RESISTANCE TRAINING 1 2
  • 61.
    RESISTANCE TRAINING 57 RE S I S TA N C E T R A I N I N G D. Decrease back pain E. Increase power CREATE a core resistance training workout A. Equipment needed (all optional) i. Resistance bands ii. Stability ball B. Steps (demo) i. Write out goal ii. Plan iii. Demonstrate five to eight core resistance training exercises Practice (do) A. Write out goal B. Plan C. Stretch D. Perform five to eight core resistance training exercises Incorporate into your daily life A. Class B. School C. Work D. Personal life Conclusion and assignment A. Participate in 15-30 min of resistance training exercises per day B. Track your physical activity C. Write in your journal how your body responds to resistance training Update fitness plan/record and answer questions Schedule/remind of next appointment 5 3 4 7 8 6
  • 62.
    58 RESISTANCE TRAINING RE S I S TA N C E T R A I N I N G Introduction – This lesson teaches how to perform core resistance training. Please review points a-c and include d-g as applicable. A. Choose one physical education lesson (from the lesson resources in the back) to teach before doing this activity. Then ask questions such as: i. Why is physical activity important? ii. When was a time you were very active? How did you feel? B. Discuss the necessity of physical activity C. Follow up on previous activities or assignments D. Define the difference between physical activity and exercise i. Physical activity • Bodily movement produced by skeletal muscles that requires energy expenditure, such as walking to work, doing chores, etc. ii. Exercise • Activity requiring physical effort, carried out especially to sustain or improve health and fitness. Typically, exercise is a planned activity to enhance health or meet goals. E. Discuss the importance of positive body image i. Body image is a term used to describe how people, men or women, feel about themselves and their body. This includes what they see when they look in a mirror or when they think of themselves in their mind. Body image includes how people feel about their height, weight, appearance, and overall, how they feel about their body. People with a positive body image have an accurate perception of what they look like and demonstrate happiness and confidence in their body. Many people struggle with negative body image, meaning they have a distorted or negative sense of their body and/or appearance. F. Discuss the components of maintaining physical activity i. How to set goals ii. The importance of regular and consistent activity iii. The benefit of personal responsibility iv. The benefit of group physical activity G. Discuss how to track physical activity i. Personal activity journal (personal) ii. Local (website) iii. Statewide (website) Benefits of lower body resistance training A. Ability to perform more intense physical activity B. Increase metabolism GOAL: Become comfortable performing basic resistance training on your own. BEST FOR: All LESSON OBJECTIVES • Learn the benefits of resistance training • Gain the knowledge to perform resistance training on your own LOWER BODY RESISTANCE TRAINING 1 2
  • 63.
    RESISTANCE TRAINING 59 RE S I S TA N C E T R A I N I N G C. Help tone entire body D. Improve daily life with stronger legs CREATE a lower body resistance training workout A. Equipment needed (all optional) i. Resistance bands ii. Stability ball B. Steps (demo) i. Write out goal ii. Plan iii. Demonstrate five to eight resistance training exercises Practice (do) A. Write out goal B. Plan C. Stretch D. Perform five to eight resistance training exercises Incorporate into your daily life A. Class B. School C. Work D. Personal life Conclusion and assignment A. Participate in 15-30 min of resistance training exercises per day B. Track your physical activity C. Write in your journal how your body responds to resistance training Update fitness plan/record and answer questions Schedule/remind of next appointment 5 3 4 7 8 6
  • 64.
    60 RESISTANCE TRAINING RE S I S TA N C E T R A I N I N G
  • 65.
    Overview: These lessonscompare and help you teach the most common forms of exercise using body weight. Please adapt these lessons to fit your target audience: adults, mothers, fathers or teens. STRENGTH TRAINING T H R E E L E S S O N S STRENGTH TRAINING 61
  • 66.
    62 STRENGTH TRAINING ST R E N G T H T R A I N I N G Introduction – This lesson teaches how to perform core upper body strength training. Please review points a-c and include d-g as applicable. A. Choose one physical education lesson (from the lesson resources in the back) to teach before doing this activity. Then ask questions such as: i. Why is physical activity important? ii. When was a time you were very active? How did you feel? B. Discuss the necessity of physical activity C. Follow up on previous activities or assignments D. Define the difference between physical activity and exercise i. Physical activity • Bodily movement produced by skeletal muscles that requires energy expenditure, such as walking to work, doing chores, etc. ii. Exercise • Activity requiring physical effort, carried out especially to sustain or improve health and fitness. Typically, exercise is a planned activity to enhance health or meet goals. E. Discuss the importance of positive body image i. Body image is a term used to describe how people, men or women, feel about themselves and their body. This includes what they see when they look in a mirror or when they think of themselves in their mind. Body image includes how people feel about their height, weight, appearance, and overall, how they feel about their body. People with a positive body image have an accurate perception of what they look like and demonstrate happiness and confidence in their body. Many people struggle with negative body image, meaning they have a distorted or negative sense of their body and/or appearance. F. Discuss the components of maintaining physical activity i. How to set goals ii. The importance of regular and consistent activity iii. The benefit of personal responsibility iv. The benefit of group physical activity G. Discuss how to track physical activity i. Personal activity journal (personal) ii. Local (website) iii. Statewide (website) Benefits of upper body strength training A. Improve muscle strength and tone B. Increase bone density and strength GOAL: Become comfortable performing basic upper body strength training on your own. BEST FOR: All LESSON OBJECTIVES • Learn the benefits of strength training • Gain the knowledge to perform strength training on your own • Improve health UPPER BODY STRENGTH TRAINING 1 2
  • 67.
    STRENGTH TRAINING 63 ST R E N G T H T R A I N I N G C. Increase ability to perform daily activities D. Improve balance, coordination, and mobility E. Increase energy F. Decrease risk of chronic diseases G. Relieve back pain H. Increase metabolism I. Increase flexibility CREATE an upper body strength training workout A. Equipment needed (all optional) i. Weighted bar ii. Medicine ball iii. Other weights (chair, books, etc.) B. Steps (demo) i. Write out goal ii. Plan iii. Stretch iv. Demonstrate five to eight strength training exercises Practice (do) A. Write out goal B. Plan C. Stretch D. Perform strength training Incorporate into your daily life A. Class B. School C. Work D. Personal life Conclusion and assignment A. Participate in 15-30 min of strength training exercises per day B. Track your physical activity C. Write in your journal how your body responds to strength training Update fitness plan/record and answer questions Schedule/remind of next appointment 5 3 4 7 8 6
  • 68.
    64 STRENGTH TRAINING ST R E N G T H T R A I N I N G Introduction – This lesson teaches how to perform core strength training. Please review points a-c and include d-g as applicable. A. Choose one physical education lesson (from the lesson resources in the back) to teach before doing this activity. Then ask questions such as: i. Why is physical activity important? ii. When was a time you were very active? How did you feel? B. Discuss the necessity of physical activity C. Follow up on previous activities or assignments D. Define the difference between physical activity and exercise i. Physical activity • Bodily movement produced by skeletal muscles that requires energy expenditure, such as walking to work, doing chores, etc. ii. Exercise • Activity requiring physical effort, carried out especially to sustain or improve health and fitness. Typically, exercise is a planned activity to enhance health or meet goals. E. Discuss the importance of positive body image i. Body image is a term used to describe how people, men or women, feel about themselves and their body. This includes what they see when they look in a mirror or when they think of themselves in their mind. Body image includes how people feel about their height, weight, appearance, and overall, they feel about their body. People with a positive body image have an accurate perception of what they look like and demonstrate happiness and confidence in their body. Many people struggle with negative body image, meaning they have a distorted or negative sense of their body and/or appearance. F. Discuss the components of maintaining physical activity i. How to set goals ii. The importance of regular and consistent activity iii. The benefit of personal responsibility iv. The benefit of group physical activity G. Discuss how to track physical activity i. Personal activity journal (personal) ii. Local (website) iii. Statewide (website) Benefits of core strength training A. Increase ability to perform daily activities B. Relieve back pain GOAL: Become comfortable performing basic core strength training on your own. BEST FOR: All LESSON OBJECTIVES • Learn the benefits of strength training • Gain the knowledge to perform strength training on your own • Improve health CORE STRENGTH TRAINING 1 2
  • 69.
    STRENGTH TRAINING 65 ST R E N G T H T R A I N I N G C. Increase ability to enjoy sport activities D. Increase balance and stability E. Improve posture CREATE a core strength training workout A. Equipment needed (all optional) i. Weighted bar ii. Medicine ball iii. Other weights (books, chairs, etc.) B. Steps (demo) i. Write out goal ii. Plan iii. Demonstrate five to eight strength training exercises Practice (do) A. Write out goal B. Plan C. Stretch D. Perform five to eight strength training exercises Incorporate into your daily life A. Class B. School C. Work D. Personal life Conclusion and assignment A. Participate in 15-30 min of strength training exercises per day B. Track your physical activity C. Write in your journal how your body responds to strength training Update fitness plan/record and answer questions Schedule/remind of next appointment 5 3 4 7 8 6
  • 70.
    66 STRENGTH TRAINING ST R E N G T H T R A I N I N G Introduction – This lesson teaches how to perform lower body strength training. Please review points a-c and include d-g as applicable. A. Choose one physical education lesson (from the lesson resources in the back) to teach before doing this activity. Then ask questions such as: i. Why is physical activity important? ii. When was a time you were very active? How did you feel? B. Discuss the necessity of physical activity C. Follow up on previous activities or assignments D. Define the difference between physical activity and exercise i. Physical activity • Bodily movement produced by skeletal muscles that requires energy expenditure, such as walking to work, doing chores, etc. ii. Exercise • Activity requiring physical effort, carried out especially to sustain or improve health and fitness. Typically, exercise is a planned activity to enhance health or meet goals. E. Discuss the importance of positive body image i. Body image is a term used to describe how people, men or women, feel about themselves and their body. This includes what they see when they look in a mirror or when they think of themselves in their mind. Body image includes how people feel about their height, weight, appearance, and overall, how people feel about their body. People with a positive body image have an accurate perception of what they look like and demonstrate happiness and confidence in their body. Many people struggle with negative body image, meaning they have a distorted or negative sense of their body and/or appearance. F. Discuss the components of maintaining physical activity i. How to set goals ii. The importance of regular and consistent activity iii. The benefit of personal responsibility iv. The benefit of group physical activity G. Discuss how to track physical activity i. Personal activity journal (personal) ii. Local (website) iii. Statewide (website) Benefits of lower body strength training A. Increase ability to perform daily activities B. Support the rest of the body GOAL: Become comfortable performing basic lower body strength training on your own. BEST FOR: All LESSON OBJECTIVES • Learn the benefits of strength training • Gain the knowledge to perform strength training on your own • Improve health LOWER BODY STRENGTH TRAINING 1 2
  • 71.
    STRENGTH TRAINING 67 ST R E N G T H T R A I N I N G C. Increase calorie expenditure D. Ability to perform more intense physical activity E. Improve balance F. Decrease risk of chronic disease G. Decrease risk of falls CREATE a lower body strength training workout A. Equipment needed (all optional) i. Weighted bar ii. Medicine ball iii. Other weights (chair, books, etc.) B. Steps (demo) i. Write out goal ii. Plan iii. Stretch iv. Demonstrate five to eight strength training exercises Practice (do) A. Write out goal B. Plan C. Stretch D. Perform five to eight strength training exercises Incorporate into your daily life A. Class B. School C. Work D. Personal life Conclusion and assignment A. Participate in 15-30 min of strength training exercises per day B. Track your physical activity C. Write in your journal how your body responds to strength training Update fitness plan/record and answer questions Schedule/remind of next appointment 5 3 4 7 8 6
  • 72.
    68 STRENGTH TRAINING ST R E N G T H T R A I N I N G
  • 73.
    Overview: This lessonwill help you teach the fundamentals of circuit training. Please adapt this lesson to fit your target audience: adults, mothers, fathers or teens. CIRCUIT TRAINING O N E L E S S O N CIRCUIT TRAINING 69
  • 74.
    70 CIRCUIT TRAINING CI R C U I T T R A I N I N G Introduction – This lesson teaches how to create and participate in circuit training. Please review points a-c and include d-g as applicable. A. Choose one physical education lesson (from the lesson resources in the back) to teach before doing this activity. Then ask questions such as: i. Why is physical activity important? ii. When was a time you were very active? How did you feel? B. Discuss the necessity of physical activity C. Follow up on previous activities or assignments D. Define the difference between physical activity and exercise i. Physical activity • Bodily movement produced by skeletal muscles that requires energy expenditure, such as walking to work, doing chores, etc. ii. Exercise • Activity requiring physical effort, carried out especially to sustain or improve health and fitness. Typically, exercise is a planned activity to enhance health or meet goals. E. Discuss the importance of positive body image i. Body image is a term used to describe how people, men or women, feel about themselves and their body. This includes what they see when they look in a mirror or when they think of themselves in their mind. Body image includes how people feel about their height, weight, appearance, and overall, how they feel about their body. People with a positive body image have an accurate perception of what they look like and demonstrate happiness and confidence in their body. Many people struggle with negative body image, meaning they have a distorted or negative sense of their body and/or appearance. F. Discuss the components of maintaining physical activity i. How to set goals ii. The importance of regular and consistent activity iii. The benefit of personal responsibility iv. The benefit of group physical activity G. Discuss how to track physical activity i. Personal activity journal (personal) ii. Local (website) iii. Statewide (website) Benefits of circuit training A. Increase strength B. Increase mental wellness C. Increase cardiorespiratory function GOAL: Become comfortable creating and participating in circuit training. BEST FOR: All LESSON OBJECTIVES • Learn the benefits of circuit training • Gain the knowledge to perform circuit training on your own • Improve health 1 2
  • 75.
    CIRCUIT TRAINING 71 CI R C U I T T R A I N I N G D. Increase mental wellness E. Improve quality of sleep F. Improve and lower cholesterol G. Reduce risk of injury H. Increase flexibility CREATE a circuit A. Equipment needed (all optional) i. Depends on the circuit you choose B. Steps (demo) i. Write out goal ii. Plan iii. Stretch iv. Outline and demonstrate one to two circuits Practice (do) A. Write out goal B. Plan C. Stretch D. Perform one to two circuits Incorporate into your daily life A. Class B. School C. Work D. Personal life Conclusion and assignment A. Participate in 20-30 min of circuit training exercises per day. B. Track your physical activity C. Write in your journal how your body responds to circuit training Update fitness plan/record and Answer Questions Schedule/remind of next appointment 5 3 4 7 8 6 For this lesson, reference the circuit training handout shown above. For copies of this handout, please visit: extension.usu.edu/fscreate/htm/ staff-menu. You can find the handouts under Lessons for Adults.
  • 76.
    72 CIRCUIT TRAINING CI R C U I T T R A I N I N G CIRCUIT TRAINING WORKOUTS BOOTCAMP WARM UP 7 Minutes Jog 30 Sec BK 30 Sec HK 30 Sec Heel Touch 30 Sec Toe Touch 30 Sec Jumping Jacks 30 Sec Lunge 30 Sec (each leg) Squat with Front Raise 1min Shuffle 1min Jumping Jacks 30 Sec Jog OH Press 30 Sec CIRCUIT #4 Repeat 3x, Rest 30 Sec after each round Lunge 1 Arm Press 30 Sec (Legs/Delt) Step Up, Ham & Bi Curl 30 Sec (Hams/Bi) Shuffle Side Shot 30 Sec Jump Rope 30 Sec CIRCUIT #5 Repeat 3x, Rest 30 Sec after each round Jumping Jacks 30 Sec Kneeling Pushups 30 Sec (Chest) Squats 30 Sec (Legs) Bicycle crunches 30 Sec CIRCUIT #6 Repeat 3x, Rest 30 Sec after each round Burpees 30 Sec Triceps Dip on Bench 30 Sec (Triceps) Plank 30 Sec Walking Lunges 30 Sec (Legs) COOL DOWN 5 Minutes All 4’s 30 Sec (Spinal muscle) Oblique Abs 30 Sec Plank All the way around Hamstring Stretch Quad Stretch Back Stretch Chest Stretch CIRCUIT #1 Repeat 3x, Rest 30 Sec after each round DB Bench on Ball 30 Sec (Chest) Pushup 30 Sec (Chest) Plank 30 Sec (Core) Mt. Climbers 30 Sec CIRCUIT #2 Repeat 3x, Rest 30 Sec after each round DB Bicep Curls 30 Sec (Biceps) Triceps Dip on Bench 30 Sec (Triceps) DB Lateral Raises 30 Sec (Delts) Jumping Jacks 30 Sec CIRCUIT #3 Repeat 3x, Rest 30 Sec after each round Squat w/DB Front Raise 30 Sec (Legs) DB Pullover on Ball 30 Sec (Lat) Plank Row 30 Sec (Back) Burpees 30 Sec
  • 77.
    CIRCUIT TRAINING 73 CI R C U I T T R A I N I N G CIRCUIT SYSTEM 1. JUMPING JACKS 2. WALL SIT 3. PUSHUP 4. ABDOMINAL CRUNCH 5. STEP-UP ON CHAIR 6. SQUAT 7. TRICEPS DIP 8. PLANK 9. HIGH KNEES 10. LUNGE 11. PUSHUP/ROTATION 12. SIDE PLANK
  • 78.
    74 CIRCUIT TRAINING CI R C U I T T R A I N I N G THE 4X4 WORKOUT BEGINNER CIRCUIT TRAINING ADVANCED CIRCUIT TRAINING 1. CARDIO Jump Rope Front Kicks Burpees Jumping Jacks 1. Jog in Place 2. Wall Pushups or Counter Pushups 3. Chair Squats 4. Crunches 5. Jumping Jacks 6. Chair Dips with Knees Bent 7. Bridges 8. Bird Dogs 9. Straight-leg Raises (30 sec each) 1. Jumping Jacks 2. Crossover Pushups 3. Squat with Front Kick, Alternating Legs 4. Ab Chopper 5. Mountain Climbers 6. Chair Dips/One Leg Raised (30 sec each) 7. Split Squat Jump 8. Side Plank (30 sec each side) 9. Step-ups on a Chair, Alternating Leg 2. STRENGTH 10 Pushups/10 Dips Alternating Lunges Squat Press Back Row 3. CARDIO Flying Lunges Side Shuffle Mountain Climbers Squat Pulses/ Squat Jumps 4. ABS Plank Bicycle Crunches V-sit Hold Reverse Crunches Beginner: 30 seconds per exercise, 1x through, Intermediate: 45 seconds per exercise, 2x through, Advanced: 60 seconds per exercise, 3x through Take breaks as you need them and drink water. At the end of the circuit, rest for 1 minute and then get ready to start again. Try to complete the circuit two to three times during each workout. At the end of the circuit, rest for 1 minute and then get ready to start again. Try to complete the circuit two to three times during each workout.
  • 79.
    CIRCUIT TRAINING 75 CI R C U I T T R A I N I N G CIRCUIT TRAINING Ski Jumps Squat Thrusts Bench Step-upsFree Squats Press-ups Chin-ups Sit-ups Back Extensions
  • 80.
    76 CIRCUIT TRAINING CI R C U I T T R A I N I N G
  • 81.
    Overview: These appliedlessons help you teach and encourage participants to become more active in various locations and during everyday activities. Please adapt these lessons to fit your target audience: adults, mothers, fathers, or teens. APPLIED LESSONS T H R E E L E S S O N S APPLIED LESSONS 77
  • 82.
    78 APPLIED LESSONS AP P L I E D L E S S O N S Introduction – This lesson teaches how to increase physical activity at home and in the park. Please review points a-c and include d-g as applicable. A. Choose one physical education lesson (from the lesson resources in the back) to teach before doing this activity. Then ask questions such as: i. Why is physical activity important? ii. When was a time you were very active? How did you feel? B. Discuss the necessity of physical activity C. Follow up on previous activities or assignments D. Define the difference between physical activity and exercise i. Physical activity • Bodily movement produced by skeletal muscles that requires energy expenditure, such as walking to work, doing chores, etc. ii. Exercise • Activity requiring physical effort, carried out especially to sustain or improve health and fitness. Typically, exercise is a planned activity to enhance health or meet goals. E. Discuss the importance of positive body image i. Body image is a term used to describe how people, men or women, feel about themselves and their body. This includes what they see when they look in a mirror or when they think of themselves in their mind. Body image includes how people feel about their height, weight, appearance, and overall, how people feel about their body. People with a positive body image have an accurate perception of what they look like and demonstrate happiness and confidence in their body. Many people struggle with negative body image, meaning they have a distorted or negative sense of their body and/or appearance. F. Discuss the components of maintaining physical activity i. How to set goals ii. The importance of regular and consistent activity iii. The benefit of personal responsibility iv. The benefit of group physical activity G. Discuss how to track physical activity i. Personal activity journal (personal) ii. Local (website) iii. Statewide (website) Benefits of incorporating physical activity at home or in the park A. Save money B. Save time GOAL: Encourage participants to increase physical activity at home and in the park. BEST FOR: All LESSON OBJECTIVES • Learn how to incorporate physical activity at home and in the park • Gain the knowledge to perform physical activities anywhere you are • Improve health PHYSICAL ACTIVITY AT HOME AND IN THE PARK 1 2
  • 83.
    APPLIED LESSONS 79 AP P L I E D L E S S O N S C. Increase privacy D. Freedom to exercise when you want CREATE the habit of being active at home and at the park A. Equipment needed (all optional) i. None B. Steps (demo) i. Write out goal ii. Plan iii. Demonstrate 10-12 activities to do at home or in the park Practice (do) A. Write out goal B. Plan C. Stretch D. Perform 10-12 activities to do at home or in the park Incorporate into your daily life A. Class B. School C. Work D. Personal life Conclusion and assignment A. Participate in 15-20 min of physical activity at home or in the park B. Track your physical activity C. Write in your journal about how each is incorporating physical activity into your life everyday Update fitness plan/record and answer questions Schedule/remind of next appointment 5 3 4 7 8 6
  • 84.
    80 APPLIED LESSONS AP P L I E D L E S S O N S Introduction – This lesson teaches how to increase physical activity while at work. Please review points a-c and include d-g as applicable. A. Choose one physical education lesson (from the lesson resources in the back) to teach before doing this activity. Then ask questions such as: i. Why is physical activity important? ii. When was a time you were very active? How did you feel? B. Discuss the necessity of physical activity C. Follow up on previous activities or assignments D. Define the difference between physical activity and exercise i. Physical activity • Bodily movement produced by skeletal muscles that requires energy expenditure, such as walking to work, doing chores, etc. ii. Exercise • Activity requiring physical effort, carried out especially to sustain or improve health and fitness. Typically, exercise is a planned activity to enhance health or meet goals. E. Discuss the importance of positive body image i. Body image is a term used to describe how people, men or women, feel about themselves and their body. This includes what they see when they look in a mirror or when they think of themselves in their mind. Body image includes how people feel about their height, weight, appearance, and overall, how they feel about their body. People with a positive body image have an accurate perception of what they look like and demonstrate happiness and confidence in their body. Many people struggle with negative body image, meaning they have a distorted or negative sense of their body and/or appearance. F. Discuss the components of maintaining physical activity i. How to set goals ii. The importance of regular and consistent activity iii. The benefit of personal responsibility iv. The benefit of group physical activity G. Discuss how to track physical activity i. Personal activity journal (personal) ii. Local (website) iii. Statewide (website) GOAL: Encourage participants to increase physical activity at work. BEST FOR: All LESSON OBJECTIVES • Learn how to incorporate physical activity at work • Gain the knowledge to perform physical activities anywhere you are • Improve health PHYSICAL ACTIVITY AT WORK 1
  • 85.
    APPLIED LESSONS 81 AP P L I E D L E S S O N S Benefits of incorporating physical activity at work A. Improve memory and concentration B. Increase mental stamina C. Enhance creativity D. Decrease stress E. Increase performance F. Increase work satisfaction G. Reduce risk of chronic disease H. Decrease weight CREATE the habit of being active at work A. Equipment needed (all optional) i. Depends on the circuit you choose B. Steps (demo) i. Write out goal ii. Plan iii. Stretch iv. Demonstrate 10-12 activities to do at work Practice (do) A. Write out goal B. Plan C. Stretch D. Perform 10-12 activities to do at work Incorporate into your daily life A. Class B. School C. Work D. Personal life Conclusion and assignment A. Participate in 15-20 min of physical activity at home or work B. Track your physical activity C. Write in your journal about how each is incorporating physical activity into their life everyday Update fitness plan/record and answer questions Schedule/remind of next appointment 2 5 3 4 7 8 6 For this lesson, reference the work stretches handout shown above. For copies of this handout, please visit: extension.usu.edu/fscreate/htm/ staff-menu. You can find the handouts under Lessons for Adults.
  • 86.
    82 APPLIED LESSONS AP P L I E D L E S S O N S WORK STRETCHES NECK FLEXION/EXTENSION STRETCH Gently rotate your head forward then backward, like an exaggerated nod for yes. NECK LATERAL FLEXION STRETCH Gently rotate your head from side to side. like an exaggerated nod for no. CROSSOVER ARM STRETCH Bring the right arm across the body. Use the left hand or forearm to hold the right arm against the chest. WALL PUSHUPS Stand facing the wall and push yourself off the wall with your arms. TRICEPS STRETCH Gently bend arm behind head as if scratching back. Then, place the opposite hand on elbow and pull down, hold, repeat. HIP FLEXOR STRETCH Keep back straight, tuck bottom under, lunge forward on front leg. WRIST STRETCH Stand up and turn your hands so that the wrists face your computer and touch the desk. Lean into the wrists. HAND AND FINGER STRETCH Extend fingers open as far as possible and hold for 5 seconds. Then make a fist and hold for 5 seconds. Repeat. LOWER BACK STRETCH Sit forward in chair and bring knee toward chest. Grab the back of your thigh and gently pull it toward you. BACK AND BICEP STRETCH Straighten arms, place hands on desk. Push your chair back until your head is between your arms. Pull yourself back in. REACH FOR THE SKY Sit tall in your chair and stretch your arms overhead, interlocking fingers. Hold for 10 seconds. HAMSTRING STRETCH Push back from your desk and put your heel on your desk. Bend forward.
  • 87.
    APPLIED LESSONS 83 AP P L I E D L E S S O N S WALL SQUATS Lean your back against a sturdy wall, with your feet planted 1-2 feet in front of you. Bend the knees to squat down and straighten them to push back up. Keep the abs engaged, your back straight, and your weight on your heels. Make sure your knees don’t go past your toes. Exhale as you stand back up and inhale as you lower down. CALF RAISES Stand tall with feet wider than the hips and toes turned outward. Hold onto the wall for support. Raise your heels up away from the floor and slowly lower them back down. Exhale as you lift your heels and inhale as you lower down. WALL LUNGES Step forward with your right leg, placing your left heel up on the wall and the ball of the left foot on the floor. Face forward and bend the knees to lunge straight down, then push back up. Don’t lean forward. Try to balance your weight evenly between both feet, and keep your toes pointed forward. Exhale as you push back up and inhale as you lower down. Repeat on opposite leg before moving on to the next exercise. WALL PUSHUPS Place your toes 2-3 feet away from the wall and you hands shoulder-width on the wall in front of you. Keeping the body in a straight line, bend the elbows to lower your body toward the wall and extend them to push back up. Keep abs engaged and the body straight—don’t lean forward with just your chest. Exhale as you push back up and inhale as you lower toward the wall. STANDING THIGH STRETCH Stand on one leg, balance, pull foot toward buttocks. LEG EXTENSIONS Grab the seat of your chair and extend your legs out in front of you. Flex and point your toes five times. Release and repeat. BICEP STRETCH Extend arms palms up and “push” your bicep upward. Make this stretch easier by putting palms of hands on bottom of a table. GASTROCNEMIUS STRETCH Keep knee straight and heel down, feet facing forward.
  • 88.
    84 APPLIED LESSONS AP P L I E D L E S S O N S SEATED SIDE BENDS Sit tall on your chair, feet flat on the floor, without leaning into your chair back. Engage the abs and place your hands next to your ears, elbows bent. Moving from the waist, bend down to the right, bring it back up, and then bend down to the left, focusing on the obliques on the sides of the waist. Keep your head and neck in line with the spine. Exhale as you sit back up and inhale as you bend to the side. SEATED HIP FLEXOR AND EXTENSION Sit tall on your chair, feet flat on the floor, hands grasping the sides of the chair. Lift your right knee up (so your thigh is raised off of the chair) and extend your leg, toes pointing toward the ceiling. Bend at the knee and lower the thigh back down to complete one rep. Exhale as you lift and extend your leg and inhale as you bend and lower your leg. Repeat all reps on the right leg and then do this exercise on your left side. TRICEPS DIPS WITH CHAIR Sit at the edge of a chair and take an overhand grip of the chair’s edge, straightening the arms and lifting your body off the chair and placing the feet flat on the floor. Bend the elbows to lower your body down toward the floor and straighten the arms to come back up. Exhale as you straighten the arms and push up and inhale as you bend the arms and lower down. SEATED KNEE LIFTS Sit at the front edge of your chair, hands grasping the sides of the chair. Keeping the spine straight, lean back until you feel your abs engage. Keeping the knees bent and legs together, lift your knees toward your chest and slowly lower them back down. Make sure you’re not leaning into your chair back. Keep your abs pulled in tight and your torso still. Exhale as you lift the legs up and inhale as you lower them down.
  • 89.
    APPLIED LESSONS 85 AP P L I E D L E S S O N S
  • 90.
    86 APPLIED LESSONS AP P L I E D L E S S O N S Introduction – This lesson teaches how to increase physical activity with your children. Please review points a-c and include d-g as applicable. A. Choose one physical education lesson (from the lesson resources in the back) to teach before doing this activity. Then ask questions such as: i. Why is physical activity important? ii. When was a time you were very active? How did you feel? B. Discuss the necessity of physical activity C. Follow up on previous activities or assignments D. Define the difference between physical activity and exercise i. Physical activity • Bodily movement produced by skeletal muscles that requires energy expenditure, such as walking to work, doing chores, etc. ii. Exercise • Activity requiring physical effort, carried out especially to sustain or improve health and fitness. Typically, exercise is a planned activity to enhance health or meet goals. E. Discuss the importance of positive body image i. Body image is a term used to describe how people, men or women, feel about themselves and their body. This includes what they see when they look in a mirror or when they think of themselves in their mind. Body image includes how people feel about their height, weight, appearance, and overall, how they feel about their body. People with a positive body image have an accurate perception of what they look like and demonstrate happiness and confidence in their body. Many people struggle with negative body image, meaning they have a distorted or negative sense of their body and/or appearance. F. Discuss the components of maintaining physical activity i. How to set goals ii. The importance of regular and consistent activity iii. The benefit of personal responsibility iv. The benefit of group physical activity G. Discuss how to track physical activity i. Personal activity journal (personal) ii. Local (website) iii. Statewide (website) GOAL: Encourage participants to increase physical activity with their children. BEST FOR: All LESSON OBJECTIVES • Learn how to be physically active with your own children • Gain the knowledge to perform physical activities anywhere you are • Improve health PHYSICAL ACTIVITY WITH YOUR CHILDREN 1
  • 91.
    APPLIED LESSONS 87 AP P L I E D L E S S O N S CREATE the habit of being active with your children A. Equipment needed (all optional) i. None B. Steps (demo) i. Write out goal ii. Plan iii. Stretch iv. Demonstrate 10-12 activities to do with children Practice (do) A. Write out goal B. Plan C. Stretch D. Perform 10-12 activities with children Incorporate into your daily life A. Class B. School C. Work D. Personal life Conclusion and assignment A. Participate in 15-20 min of physical activity with your children B. Track your physical activity C. Write in your journal about how each is incorporating physical activity into their life everyday Update fitness plan/record and answer questions Schedule/remind of next appointment 2 5 3 4 7 6
  • 92.
    88 APPLIED LESSONS AP P L I E D L E S S O N S
  • 93.
    Overview: This sectionis meant to increase personal awareness and allow participants to measure the change. POST PHYSICAL ASSESSMENT O N E L E S S O N POST PHYSICAL ASSESSMENT 89
  • 94.
    90 POST PHYSICALASSESSMENT P O S T P H Y S I C A L A S S E S S M E N T Introduction – This lesson teaches how to perform a physical activity post-assessment. Please review points a-c and include d-g as applicable. A. Choose one physical education lesson (from the lesson resources in the back) to teach before doing this activity. Then ask questions such as: i. Why is physical activity important? ii. When was a time you were very active? How did you feel? B. Discuss the necessity of physical activity C. Follow up on previous activities or assignments D. Define the difference between physical activity and exercise i. Physical activity • Bodily movement produced by skeletal muscles that requires energy expenditure, such as walking to work, doing chores, etc. ii. Exercise • Activity requiring physical effort, carried out especially to sustain or improve health and fitness. Typically, exercise is a planned activity to enhance health or meet goals. E. Discuss the importance of positive body image i. Body image is a term used to describe how people, men or women, feel about themselves and their body. This includes what they see when they look in a mirror or when they think of themselves in their mind. Body image includes how people feel about their height, weight, appearance, and overall, how they feel about their body. People with a positive body image have an accurate perception of what they look like and demonstrate happiness and confidence in their body. Many people struggle with negative body image, meaning they have a distorted or negative sense of their body and/or appearance. F. Discuss the components of maintaining physical activity i. How to set goals ii. The importance of regular and consistent activity iii. The benefit of personal responsibility iv. The benefit of group physical activity G. Discuss how to track physical activity i. Personal activity journal (personal) ii. Local (website) iii. Statewide (website) CREATE a personal assessment (adult, etc.) A. Equipment needed i. Physical activity log to record results ii. Scale iii. Measuring tape GOAL: Learn how to properly give a physical activity post-assessment. BEST FOR: All LESSON OBJECTIVES • Compare pre- and post-assessments to pinpoint improvement 1 2
  • 95.
    POST PHYSICAL ASSESSMENT91 P O S T P H Y S I C A L A S S E S S M E N T iv. Stopwatch v. Blood pressure cuff B. Steps (demo) i. Write out goal ii. Exercise plan iii. Take measurements Practice (do) A. Write physical activity goal B. Exercise plan C. Take resting heart rate D. Height/weight E. BMI F. Waist circumference G. Blood pressure H. Presidential tests i. Sit and reach or V-sit and reach ii. 1 mile run iii. Pull-up test iv. Curl-ups v. Shuttle run Compare to pre-assessment to evaluate progress Conclusion and assignment A. Participate in 15-20 min of physical activity with your children B. Track your physical activity C. Write in your journal about how each is incorporating physical activity into his or her life everyday Update fitness plan/record and Answer Questions Schedule/remind of next appointment 4 3 6 7 5
  • 96.
    92 POST PHYSICALASSESSMENT P O S T P H Y S I C A L A S S E S S M E N T
  • 97.
    EDUCATIONAL LESSON RESOURCES Provide ONEeducational lesson before each physical activity lesson. Each mini-lesson should take 5-15 minutes. The Food $ense CREATE an Active Lifestyle Curriculum is designed to get participants active and moving. These classes are designed to help participants learn basic stretches, exercises, have opportunities to discuss the concepts, provide a support group and practice new habits that will help them take control of their own nutrition and health. You will be seen as an expert and a valuable resource to your participants on all habits taught in the lessons. This section provides the information you will need to be that expert. Please study this section and become familiar with each concept so you can have meaningful discussions about the healthy habits during each lesson you teach. Remember, you do not need to cover every habit extensively in every lesson. Just become so familiar with the subject material that you are comfortable incorporating it into your lessons in natural conversation. PHYSICAL ACTIVITY Physical activity is defined as any bodily movement produced by skeletal muscles that requires energy expenditure. Physical inactivity has been identified as the fourth leading risk factor for global mortality causing an estimated 3.2 million deaths globally. Regular moderate intensity physical activity – such as walking, cycling, or participating in sports – has significant benefits for health. For instance, it can reduce the risk of cardiovascular diseases, diabetes, colon and breast cancer, and depression. Moreover adequate levels of physical activity will decrease the risk of a hip or vertebral fracture and help control weight. Physical activity, “exercise,” is the most variable and changeable factor that influences total energy expenditure. In other words, your gender, stage of life, and other factors have little to do with the amount of physical activity in your life. Your physical activity depends on you and only you. It is also important to note that physical activity plays a significant role in weight loss. Conversely, it can be said that a lack of physical activity plays a significant role in weight gain. Before we dive in further, let’s watch these videos. Links: https://www.youtube.com/watch?v=0oEeXs4FTXU https://www.youtube.com/watch?v=rasZGZpQsy0 https://www.youtube.com/watch?v=NLHYnRCd8sA The amount of energy used during physical activity depends on • Muscle mass • Body weight • The chosen activity • Duration of activity (Duration refers to the amount of time you do the activity.) • Frequency of activity (Frequency means how often you do the activity.) • Intensity of activity L E S S O N R E S O U R C E S LESSON RESOURCES 93
  • 98.
    94 LESSON RESOURCES LE S S O N R E S O U R C E S Intensity also plays an important role in how much energy you use. For example, running at a pace of 6 miles an hour for 30 min will burn more calories than walking at a pace of 3 miles an hour for 30 minutes; even though it is the same time duration, the intensity is NOT the same. PHYSICAL ACTIVITY VS. EXERCISE Physical activity is defined as bodily movement produced by skeletal muscles that require energy expenditure. This includes walking to work, doing chores, etc. Exercise is understood to be any activity requiring physical effort, carried out especially to sustain or improve health and fitness. Typically, exercise is a planned activity to enhance health or meet goals. The American lifestyle is typically very sedentary, meaning we don’t move around much. Our goal should be to lead active lifestyles pursuing goals and activities we love. This will naturally lead to becoming fit. Often this “fit” ideal is set by individuals; whether it is to be able to walk to school with their children, run a 5k, lift a bale of hay, hike along the Great Wall of China, go the park with their kids, grocery shop or be able to take care of their yard/garden, etc. Notice that none of these definitions involve the component of media body images. These active lifestyles are found by combining activity and a nutritious diet. As individuals become more active they will come to enjoy healthy food more and find fulfilment in the lives they lead. PHYSICAL ACTIVITY RECOMMENDATIONS The current physical activity recommendation for adults is 2 hours and 30 minutes each week of moderate aerobic physical activity or 1 hour and 15 minutes of vigorous aerobic activity. Paired with aerobic activity, it is recommended that adults do strength straining twice a week. To lose weight, it is recommended that you get 60 to 90 minutes of intense physical activity daily. Children and adolescents need a minimum of 60 minutes of physical activity daily. It is important to note that it does not matter what activity you choose, what matters is that you choose activities you find enjoyable and that you strive for a physically active lifestyle. There are three types of exercise intensities • Low-intensity • Ex: walking, doing household chores, etc. • Moderate-intensity • Jogging for 20 min or less, etc. • High-intensity • Swimming, cycling for 40 min or more. “Only moderate and vigorous intensity activities count toward meeting your physical activity needs. With vigorous activities, you get similar health benefits in half the time it takes you with moderate ones. You can replace some or all of your moderate activity with vigorous activity. Although you are moving, light intensity activities do not increase your heart rate, so you should not count these toward meeting the physical activity recommendations. These activities include walking at a casual pace, such as while grocery shopping, and doing light household chores.” – USDA
  • 99.
    LESSON RESOURCES 95 LE S S O N R E S O U R C E S HOW TO CONDUCT PHYSICAL ACTIVITY ASSESSMENTS In the course we ask that participants perform personal physical activity assessments. You are there to assist them and answer questions. However, due to privacy concerns we ask you to allow participants to remain anonymous. Physical activity assessments are one of the best blends of subjective and objective methods to track your progress. Assessments range from specific qualitative data such as heart rate, strength tests and stamina tests to more simplified data such as saying “I did this week which was a ____ improvement from last week”. For this course we focus on three main factors • BMI • Weight • Reps/activity tracking KEEPING AN EXERCISE JOURNAL/CALENDAR If you want to see results from each and every workout you do, chart your progress in an exercise journal. Self-monitoring your workout has proved to be a cornerstone in losing weight and building muscle, according to Jeffrey Katula, PhD, an exercise physiologist at Wake Forest University. While many people jot down their weight after stepping off the bathroom scale, researchers at Northwestern University found that those who consistently tracked their exercise habits — especially during holidays — lost more weight compared to those who did not. How can you increase your chance of journal success? “Keep it simple,” says Katula. “You’re more likely to stick with something that’s convenient.” Westcott suggests recording the exercises you’ve done, the weight load and the number of repetitions. Also record the time you spent doing cardio, along with other available measurements, including distance, for example, or the pre-programmed treadmill or stationary bike program you followed. Journal Your Way to Fitness 1. It increases awareness of your behavior. According to Katula, “a workout journal helps you become aware of what you are and are not achieving at the gym.” An accurate record might reveal, for example, that you are doing only 10 minutes of cardio after lifting weights, not the 20 you thought. 2. It reminds you to change your workout. You have to increase your workload if you want to see changes in your body. “Once you can lift a weight 12 times, you should increase the weight by 5 percent and lift it 9 or 10 times,” says Wayne Westcott, PhD, CSCS, fitness research director at the South Shore YMCA in Quincy, Mass. “Then stick with it until you can easily lift it 12 times.” Your journal will help you keep track of these numbers and show you when it’s time to increase the weight. 3. It allows you to evaluate your progress. “Write down your specific goals, like when you want to be able to lift a certain amount of weight or run at a certain speed,” says Westcott. “Then check to see how long it takes you to reach them. “Set small goals that can be realistically conquered in 2-4 weeks.”
  • 100.
    96 LESSON RESOURCES LE S S O N R E S O U R C E S 4. It provides a record of accomplishment over time. “The more improvement you see on the page, the better your physical results will be,” says Westcott. “Every day you should see some improvement in the numbers. Maybe you can do an extra rep or increase the weight a bit.” FINDING YOUR INTRINSIC MOTIVATION There are two main types of motivation, extrinsic and intrinsic. Extrinsic motivation is the most commonly discussed type of motivation. The definition of extrinsic motivation means motivation or desire to accomplish something that comes from an external source. Examples of extrinsic motivation may be a work bonus, a reward for accomplishment, “do this or else…,” recognition, how you think others may perceive your body (attractive, repulsive, etc.), losing weight to fit into new clothes, looking good for the beach, and many more. Basically, this type of motivation is provided to you by someone or something outside of your control. This is the weakest form of motivation and will eventually demotivate an individual for accomplishing their goals. Intrinsic motivation is just the opposite. This type of motivation comes from within. You want to lose weight because your body feels better, or you go to work because you enjoy making a difference in the lives of others, or because you want to master a skill, etc. This is the type of motivation that will sustain an active lifestyle and empower individuals to reach their goals. Please help participants understand and find their intrinsic motivation to become physically active. This is one of the single most important concepts you can instill within individuals throughout this course. THE POWER OF HABIT “Your beliefs become your thoughts, Your thoughts become your words, Your words become your actions, Your actions become your HABITS, Your habits become your values, Your values become your destiny.” - Mahatma Ghandi Habit, combined with internal motivation, is where an active lifestyle begins. Before a new habit of physical activity can be born, individuals must believe that being active is good for them, then they must think about the benefits and build their intrinsic motivation. Next individuals can vocalize their thoughts and establish goals and guiding principles for their actions. Then comes action. Until action occurs the belief is only a wish. This class is designed to provide the instruction for participants to confidently act on their beliefs, thoughts, and words. By maintaining an exercise journal and tracking personal successes, the habit of physical activity will be developed. This will in turn become a value and priority and lead to a healthy lifestyle. CREATE YOUR OWN PHYSICAL ACTIVITY PLAN When making your own physical activity plan, begin by setting goals. Next, write down what exercises or stretches you like and make a list of those that are difficult for you. Finally, write a short list of exercises that will help you meet your goal.
  • 101.
    LESSON RESOURCES 97 LE S S O N R E S O U R C E S After you have created your list, begin to plan which days you will do which exercises. You can search the Internet for examples of physical activity plans and customize them to meet your needs. SETTING GOALS Setting goals is a prerequisite to achieving ultimate success. Goals must be intrinsic to be effective and serve as a guide to success. When setting goals be sure participants use the SMART goal method. SMART stands for: S – Specific • What: What do I want to accomplish? • Why: Specific purpose of benefit of accomplishing goal • Who: Who is involved? • Where: Identify location. • Which: Requirements and constrains. M – Measurable • How much? • How many? • How will I know when it is accomplished? • Indicators should be quantifiable. A – Attainable • How can the goal be accomplished? • How realistic is the goal based on other constraints? R – Relevant • Does this seem worthwhile? • Is this the right time? • Does this match your other efforts/needs? • Is it applicable in the current socioeconomic environment? T – Time-bound • When? • What can I do in 6 months from now? • What can I do in 6 weeks from now? • What can I do today? • When do I expect to complete this goal? Good Examples • I will run a marathon at the end of 6 months to increase my confidence and strengthen my cardiovascular system. • By August 1, 2015, I will have developed the habit of being active for 45 min each day by participating in vigorous activity to increase my self-esteem and personal health. Examples of goal fragments that can be incorporated into the SMART goal system • Run around the block. • Complete a 5K. • Complete a 10K. • Complete a half marathon. • Complete a marathon. • Participate in a triathlon. • Swim ____ meters. • Be able to lift a bag of potatoes over your head. • Be able to load the car without getting tired. • Take a class at a gym. • Be able to walk the Great Wall of China. • Be able to play and keep up with children. • Be able to go on a hike. • Be able to bike to _____.
  • 102.
    98 LESSON RESOURCES LE S S O N R E S O U R C E S • Park farthest from a store. • Only take stairs. • Be able to go up two flights of stairs without getting out of breath. • Take a walk during lunch at work. • Make walking/playground a family activity. • Walk children to school. • Do something active while food is in the microwave or during a commercial break. • Decrease chance of cardiac arrest by doing something active everyday. • Take the time you would watch your favorite TV show and replace it with a walk. INCREASE PHYSICAL ACTIVITY DURING NORMAL ACTIVITIES Choose activities that you enjoy and can do regularly. Fitting activity into a daily routine can be easy — such as taking a brisk 10 minute walk to and from the parking lot, bus stop, or subway station. Keep it interesting by trying something different on alternate days. Every little bit adds up and doing something is better than doing nothing. Make sure to do at least 10 minutes of activity at a time, shorter bursts of activity will not have the same health benefits. For example, walking the dog for 10 minutes before and after work or adding a 10 minute walk at lunchtime can add to your weekly goal. Mix it up; swim, take a yoga class, garden, or lift weights. To be ready anytime, keep comfortable clothes and a pair of walking or running shoes in the car and at the office. More ways to increase physical activity At home • Join a walking group in the neighborhood or at the local shopping mall. • Recruit a partner for support and encouragement. • Push the baby in a stroller. • Do crunches while you microwave your dinner. • Stretch or do pushups during commercial breaks on TV. • Park in the farthest parking stall from the store. • Recruit children to participate with you. • Do 2-5 min of exercise everyday before you shower. • Get the whole family involved — enjoy an afternoon bike ride with your kids. • Walk up and down the soccer or softball field sidelines while watching the kids play. • Walk the dog — don’t just watch the dog walk. • Clean the house or wash the car. • Walk, skate, or cycle more, and drive less. • Do stretches, exercises, or pedal a stationary bike while watching television. • Mow the lawn with a push mower. • Plant and care for a vegetable or flower garden. • Play with the kids — tumble in the leaves, build a snowman, splash in a puddle, dance to favorite music. • Exercise to a workout video. At work • Get off the bus or subway one stop early and walk or skate the rest of the way. • Replace a coffee break with a brisk 10-minute walk. Ask a friend to go with you. • Take part in an exercise program at work or a nearby gym. • Join the office softball team or walking group. At play • Walk, jog, skate, or cycle. • Swim or do water aerobics. • Take a class in martial arts, dance, or yoga. • Golf (pull cart or carry clubs). • Canoe, row, or kayak. • Play racquetball, tennis, or squash. • Ski cross-country or downhill. • Play basketball, softball, or soccer.
  • 103.
    LESSON RESOURCES 99 LE S S O N R E S O U R C E S • Hand cycle or play wheelchair sports. • Take a nature walk. Most important — have fun while being active! BENEFITS FROM PHYSICAL ACTIVITY The benefits of physical activity vary by individual. However, most studies conclude that being active has great personal and community benefits. Some of the most common benefits associated with physical activity are: • Building a stronger heart and lungs. • Keeping bones and muscles strong. • Maintaining a healthy body weight. • Preventing or managing diabetes. • Preventing obesity. • Improving body composition. • Improving appetite for nutrient dense-food. • Helping to manage stress and ease depression. • Reducing risk for Cardiovascular disease (CVD) and Coronary Heart Disease (CHD). • Reducing the risk of developing certain types of cancer. BODY COMPOSITION Body composition is the proportion of fat, muscle, and bone of an individual’s body, expressed as percentage of body fat and percentage of lean body mass. Body composition testing determines how much of your body is made up of fat. The non-fat part of your body is called lean tissue, which includes your muscles, water, bones, and organs. Lean tissue is known as metabolically active tissue, the tissue that burns calories all day. The more lean tissue you have, the higher your resting metabolic rate will be. Body fat is a storage form of energy and, therefore, has a very low calorie demand. This is important to know since body composition can be an indicator of your risk of chronic disease. Body composition changes over time based on physical activity, exercise, work, diet, genotype, age, gender, pregnancy, disease, etc. There are many different ways to measure body composition. Each method has its advantages and disadvantages. Some are more accurate than others. Here is a review of the six most commonly available methods of body composition testing (listed in order of most accurate to least accurate): • DEXA Scan • This is the most accurate or “gold” standard measurement. • Subject lies on a table fully clothed. A small dose of radiation passes through the body allowing X-rays to distinguish fat from muscle from bone. • Whole Body Plethysmography (Bod Pod) • Subject steps inside an egg shaped “pod” wearing minimal clothing. The pod measures the volume of air you displace, allowing the bod pod to measure your overall density. Since the density of an object (in this case your body) equals mass divided by volume, we know mass equals your body weight. • Volume is measured by the bod pod. We know the density of fat, muscle, bone, and water. The percentage of body fat can be calculated from overall body density.
  • 104.
    100 LESSON RESOURCES LE S S O N R E S O U R C E S • Underwater/Hydrostatic Weighing • Subjects sit on a scale inside a giant tank of water. After exhaling all of the air from their lungs, they will pull themselves under water completely and sit very still for 10 seconds while the scale stabilizes. Underwater weighing also measures a person’s overall density. • Volume is calculated by measuring how much water your body displaces underwater. Volume equals your weight on land minus your weight under water. The percentage of body fat can be calculated from overall body density. • Skinfold Calipers • Calipers are used to measure the thickness of two layers of skin plus the subcutaneous (just under the skin) fat at four to six locations around the body. The most common locations are triceps, shoulder blade, abdomen, calf, and just above the hip bone. These measurements are totaled to arrive at a sum of skinfolds, which is compared to a table that equates skinfold total to percent body fat. • Bio-impedance • Subject either stands on a scale-like device or holds an apparatus in outstretched hands and pushes a button. The button sends a very small current of electricity through that specific part of the body. Fat acts like the rubber insulation on a wire while muscle and bone and water all conduct electricity well. The larger the drop in current, the greater the body fat percentage. • Special note: Since water and electrolytes both positively affect current flow, dehydration will cause body fat to be overestimated. • Be aware that since this machine only sends current through a specific part of the body, the accuracy of the readings are suspect. For example, most men do not store fat in their legs. If they are using a scale-like device that sends the electrical current through the legs, the overall body fat estimation will likely be low. • Body Mass Index • This is often calculated through a bio-impedance mechanism but is the simplified scale. Because BMI is popular and easy to use, we will discuss it in more detail. The body mass index or BMI compares weight to height. It is used to measure overweight and obesity. The score is valid for both men and women and is an indicator of total body weight in relation to risk of disease and death. It only compares weight to height and does not account for body composition. In other words, it does not take into account percent of body fat or muscle. While BMI may be a useful tool to assess where you are with your weight and health, it is NOT a perfect indicator. There are limits to using BMI and it should only be used as an approximation. BMI may overestimate body fat in athletes and those with a muscular build. These individuals often have a high percentage of lean body mass. Lean body mass, or muscle, is heavier than fat and this leads to a higher body weight. Even though many athletes weigh more, they are not necessarily at a higher risk for disease. BMI may also be underestimated in the elderly because of lost muscle mass.Thus, BMI should ONLY be used as an approximation, not an exact measurement.
  • 105.
    LESSON RESOURCES 101 LE S S O N R E S O U R C E S BODY IMAGE According to the National Eating Disorder Association [NEDA], body image is a term used to describe how people, men or women, feel about themselves and their body. This includes what they see when they look in a mirror or when they think of themselves in their mind. Body image includes how a person feels about their height, weight, appearance, and how people feel about their body overall. People with a positive body image have an accurate perception of what they look like and demonstrate happiness and confidence in their body. Many people struggle with negative body image, meaning they have a distorted or negative sense of their body and/or appearance. This often leads people to feel anxious, self-conscious, and ashamed of their body. Negative body image can lead to disordered eating, which is defined as a wide range of irregular eating behaviors that may not be appropriate for a diagnosis of an eating disorder. People who develop strong negative feelings toward their body are more likely to develop eating disorders like Anorexia Nervosa or Bulimia Nervosa. Just because the focus is on women doesn’t mean men aren’t affected. Another issue concerning body image is exercise addiction. Other terms associated with exercise addiction are “exercise dependence,” “exercise compulsion,” and “obligatory exercise.” You know the people in your community who are ALWAYS exercising, and if they aren’t exercising, they are thinking and talking about exercising? Anybody is susceptible, just as with any other addiction. Since exercise is part of a healthy lifestyle, excessive exercise can often be masked or left unaddressed. However, such behavior can lead to disease, disordered eating, and poor health. EQUIPMENT LIST TO HAVE ON HAND Just like having the essential foods stocked in your pantry is important, so is having physical activity equipment or resources on hand too. Here is a short list of helpful, but optional, equipment: • Knowing where the nearest park is • Canned food or gallons of milk • Chairs • A 5-6 foot pipe or pole • Stretch/resistance bands • Water • Good, sturdy shoes HYDRATION Proper hydration is one of the most important aspects of healthy physical activity. Drinking the right amount of fluids before, during, and after every physical activity is vital to providing your body the fluids it needs to perform properly. Hydration Goal The overall goal is to minimize dehydration without over- drinking. Adequate hydration varies among individuals. Practical ways to monitor hydration are: Urine color The color of the first morning’s urine void after awakening is an overall indicator of hydration status. • Straw or lemonade colored urine is a sign of appropriate hydration. • Dark colored urine, the color of apple juice, indicates dehydration. • Dark urine is often produced soon after consuming vitamin supplements. Sweat loss change in body weight before and after exercise is used to estimate sweat loss. Since an athlete’s sweat loss during exercise is an indicator of hydration status, athletes
  • 106.
    102 LESSON RESOURCES LE S S O N R E S O U R C E S are advised to follow customized fluid replacement plans that consider thirst, urine color, fluid intake, sweat loss and body weight changes that occur during exercise. Minimize Dehydration Dehydration can occur in virtually every physical activity scenario. It doesn’t have to be hot and you don’t have to have visible perspiration. You can become dehydrated in the water, at a pool or lake, or skiing on a winter day. Dehydration results when athletes fail to adequately replace fluid lost through sweating. Since dehydration that exceeds 2 percent body weight loss harms exercise performance, athletes are advised to begin exercise well hydrated, minimize dehydration during exercise and replace fluid losses after exercise. Be alert for conditions that increase your fluid loss through sweat. Air Temperature The higher the temperature, the greater your sweat loss. Intensity The harder you work out, the more you perspire. Body Size and Gender Larger people sweat more. Men generally sweat more than women. Duration The longer the workout, the more fluid loss. Fitness Well-trained athletes perspire more than less fit people. Why? Athletes cool their bodies through sweat more efficiently than most people because their bodies are used to the extra stress. Thus, fluid needs are higher for highly trained athletes than for less fit individuals. Remember swimmers sweat, too. Like any athletic activity, when you swim, your body temperature rises and your body sweats to keep from overheating. You may not notice because you are in the water, but you can become dehydrated. Swimmers, from competitive athletes to families splashing around, need to drink fluids before, during, and after swimming, even if they don’t feel thirsty. Warning Signs. Know the signs of dehydration. Early signs are • Thirst • Flushed skin • Premature fatigue • Increased body temperature • Faster breathing and pulse rate • Increased perception of effort • Decreased exercise capacity Later signs include • Dizziness • Increased weakness • Labored breathing with exercise
  • 107.
    LESSON RESOURCES 103 LE S S O N R E S O U R C E S Fluid Replacement Replace fluids during exercise to promote adequate hydration. Drink water rather than pour it over your head. Drinking is the only way to rehydrate and cool your body from the inside out. Sports drinks are more appropriate than water for athletes engaged in moderate to high intensity exercise that lasts an hour or longer. Rehydrate after exercise by drinking enough fluid to replace fluid lost during exercise. BASIC ANATOMY It is important to understand the basic anatomy of the body. This will help you and the participants feel more confident about the exercises they perform and will help in the prevention or diagnosis of basic injuries. Please review the musculoskeletal system in the first chapter of this manual for specific muscle terms. PREVENTING INJURY Just like anything we do, there is a potential for injury, especially as individuals are learning to become more active and use muscles they have rarely used. This section does not preclude you from the use of first aid or professional advice in the event of an injury but provides guidelines to help avoid injury. Prevention • Stretch before exercising (especially dynamic stretching). • Don’t bounce while stretching. • Stretch throughout the day for better range of motion at joints. • Learn and use proper technique. • Consider personal limitations and injury history. • Follow advice concerning what not to do from qualified doctors or physical therapists. • Start small, light, and simple. • Increasing speed of any exercise can promote the possibility of injury. • Avoid or modify any exercise that causes you pain or discomfort. • Cross-train with other sports and/or vary the exercises you perform. • Have at least one recovery day each week. • Injuries need rest, allow old injuries to heal with time and no or light exercise. • Gradually increase time and intensity. • Hydrate yourself continually throughout the day. • Listen to your body. • Exercise regularly. Stop exercising if • Discomfort or sharp pain. • Chest pain or other pain that could indicate a heart attack, including pain in the neck and jaw, pain travelling down the arm or pain between the shoulder blades. • Extreme breathlessness. • A very rapid or irregular heartbeat during exercise. • Too sick or tired. • Asthma flare up. • Severe nausea or vomiting. • Muscle cramps. • Sudden weakness or changes in feeling in your arms and/or legs.
  • 108.
    104 LESSON RESOURCES LE S S O N R E S O U R C E S • Trouble swallowing, talking or seeing. • Severe headache, dizziness, or lightheadedness. • Severe joint pain. ENDURANCE Endurance has two important aspects. One is endurance training. Endurance activities are focused on aerobic activity that improves cardiovascular health. Increasing one’s endurance will decrease body fatigue and decrease risk for heart problems. This endurance extends past exercise and influences one’s ability to perform daily activities. Another important definition of endurance is that of persistence. The only way anyone will make progress is through consistent effort. Obviously if the activity poses risk to your health or danger of injury to yourself and others, STOP. However, due to human nature, we often stop or give up before finishing hard challenges. RESOURCES http://www.acefitness.org/acefit/healthy-living-article/60/648/what-is-crossfit-training-and-is-it/ http://www.acsm.org/docs/current-comments/exerciseforpersonswithcopd.pdf http://www.betterhealth.vic.gov.au/Bhcv2/bhcarticles.nsf/pages/Pilates_and_yoga_the_health_benefits?open http://www.bucknell.edu/athletics/recreation-services/swimming-information.html http://www.cdc.gov/healthywater/swimming/health_benefits_water_exercise.html http://www.cdc.gov/physicalactivity/downloads/growing_stronger.pdf http://www.cdc.gov/workplacehealthpromotion/implementation/topics/physical-activity.html http://www.choosemyplate.gov/physical-activity/increase-physical-activity.html http://www.eatright.org/Public/content.aspx?id=7084 http://www.exercise.wsu.edu/plyometric/default.aspx http://www.hbr.org/2014/10/regular-exercise-is-part-of-your-job/ http://www.health.harvard.edu/blog/more-than-a-stretch-yogas-benefits-may-extend-to-the-heart-201504157868 http://www.health.harvard.edu/healthbeat/the-real-world-benefits-of-strengthening-your-core http://www.hsph.harvard.edu/nutritionsource/staying-active-full-story/#exercise-intensity http://www.hss.edu/conditions_stretching-tips-athletes-dynamic-static.asp#.VVJzVfnF9Cg http://www.mayoclinic.org/healthy-lifestyle/fitness/in-depth/boot-camp-workout/art-20046363?pg=1 http://www.mayoclinic.org/healthy-lifestyle/fitness/in-depth/exercise/art-20048389 http://www.mayoclinic.org/healthy-lifestyle/fitness/in-depth/interval-training/art-20044588?pg=2 http://www.mayoclinic.org/healthy-lifestyle/fitness/in-depth/pilates-for-beginners/art-20047673 http://www.mayoclinic.org/healthy-lifestyle/stress-management/in-depth/yoga/art-20044733 http://www.myweb.facstaff.wwu.edu/chalmers/PDFs/Introduction%20to%20plyometrics.pdf http://www.ncbi.nlm.nih.gov/pmc/articles/PMC3273886/ http://www.ncbi.nlm.nih.gov/pubmed/11323537 http://www.ncbi.nlm.nih.gov/pubmed/20040880 http://www.ncbi.nlm.nih.gov/pubmed/24866862 http://www.ncbi.nlm.nih.gov/pubmed/8326055 http://www.nccih.nih.gov/health/yoga/introduction.htm http://www.nihseniorhealth.gov/exerciseforolderadults/benefitsforeverydaylife/01.html http://www.osteopathic.org/osteopathic-health/about-your-health/health-conditions-library/general-health/Pages/yoga.aspx http://www.ptjournal.apta.org/content/87/3/304.short http://www.racgp.org.au/afp/2012/december/evidence-based-exercise/ http://www.reidhospital.org/the-benefits-of-strength-training/ http://www.ucdenver.edu/academics/colleges/medicalschool/departments/familymed/education/fellowship/sportsmedfellow/ Documents/Core%20Plyo%20article.pdf http://www.unitypoint.org/livewell/article.aspx?id=2a771708-74b0-4955-b677-53e247c78ec4&Functional+Circuit+Training+a nd+It%27s+Heart+Healthy+Benefits http://www.utexas.edu/student/housing/pdfs/ctbf_lowerbody.pdf http://www.weightwatchers.com/util/art/index_art.aspx?tabnum=1&art_id=33751
  • 109.
    LESSON RESOURCES 105 Toorder printable versions of this handout, go to extension.usu.edu/fscreate/htm/staff-menu. This material was funded by USDA’s Supplemental Nutrition Assistance Program - SNAP. Utah State University is an affirmative action/equal opportunity institution. AN ACTIVE LIFESTYLE ACCIDENT WAI V E R AND RELEASE OF LIABILIT Y FORM I ____________________________HEREBY ASSUME ALL OF THE RISKS OF PARTICIPATING IN ANY/ALL ACTIVITIES ASSOCIATED WITH THIS COURSE, including by way of example and not limitation, any risks that may arise from negligence or carelessness on the part of the persons or entities being released, from dangerous or defective equipment or property owned, maintained, or controlled by them, or because of their possible liability without fault. I certify that I am physically fit, have sufficiently prepared or trained for participation in this activity, and have not been advised to not participate by a qualified medical professional. I certify that there are no health-related reasons or problems which preclude my participation in this activity. I acknowledge that this Accident Waiver and Release of Liability Form will be used by the event holders, sponsors, and organizers of the activity in which I may participate, and that it will govern my actions and responsibilities at said activity. (A) I WAIVE, RELEASE, AND DISCHARGE from any and all liability, including but not limited to, liability arising from the negligence or fault of the entities or persons released, for my death, disability, personal injury, property damage, property theft, or actions of any kind which may hereafter occur to me including my traveling to and from this activity, THE FOLLOWING ENTITIES OR PERSONS: The Soil Ecology Society, (SES) and/or their directors, officers, employees, volunteers, representatives, and agents, and the activity holders, sponsors, and volunteers; (B) INDEMNIFY, HOLD HARMLESS, AND PROMISE NOT TO SUE the entities or persons mentioned in this paragraph from any and all liabilities or claims made as a result of participation in this activity, whether caused by the negligence of release or otherwise. I acknowledge that Utah State University (USU), USU Extension, SNAP-ED, Food $ense and their directors, officers, volunteers, representatives, and agents are NOT responsible for the errors, omissions, acts, or failures to act of any party or entity conducting a specific activity on their behalf. I acknowledge that this activity may involve a test of a person’s physical and mental limits and carries with it the potential for death, serious injury, and property loss. The risks include, but are not limited to, those caused by terrain, facilities, temperature, weather, condition of participants, equipment, vehicular traffic, lack of hydration, and actions of other people including, but not limited to, participants, volunteers, monitors, and/or producers of the activity. These risks are not only inherent to participants, but are also present for volunteers. I hereby consent to receive medical treatment which may be deemed advisable in the event of injury, accident, and/or illness during this activity. I understand while participating in this activity, I may be photographed. I agree to allow my photo, video, or film likeness to be used for any legitimate purpose by the activity holders, producers, sponsors, organizers, and assigns. The Accident Waiver and Release of Liability Form shall be construed broadly to provide a release and waiver to the maximum extent permissible under applicable law. I CERTIFY THAT I HAVE READ THIS DOCUMENT AND I FULLY UNDERSTAND ITS CONTENT. I AM AWARE THAT THIS IS A RELEASE OF LIABILITY AND A CONTRACT AND I SIGN IT OF MY OWN FREE WILL. Participant’s Signature Date AgeParticipant’s Name (Please print legibly) Parent/Guardian Signature (If under 18 years old, Parent or Guardian must also sign) Date
  • 110.
    Utah State Universityis an affirmative action/equal opportunity institution.