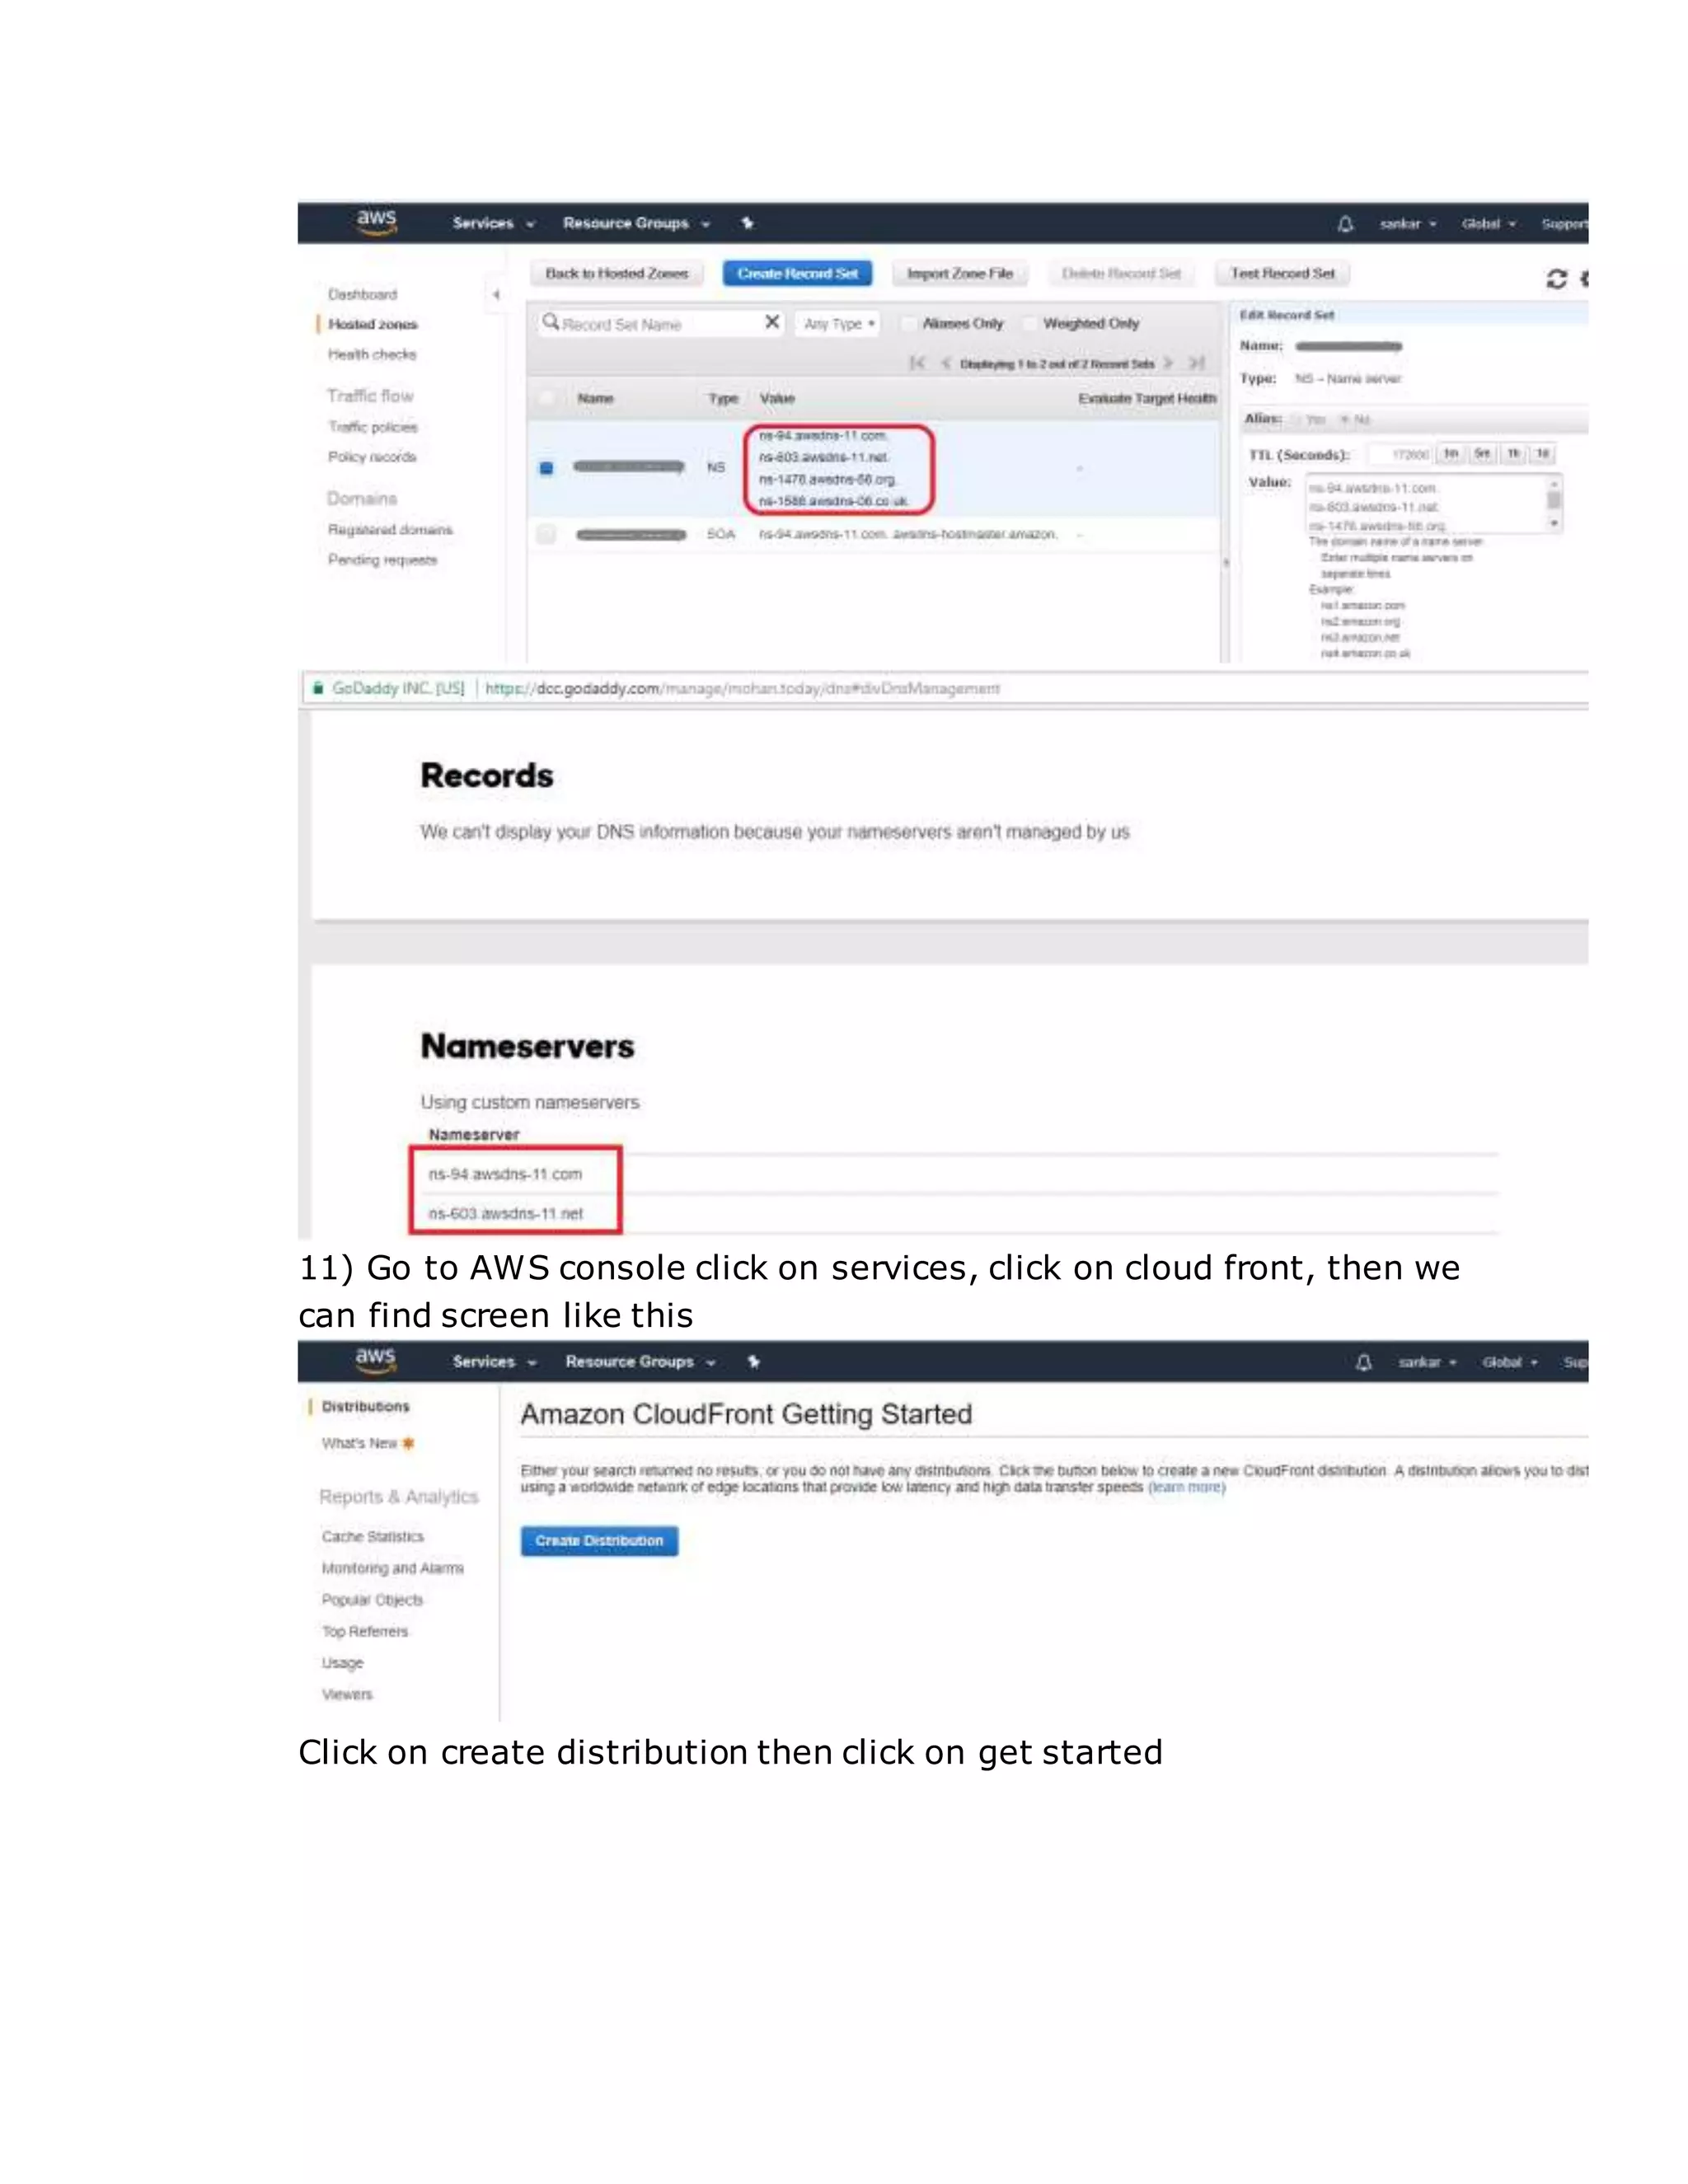
What Is Amazon CloudFront?
Amazon Cloud Front is a web service that speeds up distribution of your
static and dynamic web content, such as .html, .css, .php, and image files,
to your users.
Cloud Front delivers your content through a worldwide network of data
centers called edge locations.
When a user requests content that you're serving with Cloud Front, the user
is routed to the edge location that provides the lowest latency (time delay),
If the content is already in the edge location with the lowest latency, Cloud
Front delivers it immediately. If the content is not in that edge location,
Cloud Front retrieves it from an Amazon S3 bucket or an HTTP server (for
example, a web server) that you have identified as the source for the
definitive version of your content.
This dramatically reduces the number of networks that your users' requests
must pass through, which improves performance. Users get lower latency—
the time it takes to load the first byte of the file—and higher data transfer
rates. You also get increased reliability and availability because copies of
your files (also known as objects) are now held in multiple edge locations
around the world.
Cloud Front Configuration
Will host website in s3 bucket then will create cloud front web distribution
1) Once you login in to the AWS console, click on services select S3.
2) Click on create bucket, then give bucket name region( where you want
to create, click on create.
3) Then upload the file (index.html) which having the content from your
local machine.
4) Make the file as public.
7) Click on bucket name go to permission and click on bucket policy
http://docs.aws.amazon.com/AmazonS3/latest/dev/example-bucket-
policies.html
8) Go to services select route 53
9) Click on created hosted zone, then it will ask you your domain name
and click on create.
10) Copy the name values and paste in domain account
11) Go to AWS console click on services, click on cloud front, then we
can find screen like this
Click on create distribution then click on get started
12) Select the domain name and origin ID
Here we can go with default cache behavior settings
13) Here we can select distribution settings, where we want to store
the cache, and give cnames and default root object then click on
create
14) Once you done you can find this screen and copy domain name
and paste in route 53
15) Go to route 53, open hosted zone click on record set, click on alias
yes paste domain name at alias target place.
16) To restrict our website in particular region go to route 53, click on
distribution settings.
17) Then go to restrictions and click on edit
18) enable geo restrictions, check black list, select countries click on
add and click on yes and edit.
Once status become deployed, create one instance on Singapore try to
search your domain you will get error.(blocked by cloud front)
On other regions you can able to view.

Configure Amazon cloud front

  • 1.
    What Is AmazonCloudFront? Amazon Cloud Front is a web service that speeds up distribution of your static and dynamic web content, such as .html, .css, .php, and image files, to your users. Cloud Front delivers your content through a worldwide network of data centers called edge locations. When a user requests content that you're serving with Cloud Front, the user is routed to the edge location that provides the lowest latency (time delay), If the content is already in the edge location with the lowest latency, Cloud Front delivers it immediately. If the content is not in that edge location, Cloud Front retrieves it from an Amazon S3 bucket or an HTTP server (for example, a web server) that you have identified as the source for the definitive version of your content. This dramatically reduces the number of networks that your users' requests must pass through, which improves performance. Users get lower latency— the time it takes to load the first byte of the file—and higher data transfer rates. You also get increased reliability and availability because copies of your files (also known as objects) are now held in multiple edge locations around the world. Cloud Front Configuration Will host website in s3 bucket then will create cloud front web distribution 1) Once you login in to the AWS console, click on services select S3.
  • 2.
    2) Click oncreate bucket, then give bucket name region( where you want to create, click on create. 3) Then upload the file (index.html) which having the content from your local machine.
  • 3.
    4) Make thefile as public.
  • 4.
    7) Click onbucket name go to permission and click on bucket policy http://docs.aws.amazon.com/AmazonS3/latest/dev/example-bucket- policies.html
  • 5.
    8) Go toservices select route 53 9) Click on created hosted zone, then it will ask you your domain name and click on create. 10) Copy the name values and paste in domain account
  • 6.
    11) Go toAWS console click on services, click on cloud front, then we can find screen like this Click on create distribution then click on get started
  • 7.
    12) Select thedomain name and origin ID Here we can go with default cache behavior settings
  • 8.
    13) Here wecan select distribution settings, where we want to store the cache, and give cnames and default root object then click on create
  • 9.
    14) Once youdone you can find this screen and copy domain name and paste in route 53 15) Go to route 53, open hosted zone click on record set, click on alias yes paste domain name at alias target place. 16) To restrict our website in particular region go to route 53, click on distribution settings. 17) Then go to restrictions and click on edit
  • 10.
    18) enable georestrictions, check black list, select countries click on add and click on yes and edit. Once status become deployed, create one instance on Singapore try to search your domain you will get error.(blocked by cloud front) On other regions you can able to view.