If a client appears hypoxemic but the pulse oximeter reading is normal:
- Perform a full physical assessment including respiratory rate, effort, use of accessory muscles, skin color, etc. and compare findings to the client's baseline and normal values. This will help identify any discrepancies.
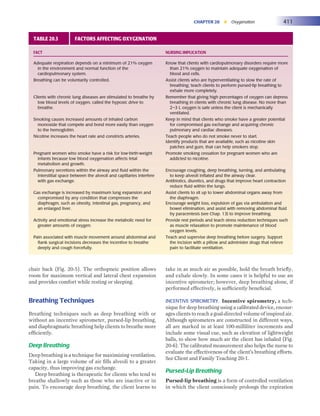
- Consider potential causes for inaccurate pulse oximetry reading as listed in Table 20-2 and address as possible.
- Notify the provider and consider obtaining an arterial blood gas to directly measure oxygen levels.
If the client appears normal but the pulse oximeter reading gives cause for concern:
- Perform a full physical assessment as described above and compare to client's baseline and normal values.
- Consider potential causes for inaccurate