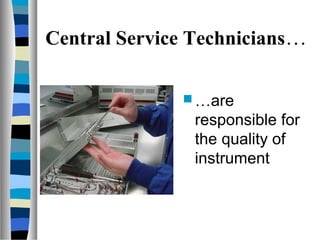
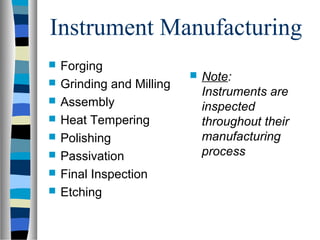
Surgical
Instrumentation
Chapter 11
Objectives:
As a result of successfully completing this chapter, students
will be able to:
 Review the process by which surgical instruments are manufactured
 Define basic categories of surgical instruments based upon their
functions, and identify the points of inspection, anatomy (features) of,
and procedures to measure the following types of instruments:
 Hemostatic Forceps
 Needleholders
 Tissue Forceps
 Dressing Forceps
 Retractors
 Scissors
 Suction Devices
 Single and Double Action Rongeurs
 Kerrison/Laminectomy Rongeurs
 Nail Nippers
 Graves and Pederson Vaginal Speculums
Objectives:
 Identify solutions that can damage stainless steel instruments
 Explain procedures to test instruments for sharpness, and to
identify (mark) them
 Emphasize the importance of instrument lubrication, and
review tray assembly safeguards
Central Service Technicians…
 …are
responsible for
the quality of
instrument
Martensitic (400 Series)
Stainless Steel
 Hard, used when sharp cutting
edges are needed
 Often used for scissors,
osteotomes, chisels, hemostatic
forceps, and needleholders
Austenitic (300 Series)
Stainless Steel
 Highly Corrosion Resistant
 Not as hard as 400 Series
 Used for retractors, cannulas, rib
spreaders, suction devices
Instrument Manufacturing
 Forging
 Grinding and Milling
 Assembly
 Heat Tempering
 Polishing
 Passivation
 Final Inspection
 Etching
 Note:
Instruments are
inspected
throughout their
manufacturing
process
Passivation
A chemical process applied during
instrument manufacture that provides
a corrosion-resistant finish by forming
a thin transparent oxide film
Instrument Finishes
 The instrument on the
left has a matte, or
satin-finish
 The instrument on the
right has a shiny, or
mirror finish
Overview of
Surgical Instruments
 Pages 178 – 187
provide an overview
of basic surgical
instruments along
with tips and
techniques for
proper inspection
Post-Ooperative Care of
Surgical Instruments
 Keep instruments moist
 Transport to Central Service for
cleaning as soon as possible
Solutions that Damage Surgical
Instruments
 Saline
 Betadine
 Peroxide
 Dish Soaps
 Soaking in Water
 Soaking in Saline
 Bleach
 Iodine
 Hand Soaps
 Laundry Detergents
 Long-term Soaking in
Rust Remover
 Long-term Soaking in
Stain Remover
 Surgeon’s Hand Scrubs
 Household Lubricants
 Household Powder
Cleaners
Surgical Sharps
Testing
Scissors Guidelines
 NEVER use them
to cut other
products
 Protect Blades
 Test Between
Uses
Scissors Testing Material
 Use RED Test Material
for Scissors greater
than 4.5”
 Use Yellow Test for
Scissors smaller than
4”
 Use Single-Ply Facial
Tissue for
Laparoscopic Scissors
Bone Cutters
 Test with an Index
Card
Rongeur Testing
 Kerrison, Laminectomy
and Double Action
Rongeurs should be
tested using a 3” x 5”
index card
 Look for clean bites
Curettes, Chisels, and
Osteotomes
 Test each using a
plastic dowel rod
 Each should shave
off pieces of the rod
Instrument Identification
Procedures
Tape
 Clean hands thoroughly with alcohol to remove oils
and grease
 Wipe the part of the instrument where the tape will
be placed with alcohol
 Cut the tape at an angle
 Wrap the tape 1 to 1.5 times around the device
 Autoclave the instrument to allow the heat to help
bond the tape to the instrument
Acid Etching
Process that uses a stencil,
solution and electricity to
mark and instrument
Heat-fused Nylon
A process that leaves a thin
color-coded layer on nylon
on an instrument
Laser Etching
Permanent marking method
done by instrument
manufacturers and repair
vendors
Instrument Lubrication
 The use of a neutral pH lubricant extends the
life of instruments
 Use lubricants in according with instrument
manufacturers’ and the lubricant
manufacturer’s recommendations
 ALL Lubricants must be approved for use as
a surgical instrument lubricant
Tray Assembly Tips
 Place heavy instruments on the bottom or side of the tray
 Select an instrument tray that allows adequate space for weight
distribution
 Place all curved instruments in the same direction
 Nest Tissue and Dressing Forceps
 Protect Delicate Instruments
 Use Instrument Stringers (holders) to keep instruments open
and in place
 Avoid metal to metal contact between laser finish instruments

Chapter 11 surgical instrumentation

  • 1.
  • 2.
    Objectives: As a resultof successfully completing this chapter, students will be able to:  Review the process by which surgical instruments are manufactured  Define basic categories of surgical instruments based upon their functions, and identify the points of inspection, anatomy (features) of, and procedures to measure the following types of instruments:  Hemostatic Forceps  Needleholders  Tissue Forceps  Dressing Forceps  Retractors  Scissors  Suction Devices  Single and Double Action Rongeurs  Kerrison/Laminectomy Rongeurs  Nail Nippers  Graves and Pederson Vaginal Speculums
  • 3.
    Objectives:  Identify solutionsthat can damage stainless steel instruments  Explain procedures to test instruments for sharpness, and to identify (mark) them  Emphasize the importance of instrument lubrication, and review tray assembly safeguards
  • 4.
    Central Service Technicians… …are responsible for the quality of instrument
  • 5.
    Martensitic (400 Series) StainlessSteel  Hard, used when sharp cutting edges are needed  Often used for scissors, osteotomes, chisels, hemostatic forceps, and needleholders
  • 6.
    Austenitic (300 Series) StainlessSteel  Highly Corrosion Resistant  Not as hard as 400 Series  Used for retractors, cannulas, rib spreaders, suction devices
  • 7.
    Instrument Manufacturing  Forging Grinding and Milling  Assembly  Heat Tempering  Polishing  Passivation  Final Inspection  Etching  Note: Instruments are inspected throughout their manufacturing process
  • 8.
    Passivation A chemical processapplied during instrument manufacture that provides a corrosion-resistant finish by forming a thin transparent oxide film
  • 9.
    Instrument Finishes  Theinstrument on the left has a matte, or satin-finish  The instrument on the right has a shiny, or mirror finish
  • 10.
    Overview of Surgical Instruments Pages 178 – 187 provide an overview of basic surgical instruments along with tips and techniques for proper inspection
  • 15.
    Post-Ooperative Care of SurgicalInstruments  Keep instruments moist  Transport to Central Service for cleaning as soon as possible
  • 16.
    Solutions that DamageSurgical Instruments  Saline  Betadine  Peroxide  Dish Soaps  Soaking in Water  Soaking in Saline  Bleach  Iodine  Hand Soaps  Laundry Detergents  Long-term Soaking in Rust Remover  Long-term Soaking in Stain Remover  Surgeon’s Hand Scrubs  Household Lubricants  Household Powder Cleaners
  • 17.
  • 18.
    Scissors Guidelines  NEVERuse them to cut other products  Protect Blades  Test Between Uses
  • 19.
    Scissors Testing Material Use RED Test Material for Scissors greater than 4.5”  Use Yellow Test for Scissors smaller than 4”  Use Single-Ply Facial Tissue for Laparoscopic Scissors
  • 20.
    Bone Cutters  Testwith an Index Card
  • 21.
    Rongeur Testing  Kerrison,Laminectomy and Double Action Rongeurs should be tested using a 3” x 5” index card  Look for clean bites
  • 22.
    Curettes, Chisels, and Osteotomes Test each using a plastic dowel rod  Each should shave off pieces of the rod
  • 23.
  • 24.
    Tape  Clean handsthoroughly with alcohol to remove oils and grease  Wipe the part of the instrument where the tape will be placed with alcohol  Cut the tape at an angle  Wrap the tape 1 to 1.5 times around the device  Autoclave the instrument to allow the heat to help bond the tape to the instrument
  • 25.
    Acid Etching Process thatuses a stencil, solution and electricity to mark and instrument
  • 26.
    Heat-fused Nylon A processthat leaves a thin color-coded layer on nylon on an instrument
  • 27.
    Laser Etching Permanent markingmethod done by instrument manufacturers and repair vendors
  • 28.
    Instrument Lubrication  Theuse of a neutral pH lubricant extends the life of instruments  Use lubricants in according with instrument manufacturers’ and the lubricant manufacturer’s recommendations  ALL Lubricants must be approved for use as a surgical instrument lubricant
  • 29.
    Tray Assembly Tips Place heavy instruments on the bottom or side of the tray  Select an instrument tray that allows adequate space for weight distribution  Place all curved instruments in the same direction  Nest Tissue and Dressing Forceps  Protect Delicate Instruments  Use Instrument Stringers (holders) to keep instruments open and in place  Avoid metal to metal contact between laser finish instruments