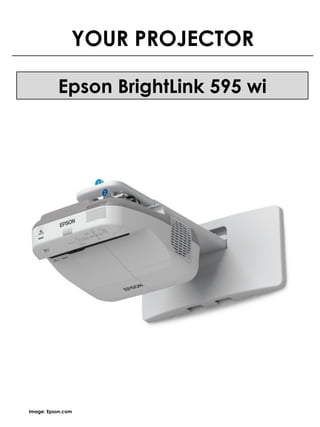
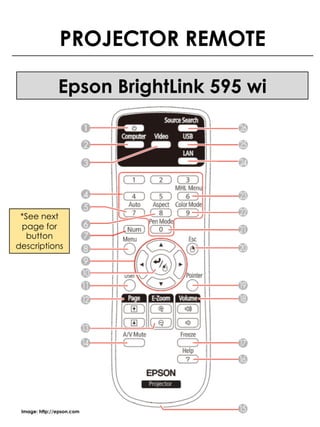
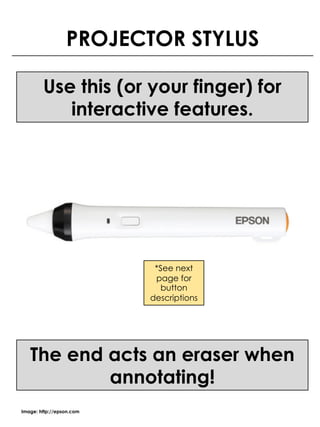
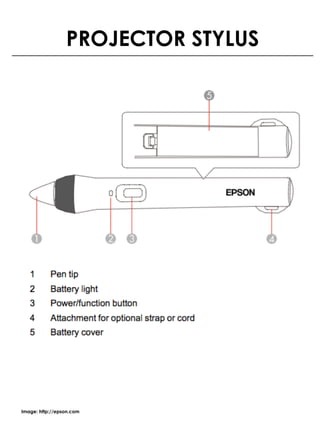
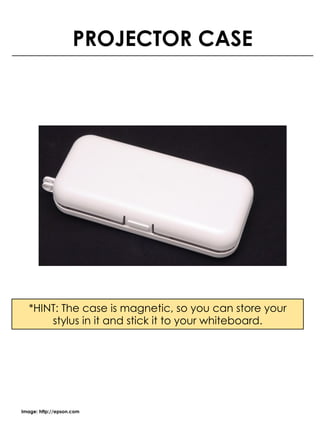
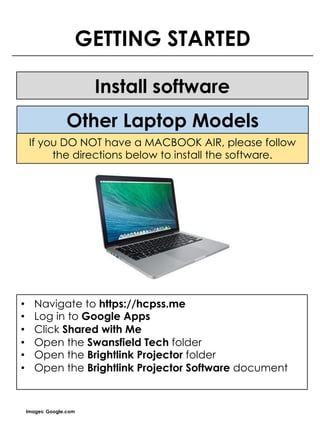
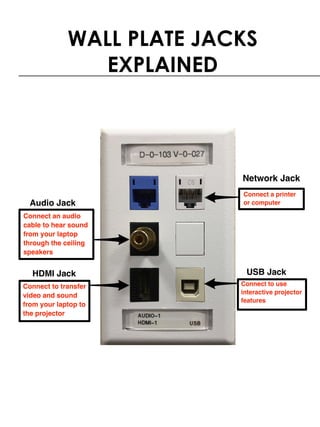
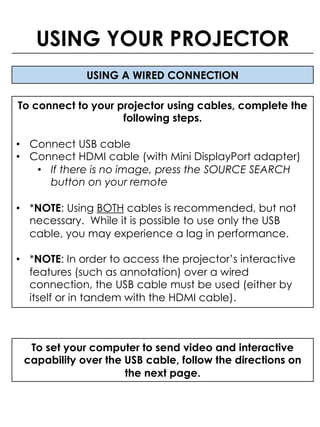
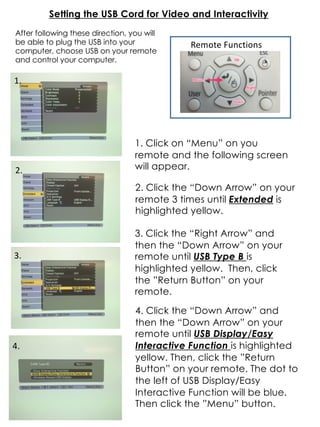
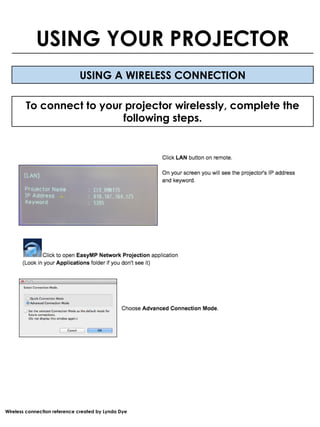
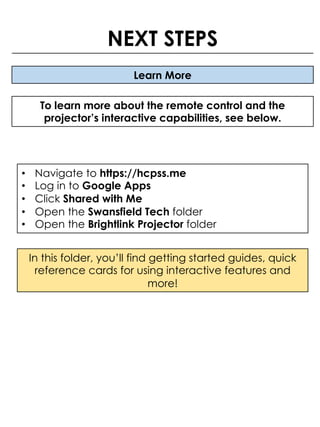
SCHOOL RENOVATION
TECH GUIDE
Created By
MIKE GLENNON
*Image Sources: Public domain/no attribution required, Apple.com, or Mac OS screen captures, author
phoitos unless otherwise noted. Avatar Image: http://sigfigcreator.thelegomovie.com/
YOUR PROJECTOR
Epson BrightLink 595 wi
Image: Epson.com
PROJECTOR REMOTE
Epson BrightLink 595 wi
Image: http://epson.com
*See next
page for
button
descriptions
PROJECTOR REMOTE
Epson BrightLink 595 wi
PROJECTOR STYLUS
Use this (or your finger) for
interactive features.
Image: http://epson.com
The end acts an eraser when
annotating!
*See next
page for
button
descriptions
PROJECTOR STYLUS
Image: http://epson.com
PROJECTOR CASE
Image: http://epson.com
*HINT: The case is magnetic, so you can store your
stylus in it and stick it to your whiteboard.
GETTING STARTED
Install software
Images: Apple.com, Jamf.com
If you received a new MACBOOK AIR last year,
proceed to Self Service to install the software
• Open Self-Service
• Search for Epson
• Select Epson Brightlink Software & install
MacBook Air Only
GETTING STARTED
Install software
Images: Google.com
If you DO NOT have a MACBOOK AIR, please follow
the directions below to install the software.
• Navigate to https://hcpss.me
• Log in to Google Apps
• Click Shared with Me
• Open the Swansfield Tech folder
• Open the Brightlink Projector folder
• Open the Brightlink Projector Software document
Other Laptop Models
WALL PLATE JACKS
EXPLAINED
AUDIO JACK
PROJECTOR CONNECTIONS
FOR THIS… …USE THIS
PLUG IN
TO WALL
PLUG IN
TO LAPTOP
NETWORK JACK
PLUG IN
TO WALL
PLUG IN
TO LAPTOP
Images: CablestoGo.com
HDMI JACK
FOR THIS… …USE THIS
PLUG IN
TO WALL
PLUG IN
TO ADAPTER
USB JACK
PLUG IN
TO WALL
PLUG IN
TO LAPTOP
*Requires HDMI
to Mini Display
Port Adapter
(See next page)
HDMI cable to
adapter /
Adapter to
laptop
PROJECTOR CONNECTIONS
Images: CablestoGo.com
HDMI TO MINI DISPLAY PORT ADAPTER
FOR THIS… …USE THIS
This adapter is required in order to connect your laptop
to the HDMI jack.
PROJECTOR CONNECTIONS
Images: Amazon.com
USING A WIRED CONNECTION
To connect to your projector using cables, complete the
following steps.
• Connect USB cable
• Connect HDMI cable (with Mini DisplayPort adapter)
• If there is no image, press the SOURCE SEARCH
button on your remote
• *NOTE: Using BOTH cables is recommended, but not
necessary. While it is possible to use only the USB
cable, you may experience a lag in performance.
• *NOTE: In order to access the projector’s interactive
features (such as annotation) over a wired
connection, the USB cable must be used (either by
itself or in tandem with the HDMI cable).
USING YOUR PROJECTOR
To set your computer to send video and interactive
capability over the USB cable, follow the directions on
the next page.
1. Click on “Menu” on you
remote and the following screen
will appear.
4. Click the “Down Arrow” and
then the “Down Arrow” on your
remote until USB Display/Easy
Interactive Function is highlighted
yellow. Then, click the ”Return
Button” on your remote. The dot to
the left of USB Display/Easy
Interactive Function will be blue.
Then click the ”Menu” button.
Remote	Functions
1.	
2. Click the “Down Arrow” on your
remote 3 times until Extended is
highlighted yellow.
2.
3. Click the “Right Arrow” and
then the “Down Arrow” on your
remote until USB Type B is
highlighted yellow. Then, click
the ”Return Button” on your
remote.
3.
4.
Setting the USB Cord for Video and Interactivity
After following these direction, you will
be able to plug the USB into your
computer, choose USB on your remote
and control your computer.
USING A WIRELESS CONNECTION
To connect to your projector wirelessly, complete the
following steps.
USING YOUR PROJECTOR
Wireless connection reference created by Lynda Dye
USING A WIRELESS CONNECTION
To connect to your projector wirelessly, complete the
following steps.
USING YOUR PROJECTOR
Learn More
To learn more about the remote control and the
projector’s interactive capabilities, see below.
NEXT STEPS
• Navigate to https://hcpss.me
• Log in to Google Apps
• Click Shared with Me
• Open the Swansfield Tech folder
• Open the Brightlink Projector folder
In this folder, you’ll find getting started guides, quick
reference cards for using interactive features and
more!

Bright link projector intro glennon

  • 1.
  • 2.
    Created By MIKE GLENNON *ImageSources: Public domain/no attribution required, Apple.com, or Mac OS screen captures, author phoitos unless otherwise noted. Avatar Image: http://sigfigcreator.thelegomovie.com/
  • 3.
    YOUR PROJECTOR Epson BrightLink595 wi Image: Epson.com
  • 4.
    PROJECTOR REMOTE Epson BrightLink595 wi Image: http://epson.com *See next page for button descriptions
  • 5.
  • 6.
    PROJECTOR STYLUS Use this(or your finger) for interactive features. Image: http://epson.com The end acts an eraser when annotating! *See next page for button descriptions
  • 7.
  • 8.
    PROJECTOR CASE Image: http://epson.com *HINT:The case is magnetic, so you can store your stylus in it and stick it to your whiteboard.
  • 9.
    GETTING STARTED Install software Images:Apple.com, Jamf.com If you received a new MACBOOK AIR last year, proceed to Self Service to install the software • Open Self-Service • Search for Epson • Select Epson Brightlink Software & install MacBook Air Only
  • 10.
    GETTING STARTED Install software Images:Google.com If you DO NOT have a MACBOOK AIR, please follow the directions below to install the software. • Navigate to https://hcpss.me • Log in to Google Apps • Click Shared with Me • Open the Swansfield Tech folder • Open the Brightlink Projector folder • Open the Brightlink Projector Software document Other Laptop Models
  • 11.
  • 12.
    AUDIO JACK PROJECTOR CONNECTIONS FORTHIS… …USE THIS PLUG IN TO WALL PLUG IN TO LAPTOP NETWORK JACK PLUG IN TO WALL PLUG IN TO LAPTOP Images: CablestoGo.com
  • 13.
    HDMI JACK FOR THIS……USE THIS PLUG IN TO WALL PLUG IN TO ADAPTER USB JACK PLUG IN TO WALL PLUG IN TO LAPTOP *Requires HDMI to Mini Display Port Adapter (See next page) HDMI cable to adapter / Adapter to laptop PROJECTOR CONNECTIONS Images: CablestoGo.com
  • 14.
    HDMI TO MINIDISPLAY PORT ADAPTER FOR THIS… …USE THIS This adapter is required in order to connect your laptop to the HDMI jack. PROJECTOR CONNECTIONS Images: Amazon.com
  • 15.
    USING A WIREDCONNECTION To connect to your projector using cables, complete the following steps. • Connect USB cable • Connect HDMI cable (with Mini DisplayPort adapter) • If there is no image, press the SOURCE SEARCH button on your remote • *NOTE: Using BOTH cables is recommended, but not necessary. While it is possible to use only the USB cable, you may experience a lag in performance. • *NOTE: In order to access the projector’s interactive features (such as annotation) over a wired connection, the USB cable must be used (either by itself or in tandem with the HDMI cable). USING YOUR PROJECTOR To set your computer to send video and interactive capability over the USB cable, follow the directions on the next page.
  • 16.
    1. Click on“Menu” on you remote and the following screen will appear. 4. Click the “Down Arrow” and then the “Down Arrow” on your remote until USB Display/Easy Interactive Function is highlighted yellow. Then, click the ”Return Button” on your remote. The dot to the left of USB Display/Easy Interactive Function will be blue. Then click the ”Menu” button. Remote Functions 1. 2. Click the “Down Arrow” on your remote 3 times until Extended is highlighted yellow. 2. 3. Click the “Right Arrow” and then the “Down Arrow” on your remote until USB Type B is highlighted yellow. Then, click the ”Return Button” on your remote. 3. 4. Setting the USB Cord for Video and Interactivity After following these direction, you will be able to plug the USB into your computer, choose USB on your remote and control your computer.
  • 17.
    USING A WIRELESSCONNECTION To connect to your projector wirelessly, complete the following steps. USING YOUR PROJECTOR Wireless connection reference created by Lynda Dye
  • 18.
    USING A WIRELESSCONNECTION To connect to your projector wirelessly, complete the following steps. USING YOUR PROJECTOR
  • 19.
    Learn More To learnmore about the remote control and the projector’s interactive capabilities, see below. NEXT STEPS • Navigate to https://hcpss.me • Log in to Google Apps • Click Shared with Me • Open the Swansfield Tech folder • Open the Brightlink Projector folder In this folder, you’ll find getting started guides, quick reference cards for using interactive features and more!