This document provides a 4-step guide to connecting a laptop to a projector:
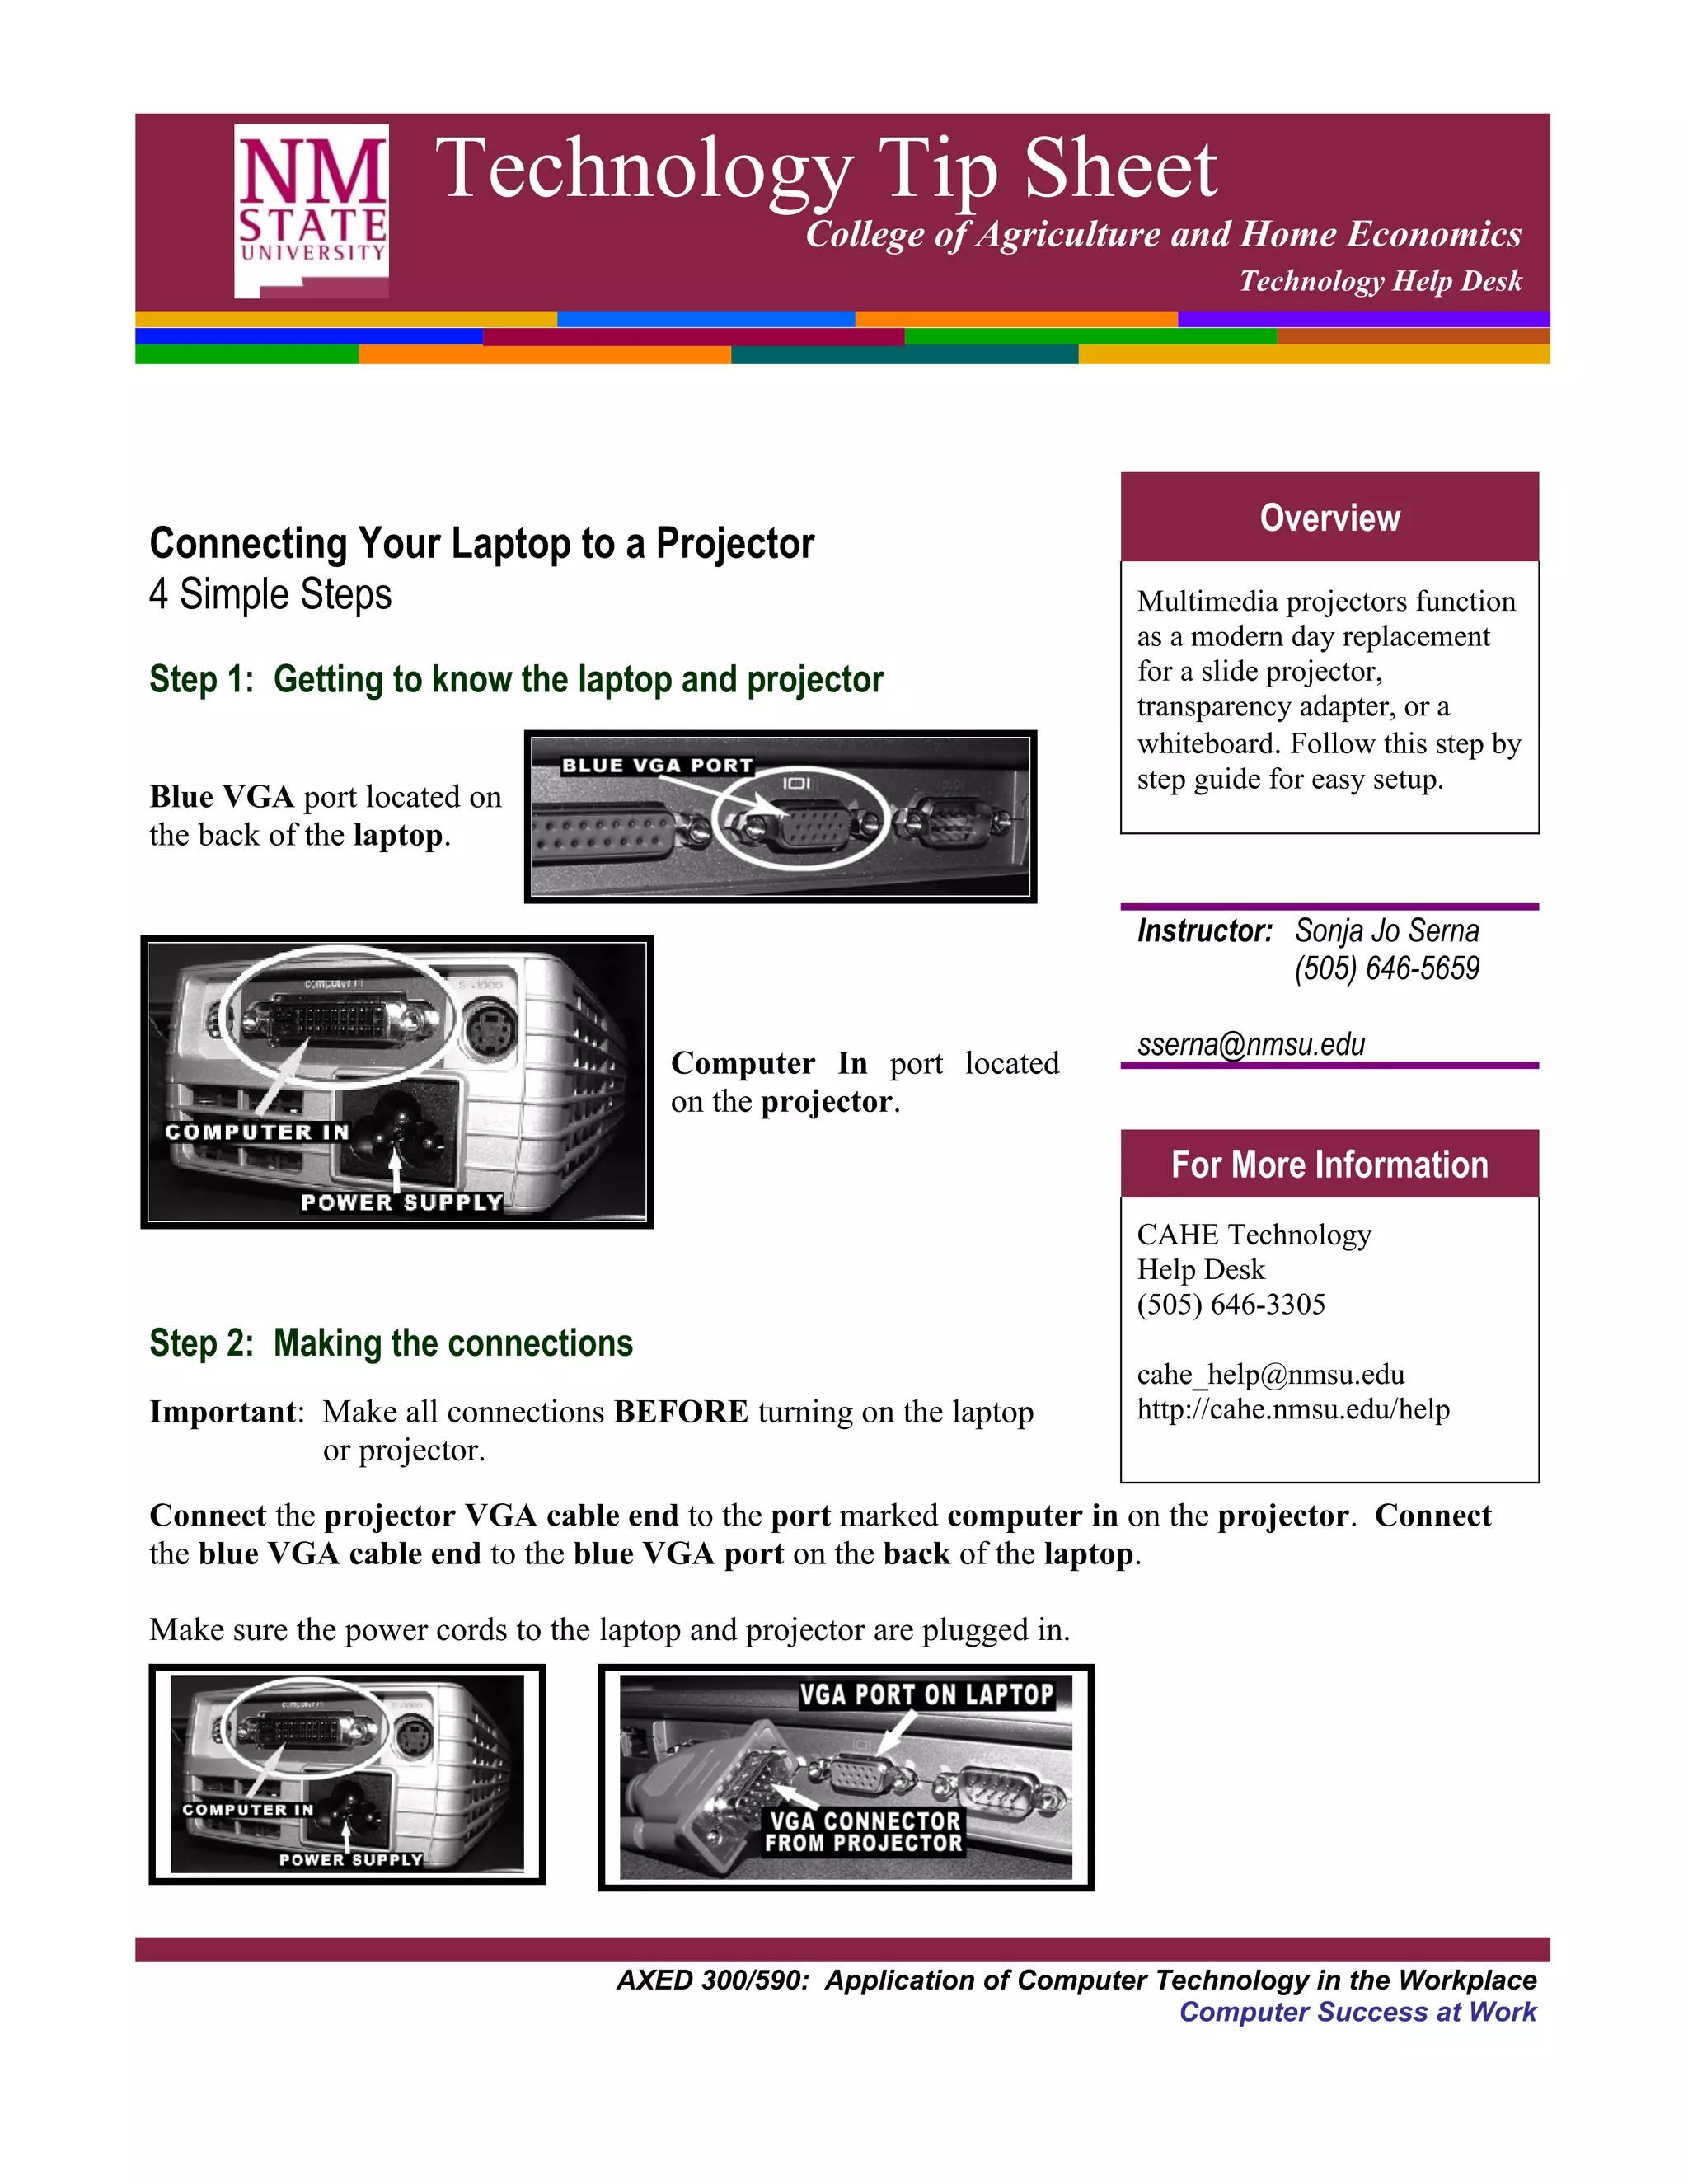
1. Identify the blue VGA port on the laptop and the computer in port on the projector.
2. Connect the projector's VGA cable to the computer in port and the laptop's blue VGA port before turning on either device.
3. Power on the laptop first, then the projector, and use function keys to project the laptop screen.
4. Adjust the projector's keystone, sync, tracking, and focus settings if needed. Power down by letting the projector fan run before disconnecting cables.


![Getting Started with Apache Spark: Big Data Made Simple [Free Meetup]](https://cdn.slidesharecdn.com/ss_thumbnails/apachesparkgettingstarted-260203175547-8361bcc3-thumbnail.jpg?width=640&height=640&fit=bounds)


