


![Chapter 2 Installation 23
C:AegisDatabasezDbt
This directory contains the MS Access database templates
and MS SQL and MySQL scripts.
C:AegisDatabasezDbtMSAccess
This directory contains the MS Access database templates.
C:AegisDatabasezDbtMSSql
This directory contains the scripts used for converting an MS
Access database to a SQL Server 2000 database.
C:AegisDatabasezDbtMSSqlv7
This directory contains the scripts used for converting an MS
Access database to a SQL Server 7.0 database.
C:AegisDatabasezDbtMySQL
This directory contains the scripts used for converting an MS
Access database to a MySQL Server database.
The Client Component only creates the directory you specified for the
programs.
INI File
The Aegis INI file stores database configuration and path information,
it is used locate the databases on your server or workstation.
Database Section
The [Database] section in the INI file contains the following keywords:
Provider Specifies the database backend.
• For Access database, specify
Provider=MSACCESS.
• For MS SQL Server database, specify
Provider =MSSQL Provider=MSSQL7
for MS SQL Server 7).
• For MySQL, specify Provider=MYSQL.
Server This keyword is only applicable if you use
MS SQL Server or MySQL databases.
Define the MS SQL or MySQL server you
wish to connect to in this keyword. For
example: Server=Aegis.](https://image.slidesharecdn.com/userguidev7-08-110220183607-phpapp02/85/Aegis-User-guide-v7-08-33-320.jpg)
![24 Chapter 2 Installation
Authentication This keyword is only applicable if you use
MS SQL Server database. The valid values
are Windows and SQL. If you specify
Windows, Aegis will use Windows
Authentication when connecting to the
server. If you specify SQL, Aegis will use
MS SQL Server Authentication when
connecting to the server. If you use SQL
Server Authentication, you must also
specify the User Id and Password.
User Id This keyword is only applicable if you use
MS SQL Server with SQL Server
Authentication or MySQL databases. The
User Id must be a valid user created in MS
SQL Server or MySQL. You would
normally give this user a very limited
access to the Aegis SYS database only.
Password This keyword is only applicable if you use
MS SQL Server with SQL Server
Authentication or MySQL databases. The
password must be a valid password for the
user created in MS SQL Server or MySQL.
If there no password for the user, you can
leave this field blank.
Paths Section
The [Paths] section in the INI file contains the following keywords:
Server Specifies the full path name where the
Server Component resides.
Work Specifies the full path name to the WORK
directory.
Options Section
The [Options] section in the INI file contains the following keywords:
SmtpLog Specify the Smtp log file. All Smtp events
will be written to a log file. To log all Smtp
events, specify SmtpLog=Y under the
Options section.
Pop3Log Specify the Pop3 log file. All Pop3 events
will be written to a log file. To log all Pop3
events, specify Pop3Log=Y under the
Options section. This option is only used
by the E-mail Server Add On.](https://image.slidesharecdn.com/userguidev7-08-110220183607-phpapp02/85/Aegis-User-guide-v7-08-34-320.jpg)


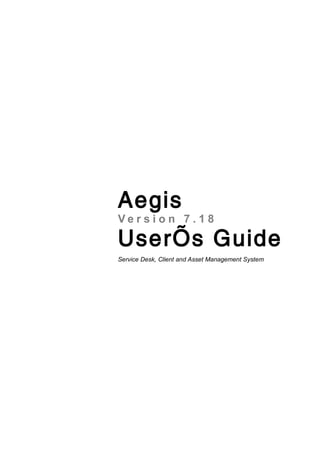
![30 Chapter 2 Installation
4. Open the Machine.config file. This file should be in the
WinNTMicrosoft.NETFrameworkv1.0.3705CONFIG
directory.
5. In the <processModel> section of the Machine.config file,
change the userName and the password attributes to the
name and the password of the account that you created in
step 1. For example:
userName="DomainNameASPNET"
password="ASPNETpassword"
6. Save the changes to the Machine.config file.
AegisWeb Configuration File
The AegisWeb.cfg file stores database configuration and path
information. The set up program will attempt to create a path to the
example databases installed by the Windows version of Aegis if they
can be found.
Below are a list of options you can define in AegisWeb.cfg.
Paths Section
The [Paths] section in the configuration file contains the following
keywords:
Server Specifies the full path name where the
Aegis Server Component resides (this is
installed by the Windows version of Aegis).
Database Section
The [Database] section contains the following keywords:
Provider Specifies the database backend.
• For Access database, specify
Provider=MSACCESS.
• For MS SQL Server database, specify
Provider =MSSQL (Provider=MSSQL7
for MS SQL Server 7).
• For MySQL, specify Provider=MYSQL.
Server This keyword is only applicable if you use
MS SQL Server or MySQL databases.
Define the MS SQL or MySQL server you
wish to connect to in this keyword. For
example: Server=Aegis.](https://image.slidesharecdn.com/userguidev7-08-110220183607-phpapp02/85/Aegis-User-guide-v7-08-40-320.jpg)
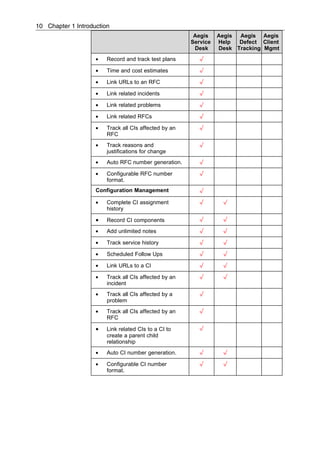
![Chapter 2 Installation 31
Authentication This keyword is only applicable if you use
MS SQL Server database. The valid values
are Windows and SQL. If you specify
Windows, Aegis will use Windows
Authentication when connecting to the
server. If you specify SQL, Aegis will use
MS SQL Server Authentication when
connecting to the server. If you use SQL
Server Authentication, you must also
specify the User Id and Password.
User Id This keyword is only applicable if you use
MS SQL Server with SQL Server
Authentication or MySQL databases. The
User Id must be a valid user created in MS
SQL Server or MySQL. You would
normally give this user a very limited
access to the Aegis SYS database only.
Password This keyword is only applicable if you use
MS SQL Server with SQL Server
Authentication or MySQL databases. The
password must be a valid password for the
user created in MS SQL Server or MySQL.
If there no password for the user, you can
leave this field blank.
IncidentDb Specifies the incident database to use.
ClientDb Specifies the client database to be use with
the incident database.
ListBoxDb Specifies the list box database to be use
with the incident database.
Database Set Section
The section allows you to define which databases to group under a
database set name. This section contains the following keywords:
IncidentDb Specifies the incident database to use.
ClientDb Specifies the client database to be use with
the incident database.
ListBoxDb Specifies the list box database to be use
with the incident database.
For example, for MS Access databases you can create two database
sections as follows.
[Database]](https://image.slidesharecdn.com/userguidev7-08-110220183607-phpapp02/85/Aegis-User-guide-v7-08-41-320.jpg)
![32 Chapter 2 Installation
IncidentDb=F:AegisDatabaseIncidentIncident.mdb
ClientDb=F:Aegis DatabaseClientClient.mdb
ListBoxDb=F:AegisDatabaseListBoxListBox.mdb
[DbSet1]
ClientDb=C:AegisDatabaseClientSet1.mdb
IncidentDb=C:AegisDatabaseIncidentSet1.mdb
ListBoxDb=C:AegisDatabaseListBoxSet1.mdb
[DbSet2]
ClientDb=C:AegisDatabaseClientSet2.mdb
IncidentDb=C:AegisDatabaseIncidentSet2.mdb
ListBoxDb=C:AegisDatabaseListBoxSet2.mdb
To use the default database, don’t include the DbSet keyword in the
URL. For example:
http://localhost/AegisWeb/logon.aspx
To use the first database set:
http://localhost/AegisWeb/logon.aspx?DbSet=DbSet1
To use the second database set:
http://localhost/AegisWeb/logon.aspx?DbSet=DbSet2
Directories Section
The [Directories] section contains the following keywords:
Attachments You can upload attachments in AegisWeb.
All attachments will be stored in the
directory specified here. For example, if
you include the following in AegisWeb.cfg:
[Directories]
Attachments = C:AegisAttachments
All attachments you uploaded will be stored
in C:AegisAttachments. To view the
attachments, you must create a virtual
directory for it. See section below.
Virtual Directories Section
Virtual directories are created in IIS (Internet Information Services)
under AegisWeb. You have to create virtual directories for
attachments and reports created by the Report Scheduler add on so
that users can view the files.
The [Virtual Directories] section contains the following keywords:](https://image.slidesharecdn.com/userguidev7-08-110220183607-phpapp02/85/Aegis-User-guide-v7-08-42-320.jpg)
![Chapter 2 Installation 33
Attachments This is the virtual directory name for
attachments and is created in IIS. For
example, if your Attachments directory is
C:AegisAttachments, when you create
this virtual directory for AegisWeb in IIS,
enter Attachments (or any name you like)
when prompted for the Alias field and
C:AegisAttachments when prompted for
the Directory. The entries in AegisWeb.cfg
will be:
[Virtual Directories]
Attachments = Attachments
ReportScheduler This is the virtual directory name for
reports created by the Report Scheduler
add on and is created in IIS. For example,
if the reports directory is C:AegisRps,
when you create this virtual directory for
AegisWeb in IIS, enter RPSReports (or any
name you like) when prompted for the Alias
field and C:AegisRps when prompted for
the Directory. The entries in AegisWeb.cfg
will be:
[Virtual Directories]
ReportScheduler = RPSReports
Note: You must only specify ONE section
name, for example:
[Virtual Directories]
Attachments = Attachments
ReportScheduler = RPSReports
Instead of:
[Virtual Directories]
Attachments = Attachments
[Virtual Directories]
ReportScheduler = RPSReports
Options Section
The [Options] section contains the following keywords:
NotifySelf Set this option to N if you do not wish to
receive notification when it is triggered by
yourself. For example, if you set up
notification to notify the person in the
Assigned To field and when you add a new](https://image.slidesharecdn.com/userguidev7-08-110220183607-phpapp02/85/Aegis-User-guide-v7-08-43-320.jpg)

![Chapter 2 Installation 35
LogonInfoTop This must be a number greater than zero.
This is the top position of the information
area.
LogonInfoHeight This must be a number greater than zero.
This is the height of the information area.
Since you can include HTML in the info.txt file, you can set HideAll=Y,
specify a system name (E.g. SystemName=Abacus Sytems Service
Desk) and reposition the logon window and information area so it can
look more like your corporate web site.
Sample Configuration Files
For MS Access Database
Below is a sample configuration file for MS Access.
[Paths]
Server=C: Aegis
[Database]
IncidentDb=C:AegisDatabaseIncidentEgIncident.mdb
ClientDb=C:Aegis DatabaseClientEgClient.mdb
ListBoxDb=C:AegisDatabaseListBoxEgListBox.mdb
[Directories]
Attachments=C:AegisWebAttachments
[Options]
NotifySelf=Y
SmtpServer=mail.abacus-systems.com
HomeURL=http://www.abacus-systems.com
ContactURL= http://www.abacus-systems.com/Contacts.htm
For MS SQL Server 2000/2005 Database
Below is a sample configuration file for MS SQL Server 2000/2005.
[Paths]
Server=C: Aegis
[Database]
Provider=MSSQL
Server=Aegis
IncidentDb=EgIncident
ClientDb=EgClient
ListBoxDb=EgListBox](https://image.slidesharecdn.com/userguidev7-08-110220183607-phpapp02/85/Aegis-User-guide-v7-08-45-320.jpg)
![36 Chapter 2 Installation
[Directories]
Attachments=C:AegisWebAttachments
[Options]
NotifySelf=Y
SmtpServer=mail.abacus-systems.com
HomeURL=http://www.abacus-systems.com
ContactURL= http://www.abacus-systems.com /Contacts.htm
If you use SQL Server Authentication, you must include the
Authentication, User Id and Password keywords in the [Database]
section as well. For example:
[Paths]
Server=C: Aegis
[Database]
Provider=MSSQL
Server=Aegis
Authentication=SQL
UserId=SqlUser
Password=Password
IncidentDb=EgIncident
ClientDb=EgClient
ListBoxDb=EgListBox
Where SqlUser is the MS SQL user you created in MS SQL Server
and Password is the password you defined for SqlUser. You would
normally give this user a very limited access to the Aegis SYS
database only.
For MS SQL Server 7.0 Database
Below is a sample configuration file for MS SQL Server 7.
[Paths]
Server=C: Aegis
[Database]
Provider=MSSQL7
Server=Aegis
IncidentDb=EgIncident
ClientDb=EgClient
ListBoxDb=EgListBox
[Directories]
Attachments=C:AegisWebAttachments
[Options]](https://image.slidesharecdn.com/userguidev7-08-110220183607-phpapp02/85/Aegis-User-guide-v7-08-46-320.jpg)
![Chapter 2 Installation 37
NotifySelf=Y
SmtpServer=mail.abacus-systems.com
HomeURL=http://www.abacus-systems.com
ContactURL= http://www.abacus-systems.com /Contacts.htm
If you use SQL Server Authentication, you must include the
Authentication, UserId and Password keywords in the [Database]
section as well. For example:
[Paths]
Server=C: Aegis
[Database]
Provider=MSSQL
Server=Aegis
Authentication=SQL
UserId=SqlUser
Password=Password
IncidentDb=EgIncident
ClientDb=EgClient
ListBoxDb=EgListBox
Where SqlUser is the MS SQL user you created in MS SQL Server
and Password is the password you defined for SqlUser. You would
normally give this user a very limited access to the Aegis SYS
database only.
For MySQL Server Database
Below is a sample configuration file for MySQL Server.
[Paths]
Server=C: Aegis
[Database]
Provider=MYSQL
Server=Aegis
UserId=SqlUser
Password=Password
IncidentDb=EgIncident
ClientDb=EgClient
ListBoxDb=EgListBox
[Directories]
Attachments=C:AegisWebAttachments
[Options]
NotifySelf=Y
SmtpServer=mail.abacus-systems.com](https://image.slidesharecdn.com/userguidev7-08-110220183607-phpapp02/85/Aegis-User-guide-v7-08-47-320.jpg)
![38 Chapter 2 Installation
HomeURL=http://www.abacus-systems.com
ContactURL= http://www.abacus-systems.com /Contacts.htm
Where SqlUser is the SQL user you created in MySQL and Password
is the password you defined for SqlUser. You would normally give this
user a very limited access to the Aegis SYS database only.
Using Your Existing Databases
The set up program will attempt to locate the example databases
installed by the Windows version of Aegis only. If you are currently
using the Windows version of Aegis and wish to use the databases on
the web, you must specify the full database path on the AegisWeb.cfg
file.
This can be done in the [Database] Section. Specify the Incident
database with the IncidentDb keyword, the Client database with the
ClientDb keyword and the List Box database with the ListBoxDb
keyword. For example:
For MS Access databases:
[Database]
IncidentDb=F:AegisDatabaseIncidentMyIncident.mdb
ClientDb=F:Aegis DatabaseClientMyClient.mdb
ListBoxDb=F:AegisDatabaseListBoxMyListBox.mdb
You must also have the appropriate security set up for the ASPNET
user to access the above directories.
For MS SQL Server 2000/2005 databases:
[Database]
Provider=MSSQL
Server=(local)
IncidentDb=MyIncident
ClientDb=MyClient
ListBoxDb=MyListBox
If you use SQL Server Authentication, you must include the
Authentication, UserId and Password keywords in the
[Database] section as well. For example:
[Database]
Provider=MSSQL
Server=(local)
Authentication=SQL
UserId=SqlUser
Password=Password
IncidentDb=MyIncident](https://image.slidesharecdn.com/userguidev7-08-110220183607-phpapp02/85/Aegis-User-guide-v7-08-48-320.jpg)
![Chapter 2 Installation 39
ClientDb=MyClient
ListBoxDb=MyListBox
Where SqlUser is the MS SQL user you created in MS SQL
Server and Password is the password you defined for
SqlUser. You would normally give this user a very limited
access to the Aegis SYS database only.
For MS SQL Server 7.0 databases:
[Database]
Provider=MSSQL7
Server=(local)
IncidentDb=MyIncident
ClientDb=MyClient
ListBoxDb=MyListBox
If you use SQL Server Authentication, you must include the
Authentication, UserId and Password keywords in the
[Database] section as well. For example:
[Database]
Provider=MSSQL7
Server=(local)
Authentication=SQL
UserId=SqlUser
Password=Password
IncidentDb=MyIncident
ClientDb=MyClient
ListBoxDb=MyListBox
Where SqlUser is the MS SQL user you created in MS SQL
Server and Password is the password you defined for
SqlUser. You would normally give this user a very limited
access to the Aegis SYS database only.
For MySQL Server databases:
[Database]
Provider=MYSQL
Server=(local)
UserId=SqlUser
Password=Password
IncidentDb=MyIncident
ClientDb=MyClient
ListBoxDb=MyListBox](https://image.slidesharecdn.com/userguidev7-08-110220183607-phpapp02/85/Aegis-User-guide-v7-08-49-320.jpg)


![Chapter 2 Installation 43
Using MS SQL Server
Aegis supports MS SQL Server 7/2000/2005 databases. However,
MS SQL Server is not included with Aegis - you must purchase and
install the product separately.
MS SQL Server Client Connection
To use MS SQL Server, you must have the appropriate MS SQL
Server software component install on your workstation and server.
To access an MS SQL Server database, as a minimum, you must
install the Client Connectivity component from the MS SQL Server
CD. Then create an Alias for the SQL Server you are connecting to.
For example, if your MS SQL Server is called ABACUS, you must
create an Alias called ABACUS in the Client Connectivity
configuration and include the following lines in your Aegis.INI file:
If you use MS SQL Server 2000/2005:
[Database]
Provider=MSSQL
Server=ABACUS
If you use MS SQL Server 7.0:
[Database]
Provider=MSSQL7
Server=ABACUS
Connecting to MS SQL Server
MS SQL Server can use the Windows NT/2000 user information to
validate the user. This option is only available when connecting to a
MS SQL Server running on Windows NT/2000. The client needs to be
part of a Windows NT domain or workgroup. The user needs to be
validated as a Windows NT user before access is granted.
You can also use SQL Server Authentication which is the standard
MS SQL Server security validation. This is the default and the only
available option when MS SQL Server is running on Windows 95/98.
It is optional when the server is running on Windows NT/2000. The
login must be added to the MS SQL Server before a user can log in.
Using Windows NT/2000 Authentication
There are no further steps required if you use Windows NT/2000
authentication.](https://image.slidesharecdn.com/userguidev7-08-110220183607-phpapp02/85/Aegis-User-guide-v7-08-53-320.jpg)
![44 Chapter 2 Installation
Using SQL Server Authentication
If you use SQL Server authentication, there must be a way for Aegis
to connect to the Aegis’ system (Sys) database. The system
databases stores the user information.
The User Id and Password used for this is stored in the INI file as
described above.
To use SQL Server authentication when connecting to the server, the
INI file must contain the following:
[Database]
Provider=MSSQL
Server=<Server Name>
Authentication=SQL
User Id=<The User Id created in SQL Server>
Password=<The password for the user>
If you use MS SQL Server 7.0, change Provider to MSSQL7.
Since the User Id and Password is stored in the Aegis INI file, these
information can be exposed to unauthorized users.
To protect your MS SQL Server databases, you should do the
following:
• Create a user with only read access to the Aegis system
database.
• Use this User Id and Password in the Aegis INI file.
The User Id and Password specified in the Aegis INI file is only used
to connect to the system database. When you open an incident
database, Aegis will use the User Id and Password set up in Aegis to
connect to the incident database and all other databases.
User Id and Password
If you use MS SQL Server database with SQL Server authentication,
the User Id and Password in Aegis (which defaults to PASSWORD for
new users added) is tied in to MS SQL Server’s User Id and
Password.
If you change Aegis’ User Id/Password, it will not be change in MS
SQL Server. You will have to change it in MS SQL Server as well.
Also, if you added new users in future, you must also use MS SQL
Server to add these new users unless you create a Single Login in
Aegis. See Using MS SQL Single Login on page 45.](https://image.slidesharecdn.com/userguidev7-08-110220183607-phpapp02/85/Aegis-User-guide-v7-08-54-320.jpg)

![46 Chapter 2 Installation
4. Click on Convert.
Using MySQL Server
Aegis can also work with MySQL databases. However, MySQL
Server is not included with Aegis.
To use MySQL Server database, you must download MySQL Server
v5 or later.
Since Aegis is not open source software, a license is required to use
MySQL. This is the license requirement from the MySQL vendor.
Please contact us for latest pricing.
MySQL Server Client Connection
To use MySQL Server, you must have the appropriate MySQL Server
software component install on your workstation and server.
To access a MySQL Server database, you must also download
MySQL ODBC Connector 3.51 or later. The is used by Aegis to
connect to MySQL Server.
Connecting to MySQL Server
To connect to MySQL Server, you have to configure the Aegis INI file
and AegisWeb.Cfg (for AegisWeb).
The following entries must be inserted in to the Aegis INI file and
AegisWeb.Cfg file:
[Database]
Provider=MYSQL
Server=<Server Name>
User Id=<The User Id created in SQL Server>
Password=<The password for the user>
Where <Server Name> is the MySQL Server you wish to connect to.
If you use MySQL Server, there must be a way for Aegis to connect to
the Aegis’ system (Sys) database. The system database stores the
user information. The User Id and Password used for this is stored in
the INI file and AegisWeb.Cfg for AegisWeb.
Since the User Id and Password is stored in a text file, it can be
exposed to unauthorized users.
To protect your MySQL Server databases, you should do the
following:](https://image.slidesharecdn.com/userguidev7-08-110220183607-phpapp02/85/Aegis-User-guide-v7-08-56-320.jpg)


This document provides an overview of the Aegis service desk, help desk, and asset management system. It describes the various modules, including the core incident, problem, change request, client, and asset management modules. It also outlines optional add-on modules for features like active directory integration, database monitoring, email logging, escalation, reporting, and more. Installation instructions and system requirements are also covered.

![Erpi admin 11123510[1] by иссам неязын issam hejazin](https://cdn.slidesharecdn.com/ss_thumbnails/erpiadmin111235101-140814022227-phpapp01-thumbnail.jpg?width=640&height=640&fit=bounds)