The document is the user guide for Amazon Elastic Compute Cloud (EC2) specifically for Linux instances, covering a wide range of topics from getting started, accessing EC2, pricing, and compliance to detailed sections on instances, Amazon Machine Images (AMIs), and best practices. It includes tutorials, configuration steps, monitoring, network and security guidelines, as well as troubleshooting tips for users. This comprehensive guide is intended to assist users in effectively utilizing AWS EC2 services.


![To find your regions and Availability Zones using the AWS CLI
1. Use the describe-regions command as follows to describe your regions.
$ aws ec2 describe-regions
{
"Regions": [
{
"Endpoint": "ec2.us-east-1.amazonaws.com",
"RegionName": "us-east-1"
},
{
"Endpoint": "ec2.ap-southeast-1.amazonaws.com",
"RegionName": "ap-southeast-1"
},
{
"Endpoint": "ec2.ap-southeast-2.amazonaws.com",
"RegionName": "ap-southeast-2"
},
...
]
}
2. Use the describe-availability-zones command as follows to describe your Availability Zones within
the us-east-1 region.
$ aws ec2 describe-availability-zones --region us-east-1
{
"AvailabilityZones": [
{
"State": "available",
"RegionName": "us-east-1",
"Messages": [],
"ZoneName": "us-east-1b"
},
11
Amazon Elastic Compute Cloud User Guide for Linux
Instances
Describing Your Regions and Availability Zones](https://image.slidesharecdn.com/ec2-ug-151130152858-lva1-app6892/75/Amazan-Ec2-20-2048.jpg)
![{
"State": "available",
"RegionName": "us-east-1",
"Messages": [],
"ZoneName": "us-east-1c"
},
{
"State": "available",
"RegionName": "us-east-1",
"Messages": [],
"ZoneName": "us-east-1d"
}
]
}
To find your regions and Availability Zones using the Amazon EC2 CLI
1. Use the ec2-describe-regions command as follows to describe your regions.
PROMPT> ec2-describe-regions
REGION us-east-1 ec2.us-east-1.amazonaws.com
REGION ap-northeast-1 ec2.ap-northeast-1.amazonaws.com
REGION ap-southeast-1 ec2.ap-southeast-1.amazonaws.com
..
2. Use the ec2-describe-availability-zones command as follows to describe your Availability Zones
within the us-east-1 region.
PROMPT> ec2-describe-availability-zones --region us-east-1
AVAILABILITYZONE us-east-1a available us-east-1
AVAILABILITYZONE us-east-1b available us-east-1
AVAILABILITYZONE us-east-1c available us-east-1
AVAILABILITYZONE us-east-1d available us-east-1
Specifying the Region for a Resource
Every time you create an Amazon EC2 resource, you can specify the region for the resource.You can
specify the region for a resource using the AWS Management Console or the command line.
To specify the region for a resource using the console
1. Open the Amazon EC2 console.
2. Use the region selector in the navigation bar.
12
Amazon Elastic Compute Cloud User Guide for Linux
Instances
Specifying the Region for a Resource](https://image.slidesharecdn.com/ec2-ug-151130152858-lva1-app6892/75/Amazan-Ec2-21-2048.jpg)

![3. Follow the directions for the wizard. On the Configure Instance Details page, do the following:
• [EC2-Classic] Select one of the Availability Zone options from the list, or select No Preference to
enable us to select the best one for you.
• [EC2-VPC] Select one of the subnet options from the list, or select No preference (default subnet
in any Availability Zone) to enable us to select the best one for you.
To specify an Availability Zone for your instance using the AWS CLI
You can use the run-instances command with one of the following options:
• [EC2-Classic] --placement
• [EC2-VPC] --subnet-id
To specify an Availability Zone for your instance using the Amazon EC2 CLI
You can use the ec2-run-instances command with one of the following options:
• [EC2-Classic] --availability-zone
• [EC2-VPC] --subnet
Migrating an Instance to Another Availability Zone
If you need to, you can migrate an instance from one Availability Zone to another. For example, if you
are trying to modify the instance type of your instance and we can't launch an instance of the new instance
type in the current Availability Zone, you could migrate the instance to an Availability Zone where we can
launch an instance of that instance type.
The migration process involves creating an AMI from the original instance, launching an instance in the
new Availability Zone, and updating the configuration of the new instance, as shown in the following
procedure.
To migrate an instance to another Availability Zone
1. Create an AMI from the instance. The procedure depends on the operating system and the type of
root device volume for the instance. For more information, see the documentation that corresponds
to your operating system and root device volume:
• Creating an Amazon EBS-Backed Linux AMI (p. 87)
• Creating an Instance Store-Backed Linux AMI (p. 90)
• Creating an Amazon EBS-Backed Windows AMI
• Creating an Instance Store-Backed Windows AMI
2. [EC2-VPC] If you need to preserve the private IP address of the instance, you must delete the subnet
in the current Availability Zone and then create a subnet in the new Availability Zone with the same
IP address range as the original subnet. Note that you must terminate all instances in a subnet before
you can delete it. Therefore, you should move all instances in the current subnet to the new subnet.
14
Amazon Elastic Compute Cloud User Guide for Linux
Instances
Migrating an Instance to Another Availability Zone](https://image.slidesharecdn.com/ec2-ug-151130152858-lva1-app6892/75/Amazan-Ec2-23-2048.jpg)


![Changing the Root Volume of an Instance to Persist Using
the AWS CLI
Using the AWS CLI, you can change the DeleteOnTermination attribute when you launch an instance
or while the instance is running. The root device is typically /dev/sda1 (Linux) or xvda (Windows).
Example at Launch
Use the run-instances command to preserve the root volume by including a block device mapping that
sets its DeleteOnTermination attribute for to false.
$ aws ec2 run-instances --image-id ami-1a2b3c4d --block-device-mappings
'[{"DeviceName":"/dev/sda1","Ebs":{"DeleteOnTermination":false}}]' other para
meters...
You can confirm that DeleteOnTermination is false by using the describe-instances command and
looking for the BlockDeviceMappings entry for /dev/sda1 in the command output, as shown here.
...
"BlockDeviceMappings": [
{
"DeviceName": "/dev/sda1",
"Ebs": {
"Status": "attached",
"DeleteOnTermination": false,
"VolumeId": "vol-877166c8",
"AttachTime": "2013-07-19T02:42:39.000Z"
}
}
...
Example While the Instance is Running
Use the modify-instance-attribute command to preserve the root volume by including a block device
mapping that sets its DeleteOnTermination attribute to false.
$ aws ec2 modify-instance-attribute --instance-id i-5203422c --block-device-
mappings '[{"DeviceName":"/dev/sda1","Ebs":{"DeleteOnTermination":false}}]'
Changing the Root Volume of an Instance to Persist Using
the Amazon EC2 CLI
Using the Amazon EC2 CLI, you can change the DeleteOnTermination attribute when you launch an
instance or while the instance is running. The root device is typically /dev/sda1 (Linux) or xvda
(Windows).
Example at Launch
Use the ec2-run-instances command to include a block device mapping that sets the
DeleteOnTermination flag for the root device to false. Include the -v option to run the command in
verbose mode.
19
Amazon Elastic Compute Cloud User Guide for Linux
Instances
Changing the Root Device Volume to Persist](https://image.slidesharecdn.com/ec2-ug-151130152858-lva1-app6892/75/Amazan-Ec2-28-2048.jpg)


![[ec2-user ~]$ df -h
For a micro instance, your output should look something like this.
Filesystem Size Used Avail Use% Mounted on
/dev/xvda1 8.0G 1.1G 6.9G 14% /
tmpfs 298M 0 298M 0% /dev/shm
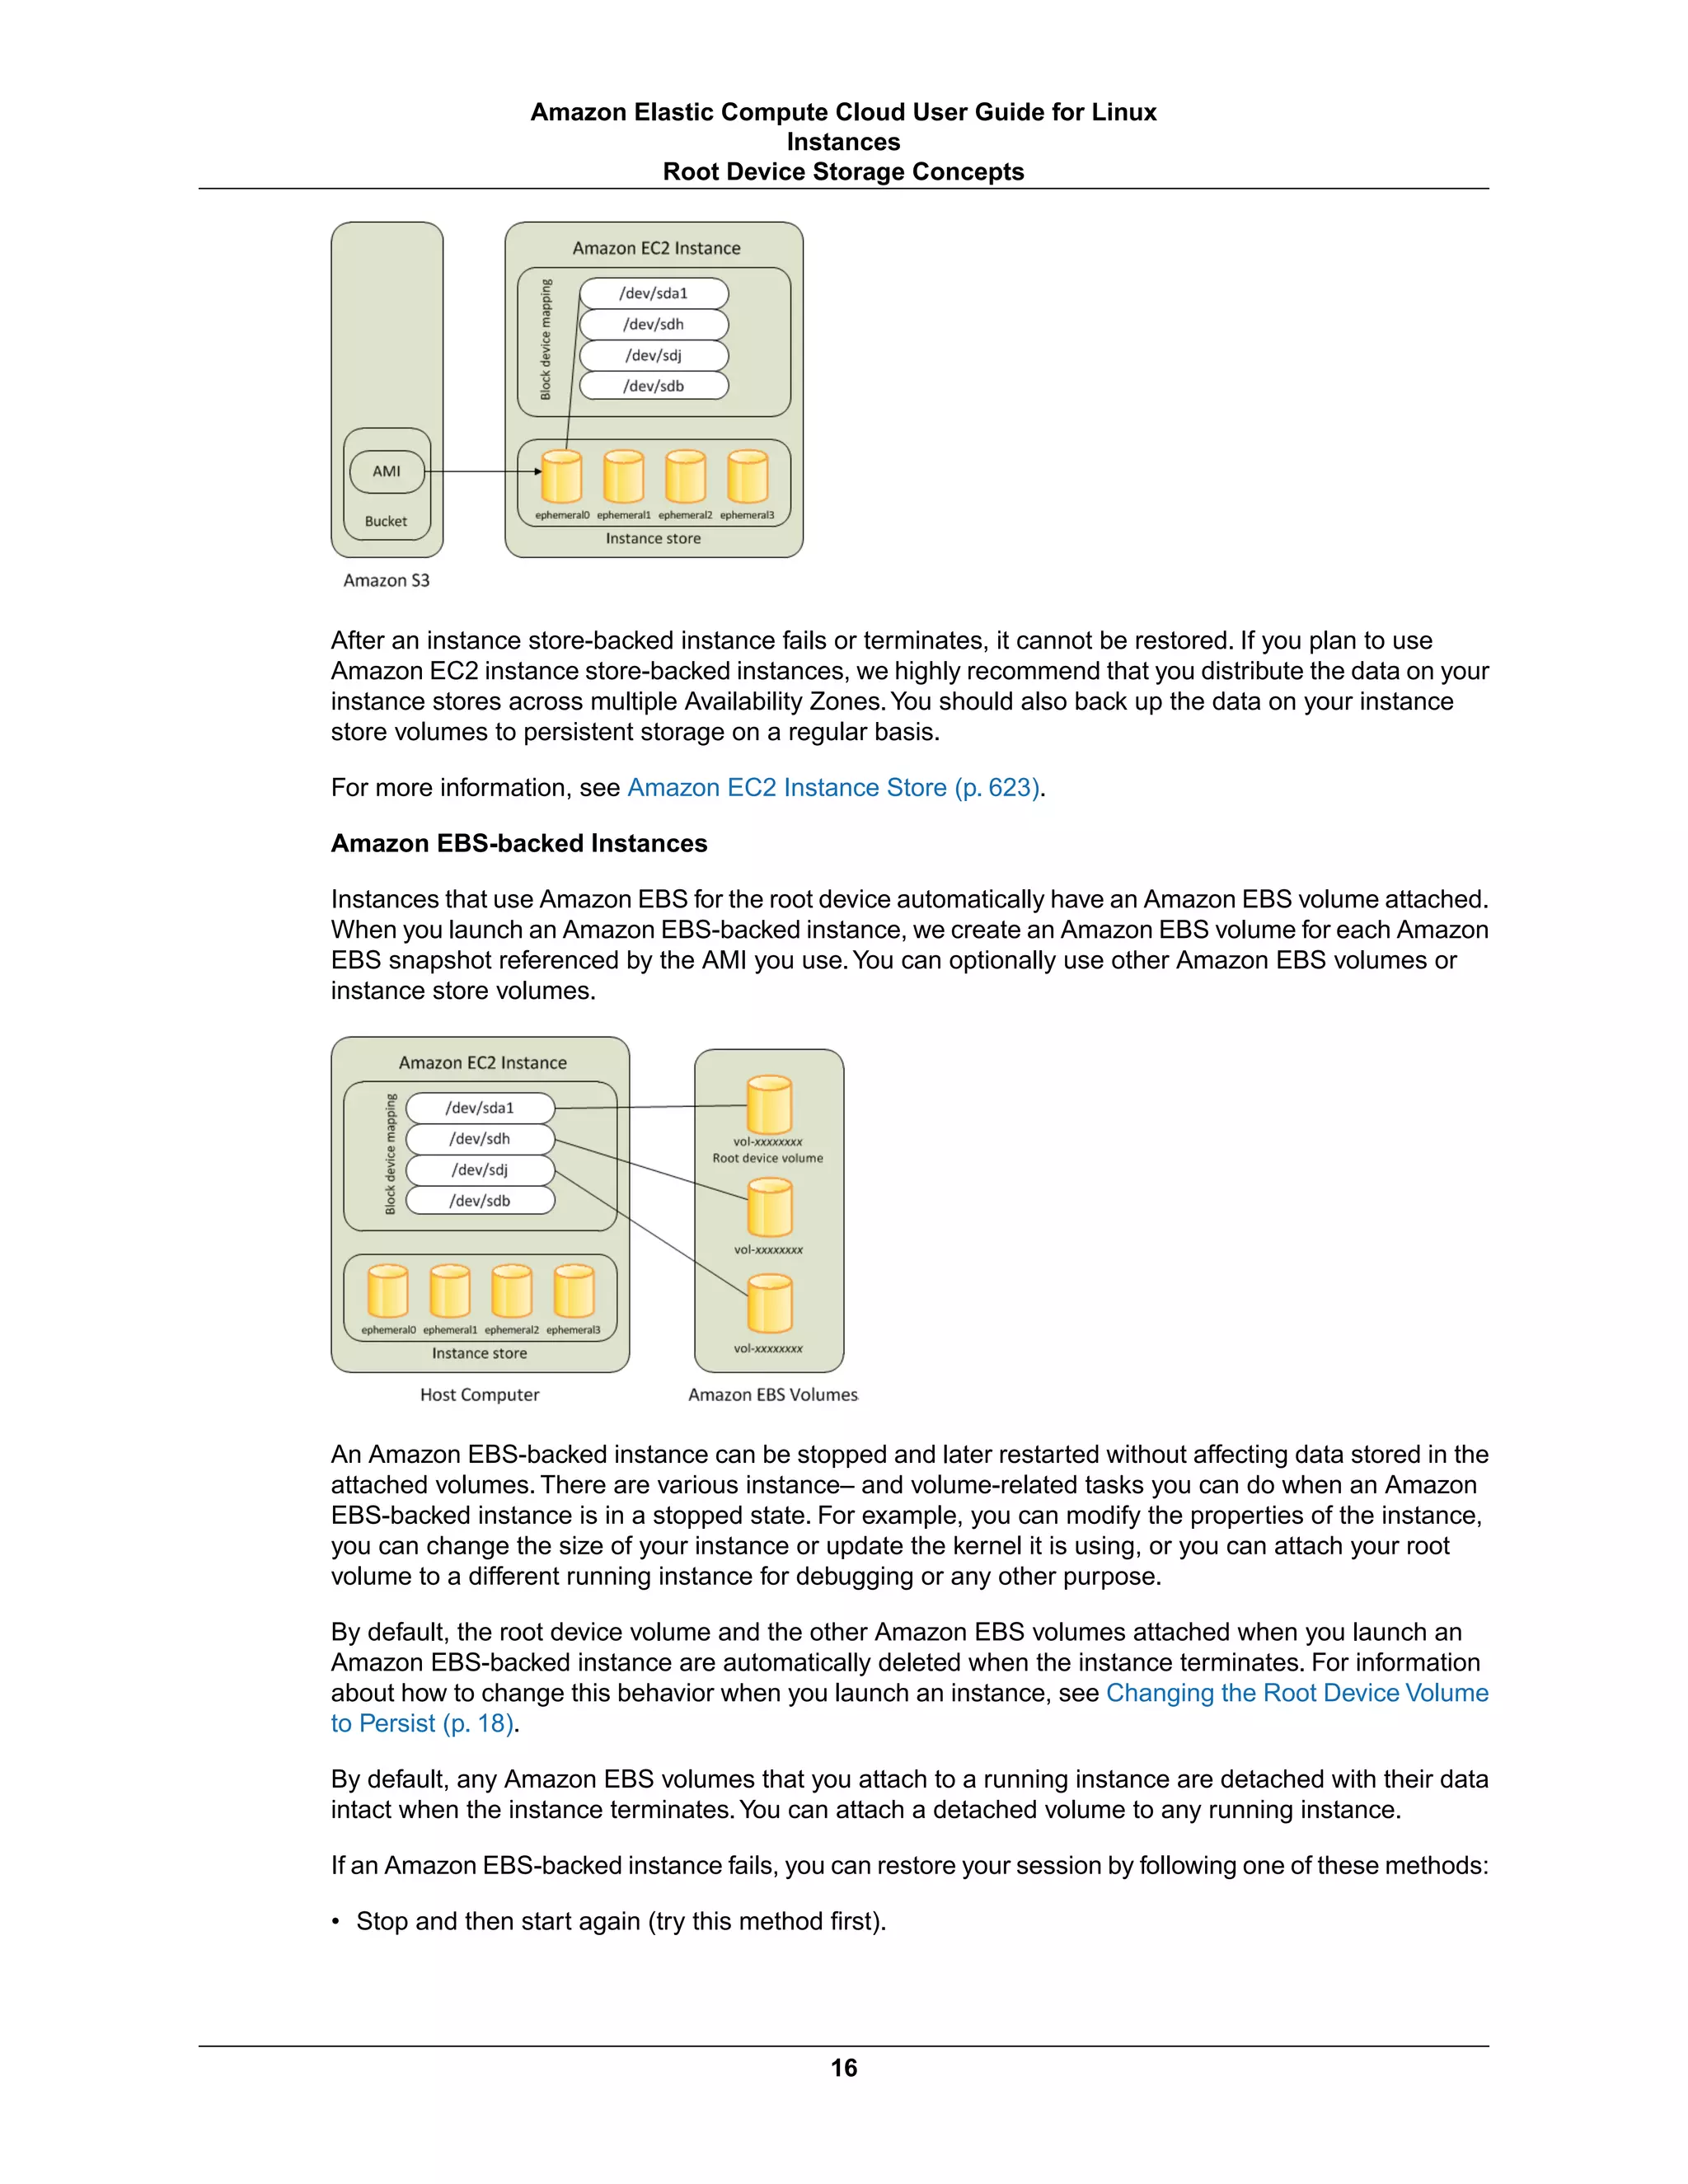
The /dev/xvda1 volume is the root device volume. It contains the image used to boot the instance.
Notice that there's some room to install additional software on your instance (only 14% of the file system
is being used above). For example, you can use the yum command to download and install packages.
If you need additional storage for your data, a simple solution is to add Amazon EBS volumes to your
instance. An Amazon EBS volume serves as network-attached storage for your instance. Let's add a
volume to the Linux instance that you've launched. First we'll use the EC2 console to create the volume
and attach it to the instance, and then we'll mount the volume to make it available.
To create and attach an Amazon EBS volume
1. Open the Amazon EC2 console at https://console.aws.amazon.com/ec2/.
2. In the navigation bar, select the region in which you created your instance, and then click Instances
in the navigation pane.
The console displays the list of current instances in that region. Select your Linux instance. In the
Description tab in the bottom pane note the Availability Zone for the instance.
3. In the navigation pane, under Elastic Block Store, click Volumes.
4. Click Create Volume.
5. Configure the following, and then click Create:
• Select the General Purpose (SSD) volume type to create a General Purpose (SSD) EBS volume.
• Enter the size of the volume you want to create. The free tier benefits for Amazon EBS include up
to 30 GiB of storage; therefore, to avoid being charged for this tutorial, choose a volume size that
will keep you from exceeding that limit. For example, if the boot volume for the instance you created
uses an 8 GiB Amazon EBS volume, then make sure to create a volume that is less than or equal
to 22 GiB.
• Select the same Availability Zone that you used when you created your instance. Otherwise, you
can't attach the volume to your instance.
6. In the navigation pane, under Elastic Block Store, click Volumes. Notice that your newly created
volume appears there and the state of the volume is available, so it's ready to be attached to an
instance.
7. Right-click the newly created volume and select Attach Volume.
8. In the Attach Volume dialog box, configure the following, and then click Attach:
• Start typing in the name or ID of your instance, then select it from the list of suggested options.
• Specify an unused device name for that instance. We'll use /dev/sdf in this tutorial. If you select
a different device name, be sure to note it as you'll need this information in the next procedure.
You'll notice that in the Details pane for your volume, the state of the volume is in-use, and the volume
is attached to your instance with the device name /dev/sdf. However, if you return to your instance and
33
Amazon Elastic Compute Cloud User Guide for Linux
Instances
Step 3: Add a Volume](https://image.slidesharecdn.com/ec2-ug-151130152858-lva1-app6892/75/Amazan-Ec2-42-2048.jpg)
![run the df -h command again, you won't see the volume yet.That's because we need to mount the volume
for df -h to see it. The lsblk command, however, can see all block devices attached to the instance.
Note
Some Linux distributions do not provide the lsblk command by default. If the lsblk command
does not work, you can use sudo fdisk -l | grep Disk instead.
[ec2-user ~]$ lsblk
NAME MAJ:MIN RM SIZE RO TYPE MOUNTPOINT
xvdf 202:80 0 22G 0 disk
xvda1 202:1 0 8G 0 disk /
In the above example, lsblk reports that there are two block devices attached to the instance; xvda1 is
mounted as the root file system (note the MOUNTPOINT value of /) and xvdf is not mounted at all.
To make a volume available
1. Identify the device to mount. In the previous procedure, the new volume was attached to /dev/sdf.
Depending on the block device drivers on your instance's operating system, the device may appear
at a different location (such as /dev/xvdf in the previous example) than what you specified in the
console (/dev/sdf); in some cases, even the trailing letter may change (for example, /dev/xvdj).
Amazon Linux instances always create links from the device path that you specified in the console
to the new device path, but other distributions (such as Ubuntu or Red Hat) are not as predictable.
Use the lsblk command to list the available devices.
Note
Some Linux distributions do not provide the lsblk command by default. If the lsblk command
does not work, you can use sudo fdisk -l | grep Disk instead.
[ec2-user ~]$ lsblk
NAME MAJ:MIN RM SIZE RO TYPE MOUNTPOINT
xvdf 202:80 0 22G 0 disk
xvda1 202:1 0 8G 0 disk /
In the above example, the xvdf device is not mounted. Sometimes when you create a volume from
a snapshot, the data on the volume is contained in a partition (such as /dev/xvdf1) instead of the
root of the volume. In such a case, you would mount the /dev/xvdf1 partition (the lsblk command
output omits the /dev/ portion of the file path). In this example, there is an empty volume with no
partition, so you will mount /dev/xvdf.
2. Because you created an empty volume instead of restoring a volume from a snapshot in the previous
procedure, you need to format the volume using mkfs before you can mount it. Use the following
command to create an ext4 file system on the volume. Substitute the device name you used if you
did not use /dev/xvdf when you attached the volume.
Caution
This step assumes that you're mounting an empty volume. If you're mounting a volume that
already has data on it (for example, a volume that was restored from a snapshot), don't use
mkfs before mounting the volume (skip to the next step instead). Otherwise, you'll format
the volume and delete the existing data. For more information, see Making the Volume
Available on Linux.
Note
SUSE Linux Enterprise Server 11 does not fully support ext4 file systems. If you chose a
SLES 11 AMI for your instance, use ext3 in the following command instead.
[ec2-user ~]$ sudo mkfs -t ext4 /dev/xvdf
34
Amazon Elastic Compute Cloud User Guide for Linux
Instances
Step 3: Add a Volume](https://image.slidesharecdn.com/ec2-ug-151130152858-lva1-app6892/75/Amazan-Ec2-43-2048.jpg)
![3. To mount the device as /mnt/my-data, run the following commands.
[ec2-user ~]$ sudo mkdir /mnt/my-data
[ec2-user ~]$ sudo mount /dev/xvdf /mnt/my-data
Be sure to specify the device name you identified in Step 1 (p. 34); otherwise, you might receive the
following error when you run this mount command:"mount: you must specify the filesystem
type". If you see this error, repeat Step 1 (p. 34) and use the correct device path (remember to add
the /dev/ to the device name you get from the lsblk command).
4. Now when you run the df -h command, you'll see output like the following.
[ec2-user ~]$ df -h
Filesystem Size Used Avail Use% Mounted on
/dev/xvda1 7.9G 1.1G 6.8G 14% /
tmpfs 298M 0 298M 0% /dev/shm
/dev/xvdf 22G 0 22G 0% /mnt/my-data
5. To view the contents of the new volume, run the following command.
[ec2-user ~]$ ls /mnt/my-data
At this point, you have completed the example architecture for this tutorial.You can continue to customize
and use your instance for as long as you wish.
Important
Remember, if you stayed within the free tier benefits, there are no charges. Otherwise, as soon
as your instance starts to boot, you're billed for each hour or partial hour that you keep the
instance running, even if the instance is idle.You'll stop incurring charges for a regular instance
as soon as the instance status changes to shutting down or terminated.
When you're finished with your instance, don't forget to clean up any resources you've used and terminate
the instance, as shown in the next step, Clean Up Your Instance and Volume (p. 35).
Clean Up Your Instance and Volume
After you've finished with the instance and the Amazon EBS volume that you created for this tutorial, you
should clean up. First, terminate the instance, which detaches the volume from the instance, and then
delete the volume.
Terminating an instance effectively deletes it because you can't reconnect to an instance after you've
terminated it. This differs from stopping the instance; when you stop an instance, it is shut down and you
are not billed for hourly usage or data transfer (but you are billed for any Amazon EBS volume storage).
Also, you can restart a stopped instance at any time. For more information about the differences between
stopping and terminating an instance, see Stopping Instances.
To terminate the instance
1. Locate your instance in the list of instances on the Instances page. If you can't find your instance,
verify that you have selected the correct region.
2. Right-click the instance, select Instance State, and then click Terminate.
3. Click Yes,Terminate when prompted for confirmation.
35
Amazon Elastic Compute Cloud User Guide for Linux
Instances
Step 4: Clean Up](https://image.slidesharecdn.com/ec2-ug-151130152858-lva1-app6892/75/Amazan-Ec2-44-2048.jpg)


![2. To ensure that all of your software packages are up to date, perform a quick software update on your
instance. This process may take a few minutes, but it is important to make sure you have the latest
security updates and bug fixes.
Note
The -y option installs the updates without asking for confirmation. If you would like to
examine the updates before installing, you can omit this option.
[ec2-user ~]$ sudo yum update -y
3. Now that your instance is current, you can install the Apache web server, MySQL, and PHP software
packages. Use the yum install command to install multiple software packages and all related
dependencies at the same time.
[ec2-user ~]$ sudo yum install -y httpd24 php56 mysql55-server php56-mysqlnd
4. Start the Apache web server.
[ec2-user ~]$ sudo service httpd start
Starting httpd: [ OK ]
5. Use the chkconfig command to configure the Apache web server to start at each system boot.
[ec2-user ~]$ sudo chkconfig httpd on
Tip
The chkconfig command does not provide any confirmation message when you successfully
enable a service.You can verify that httpd is on by running the following command.
[ec2-user ~]$ chkconfig --list httpd
httpd 0:off 1:off 2:on 3:on 4:on 5:on 6:off
Here, httpd is on in runlevels 2, 3, 4, and 5 (which is what you want to see).
6. Test your web server. In a web browser, enter the public DNS address (or the public IP address) of
your instance; you should see the Apache test page.You can get the public DNS for your instance
using the Amazon EC2 console (check the Public DNS column; if this column is hidden, click the
Show/Hide icon and select Public DNS).
Tip
If you are unable to see the Apache test page, check that the security group you are using
contains a rule to allow HTTP (port 80) traffic. For information about adding an HTTP rule to
your security group, see Adding Rules to a Security Group (p. 430).
Important
If you are not using Amazon Linux, you may also need to configure the firewall on your
instance to allow these connections.For more information about how to configure the firewall,
see the documentation for your specific distribution.
40
Amazon Elastic Compute Cloud User Guide for Linux
Instances
Tutorial: Installing a LAMPWeb Server on Amazon Linux](https://image.slidesharecdn.com/ec2-ug-151130152858-lva1-app6892/75/Amazan-Ec2-49-2048.jpg)
![Note
This test page appears only when there is no content in /var/www/html. When you add
content to the document root, your content appears at the public DNS address of your
instance instead of this test page.
Apache httpd serves files that are kept in a directory called the Apache document root. The Amazon
Linux Apache document root is /var/www/html, which is owned by root by default.
[ec2-user ~]$ ls -l /var/www
total 16
drwxr-xr-x 2 root root 4096 Jul 12 01:00 cgi-bin
drwxr-xr-x 3 root root 4096 Aug 7 00:02 error
drwxr-xr-x 2 root root 4096 Jan 6 2012 html
drwxr-xr-x 3 root root 4096 Aug 7 00:02 icons
To allow ec2-user to manipulate files in this directory, you need to modify the ownership and permissions
of the directory. There are many ways to accomplish this task; in this tutorial, you add a www group to
your instance, and you give that group ownership of the /var/www directory and add write permissions
for the group. Any members of that group will then be able to add, delete, and modify files for the web
server.
To set file permissions
1. Add the www group to your instance.
[ec2-user ~]$ sudo groupadd www
2. Add your user (in this case, ec2-user) to the www group.
[ec2-user ~]$ sudo usermod -a -G www ec2-user
41
Amazon Elastic Compute Cloud User Guide for Linux
Instances
Tutorial: Installing a LAMPWeb Server on Amazon Linux](https://image.slidesharecdn.com/ec2-ug-151130152858-lva1-app6892/75/Amazan-Ec2-50-2048.jpg)
![Important
You need to log out and log back in to pick up the new group.You can use the exit command,
or close the terminal window.
3. Log out and then log back in again, and verify your membership in the www group.
a. Log out.
[ec2-user ~]$ exit
b. Reconnect to your instance, and then run the following command to verify your membership in
the www group.
[ec2-user ~]$ groups
ec2-user wheel www
4. Change the group ownership of /var/www and its contents to the www group.
[ec2-user ~]$ sudo chown -R root:www /var/www
5. Change the directory permissions of /var/www and its subdirectories to add group write permissions
and to set the group ID on future subdirectories.
[ec2-user ~]$ sudo chmod 2775 /var/www
[ec2-user ~]$ find /var/www -type d -exec sudo chmod 2775 {} +
6. Recursively change the file permissions of /var/www and its subdirectories to add group write
permissions.
[ec2-user ~]$ find /var/www -type f -exec sudo chmod 0664 {} +
Now ec2_user (and any future members of the www group) can add, delete, and edit files in the Apache
document root. Now you are ready to add content, such as a static website or a PHP application.
To test your LAMP web server
If your server is installed and running, and your file permissions are set correctly, your ec2-user account
should be able to create a simple PHP file in the /var/www/html directory that will be available from
the Internet.
1. Create a simple PHP file in the Apache document root.
[ec2-user ~]$ echo "<?php phpinfo(); ?>" > /var/www/html/phpinfo.php
Tip
If you get a "Permission denied" error when trying to run this command, try logging out
and logging back in again to pick up the proper group permissions that you configured in
To set file permissions (p. 41).
42
Amazon Elastic Compute Cloud User Guide for Linux
Instances
Tutorial: Installing a LAMPWeb Server on Amazon Linux](https://image.slidesharecdn.com/ec2-ug-151130152858-lva1-app6892/75/Amazan-Ec2-51-2048.jpg)
![2. In a web browser, enter the URL of the file you just created. This URL is the public DNS address of
your instance followed by a forward slash and the file name. For example:
http://my.public.dns.amazonaws.com/phpinfo.php
You should see the PHP information page.
Note
If you do not see this page, verify that the /var/www/html/phpinfo.php file was created
properly in the previous step.You can also verify that all of the required packages were
installed with the following command (the package versions in the second column do not
need to match this example output):
[ec2-user ~]$ sudo yum list installed httpd24 php56 mysql55-server
php56-mysqlnd
Loaded plugins: priorities, update-motd, upgrade-helper
959 packages excluded due to repository priority protections
Installed Packages
httpd24.x86_64 2.4.16-1.62.amzn1
@amzn-main
mysql55-server.x86_64 5.5.45-1.9.amzn1
@amzn-main
php56.x86_64 5.6.13-1.118.amzn1
@amzn-main
php56-mysqlnd.x86_64 5.6.13-1.118.amzn1
@amzn-main
If any of the required packages are not listed in your output, install them with the sudo yum
install package command.
3. Delete the phpinfo.php file.Although this can be useful information to you, it should not be broadcast
to the Internet for security reasons.
[ec2-user ~]$ rm /var/www/html/phpinfo.php
To secure the MySQL server
The default installation of the MySQL server has several features that are great for testing and development,
but they should be disabled or removed for production servers.The mysql_secure_installation command
walks you through the process of setting a root password and removing the insecure features from your
43
Amazon Elastic Compute Cloud User Guide for Linux
Instances
Tutorial: Installing a LAMPWeb Server on Amazon Linux](https://image.slidesharecdn.com/ec2-ug-151130152858-lva1-app6892/75/Amazan-Ec2-52-2048.jpg)
![installation. Even if you are not planning on using the MySQL server, performing this procedure is a good
idea.
1. Start the MySQL server so that you can run mysql_secure_installation.
[ec2-user ~]$ sudo service mysqld start
Initializing MySQL database: Installing MySQL system tables...
OK
Filling help tables...
OK
To start mysqld at boot time you have to copy
support-files/mysql.server to the right place for your system
PLEASE REMEMBER TO SET A PASSWORD FOR THE MySQL root USER !
...
Starting mysqld: [ OK ]
2. Run mysql_secure_installation.
[ec2-user ~]$ sudo mysql_secure_installation
a. When prompted, enter a password for the root account.
i. Enter the current root password. By default, the root account does not have a password
set, so press Enter.
ii. Type Y to set a password, and enter a secure password twice. For more information about
creating a secure password, go to http://www.pctools.com/guides/password/. Make sure to
store this password in a safe place.
b. Type Y to remove the anonymous user accounts.
c. Type Y to disable remote root login.
d. Type Y to remove the test database.
e. Type Y to reload the privilege tables and save your changes.
3. (Optional) Stop the MySQL server if you do not plan to use it right away.You can restart the server
when you need it again.
[ec2-user ~]$ sudo service mysqld stop
Stopping mysqld: [ OK ]
4. (Optional) If you want the MySQL server to start at every boot, enter the following command.
[ec2-user ~]$ sudo chkconfig mysqld on
You should now have a fully functional LAMP web server. If you add content to the Apache document
root at /var/www/html, you should be able to view that content at the public DNS address for your
instance.
44
Amazon Elastic Compute Cloud User Guide for Linux
Instances
Tutorial: Installing a LAMPWeb Server on Amazon Linux](https://image.slidesharecdn.com/ec2-ug-151130152858-lva1-app6892/75/Amazan-Ec2-53-2048.jpg)
![(Optional) Install phpMyAdmin
phpMyAdmin is a web-based database management tool that you can use to view and edit the MySQL
databases on your EC2 instance. Follow the steps below to install and configure phpMyAdmin on your
Amazon Linux instance.
1. Enable the Extra Packages for Enterprise Linux (EPEL) repository from the Fedora project on your
instance.
[ec2-user ~]$ sudo yum-config-manager --enable epel
2. Install the phpMyAdmin package.
[ec2-user ~]$ sudo yum install -y phpMyAdmin
Note
Answer y to import the GPG key for the EPEL repository when prompted.
3. Configure your phpMyAdmin installation to allow access from your local machine. By default,
phpMyAdmin only allows access from the server that it is running on, which is not very useful because
Amazon Linux does not include a web browser.
a. Find your local IP address by visiting a service such as whatismyip.com.
b. Edit the /etc/httpd/conf.d/phpMyAdmin.conf file and replace the server IP address
(127.0.0.1) with your local IP address with the following command, replacing your_ip_address
with the local IP address you identified in the previous step.
[ec2-user ~]$ sudo sed -i -e 's/127.0.0.1/your_ip_address/g' /etc/ht
tpd/conf.d/phpMyAdmin.conf
4. Restart the Apache web server to pick up the new configuration.
[ec2-user ~]$ sudo service httpd restart
Stopping httpd: [ OK ]
Starting httpd: [ OK ]
5. In a web browser, enter the URL of your phpMyAdmin installation.This URL is the public DNS address
of your instance followed by a forward slash and phpmyadmin. For example:
http://my.public.dns.amazonaws.com/phpmyadmin
You should see the phpMyAdmin login page.
45
Amazon Elastic Compute Cloud User Guide for Linux
Instances
Tutorial: Installing a LAMPWeb Server on Amazon Linux](https://image.slidesharecdn.com/ec2-ug-151130152858-lva1-app6892/75/Amazan-Ec2-54-2048.jpg)

![[ec2-user ~]$ sudo tail -n 1 /var/log/httpd/access_log | awk '{ print
$1 }'
205.251.233.48
Repeat Step 3.b (p. 45) with the IP address returned here and restart the httpd service
with Step 4 (p. 45).
6. Log into your phpMyAdmin installation with the root user name the MySQL root password you
created earlier.For more information and help using phpMyAdmin, see the phpMyAdmin User Guide.
Related Topics
For more information on transferring files to your instance or installing a WordPress blog on your web
server, see the following topics:
• Transferring Files to Your Linux Instance Using WinSCP (p. 243)
• Transferring Files to Linux Instances from Linux Using SCP (p. 237)
• Tutorial: Hosting a WordPress Blog with Amazon Linux (p. 47)
For more information about the commands and software used in this topic, go to the following web pages:
• Apache web server: http://httpd.apache.org/
• MySQL database server: http://www.mysql.com/
• PHP programming language: http://php.net/
• The chmod command: https://en.wikipedia.org/wiki/Chmod
• The chown command: https://en.wikipedia.org/wiki/Chown
If you are interested in registering a domain name for your web server, or transferring an existing domain
name to this host, see Creating and Migrating Domains and Subdomains to Amazon Route 53 in the
Amazon Route 53 Developer Guide.
Tutorial: Hosting aWordPress Blog with Amazon
Linux
The following procedures will help you install, configure, and secure a WordPress blog on your Amazon
Linux instance.
Important
These procedures are intended for use with Amazon Linux. For more information about other
distributions, see their specific documentation. Many steps in this tutorial do not work on Ubuntu
instances. For help installing WordPress on an Ubuntu instance, see WordPress in the Ubuntu
documentation.
Install WordPress
This tutorial is a good introduction to using Amazon EC2 in that you have full control over a web server
that hosts your WordPress blog, which is not typical with a traditional hosting service. Of course, that
means that you are responsible for updating the software packages and maintaining security patches for
your server as well. For a more automated WordPress installation that does not require direct interaction
with the web server configuration, the AWS CloudFormation service provides a WordPress template that
can also get you started quickly. For more information, see Getting Started in the AWS CloudFormation
47
Amazon Elastic Compute Cloud User Guide for Linux
Instances
Tutorial: Hosting a WordPress Blog](https://image.slidesharecdn.com/ec2-ug-151130152858-lva1-app6892/75/Amazan-Ec2-56-2048.jpg)
![User Guide. If you'd prefer to host your WordPress blog on a Windows instance, see Deploying a
WordPress Blog on Your Amazon EC2 Windows Instance in the Amazon EC2 User Guide for Microsoft
Windows Instances.
Prerequisites
This tutorial assumes that you have launched an Amazon Linux instance with a functional web server
with PHP and MySQL support by following all of the steps in Tutorial: Installing a LAMP Web Server on
Amazon Linux (p. 39). This tutorial also has steps for configuring a security group to allow HTTP and
HTTPS traffic, as well as several steps to ensure that file permissions are set properly for your web server.
If you have not already done so, see Tutorial: Installing a LAMP Web Server on Amazon Linux (p. 39) to
meet these prerequisites and then return to this tutorial to install WordPress. For information about adding
rules to your security group, see Adding Rules to a Security Group (p. 430).
Important
We strongly recommend that you associate an Elastic IP address (EIP) to the instance you are
using to host a WordPress blog. This prevents the public DNS address for your instance from
changing and breaking your installation. If you own a domain name and you want to use it for
your blog, you can update the DNS record for the domain name to point to your EIP address
(for help with this, contact your domain name registrar).You can have one EIP address associated
with a running instance at no charge. For more information, see Elastic IP Addresses (p. 519).
If you don't already have a domain name for your blog, you can register a domain name with
Amazon Route 53 and associate your instance's EIP address with your domain name. For more
information, see Registering Domain Names Using Amazon Route 53 in the Amazon Route 53
Developer Guide.
To download and unzip the WordPress installation package
1. Download the latest WordPress installation package with the wget command.The following command
should always download the latest release.
[ec2-user ~]$ wget https://wordpress.org/latest.tar.gz
--2013-08-09 17:19:01-- https://wordpress.org/latest.tar.gz
Resolving wordpress.org (wordpress.org)... 66.155.40.249, 66.155.40.250
Connecting to wordpress.org (wordpress.org)|66.155.40.249|:443... connected.
HTTP request sent, awaiting response... 200 OK
Length: 4028740 (3.8M) [application/x-gzip]
Saving to: latest.tar.gz
100%[======================================>] 4,028,740 20.1MB/s in 0.2s
2013-08-09 17:19:02 (20.1 MB/s) - latest.tar.gz saved [4028740/4028740]
2. Unzip and unarchive the installation package. The installation folder is unzipped to a folder called
wordpress.
[ec2-user ~]$ tar -xzf latest.tar.gz
[ec2-user ~]$ ls
latest.tar.gz wordpress
To create a MySQL user and database for your WordPress installation
Your WordPress installation needs to store information, such as blog post entries and user comments,
in a database. This procedure helps you create a database for your blog and a user that is authorized to
read and save information to that database.
48
Amazon Elastic Compute Cloud User Guide for Linux
Instances
Install WordPress](https://image.slidesharecdn.com/ec2-ug-151130152858-lva1-app6892/75/Amazan-Ec2-57-2048.jpg)
![1. Start the MySQL server.
[ec2-user ~]$ sudo service mysqld start
2. Log in to the MySQL server as the root user. Enter your MySQL root password when prompted;
this may be different than your root system password, or it may even be empty if you have not
secured your MySQL server.
Important
If you have not secured your MySQL server yet, it is very important that you do so. For more
information, see To secure the MySQL server (p. 43).
[ec2-user ~]$ mysql -u root -p
Enter password:
3. Create a user and password for your MySQL database.Your WordPress installation uses these
values to communicate with your MySQL database. Enter the following command, substituting a
unique user name and password.
mysql> CREATE USER 'wordpress-user'@'localhost' IDENTIFIED BY
'your_strong_password';
Query OK, 0 rows affected (0.00 sec)
Make sure that you create a strong password for your user. Do not use the single quote character (
' ) in your password, because this will break the preceding command. For more information about
creating a secure password, go to http://www.pctools.com/guides/password/. Do not reuse an existing
password, and make sure to store this password in a safe place.
4. Create your database. Give your database a descriptive, meaningful name, such as wordpress-db.
Note
The punctuation marks surrounding the database name in the command below are called
backticks.The backtick (`) key is usually located above the Tab key on a standard keyboard.
Backticks are not always required, but they allow you to use otherwise illegal characters,
such as hyphens, in database names.
mysql> CREATE DATABASE `wordpress-db`;
Query OK, 1 row affected (0.01 sec)
5. Grant full privileges for your database to the WordPress user that you created earlier.
mysql> GRANT ALL PRIVILEGES ON `wordpress-db`.* TO "wordpress-user"@"local
host";
Query OK, 0 rows affected (0.00 sec)
6. Flush the MySQL privileges to pick up all of your changes.
mysql> FLUSH PRIVILEGES;
Query OK, 0 rows affected (0.01 sec)
7. Exit the mysql client.
49
Amazon Elastic Compute Cloud User Guide for Linux
Instances
Install WordPress](https://image.slidesharecdn.com/ec2-ug-151130152858-lva1-app6892/75/Amazan-Ec2-58-2048.jpg)
![mysql> exit
Bye
To create and edit the wp-config.php file
The WordPress installation folder contains a sample configuration file called wp-config-sample.php.
In this procedure, you copy this file and edit it to fit your specific configuration.
1. Copy the wp-config-sample.php file to a file called wp-config.php. This creates a new
configuration file and keeps the original sample file intact as a backup.
[ec2-user ~]$ cd wordpress/
[ec2-user wordpress]$ cp wp-config-sample.php wp-config.php
2. Edit the wp-config.php file with your favorite text editor (such as nano or vim) and enter values
for your installation. If you do not have a favorite text editor, nano is much easier for beginners to
use.
[ec2-user wordpress]$ nano wp-config.php
a. Find the line that defines DB_NAME and change database_name_here to the database name
that you created in Step 4 (p. 49) of To create a MySQL user and database for your WordPress
installation (p. 48).
define('DB_NAME', 'wordpress-db');
b. Find the line that defines DB_USER and change username_here to the database user that you
created in Step 3 (p. 49) of To create a MySQL user and database for your WordPress
installation (p. 48).
define('DB_USER', 'wordpress-user');
c. Find the line that defines DB_PASSWORD and change password_here to the strong password
that you created in Step 3 (p. 49) of To create a MySQL user and database for your WordPress
installation (p. 48).
define('DB_PASSWORD', 'your_strong_password');
d. Find the section called Authentication Unique Keys and Salts. These KEY and SALT
values provide a layer of encryption to the browser cookies that WordPress users store on their
local machines. Basically, adding long, random values here makes your site more secure. Visit
https://api.wordpress.org/secret-key/1.1/salt/ to randomly generate a set of key values that you
can copy and paste into your wp-config.php file. To paste text into a PuTTY terminal, place
the cursor where you want to paste the text and right-click your mouse inside the PuTTY terminal.
For more information about security keys, go to http://codex.wordpress.org/
Editing_wp-config.php#Security_Keys.
Note
The values below are for example purposes only; do not use these values for your
installation.
50
Amazon Elastic Compute Cloud User Guide for Linux
Instances
Install WordPress](https://image.slidesharecdn.com/ec2-ug-151130152858-lva1-app6892/75/Amazan-Ec2-59-2048.jpg)
![define('AUTH_KEY', ' #U$$+[RXN8:b^-L 0(WU_+ c+WFkI~c]o]-
bHw+)/Aj[wTwSiZ<Qb[mghEXcRh-');
define('SECURE_AUTH_KEY', 'Zsz._P=l/|y.Lq)XjlkwS1y5NJ76E6EJ.AV0pCK
ZZB,*~*r ?6OP$eJT@;+(ndLg');
define('LOGGED_IN_KEY', 'ju}qwre3V*+8f_zOWf?{LlGsQ]Ye@2Jh^,8x>)Y
|;(^[Iw]Pi+LG#A4R?7N`YB3');
define('NONCE_KEY',
'P(g62HeZxEes|LnI^i=H,[XwK9I&[2s|:?0N}VJM%?;v2v]v+;+^9eXUahg@::Cj');
define('AUTH_SALT',
'C$DpB4Hj[JK:?{ql`sRVa:{:7yShy(9A@5wg+`JJVb1fk%_-Bx*M4(qc[Qg%JT!h');
define('SECURE_AUTH_SALT',
'd!uRu#}+q#{f$Z?Z9uFPG.${+S{n~1M&%@~gL>U>NV<zpD-@2-Es7Q1O-bp28EKv');
define('LOGGED_IN_SALT', ';j{00P*owZf)kVD+FVLn-~
>.|Y%Ug4#I^*LVd9QeZ^&XmK|e(76miC+&W&+^0P/');
define('NONCE_SALT',
'-97r*V/cgxLmp?Zy4zUU4r99QQ_rGs2LTd%P;|_e1tS)8_B/,.6[=UK<J_y9?JWG');
e. Save the file and exit your text editor.
To move your WordPress installation to the Apache document root
Now that you've unzipped the installation folder, created a MySQL database and user, and customized
the WordPress configuration file, you are ready to move your installation files to your web server document
root so you can run the installation script that completes your installation. The location of these files
depends on whether you want your WordPress blog to be available at the root of your web server (for
example, my.public.dns.amazonaws.com) or in a subdirectory or folder (for example,
my.public.dns.amazonaws.com/blog).
• Choose the location where you want your blog to be available and only run the mv associated with
that location.
Important
If you run both sets of commands below, you will get an error message on the second mv
command because the files you are trying to move are no longer there.
• To make your blog available at my.public.dns.amazonaws.com, move the files in the
wordpress folder (but not the folder itself) to the Apache document root (/var/www/html on
Amazon Linux instances).
[ec2-user wordpress]$ mv * /var/www/html/
• OR, to make your blog available at my.public.dns.amazonaws.com/blog instead, create
a new folder called blog inside the Apache document root and move the files in the wordpress
folder (but not the folder itself) to the new blog folder.
[ec2-user wordpress]$ mkdir /var/www/html/blog
[ec2-user wordpress]$ mv * /var/www/html/blog
Important
For security purposes, if you are not moving on to the next procedure immediately, stop the
Apache web server (httpd) now. After you move your installation to the Apache document root,
the WordPress installation script is unprotected and an attacker could gain access to your blog
51
Amazon Elastic Compute Cloud User Guide for Linux
Instances
Install WordPress](https://image.slidesharecdn.com/ec2-ug-151130152858-lva1-app6892/75/Amazan-Ec2-60-2048.jpg)
![if the Apache web server were running. To stop the Apache web server, enter the command
sudo service httpd stop. If you are moving on to the next procedure, you do not need to stop
the Apache web server.
To allow WordPress to use permalinks
WordPress permalinks need to use Apache .htaccess files to work properly, but this is not enabled by
default on Amazon Linux. Use this procedure to allow all overrides in the Apache document root.
1. Open the httpd.conf file with your favorite text editor (such as nano or vim). If you do not have a
favorite text editor, nano is much easier for beginners to use.
[ec2-user wordpress]$ sudo vim /etc/httpd/conf/httpd.conf
2. Find the section that starts with <Directory "/var/www/html">.
<Directory "/var/www/html">
#
# Possible values for the Options directive are "None", "All",
# or any combination of:
# Indexes Includes FollowSymLinks SymLinksifOwnerMatch ExecCGI Mul
tiViews
#
# Note that "MultiViews" must be named *explicitly* --- "Options All"
# doesn't give it to you.
#
# The Options directive is both complicated and important. Please see
# http://httpd.apache.org/docs/2.4/mod/core.html#options
# for more information.
#
Options Indexes FollowSymLinks
#
# AllowOverride controls what directives may be placed in .htaccess
files.
# It can be "All", "None", or any combination of the keywords:
# Options FileInfo AuthConfig Limit
#
AllowOverride None
#
# Controls who can get stuff from this server.
#
Require all granted
</Directory>
3. Change the AllowOverride None line in the above section to read AllowOverride All.
Note
There are multiple AllowOverride lines in this file; be sure you change the line in the
<Directory "/var/www/html"> section.
AllowOverride All
4. Save the file and exit your text editor.
52
Amazon Elastic Compute Cloud User Guide for Linux
Instances
Install WordPress](https://image.slidesharecdn.com/ec2-ug-151130152858-lva1-app6892/75/Amazan-Ec2-61-2048.jpg)
![To fix file permissions for the Apache web server
Some of the available features in WordPress require write access to the Apache document root (such as
uploading media though the Administration screens). The web server runs as the apache user, so you
need to add that user to the www group that was created in the LAMP web server tutorial (p. 39).
1. Add the apache user to the www group.
[ec2-user wordpress]$ sudo usermod -a -G www apache
2. Change the file ownership of /var/www and its contents to the apache user.
[ec2-user wordpress]$ sudo chown -R apache /var/www
3. Change the group ownership of /var/www and its contents to the www group.
[ec2-user wordpress]$ sudo chgrp -R www /var/www
4. Change the directory permissions of /var/www and its subdirectories to add group write permissions
and to set the group ID on future subdirectories.
[ec2-user wordpress]$ sudo chmod 2775 /var/www
[ec2-user wordpress]$ find /var/www -type d -exec sudo chmod 2775 {} +
5. Recursively change the file permissions of /var/www and its subdirectories to add group write
permissions.
[ec2-user wordpress]$ find /var/www -type f -exec sudo chmod 0664 {} +
6. Restart the Apache web server to pick up the new group and permissions.
[ec2-user wordpress]$ sudo service httpd restart
Stopping httpd: [ OK ]
Starting httpd: [ OK ]
To run the WordPress installation script
1. Use the chkconfig command to ensure that the httpd and mysqld services start at every system
boot.
[ec2-user wordpress]$ sudo chkconfig httpd on
[ec2-user wordpress]$ sudo chkconfig mysqld on
2. Verify that the MySQL server (mysqld) is running.
[ec2-user wordpress]$ sudo service mysqld status
mysqld (pid 4746) is running...
53
Amazon Elastic Compute Cloud User Guide for Linux
Instances
Install WordPress](https://image.slidesharecdn.com/ec2-ug-151130152858-lva1-app6892/75/Amazan-Ec2-62-2048.jpg)
![If the mysqld service is not running, start it.
[ec2-user wordpress]$ sudo service mysqld start
Starting mysqld: [ OK ]
3. Verify that your Apache web server (httpd) is running.
[ec2-user wordpress]$ sudo service httpd status
httpd (pid 502) is running...
If the httpd service is not running, start it.
[ec2-user wordpress]$ sudo service httpd start
Starting httpd: [ OK ]
4. In a web browser, enter the URL of your WordPress blog (either the public DNS address for your
instance, or that address followed by the blog folder).You should see the WordPress installation
screen.
http://my.public.dns.amazonaws.com
5. Enter the remaining installation information into the WordPress installation wizard.
ValueField
Enter a name for your WordPress site.Site Title
54
Amazon Elastic Compute Cloud User Guide for Linux
Instances
Install WordPress](https://image.slidesharecdn.com/ec2-ug-151130152858-lva1-app6892/75/Amazan-Ec2-63-2048.jpg)
![the problem and several possible solutions are outlined in http://codex.wordpress.org/
Changing_The_Site_URL.
If this has happened to your WordPress installation, you may be able to recover your blog with the
procedure below, which uses the wp-cli command line interface for WordPress.
To change your WordPress site URL with the wp-cli
1. Connect to your EC2 instance with SSH.
2. Note the old site URL and the new site URL for your instance. The old site URL is likely the public
DNS name for your EC2 instance when you installed WordPress. The new site URL is the current
public DNS name for your EC2 instance. If you are not sure of your old site URL, you can use curl
to find it with the following command.
[ec2-user ~]$ curl localhost | grep wp-content
You should see references to your old public DNS name in the output, which will look like this (old
site URL in red):
<script type='text/javascript' src='http://ec2-52-8-139-223.us-west-1.com
pute.amazonaws.com/wp-content/themes/twentyfifteen/js/func
tions.js?ver=20150330'></script>
3. Download the wp-cli with the following command.
[ec2-user ~]$ curl -O https://raw.githubusercontent.com/wp-cli/builds/gh-
pages/phar/wp-cli.phar
4. Search and replace the old site URL in your WordPress installation with the following command.
Substitute the old and new site URLs for your EC2 instance and the path to your WordPress installation
(usually /var/www/html or /var/www/html/blog).
[ec2-user ~]$ php wp-cli.phar search-replace 'old_site_url' 'new_site_url'
--path=/path/to/wordpress/installation --skip-columns=guid
5. In a web browser, enter the new site URL of your WordPress blog to verify that the site is working
properly again. If it is not, see http://codex.wordpress.org/Changing_The_Site_URL and http://
codex.wordpress.org/Installing_WordPress#Common_Installation_Problems for more information.
Tutorial: Configure Apache Web Server on
Amazon Linux to use SSL/TLS
Secure Sockets Layer/Transport Layer Security (SSL/TLS) creates an encrypted channel between a web
server and web client that protects data in transit from being eavesdropped on.This tutorial explains how
to add support for SSL/TLS on a single instance of Amazon Linux running Apache web server.
Note
For historical reasons, web encryption is often referred to as simply SSL. While web browsers
still support SSL, its successor protocol TLS is considered to be less vulnerable to attack.Amazon
Linux disables SSL version 2 by default, and this tutorial recommends disabling SSL version 3
56
Amazon Elastic Compute Cloud User Guide for Linux
Instances
Tutorial: Configure ApacheWeb Server on Amazon Linux
to use SSL/TLS](https://image.slidesharecdn.com/ec2-ug-151130152858-lva1-app6892/75/Amazan-Ec2-65-2048.jpg)
![as well, as described below. For more information about the proposed updated encryption
standard, go to RFC7568.
Important
These procedures are intended for use with Amazon Linux. If you are trying to set up a LAMP
web server on an instance of a different distribution, this tutorial will not work for you. For
information about LAMP web servers on Ubuntu, go to the Ubuntu community documentation
ApacheMySQLPHP topic. For information about Red Hat Enterprise Linux, go to the Customer
Portal topic Web Servers.
Topics
• Prerequisites (p. 57)
• Step 1: Enable SSL/TLS on the Server (p. 57)
• Step 2: Obtain a CA-signed Certificate (p. 58)
• Step 3: Test and Harden the Security Configuration (p. 61)
Prerequisites
Before you begin this tutorial, complete the following steps:
• Launch an Amazon Linux instance. For more information, see Launch an Amazon EC2 Instance (p. 28).
• Configure your security group to allow SSH (port 22), HTTP (port 80), and HTTPS (port 443) connections.
For more information, see Setting Up with Amazon EC2 (p. 21).
• Install Apache web server. For step-by-step instructions, see Tutorial: Installing a LAMP Web Server
on Amazon Linux (p. 39). Only the http24 package and its dependencies are needed; you can ignore
the instructions involving PHP and MySQL.
• The SSL/TLS public key infrastructure (PKI) relies on the Domain Name System (DNS) to identify and
authenticate web sites. If you plan to use your EC2 instance to host a public web site, you need to
register a domain name for your web server or transfer an existing domain name to your Amazon EC2
host. Numerous third-party domain registration and DNS hosting services are available for this, or you
may use Amazon Route 53.
Step 1: Enable SSL/TLS on the Server
This procedure takes you through the process of setting up SSL/TLS on Amazon Linux with a self-signed,
digital certificate.
To enable SSL/TLS on a server
1. Connect to your instance (p. 29) and confirm that Apache is running.
[ec2-user ~]$ sudo service httpd status
If necessary, start Apache.
[ec2-user ~]$ sudo service httpd start
2. To ensure that all of your software packages are up to date, perform a quick software update on your
instance. This process may take a few minutes, but it is important to make sure you have the latest
security updates and bug fixes.
57
Amazon Elastic Compute Cloud User Guide for Linux
Instances
Prerequisites](https://image.slidesharecdn.com/ec2-ug-151130152858-lva1-app6892/75/Amazan-Ec2-66-2048.jpg)
![Note
The -y option installs the updates without asking for confirmation. If you would like to
examine the updates before installing, you can omit this option.
[ec2-user ~]$ sudo yum update -y
3. Now that your instance is current, add SSL/TLS support by installing the Apache module mod_ssl:
[ec2-user ~]$ sudo yum install -y mod24_ssl
Later in this tutorial you will work with three important files that have been installed:
• /etc/httpd/conf.d/ssl.conf
The configuration file for mod_ssl. It contains "directives" telling Apache where to find encryption
keys and certificates, which SSL/TLS protocols to allow, and what encryption algorithms to use.
• /etc/pki/tls/private/localhost.key
An automatically generated, 2048-bit RSA private key for your Amazon EC2 host.During installation,
OpenSSL used this key to generate a self-signed host certificate, and you can also use it later to
generate a certificate signing request (CSR) to submit to a certificate authority (CA).
• /etc/pki/tls/certs/localhost.crt
An automatically generated, self-signed X.509 certificate for your server host. This certificate is
useful for testing that Apache is properly set up to use SSL/TLS.
4. Your Apache web server should now support HTTPS (secure HTTP) over port 443. Test it by typing
the IP address or fully qualified domain name of your EC2 instance into a browser URL bar with the
prefix https://. Because you are connecting to a site with a self-signed, untrusted certificate, your
browser may display a series of warnings.
Override these and proceed to the site. If the default Apache welcome page opens, it means that
you have successfully configured SSL/TLS on your server. All data passing between the browser
and server is now safely encrypted, as signalled by the lock icon in the browser's URL bar.
To prevent site visitors from encountering warning screens, you need to obtain a certificate that not
only encrypts, but also publicly authenticates you as the owner of the site.
Step 2: Obtain a CA-signed Certificate
This section describes the process of generating a certificate signing request (CSR) from a private key,
submitting the CSR to a certificate authority (CA), obtaining a signed certificate, and configuring Apache
to use it.
A self-signed SSL/TLS X.509 certificate is cryptologically identical to a CA-signed certificate.The difference
is social, not mathematical; a CA promises to validate, at a minimum, a domain's ownership before issuing
a certificate to an applicant. Each web browser contains a list of CAs trusted by the browser vendor to
do this. An X.509 certificate consists primarily of a public key that corresponds to your private server key,
and a signature by the CA that is cryptographically tied to the public key. When a browser connects to a
web server over HTTPS, the server presents a certificate for the browser to check against its list of trusted
CAs. If the signer is on the list, or accessible through a chain of other trusted signers, the browser
negotiates a fast encrypted data channel with the server and loads the page.
58
Amazon Elastic Compute Cloud User Guide for Linux
Instances
Step 2: Obtain a CA-signed Certificate](https://image.slidesharecdn.com/ec2-ug-151130152858-lva1-app6892/75/Amazan-Ec2-67-2048.jpg)
![Certificates generally cost money because of the labor involved in validating the requests, so it pays to
shop around. A list of well-known CAs can be found at dmoz.org. A few CAs, such as StartCom, offer
basic-level ("Class 1") certificates free of charge.
Underlying the certificate is the key. As of 2013, government and industry groups recommend using a
minimum key (modulus) size of 2048 bits for RSA keys.The default modulus size generated by OpenSSL
in Amazon Linux is 2048 bits, which means that the existing auto-generated key is suitable for use in a
CA-signed certificate. An alternative procedure is described below for those who desire a customized
key, for instance, one with a larger modulus or using a different encryption algorithm.
To obtain a CA-signed certificate
1. Connect to your instance (p. 29) and navigate to /etc/pki/tls/private/. This is the directory where the
server's private key for SSL/TLS is stored. If you prefer to use your existing host key to generate the
CSR, skip to Step 3.
2. (Optional) Generate a new private key. As a starting point, here is the command to create a key
resembling the default host key:
[ec2-user ~]$ sudo openssl genrsa -out custom.key 2048
The resulting file, custom.key, is a 2048-bit RSA private key.To create a stronger key with a bigger
modulus and with password protection, use the following command:
[ec2-user ~]$ sudo openssl genrsa -aes128 -passout pass:abcde12345 -out
custom.key 4096
This results in a 4096-bit RSA private key that has been encrypted with the AES-128 cipher.Encryption
provides greater security, but because an encrypted key requires a password, services depending
on it cannot be auto-started. Each time you use this key, you need to supply the password
"abcde12345" over an SSH connection.
RSA cryptography can be relatively slow, because its security relies on the difficulty of factoring the
product of two large two prime numbers. However, it is possible to create keys for SSL/TLS that use
non-RSA ciphers. Keys based on the mathematics of elliptic curves are smaller and faster when
delivering an equivalent level of security. Here is an example:
[ec2-user ~]$ sudo openssl ecparam -name prime256v1 -out custom.key -genkey
The output in this case is a 256-bit elliptic curve private key using prime256v1, a "named curve" that
OpenSSL supports. Its cryptographic strength is slightly greater than a 2048-bit RSA key, according
to NIST.
Note
Not all CAs provide the same level of support for elliptic-curve-based keys as for RSA keys.
Make sure that the new private key has highly restrictive permissions (owner root, group root,
read/write for owner only). The commands would be as follows:
[ec2-user ~]$ sudo chown root.root custom.key
[ec2-user ~]$ sudo chmod 600 custom.key
[ec2-user ~]$ ls -al custom.key
The commands above should yield the following result:
59
Amazon Elastic Compute Cloud User Guide for Linux
Instances
Step 2: Obtain a CA-signed Certificate](https://image.slidesharecdn.com/ec2-ug-151130152858-lva1-app6892/75/Amazan-Ec2-68-2048.jpg)
![-rw------- root root custom.key
After you have created and configured a satisfactory key, you can create a CSR.
3. Create a CSR using your preferred key; the example below uses private.key:
[ec2-user ~]$ sudo openssl req -new -key private.key -out csr.pem
OpenSSL opens a dialog and prompts you for information shown in the table below. All of the fields
except Common Name are optional for a basic, domain-validated certificate.
ExampleDescriptionName
US (=United States)The two-letter ISO abbreviation for your country.Country Name
WashingtonThe name of the state or province where your organ-
ization is located. This name cannot be abbreviated.
State or Province
Name
SeattleThe location of your organization, such as a city.Locality Name
Example CorpThe full legal name of your organization.Do not abbre-
viate your organization name.
Organization Name
Example DeptAdditional organizational information, if any.Organizational Unit
Name
www.example.comThis value must exactly match the web address that
you expect users to type into a browser. Usually, this
means a domain name with a prefixed host name or
alias in the form www.example.com. In testing with
a self-signed certificate and no DNS resolution, the
common name may consist of the host name alone.
CAs also offer more expensive certificates that accept
wild-card names such as *.example.com.
Common Name
someone@ex-
ample.com
The server administrator's email address.Email Address
Finally, OpenSSL prompts you for an optional challenge password. This password applies only to
the CSR and to transactions between you and your CA, so follow the CA's recommendations about
this and the other optional field, optional company name.The CSR challenge password has no effect
on server operation.
The resulting file csr.pem contains your public key, your digital signature of your public key, and
the metadata that you entered.
4. Submit the CSR to a CA. This usually consists of opening your CSR file in a text editor and copying
the contents into a web form. At this time, you may be asked to supply one or more subject alternate
names (SANs) to be placed on the certificate. If www.example.com is the common name, then
example.com would be a good SAN, and vice versa. A user typing in either of the listed names
would see an error-free connection. If your CA web form allows it, include the common name in the
list of SANs. (Some CAs include it automatically.)
After your request has been approved, you will receive a new host certificate signed by the CA.You
may also be instructed to download an intermediate certificate file that contains additional certificates
needed to complete the CA's chain of trust.
5. Remove the old self-signed host certificate localhost.crt from /etc/pki/tls/certs and place the
new CA-signed certificate (along with any intermediate certificates) in that directory. Check that the
60
Amazon Elastic Compute Cloud User Guide for Linux
Instances
Step 2: Obtain a CA-signed Certificate](https://image.slidesharecdn.com/ec2-ug-151130152858-lva1-app6892/75/Amazan-Ec2-69-2048.jpg)
![file ownership, group, and permission settings match the highly restrictive Amazon Linux defaults
(owner root, group root, read/write for owner only). The commands would be as follows:
[ec2-user ~]$ sudo chown root.root custom.crt
[ec2-user ~]$ sudo chmod 600 custom.crt
[ec2-user ~]$ ls -al custom.crt
The commands above should yield the following result:
-rw------- root root custom.crt
The permissions for the intermediate certificate file are less stringent (owner root, group root, owner
can write, world can read). The commands would be:
[ec2-user ~]$ sudo chown root.root intermediate.crt
[ec2-user ~]$ sudo chmod 644 intermediate.crt
[ec2-user ~]$ ls -al intermediate.crt
The commands above should yield the following result:
-rw-r--r-- root root intermediate.crt
6. The file name of the new CA-signed certificate (custom.crt in this example) probably differs from
the old certificate. Edit /etc/httpd/conf.d/ssl.conf and provide the correct path and file name using
Apache's SSLCertificateFile directive.
SSLCertificateFile /etc/pki/tls/certs/custom.crt
If you received an intermediate certificate file (intermediate.crt in this example), provide its path
and file name using Apache's SSLCertificateChainFile directive.
SSLCertificateChainFile /etc/pki/tls/certs/intermediate.crt
7. Save /etc/httpd/conf.d/ssl.conf and restart Apache.
[ec2-user ~]$ sudo service httpd restart
Step 3:Test and Harden the Security Configuration
After your SSL/TLS is operational and exposed to the public, you should test how secure it really is. This
is easy to do using online services such as Qualys SSL Labs, which performs a free and thorough analysis
of your security setup. Based on the results, you may decide to harden the default security configuration
by controlling which protocols you accept, which ciphers you prefer, and which you exclude. For more
information, see how Qualys formulates its scores.
Important
Real-world testing is crucial to the security of your server. Small configuration errors may lead
to serious security breaches and loss of data. Because recommended security practices change
61
Amazon Elastic Compute Cloud User Guide for Linux
Instances
Step 3:Test and Harden the Security Configuration](https://image.slidesharecdn.com/ec2-ug-151130152858-lva1-app6892/75/Amazan-Ec2-70-2048.jpg)


![are not billed when your AMI is launched by other AWS accounts; only the accounts launching the AMI
are billed.
To avoid exposing sensitive data when you share an AMI, read the security considerations in Guidelines
for Shared Linux AMIs (p. 79) and follow the recommended actions.
Note
If an AMI has a product code, you can't make it public.You must share the AMI with only specific
AWS accounts.
Sharing a Public AMI (Console)
To share a public AMI using the console
1. Open the Amazon EC2 console at https://console.aws.amazon.com/ec2/.
2. In the navigation pane, choose AMIs.
3. Select your AMI in the list, and then choose Modify Image Permissions from the Actions list.
4. Choose Public and choose Save.
Sharing a Public AMI (AWS CLI)
Each AMI has a launchPermission property that controls which AWS accounts, besides the owner's,
are allowed to use that AMI to launch instances. By modifying the launchPermission property of an
AMI, you can make the AMI public (which grants launch permissions to all AWS accounts) or share it
with only the AWS accounts that you specify.
You can add or remove account IDs from the list of accounts that have launch permissions for an AMI.
To make the AMI public, specify the all group.You can specify both public and explicit launch permissions.
To make an AMI public
Use the modify-image-attribute command as follows to add the all group to the launchPermission
list for the specified AMI.
$ aws ec2 modify-image-attribute --image-id ami-2bb65342 --launch-permission
"{"Add":[{"Group":"all"}]}"
To verify the launch permissions of the AMI, use the following describe-image-attribute command.
$ aws ec2 describe-image-attribute --image-id ami-2bb65342 --attribute launch
Permission
(Optional) To make the AMI private again, remove the all group from its launch permissions. Note that
the owner of the AMI always has launch permissions and is therefore unaffected by this command.
$ aws ec2 modify-image-attribute --image-id ami-2bb65342 "{"Re
move":[{"Group":"all"}]}"
Sharing a Public AMI (Amazon EC2 CLI)
Each AMI has a launchPermission property that controls which AWS accounts, besides the owner's,
are allowed to use that AMI to launch instances. By modifying the launchPermission property of an
AMI, you can make the AMI public (which grants launch permissions to all AWS accounts or share it with
only the AWS accounts that you specify.
76
Amazon Elastic Compute Cloud User Guide for Linux
Instances
Making an AMI Public](https://image.slidesharecdn.com/ec2-ug-151130152858-lva1-app6892/75/Amazan-Ec2-85-2048.jpg)
![$ aws ec2 modify-image-attribute --image-id ami-2bb65342 --launch-permission
"{"Add":[{"UserId":"123456789012"}]}"
To remove launch permissions for an account
The following command removes launch permissions for the specified AMI from the specified AWS
account:
$ aws ec2 modify-image-attribute --image-id ami-2bb65342 "{"Re
move":[{"UserId":"123456789012"}]}"
To remove all launch permissions
The following command removes all public and explicit launch permissions from the specified AMI. Note
that the owner of the AMI always has launch permissions and is therefore unaffected by this command.
$ aws ec2 reset-image-attribute --image-id ami-2bb65342 --attribute launchPer
mission
Sharing an AMI (Amazon EC2 CLI)
Use the ec2-modify-image-attribute command to share an AMI as shown in the following examples.
To grant explicit launch permissions
The following command grants launch permissions for the specified AMI to the specified AWS account.
$ ec2-modify-image-attribute ami-2bb65342 -l -a 111122223333
To remove launch permissions for an account
The following command removes launch permissions for the specified AMI from the specified AWS
account:
$ ec2-modify-image-attribute ami-2bb65342 -l -r 111122223333
To remove all launch permissions
The following command removes all public and explicit launch permissions from the specified AMI. Note
that the owner of the AMI always has launch permissions and is therefore unaffected by this command.
$ ec2-reset-image-attribute ami-2bb65342 -l
Using Bookmarks
If you have created a public AMI, or shared an AMI with another AWS user, you can create a bookmark
that allows a user to access your AMI and launch an instance in their own account immediately. This is
an easy way to share AMI references, so users don't have to spend time finding your AMI in order to use
it.
Note that your AMI must be public, or you must have shared it with the user to whom you want to send
the bookmark.
78
Amazon Elastic Compute Cloud User Guide for Linux
Instances
Using Bookmarks](https://image.slidesharecdn.com/ec2-ug-151130152858-lva1-app6892/75/Amazan-Ec2-87-2048.jpg)

![# Update the Amazon EC2 AMI tools
echo " + Updating EC2 AMI tools"
yum update -y aws-amitools-ec2
echo " + Updated EC2 AMI tools"
Use this method to automatically update other software on your image.
Note
When deciding which software to automatically update, consider the amount of WAN traffic that
the update will generate (your users will be charged for it) and the risk of the update breaking
other software on the AMI.
For other distributions, make sure you have the latest AMI tools.
Disable Password-Based Remote Logins for Root
Using a fixed root password for a public AMI is a security risk that can quickly become known. Even
relying on users to change the password after the first login opens a small window of opportunity for
potential abuse.
To solve this problem, disable password-based remote logins for the root user.
To disable password-based remote logins for root
1. Open the /etc/ssh/sshd_config file with a text editor and locate the following line:
#PermitRootLogin yes
2. Change the line to:
PermitRootLogin without-password
The location of this configuration file might differ for your distribution, or if you are not running
OpenSSH. If this is the case, consult the relevant documentation.
Disable Local Root Access
When you work with shared AMIs, a best practice is to disable direct root logins. To do this, log into your
running instance and issue the following command:
[ec2-user ~]$ sudo passwd -l root
Note
This command does not impact the use of sudo.
Remove SSH Host Key Pairs
If you plan to share an AMI derived from a public AMI, remove the existing SSH host key pairs located
in /etc/ssh. This forces SSH to generate new unique SSH key pairs when someone launches an
instance using your AMI, improving security and reducing the likelihood of "man-in-the-middle" attacks.
Remove all of the following key files that are present on your system.
80
Amazon Elastic Compute Cloud User Guide for Linux
Instances
Guidelines for Shared Linux AMIs](https://image.slidesharecdn.com/ec2-ug-151130152858-lva1-app6892/75/Amazan-Ec2-89-2048.jpg)
![• ssh_host_dsa_key
• ssh_host_dsa_key.pub
• ssh_host_key
• ssh_host_key.pub
• ssh_host_rsa_key
• ssh_host_rsa_key.pub
• ssh_host_ecdsa_key
• ssh_host_ecdsa_key.pub
• ssh_host_ed25519_key
• ssh_host_ed25519_key.pub
You can securely remove all of these files with the following command.
[ec2-user ~]$ sudo shred -u /etc/ssh/*_key /etc/ssh/*_key.pub
Warning
Secure deletion utilities such as shred may not remove all copies of a file from your storage
media. Hidden copies of files may be created by journalling file systems (including Amazon Linux
default ext4), snapshots, backups, RAID, and temporary caching. For more information see the
shred documentation.
Important
If you forget to remove the existing SSH host key pairs from your public AMI, our routine auditing
process notifies you and all customers running instances of your AMI of the potential security
risk. After a short grace period, we mark the AMI private.
Install Public Key Credentials
After configuring the AMI to prevent logging in using a password, you must make sure users can log in
using another mechanism.
Amazon EC2 allows users to specify a public-private key pair name when launching an instance. When
a valid key pair name is provided to the RunInstances API call (or through the command line API tools),
the public key (the portion of the key pair that Amazon EC2 retains on the server after a call to
CreateKeyPair or ImportKeyPair) is made available to the instance through an HTTP query against
the instance metadata.
To log in through SSH, your AMI must retrieve the key value at boot and append it to
/root/.ssh/authorized_keys (or the equivalent for any other user account on the AMI). Users can
launch instances of your AMI with a key pair and log in without requiring a root password.
Many distributions, including Amazon Linux and Ubuntu, use the cloud-init package to inject public
key credentials for a configured user. If your distribution does not support cloud-init, you can add the
following code to a system start-up script (such as /etc/rc.local) to pull in the public key you specified
at launch for the root user.
if [ ! -d /root/.ssh ] ; then
mkdir -p /root/.ssh
chmod 700 /root/.ssh
fi
# Fetch public key using HTTP
curl http://169.254.169.254/latest/meta-data/public-keys/0/openssh-key > /tmp/my-
key
if [ $? -eq 0 ] ; then
81
Amazon Elastic Compute Cloud User Guide for Linux
Instances
Guidelines for Shared Linux AMIs](https://image.slidesharecdn.com/ec2-ug-151130152858-lva1-app6892/75/Amazan-Ec2-90-2048.jpg)

![/home/user_name/.ssh/ for regular user accounts. For more information, see ec2-bundle-vol in the
Amazon EC2 Command Line Reference.
• Always delete the shell history before bundling. If you attempt more than one bundle upload in the
same AMI, the shell history contains your secret access key. The following example should be the last
command executed before bundling from within the instance.
[ec2-user ~]$ shred -u ~/.*history
Warning
The limitations of shred described in the warning above apply here as well.
Be aware that bash writes the history of the current session to the disk on exit. If you log out
of your instance after deleting ~/.bash_history, and then log back in, you will find that
~/.bash_history has been re-created and contains all of the commands executed during
your previous session.
Other programs besides bash also write histories to disk, Use caution and remove or exclude
unnecessary dot-files and dot-directories.
• Bundling a running instance requires your private key and X.509 certificate. Put these and other
credentials in a location that is not bundled (such as the instance store).
Paid AMIs
A paid AMI is an AMI that you can purchase from a developer.
Amazon EC2 integrates with AWS Marketplace, enabling developers to charge other Amazon EC2 users
for the use of their AMIs or to provide support for instances.
The AWS Marketplace is an online store where you can buy software that runs on AWS; including AMIs
that you can use to launch your EC2 instance.The AWS Marketplace AMIs are organized into categories,
such as Developer Tools, to enable you to find products to suit your requirements. For more information
about AWS Marketplace, see the AWS Marketplace site.
Launching an instance from a paid AMI is the same as launching an instance from any other AMI. No
additional parameters are required. The instance is charged according to the rates set by the owner of
the AMI, as well as the standard usage fees for the related web services; for example, the hourly rate for
running a m1.small instance type in Amazon EC2. The owner of the paid AMI can confirm whether a
specific instance was launched using that paid AMI.
Important
Amazon DevPay is no longer accepting new sellers or products. AWS Marketplace is now the
single, unified e-commerce platform for selling software and services through AWS. For
information about how to deploy and sell software from AWS Marketplace, see Selling on AWS
Marketplace. AWS Marketplace supports AMIs backed by Amazon EBS.
Topics
• Selling Your AMI (p. 84)
• Finding a Paid AMI (p. 84)
• Purchase a Paid AMI (p. 85)
• Getting the Product Code for Your Instance (p. 85)
• Using Paid Support (p. 86)
• Bills for Paid and Supported AMIs (p. 86)
• Managing Your AWS Marketplace Subscriptions (p. 86)
83
Amazon Elastic Compute Cloud User Guide for Linux
Instances
Paid AMIs](https://image.slidesharecdn.com/ec2-ug-151130152858-lva1-app6892/75/Amazan-Ec2-92-2048.jpg)
![Selling Your AMI
You can sell your AMI using AWS Marketplace.AWS Marketplace offers an organized shopping experience.
Additionally, AWS Marketplace also supports AWS features such as Amazon EBS-backed AMIs, Reserved
Instances, and Spot instances.
For information about how to sell your AMI on AWS Marketplace, see Selling on AWS Marketplace.
Finding a Paid AMI
There are several ways that you can find AMIs that are available for you to purchase. For example, you
can use AWS Marketplace, the Amazon EC2 console, or the command line. Alternatively, a developer
might let you know about a paid AMI themselves.
Finding a Paid AMI Using the Console
To find a paid AMI using the console
1. Open the Amazon EC2 console.
2. In the navigation pane, click AMIs.
3. Select Public images from the first Filter list. Click the Search bar and select Product Code, then
Marketplace. Click the Search bar again, select Platform and then choose the operating system
from the list.
Finding a Paid AMI Using AWS Marketplace
To find a paid AMI using AWS Marketplace
1. Open AWS Marketplace.
2. Enter the name of the operating system in the search box, and click Go.
3. To scope the results further, use one of the categories or filters.
4. Each product is labeled with its product type: either AMI or Software as a Service.
Finding a Paid AMI Using the AWS CLI
You can find a paid AMI using the describe-images command as follows.
$ ec2-describe-images --owners aws-marketplace
This command returns numerous details that describe each AMI, including the product code for a paid
AMI. The output from describe-images includes an entry for the product code like the following:
"ProductCodes": [
{
"ProductCodeId": "product_code",
"ProductCodeType": "marketplace"
}
],
84
Amazon Elastic Compute Cloud User Guide for Linux
Instances
Selling Your AMI](https://image.slidesharecdn.com/ec2-ug-151130152858-lva1-app6892/75/Amazan-Ec2-93-2048.jpg)


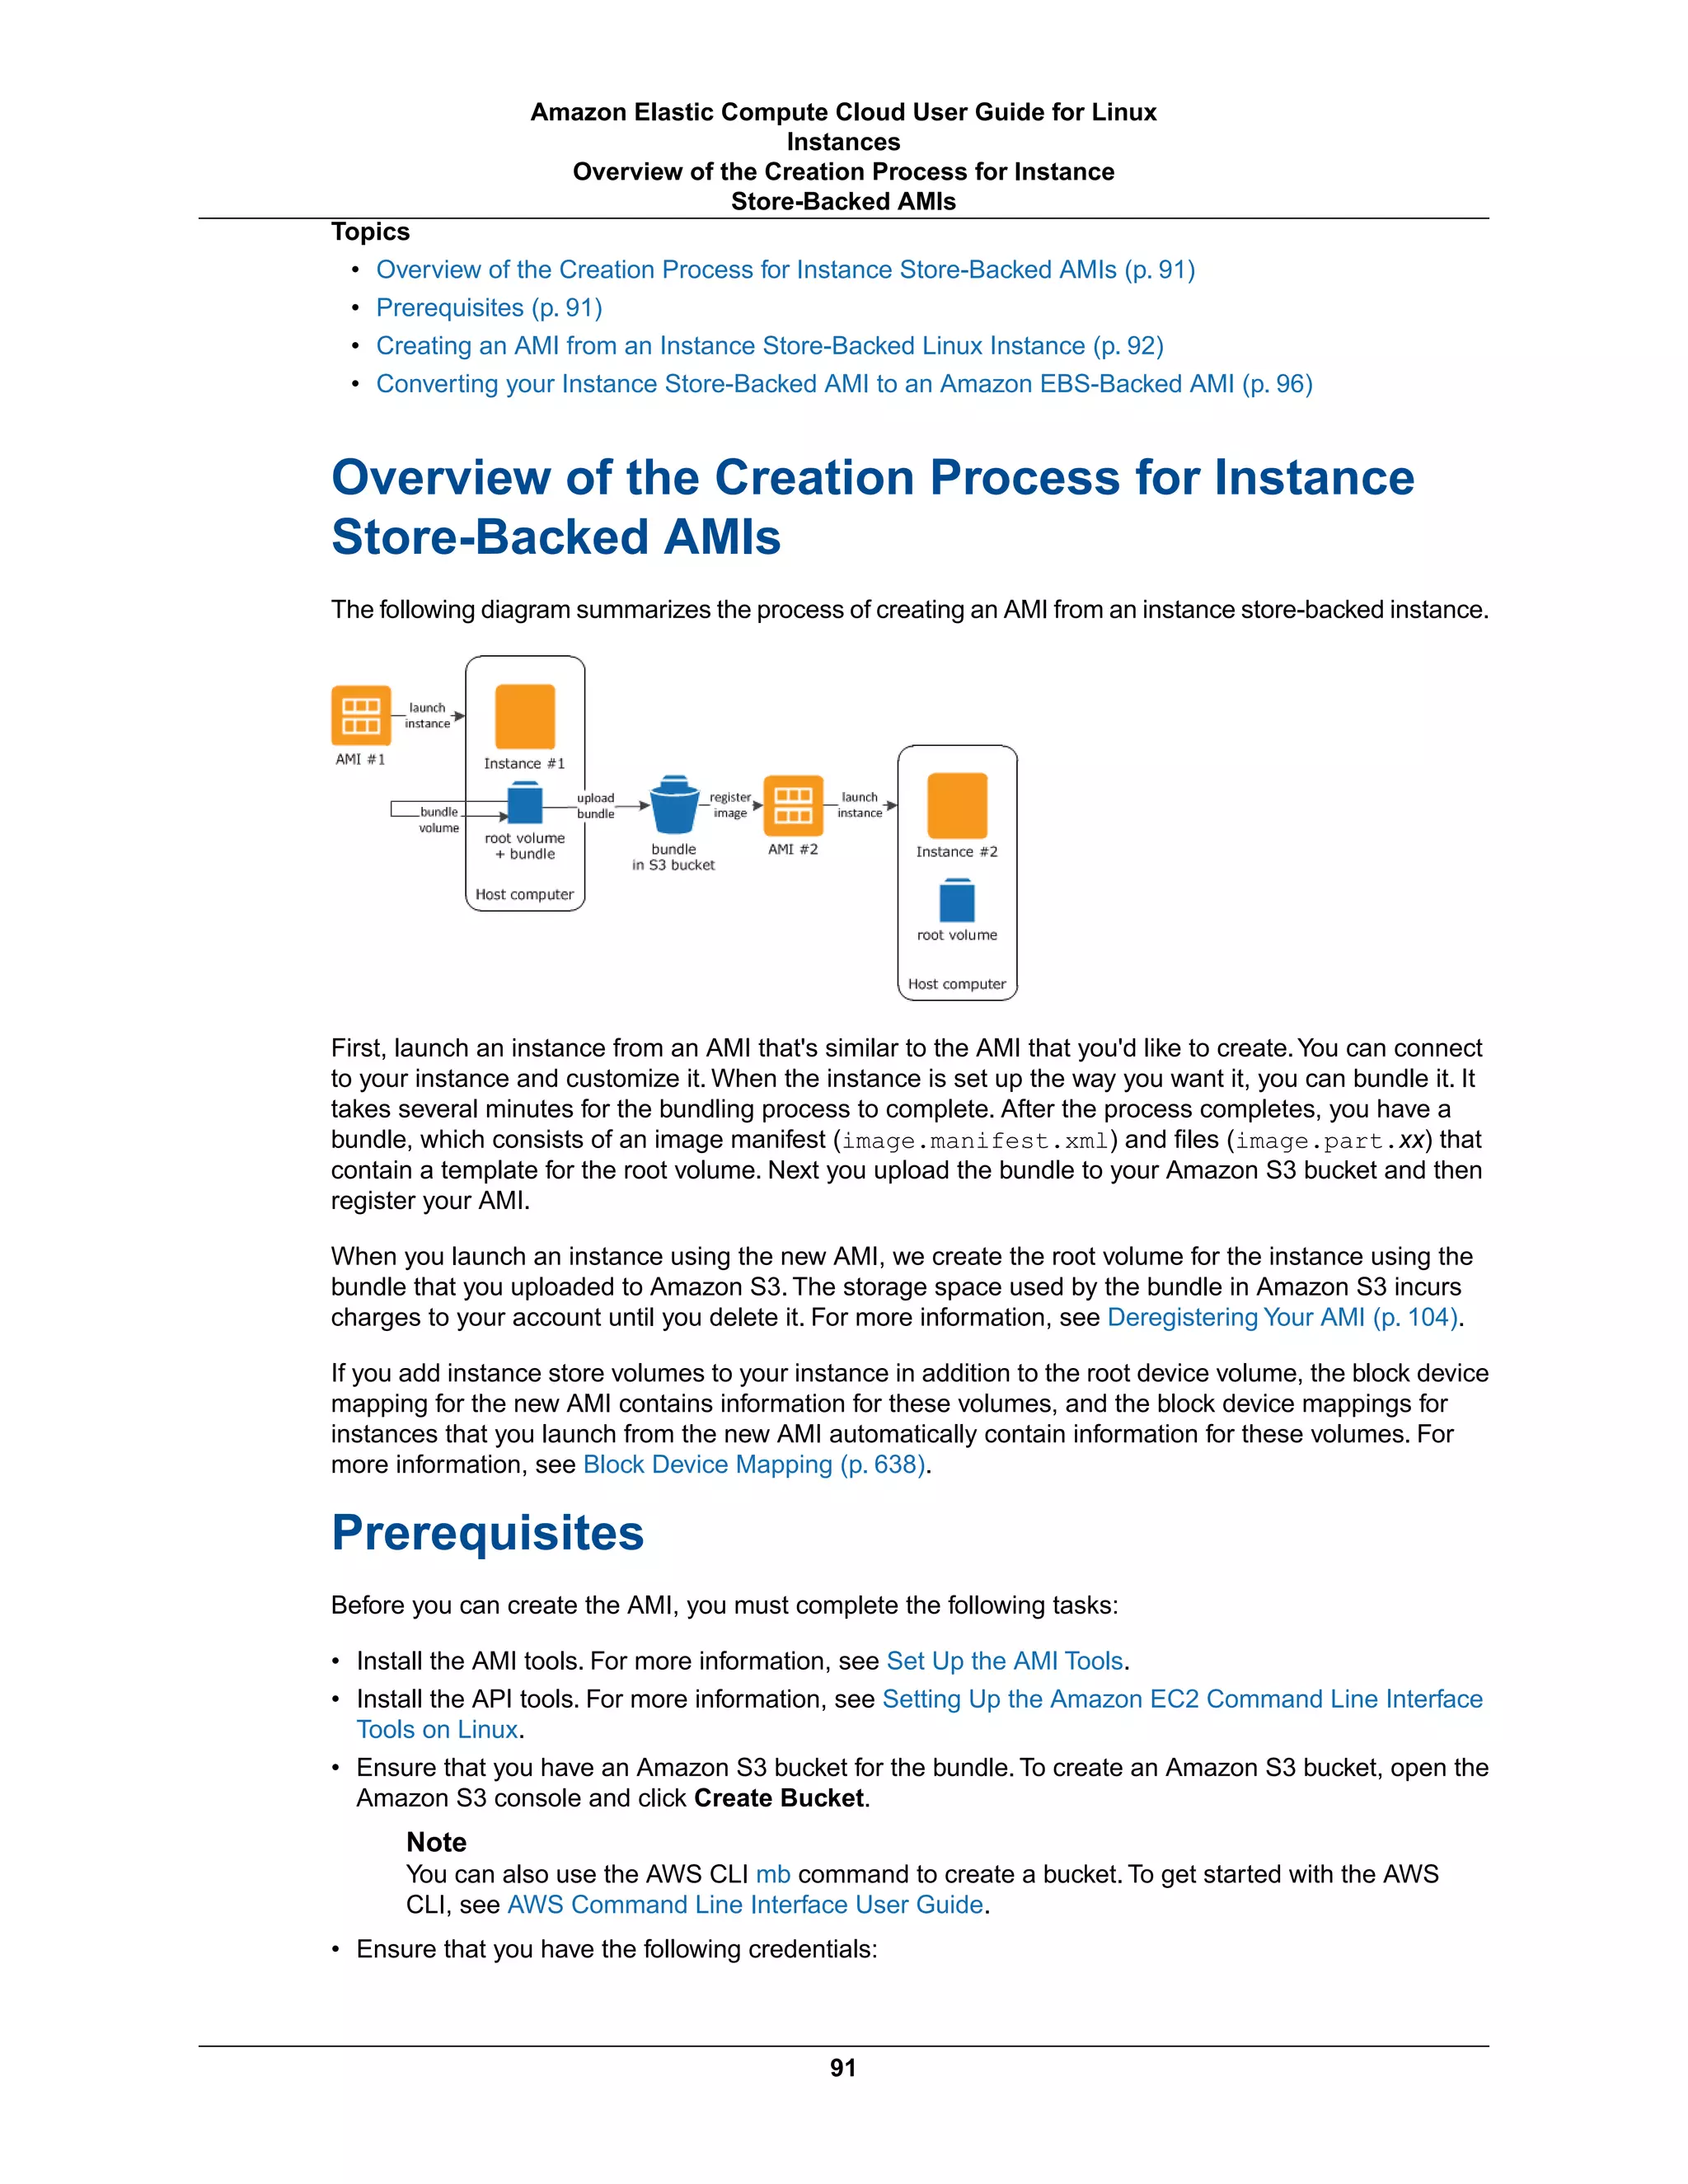
![• Your AWS account ID. To find your AWS account ID number in the AWS Management Console,
click on Support in the navigation bar in the upper-right, and then click Support Center.Your
currently signed in account ID appears below the Support menu.
• An X.509 certificate and private key. If you need to create an X.509 certificate, see Managing Signing
Certificates in the Amazon EC2 Command Line Reference.The X.509 certificate and private key are
used to encrypt and decrypt your AMI.
• Your AWS account access key ID and secret access key. For more information, see Creating,
Modifying, and Viewing Access Keys in the IAM User Guide.
• Connect to your instance and customize it. For example, you can install software and applications,
copy data, delete temporary files, and modify the Linux configuration.
Creating an AMI from an Instance Store-Backed
Linux Instance
To prepare to use the Amazon EC2 AMI Tools (HVM instances only)
The Amazon EC2 AMI tools require GRUB Legacy to boot properly. Some AMIs (most notably, Ubuntu)
are configured to use GRUB 2.You must check to see that your instance uses GRUB Legacy, and if not,
you need to install and configure it.
HVM instances also require partitioning tools to be installed for the AMI tools to work properly.
1. Check to see if your instance uses GRUB Legacy.
a. List the block devices to find the root block device.
[ec2-user ~]$ lsblk
NAME MAJ:MIN RM SIZE RO TYPE MOUNTPOINT
xvda 202:0 0 8G 0 disk
xvda1 202:1 0 8G 0 part /
xvdb 202:16 0 30G 0 disk /media/ephemeral0
In this example, the root device (indicated by a MOUNTPOINT of /) is /dev/xvda1.The root block
device is its parent, /dev/xvda.
b. Determine the GRUB version on the root block device.
[ec2-user ~]$ sudo file -s /dev/xvda
/dev/xvda: x86 boot sector; GRand Unified Bootloader, stage1 version
0x3, stage2 address 0x2000, 1st sector stage2 0x800, stage2 segment
0x200, GRUB version 0.94; partition 1: ID=0xee, starthead 254,
startsector 1, 16777215 sectors, extended partition table (last)011,
code offset 0x48
In the above example, the GRUB version is 0.94, which is GRUB Legacy. If your GRUB version
is 0.9x or less, you may move on to Step 3 (p. 93). If you do not see a GRUB version in this
output, try the grub-install --version command.
ubuntu:~$ grub-install --version
grub-install (GRUB) 1.99-21ubuntu3.10
In this example, the GRUB version is greater than 0.9x, so GRUB Legacy must be installed.
Proceed to Step 2 (p. 93).
92
Amazon Elastic Compute Cloud User Guide for Linux
Instances
Creating an AMI from an Instance Store-Backed Linux
Instance](https://image.slidesharecdn.com/ec2-ug-151130152858-lva1-app6892/75/Amazan-Ec2-101-2048.jpg)

![title Ubuntu 12.04.3 LTS, memtest86+
root (hd0)
kernel /boot/memtest86+.bin
7. Verify that your kernel entries now contain the correct parameters.
ubuntu:~$ grep ^kernel /boot/grub/menu.lst
kernel /boot/vmlinuz-3.2.0-54-virtual root=LABEL=cloudimg-rootfs ro con
sole=ttyS0 xen_emul_unplug=unnecessary
kernel /boot/vmlinuz-3.2.0-54-virtual root=LABEL=cloudimg-rootfs ro single
console=ttyS0 xen_emul_unplug=unnecessary
kernel /boot/memtest86+.bin
8. (For Ubuntu 14.04 and later only) Starting with Ubuntu 14.04, instance store backed Ubuntu AMIs
use a GPT partition table and a separate EFI partition mounted at /boot/efi.The ec2-bundle-vol
command will not bundle this boot partition, so you need to comment out the /etc/fstab entry for
the EFI partition as shown in the example below.
LABEL=cloudimg-rootfs / ext4 defaults 0 0
#LABEL=UEFI /boot/efi vfat defaults 0 0
/dev/xvdb /mnt auto defaults,nobootwait,comment=cloudconfig 0
2
To create an AMI from an instance store-backed Linux instance
This procedure assumes that you have satisfied the prerequisites in Prerequisites (p. 91).
1. Upload your credentials to your instance. We use these credentials to ensure that only you and
Amazon EC2 can access your AMI.
a. Create a temporary directory on your instance for your credentials as follows:
[ec2-user ~]$ mkdir /tmp/cert
This enables you to exclude your credentials from the created image.
b. Copy your X.509 certificate and private key from your computer to the /tmp/cert directory on
your instance, using a secure copy tool such as scp (p. 237). The -i my-private-key.pem
option in the following scp command is the private key you use to connect to your instance with
SSH, not the X.509 private key. For example:
you@your_computer:~ $ scp -i my-private-key.pem /path/to/pk-HKZYK
TAIG2ECMXYIBH3HXV4ZBEXAMPLE.pem /path/to/cert-HKZYKTAIG2ECMXY
IBH3HXV4ZBEXAMPLE.pem ec2-user@ec2-203-0-113-25.compute-1.amazon
aws.com:/tmp/cert/
pk-HKZYKTAIG2ECMXYIBH3HXV4ZBEXAMPLE.pem 100% 717 0.7KB/s 00:00
cert-HKZYKTAIG2ECMXYIBH3HXV4ZBEXAMPLE.pem 100% 685 0.7KB/s 00:00
2. Prepare the bundle to upload to Amazon S3 using the ec2-bundle-vol command. Be sure to specify
the -e option to exclude the directory where your credentials are stored. By default, the bundle
94
Amazon Elastic Compute Cloud User Guide for Linux
Instances
Creating an AMI from an Instance Store-Backed Linux
Instance](https://image.slidesharecdn.com/ec2-ug-151130152858-lva1-app6892/75/Amazan-Ec2-103-2048.jpg)
![process excludes files that might contain sensitive information. These files include *.sw, *.swo,
*.swp, *.pem, *.priv, *id_rsa*, *id_dsa* *.gpg, *.jks, */.ssh/authorized_keys, and
*/.bash_history. To include all of these files, use the --no-filter option. To include some of
these files, use the --include option.
Important
By default, the AMI bundling process creates a compressed, encrypted collection of files in
the /tmp directory that represent your root volume. If you do not have enough free disk
space in /tmp to store the bundle, you need to specify a different location for the bundle to
be stored with the -d /path/to/bundle/storage option.Some instances have ephemeral
storage mounted at /mnt or /media/ephemeral0 that you can use, or you can also
create (p. 566), attach (p. 570), and mount (p. 571) a new Amazon EBS volume to store the
bundle.
a. The ec2-bundle-vol command needs to run as root. For most commands, you can use sudo
to gain elevated permissions, but in this case, you should run sudo -E su to keep your
environment variables.
[ec2-user ~]$ sudo -E su
b. Run the ec2-bundle-vol command with the following arguments. If you do not have enough
available disk space in /tmp to store your bundle, specify a location that has available space
with the -d /path/to/bundle/storage option. For HVM instances, be sure to add the
--partition flag; otherwise, your AMI will not boot. For more information on this command
and its available options, see ec2-bundle-vol in the Amazon EC2 Command Line Reference.
Important
For Ubuntu 14.04 and later HVM instances, add the --partition mbr flag to bundle
the boot instructions properly ; otherwise, your newly-created AMI will not boot.
[root ec2-user]# $EC2_AMITOOL_HOME/bin/ec2-bundle-vol -k /tmp/cert/pk-
HKZYKTAIG2ECMXYIBH3HXV4ZBEXAMPLE.pem -c /tmp/cert/cert-HKZYKTAIG2ECMXY
IBH3HXV4ZBEXAMPLE.pem -u your_aws_account_id -r x86_64 -e /tmp/cert
It can take a few minutes to create the image.When this command completes, your tmp directory
contains the bundle (image.manifest.xml, plus multiple image.part.xx files).
c. Exit from the root shell.
[root ec2-user]# exit
3. Upload your bundle to Amazon S3 using the ec2-upload-bundle command. Note that if the bundle
prefixes (directories) don't exist in the bucket, this command creates them.
Note
If you specified a path with the -d /path/to/bundle/storage option in Step 2.b (p. 95),
use that same path in the -m option below, instead of /tmp.
[ec2-user ~]$ ec2-upload-bundle -b my-s3-bucket/bundle_folder/bundle_name
-m /tmp/image.manifest.xml -a your_access_key_id -s your_secret_access_key
--region us-west-2
4. (Optional) After the bundle is uploaded to Amazon S3, you can remove the bundle from the /tmp
directory on the instance using the following rm command:
95
Amazon Elastic Compute Cloud User Guide for Linux
Instances
Creating an AMI from an Instance Store-Backed Linux
Instance](https://image.slidesharecdn.com/ec2-ug-151130152858-lva1-app6892/75/Amazan-Ec2-104-2048.jpg)
![Note
If you specified a path with the -d /path/to/bundle/storage option in Step 2.b (p. 95),
use that same path below, instead of /tmp.
[ec2-user ~]$ sudo rm /tmp/image.manifest.xml /tmp/image.part.* /tmp/image
5. Register your AMI using the ec2-register command. Note that you don't need to specify the -O and
-W options if you've set the AWS_ACCESS_KEY and AWS_SECRET_KEY environment variables.
Important
For HVM AMIs, add the --virtualization-type hvm flag.
[ec2-user ~]$ ec2-register my-s3-bucket/bundle_folder/bundle_name/image.mani
fest.xml -n AMI_name -O your_access_key_id -W your_secret_access_key --region
us-west-2
6. (For Ubuntu 14.04 and later only) Uncomment the EFI entry in /etc/fstab; otherwise, your running
instance will not be able to reboot.
Converting your Instance Store-Backed AMI to an
Amazon EBS-Backed AMI
You can convert an instance store-backed Linux AMI that you own to an Amazon EBS-backed Linux AMI.
Important
You can't convert an instance store-backed Windows AMI to an Amazon EBS-backed Windows
AMI and you cannot convert an AMI that you do not own.
To convert an instance store-backed AMI to an Amazon EBS-backed AMI
1. Launch an Amazon Linux instance from an Amazon EBS-backed AMI. For more information, see
Launching an Instance (p. 226). Amazon Linux instances have the Amazon EC2 command line and
AMI tools pre-installed.
2. Upload the X.509 private key that you used to bundle your instance store-backed AMI to your instance.
We use this key to ensure that only you and Amazon EC2 can access your AMI.
a. Create a temporary directory on your instance for your X.509 private key as follows:
[ec2-user ~]$ mkdir /tmp/cert
b. Copy your X.509 private key from your computer to the /tmp/cert directory on your instance,
using a secure copy tool such as scp (p. 237).The my-private-key parameter in the following
command is the private key you use to connect to your instance with SSH. For example:
you@your_computer:~ $ scp -i my-private-key.pem /path/to/pk-HKZYK
TAIG2ECMXYIBH3HXV4ZBEXAMPLE.pem ec2-user@ec2-203-0-113-25.compute-
1.amazonaws.com:/tmp/cert/
pk-HKZYKTAIG2ECMXYIBH3HXV4ZBEXAMPLE.pem 100% 717 0.7KB/s 00:00
3. Set environment variables for your AWS access key and secret key.
96
Amazon Elastic Compute Cloud User Guide for Linux
Instances
Converting your Instance Store-Backed AMI to an
Amazon EBS-Backed AMI](https://image.slidesharecdn.com/ec2-ug-151130152858-lva1-app6892/75/Amazan-Ec2-105-2048.jpg)
![[ec2-user ~]$ export AWS_ACCESS_KEY=your_access_key_id
[ec2-user ~]$ export AWS_SECRET_KEY=your_secret_access_key
4. Prepare an Amazon EBS volume for your new AMI.
a. Create an empty Amazon EBS volume in the same Availability Zone as your instance using the
ec2-create-volume command. Note the volume ID in the command output.
Important
This Amazon EBS volume must be the same size or larger than the original instance
store root volume.
[ec2-user ~]$ ec2-create-volume --size 10 --region us-west-2 --availab
ility-zone us-west-2b
VOLUME volume_id 10 us-west-2b creating 2014-01-24T23:11:45+0000
standard
b. Attach the volume to your Amazon EBS-backed instance using the ec2-attach-volume command.
[ec2-user ~]$ ec2-attach-volume volume_id -i instance_id --device /dev/sdb
--region us-west-2
ATTACHMENT volume_id instance_id /dev/sdb attaching 2014-01-
24T23:15:34+0000
5. Create a folder for your bundle.
[ec2-user ~]$ mkdir /tmp/bundle
6. Download the bundle for your instance store-based AMI to /tmp/bundle using the
ec2-download-bundle command.
[ec2-user ~]$ ec2-download-bundle -b my-s3-bucket/bundle_folder/bundle_name
-m image.manifest.xml -a $AWS_ACCESS_KEY -s $AWS_SECRET_KEY --privatekey
/path/to/pk-HKZYKTAIG2ECMXYIBH3HXV4ZBEXAMPLE.pem -d /tmp/bundle
7. Reconstitute the image file from the bundle using the ec2-unbundle command.
a. Change directories to the bundle folder.
[ec2-user ~]$ cd /tmp/bundle/
b. Run the ec2-unbundle command.
[ec2-user bundle]$ ec2-unbundle -m image.manifest.xml --privatekey
/path/to/pk-HKZYKTAIG2ECMXYIBH3HXV4ZBEXAMPLE.pem
8. Copy the files from the unbundled image to the new Amazon EBS volume.
97
Amazon Elastic Compute Cloud User Guide for Linux
Instances
Converting your Instance Store-Backed AMI to an
Amazon EBS-Backed AMI](https://image.slidesharecdn.com/ec2-ug-151130152858-lva1-app6892/75/Amazan-Ec2-106-2048.jpg)
![[ec2-user bundle]$ sudo dd if=/tmp/bundle/image of=/dev/sdb bs=1M
9. Probe the volume for any new partitions that were unbundled.
[ec2-user bundle]$ sudo partprobe /dev/sdb
10. List the block devices to find the device name to mount.
[ec2-user bundle]$ lsblk
NAME MAJ:MIN RM SIZE RO TYPE MOUNTPOINT
/dev/sda 202:0 0 8G 0 disk
/dev/sda1 202:1 0 8G 0 part /
/dev/sdb 202:80 0 10G 0 disk
/dev/sdb1 202:81 0 10G 0 part
In this example, the partition to mount is /dev/sdb1, but your device name will likely be different. If
your volume is not partitioned, then the device to mount will be similar to /dev/sdb (without a device
partition trailing digit).
11. Create a mount point for the new Amazon EBS volume and mount the volume.
[ec2-user bundle]$ sudo mkdir /mnt/ebs
[ec2-user bundle]$ sudo mount /dev/sdb1 /mnt/ebs
12. Open the /etc/fstab file on the EBS volume with your favorite text editor (such as vim or nano)
and remove any entries for instance store (ephemeral) volumes. Because the Amazon EBS volume
is mounted on /mnt/ebs, the fstab file is located at /mnt/ebs/etc/fstab.
[ec2-user bundle]$ sudo nano /mnt/ebs/etc/fstab
#
LABEL=/ / ext4 defaults,noatime 1 1
tmpfs /dev/shm tmpfs defaults 0 0
devpts /dev/pts devpts gid=5,mode=620 0 0
sysfs /sys sysfs defaults 0 0
proc /proc proc defaults 0 0
/dev/sdb /media/ephemeral0 auto defaults,comment=cloudconfig
0 2
In the above example, the last line should be removed.
13. Unmount the volume and detach it from the instance.
[ec2-user bundle]$ sudo umount /mnt/ebs
[ec2-user bundle]$ ec2-detach-volume volume_id --region us-west-2
ATTACHMENT volume_id instance_id /dev/sdb detaching 2014-01-24T23:15:34+0000
14. Create an AMI from the new Amazon EBS volume as follows.
a. Create a snapshot of the new Amazon EBS volume.
[ec2-user bundle]$ ec2-create-snapshot --region us-west-2 -d
"your_snapshot_description" -O $AWS_ACCESS_KEY -W $AWS_SECRET_KEY
volume_id
98
Amazon Elastic Compute Cloud User Guide for Linux
Instances
Converting your Instance Store-Backed AMI to an
Amazon EBS-Backed AMI](https://image.slidesharecdn.com/ec2-ug-151130152858-lva1-app6892/75/Amazan-Ec2-107-2048.jpg)
![SNAPSHOT snapshot_id volume_id pending 2014-01-25T00:18:48+000
1234567891011 10 your_snapshot_description
b. Check to see that your snapshot is complete.
[ec2-user bundle]$ ec2-describe-snapshots --region us-west-2 snapshot_id
SNAPSHOT snapshot_id volume_id completed 2014-01-25T00:18:48+0000 100%
1234567891011 10 your_snapshot_description
c. Identify the processor architecture, virtualization type, and the kernel image (aki) used on the
original AMI with the ec2-describe-images command.You need the AMI ID of the original
instance store-backed AMI for this step.
[ec2-user bundle]$ ec2-describe-images --region us-west-2 ami-id
IMAGE ami-8ef297be amazon/amzn-ami-pv-2013.09.2.x86_64-s3 amazon available
public x86_64 machine aki-fc8f11cc instance-store paravirtual xen
In this example, the architecture is x86_64 and the kernel image ID is aki-fc8f11cc. Use
these values in the following step. If the output of the above command also lists an ari ID, take
note of that as well.
d. Register your new AMI with the snapshot ID of your new Amazon EBS volume and the values
from the previous step. If the previous command output listed an ari ID, include that in the
following command with --ramdisk ari_id.
[ec2-user bundle]$ ec2-register --region us-west-2 -n your_new_ami_name
-s snapshot_id -a x86_64 --kernel aki-fc8f11cc
IMAGE new-ami-id
15. (Optional) After you have tested that you can launch an instance from your new AMI, you can delete
the Amazon EBS volume that you created for this procedure.
$ ec2-delete-volume volume_id
Copying an AMI
You can easily copy the Amazon Machine Images (AMIs) that you own to other AWS regions and scale
your applications to take advantage of AWS's geographically diverse regions.
Copying your AMIs provides the following benefits:
• Consistent global deployment:You can copy an AMI from one region to another, enabling you to launch
consistent instances based from the same AMI into different regions.
• Scalability:You can more easily design and build world-scale applications that meet the needs of your
users, regardless of their location.
• Performance:You can increase performance by distributing your application, as well as locating critical
components of your application in closer proximity to your users.You can also take advantage of
region-specific features, such as instance types or other AWS services.
99
Amazon Elastic Compute Cloud User Guide for Linux
Instances
Copying an AMI](https://image.slidesharecdn.com/ec2-ug-151130152858-lva1-app6892/75/Amazan-Ec2-108-2048.jpg)

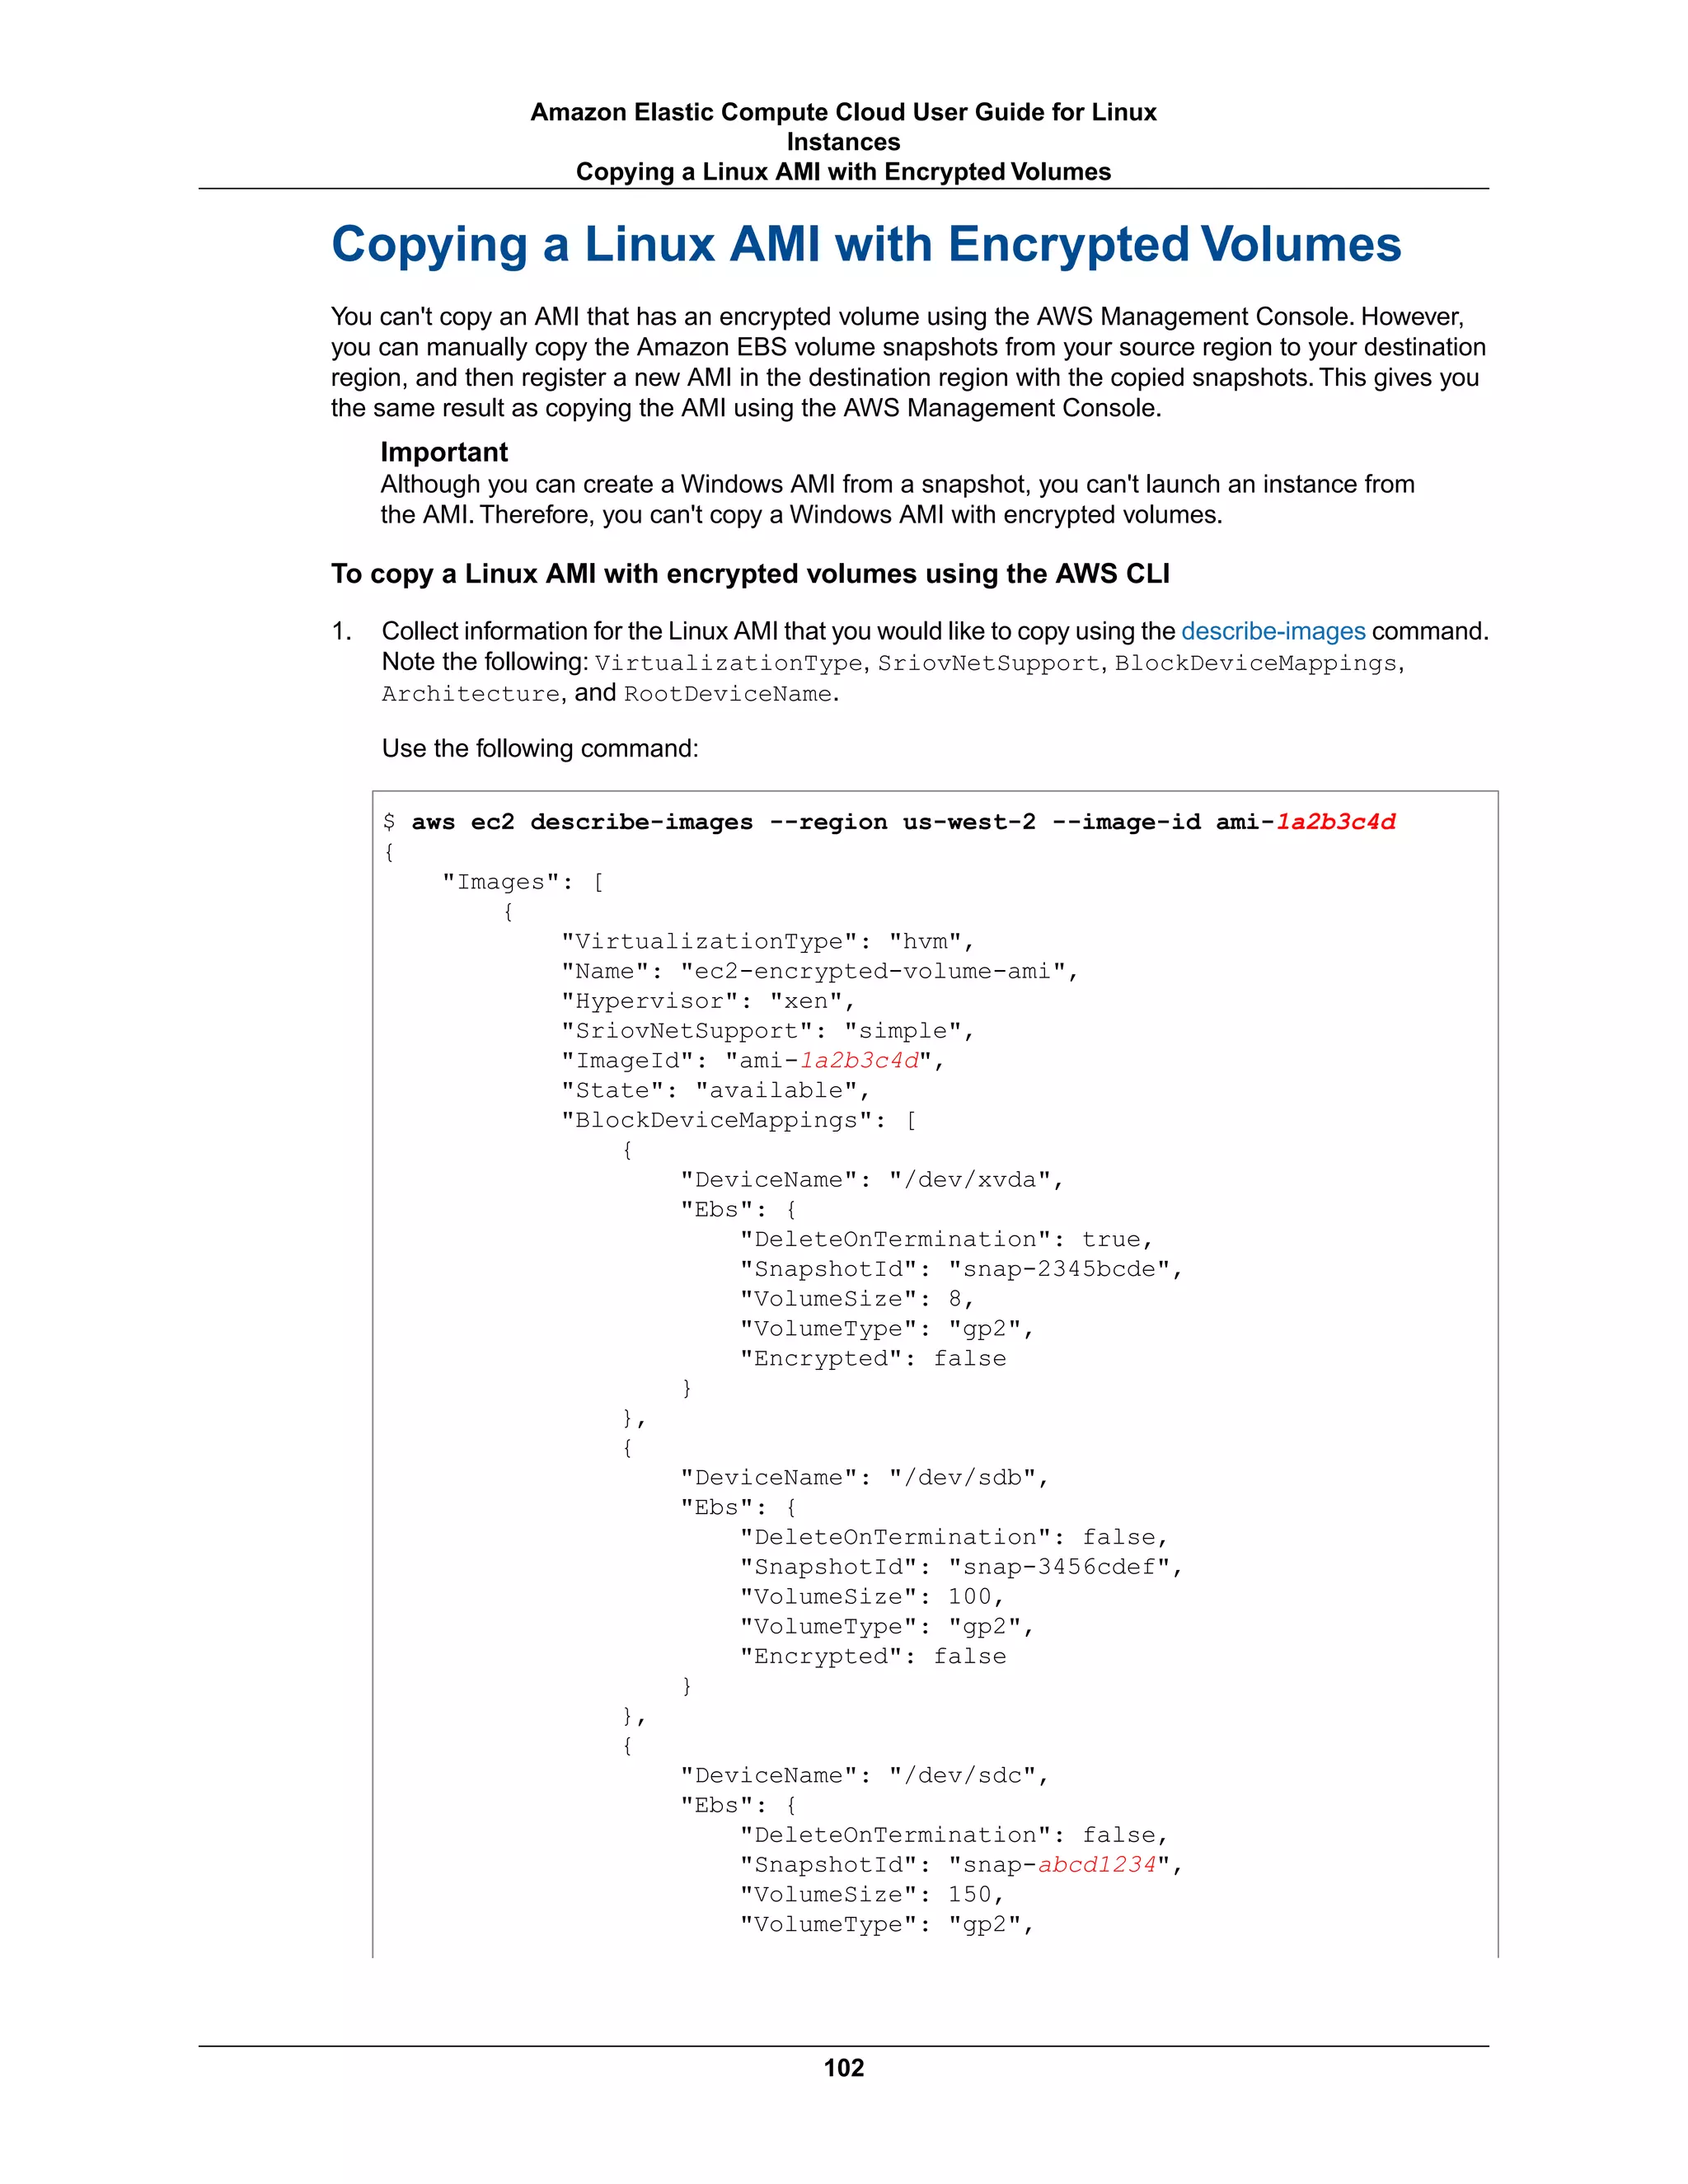
!["Encrypted": true
}
}
],
"Architecture": "x86_64",
"ImageLocation": "012345678910/ec2-encrypted-volume-ami",
"RootDeviceType": "ebs",
"OwnerId": "012345678910",
"RootDeviceName": "/dev/xvda",
"Public": false,
"ImageType": "machine",
"Description": "/dev/xvdc is encrypted"
}
]
}
2. Copy each Amazon EBS snapshot contained in the AMI to the destination region for your new AMI.
You can do this using the AWS Management Console or the AWS CLI. It is helpful to note in the
snapshot description which device the snapshot is for. This will help you configure the block device
mapping on your new AMI later. The following copy-snapshot command copies the snapshot
associated with /dev/sdc.
$ aws ec2 copy-snapshot --source-region us-west-2 --source-snapshot-id
snap-abcd1234 --region us-east-1 --description "Copy of /dev/sdc from ami-
1a2b3c4d"
{
"SnapshotId": "snap-4321dcba"
}
3. Register your new AMI with the copied snapshots in the block device mapping and the information
you recorded earlier using the register-image command. For more information, see register-image.
$ aws ec2 register-image --region us-east-1 --name "my-copied-ami" --archi
tecture x86_64 --root-device-name /dev/xvda --block-device-mappings
"[{"DeviceName":"/dev/xvda","Ebs":{"DeleteOnTermination":true,"Snap
shotId":"snap-5432edcb","VolumeType":"gp2"}},{"Device
Name":"/dev/sdb","Ebs":{"DeleteOnTermination":false,"Snapshot
Id":"snap-6543fedc","VolumeType":"gp2"}},{"Device
Name":"/dev/sdc","Ebs":{"DeleteOnTermination":false,"Snapshot
Id":"snap-4321dcba","VolumeType":"gp2"}}]" --virtualization-type
hvm --sriov-net-support simple
{
"ImageId": "ami-1d2c3b4a"
}
4. (Optional) Run the describe-images command on your new AMI and compare the output to the
output for the original AMI to ensure that everything is correct. Otherwise, you can deregister the
image, make your corrections, and try registering the AMI again. For more information, see
deregister-image.
Stopping a Pending AMI Copy Operation
You can stop a pending AMI copy using the AWS Management Console or the command line.
103
Amazon Elastic Compute Cloud User Guide for Linux
Instances
Stopping a Pending AMI Copy Operation](https://image.slidesharecdn.com/ec2-ug-151130152858-lva1-app6892/75/Amazan-Ec2-112-2048.jpg)
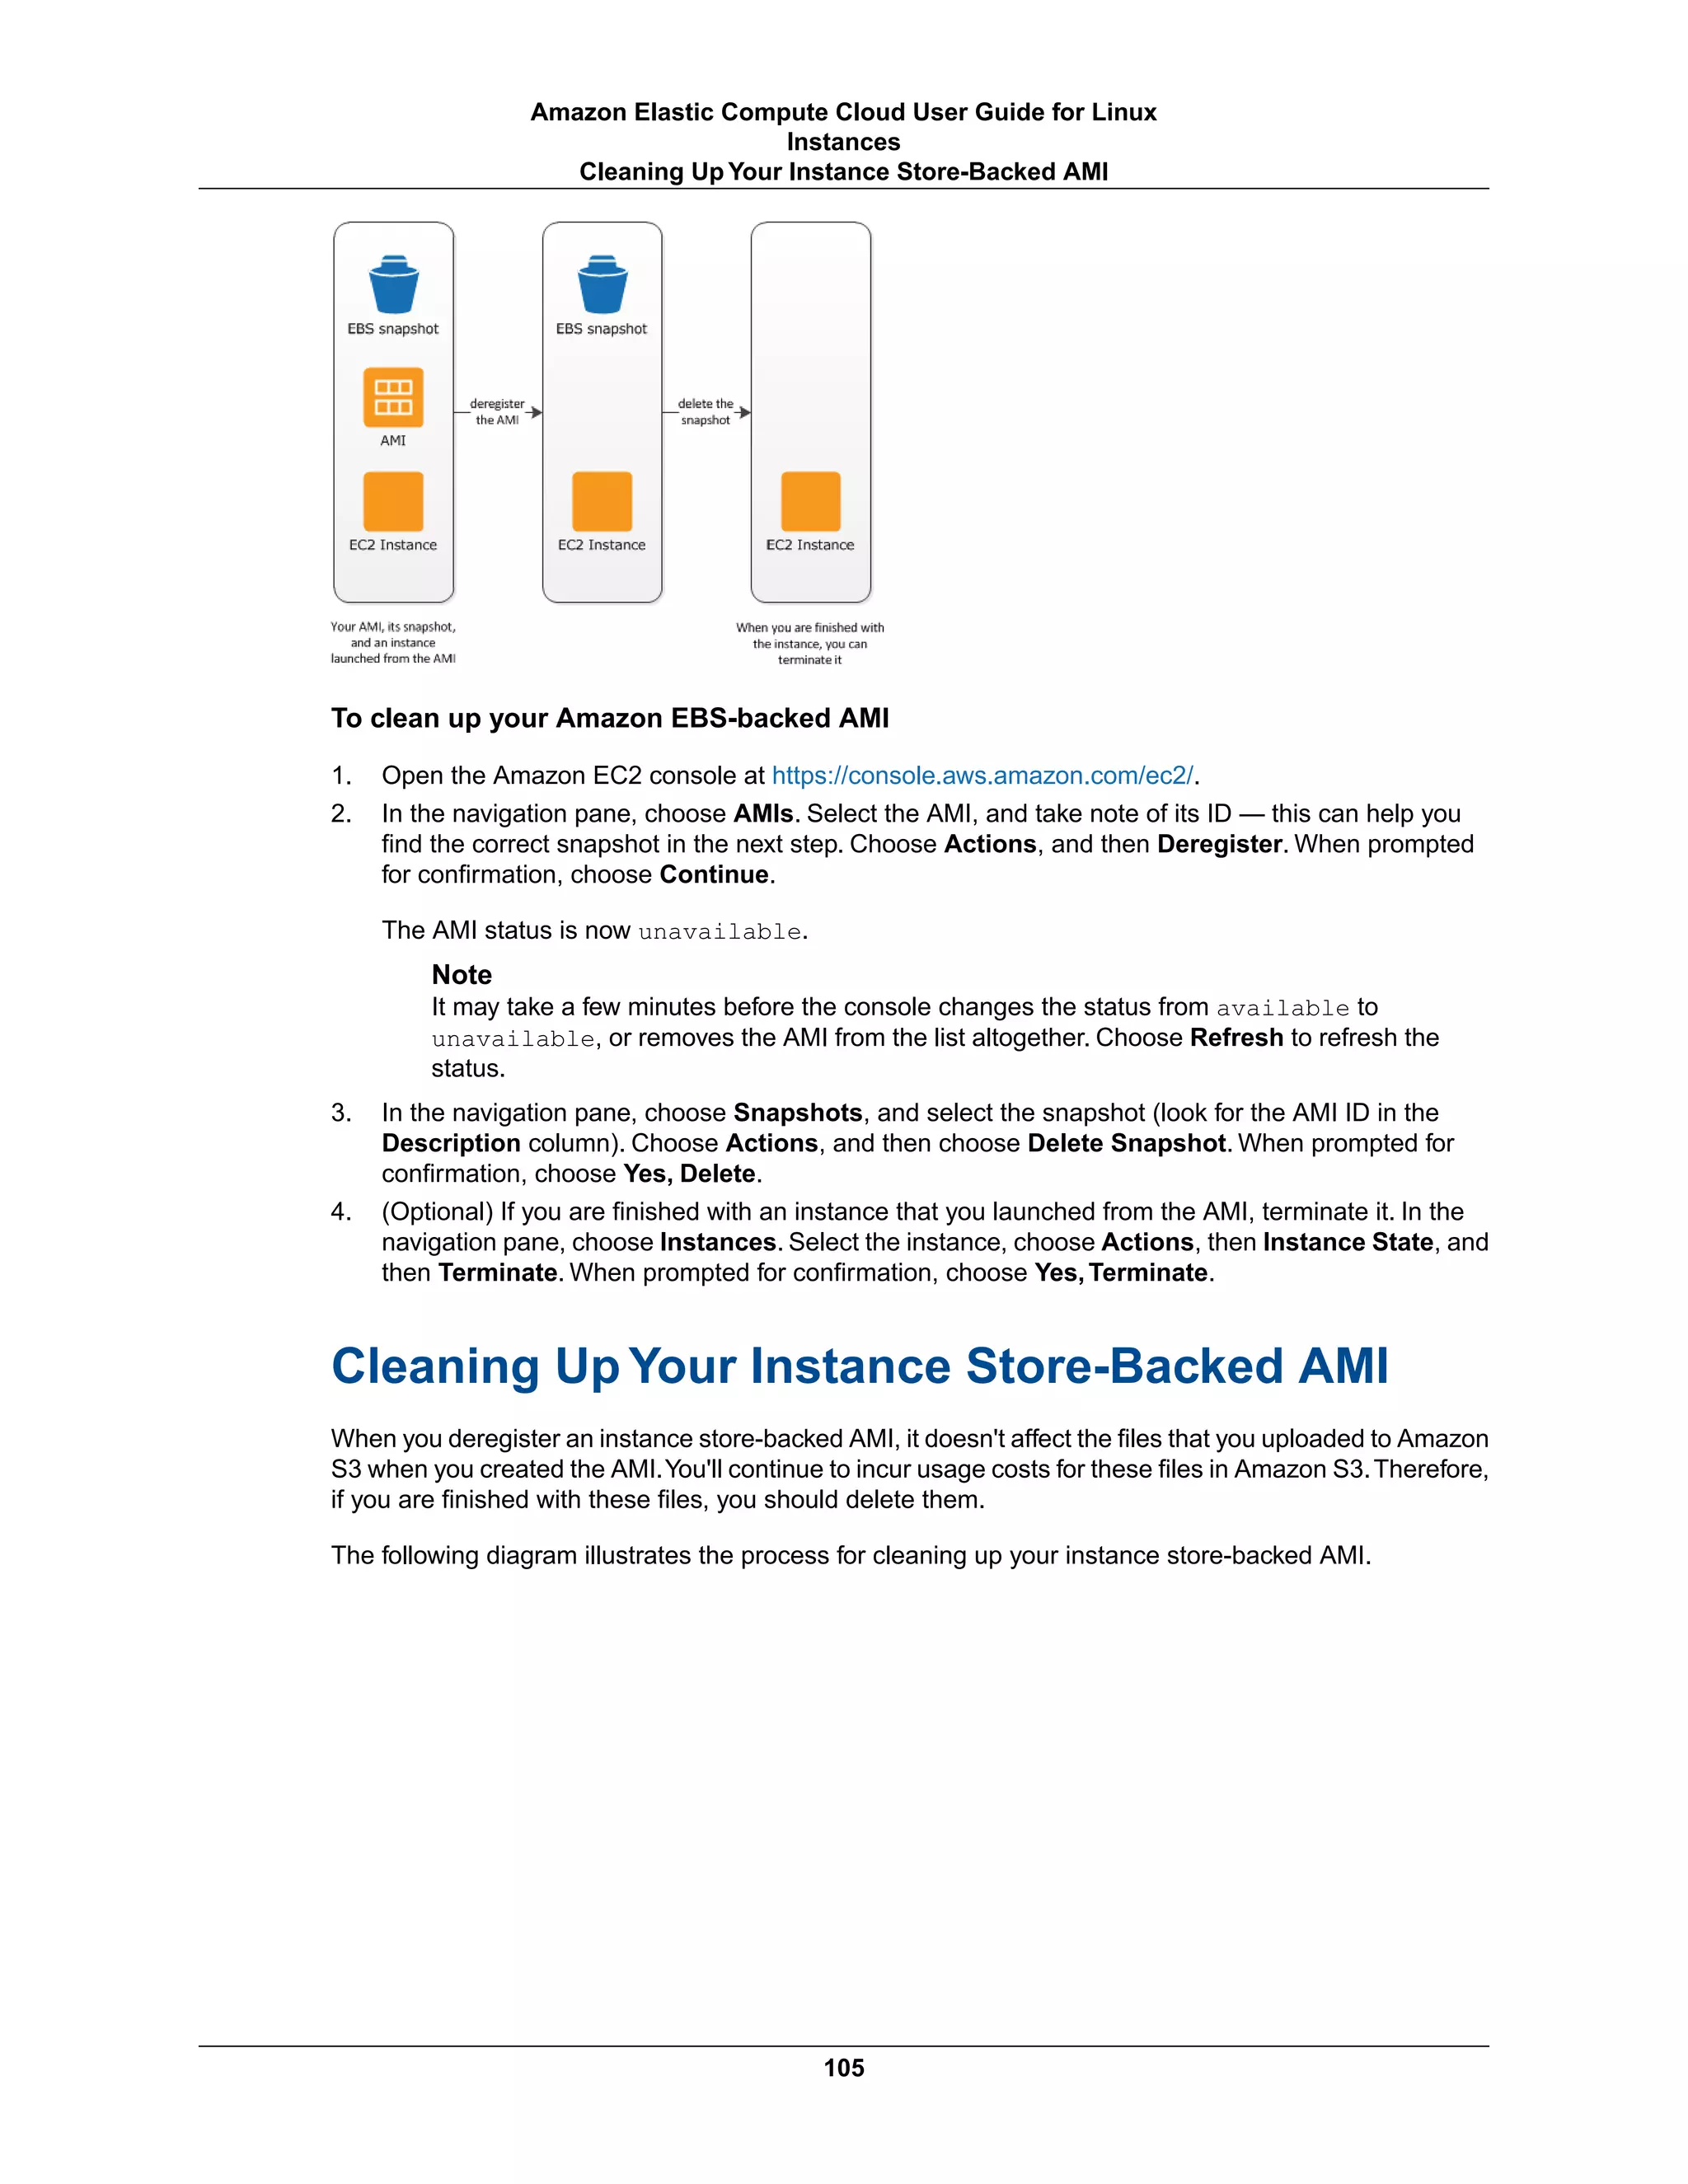

![• cloud-init (p. 109)
• Repository Configuration (p. 110)
• Adding Packages (p. 110)
• Accessing Source Packages for Reference (p. 111)
• Developing Applications (p. 112)
• Instance Store Access (p. 112)
• Product Life Cycle (p. 112)
• Security Updates (p. 112)
• Support (p. 113)
Finding the Amazon Linux AMI
For a list of the latest Amazon Linux AMIs, see Amazon Linux AMIs.
Launching and Connecting to an Amazon Linux
Instance
After locating your desired AMI, note the AMI ID.You can use the AMI ID to launch and then connect to
your instance.
Amazon Linux does not allow remote root SSH by default. Also, password authentication is disabled to
prevent brute-force password attacks. To enable SSH logins to an Amazon Linux instance, you must
provide your key pair to the instance at launch.You must also set the security group used to launch your
instance to allow SSH access.By default, the only account that can log in remotely using SSH is ec2-user;
this account also has sudo privileges. If you want to enable remote root log in, please be aware that it is
less secure than relying on key pairs and a secondary user.
For information about launching and using your Amazon Linux instance, see LaunchYour Instance (p.225).
For information about connecting to your Amazon Linux instance, see Connecting to Your Linux
Instance (p. 236).
Identifying Amazon Linux AMI Images
Each image contains a unique /etc/image-id that identifies the AMI. This file contains information
about the image.
The following is an example of the /etc/image-id file:
[ec2-user ~]$ cat /etc/image-id
image_name="amzn-ami-hvm"
image_version="2015.09"
image_arch="x86_64"
image_file="amzn-ami-hvm-2015.09.0.x86_64.ext4.gpt"
image_stamp="f819-da48"
image_date="20150916025513"
recipe_name="amzn ami"
recipe_id="b4b7f85d-c9b8-99ae-c1bb-634d-20d8-50a5-3aa92282"
The image_name, image_version, and image_arch items come from the build recipe that Amazon
used to construct the image. The image_stamp is simply a unique random hex value generated during
image creation. The image_date item is in YYYYMMDDhhmmss format, and is the UTC time of image
creation. The recipe_name and recipe_id refer to the name and ID of the build recipe Amazon used
107
Amazon Elastic Compute Cloud User Guide for Linux
Instances
Finding the Amazon Linux AMI](https://image.slidesharecdn.com/ec2-ug-151130152858-lva1-app6892/75/Amazan-Ec2-116-2048.jpg)
![to construct the image, which identifies the current running version of Amazon Linux. This file will not
change as you install updates from the yum repository.
Amazon Linux contains an /etc/system-release file that specifies the current release that is installed.
This file is updated through yum and is part of the system-release RPM.
The following is an example of an /etc/system-release file:
[ec2-user ~]$ cat /etc/system-release
Amazon Linux AMI release 2015.09
Amazon Linux also contains a machine readable version of the /etc/system-release file found in
/etc/system-release-cpe and follows the CPE specification from MITRE (CPE).
Included AWS Command Line Tools
The following popular command line tools for AWS integration and usage have been included in Amazon
Linux or in the default repositories:
• aws-amitools-ec2
• aws-apitools-as
• aws-apitools-cfn
• aws-apitools-ec2
• aws-apitools-elb
• aws-apitools-iam
• aws-apitools-mon
• aws-apitools-rds
• aws-cfn-bootstrap
• aws-cli
• aws-scripts-ses
Although the aws-apitools-* command line tools are included with every Amazon Linux version, the
aws-cli command line tools provide a standard experience across all Amazon Web Services and will
eventually replace the service-specific tool sets.
For instances launched using IAM roles, a simple script has been included to prepare
AWS_CREDENTIAL_FILE, JAVA_HOME, AWS_PATH, PATH, and product-specific environment variables
after a credential file has been installed to simplify the configuration of these tools.
Also, to allow the installation of multiple versions of the API and AMI tools, we have placed symbolic links
to the desired versions of these tools in /opt/aws, as described here:
/opt/aws/bin
Symbolic links to /bin directories in each of the installed tools directories.
/opt/aws/{apitools|amitools}
Products are installed in directories of the form name-version and a symbolic link name that is
attached to the most recently installed version.
/opt/aws/{apitools|amitools}/name/environment.sh
Used by /etc/profile.d/aws-apitools-common.sh to set product-specific environment
variables, such as EC2_HOME.
108
Amazon Elastic Compute Cloud User Guide for Linux
Instances
Included AWS Command Line Tools](https://image.slidesharecdn.com/ec2-ug-151130152858-lva1-app6892/75/Amazan-Ec2-117-2048.jpg)


![site. Hosting repositories in each region enables us to deploy updates quickly and without any data transfer
charges. The packages can be installed by issuing yum commands, such as the following example:
[ec2-user ~]$ sudo yum install httpd
Access to the Extra Packages for Enterprise Linux (EPEL) repository is configured, but it is not enabled
by default. EPEL provides third-party packages in addition to those that are in the Amazon Linux
repositories. The third-party packages are not supported by AWS.
If you find that Amazon Linux does not contain an application you need, you can simply install the
application directly on your Amazon Linux instance. Amazon Linux uses RPMs and yum for package
management, and that is likely the simplest way to install new applications.You should always check to
see if an application is available in our central Amazon Linux repository first, because many applications
are available there. These applications can easily be added to your Amazon Linux instance.
To upload your applications onto a running Amazon Linux instance, use scp or sftp and then configure
the application by logging on to your instance.Your applications can also be uploaded during the instance
launch by using the PACKAGE_SETUP action from the built-in cloud-init package. For more information,
see cloud-init (p. 109).
Important
If your instance is running in a virtual private cloud (VPC), you must attach an Internet Gateway
to the VPC in order to contact the yum repository. For more information, see Internet Gateways
in the Amazon VPC User Guide.
Accessing Source Packages for Reference
You can view the source of packages you have installed on your instance for reference purposes by using
tools provided in Amazon Linux. Source packages are available for all of the packages included in Amazon
Linux and the online package repository. Simply determine the package name for the source package
you want to install and use the get_reference_source command to view source within your running
instance. For example:
[ec2-user ~]$ get_reference_source -p bash
The following is a sample response:
Requested package: bash
Found package from local RPM database: bash-4.1.2-15.17.amzn1.x86_64
Corresponding source RPM to found package :
bash-4.1.2-15.17.amzn1.src.rpm
Are these parameters correct? Please type 'yes' to continue: yes
Source RPM downloaded to:
/usr/src/srpm/debug/bash-4.1.2-15.17.amzn1.src.rpm
The source RPM is placed in the /usr/src/srpm/debug directory of your instance. From there, it can
be unpacked, and, for reference, you can view the source tree using standard RPM tools. After you finish
debugging, the package is available for use.
Important
If your instance is running in a virtual private cloud (VPC), you must attach an Internet Gateway
to the VPC in order to contact the yum repository. For more information, see Internet Gateways
in the Amazon VPC User Guide.
111
Amazon Elastic Compute Cloud User Guide for Linux
Instances
Accessing Source Packages for Reference](https://image.slidesharecdn.com/ec2-ug-151130152858-lva1-app6892/75/Amazan-Ec2-120-2048.jpg)


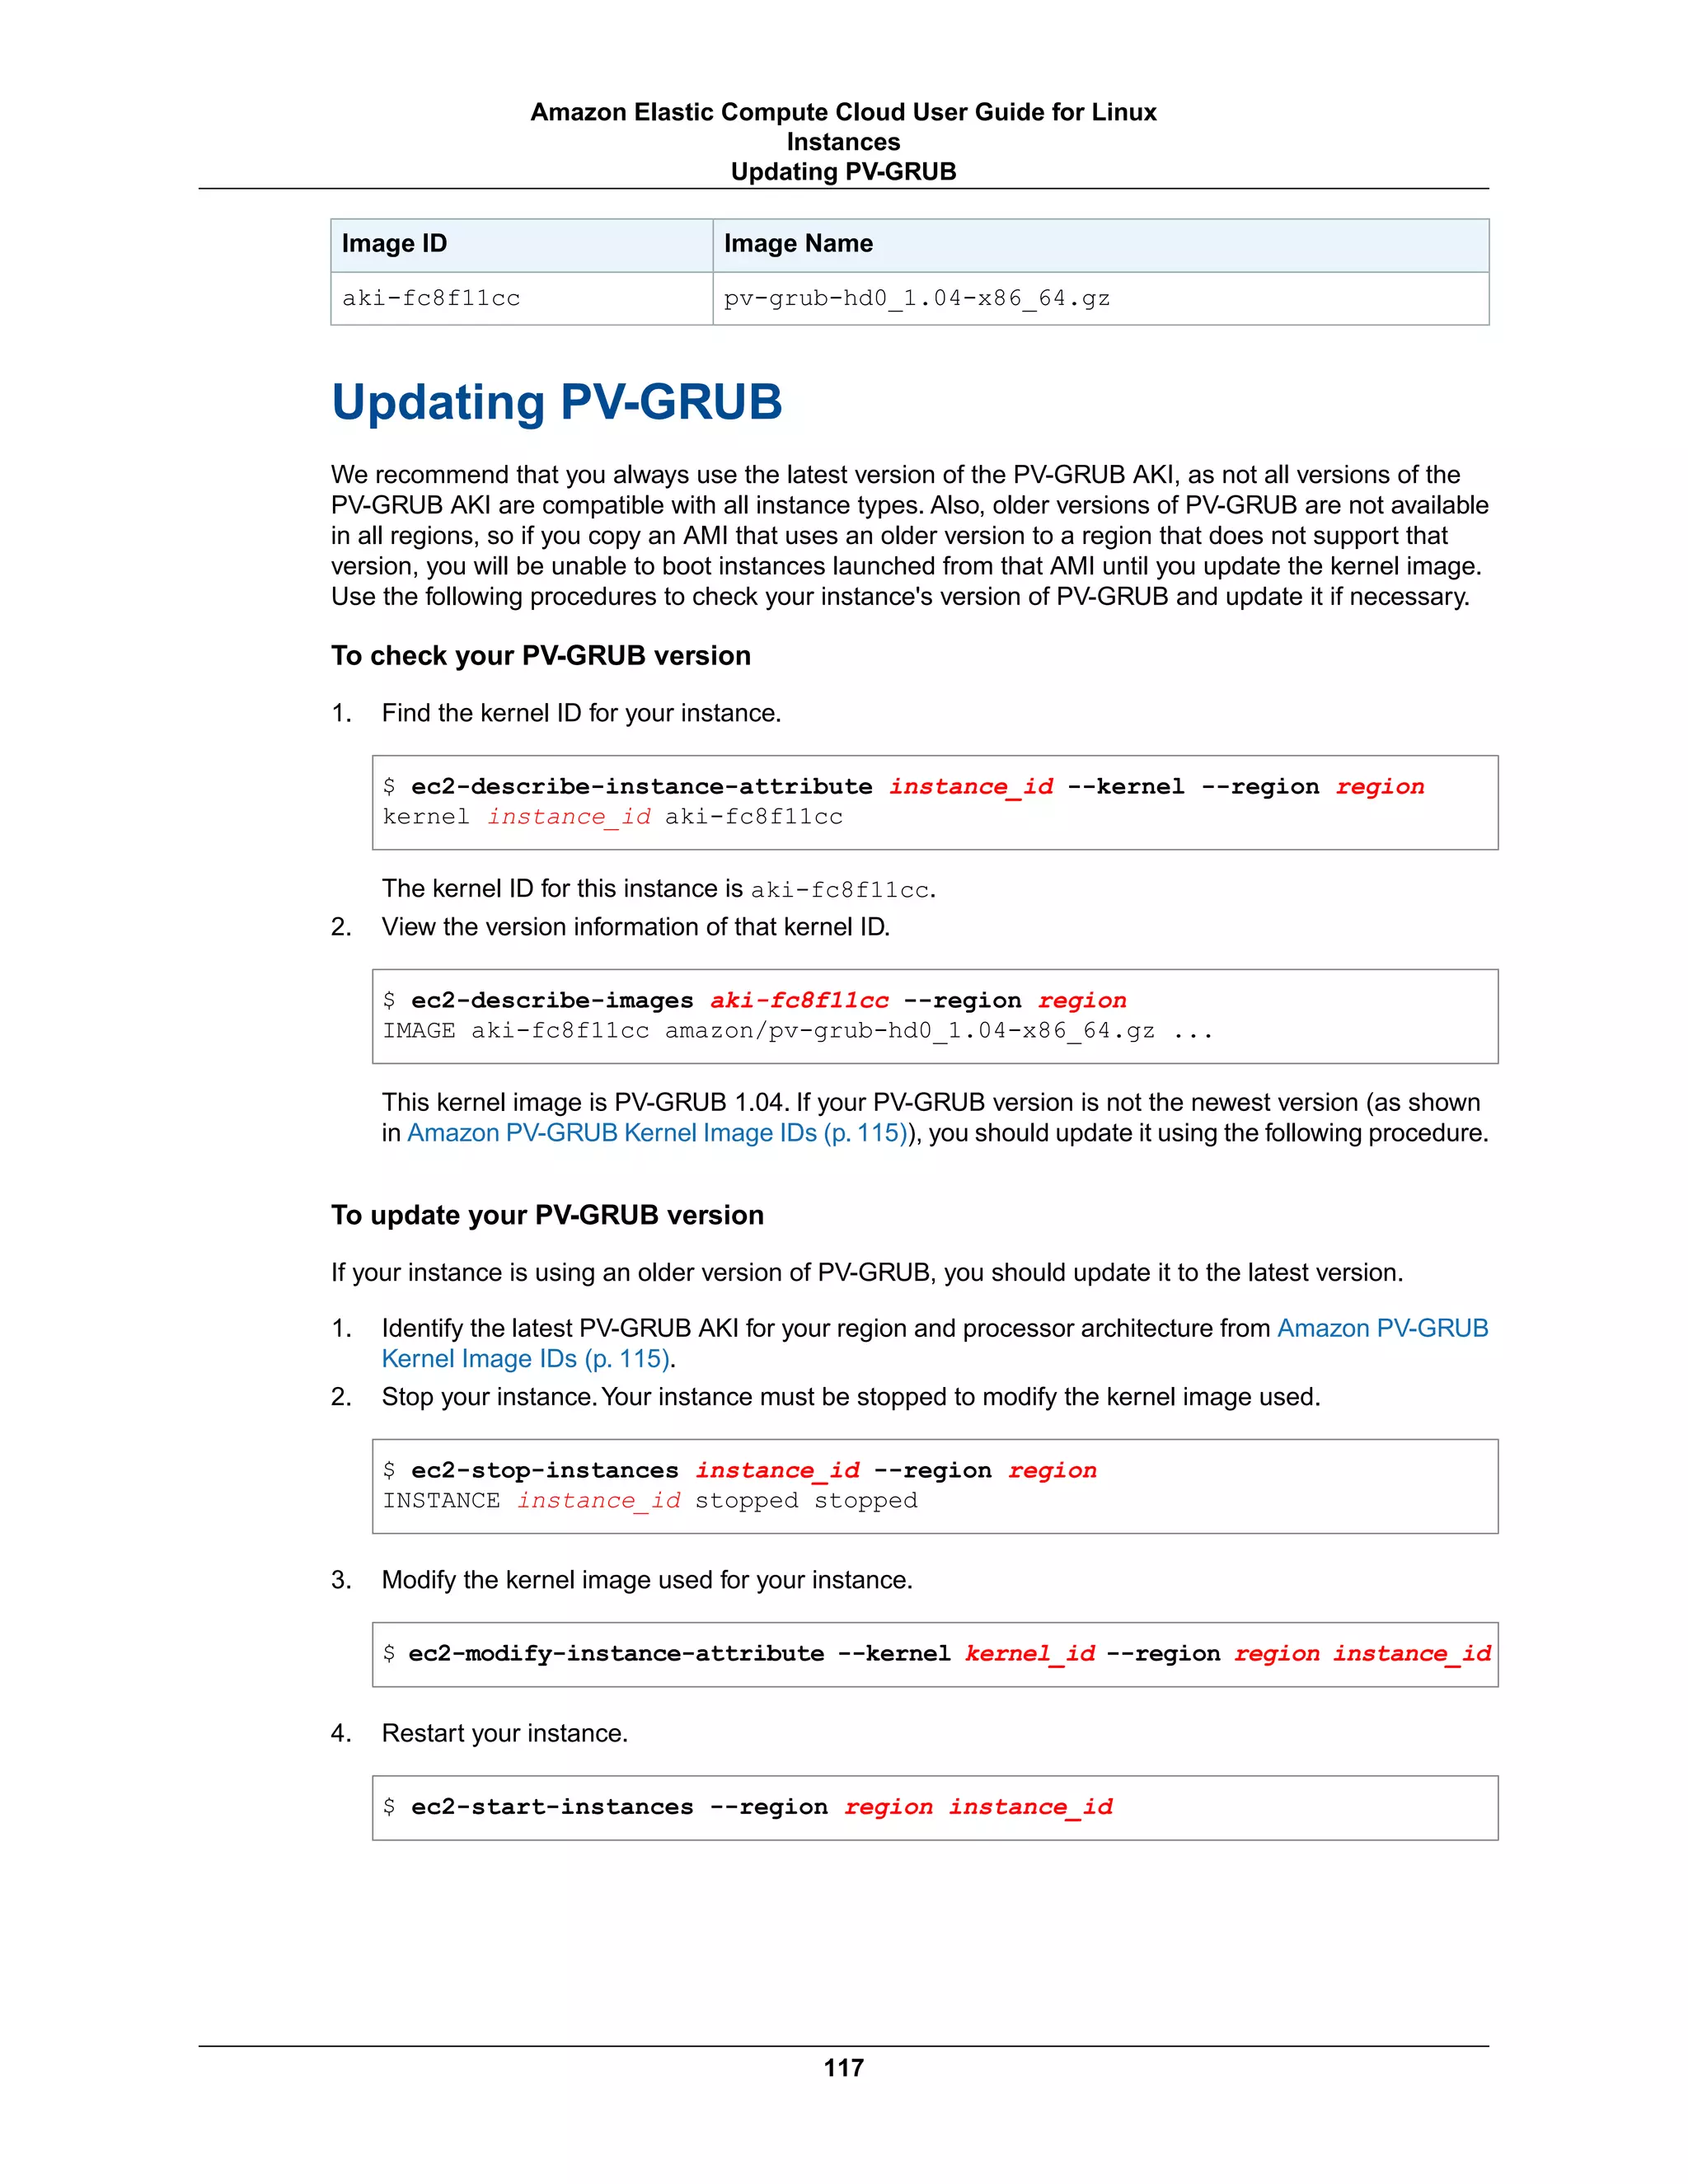


![AMIs for GPU Instances
To help you get started, NVIDIA provides AMIs for GPU instances. These reference AMIs include the
NVIDIA driver, which enables full functionality and performance of the NVIDIA GPUs. For a list of AMIs
with the NVIDIA driver, see AWS Marketplace (NVIDIA GRID).
You can launch CG1 and G2 instances using any HVM AMI.
Installing the NVIDIA Driver on Linux
A GPU instance must have the appropriate NVIDIA driver.The NVIDIA driver you install must be compiled
against the kernel that you intend to run on your instance.
Amazon provides AMIs with updated and compatible builds of the NVIDIA kernel drivers for each official
kernel upgrade in the AWS Marketplace. If you decide to use a different NVIDIA driver version than the
one that Amazon provides, or decide to use a kernel that's not an official Amazon build, you must uninstall
the Amazon-provided NVIDIA packages from your system to avoid conflicts with the versions of the drivers
that you are trying to install.
Use this command to uninstall Amazon-provided NVIDIA packages:
[ec2-user ~]$ sudo yum erase nvidia cuda
The Amazon-provided CUDA toolkit package has dependencies on the NVIDIA drivers. Uninstalling the
NVIDIA packages erases the CUDA toolkit.You must reinstall the CUDA toolkit after installing the NVIDIA
driver.
You can download NVIDIA drivers from http://www.nvidia.com/Download/Find.aspx.Select the appropriate
driver for your instance:
G2 Instances
GRIDProduct Type
GRID SeriesProduct Series
GRID K520Product
Linux 64-bitOperating System
Recommended/CertifiedRecommended/Beta
CG1 Instances
TeslaProduct Type
M-ClassProduct Series
M2050Product
Linux 64-bitOperating System
Recommended/CertifiedRecommended/Beta
For more information about installing and configuring the driver, open the ADDITIONAL INFORMATION
tab on the download page for the driver on the NVIDIA website and click the README link.
129
Amazon Elastic Compute Cloud User Guide for Linux
Instances
GPU Instances](https://image.slidesharecdn.com/ec2-ug-151130152858-lva1-app6892/75/Amazan-Ec2-138-2048.jpg)
![Install the NVIDIA Driver Manually
To install the driver for an Amazon Linux AMI
1. Run the yum update command to get the latest versions of packages for your instance.
[ec2-user ~]$ sudo yum update -y
2. Reboot your instance to load the latest kernel version.
[ec2-user ~]$ sudo reboot
3. Reconnect to your instance after it has rebooted.
4. Install the "Development tools" package group.
[ec2-user ~]$ sudo yum groupinstall -y "Development tools"
5. Make sure the kernel-devel package is installed and matches the version of the kernel you are
currently running.
[ec2-user ~]$ sudo yum install kernel-devel-`uname -r`
6. Download the driver package that you identified earlier. For example, the following command
downloads the 340.46 version of the G2 instance driver.
[ec2-user ~]$ wget http://us.download.nvidia.com/XFree86/Linux-
x86_64/340.46/NVIDIA-Linux-x86_64-340.46.run
7. Run the self-install script to install the NVIDIA driver. For example:
[ec2-user ~]$ sudo /bin/bash ./NVIDIA-Linux-x86_64-340.46.run
8. Reboot the instance. For more information, see Reboot Your Instance (p. 249).
9. Confirm that the driver is functional.The response for the following command lists the installed NVIDIA
driver version and details about the GPUs.
[ec2-user ~]$ nvidia-smi -q | head
==============NVSMI LOG==============
Timestamp : Thu Oct 2 17:28:29 2014
Driver Version : 340.46
Attached GPUs : 1
GPU 0000:00:03.0
Product Name : GRID K520
Product Brand : Grid
130
Amazon Elastic Compute Cloud User Guide for Linux
Instances
GPU Instances](https://image.slidesharecdn.com/ec2-ug-151130152858-lva1-app6892/75/Amazan-Ec2-139-2048.jpg)


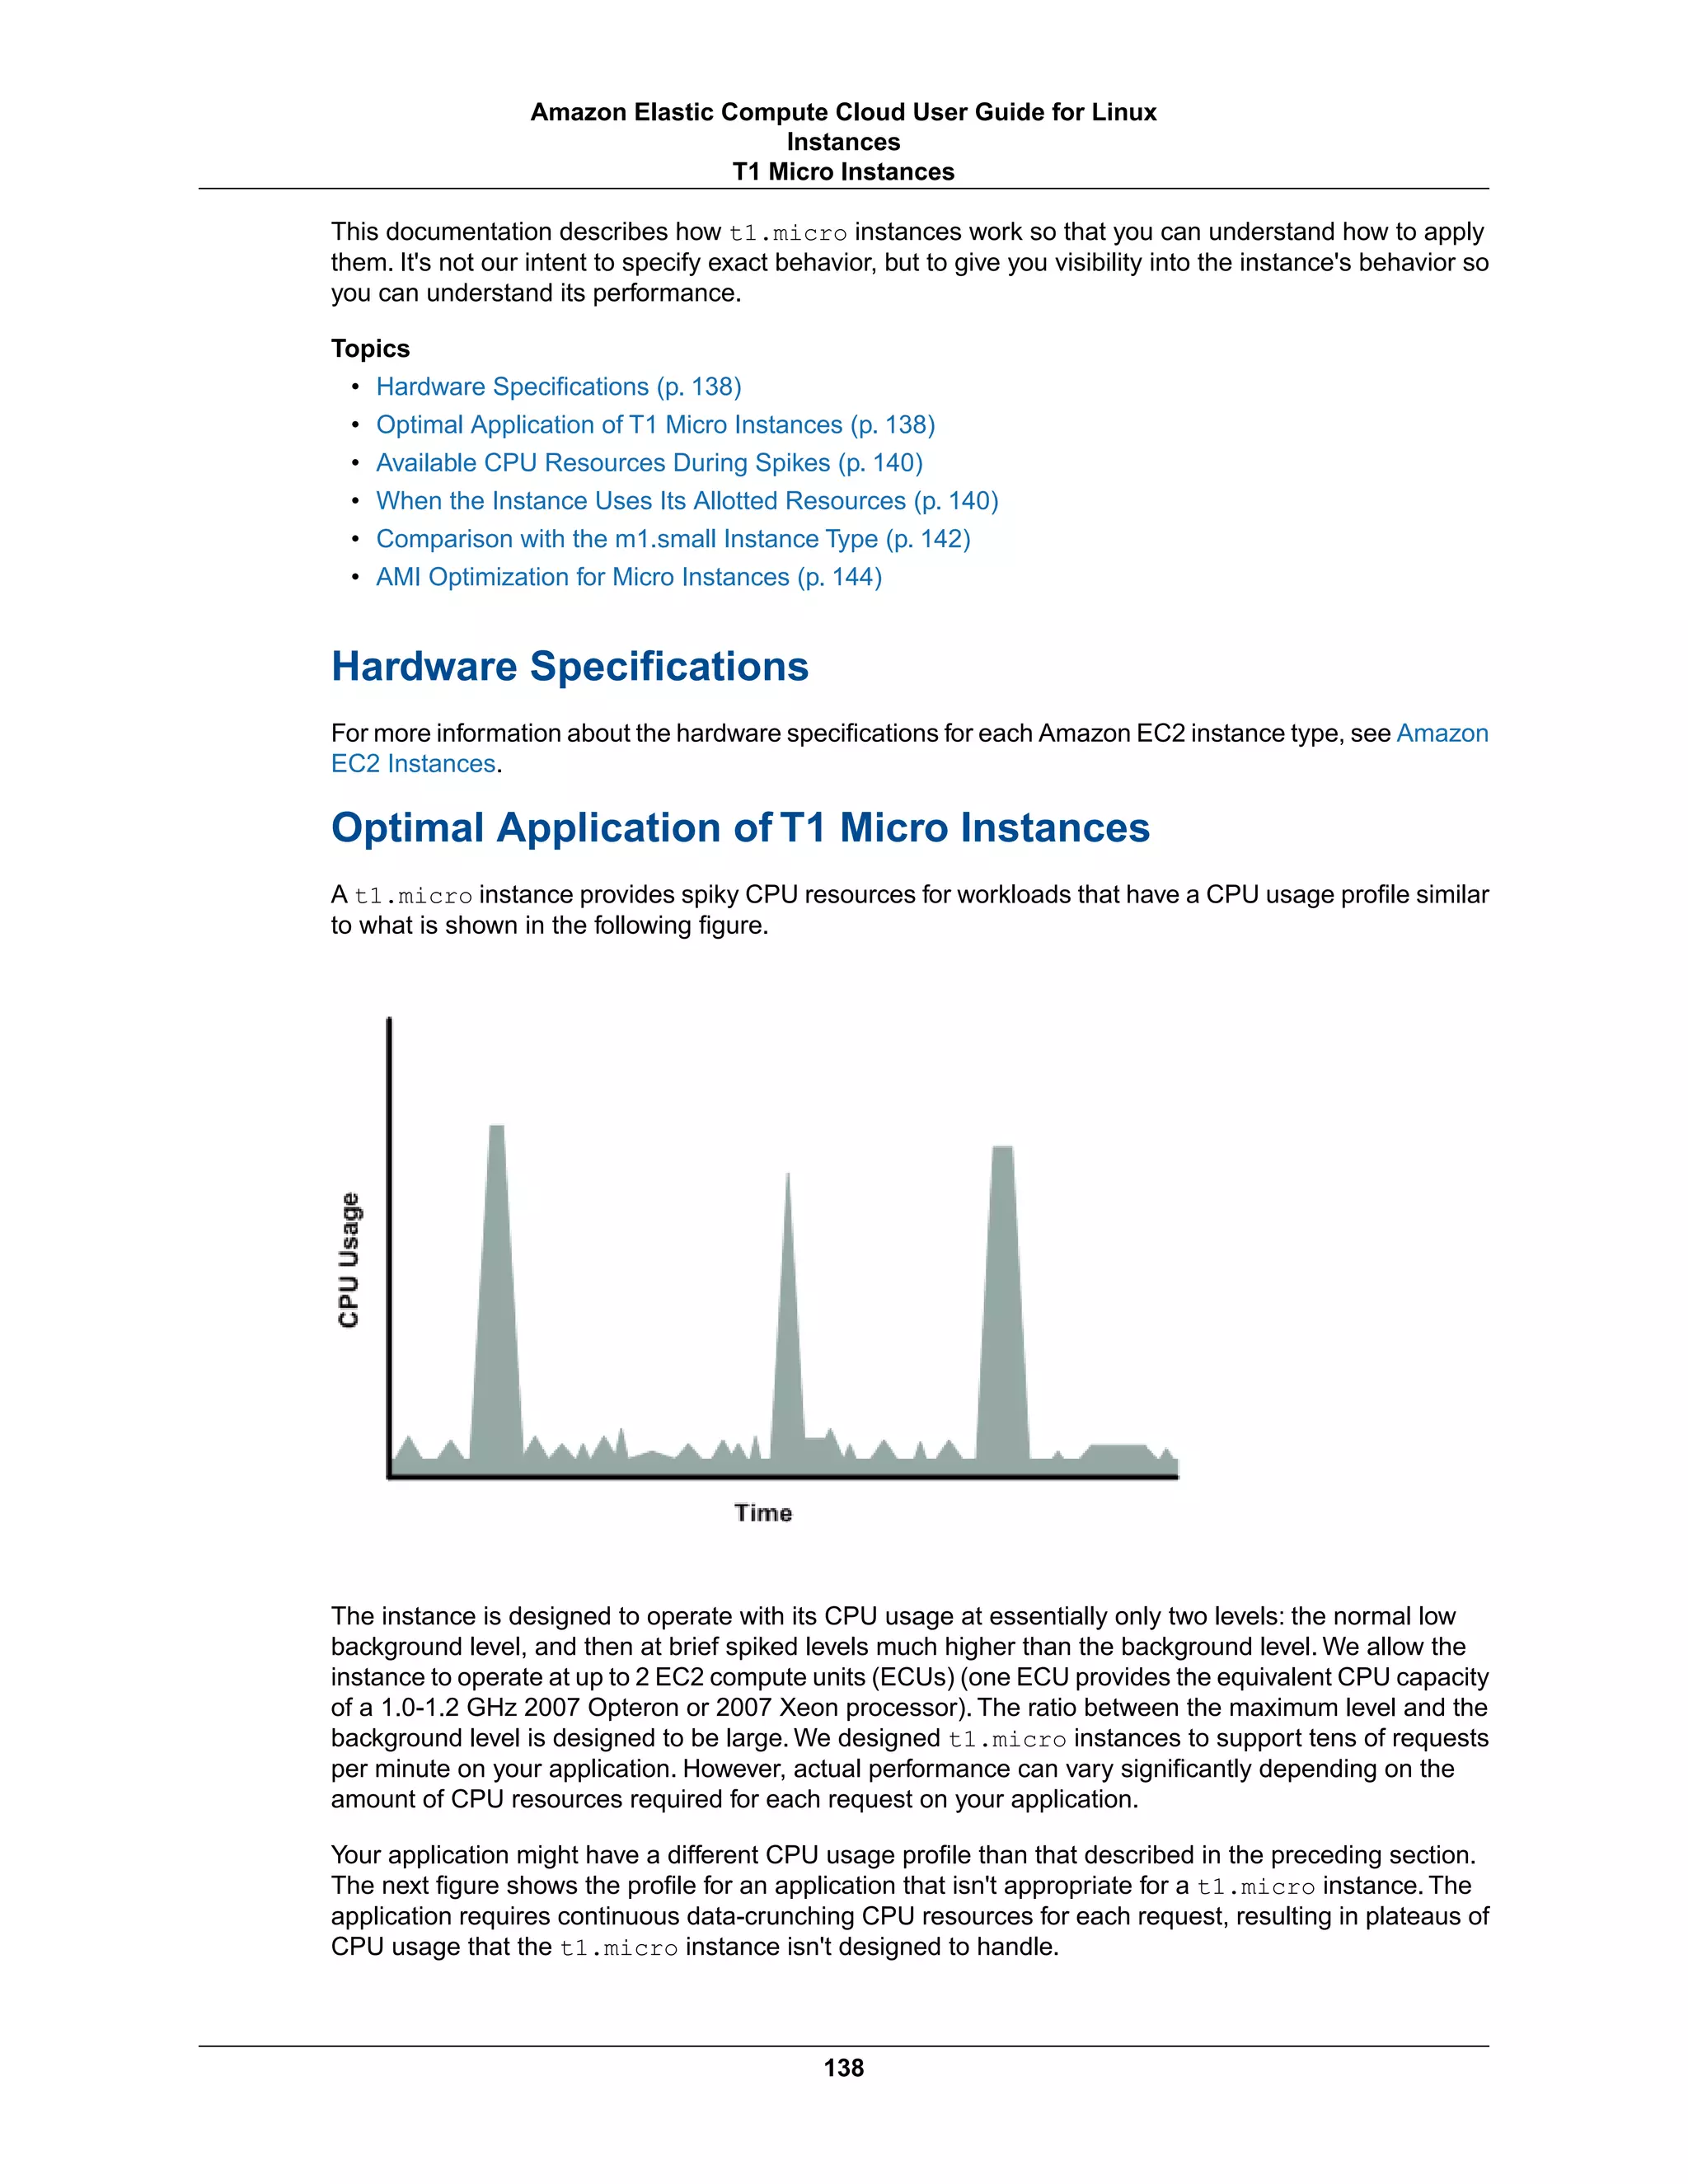


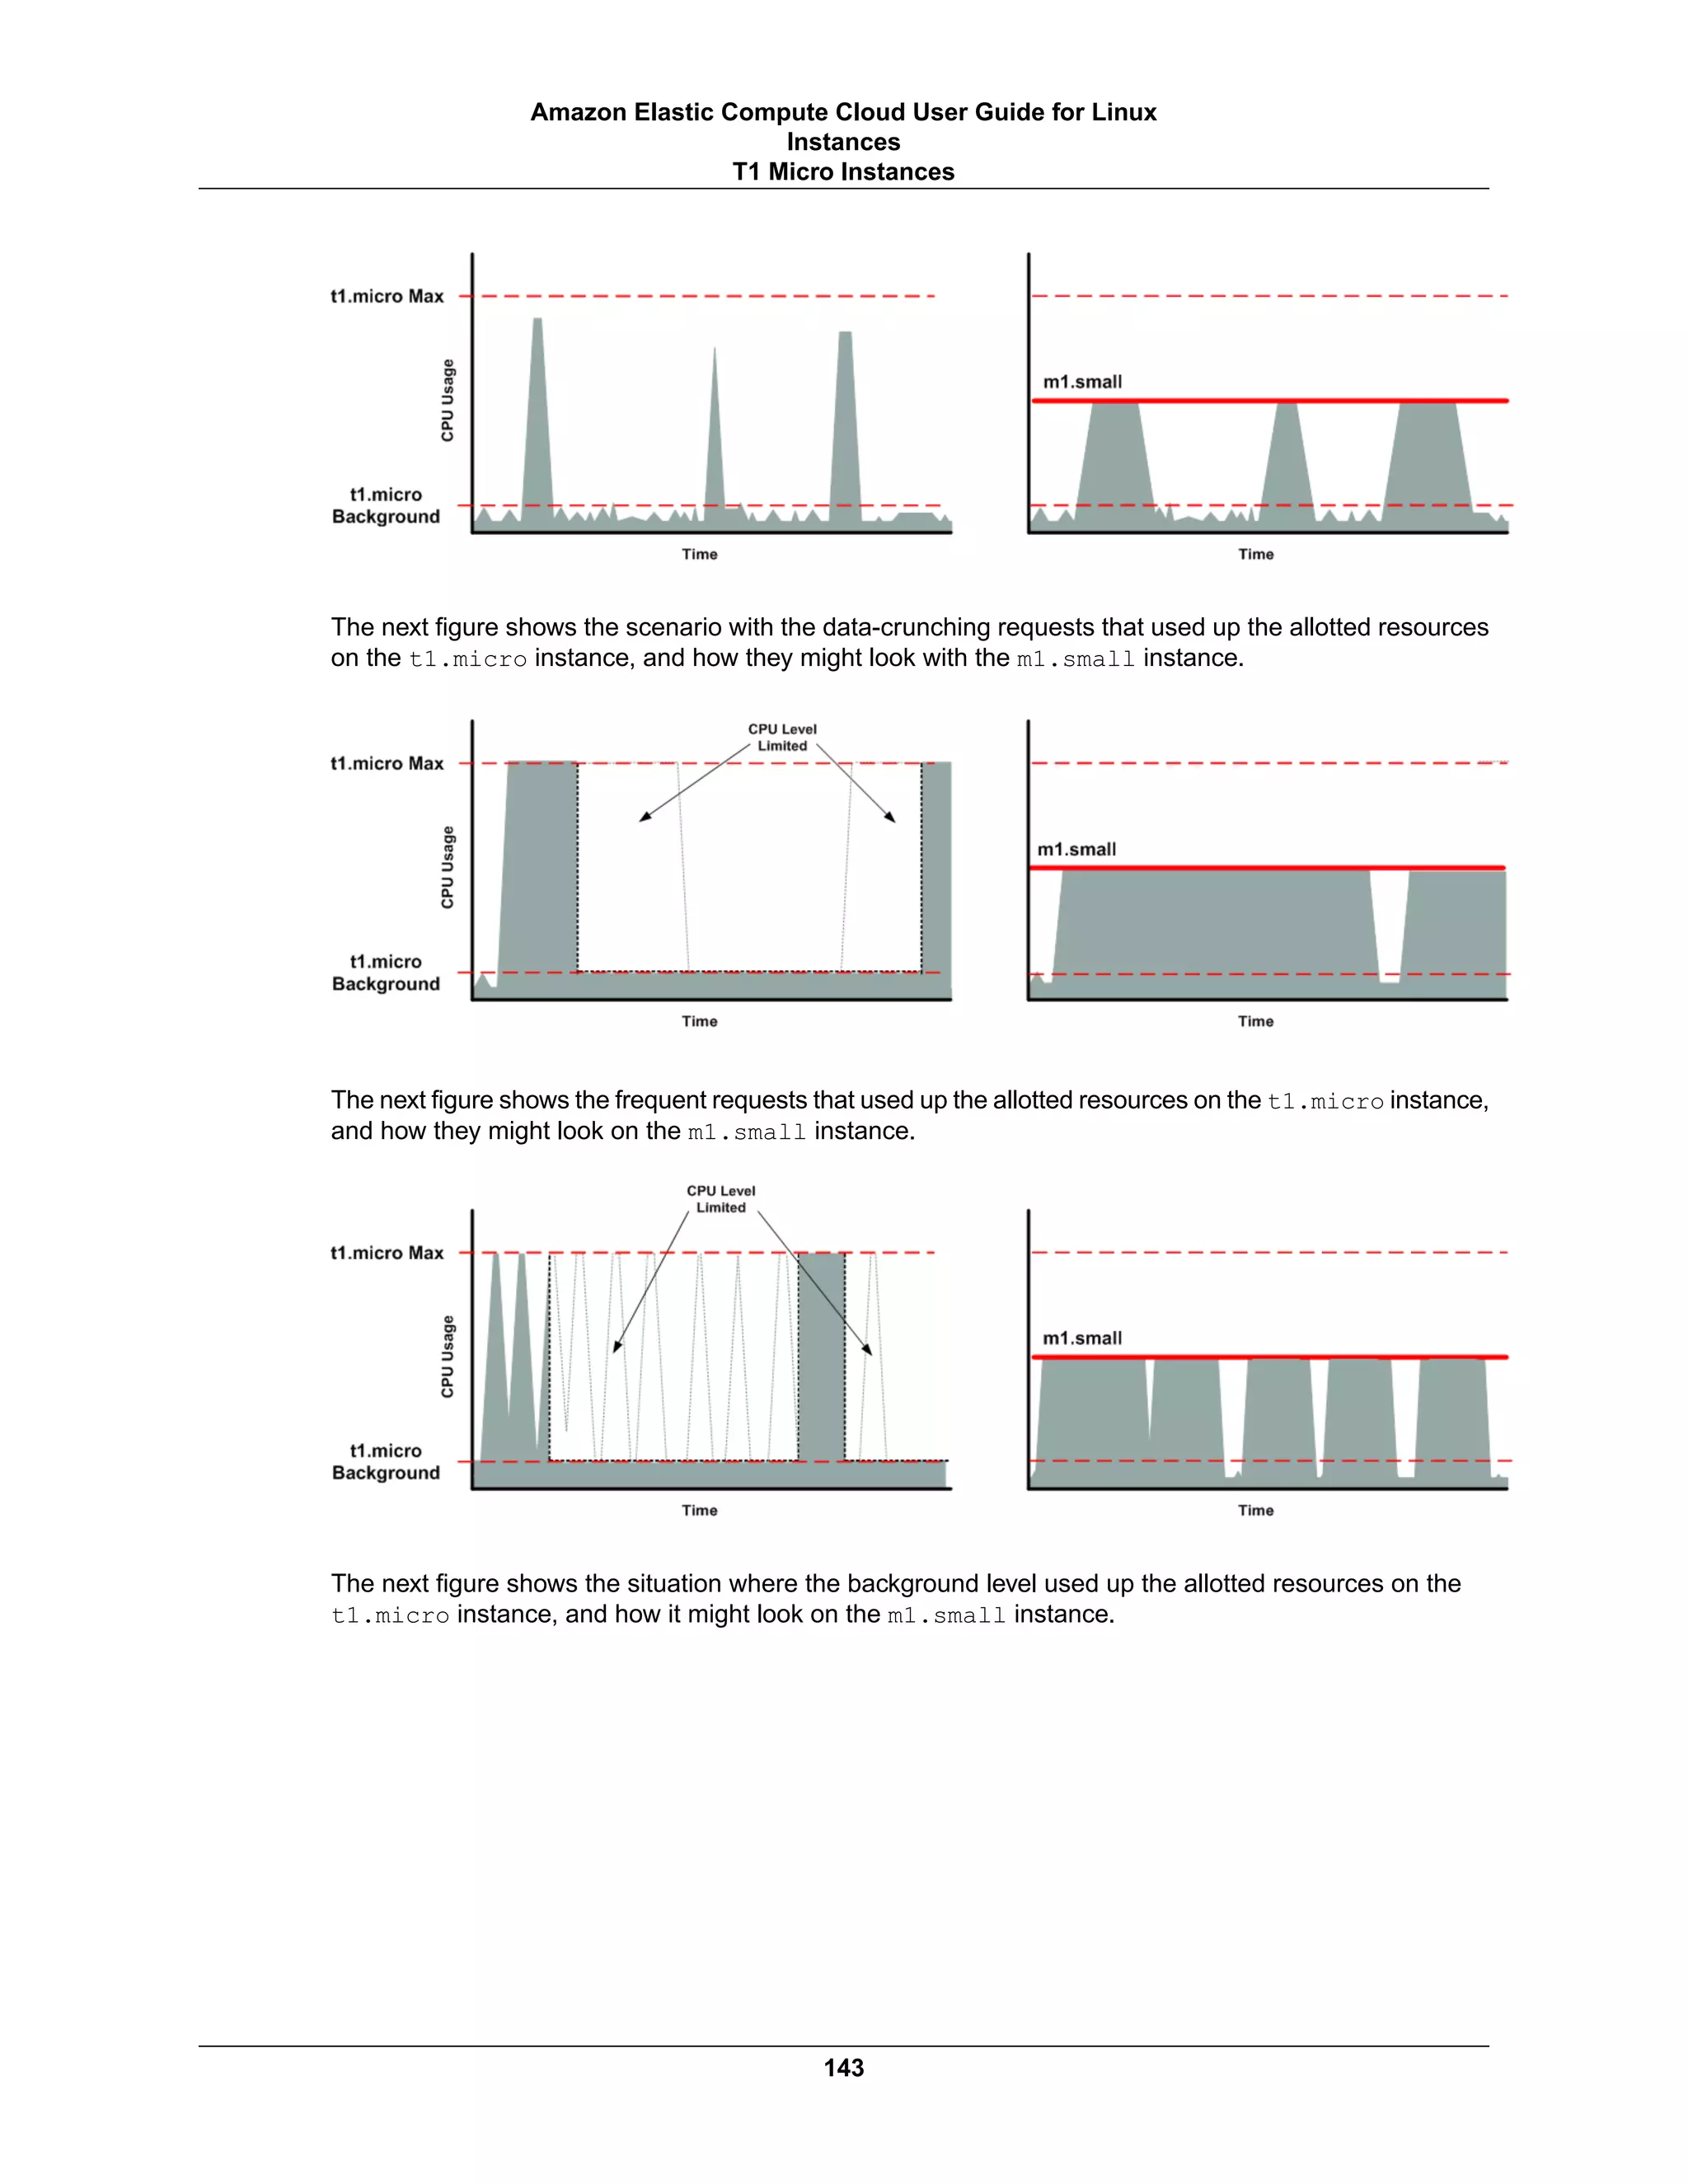

![Compatibility for Resizing Instances
You can resize an instance only if its current instance type and the new instance type that you want are
compatible in the following ways:
• Virtualization type. Linux AMIs use one of two types of virtualization: paravirtual (PV) or hardware virtual
machine (HVM).You can't resize an instance that was launched from a PV AMI to an instance type
that is HVM only. For more information, see Linux AMI Virtualization Types (p. 70).
• Network. Some instance types are not supported in EC2-Classic and must be launched in a VPC.
Therefore, you can't resize an instance in EC2-Classic to a instance type that is available only in a VPC
unless you have a nondefault VPC. For more information, see Instance Types Available Only in a
VPC (p. 488).
• Platform. All Amazon EC2 instance types support 64-bit AMIs, but only the following instance types
support 32-bit AMIs:t2.micro, t2.small, t2.medium, c3.large, t1.micro, m1.small, m1.medium,
and c1.medium. If you are resizing a 32-bit instance, you are limited to these instance types.
For example, T2 instances are not supported in EC2-Classic and they are HVM only.Therefore, you can't
resize a T1 instance to a T2 instance because T1 instances do not support HVM and must be launched
from PV AMIs. If you want to resize a T2 instance to a larger instance type, you can select any current
generation instance type, such as M3, because all current generation instance types support HVM AMIs.
For more information, see Available Instance Types (p. 119).
Resizing an Amazon EBS–backed Instance
You must stop your Amazon EBS–backed instance before you can change its instance type. When you
stop and start an instance, be aware of the following:
• We move the instance to new hardware; however, the instance ID does not change.
• If your instance is running in a VPC and has a public IP address, we release the address and give it a
new public IP address. The instance retains its private IP addresses and any Elastic IP addresses.
• If your instance is running in EC2-Classic, we give it new public and private IP addresses, and
disassociate any Elastic IP address that's associated with the instance. Therefore, to ensure that your
users can continue to use the applications that you're hosting on your instance uninterrupted, you must
re-associate any Elastic IP address after you restart your instance.
• If your instance is in an Auto Scaling group, the Auto Scaling service marks the stopped instance as
unhealthy, and may terminate it and launch a replacement instance. To prevent this, you can suspend
the Auto Scaling processes for the group while you're resizing your instance. For more information,
see Suspend and Resume Auto Scaling Processes in the Auto Scaling Developer Guide.
For more information, see Stop and Start Your Instance (p. 246).
Use the following procedure to resize an Amazon EBS–backed instance using the AWS Management
Console.
To resize an Amazon EBS–backed instance
1. Open the Amazon EC2 console.
2. In the navigation pane, choose Instances, and select the instance.
3. [EC2-Classic] If the instance has an associated Elastic IP address, write down the Elastic IP address
and the instance ID shown in the details pane.
4. Choose Actions, select Instance State, and then choose Stop.
5. In the confirmation dialog box, choose Yes, Stop. It can take a few minutes for the instance to stop.
145
Amazon Elastic Compute Cloud User Guide for Linux
Instances
Resizing Instances](https://image.slidesharecdn.com/ec2-ug-151130152858-lva1-app6892/75/Amazan-Ec2-154-2048.jpg)
![[EC2-Classic] When the instance state becomes stopped, the Elastic IP, Public DNS, Private
DNS, and Private IPs fields in the details pane are blank to indicate that the old values are no longer
associated with the instance.
6. With the instance still selected, choose Actions, select Instance Settings, and then choose Change
Instance Type. Note that this action is disabled if the instance state is not stopped.
7. In the Change Instance Type dialog box, do the following:
a. From Instance Type, select the instance type that you want. If the instance type that you want
does not appear in the list, then it is not compatible with the configuration of your instance (for
example, because of virtualization type).
b. (Optional) If the instance type that you selected supports EBS–optimization, select EBS-optimized
to enable EBS–optimization or deselect EBS-optimized to disable EBS–optimization. Note that
if the instance type that you selected is EBS–optimized by default, EBS-optimized is selected
and you can't deselect it.
c. Choose Apply to accept the new settings.
8. To restart the stopped instance, select the instance, choose Actions, select Instance State, and
then choose Start.
9. In the confirmation dialog box, choose Yes, Start. It can take a few minutes for the instance to enter
the running state.
10. [EC2-Classic] When the instance state is running, the Public DNS, Private DNS, and Private IPs
fields in the details pane contain the new values that we assigned to the instance. If your instance
had an associated Elastic IP address, you must reassociate it as follows:
a. In the navigation pane, choose Elastic IPs.
b. Select the Elastic IP address that you wrote down before you stopped the instance.
c. Choose Actions and then choose Associate Address.
d. From Instance, select the instance ID that you wrote down before you stopped the instance,
and then choose Associate.
Migrating an Instance Store-backed Instance
When you want to move your application from one instance store-backed instance to an instance
store-backed instance with a different instance type, you must migrate it by creating an image from your
instance, and then launching a new instance from this image with the instance type that you need. To
ensure that your users can continue to use the applications that you're hosting on your instance
uninterrupted, you must take any Elastic IP address that you've associated with your original instance
and associate it with the new instance. Then you can terminate the original instance.
To migrate an instance store-backed instance
1. [EC2-Classic] If the instance you are migrating has an associated Elastic IP address, record the
Elastic IP address now so that you can associate it with the new instance later.
2. Back up any data on your instance store volumes that you need to keep to persistent storage. To
migrate data on your EBS volumes that you need to keep, take a snapshot of the volumes (see
Creating an Amazon EBS Snapshot (p. 601)) or detach the volume from the instance so that you can
attach it to the new instance later (see Detaching an Amazon EBS Volume from an Instance (p. 584)).
3. Create an AMI from your instance store-backed instance by satisfying the prerequisites and following
the procedures in Creating an Instance Store-Backed Linux AMI (p. 90). When you are finished
creating an AMI from your instance, return to this procedure.
146
Amazon Elastic Compute Cloud User Guide for Linux
Instances
Resizing Instances](https://image.slidesharecdn.com/ec2-ug-151130152858-lva1-app6892/75/Amazan-Ec2-155-2048.jpg)
![4. Open the Amazon EC2 console and in the navigation pane, select AMIs. From the filter lists, select
Owned by me, and select the image that you created in the previous step. Notice that AMI Name
is the name that you specified when you registered the image and Source is your Amazon S3 bucket.
Note
If you do not see the AMI that you created in the previous step, make sure that you have
selected the region in which you created your AMI.
5. Choose Launch. When you specify options for the instance, be sure to select the new instance type
that you want. If the instance type that you want can't be selected, then it is not compatible with
configuration of the AMI that you created (for example, because of virtualization type).You can also
specify any EBS volumes that you detached from the original instance.
Note that it can take a few minutes for the instance to enter the running state.
6. [EC2-Classic] If the instance that you started with had an associated Elastic IP address, you must
associate it with the new instance as follows:
a. In the navigation pane, choose Elastic IPs.
b. Select the Elastic IP address that you recorded at the beginning of this procedure.
c. Choose Actions and then choose Associate Address.
d. From Instance, select the new instance, and then choose Associate.
7. (Optional) You can terminate the instance that you started with, if it's no longer needed. Select the
instance and verify that you are about to terminate the original instance, not the new instance (for
example, check the name or launch time). Choose Actions, select Instance State, and then choose
Terminate.
Migrating to a New Instance Configuration
If the current configuration of your instance is incompatible with the new instance type that you want, then
you can't resize the instance to that instance type. Instead, you can migrate your application to a new
instance with a configuration that is compatible with the new instance type that you want.
If you want to move from an instance launched from a PV AMI to an instance type that is HVM only, the
general process is as follows:
1. Back up any data on your instance store volumes that you need to keep to persistent storage. To
migrate data on your EBS volumes that you need to keep, create a snapshot of the volumes (see
Creating an Amazon EBS Snapshot (p. 601)) or detach the volume from the instance so that you can
attach it to the new instance later (see Detaching an Amazon EBS Volume from an Instance (p. 584)).
2. Launch a new instance, selecting the following:
• An HVM AMI.
• The HVM only instance type.
• [EC2-VPC] If you are using an Elastic IP address, select the VPC that the original instance is
currently running in.
• Any EBS volumes that you detached from the original instance and want to attach to the new
instance, or new EBS volumes based on the snapshots that you created.
• If you want to allow the same traffic to reach the new instance, select the security group that is
associated with the original instance.
3. Install your application and any required software on the instance.
4. Restore any data that you backed up from the instance store volumes of the original instance.
5. If you are using an Elastic IP address, assign it to the newly launched instance as follows:
147
Amazon Elastic Compute Cloud User Guide for Linux
Instances
Resizing Instances](https://image.slidesharecdn.com/ec2-ug-151130152858-lva1-app6892/75/Amazan-Ec2-156-2048.jpg)


![Launching Spot Instances in a VPC
To take advantage of the features of EC2-VPC when you use Spot instances, specify in your Spot request
that your Spot instances are to be launched in a VPC.You specify a subnet for your Spot instances the
same way that you specify a subnet for your On-Demand instances.
The process for making a Spot instance request that launches Spot instances in a VPC is the same as
the process for making a Spot instance request that launches Spot instances in EC2-Classic—except for
the following differences:
• You should base your bid on the Spot price history of Spot instances in a VPC.
• [Default VPC] If you want your Spot instance launched in a specific low-priced Availability Zone, you
must specify the corresponding subnet in your Spot instance request. If you do not specify a subnet,
Amazon EC2 selects one for you, and the Availability Zone for this subnet might not have the lowest
Spot price.
• [Nondefault VPC] You must specify the subnet for your Spot instance.
How Spot Fleet Works
A Spot fleet is a collection, or fleet, of Spot instances. The Spot fleet attempts to launch the number of
Spot instances that are required to meet the target capacity that you specified in the Spot fleet request.
The Spot fleet also attempts to maintain its target capacity fleet if your Spot instances are interrupted due
to a change in Spot prices or available capacity.
A Spot pool is a set of unused EC2 instances with the same instance type, operating system, Availability
Zone, and network platform (EC2-Classic or EC2-VPC). When you make a Spot fleet request, you can
include multiple launch specifications, that vary by instance type, AMI, Availability Zone, or subnet. The
Spot fleet selects the Spot pools that are used to fulfill the request, based on the launch specifications
included in your Spot fleet request, and the configuration of the Spot fleet request. The Spot instances
come from the selected Spot pools.
Contents
• Spot Fleet Allocation Strategy (p. 154)
• Spot Price Overrides (p. 155)
• Spot Fleet Instance Weighting (p. 155)
• Walkthrough: Using Spot Fleet with Instance Weighting (p. 156)
Spot Fleet Allocation Strategy
The allocation strategy for your Spot fleet determines how it fulfills your Spot fleet request from the possible
Spot pools represented by its launch specifications. The following are the allocation strategies that you
can specify in your Spot fleet request:
lowestPrice
The Spot instances come from the Spot pool with the lowest price. This is the default strategy.
diversified
The Spot instances are distributed across all Spot pools.
Choosing an Allocation Strategy
You can optimize your Spot fleets based on your use case.
154
Amazon Elastic Compute Cloud User Guide for Linux
Instances
Spot Instances](https://image.slidesharecdn.com/ec2-ug-151130152858-lva1-app6892/75/Amazan-Ec2-163-2048.jpg)


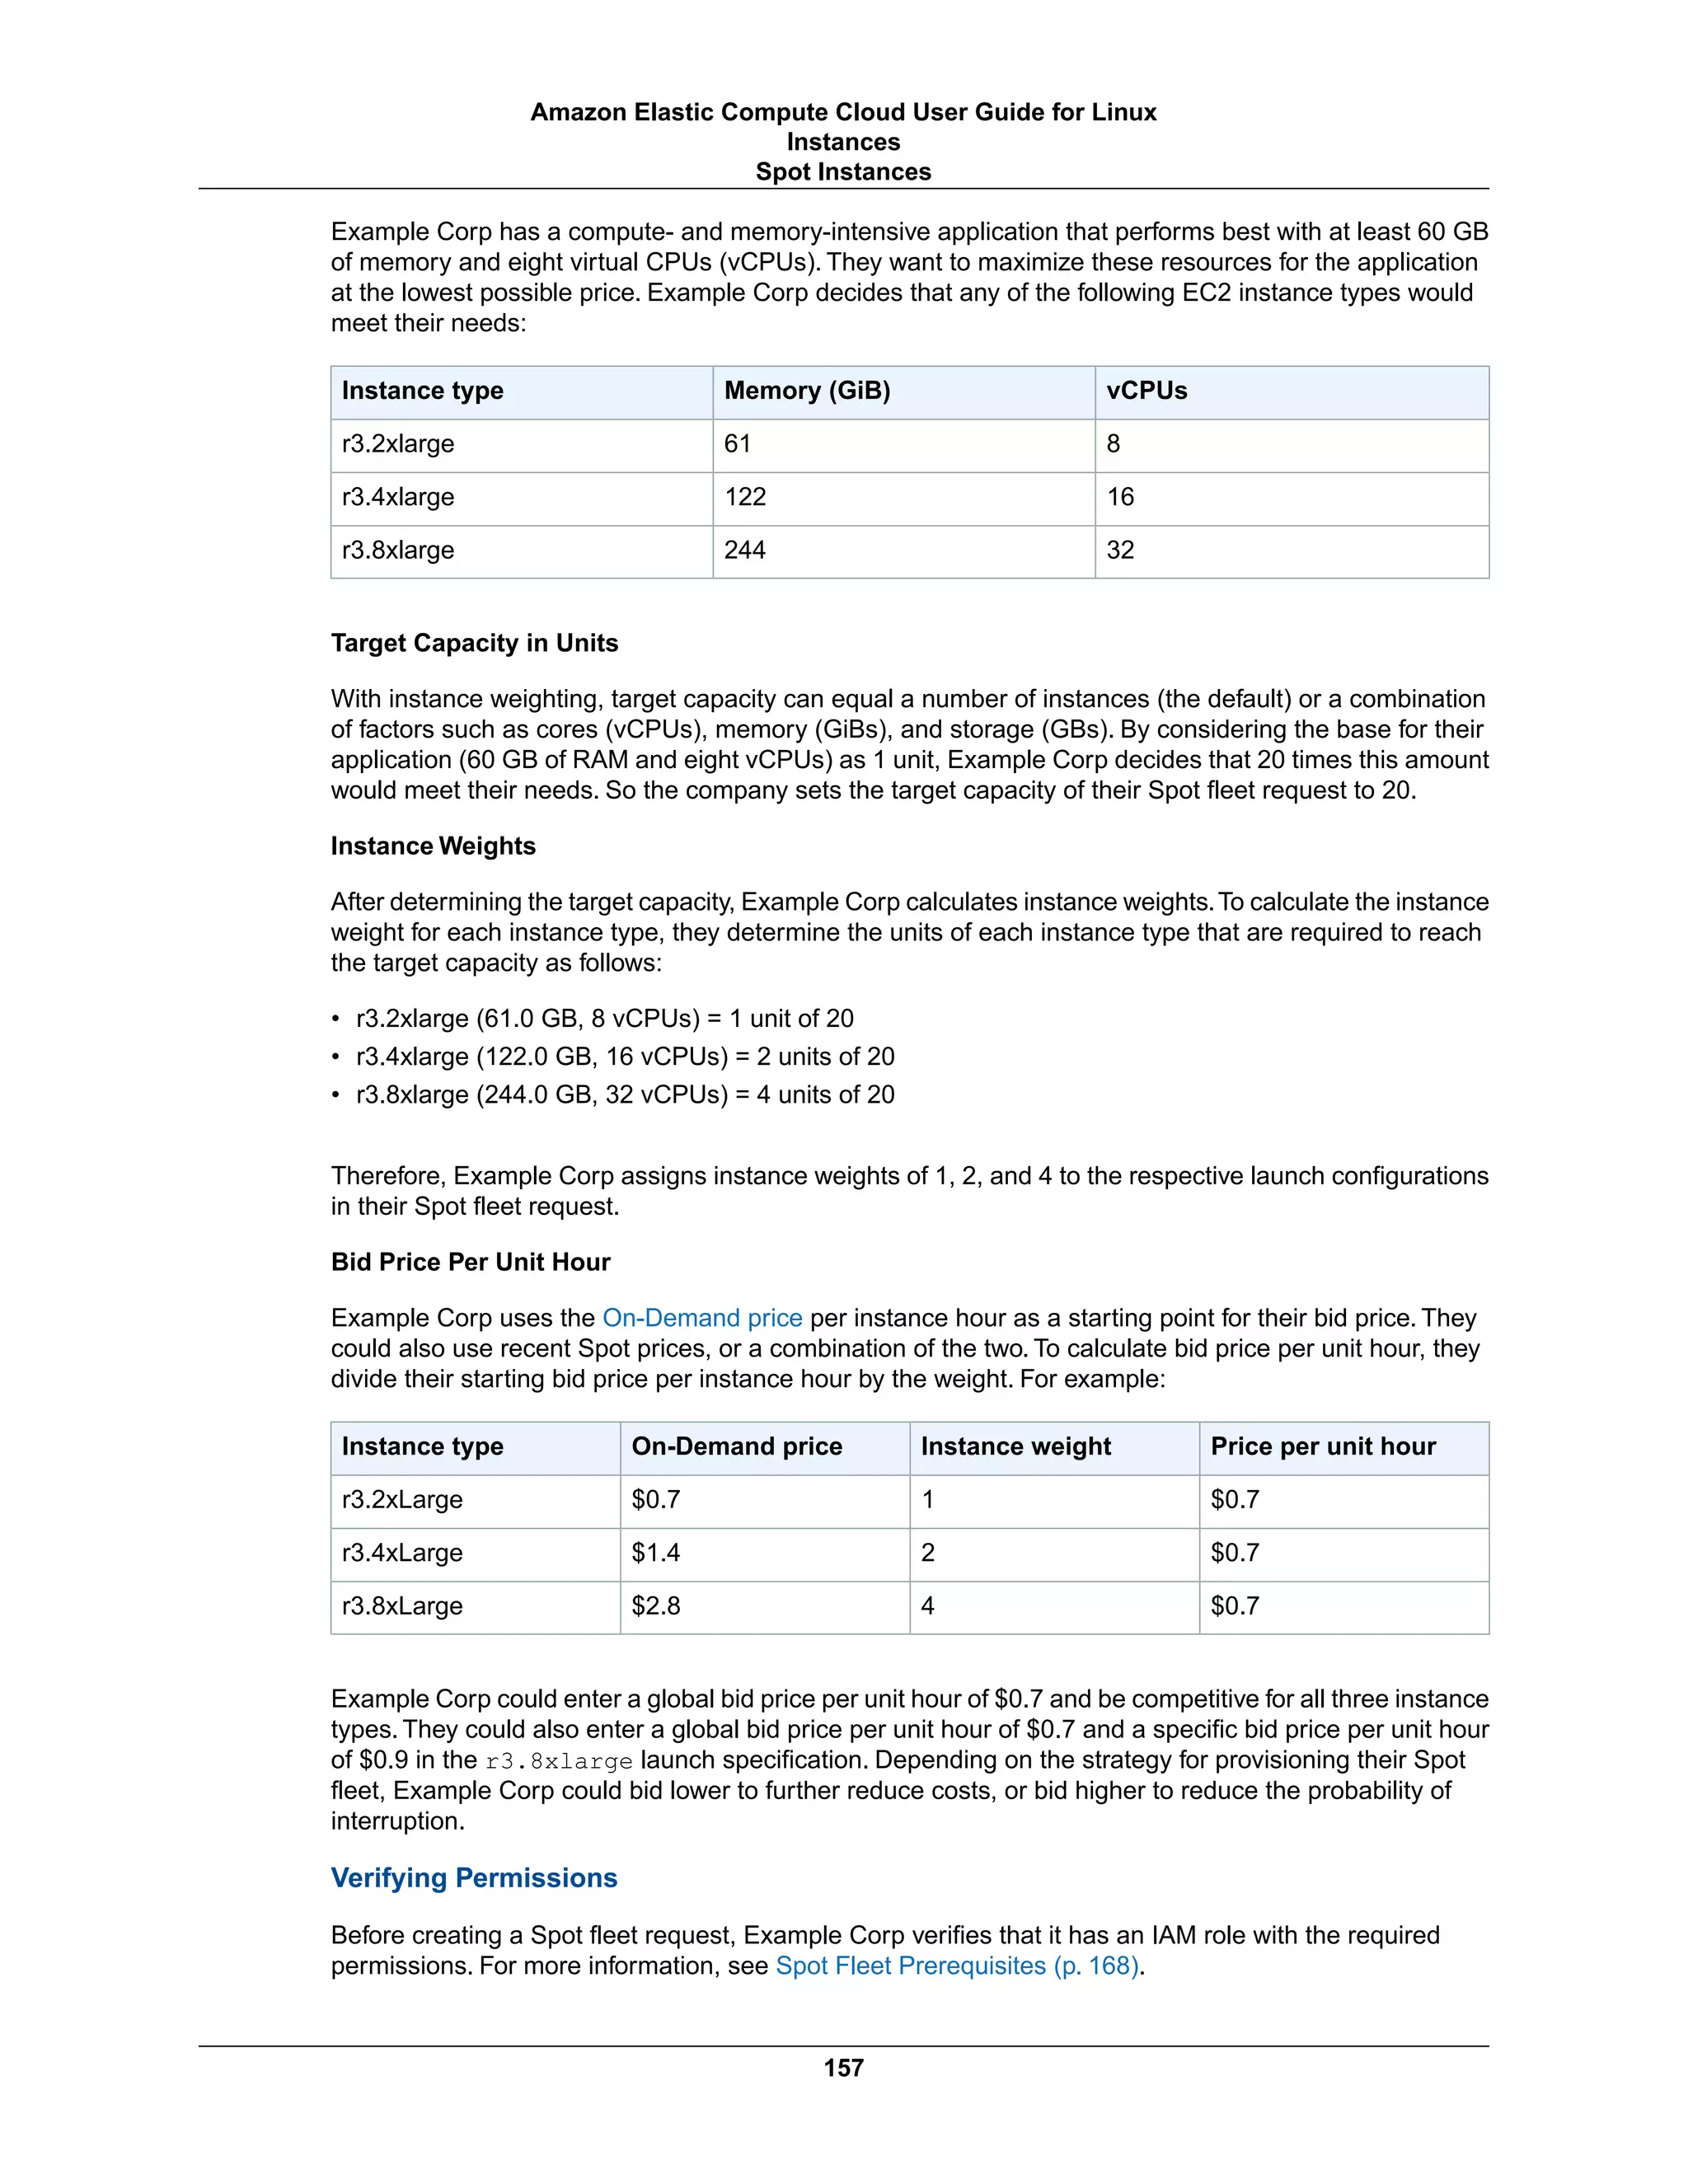
![Creating the Request
Example Corp creates a file, config.json, with the following configuration for its Spot fleet request:
{
"SpotPrice": "0.70",
"TargetCapacity": 20,
"IamFleetRole": "arn:aws:iam::123456789012:role/my-spot-fleet-role",
"LaunchSpecifications": [
{
"ImageId": "ami-1a2b3c4d",
"InstanceType": "r3.2xlarge",
"SubnetId": "subnet-482e4972",
"WeightedCapacity": 1
},
{
"ImageId": "ami-1a2b3c4d",
"InstanceType": "r3.4xlarge",
"SubnetId": "subnet-482e4972",
"WeightedCapacity": 2
}
{
"ImageId": "ami-1a2b3c4d",
"InstanceType": "r3.8xlarge",
"SubnetId": "subnet-482e4972",
"SpotPrice": "0.90",
"WeightedCapacity": 4
}
]
}
Example Corp creates the Spot fleet request using the following request-spot-fleet command:
aws ec2 request-spot-fleet --spot-fleet-request-config file://config.json
For more information, see Spot Fleet Requests (p. 167).
Fulfillment
The allocation strategy determines which Spot pools your Spot instances come from.
With the lowestPrice strategy (which is the default strategy), the Spot instances come from the Spot
pool with the lowest Spot price per unit at the time of fulfillment. To provide 20 units of capacity, the Spot
fleet launches either 20 r3.2xlarge instances (20 divided by 1), 10 r3.4xlarge instances (20 divided
by 2), or 5 r3.8xlarge instances (20 divided by 4).
If Example Corp used the diversified strategy, the Spot instances would come from all three Spot
pools. The Spot fleet would launch 6 r3.2xlarge instances (which provide 6 units), 3 r3.4xlarge
instances (which provide 6 units), and 2 r3.8xlarge instances (which provide 8 units), for a total of 20
units.
Spot Instance Pricing History
The Spot price represents the price above which you have to bid to guarantee that a single Spot request
is fulfilled. When your bid price is above the Spot price, Amazon EC2 launches your Spot instance, and
when the Spot price rises above your bid price, Amazon EC2 terminates your Spot instance.You can bid
above the current Spot price so that your Spot request is fulfilled quickly. However, before you specify a
158
Amazon Elastic Compute Cloud User Guide for Linux
Instances
Spot Instances](https://image.slidesharecdn.com/ec2-ug-151130152858-lva1-app6892/75/Amazan-Ec2-167-2048.jpg)
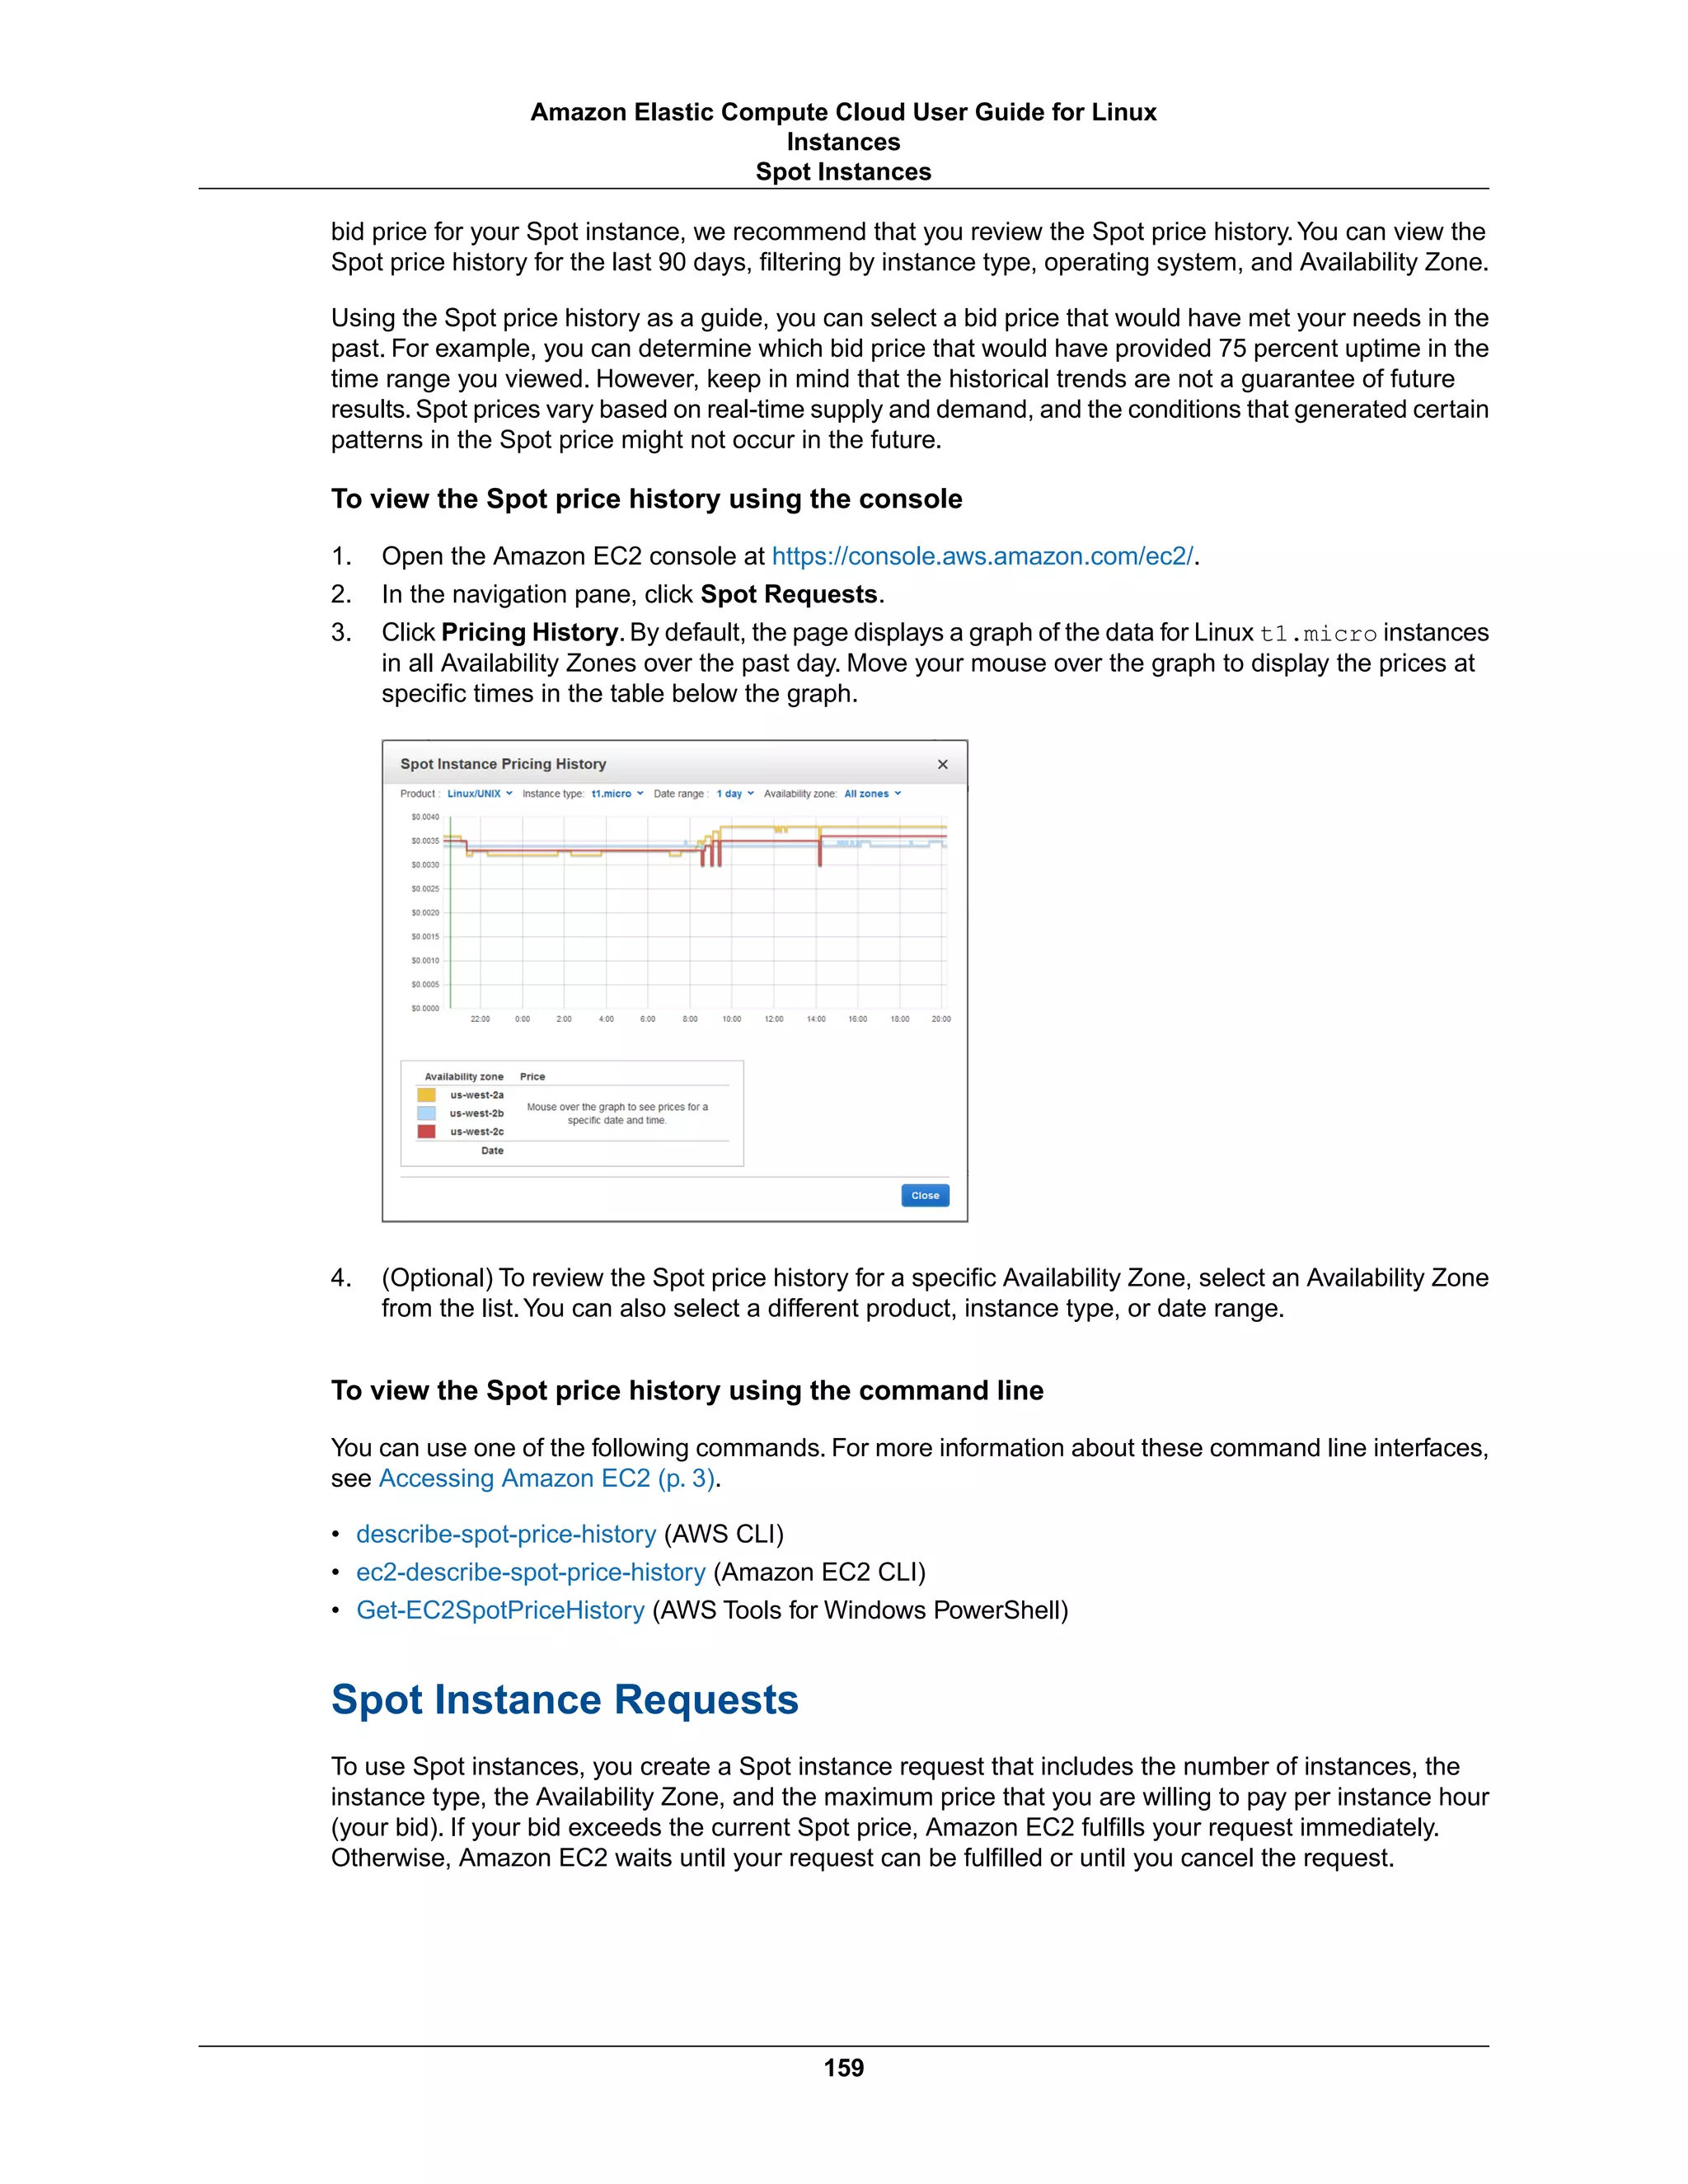
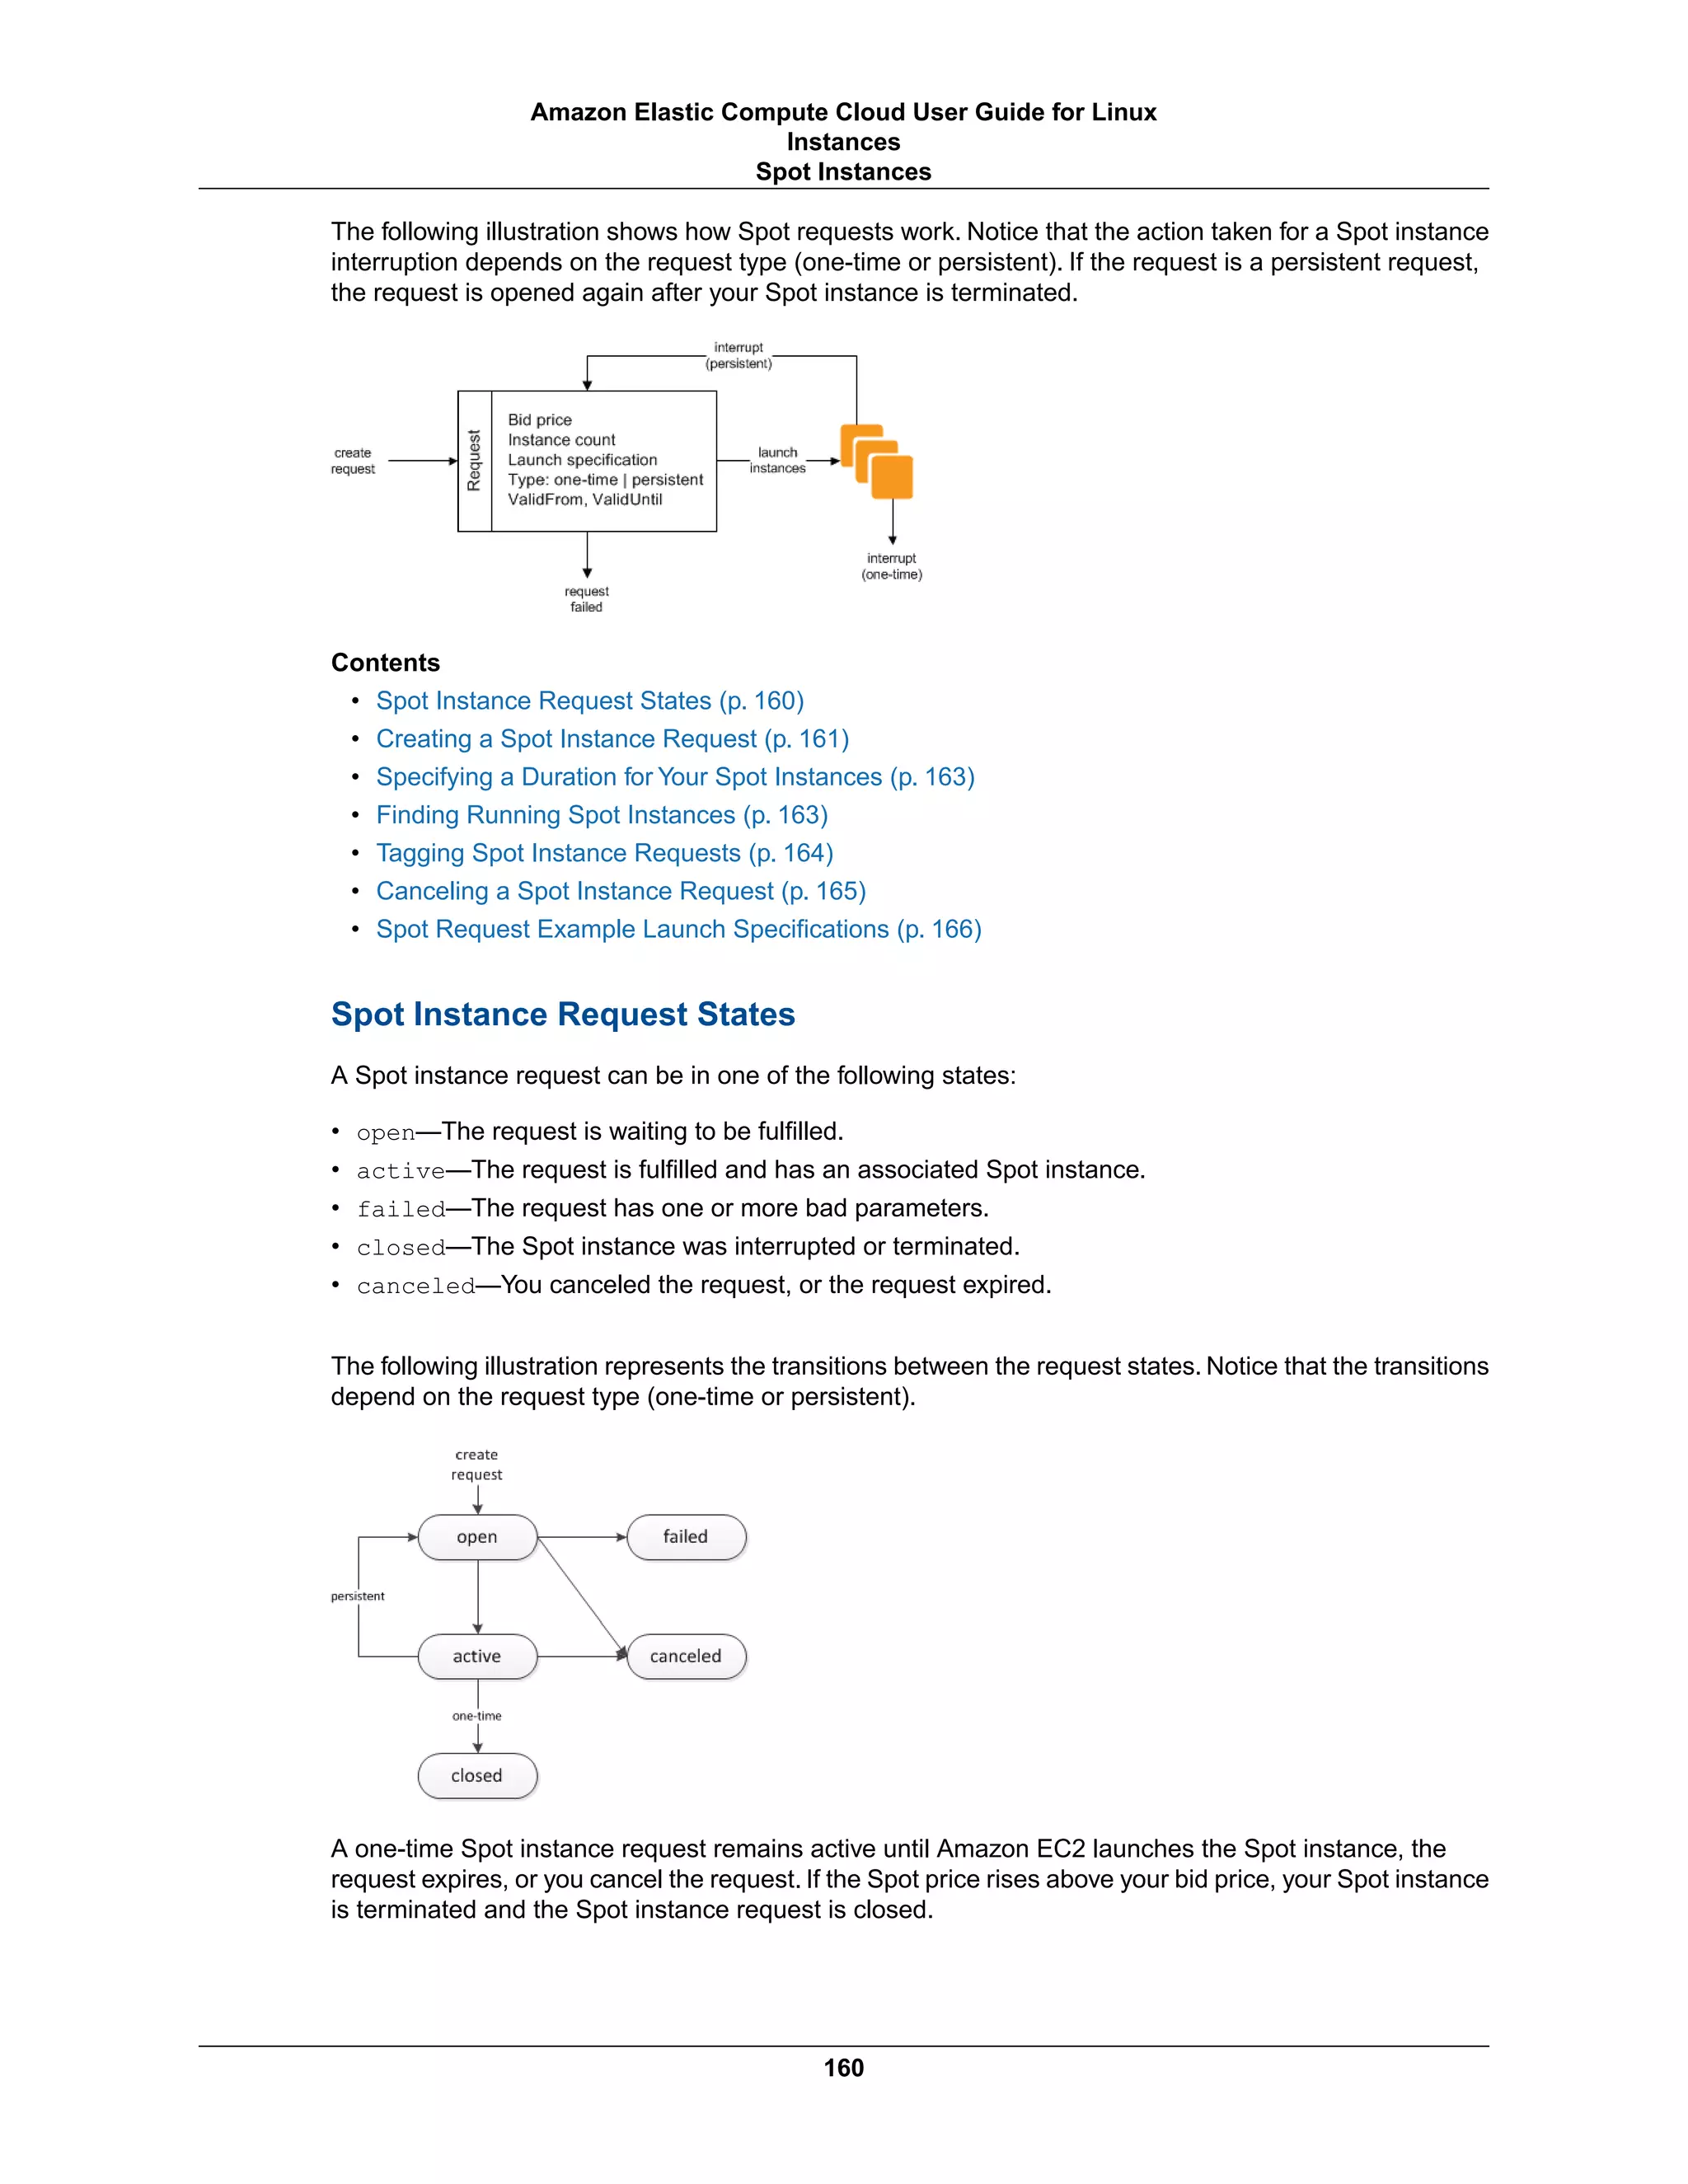


![Specifying a Duration for Your Spot Instances
Amazon EC2 does not terminate Spot instances with a specified duration when the Spot price changes.
This makes them ideal for jobs that take a finite time to complete, such as batch processing, encoding
and rendering, modeling and analysis, and continuous integration.
You can specify a duration of 1, 2, 3, 4, 5, or 6 hours. The price that you pay depends on the specified
duration. To view the current prices for a 1 hour duration or a 6 hour duration, see Spot Instance Prices.
You can use these prices to estimate the cost of the 2, 3, 4, and 5 hour durations. When a request with
a duration is fulfilled, the price for your Spot instance is fixed, and this price remains in effect until the
instance terminates.
When you specify a duration in your Spot request, the duration period for each Spot instance starts as
soon as the instance receives its instance ID.The Spot instance runs until you terminate it or the duration
period ends. At the end of the duration period, Amazon EC2 marks the Spot instance for termination and
provides a Spot instance termination notice, which gives the instance a two-minute warning before it
terminates.
To launch Spot instances with a duration using the AWS CLI
To specify a duration for your Spot instances, include the --block-duration-minutes option with the
request-spot-instances command. For example, the following command creates a Spot request that
launches Spot instances that run for two hours:
aws ec2 request-spot-instances --spot-price "0.050" --instance-count 5 --block-
duration-minutes 120 --type "one-time" --launch-specification file://specifica
tion.json
To retrieve the cost for Spot instances with a specified duration using the AWS CLI
Use the describe-spot-instance-requests command to retrieve the fixed cost for your Spot instances with
a specified duration. The information is in the actualBlockHourlyPrice field.
Finding Running Spot Instances
Amazon EC2 launches a Spot instance when the Spot price is below your bid. A Spot instance runs until
either its bid price is no longer higher than the Spot price, or you terminate it yourself. (If your bid price
is exactly equal to the Spot price, there is a chance that your Spot instance will remain running, depending
on demand.)
To find running Spot instances using the console
1. Open the Amazon EC2 console.
2. In the navigation pane, click Spot Requests and select the request. If the request has been fulfilled,
the value of the Instance column is the ID of the Spot instance.
3. Alternatively, in the navigation pane, click Instances. In the top right corner, click the Show/Hide
icon, and then select Lifecycle.The value of the Lifecycle column for each instance is either normal
or spot.
To find running Spot instances using the AWS CLI
To enumerate your Spot instances, use the describe-spot-instance-requests command with the --query
option as follows:
aws ec2 describe-spot-instance-requests --query SpotInstanceRequests[*].{ID:In
stanceId}
163
Amazon Elastic Compute Cloud User Guide for Linux
Instances
Spot Instances](https://image.slidesharecdn.com/ec2-ug-151130152858-lva1-app6892/75/Amazan-Ec2-172-2048.jpg)
![The following is example output:
[
{
"ID": "i-5203422c"
},
{
"ID": "i-43a4412a"
}
]
Alternatively, you can enumerate your Spot instances using the describe-instances command with the
--filters option as follows:
aws ec2 describe-instances --filters "Name=instance-lifecycle,Values=spot"
Tagging Spot Instance Requests
To help categorize and manage your Spot instance requests, you can tag them with metadata of your
choice.You tag your Spot instance requests in the same way that you tag other any other Amazon EC2
resource. For more information, see Tagging Your Amazon EC2 Resources (p. 655).
You can tag your Spot instance request when you first create it, or you can assign a tag to the request
after you create it.
The tags that you create for your Spot instance requests only apply to the requests. These tags are not
added automatically to the Spot instance that the Spot service launches to fulfill the request.You must
add tags to a Spot instance yourself when you create the Spot instance request or after the Spot instance
is launched.
To add a tag when creating a Spot instance request using the console
1. When creating a Spot instance request, on the Review page, click Edit tags.You can also complete
the tag with the key Name by adding a name for the Spot instance request as the value.
2. On the Tag Spot Request page, click Create Tag and enter a tag key and tag value.
3. Click Review and Launch.
To add a tag to an existing Spot instance request using the console
1. Open the Amazon EC2 console at https://console.aws.amazon.com/ec2/.
2. In the navigation pane, click Spot Requests and then select the Spot request.
3. From the Tags tab, click Add/Edit Tags.
164
Amazon Elastic Compute Cloud User Guide for Linux
Instances
Spot Instances](https://image.slidesharecdn.com/ec2-ug-151130152858-lva1-app6892/75/Amazan-Ec2-173-2048.jpg)

![aws ec2 cancel-spot-instance-requests --spot-instance-request-ids sir-08b93456
If you are finished with the associated Spot instances, you can terminate them manually using the following
terminate-instances command:
aws ec2 terminate-instances --instance-ids i-5203422c i-43a4412a
Spot Request Example Launch Specifications
The following examples show launch configurations that you can use with the request-spot-instances
command to create a Spot instance request. For more information, see Creating a Spot Instance
Request (p. 161).
1. Launch Spot instances (p. 166)
2. Launch Spot instances in the specified Availability Zone (p. 166)
3. Launch Spot instances in the specified subnet (p. 167)
Example 1: Launch Spot Instances
The following example does not include an Availability Zone or subnet. Amazon EC2 selects an Availability
Zone for you. If your account supports EC2-VPC only, Amazon EC2 launches the instances in the default
subnet of the selected Availability Zone. If your account supports EC2-Classic, Amazon EC2 launches
the instances in EC2-Classic in the selected Availability Zone.
{
"ImageId": "ami-1a2b3c4d",
"KeyName": "my-key-pair",
"SecurityGroupIds": [ "sg-1a2b3c4d" ],
"InstanceType": "m3.medium",
"IamInstanceProfile": {
"Arn": "arn:aws:iam::123456789012:instance-profile/my-iam-role"
}
}
Note that you can specify security groups for EC2-Classic either by ID or by name (using the
SecurityGroups field).You must specify security groups for EC2-VPC by ID.
Example 2: Launch Spot Instances in the Specified Availability Zone
The following example includes an Availability Zone. If your account supports EC2-VPC only, Amazon
EC2 launches the instances in the default subnet of the specified Availability Zone. If your account supports
EC2-Classic, Amazon EC2 launches the instances in EC2-Classic in the specified Availability Zone.
{
"ImageId": "ami-1a2b3c4d",
"KeyName": "my-key-pair",
"SecurityGroupIds": [ "sg-1a2b3c4d" ],
"InstanceType": "m3.medium",
"Placement": {
"AvailabilityZone": "us-west-2a"
},
"IamInstanceProfile": {
"Arn": "arn:aws:iam::123456789012:instance-profile/my-iam-role"
166
Amazon Elastic Compute Cloud User Guide for Linux
Instances
Spot Instances](https://image.slidesharecdn.com/ec2-ug-151130152858-lva1-app6892/75/Amazan-Ec2-175-2048.jpg)
![}
}
Example 3: Launch Spot Instances in the Specified Subnet
The following example includes a subnet. Amazon EC2 launches the instances in the specified subnet.
If the VPC is a nondefault VPC, the instance does not receive a public IP address by default.
{
"ImageId": "ami-1a2b3c4d",
"SecurityGroupIds": [ "sg-1a2b3c4d" ],
"InstanceType": "m3.medium",
"SubnetId": "subnet-1a2b3c4d",
"IamInstanceProfile": {
"Arn": "arn:aws:iam::123456789012:instance-profile/my-iam-role"
}
}
To assign a public IP address to an instance in a nondefault VPC, specify the
AssociatePublicIpAddress field as shown in the following example. Note that when you specify a
network interface, you must include the subnet ID and security group ID using the network interface,
rather than using the SubnetId and SecurityGroupIds fields shown in example 3.
{
"ImageId": "ami-1a2b3c4d",
"KeyName": "my-key-pair",
"InstanceType": "m3.medium",
"NetworkInterfaces": [
{
"DeviceIndex": 0,
"SubnetId": "subnet-1a2b3c4d",
"Groups": [ "sg-1a2b3c4d" ],
"AssociatePublicIpAddress": true
}
],
"IamInstanceProfile": {
"Arn": "arn:aws:iam::123456789012:instance-profile/my-iam-role"
}
}
Spot Fleet Requests
To use a Spot fleet, you create a Spot fleet request that includes the target capacity, one or more launch
specifications for the instances, and the bid price that you are willing to pay. Amazon EC2 attempts to
maintain your Spot fleet's target capacity as Spot prices change. For more information, see How Spot
Fleet Works (p. 154).
Each launch specification includes the information that Amazon EC2 needs to launch an instance—such
as an AMI, an instance type, a subnet or Availability Zone, and one or more security groups.
A Spot fleet request remains active until it expires or you cancel it. When you cancel a Spot fleet request,
you must specify that canceling your Spot fleet request terminates the Spot instances in your Spot fleet.
Contents
• Spot Fleet Request States (p. 168)
167
Amazon Elastic Compute Cloud User Guide for Linux
Instances
Spot Instances](https://image.slidesharecdn.com/ec2-ug-151130152858-lva1-app6892/75/Amazan-Ec2-176-2048.jpg)
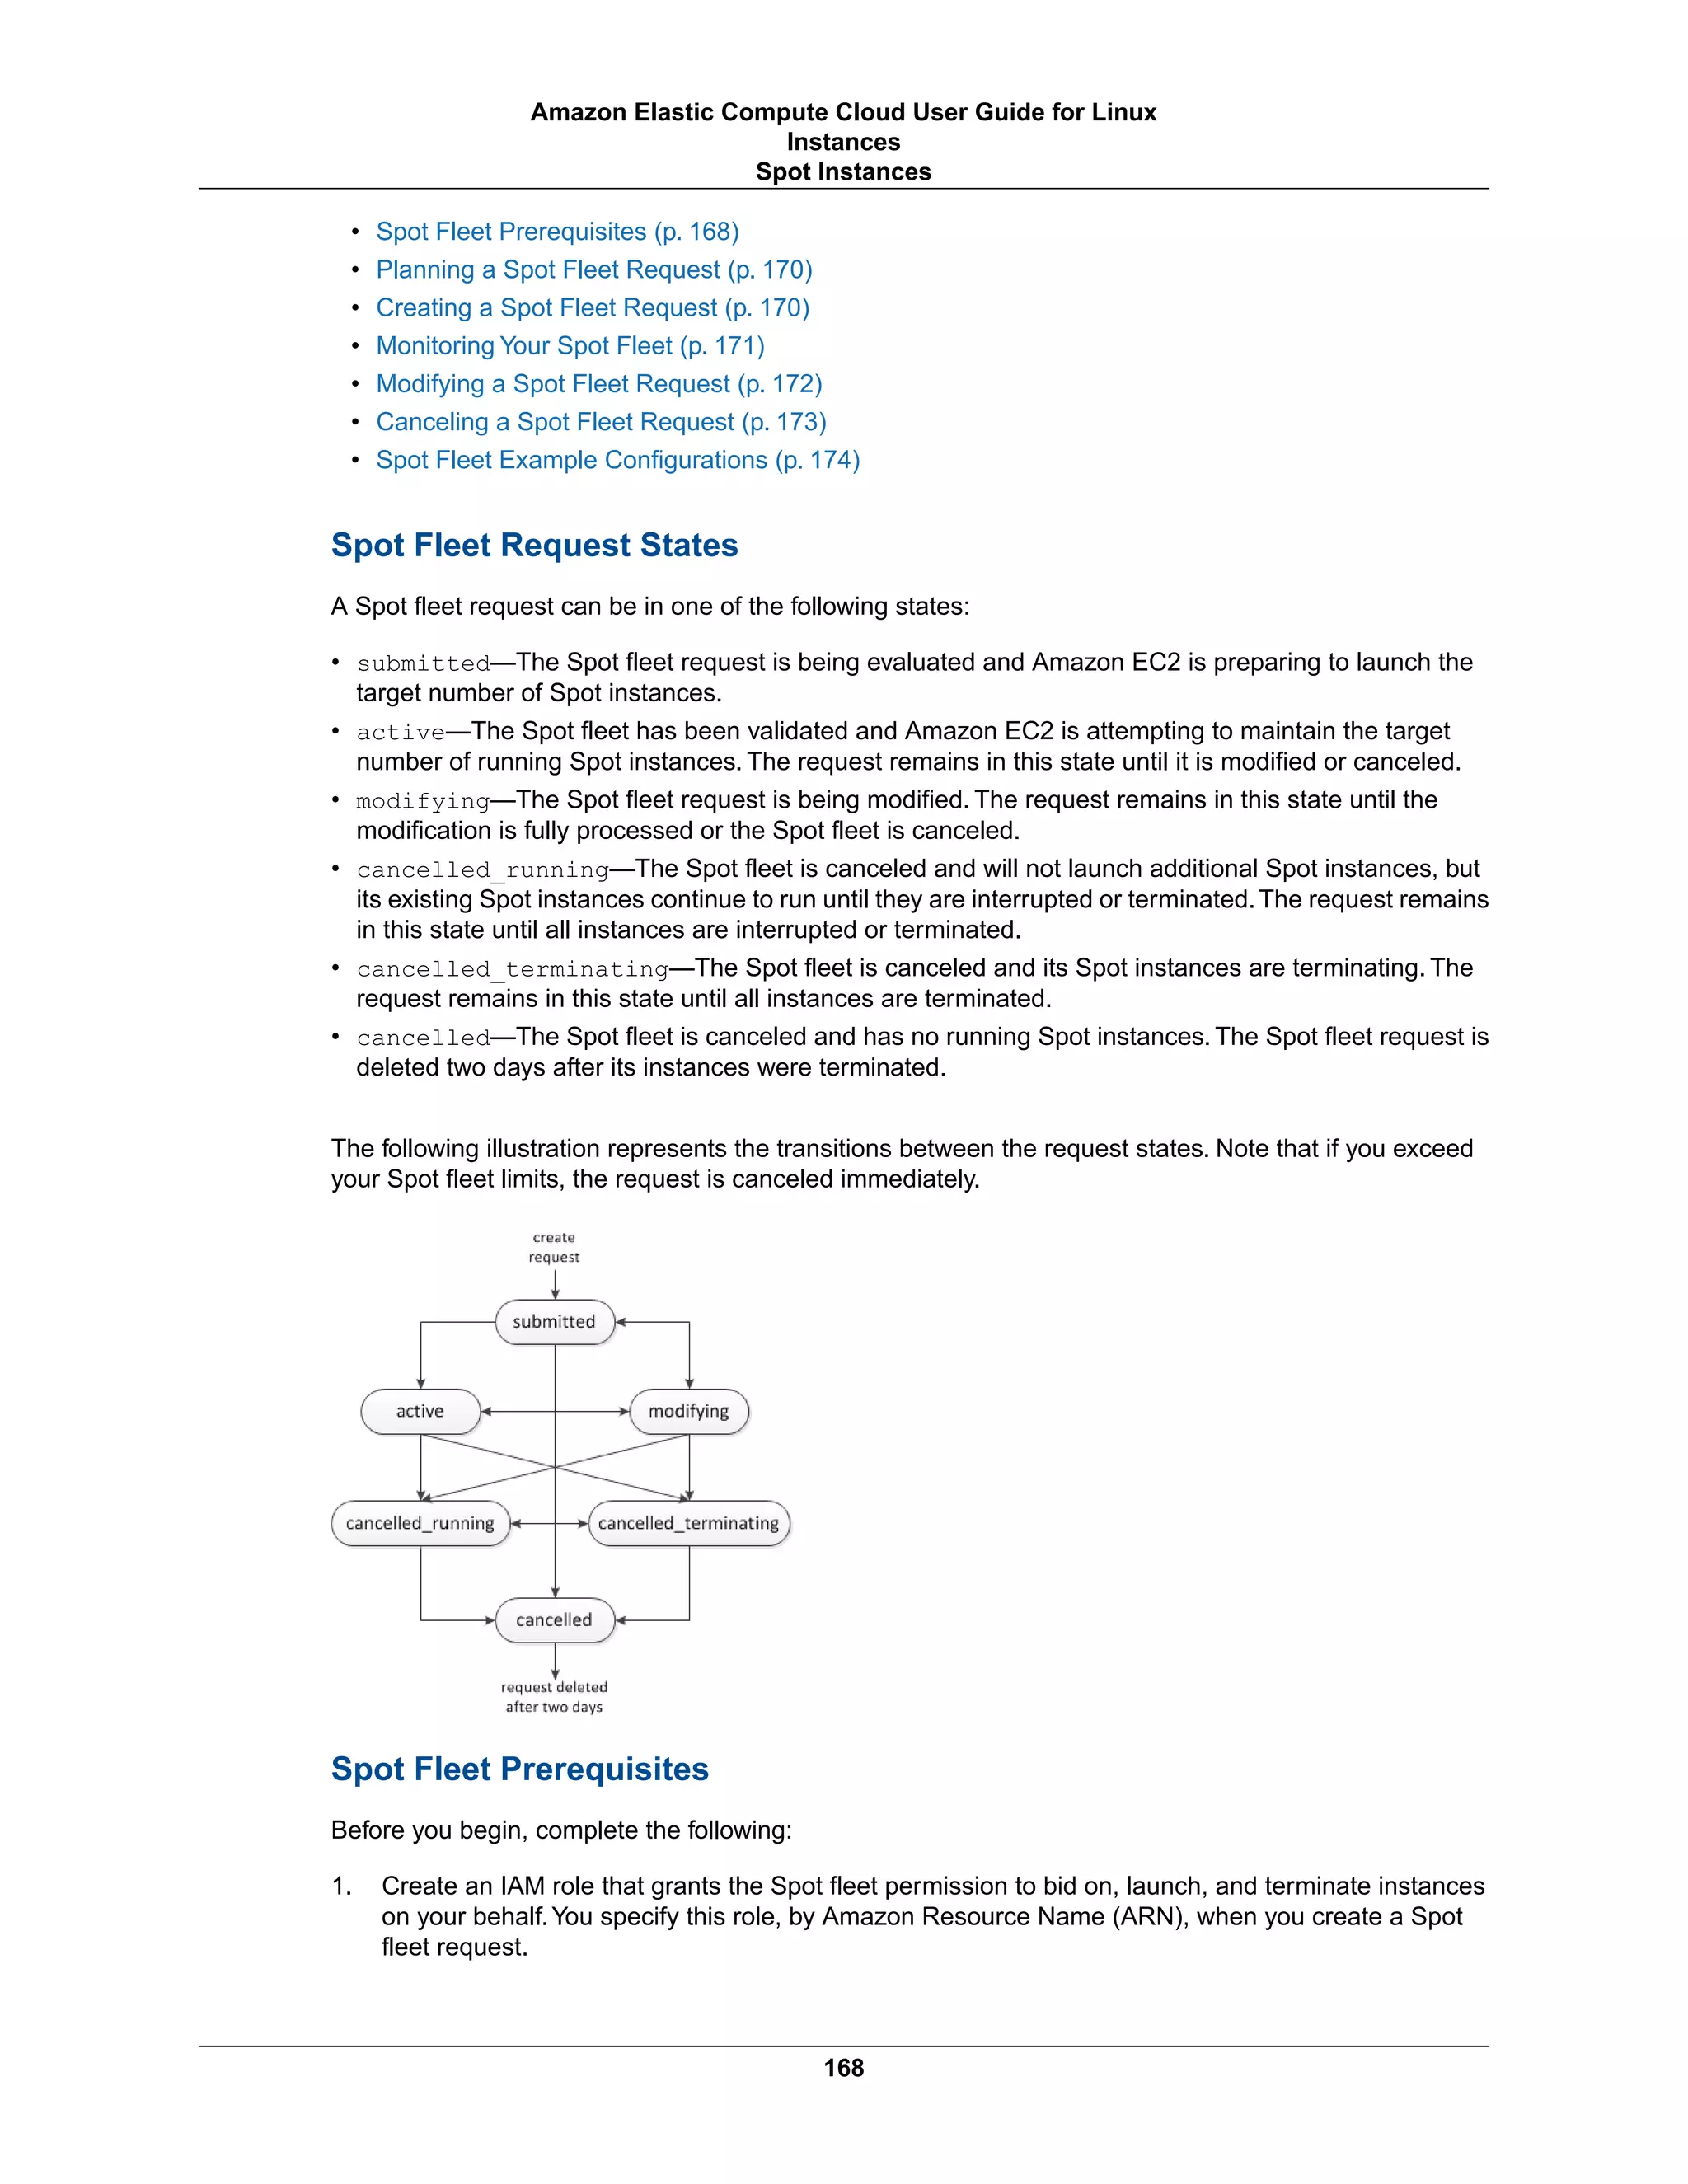
![a. Open the IAM console at https://console.aws.amazon.com/iam/.
b. In the navigation pane, choose Roles, and then choose Create New Role.
c. On the Set Role Name page, enter a name for the role and then choose Next Step.
d. On the Select Role Type page, choose Select next to Amazon EC2 Spot Fleet Role.
e. On the Attach Policy page, select the AmazonEC2SpotFleetRole policy, and then choose
Next Step.
f. On the Review page, choose Create Role.
2. Confirm that the user account that you will use to create the Spot fleet request has the required
Amazon EC2 permissions:
a. Open the IAM console at https://console.aws.amazon.com/iam/.
b. In the navigation pane, choose Policies, and then choose Create Policy.
c. On the Create Policy page, choose Select next to Create Your Own Policy.
d. On the Review Policy page, enter a policy name and copy the following text into the Policy
Document section.
{
"Version": "2012-10-17",
"Statement": [
{
"Effect": "Allow",
"Action": [
"ec2:*"
],
"Resource": "*"
},
{
"Effect": "Allow",
"Action": [
"iam:PassRole",
"iam:ListRoles",
"iam:ListInstanceProfiles"
],
"Resource": "*"
}
]
}
The ec2:* enables an IAM user to call all Amazon EC2 API actions.To limit the user to specific
API actions, specify those actions instead.
The iam:PassRole action enables the user to specify the Spot fleet role in a Spot fleet request.
The iam:ListRoles action enables the user to enumerate existing roles. The
iam:ListInstanceProfiles action enables the user to enumerate existing instance profiles.
The Amazon EC2 console uses iam:ListRoles to populate the IAM role list and
iam:ListInstanceProfiles to populate the IAM instance profile list. To enable the user
to create roles or instance profiles using the console, you must add the following actions:
iam:CreateRole, iam:CreateInstanceProfile, and iam:AddRoleToInstanceProfile.
e. Choose Create Policy.
f. In the navigation pane, choose Users, and then choose the user who will submit the Spot fleet
request.
g. On the Permissions tab, choose Attach Policy.
h. On the Attach Policy page, select the policy you created above, and choose Attach Policy.
169
Amazon Elastic Compute Cloud User Guide for Linux
Instances
Spot Instances](https://image.slidesharecdn.com/ec2-ug-151130152858-lva1-app6892/75/Amazan-Ec2-178-2048.jpg)

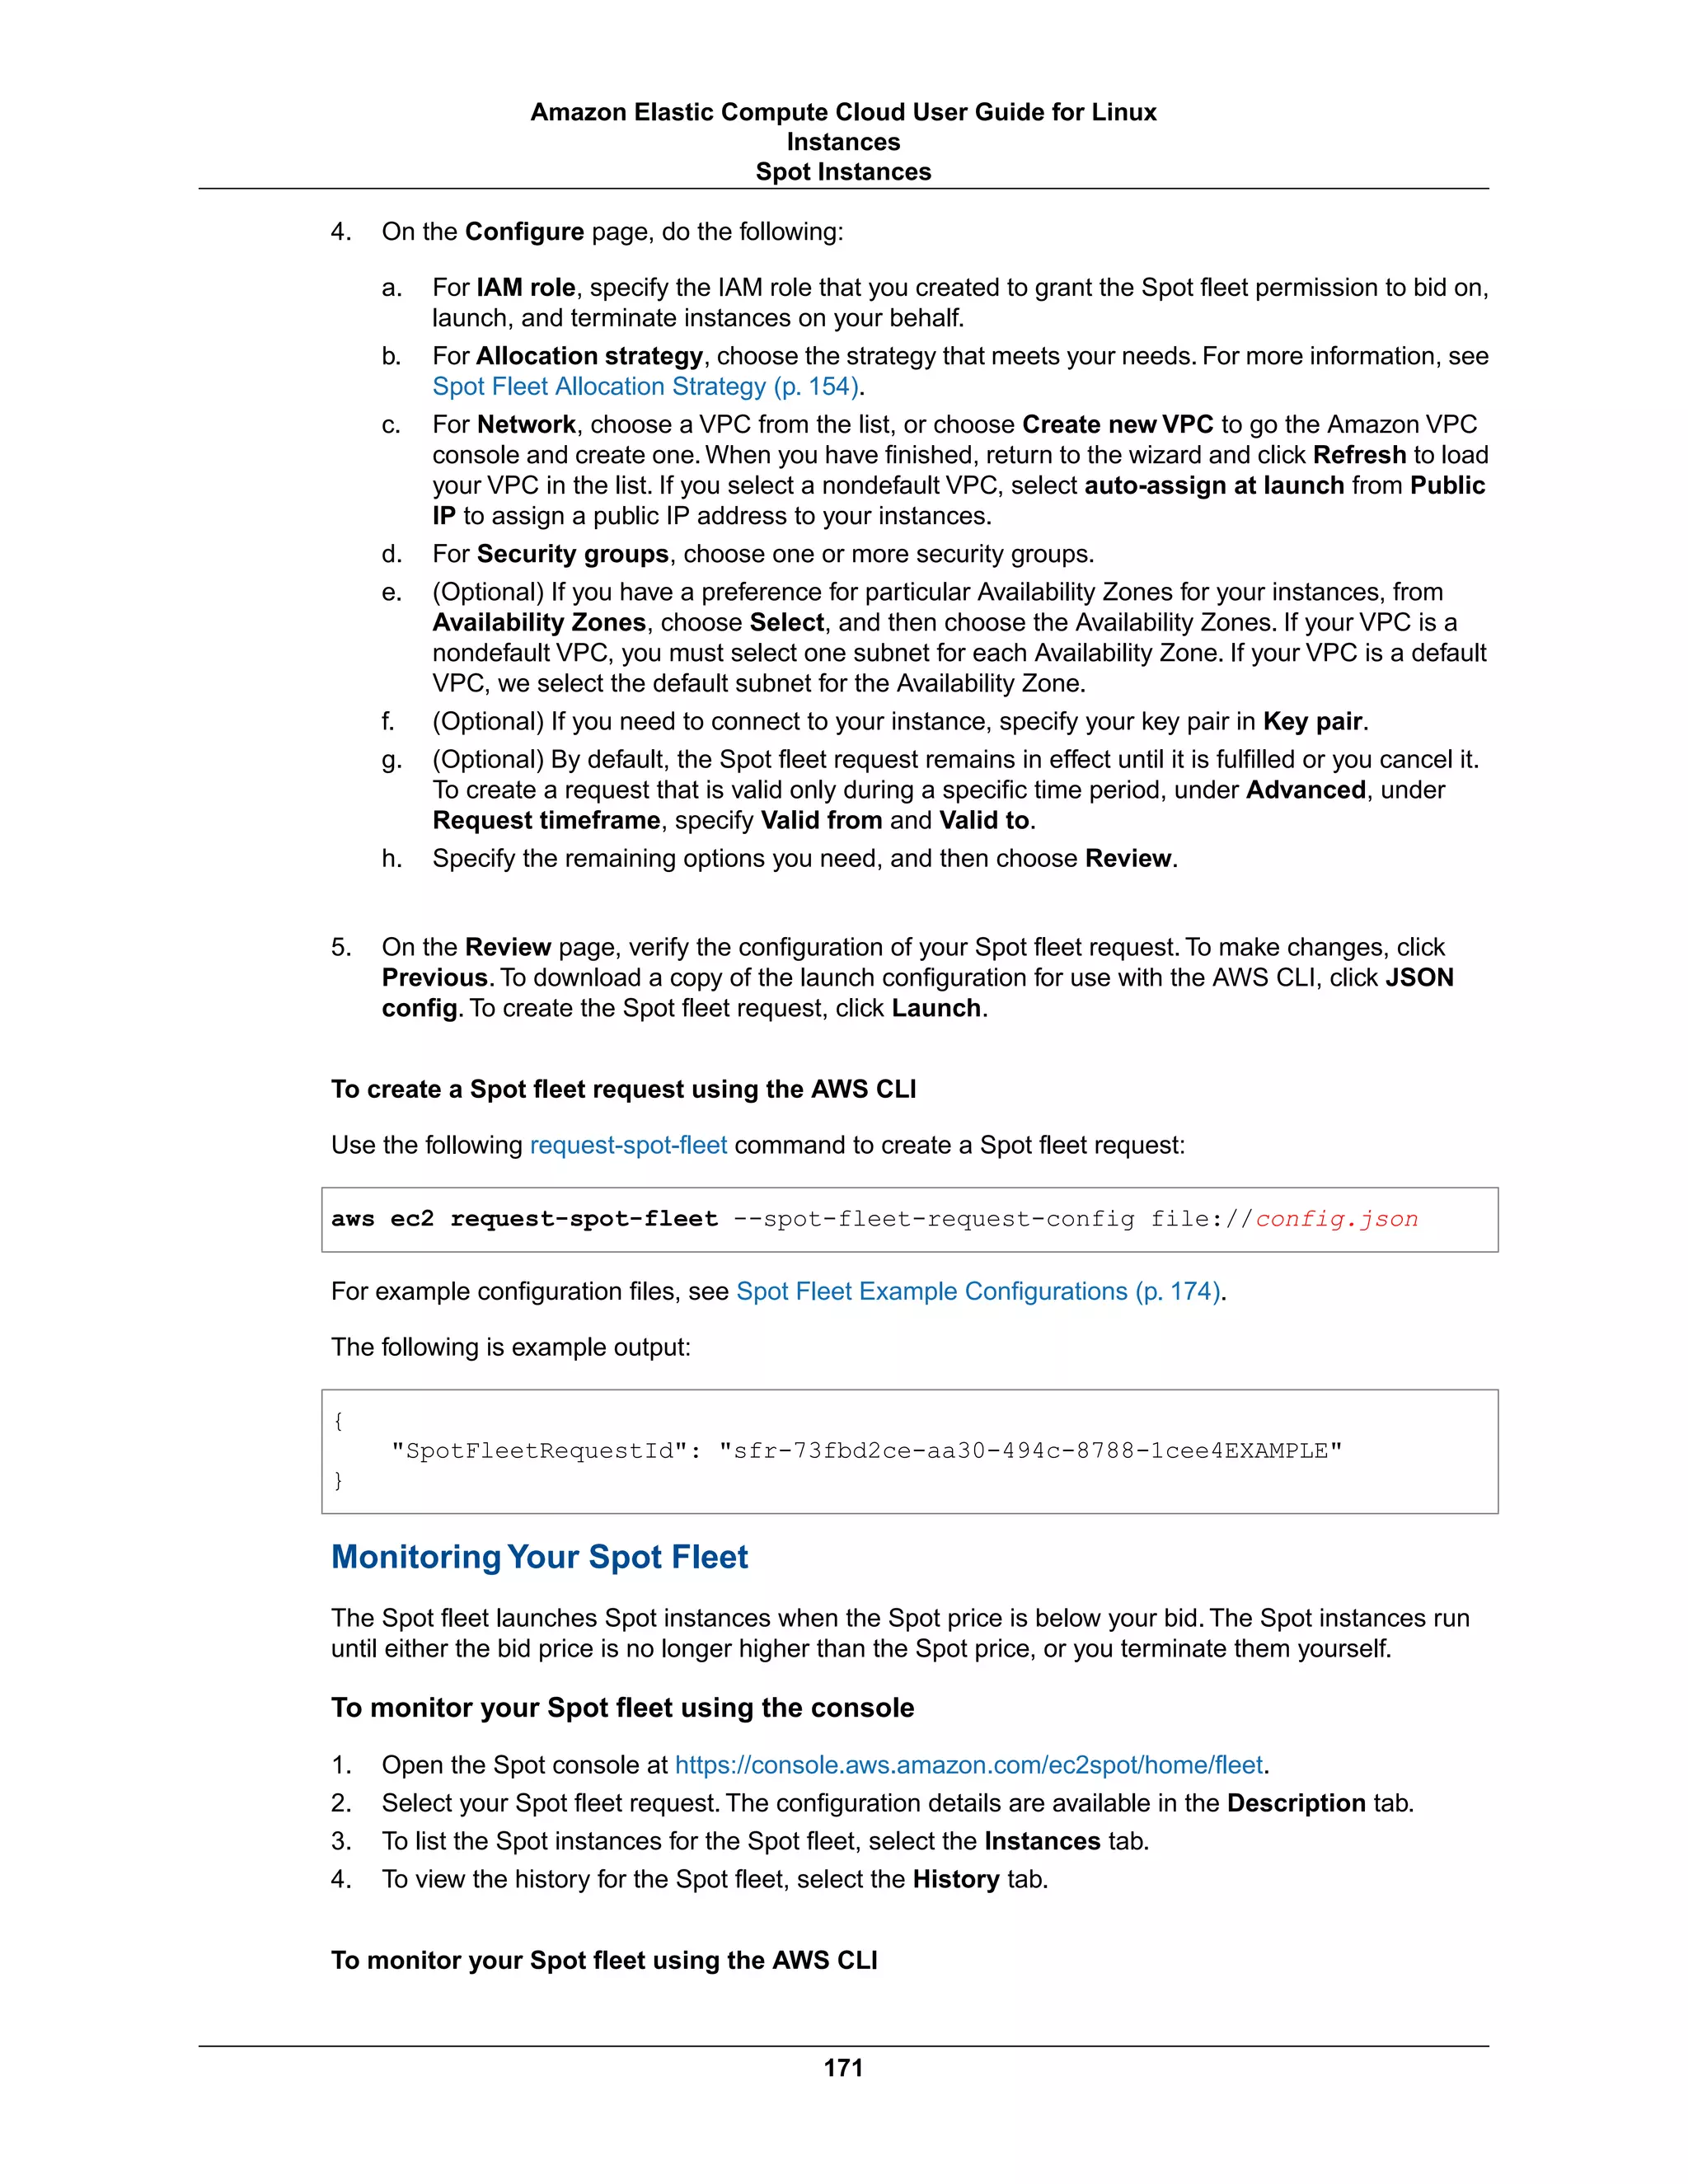

![Use the following modify-spot-fleet-request command to update the target capacity of the specified Spot
fleet request:
aws ec2 modify-spot-fleet-request --spot-fleet-request-id sfr-73fbd2ce-aa30-
494c-8788-1cee4EXAMPLE --target-capacity 20
You can modify the previous command as follows to decrease the target capacity of the specified Spot
fleet without terminating any Spot instances as a result:
aws ec2 modify-spot-fleet-request --spot-fleet-request-id sfr-73fbd2ce-aa30-
494c-8788-1cee4EXAMPLE --target-capacity 10 --excess-capacity-termination-policy
NoTermination
Canceling a Spot Fleet Request
When you are finished using your Spot fleet, you can cancel the Spot fleet request. This cancels all Spot
requests associated with the Spot fleet, so that no new Spot instances are launched for your Spot fleet.
You must specify whether the Spot fleet should terminate its Spot instances. If you terminate the instances,
the Spot fleet request enters the cancelled_terminating state. Otherwise, the Spot fleet request
enters the cancelled_running state and the instances continue to run until they are interrupted or you
terminate them manually.
To cancel a Spot fleet request using the console
1. Open the Spot console at https://console.aws.amazon.com/ec2spot/home/fleet.
2. Select your Spot fleet request.
3. Click Actions, and then click Cancel spot request.
4. In Cancel spot request, verify that you want to cancel the Spot fleet. To keep the fleet at its current
size, deselect Terminate instances. When you are ready, click Confirm.
To cancel a Spot fleet request using the AWS CLI
Use the following cancel-spot-fleet-requests command to cancel the specified Spot fleet request and
terminate the instances:
aws ec2 cancel-spot-fleet-requests --spot-fleet-request-ids sfr-73fbd2ce-aa30-
494c-8788-1cee4EXAMPLE --terminate-instances
The following is example output:
{
"SuccessfulFleetRequests": [
{
"SpotFleetRequestId": "sfr-73fbd2ce-aa30-494c-8788-1cee4EXAMPLE",
"CurrentSpotFleetRequestState": "cancelled_terminating",
"PreviousSpotFleetRequestState": "active"
}
],
"UnsuccessfulFleetRequests": []
}
You can modify the previous command as follows to cancel the specified Spot fleet request without
terminating the instances:
173
Amazon Elastic Compute Cloud User Guide for Linux
Instances
Spot Instances](https://image.slidesharecdn.com/ec2-ug-151130152858-lva1-app6892/75/Amazan-Ec2-182-2048.jpg)
![aws ec2 cancel-spot-fleet-requests --spot-fleet-request-ids sfr-73fbd2ce-aa30-
494c-8788-1cee4EXAMPLE --no-terminate-instances
The following is example output:
{
"SuccessfulFleetRequests": [
{
"SpotFleetRequestId": "sfr-73fbd2ce-aa30-494c-8788-1cee4EXAMPLE",
"CurrentSpotFleetRequestState": "cancelled_running",
"PreviousSpotFleetRequestState": "active"
}
],
"UnsuccessfulFleetRequests": []
}
Spot Fleet Example Configurations
The following examples show launch configurations that you can use with the request-spot-fleet command
to create a Spot fleet request. For more information, see Creating a Spot Fleet Request (p. 170).
1. Launch Spot instances using the lowest-priced Availability Zone or subnet in the region (p. 174)
2. Launch Spot instances using the lowest-priced Availability Zone or subnet in a specified list (p. 175)
3. Launch Spot instances using the lowest-priced instance type in a specified list (p. 177)
4. Override the Spot price for the request (p. 178)
5. Launch a Spot fleet using the diversified allocation strategy (p. 179)
6. Launch a Spot fleet using instance weighting (p. 180)
Example 1: Launch Spot Instances Using the Lowest-priced Availability Zone or Subnet
in the Region
The following example specifies a single launch specification without an Availability Zone or subnet. If
your account supports EC2-VPC only, the Spot fleet launches the instances in the lowest-priced Availability
Zone that has a default subnet.If your account supports EC2-Classic, the Spot fleet launches the instances
in EC2-Classic in the lowest-priced Availability Zone. Note that the price you pay will not exceed the
specified Spot price for the request.
{
"SpotPrice": "0.07",
"TargetCapacity": 20,
"IamFleetRole": "arn:aws:iam::123456789012:role/my-spot-fleet-role",
"LaunchSpecifications": [
{
"ImageId": "ami-1a2b3c4d",
"KeyName": "my-key-pair",
"SecurityGroups": [
{
"GroupId": "sg-1a2b3c4d"
}
],
"InstanceType": "m3.medium",
"IamInstanceProfile": {
"Arn": "arn:aws:iam::123456789012:instance-profile/my-iam-role"
174
Amazon Elastic Compute Cloud User Guide for Linux
Instances
Spot Instances](https://image.slidesharecdn.com/ec2-ug-151130152858-lva1-app6892/75/Amazan-Ec2-183-2048.jpg)
![}
}
]
}
Example 2: Launch Spot Instances Using the Lowest-priced Availability Zone or Subnet
in a Specified List
The following examples specify two launch specifications with different Availability Zones or subnets, but
the same instance type and AMI.
Availability Zones
If your account supports EC2-VPC only, the Spot fleet launches the instances in the default subnet of
the lowest-priced Availability Zone that you specified. If your account supports EC2-Classic, the Spot
fleet launches the instances in the lowest-priced Availability Zone that you specified.
{
"SpotPrice": "0.07",
"TargetCapacity": 20,
"IamFleetRole": "arn:aws:iam::123456789012:role/my-spot-fleet-role",
"LaunchSpecifications": [
{
"ImageId": "ami-1a2b3c4d",
"KeyName": "my-key-pair",
"SecurityGroups": [
{
"GroupId": "sg-1a2b3c4d"
}
],
"InstanceType": "m3.medium",
"Placement": {
"AvailabilityZone": "us-west-2a"
},
"IamInstanceProfile": {
"Arn": "arn:aws:iam::123456789012:instance-profile/my-iam-role"
}
},
{
"ImageId": "ami-1a2b3c4d",
"KeyName": "my-key-pair",
"SecurityGroups": [
{
"GroupId": "sg-1a2b3c4d"
}
],
"InstanceType": "m3.medium",
"Placement": {
"AvailabilityZone": "us-west-2b"
},
"IamInstanceProfile": {
"Arn": "arn:aws:iam::123456789012:instance-profile/my-iam-role"
}
}
]
}
175
Amazon Elastic Compute Cloud User Guide for Linux
Instances
Spot Instances](https://image.slidesharecdn.com/ec2-ug-151130152858-lva1-app6892/75/Amazan-Ec2-184-2048.jpg)
![Subnets
You can specify default subnets or nondefault subnets, and the nondefault subnets can be from a default
VPC or a nondefault VPC. The Spot service launches the instances in whichever subnet is in the
lowest-priced Availability Zone.
Note that you can't specify different subnets from the same Availability Zone in a Spot fleet request.
{
"SpotPrice": "0.07",
"TargetCapacity": 20,
"IamFleetRole": "arn:aws:iam::123456789012:role/my-spot-fleet-role",
"LaunchSpecifications": [
{
"ImageId": "ami-1a2b3c4d",
"KeyName": "my-key-pair",
"SecurityGroups": [
{
"GroupId": "sg-1a2b3c4d"
}
],
"InstanceType": "m3.medium",
"SubnetId": "subnet-a61dafcf",
"IamInstanceProfile": {
"Arn": "arn:aws:iam::123456789012:instance-profile/my-iam-role"
}
},
{
"ImageId": "ami-1a2b3c4d",
"KeyName": "my-key-pair",
"SecurityGroups": [
{
"GroupId": "sg-1a2b3c4d"
}
],
"InstanceType": "m3.medium",
"SubnetId": "subnet-65ea5f08",
"IamInstanceProfile": {
"Arn": "arn:aws:iam::123456789012:instance-profile/my-iam-role"
}
}
]
}
If the instances are launched in a default VPC, they receive a public IP address by default. If the instances
are launched in a nondefault VPC, they do not receive a public IP address by default. Use a network
interface in the launch specification to assign a public IP address to instances launched in a nondefault
VPC. Note that when you specify a network interface, you must include the subnet ID and security group
ID using the network interface.
...
{
"ImageId": "ami-1a2b3c4d",
"KeyName": "my-key-pair",
"InstanceType": "m3.medium",
"NetworkInterfaces": [
{
176
Amazon Elastic Compute Cloud User Guide for Linux
Instances
Spot Instances](https://image.slidesharecdn.com/ec2-ug-151130152858-lva1-app6892/75/Amazan-Ec2-185-2048.jpg)
!["DeviceIndex": 0,
"SubnetId": "subnet-1a2b3c4d",
"Groups": [ "sg-1a2b3c4d" ],
"AssociatePublicIpAddress": true
}
],
"IamInstanceProfile": {
"Arn": "arn:aws:iam::880185128111:instance-profile/my-iam-role"
}
}
...
Example 3: Launch Spot Instances Using the Lowest-priced Instance Type in a Specified
List
The following examples specify two launch configurations with different instance types, but the same AMI
and Availability Zone or subnet. The Spot fleet launches the instances using the specified instance type
with the lowest price.
Availability Zone
{
"SpotPrice": "2.80",
"TargetCapacity": 20,
"IamFleetRole": "arn:aws:iam::123456789012:role/my-spot-fleet-role",
"LaunchSpecifications": [
{
"ImageId": "ami-1a2b3c4d",
"SecurityGroups": [
{
"GroupId": "sg-1a2b3c4d"
}
],
"InstanceType": "cc2.8xlarge",
"Placement": {
"AvailabilityZone": "us-west-2b"
}
},
{
"ImageId": "ami-1a2b3c4d",
"SecurityGroups": [
{
"GroupId": "sg-1a2b3c4d"
}
],
"InstanceType": "r3.8xlarge",
"Placement": {
"AvailabilityZone": "us-west-2b"
}
}
]
}
Subnet
177
Amazon Elastic Compute Cloud User Guide for Linux
Instances
Spot Instances](https://image.slidesharecdn.com/ec2-ug-151130152858-lva1-app6892/75/Amazan-Ec2-186-2048.jpg)
![{
"SpotPrice": "2.80",
"TargetCapacity": 20,
"IamFleetRole": "arn:aws:iam::123456789012:role/my-spot-fleet-role",
"LaunchSpecifications": [
{
"ImageId": "ami-1a2b3c4d",
"SecurityGroups": [
{
"GroupId": "sg-1a2b3c4d"
}
],
"InstanceType": "cc2.8xlarge",
"SubnetId": "subnet-1a2b3c4d"
},
{
"ImageId": "ami-1a2b3c4d",
"SecurityGroups": [
{
"GroupId": "sg-1a2b3c4d"
}
],
"InstanceType": "r3.8xlarge",
"SubnetId": "subnet-1a2b3c4d"
}
]
}
Example 4. Override the Spot Price for the Request
The ability to specify Spot prices for individual launch specifications provides you with additional control
over the bidding process. The following examples override the Spot price for the request (0.070) with
individual Spot prices for two of the three launch specifications. Note that the Spot price for the request
is used for any launch specification that does not specify an individual Spot price.The Spot fleet launches
the instances using the instance type with the lowest price.
Availability Zone
{
"SpotPrice": "1.68",
"TargetCapacity": 30,
"IamFleetRole": "arn:aws:iam::123456789012:role/my-spot-fleet-role",
"LaunchSpecifications": [
{
"ImageId": "ami-1a2b3c4d",
"InstanceType": "c3.2xlarge",
"Placement": {
"AvailabilityZone": "us-west-2b"
},
"SpotPrice": "0.04"
},
{
"ImageId": "ami-1a2b3c4d",
"InstanceType": "c3.4xlarge",
"Placement": {
"AvailabilityZone": "us-west-2b"
},
178
Amazon Elastic Compute Cloud User Guide for Linux
Instances
Spot Instances](https://image.slidesharecdn.com/ec2-ug-151130152858-lva1-app6892/75/Amazan-Ec2-187-2048.jpg)
!["SpotPrice": "0.06"
},
{
"ImageId": "ami-1a2b3c4d",
"InstanceType": "c3.8xlarge",
"Placement": {
"AvailabilityZone": "us-west-2b"
}
}
]
}
Subnet
{
"SpotPrice": "1.68",
"TargetCapacity": 30,
"IamFleetRole": "arn:aws:iam::123456789012:role/my-spot-fleet-role",
"LaunchSpecifications": [
{
"ImageId": "ami-1a2b3c4d",
"InstanceType": "c3.2xlarge",
"SubnetId": "subnet-1a2b3c4d",
"SpotPrice": "0.04"
},
{
"ImageId": "ami-1a2b3c4d",
"InstanceType": "c3.4xlarge",
"SubnetId": "subnet-1a2b3c4d",
"SpotPrice": "0.06"
},
{
"ImageId": "ami-1a2b3c4d",
"InstanceType": "c3.8xlarge",
"SubnetId": "subnet-1a2b3c4d"
}
]
}
Example 5: Launch a Spot Fleet Using the Diversified Allocation Strategy
The following example uses the diversified allocation strategy.The launch specifications have different
instance types but the same AMI and Availability Zone or subnet.The Spot fleet distributes the 30 instances
across the 3 launch specifications, such that there are 10 instances of each type. For more information,
see Spot Fleet Allocation Strategy (p. 154).
Availability Zone
{
"SpotPrice": "0.70",
"TargetCapacity": 30,
"AllocationStrategy": "diversified",
"IamFleetRole": "arn:aws:iam::123456789012:role/my-spot-fleet-role",
"LaunchSpecifications": [
{
"ImageId": "ami-1a2b3c4d",
179
Amazon Elastic Compute Cloud User Guide for Linux
Instances
Spot Instances](https://image.slidesharecdn.com/ec2-ug-151130152858-lva1-app6892/75/Amazan-Ec2-188-2048.jpg)
!["InstanceType": "c4.2xlarge",
"Placement": {
"AvailabilityZone": "us-west-2b"
}
},
{
"ImageId": "ami-1a2b3c4d",
"InstanceType": "m3.2xlarge",
"Placement": {
"AvailabilityZone": "us-west-2b"
}
},
{
"ImageId": "ami-1a2b3c4d",
"InstanceType": "r3.2xlarge",
"Placement": {
"AvailabilityZone": "us-west-2b"
}
}
]
}
Subnet
{
"SpotPrice": "0.70",
"TargetCapacity": 30,
"AllocationStrategy": "diversified",
"IamFleetRole": "arn:aws:iam::123456789012:role/my-spot-fleet-role",
"LaunchSpecifications": [
{
"ImageId": "ami-1a2b3c4d",
"InstanceType": "c4.2xlarge",
"SubnetId": "subnet-1a2b3c4d"
},
{
"ImageId": "ami-1a2b3c4d",
"InstanceType": "m3.2xlarge",
"SubnetId": "subnet-1a2b3c4d"
},
{
"ImageId": "ami-1a2b3c4d",
"InstanceType": "r3.2xlarge",
"SubnetId": "subnet-1a2b3c4d"
}
]
}
Example 6: Launch a Spot Fleet Using Instance Weighting
The following examples use instance weighting, which means that the bid price is per unit hour instead
of per instance hour. Each launch configuration lists a different instance type and a different weight. The
Spot fleet selects the instance type with the lowest price per unit hour. The Spot fleet calculates the
number of Spot instances to launch by dividing the target capacity by the instance weight. If the result
isn't an integer, the Spot fleet rounds it up to the next integer, so that the size of your fleet is not below
its target capacity.
180
Amazon Elastic Compute Cloud User Guide for Linux
Instances
Spot Instances](https://image.slidesharecdn.com/ec2-ug-151130152858-lva1-app6892/75/Amazan-Ec2-189-2048.jpg)
![If the r3.2xlarge bid is successful, Spot provisions 4 of these instances. (Divide 20 by 6 for a total of
3.33 instances, then round up to 4 instances.)
If the c3.xlarge bid is successful, Spot provisions 7 of these instances. (Divide 20 by 3 for a total of
6.66 instances, then round up to 7 instances.)
For more information, see Spot Fleet Instance Weighting (p. 155).
Availability Zone
{
"SpotPrice": "0.70",
"TargetCapacity": 20,
"IamFleetRole": "arn:aws:iam::123456789012:role/my-spot-fleet-role",
"LaunchSpecifications": [
{
"ImageId": "ami-1a2b3c4d",
"InstanceType": "r3.2xlarge",
"Placement": {
"AvailabilityZone": "us-west-2b"
},
"WeightedCapacity": 6
},
{
"ImageId": "ami-1a2b3c4d",
"InstanceType": "c3.xlarge",
"Placement": {
"AvailabilityZone": "us-west-2b"
},
"WeightedCapacity": 3
}
]
}
Subnet
{
"SpotPrice": "0.70",
"TargetCapacity": 20,
"IamFleetRole": "arn:aws:iam::123456789012:role/my-spot-fleet-role",
"LaunchSpecifications": [
{
"ImageId": "ami-1a2b3c4d",
"InstanceType": "r3.2xlarge",
"SubnetId": "subnet-1a2b3c4d",
"WeightedCapacity": 6
},
{
"ImageId": "ami-1a2b3c4d",
"InstanceType": "c3.xlarge",
"SubnetId": "subnet-1a2b3c4d",
"WeightedCapacity": 3
}
]
}
Priority
181
Amazon Elastic Compute Cloud User Guide for Linux
Instances
Spot Instances](https://image.slidesharecdn.com/ec2-ug-151130152858-lva1-app6892/75/Amazan-Ec2-190-2048.jpg)
![You can also use instance weighting to give priority to an Availability Zone or subnet. For example, the
following launch specifications are nearly identical, except that they specify different subnets and weights.
The Spot fleet finds the specification with the highest value for WeightedCapacity, and attempts to
provision the request in the least expensive Spot pool in that subnet. (Note that the second launch
specification does not include a weight, so it defaults to 1.)
{
"SpotPrice": "0.42",
"TargetCapacity": 40,
"IamFleetRole": "arn:aws:iam::123456789012:role/my-spot-fleet-role",
"LaunchSpecifications": [
{
"ImageId": "ami-1a2b3c4d",
"InstanceType": "c3.2xlarge",
"SubnetId": "subnet-482e4972",
"WeightedCapacity": 2
},
{
"ImageId": "ami-1a2b3c4d",
"InstanceType": "c3.2xlarge",
"SubnetId": "subnet-bb3337d"
}
]
}
Spot Bid Status
To help you track your Spot instance requests, plan your use of Spot instances, and bid strategically,
Amazon EC2 provides a bid status. For example, a bid status can tell you the reason why your Spot
request isn't fulfilled yet, or list the constraints that are preventing the fulfillment of your Spot request.
At each step of the process—also called the Spot request life cycle, specific events determine successive
request states.
Contents
• Life Cycle of a Spot Request (p. 182)
• Getting Bid Status Information (p. 185)
• Spot Bid Status Codes (p. 186)
Life Cycle of a Spot Request
The following diagram shows you the paths that your Spot request can follow throughout its life cycle,
from submission to termination. Each step is depicted as a node, and the status code for each node
describes the status of the Spot request and Spot instance.
182
Amazon Elastic Compute Cloud User Guide for Linux
Instances
Spot Instances](https://image.slidesharecdn.com/ec2-ug-151130152858-lva1-app6892/75/Amazan-Ec2-191-2048.jpg)


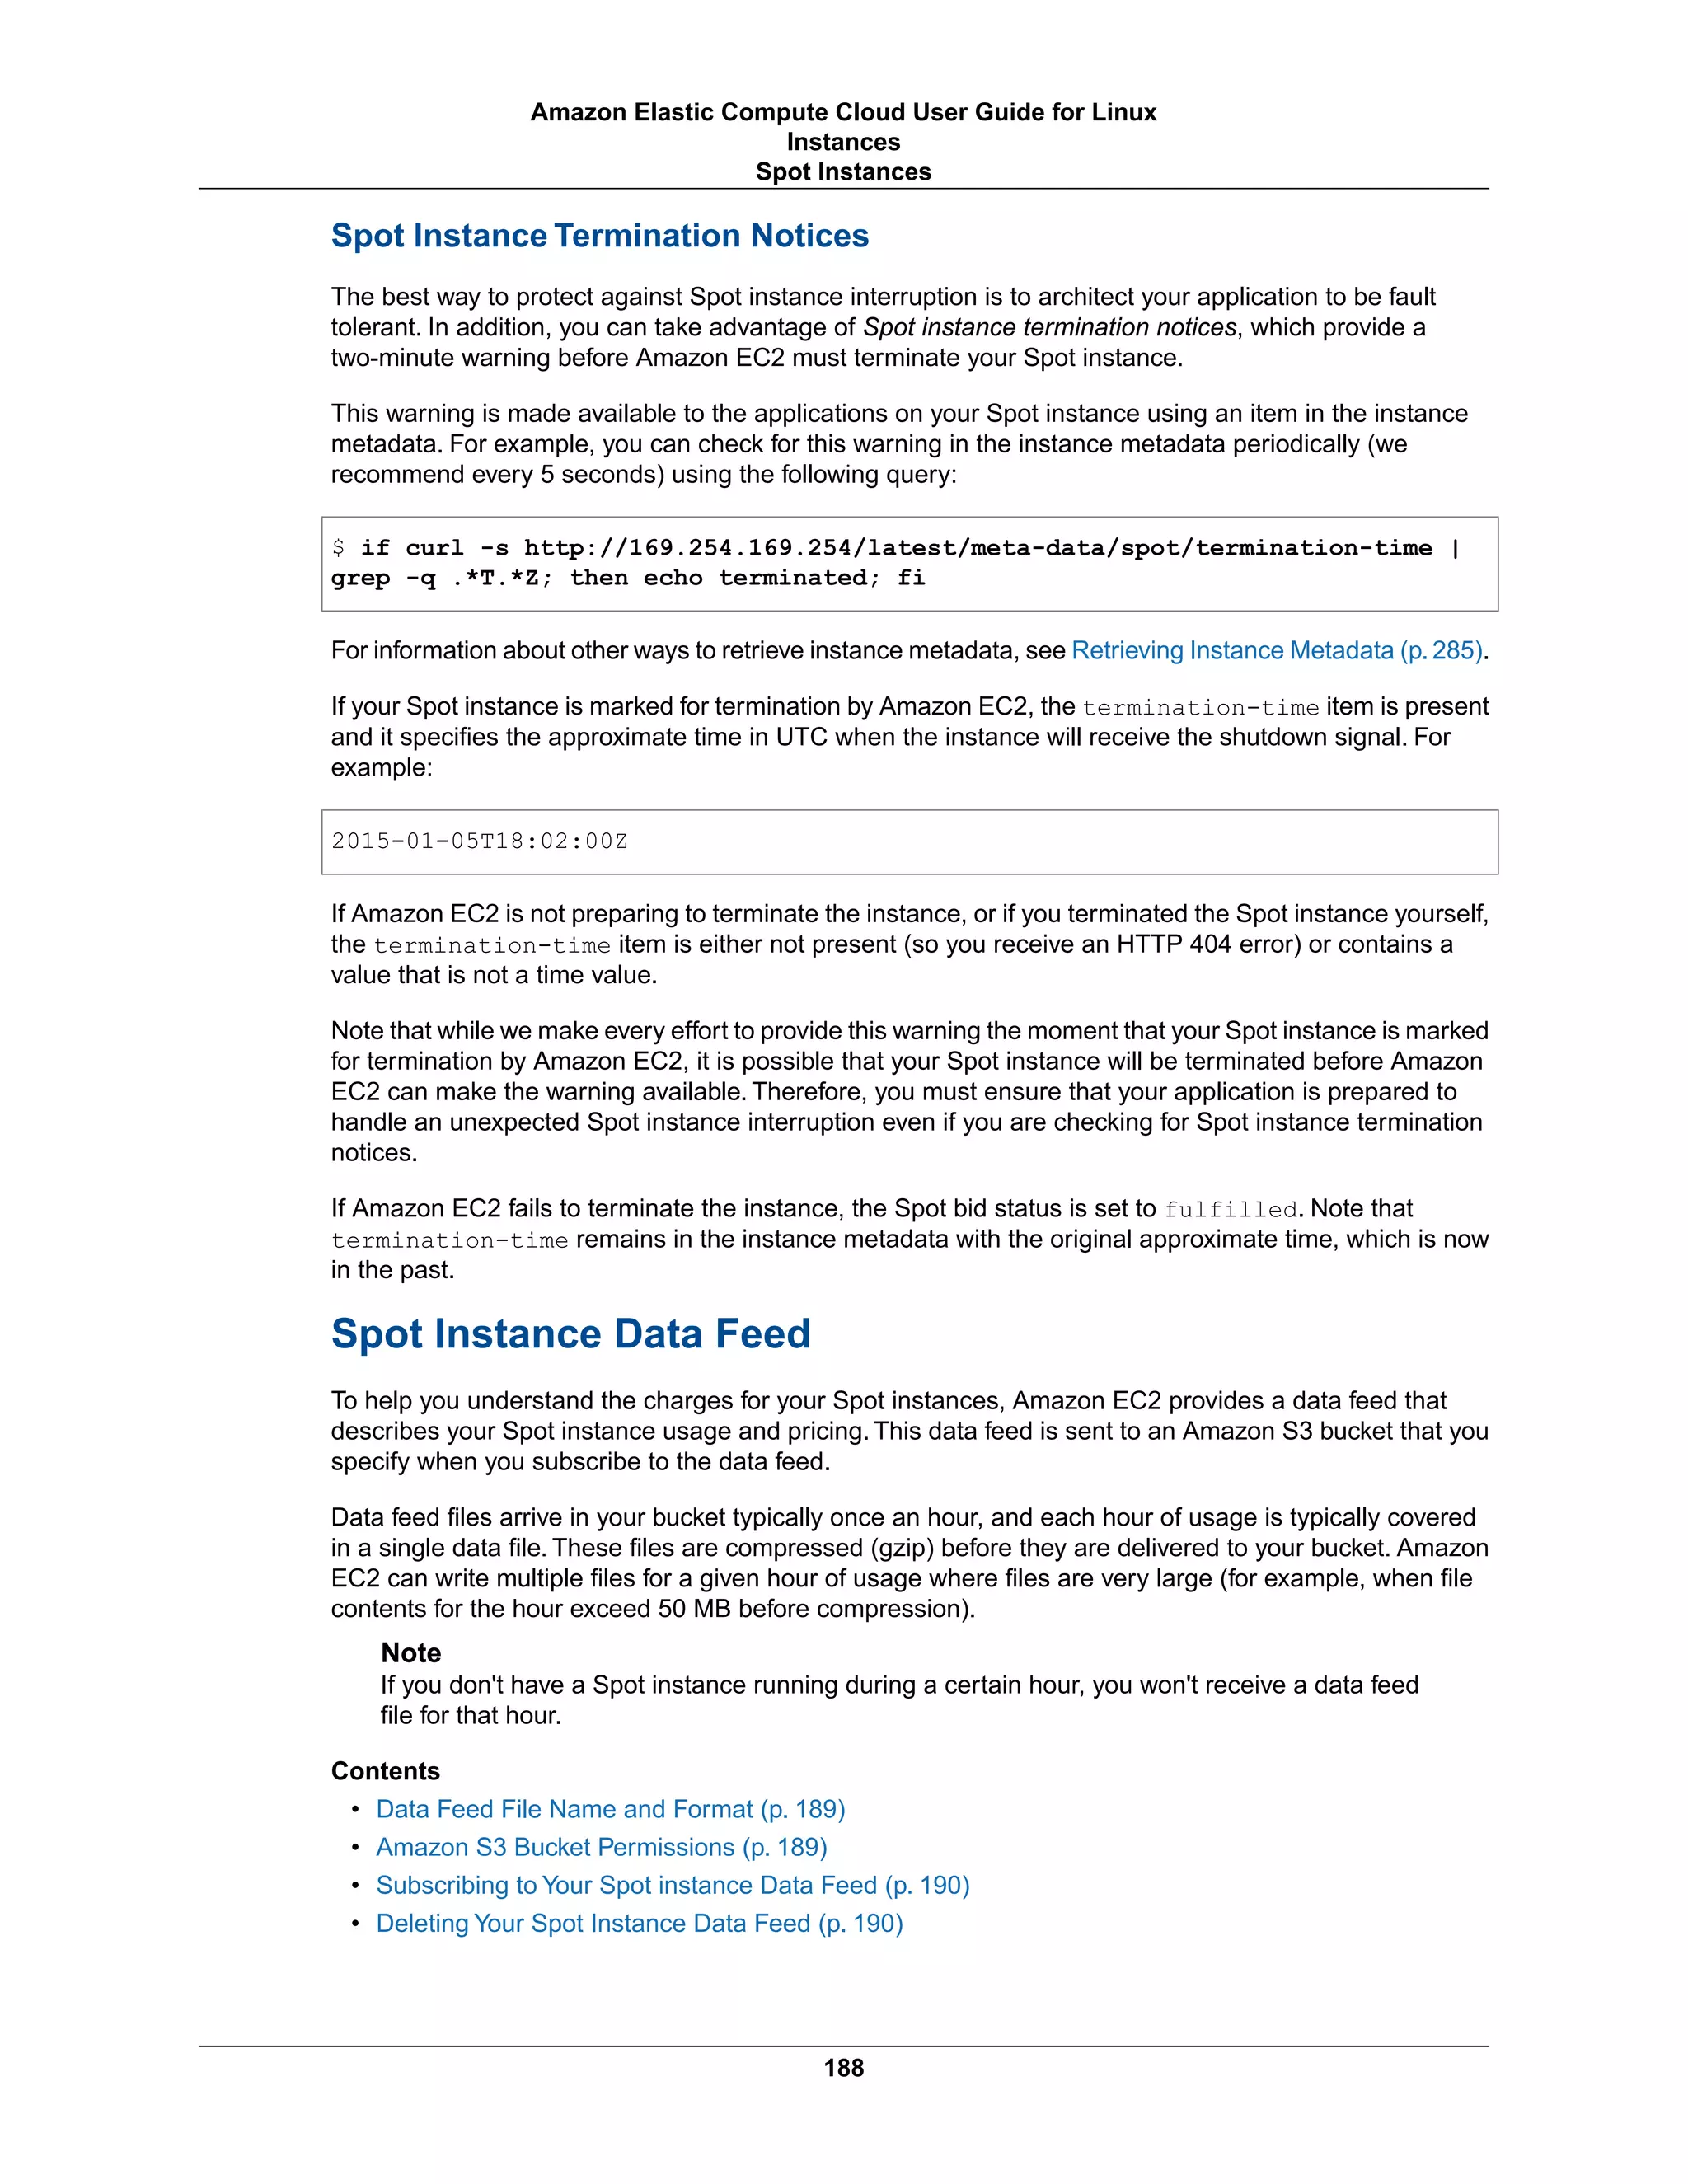
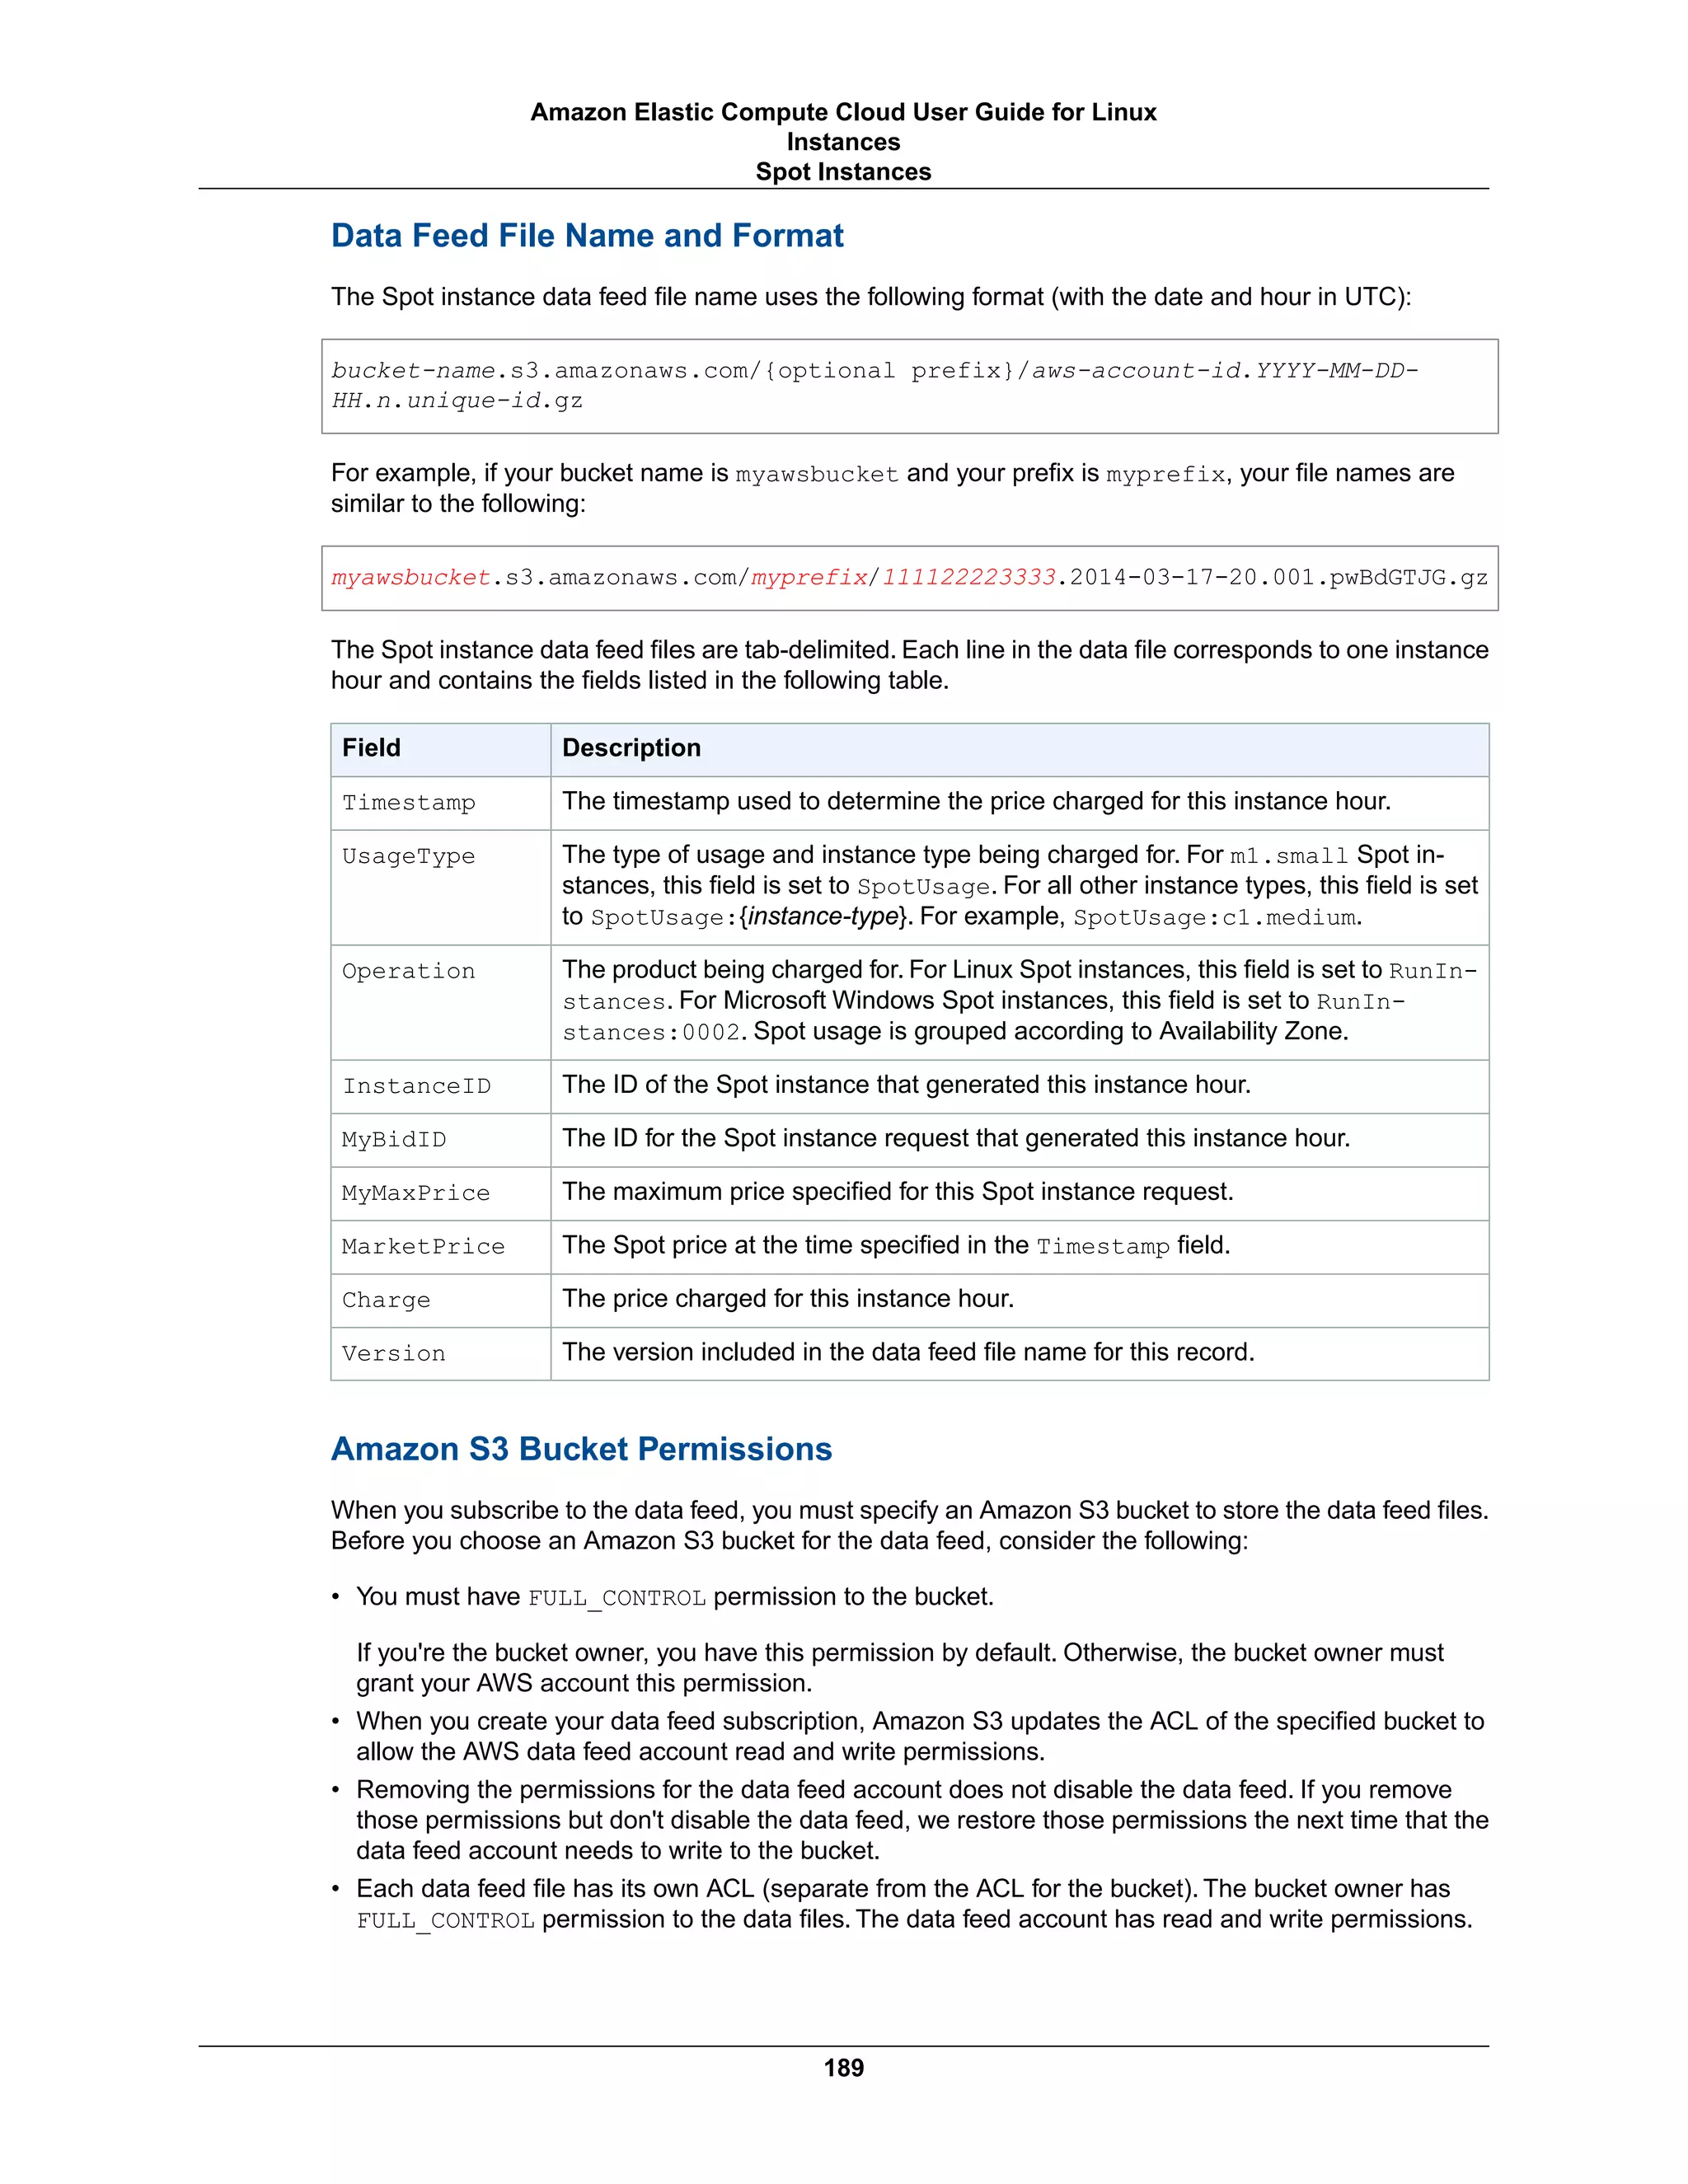
![• If you delete your data feed subscription, Amazon EC2 doesn't remove the read and write permissions
for the data feed account on either the bucket or the data files.You must remove these permissions
yourself.
Subscribing to Your Spot instance Data Feed
You can subscribe to your Spot instance data feed using the command line or API.
Subscribe Using the AWS CLI
To subscribe to your data feed, use the following create-spot-datafeed-subscription command:
$ aws ec2 create-spot-datafeed-subscription --bucket myawsbucket [--prefix
myprefix]
The following is example output:
{
"SpotDatafeedSubscription": {
"OwnerId": "111122223333",
"Prefix": "myprefix",
"Bucket": "myawsbucket",
"State": "Active"
}
}
Subscribe Using the Amazon EC2 CLI
To subscribe to your data feed, use the following ec2-create-spot-datafeed-subscription command:
$ ec2-create-spot-datafeed-subscription --bucket myawsbucket [--prefix myprefix]
The following is example output:
SPOTDATAFEEDSUBSCRIPTION 111122223333 myawsbucket myprefix
Active
Deleting Your Spot Instance Data Feed
You can delete your Spot instance data feed using the command line or API .
Delete Using the AWS CLI
To delete your data feed, use the following delete-spot-datafeed-subscription command:
$ aws ec2 delete-spot-datafeed-subscription
Delete Using the Amazon EC2 CLI
To delete your data feed, use the following ec2-delete-spot-datafeed-subscription command:
$ ec2-delete-spot-datafeed-subscription
190
Amazon Elastic Compute Cloud User Guide for Linux
Instances
Spot Instances](https://image.slidesharecdn.com/ec2-ug-151130152858-lva1-app6892/75/Amazan-Ec2-199-2048.jpg)
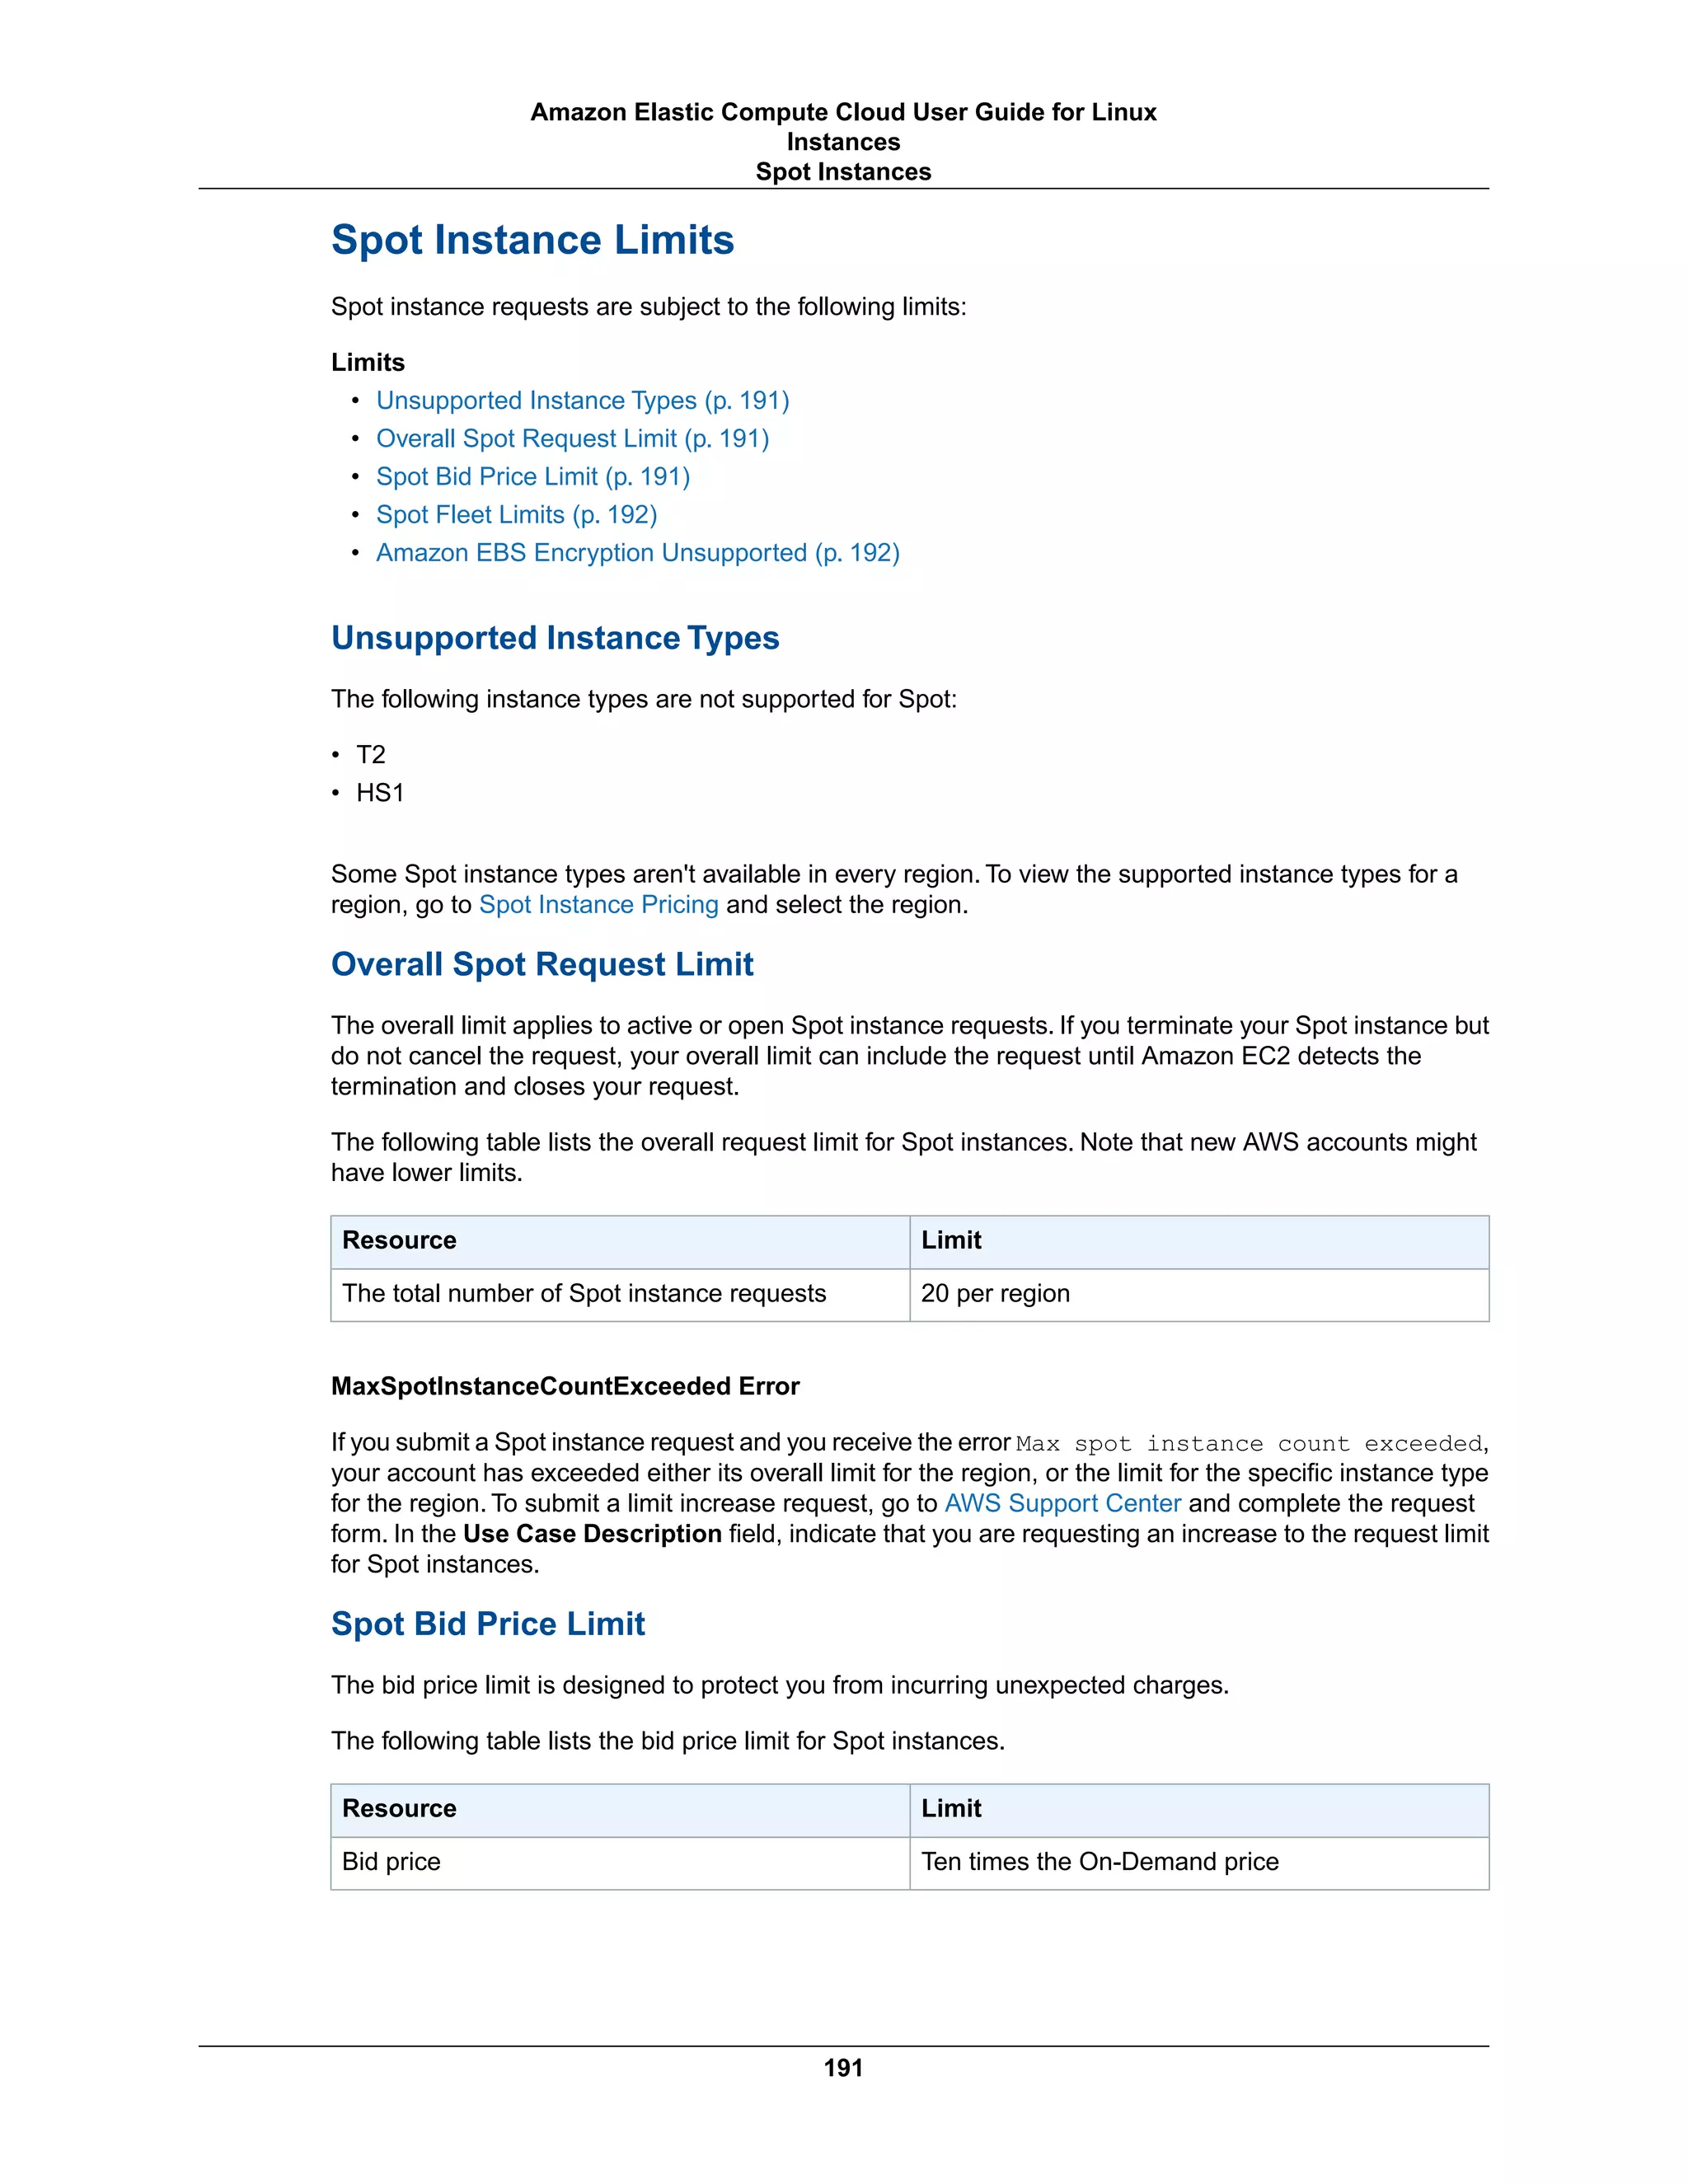


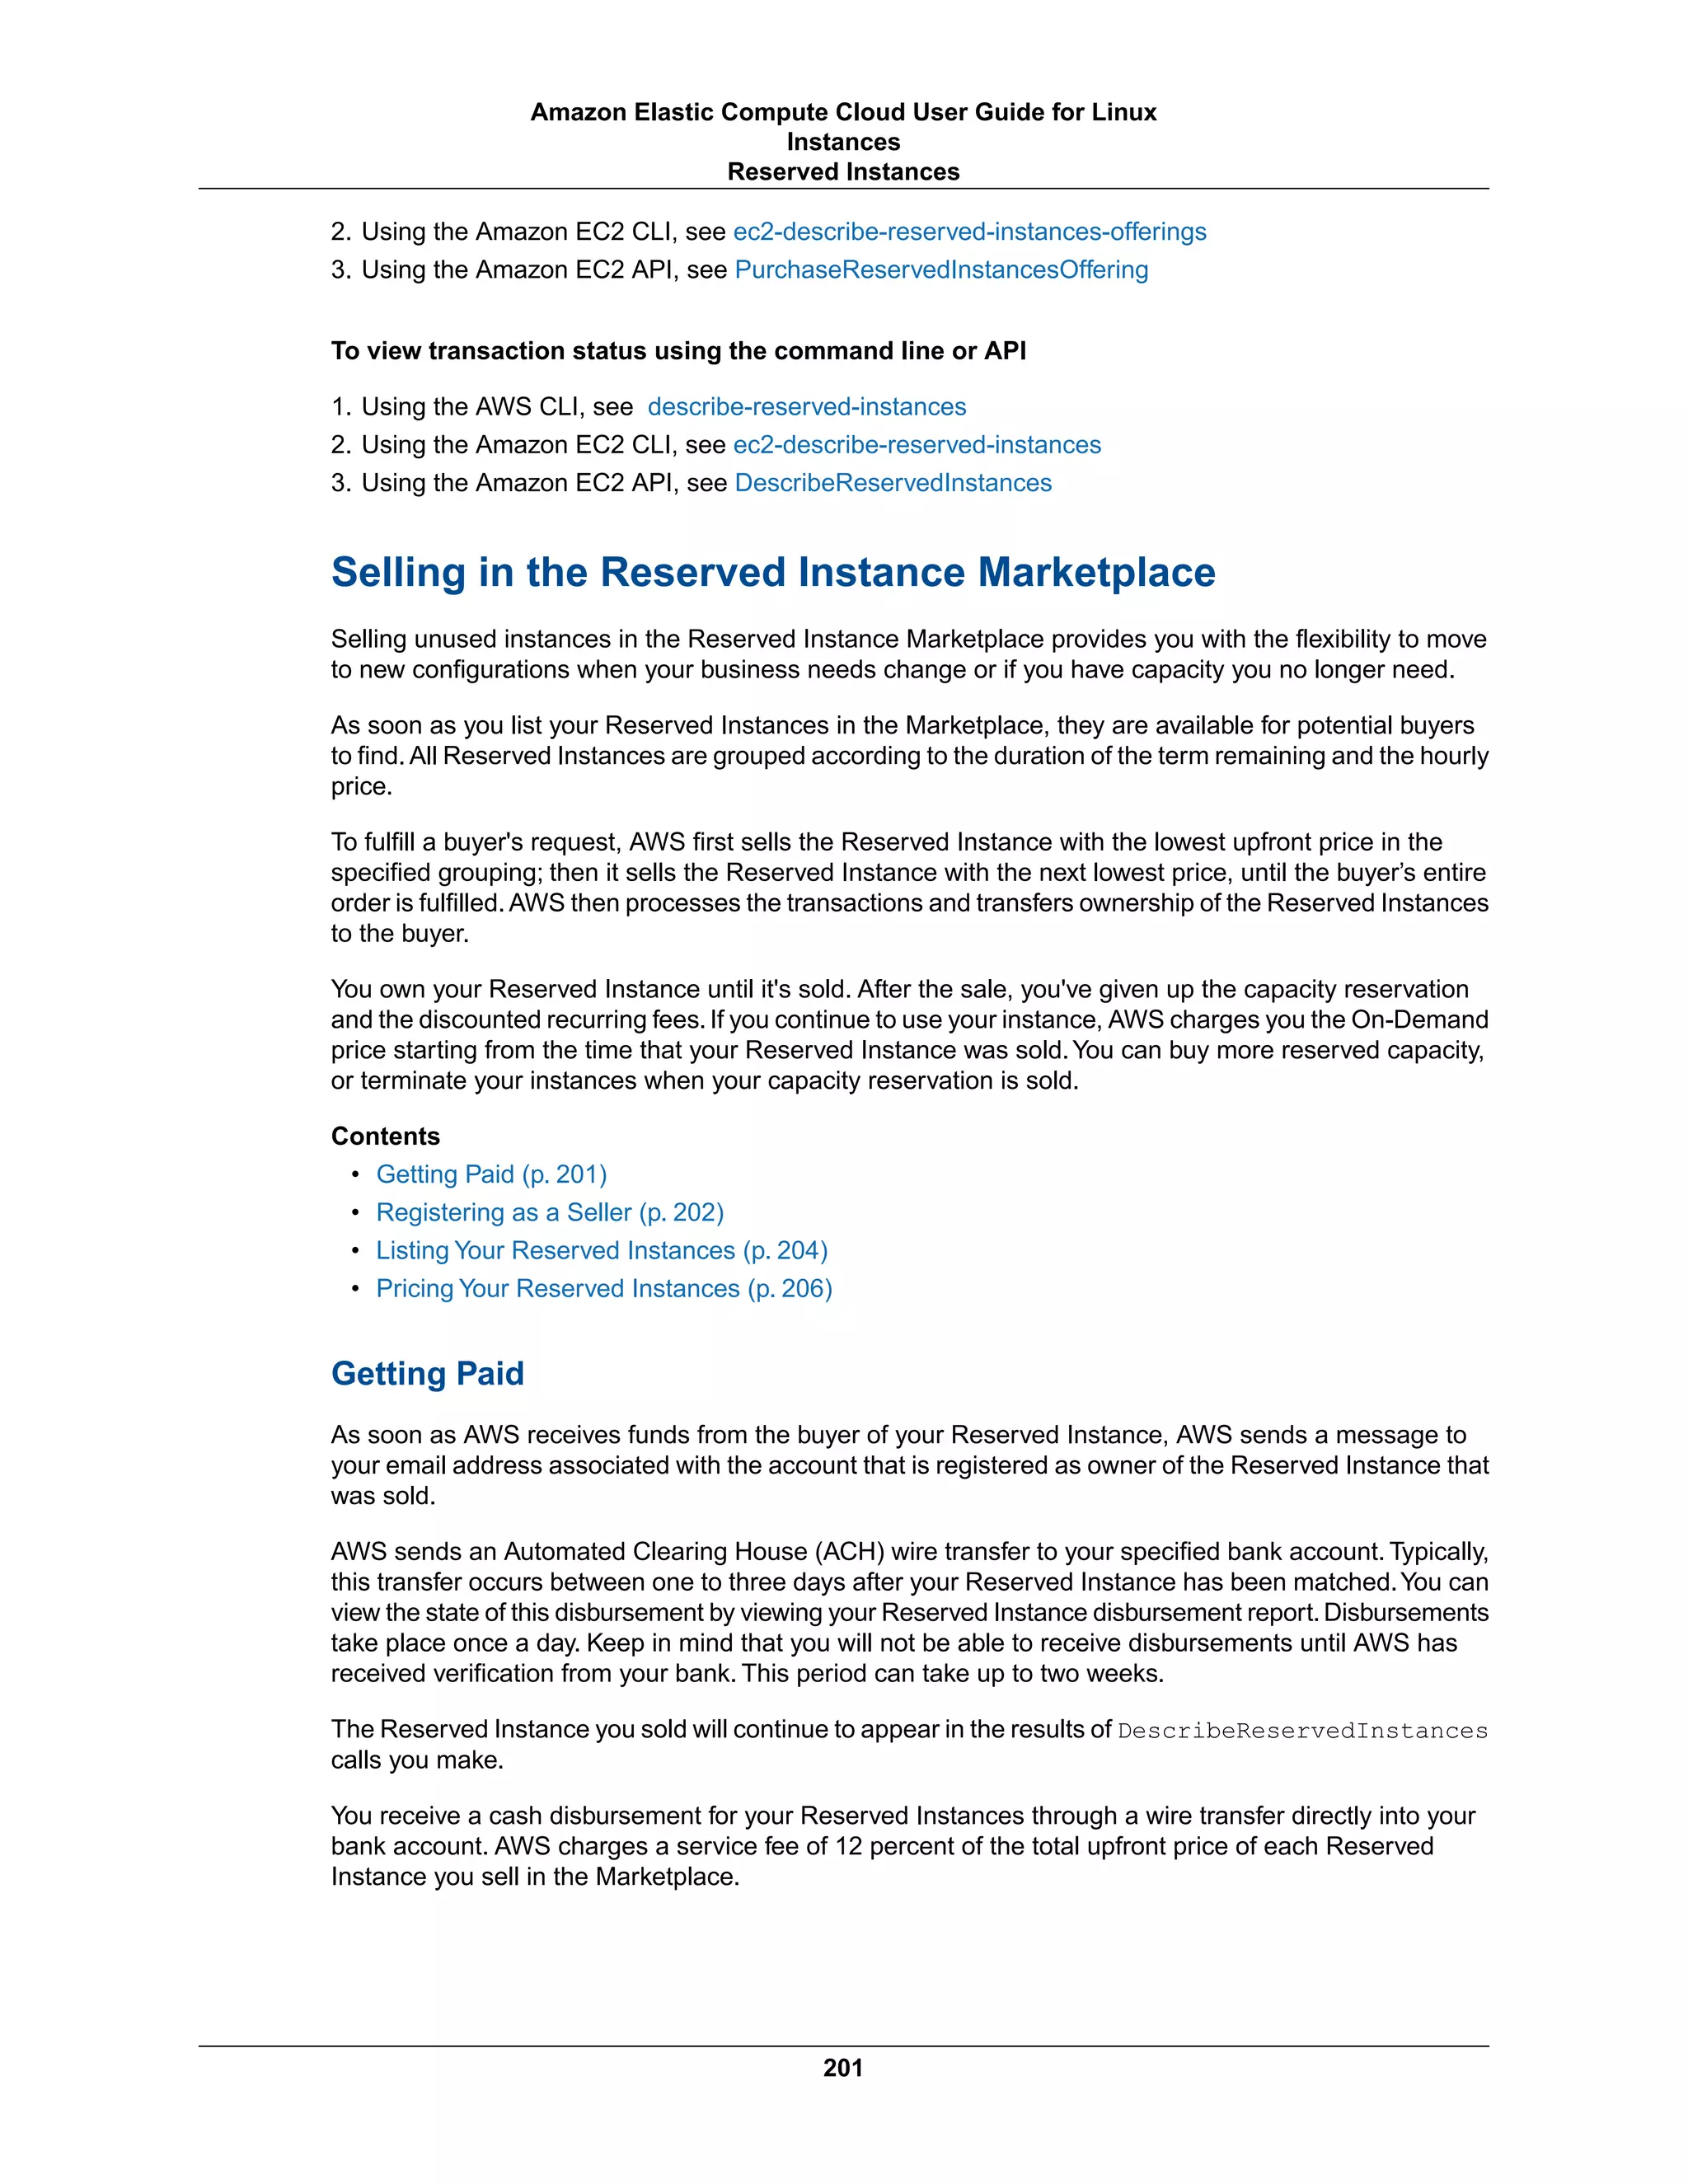


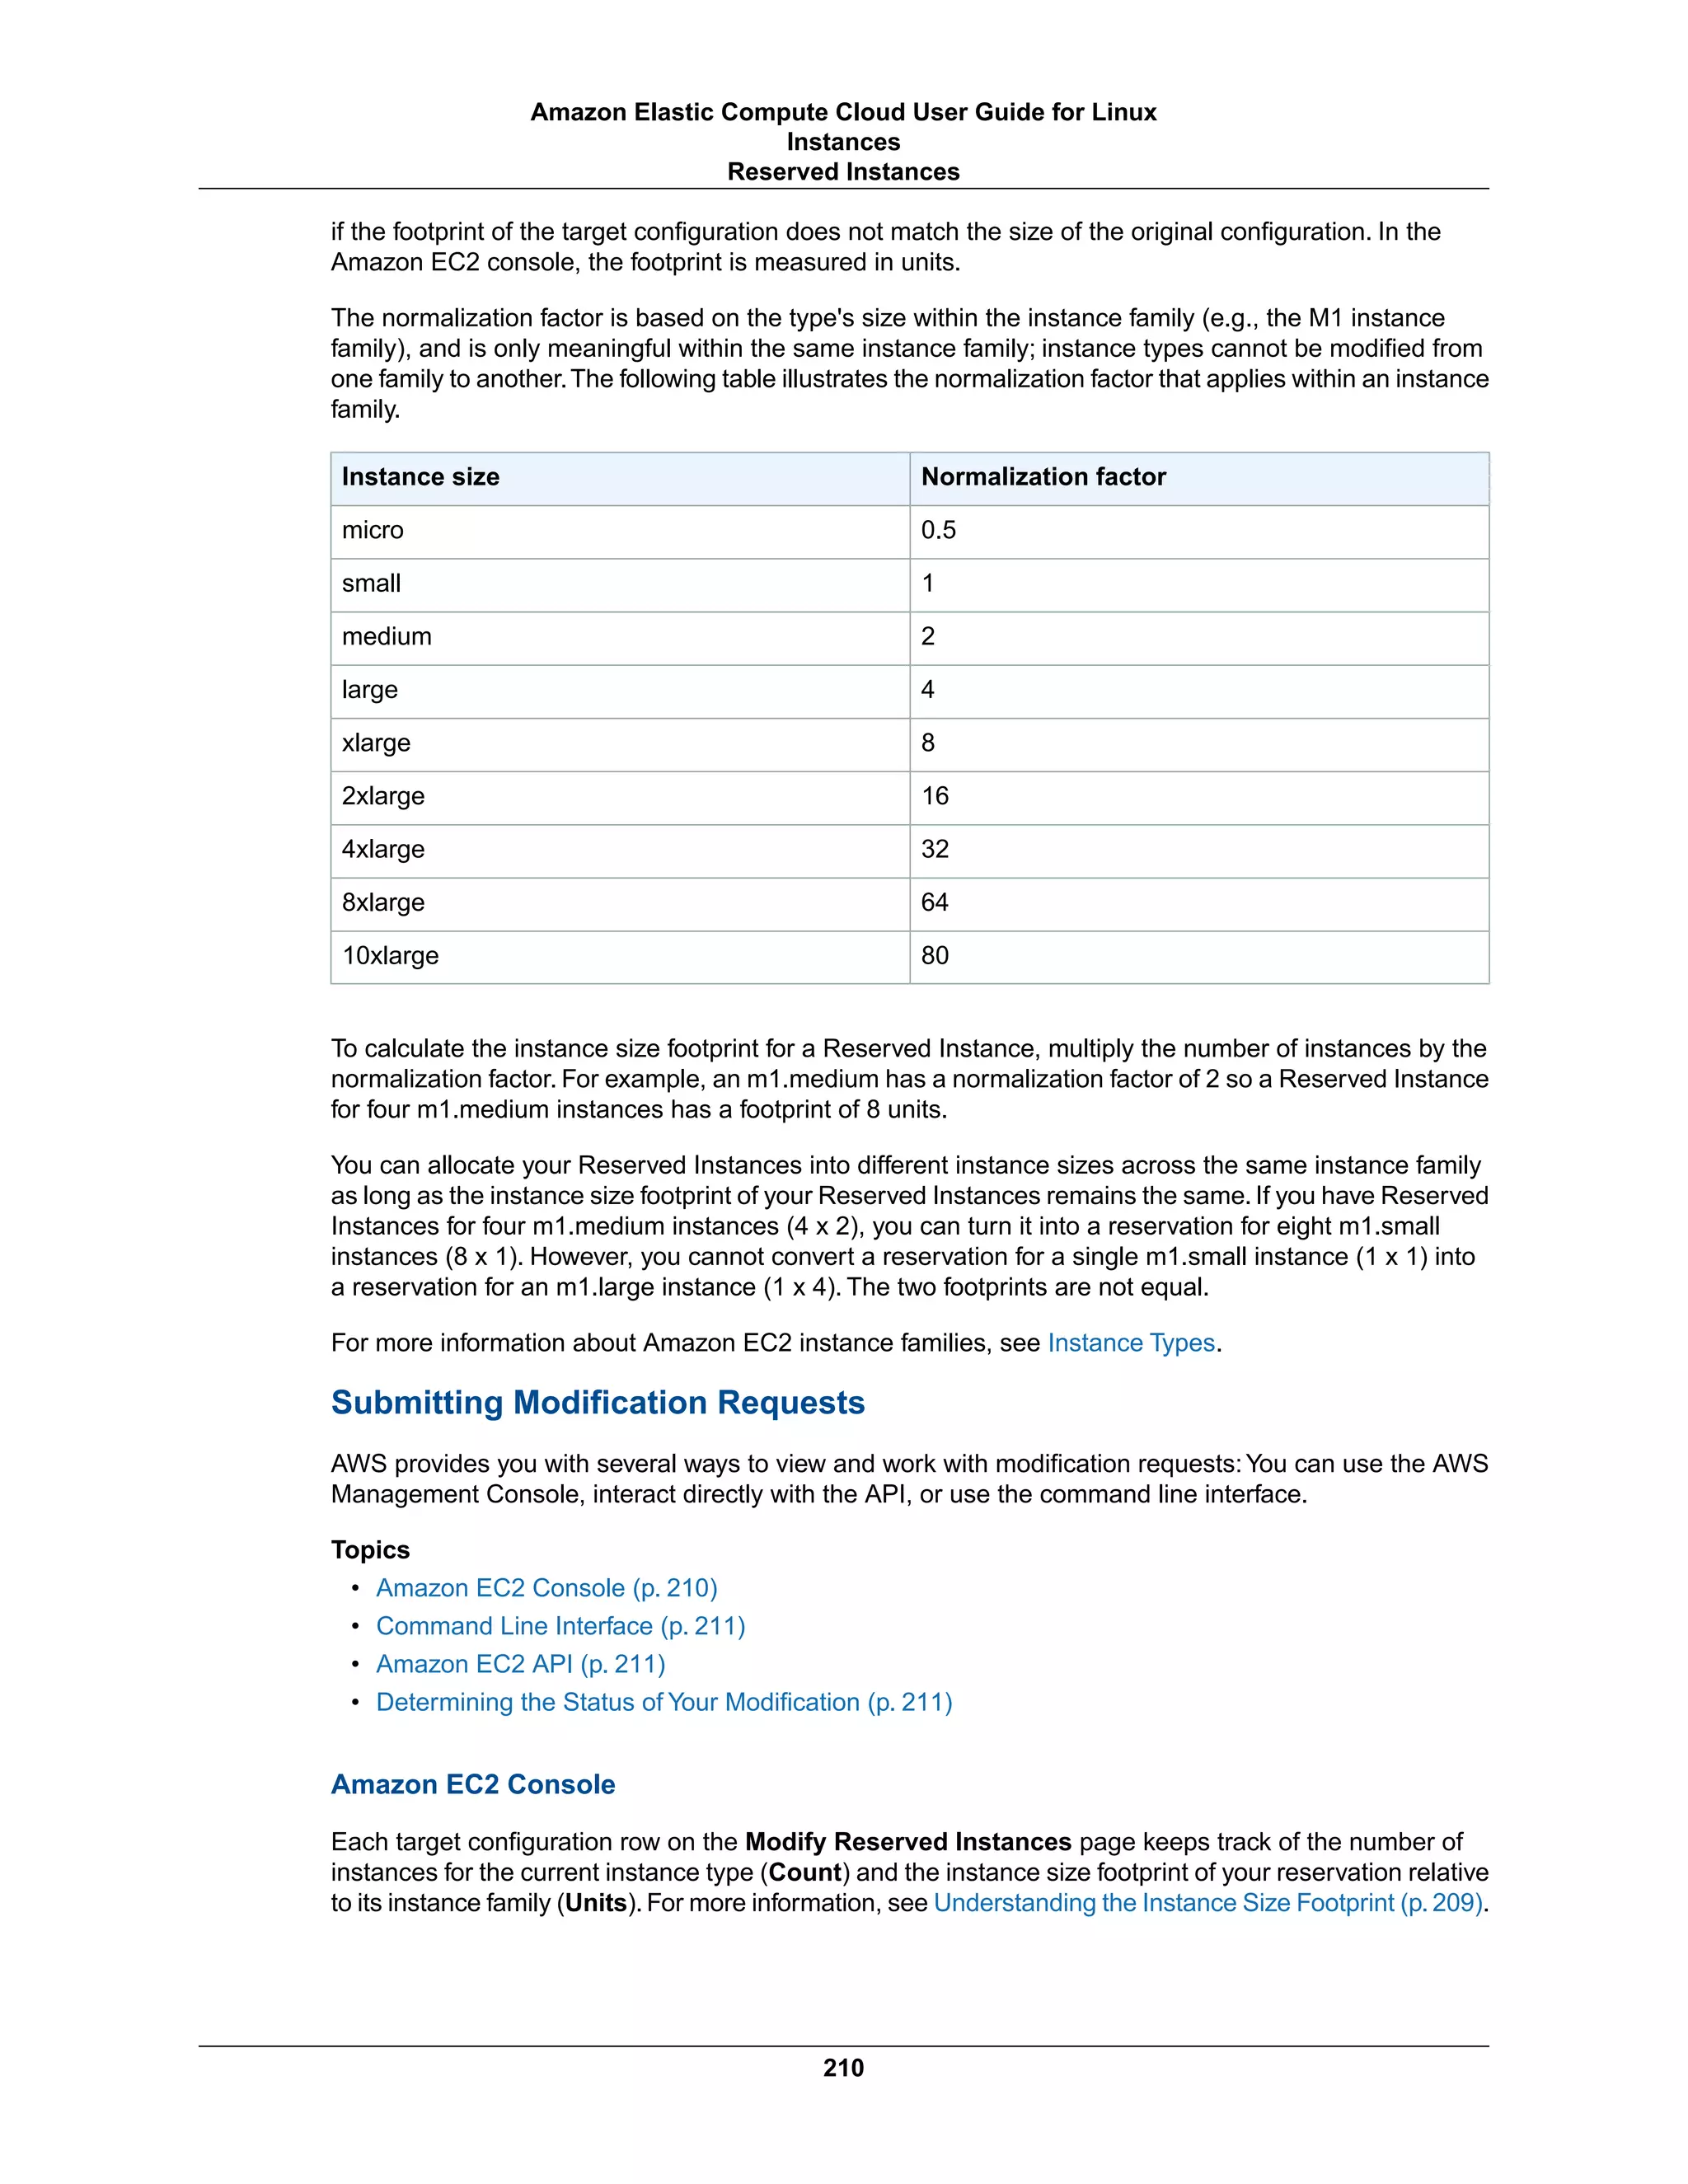
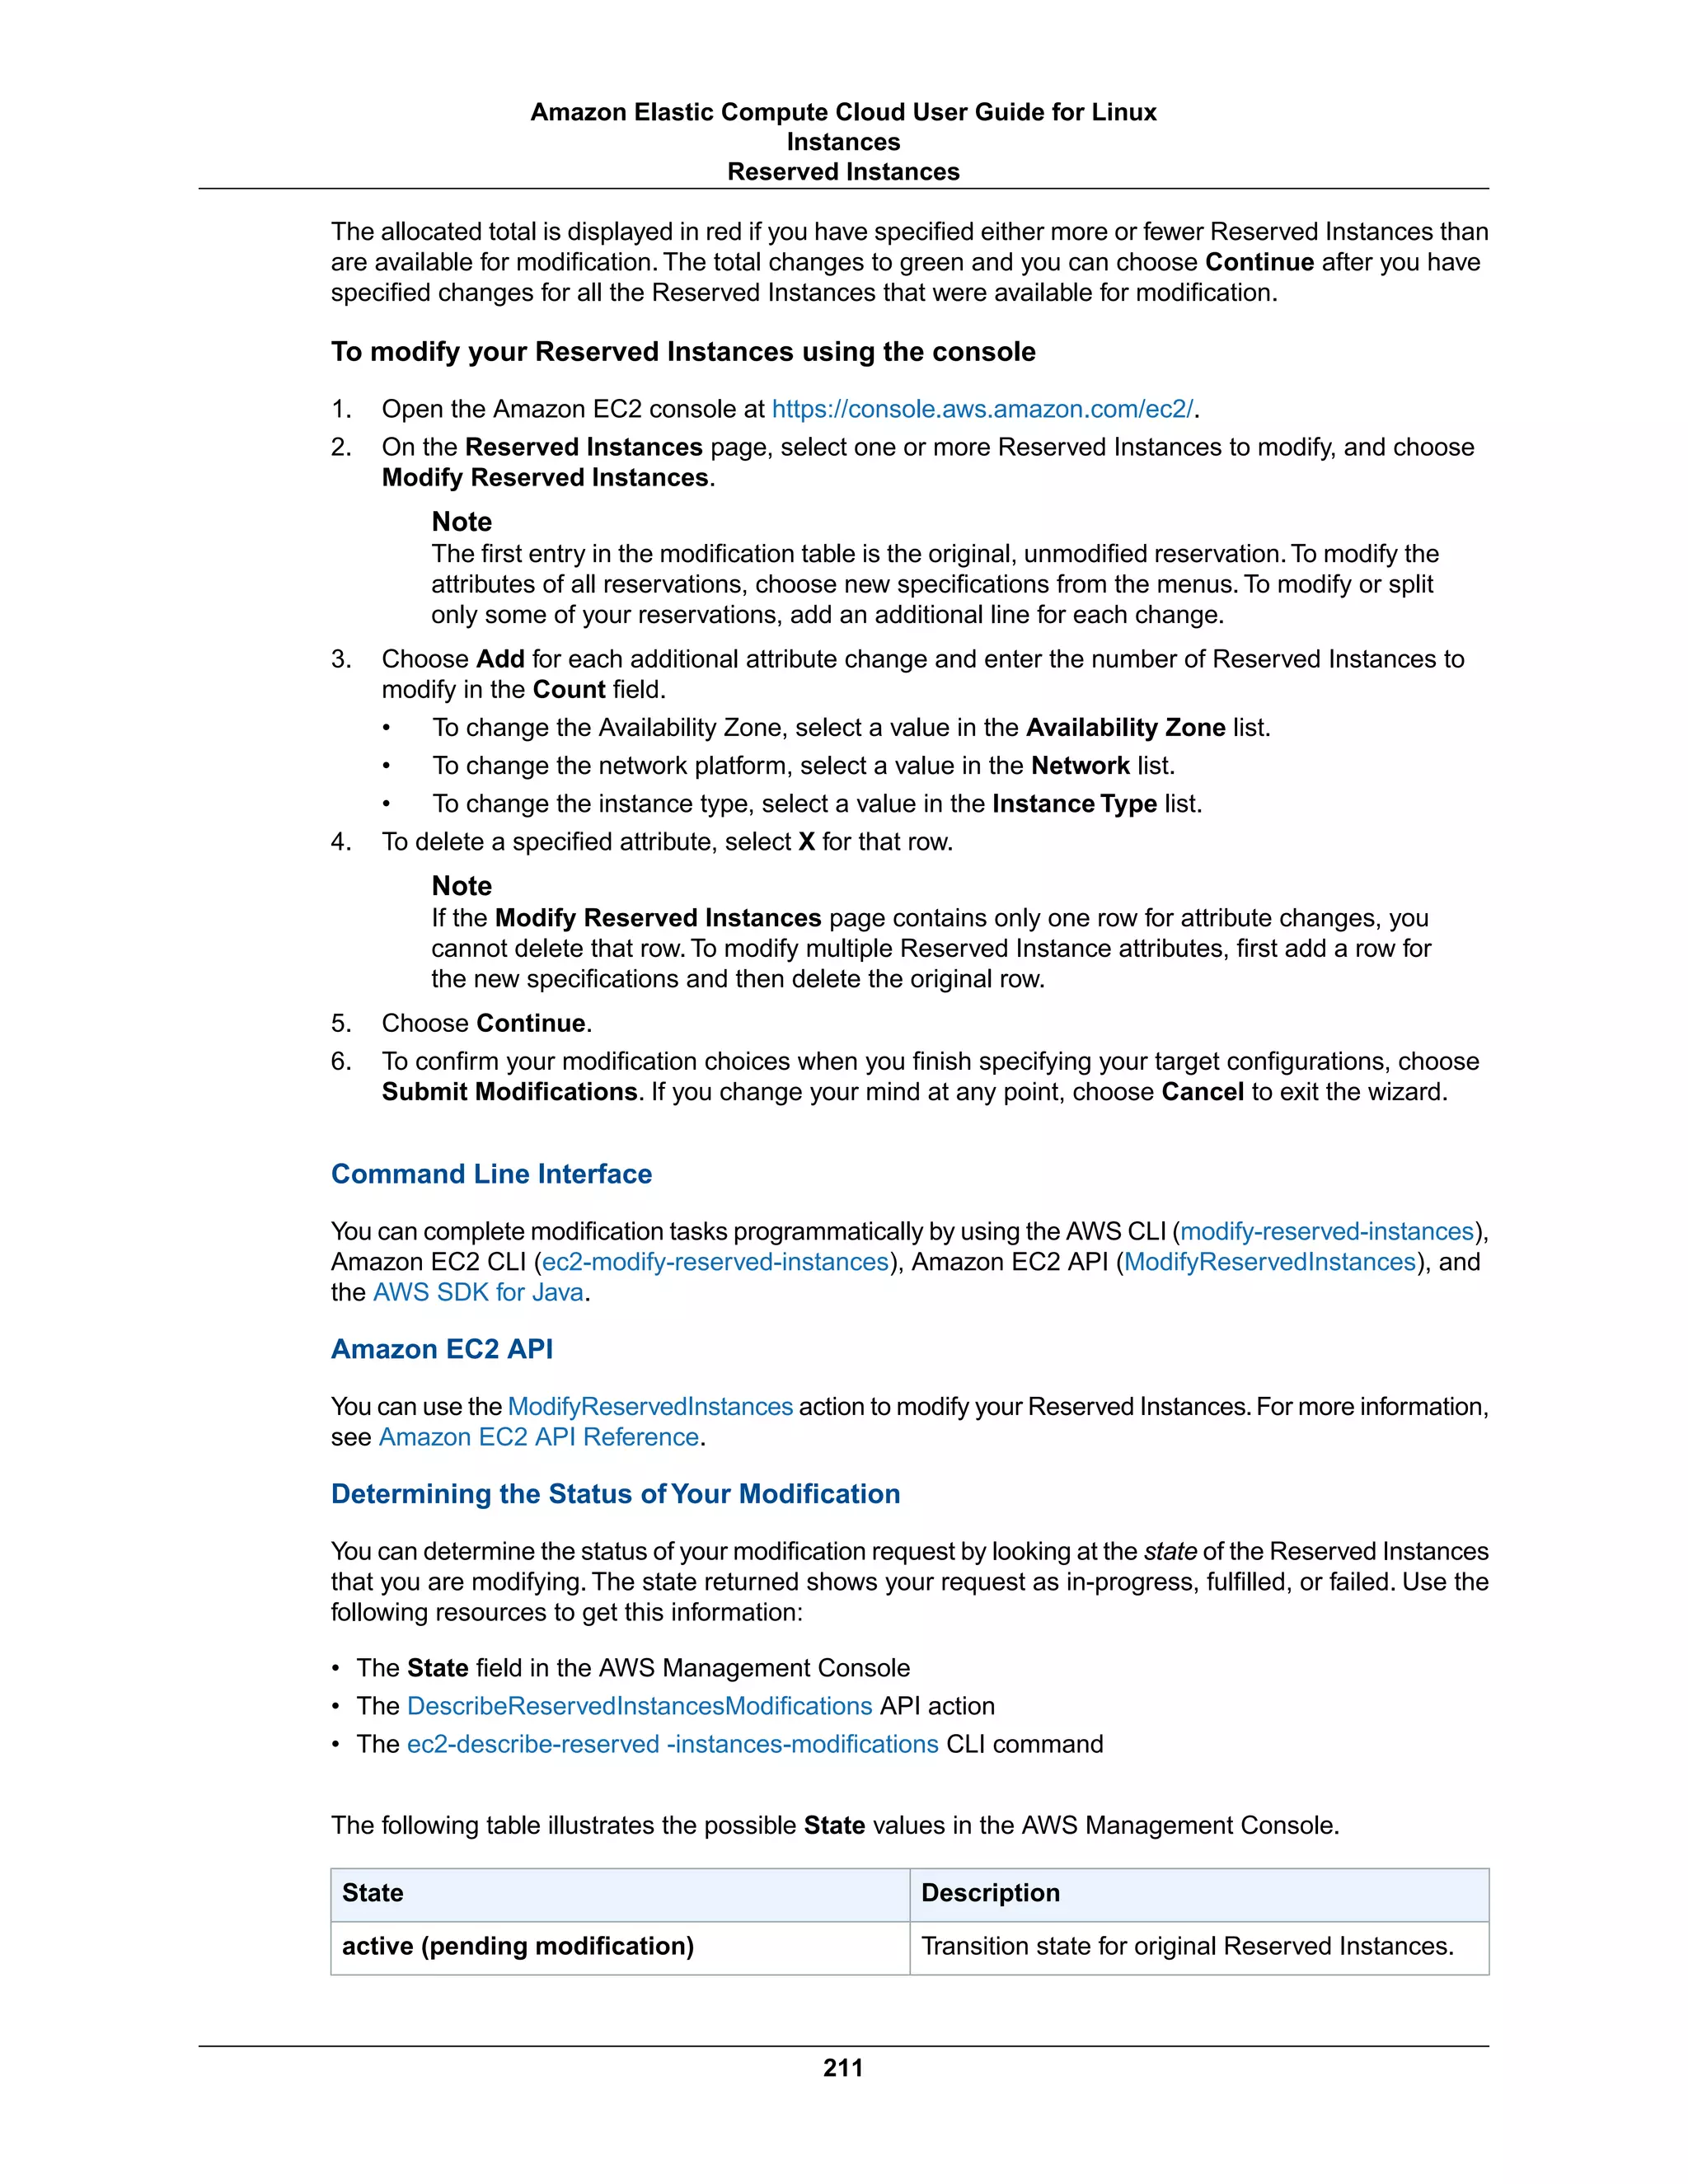

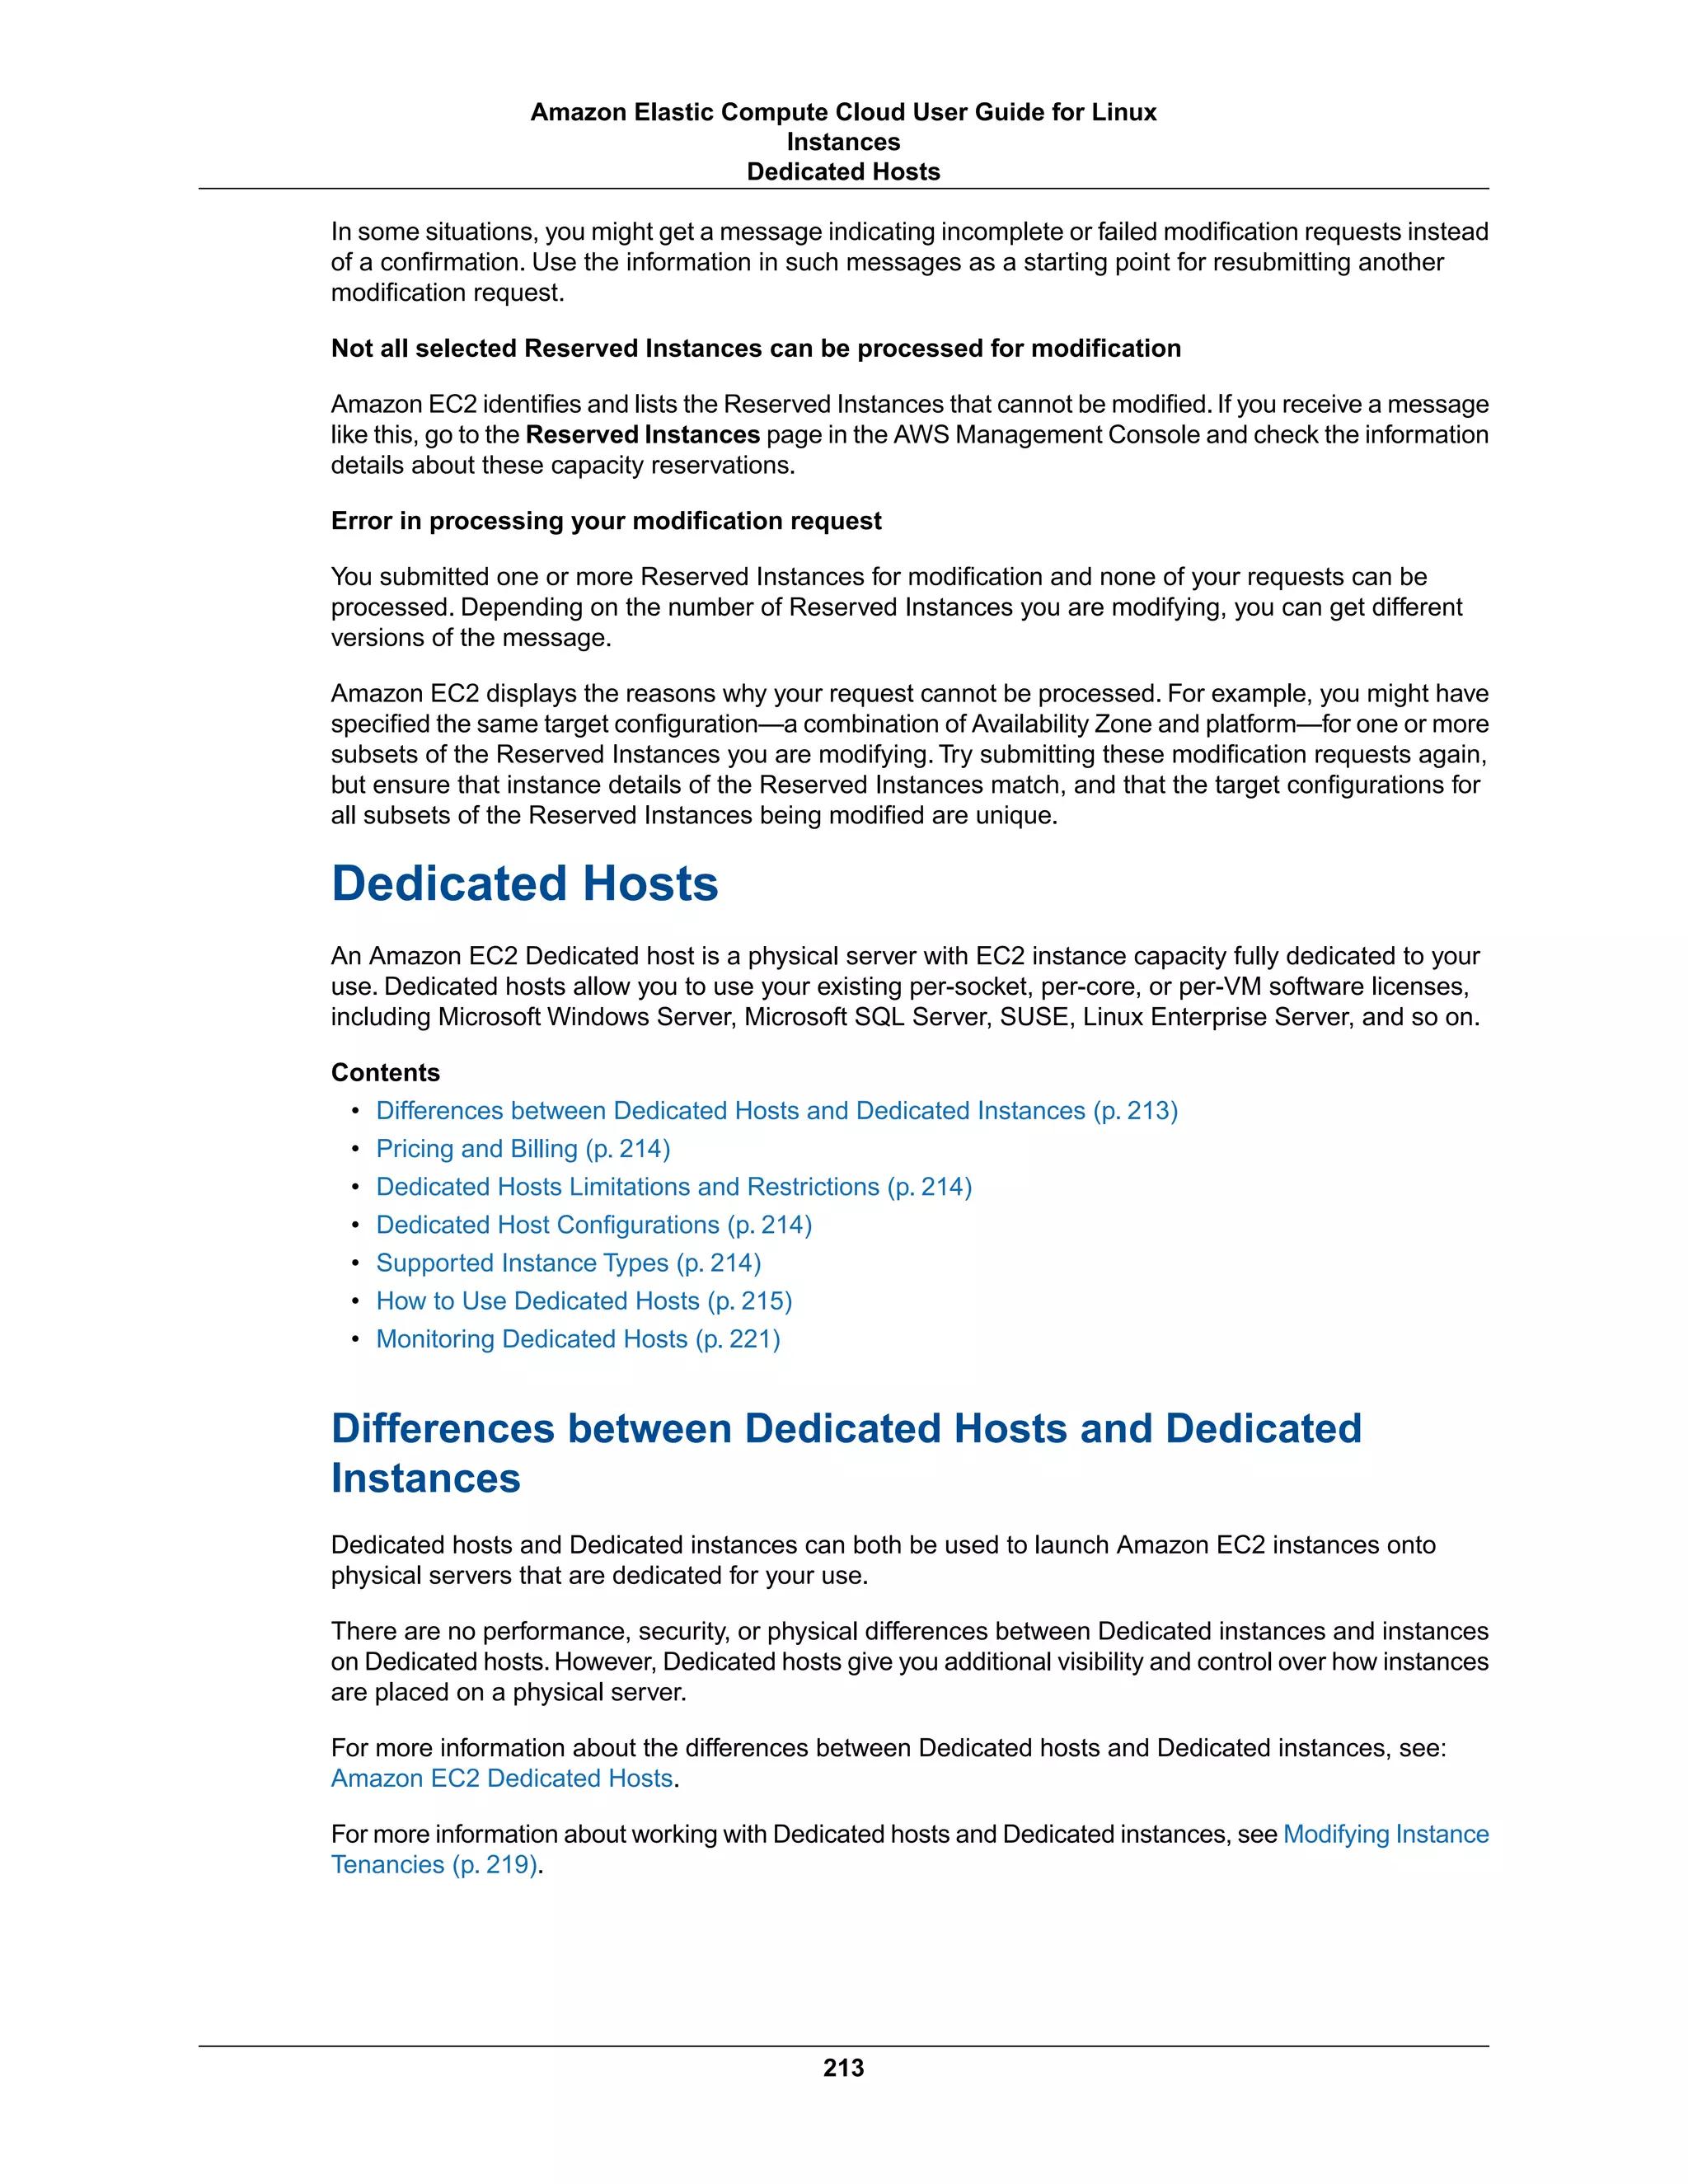
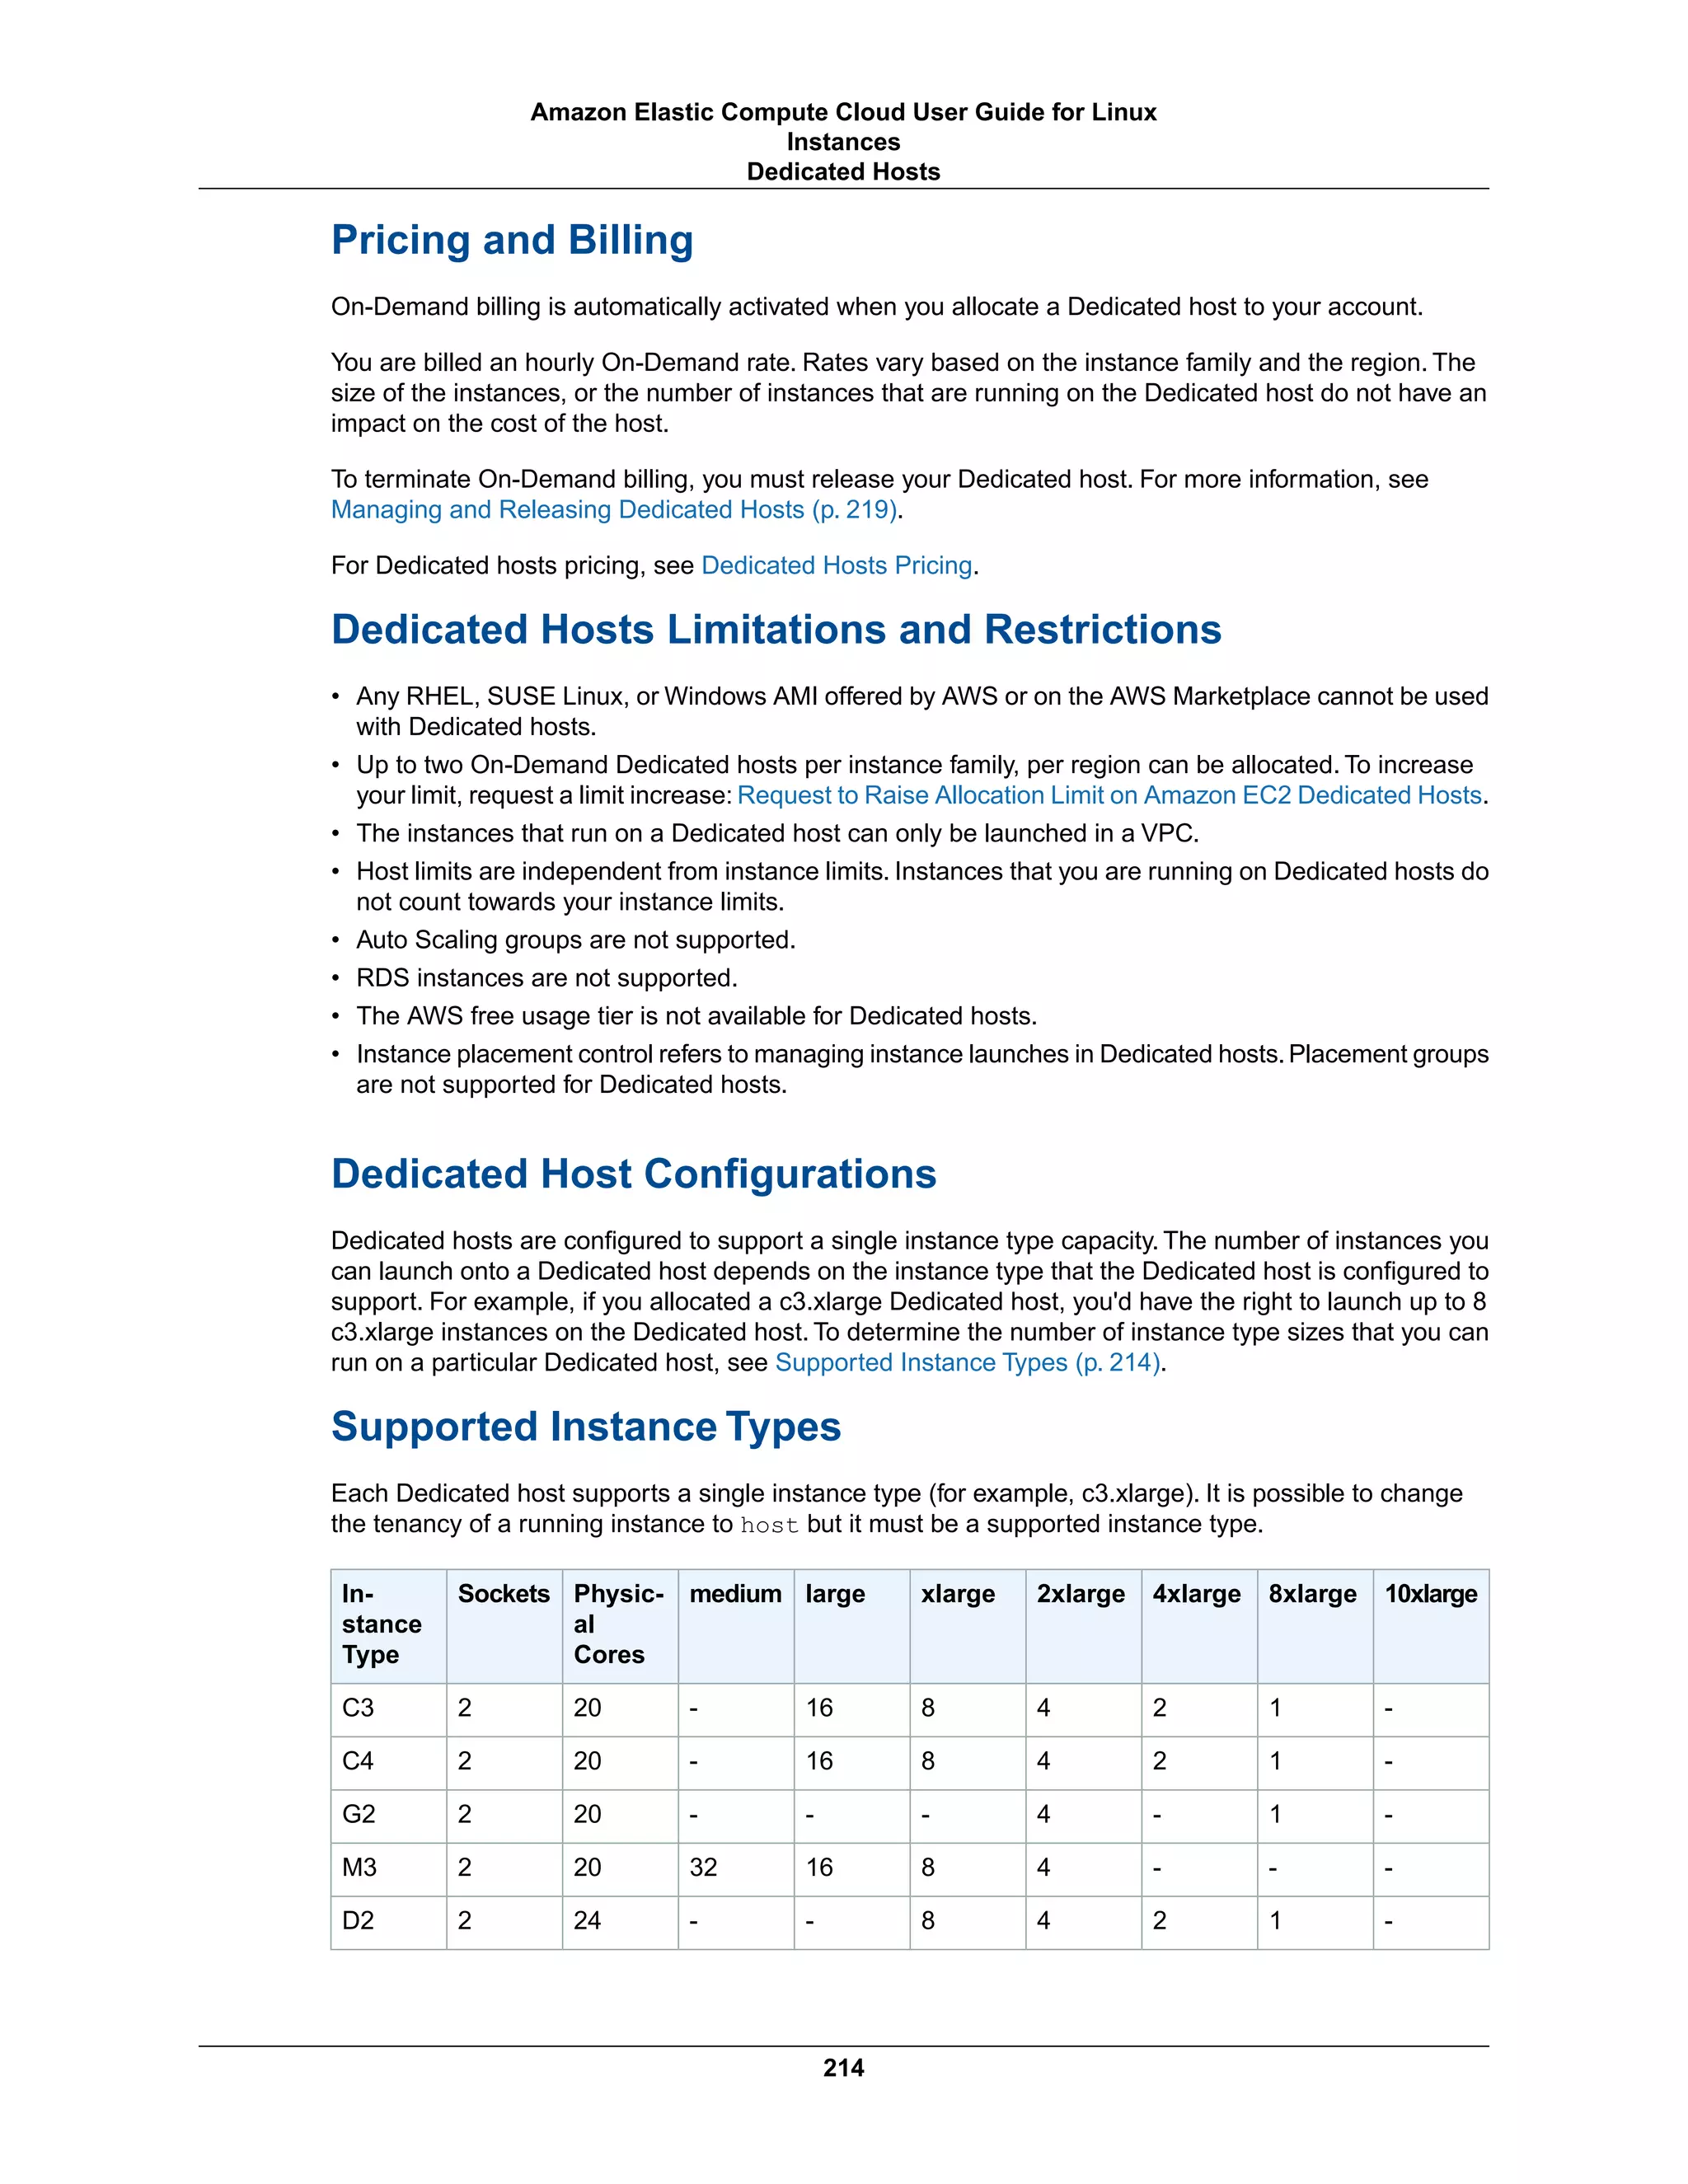


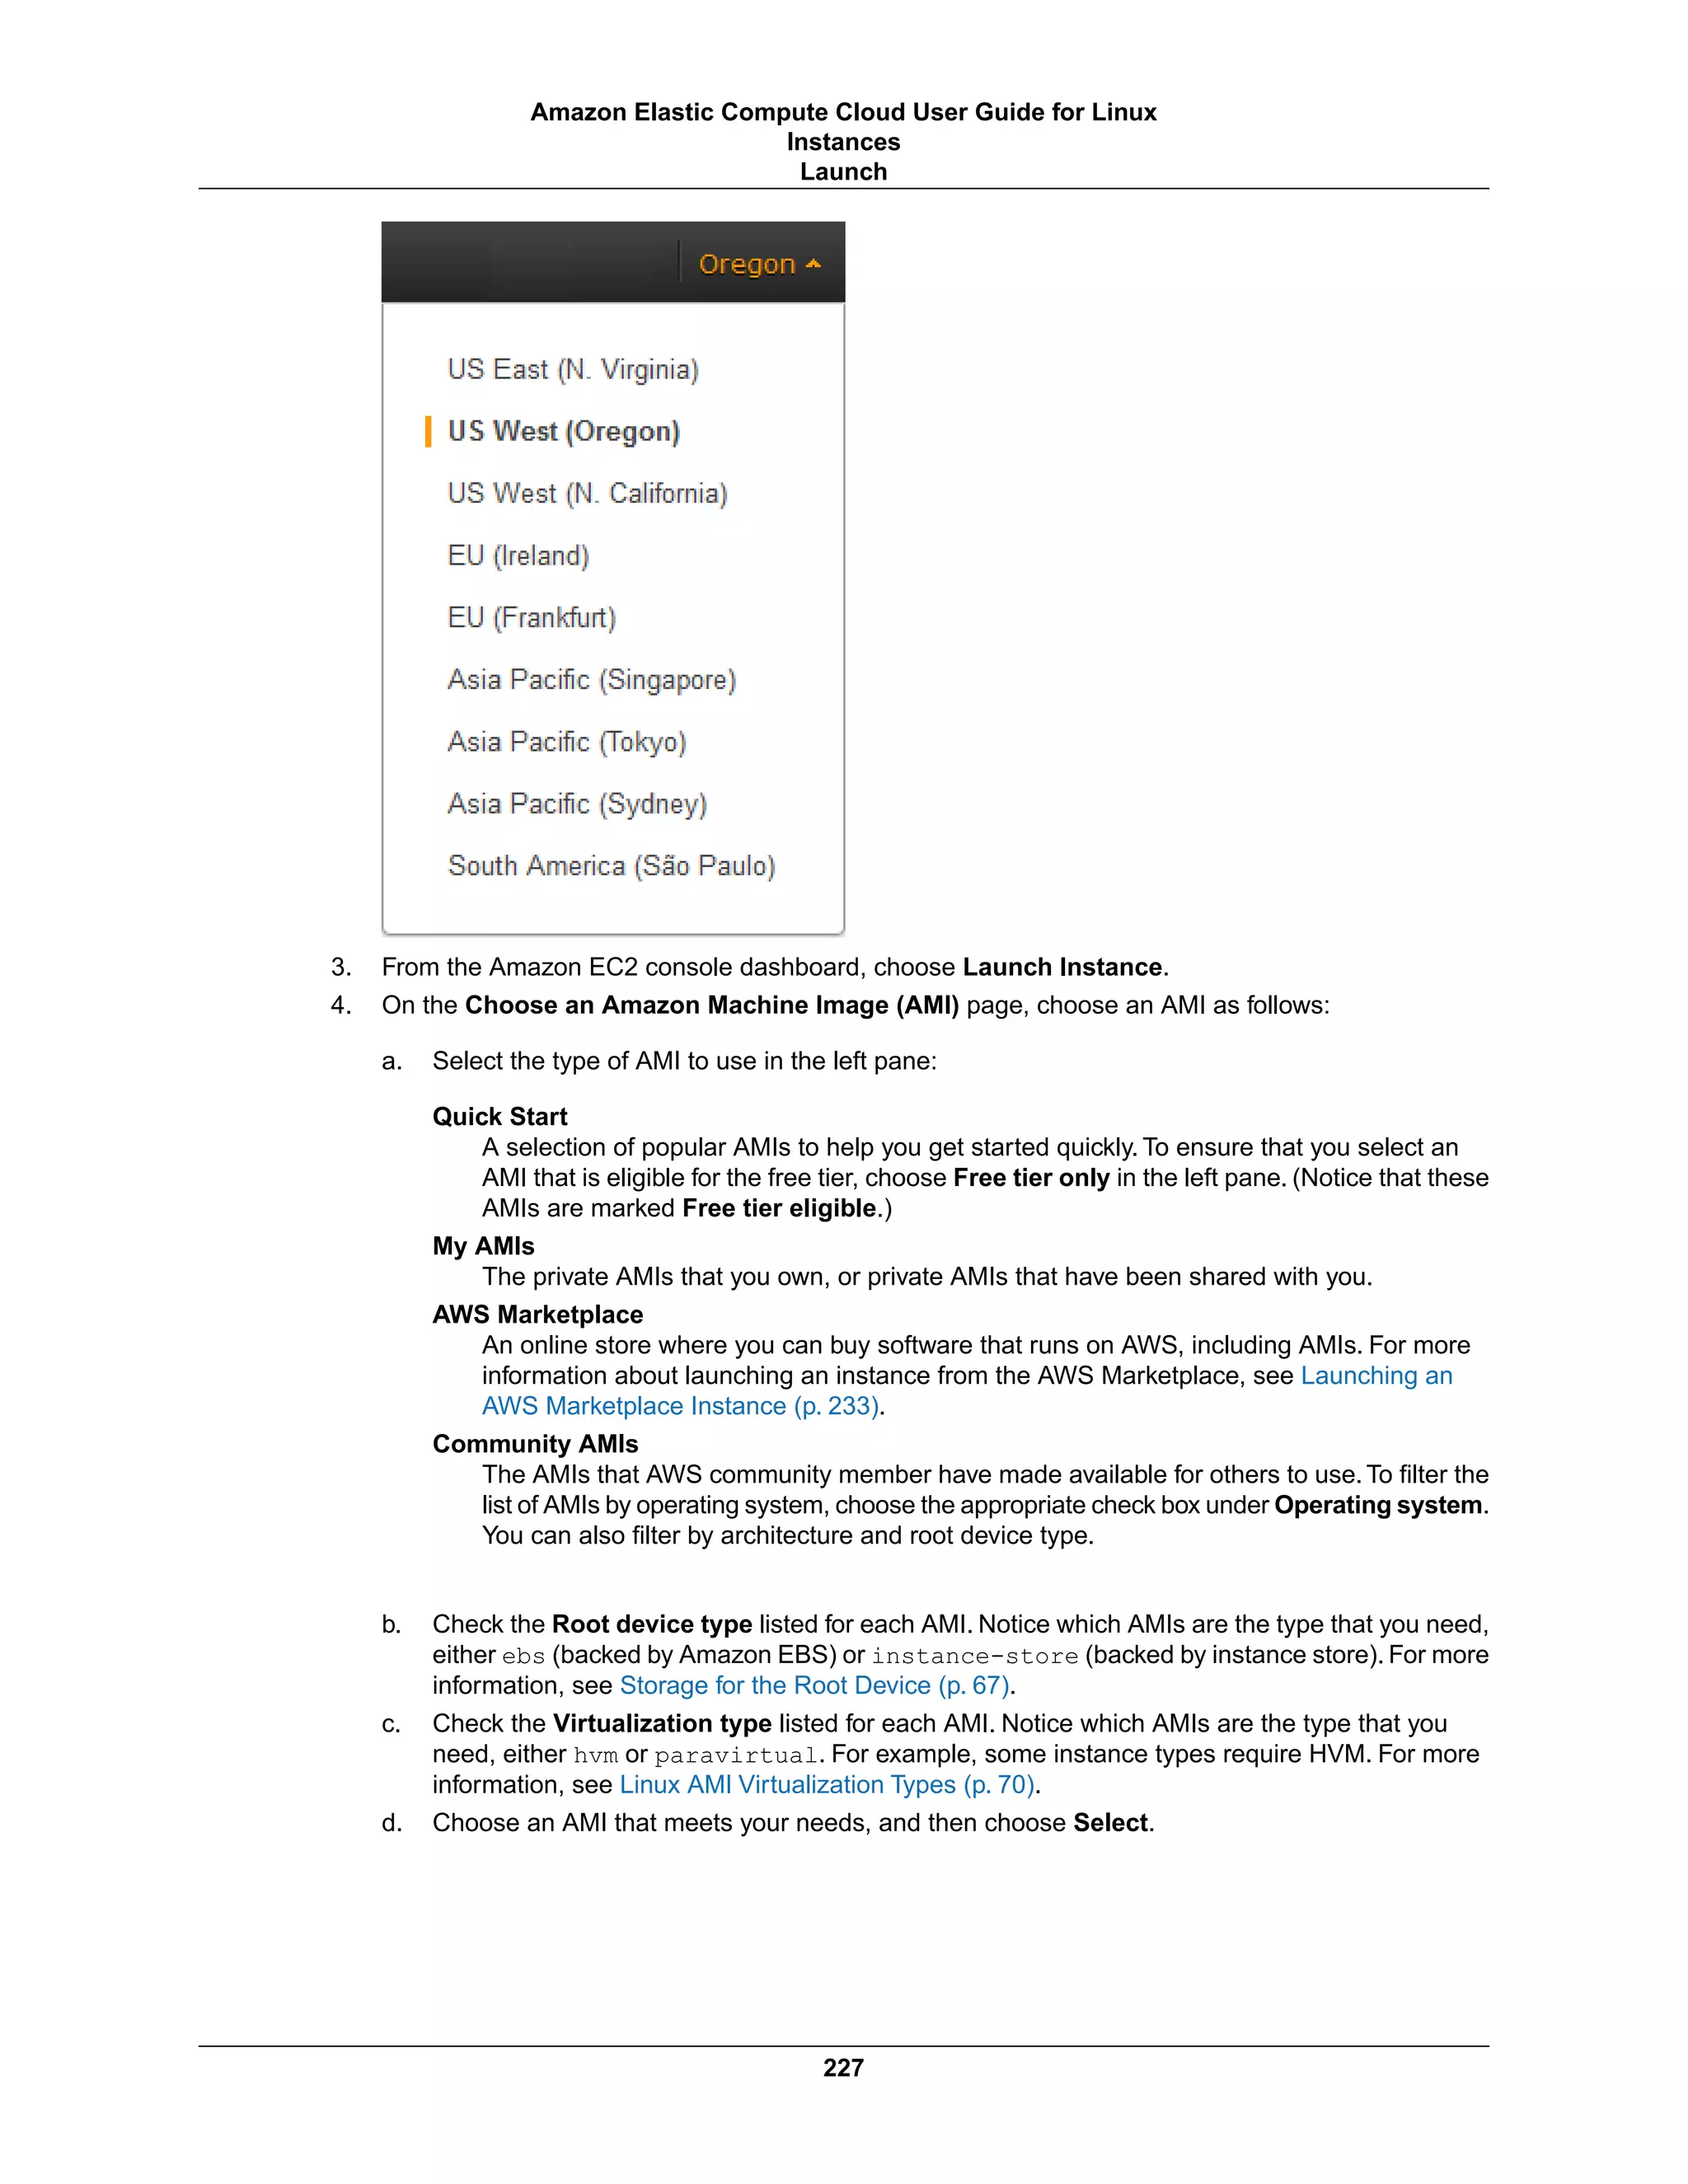


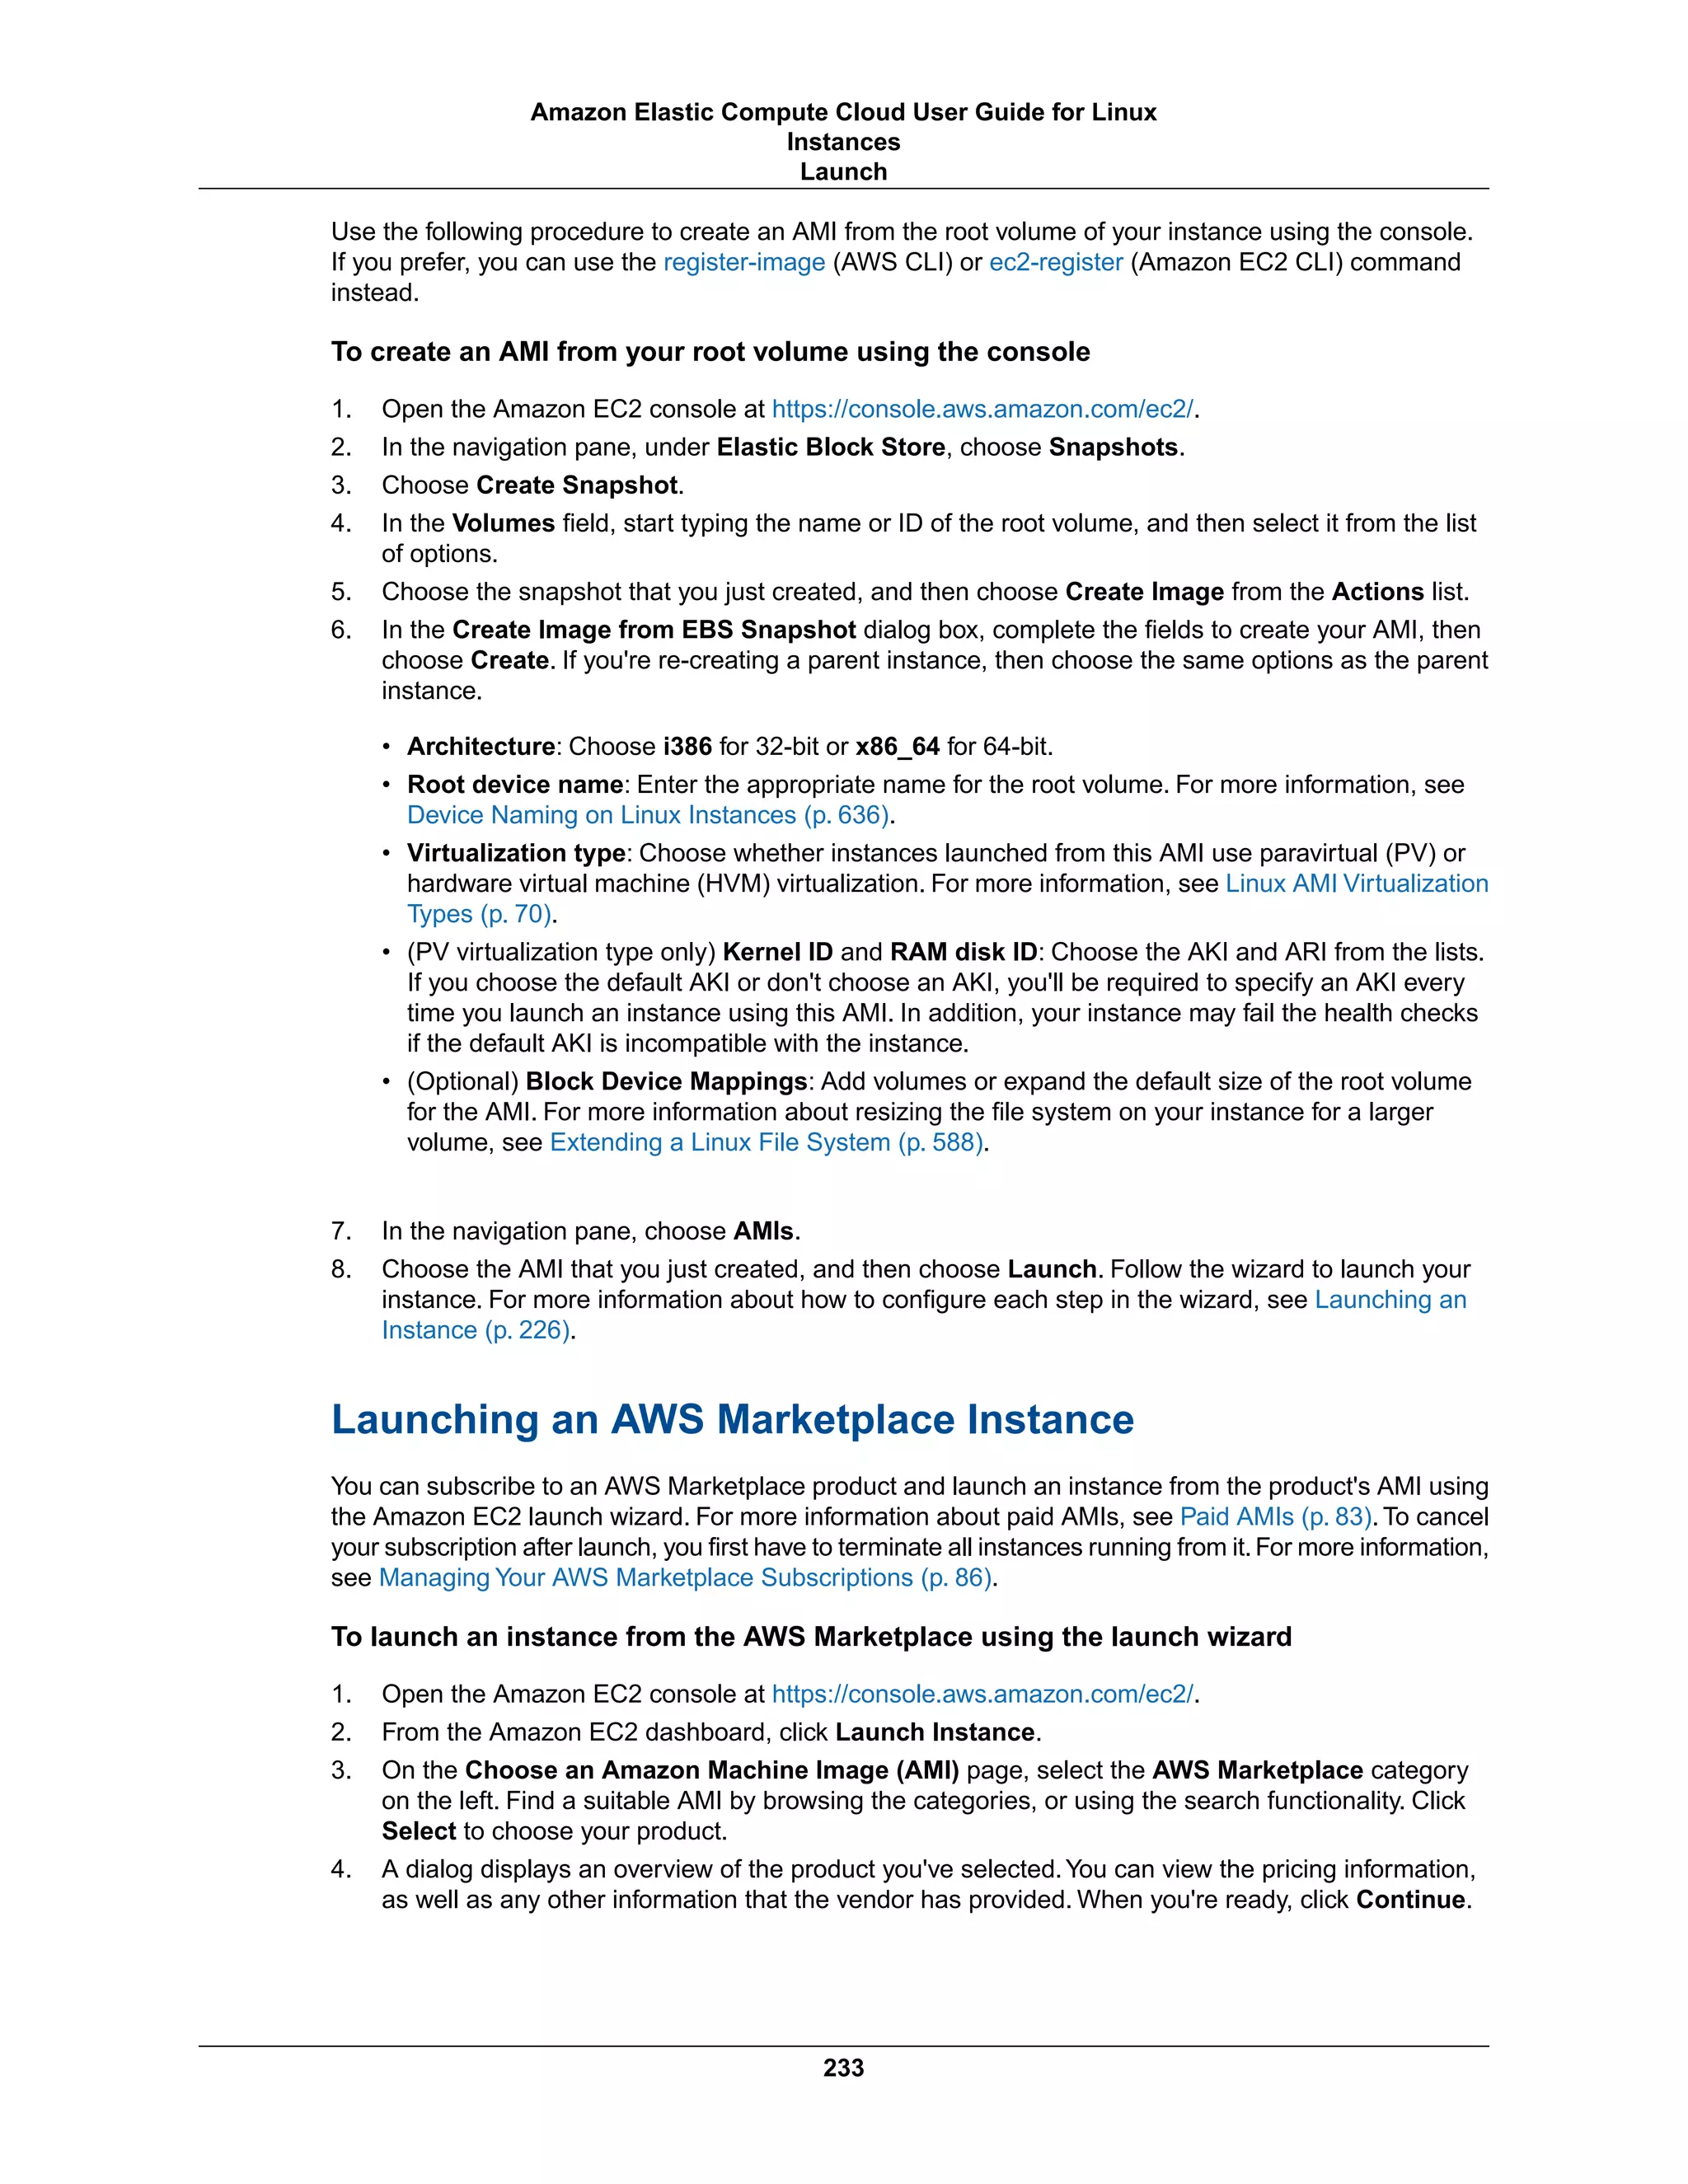


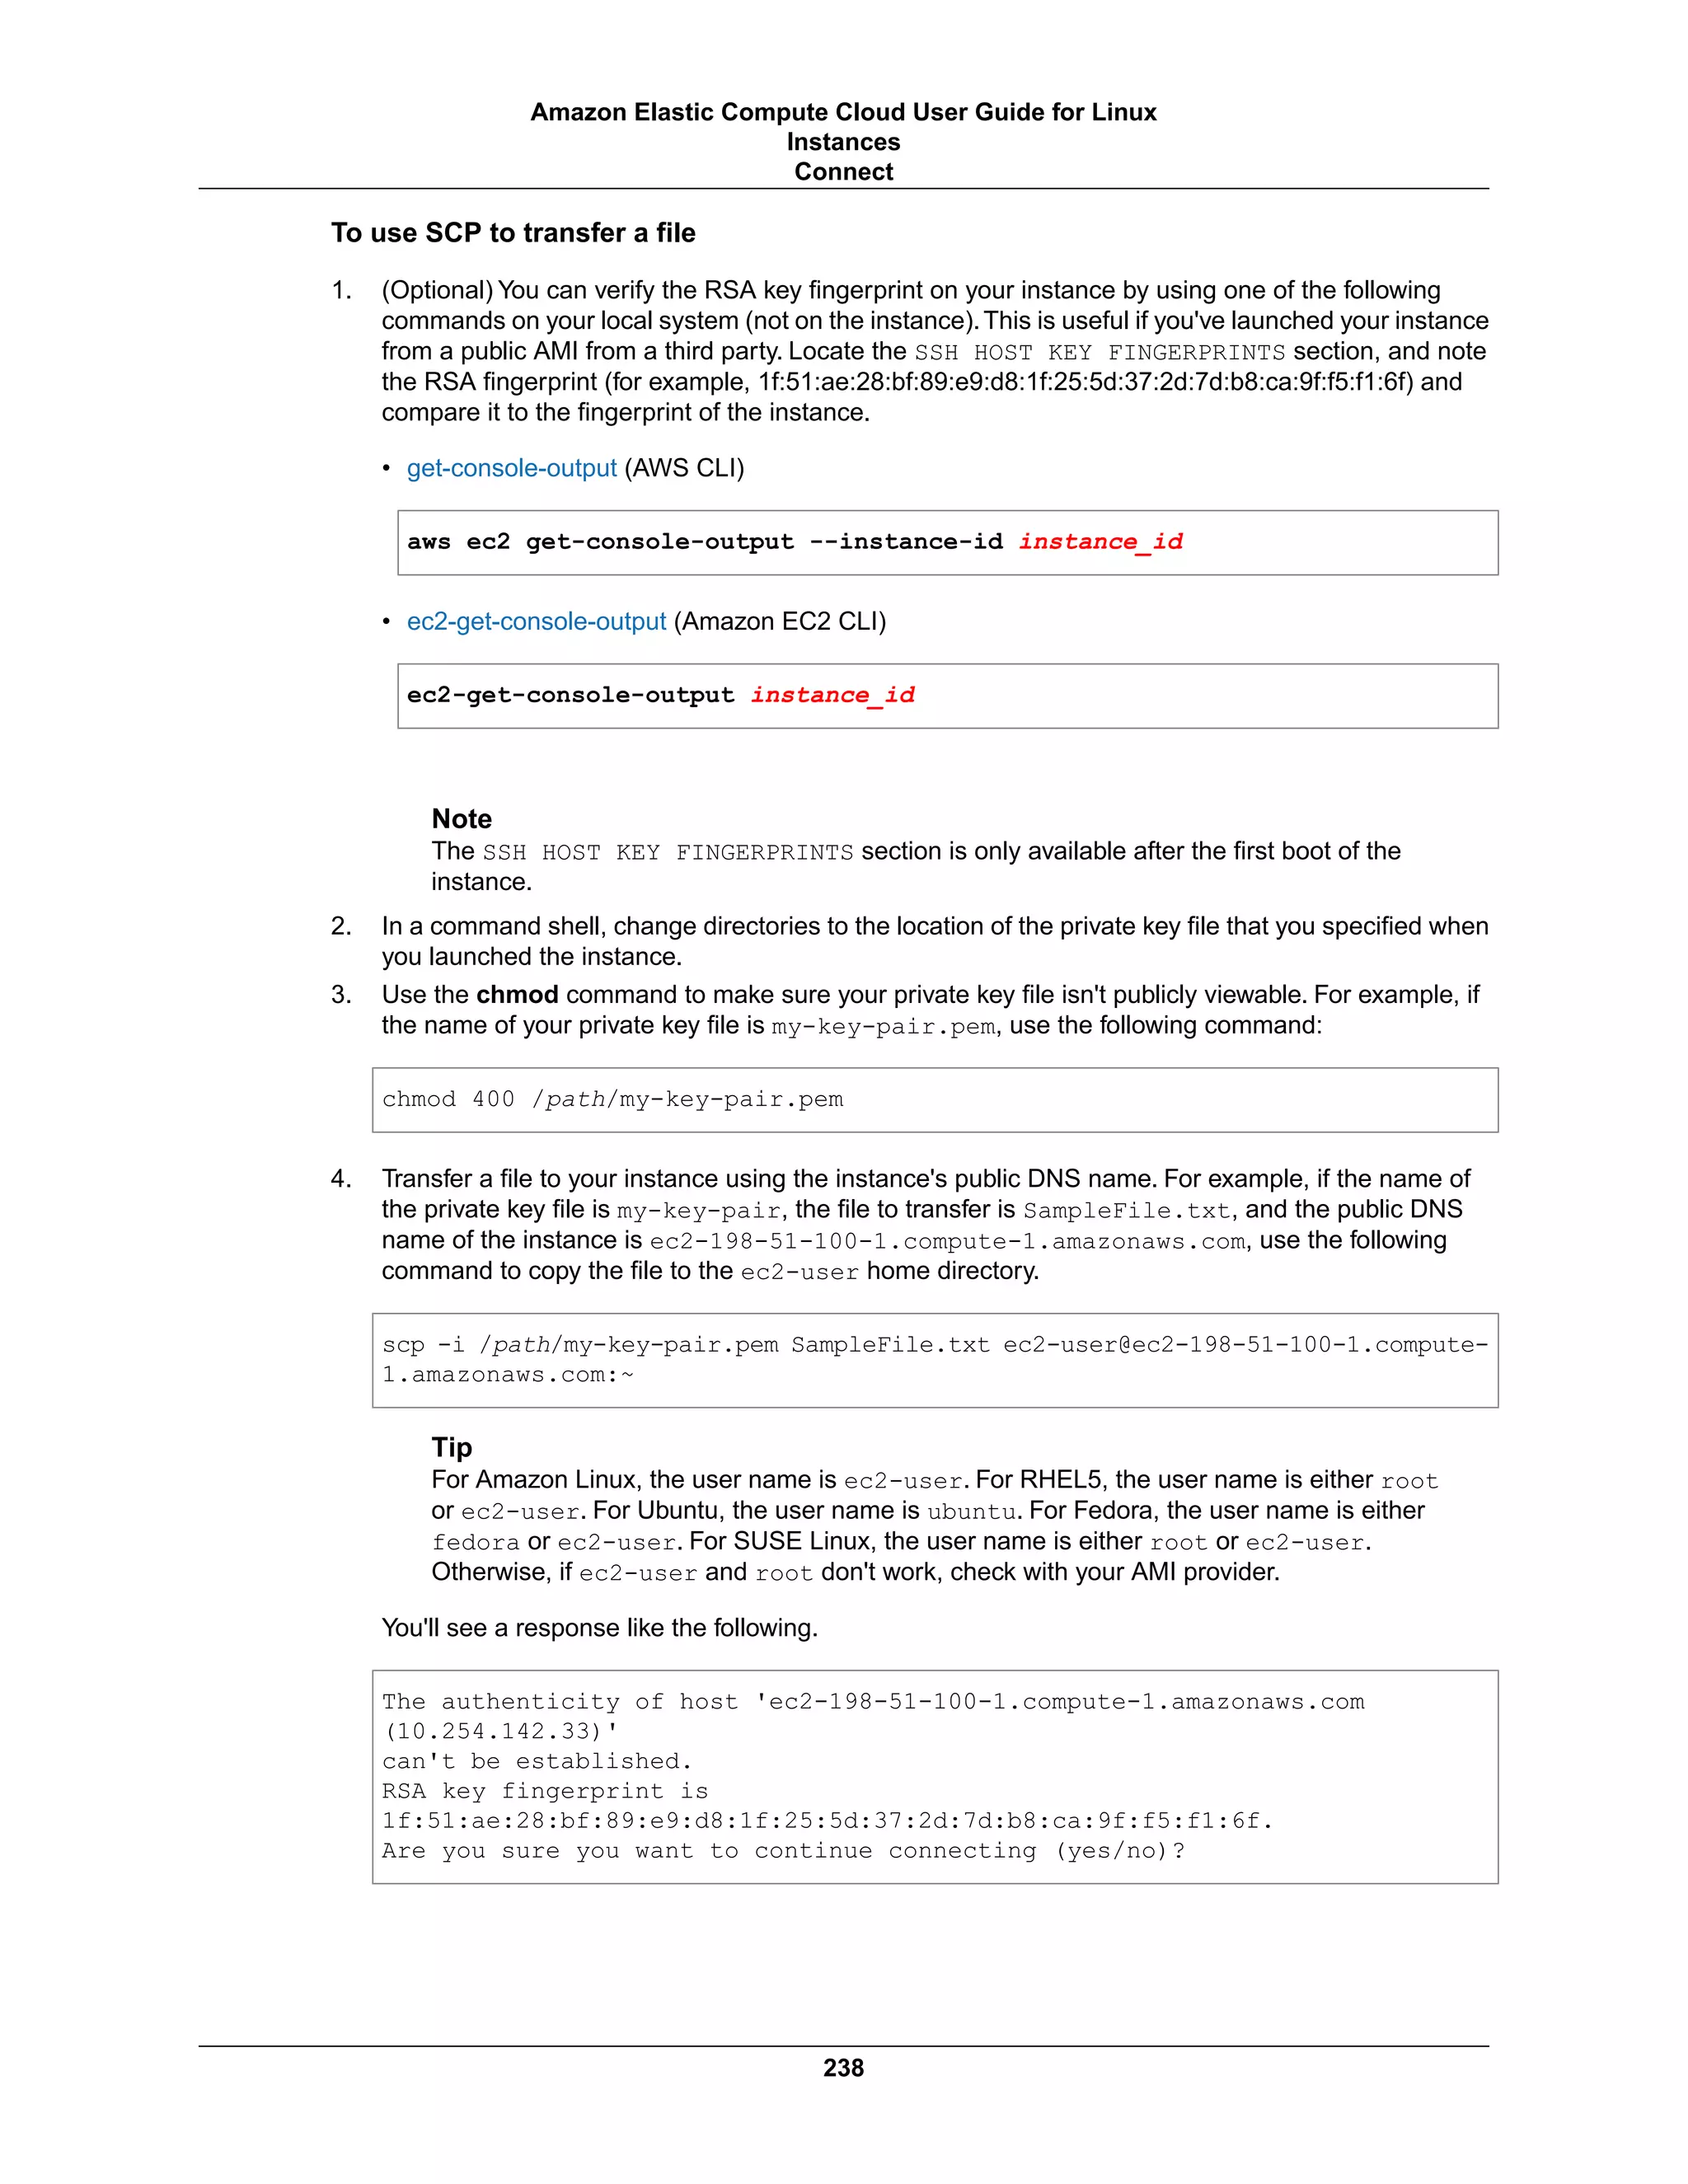
![5. (Optional) Verify that the fingerprint in the security alert matches the fingerprint that you obtained in
step 1. If these fingerprints don't match, someone might be attempting a "man-in-the-middle" attack.
If they match, continue to the next step.
6. Enter yes.
You'll see a response like the following.
Warning: Permanently added 'ec2-198-51-100-1.compute-1.amazonaws.com' (RSA)
to the list of known hosts.
Sending file modes: C0644 20 SampleFile.txt
Sink: C0644 20 SampleFile.txt
SampleFile.txt 100% 20 0.0KB/s 00:00
Note
If you receive a "bash: scp: command not found" error, you must first install scp on
your Linux instance. For some operating systems, this is located in the openssh-clients
package. For Amazon Linux variants, such as the Amazon ECS-optimized AMI, use the
following command to install scp.
[ec2-user ~]$ sudo yum install -y openssh-clients
To transfer files in the other direction (from your Amazon EC2 instance to your local computer), simply
reverse the order of the host parameters. For example, to transfer the SampleFile.txt file from your EC2
instance back to the home directory on your local computer as SampleFile2.txt, use the following command
on your local computer.
scp -i /path/my-key-pair.pem ec2-user@ec2-198-51-100-1.compute-1.amazon
aws.com:~/SampleFile.txt ~/SampleFile2.txt
Connecting to Your Linux Instance from Windows Using
PuTTY
After you launch your instance, you can connect to it and use it the way that you'd use a computer sitting
in front of you.
Note
After you launch an instance, it can take a few minutes for the instance to be ready so that you
can connect to it. Check that your instance has passed its status checks - you can view this
information in the Status Checks column on the Instances page.
The following instructions explain how to connect to your instance using PuTTY, a free SSH client for
Windows. If you receive an error while attempting to connect to your instance, see Troubleshooting
Connecting to Your Instance.
Prerequisites
Before you connect to your Linux instance using PuTTY, complete the following prerequisites:
• Install PuTTY
Download and install PuTTY from the PuTTY download page. Be sure to install the entire suite.
• Get the ID of the instance
239
Amazon Elastic Compute Cloud User Guide for Linux
Instances
Connect](https://image.slidesharecdn.com/ec2-ug-151130152858-lva1-app6892/75/Amazan-Ec2-248-2048.jpg)

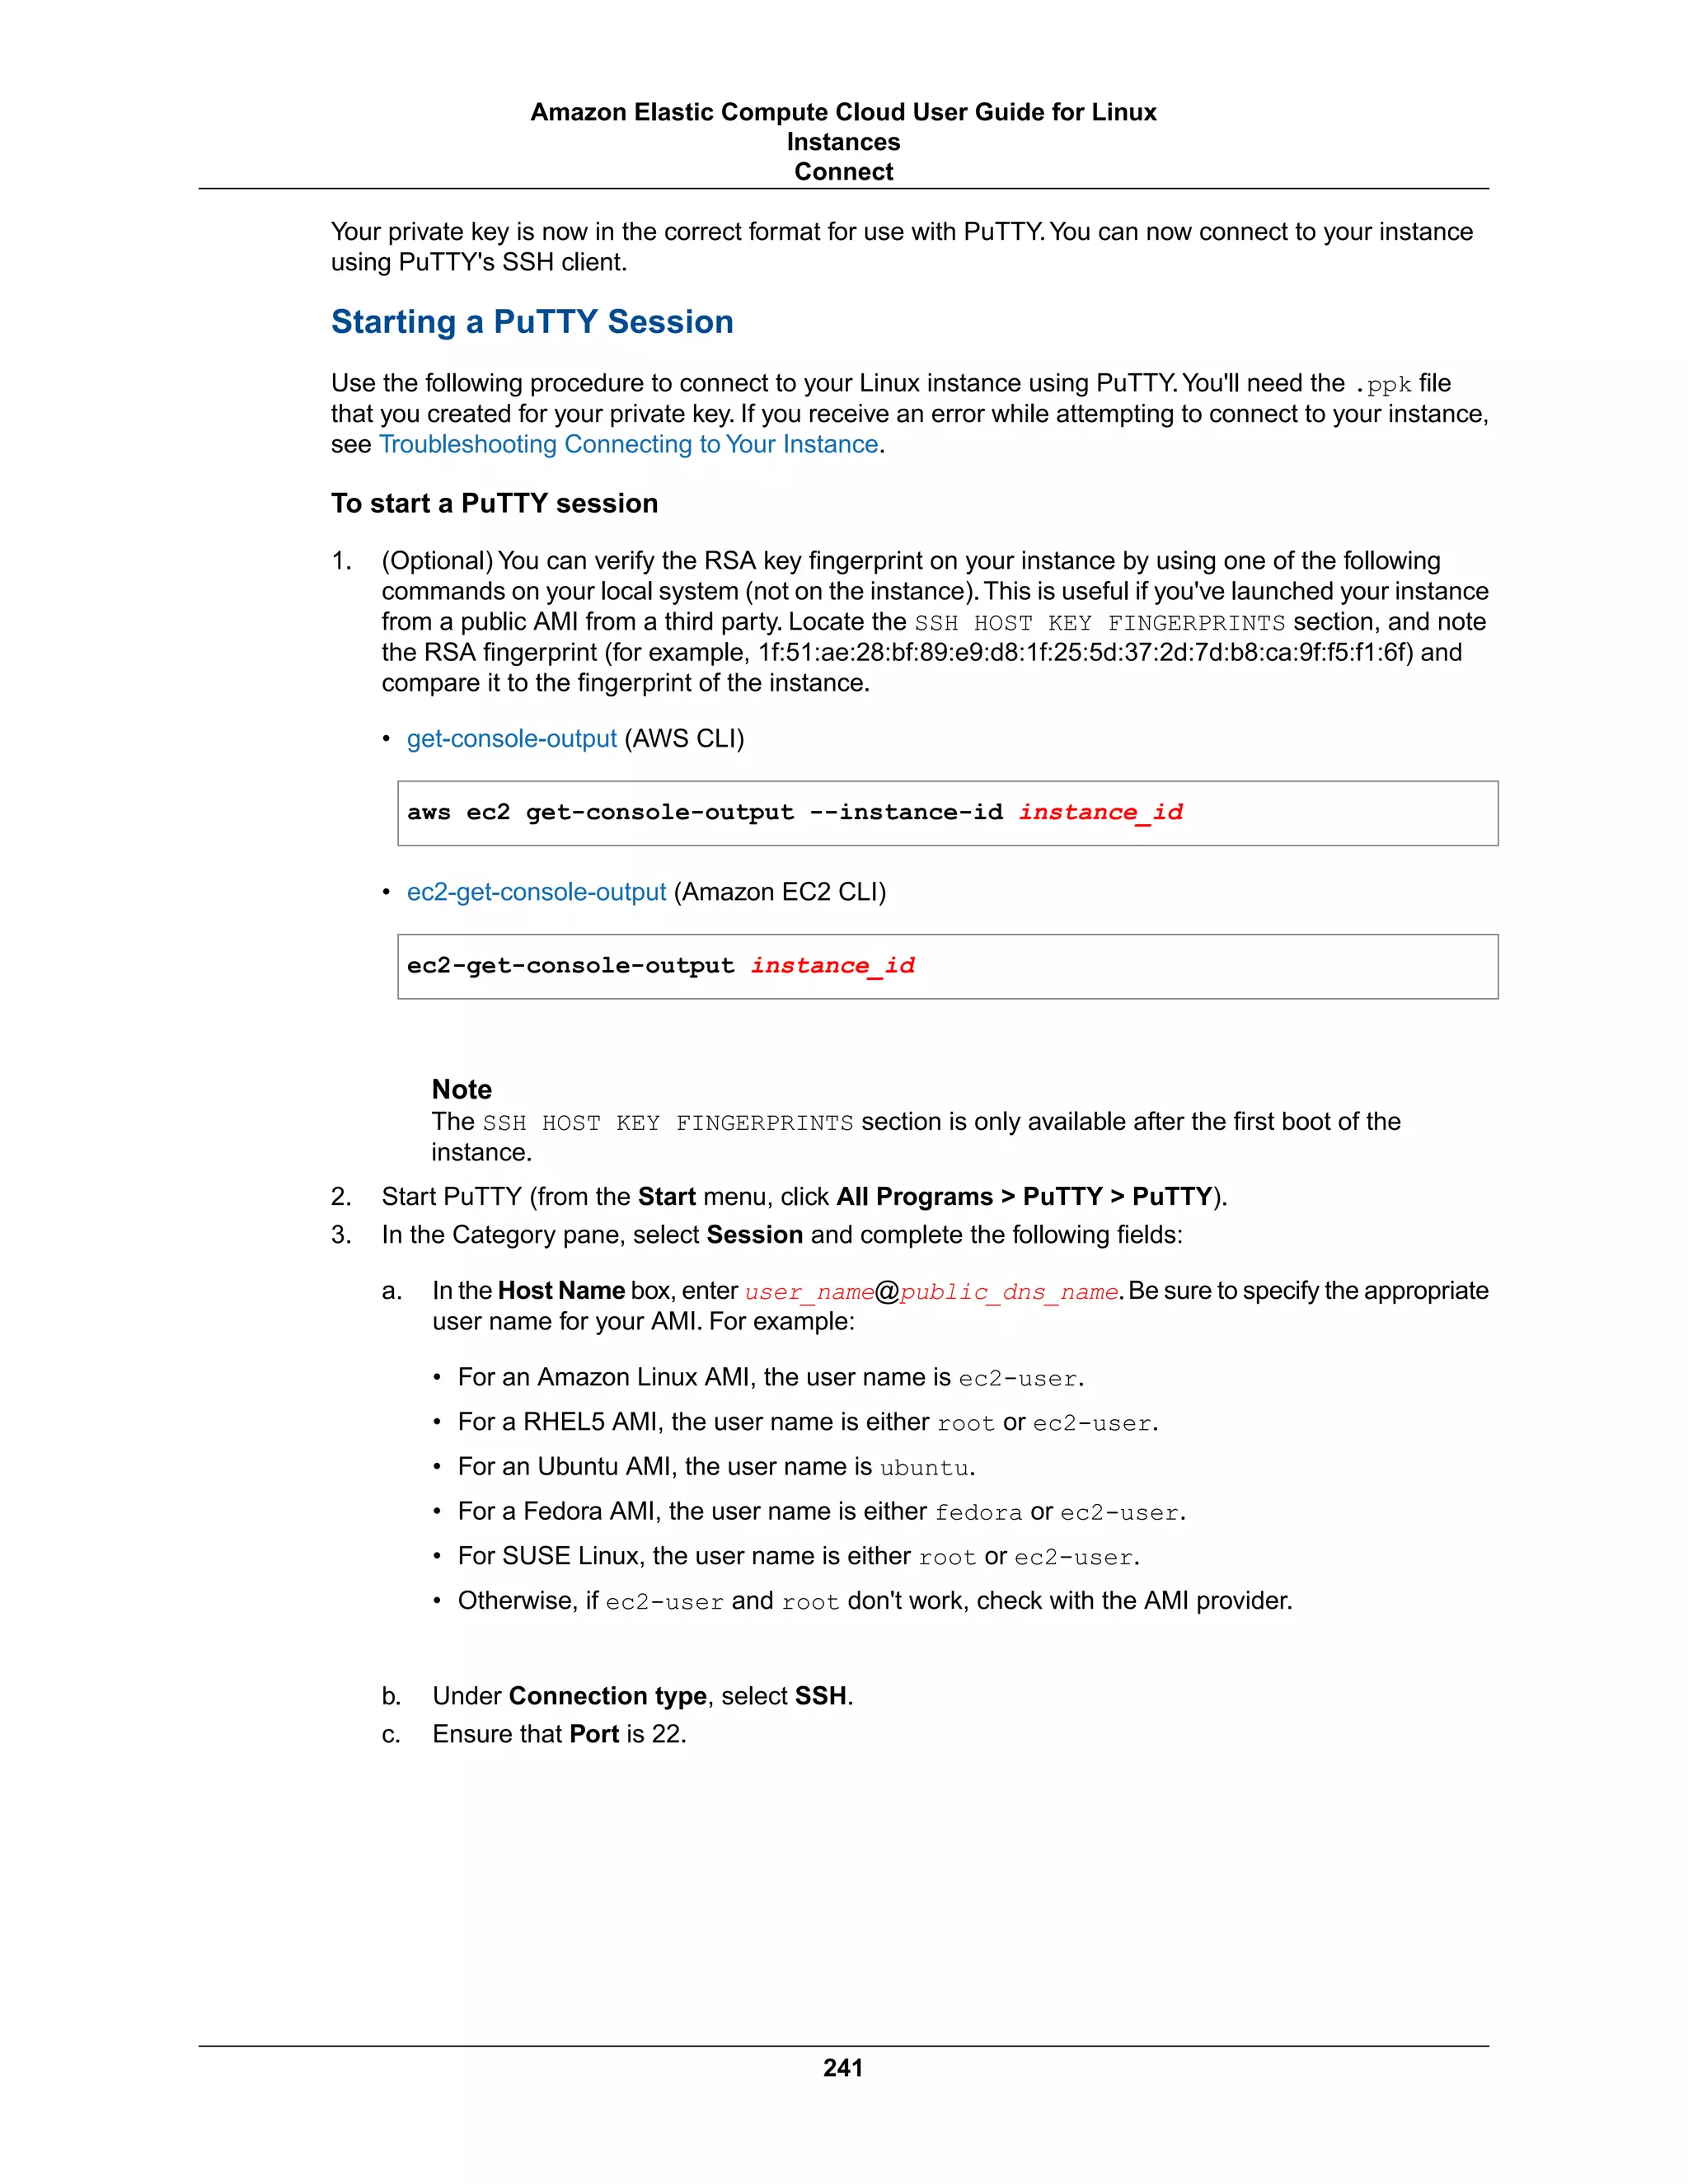


![8. After the connection is established, in the connection window your Linux instance is on the right and
your local machine is on the left.You can drag and drop files directly into the remote file system from
your local machine. For more information on WinSCP, see the project documentation at http://
winscp.net/eng/docs/start.
Note
If you receive a "Cannot execute SCP to start transfer" error, you must first install
scp on your Linux instance. For some operating systems, this is located in the
openssh-clients package. For Amazon Linux variants, such as the Amazon
ECS-optimized AMI, use the following command to install scp.
[ec2-user ~]$ sudo yum install -y openssh-clients
Connecting to Your Linux Instance Using MindTerm
After you launch your instance, you can connect to it and use it the way that you'd use a computer sitting
in front of you.
Note
After you launch an instance, it can take a few minutes for the instance to be ready so that you
can connect to it. Check that your instance has passed its status checks - you can view this
information in the Status Checks column on the Instances page.
The following instructions explain how to connect to your instance using MindTerm through the Amazon
EC2 console. If you receive an error while attempting to connect to your instance, see Troubleshooting
Connecting to Your Instance.
Prerequisites
• Install Java
244
Amazon Elastic Compute Cloud User Guide for Linux
Instances
Connect](https://image.slidesharecdn.com/ec2-ug-151130152858-lva1-app6892/75/Amazan-Ec2-253-2048.jpg)
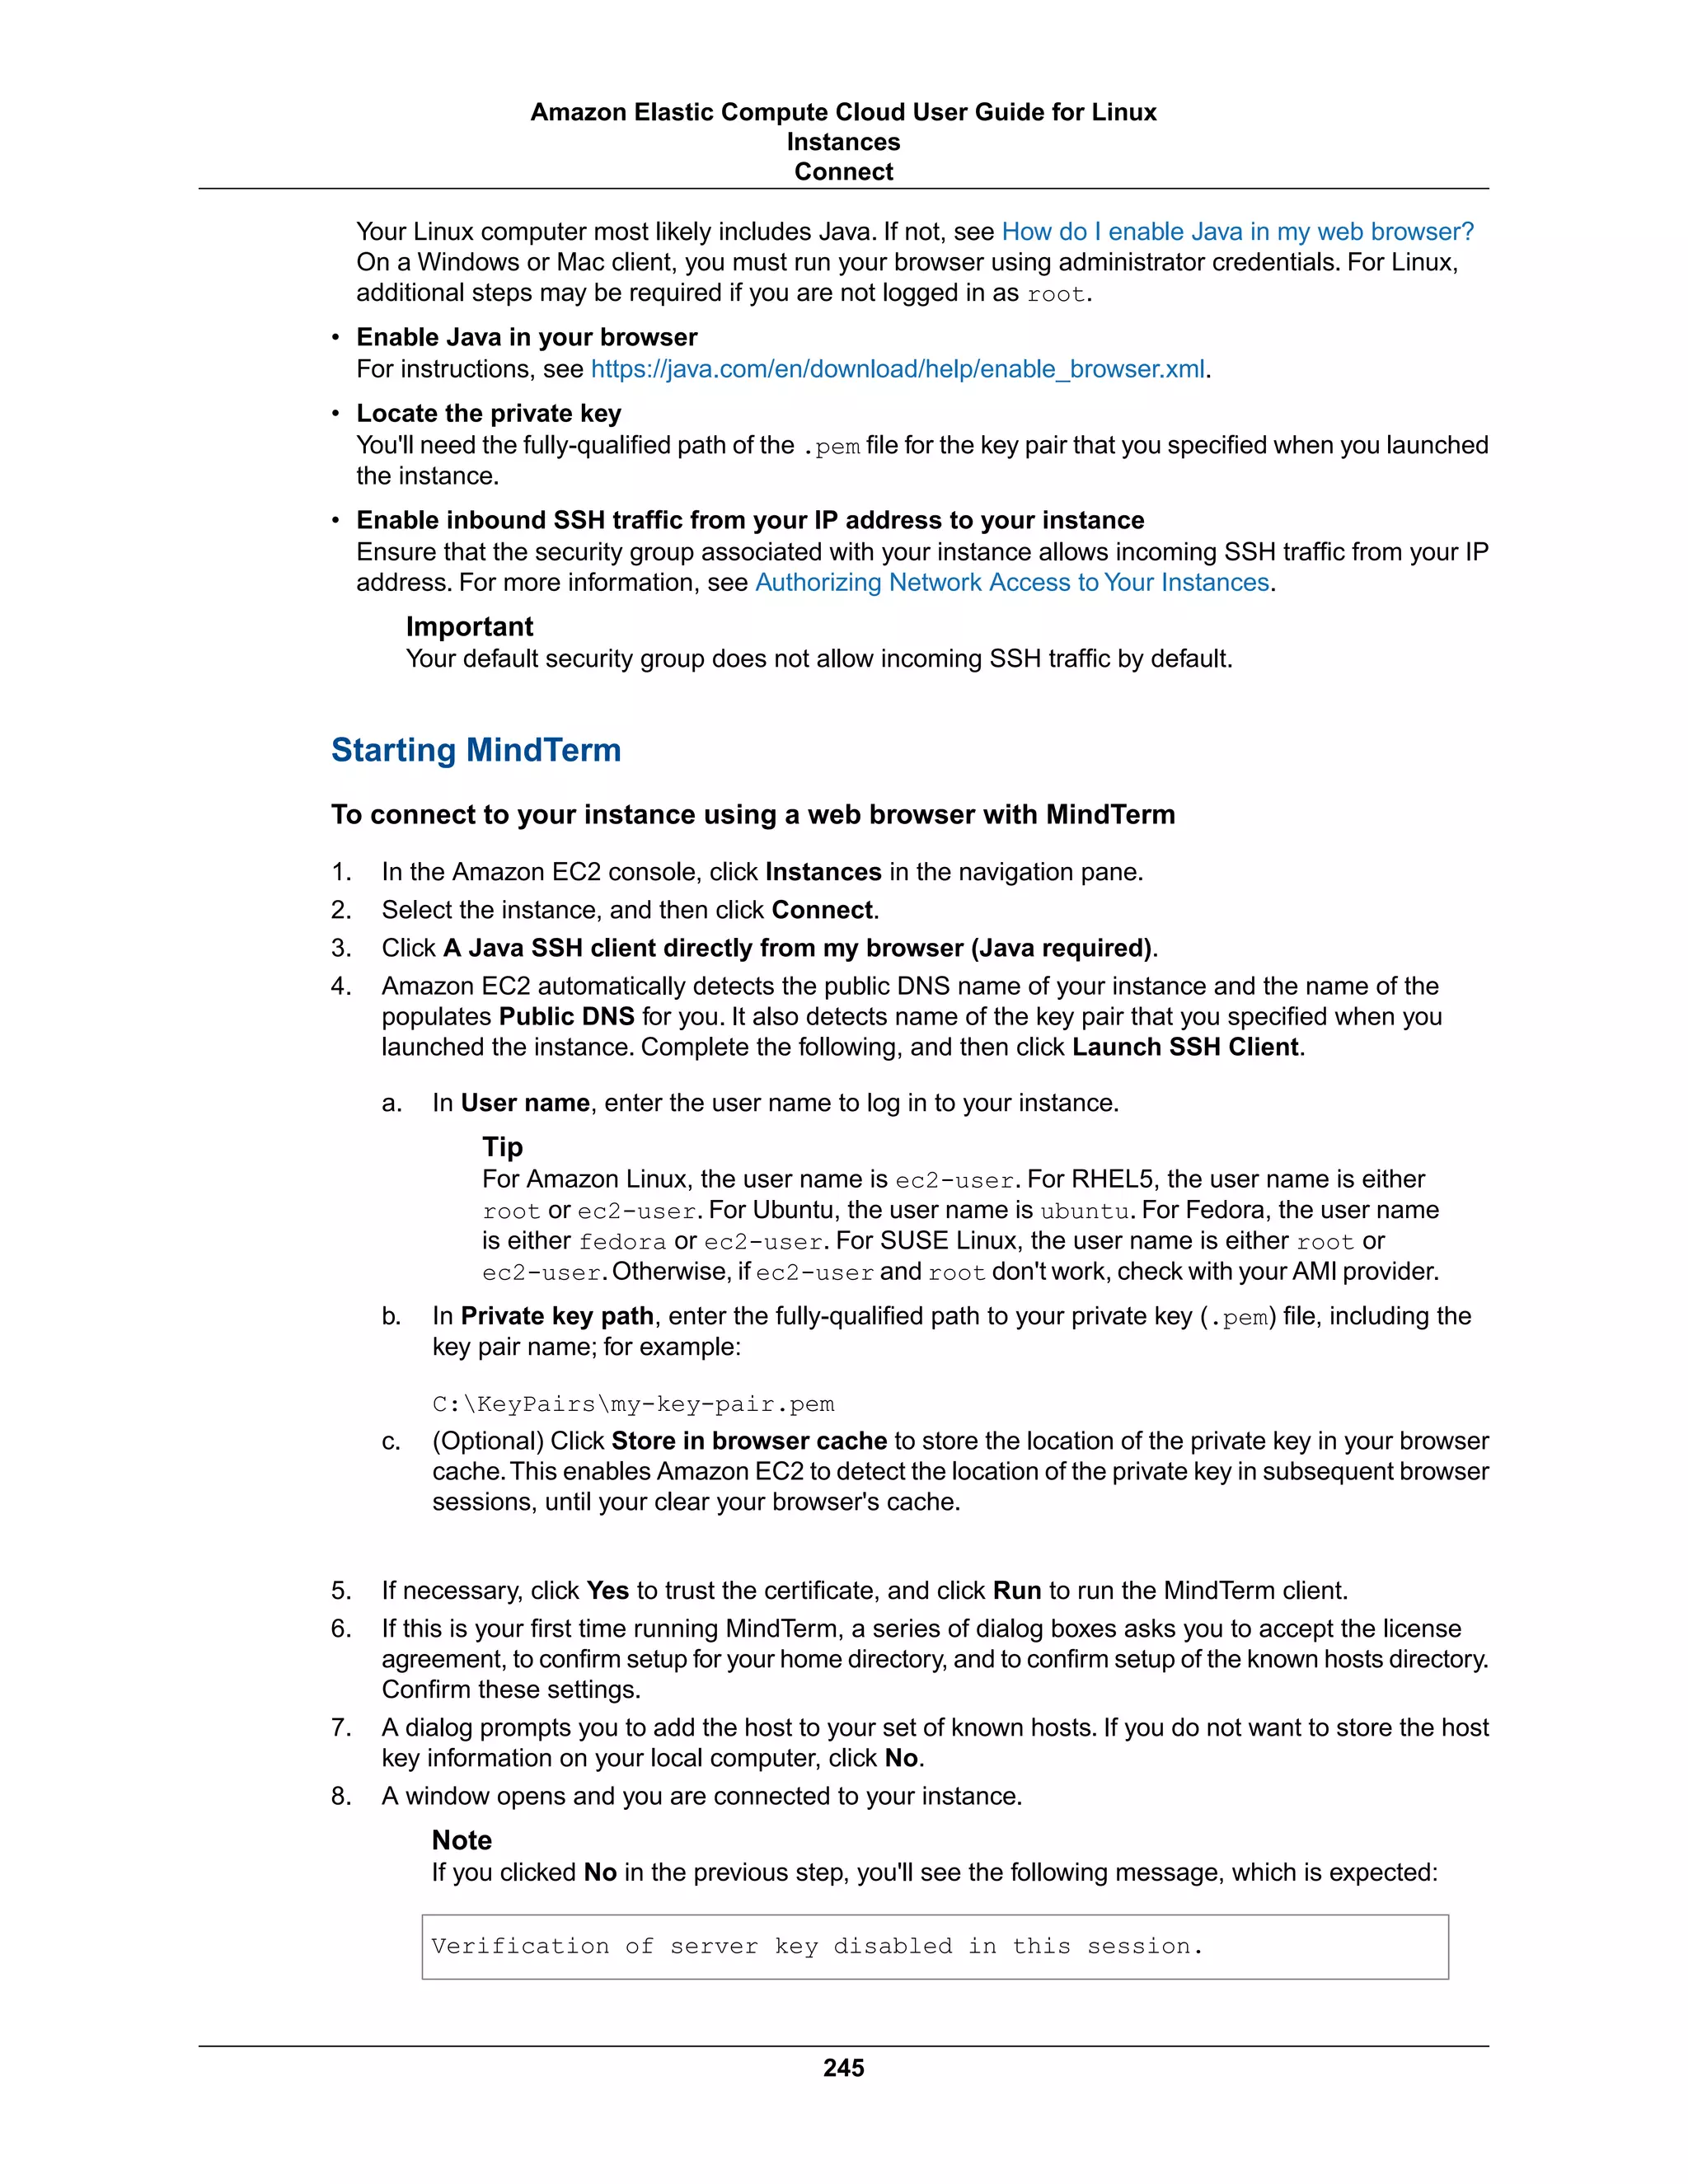

![Configuring a Windows Instance Using the EC2Config Service in the Amazon EC2 User Guide for
Microsoft Windows Instances.
• If you've registered the instance with a load balancer, it's likely that the load balancer won't be able to
route traffic to your instance after you've stopped and restarted it.You must de-register the instance
from the load balancer after stopping the instance, and then re-register after starting the instance. For
more information, see De-Register and Register EC2 Instances with Your Load Balancer in the Elastic
Load Balancing Developer Guide.
• If your instance is in an Auto Scaling group, the Auto Scaling service marks the stopped instance as
unhealthy, and may terminate it and launch a replacement instance. For more information, see Health
Checks for Auto Scaling Instances in the Auto Scaling Developer Guide.
• When you stop a ClassicLink instance, it's unlinked from the VPC to which it was linked.You must link
the instance to the VPC again after restarting it. For more information about ClassicLink, see
ClassicLink (p. 490).
For more information, see Differences Between Reboot, Stop, and Terminate (p. 224).
You can modify the following attributes of an instance only when it is stopped:
• Instance type
• User data
• Kernel
• RAM disk
If you try to modify these attributes while the instance is running, Amazon EC2 returns the
IncorrectInstanceState error.
Stopping and Starting Your Instances
You can start and stop your Amazon EBS-backed instance using the console or the command line.
By default, when you initiate a shutdown from an Amazon EBS-backed instance (using the shutdown,
halt, or poweroff command), the instance stops.You can change this behavior so that it terminates
instead. For more information, see Changing the Instance Initiated Shutdown Behavior (p. 254).
To stop and start an Amazon EBS-backed instance using the console
1. In the navigation pane, choose Instances, and select the instance.
2. [EC2-Classic] If the instance has an associated Elastic IP address, write down the Elastic IP address
and the instance ID shown in the details pane.
3. Choose Actions, select Instance State, and then choose Stop.If Stop is disabled, either the instance
is already stopped or its root device is an instance store volume.
Warning
When you stop an instance, the data on any instance store volumes is erased. Therefore,
if you have any data on instance store volumes that you want to keep, be sure to back it up
to persistent storage.
4. In the confirmation dialog box, choose Yes, Stop. It can take a few minutes for the instance to stop.
[EC2-Classic] When the instance state becomes stopped, the Elastic IP, Public DNS, Private
DNS, and Private IPs fields in the details pane are blank to indicate that the old values are no longer
associated with the instance.
5. While your instance is stopped, you can modify certain instance attributes. For more information,
see Modifying a Stopped Instance (p. 248).
247
Amazon Elastic Compute Cloud User Guide for Linux
Instances
Stop and Start](https://image.slidesharecdn.com/ec2-ug-151130152858-lva1-app6892/75/Amazan-Ec2-256-2048.jpg)
![6. To restart the stopped instance, select the instance, choose Actions, select Instance State, and
then choose Start.
7. In the confirmation dialog box, choose Yes, Start. It can take a few minutes for the instance to enter
the running state.
[EC2-Classic] When the instance state becomes running, the Public DNS, Private DNS, and
Private IPs fields in the details pane contain the new values that we assigned to the instance.
8. [EC2-Classic] If your instance had an associated Elastic IP address, you must reassociate it as
follows:
a. In the navigation pane, choose Elastic IPs.
b. Select the Elastic IP address that you wrote down before you stopped the instance.
c. Choose Actions, and then select Associate Address.
d. Select the instance ID that you wrote down before you stopped the instance, and then choose
Associate.
To stop and start an Amazon EBS-backed instance using the command line
You can use one of the following commands. For more information about these command line interfaces,
see Accessing Amazon EC2 (p. 3).
• stop-instances and start-instances (AWS CLI)
• ec2-stop-instances and ec2-start-instances (Amazon EC2 CLI)
• Stop-EC2Instance and Start-EC2Instance (AWS Tools for Windows PowerShell)
Modifying a Stopped Instance
You can change the instance type, user data, and EBS-optimization attributes of a stopped instance using
the AWS Management Console or the command line interface.You can't use the AWS Management
Console to modify the kernel or RAM disk attributes.
To change the instance type for a stopped instance using the console
For information about the limitations, and step-by-step directions, see Resizing Your Instance (p. 144).
To change the user data for a stopped instance using the console
For information about the limitations, and step-by-step directions, see Adding User Data (p. 287).
To enable or disable EBS–optimization for your instance using the console
For more information and step-by-step directions, see Modifying EBS–Optimization (p. 608).
To modify an instance attribute using the command line
You can use one of the following commands. For more information about these command line interfaces,
see Accessing Amazon EC2 (p. 3).
• modify-instance-attribute (AWS CLI)
• ec2-modify-instance-attribute (Amazon EC2 CLI)
• Edit-EC2InstanceAttribute (AWS Tools for Windows PowerShell)
248
Amazon Elastic Compute Cloud User Guide for Linux
Instances
Stop and Start](https://image.slidesharecdn.com/ec2-ug-151130152858-lva1-app6892/75/Amazan-Ec2-257-2048.jpg)


![$ aws ec2 modify-instance-attribute --instance-id i-5203422c --block-device-
mappings '[{"DeviceName":"/dev/sda1","Ebs":{"DeleteOnTermination":false}}]'
You can confirm that deleteOnTermination is false by using the describe-instances command and
looking for the BlockDeviceMappings entry for /dev/sda1 in the command output.
Example for Amazon EC2 CLI
The following command preserves the root volume by setting its DeleteOnTermination attribute to
false.
$ ec2-modify-instance-attribute i-5203422c -b /dev/sda1=::false
Changing the Root Volume of an Instance to Persist at Launch Using the
Command Line
When you launch an instance, you can use one of the following commands to change the root device
volume to persist. The root device is typically /dev/sda1. For more information about these command
line interfaces, see Accessing Amazon EC2 (p. 3).
• run-instances (AWS CLI)
• ec2-run-instances (Amazon EC2 CLI)
• New-EC2Instance (AWS Tools for Windows PowerShell)
Example for AWS CLI
The following command preserves the root volume by setting its DeleteOnTermination attributes to
false.
$ aws ec2 run-instances --image-id ami-1a2b3c4d --block-device-mappings
'[{"DeviceName":"/dev/sda1","Ebs":{"DeleteOnTermination":false}}]" other para
meters...
You can confirm that deleteOnTermination is false by using the describe-instances command and
looking for the BlockDeviceMappings entry for /dev/sda1 in the command output.
Example for Amazon EC2 CLI
The following command preserves the root volume by setting its DeleteOnTermination attribute to
false.
$ ec2-run-instances ami-1a2b3c4d -b /dev/sda1=::false other parameters... -v
Troubleshooting
If your instance is in the shutting-down state for longer than usual, it will eventually be cleaned up
(terminated) by automated processes within the Amazon EC2 service. For more information, see
Troubleshooting Terminating (Shutting Down) Your Instance (p. 686).
256
Amazon Elastic Compute Cloud User Guide for Linux
Instances
Terminate](https://image.slidesharecdn.com/ec2-ug-151130152858-lva1-app6892/75/Amazan-Ec2-265-2048.jpg)

![You can pass two types of user data to Amazon EC2, cloud-init directives, and shell scripts. For more
information, see Running Commands on Your Linux Instance at Launch (p. 281).
Managing Software on Your Linux Instance
The base distribution of Amazon Linux contains many software packages and utilities that are required
for basic server operations. However, many more software packages are available in various software
repositories, and even more packages are available for you to build from source code.
Contents
• Updating Instance Software (p. 259)
• Adding Repositories (p. 263)
• Finding Software Packages (p. 264)
• Installing Software Packages (p. 265)
• Preparing to Compile Software (p. 266)
It is important to keep software up-to-date. Many packages in a Linux distribution are updated frequently
to fix bugs, add features, and protect against security exploits. For more information, see Updating Instance
Software (p. 259).
By default, Amazon Linux instances launch with two repositories enabled:amzn-main and amzn-updates.
While there are many packages available in these repositories that are updated by Amazon Web Services,
there may be a package that you wish to install that is contained in another repository.For more information,
see Adding Repositories (p.263).For help finding packages in enabled repositories, see Finding Software
Packages (p. 264). For information about installing software on an Amazon Linux instance, see Installing
Software Packages (p. 265).
Not all software is available in software packages stored in repositories; some software must be compiled
on an instance from its source code. For more information, see Preparing to Compile Software (p. 266).
Amazon Linux instances manage their software using the yum package manager. The yum package
manager can install, remove, and update software, as well as manage all of the dependencies for each
package. Debian-based Linux distributions, like Ubuntu, use the apt-get command and dpkg package
manager, so the yum examples in the following sections do not work for those distributions.
Updating Instance Software
It is important to keep software up-to-date. Many packages in a Linux distribution are updated frequently
to fix bugs, add features, and protect against security exploits. When you first launch and connect to an
Amazon Linux instance, you may see a message asking you to update software packages for security
purposes. This section shows how to update an entire system, or just a single package.
Important
These procedures are intended for use with Amazon Linux. For more information about other
distributions, see their specific documentation.
__| __|_ )
_| ( / Amazon Linux AMI
___|___|___|
https://aws.amazon.com/amazon-linux-ami/2013.03-release-notes/
There are 12 security update(s) out of 25 total update(s) available
Run "sudo yum update" to apply all updates.
[ec2-user ~]$
259
Amazon Elastic Compute Cloud User Guide for Linux
Instances
Managing Software](https://image.slidesharecdn.com/ec2-ug-151130152858-lva1-app6892/75/Amazan-Ec2-268-2048.jpg)
![To update all packages on an Amazon Linux instance
1. (Optional) Start a screen session in your shell window. Sometimes you may experience a network
interruption that can disconnect the SSH connection to your instance. If this happens during a long
software update, it can leave the instance in a recoverable, although confused state. A screen
session allows you to continue running the update even if your connection is interrupted, and you
can reconnect to the session later without problems.
a. Execute the screen command to begin the session.
[ec2-user ~]$ screen
b. If your session is disconnected, log back into your instance and list the available screens.
[ec2-user ~]$ screen -ls
There is a screen on:
17793.pts-0.ip-12-34-56-78 (Detached)
1 Socket in /var/run/screen/S-ec2-user.
c. Reconnect to the screen using the screen -r command and the process ID from the previous
command.
[ec2-user ~]$ screen -r 17793
d. When you are finished using screen, use the exit command to close the session.
[ec2-user ~]$ exit
[screen is terminating]
2. Run the yum update command. Optionally, you can add the --security flag to apply only security
updates.
[ec2-user ~]$ sudo yum update
Loaded plugins: priorities, security, update-motd, upgrade-helper
amzn-main | 2.1 kB 00:00
amzn-updates | 2.3 kB 00:00
Setting up Update Process
Resolving Dependencies
--> Running transaction check
---> Package aws-apitools-ec2.noarch 0:1.6.8.1-1.0.amzn1 will be updated
---> Package aws-apitools-ec2.noarch 0:1.6.10.0-1.0.amzn1 will be an update
---> Package gnupg2.x86_64 0:2.0.18-1.16.amzn1 will be updated
---> Package gnupg2.x86_64 0:2.0.19-8.21.amzn1 will be an update
---> Package libgcrypt.i686 0:1.4.5-9.10.amzn1 will be updated
---> Package libgcrypt.x86_64 0:1.4.5-9.10.amzn1 will be updated
---> Package libgcrypt.i686 0:1.4.5-9.12.amzn1 will be an update
---> Package libgcrypt.x86_64 0:1.4.5-9.12.amzn1 will be an update
---> Package openssl.x86_64 1:1.0.1e-4.53.amzn1 will be updated
---> Package openssl.x86_64 1:1.0.1e-4.54.amzn1 will be an update
---> Package python-boto.noarch 0:2.9.9-1.0.amzn1 will be updated
---> Package python-boto.noarch 0:2.13.3-1.0.amzn1 will be an update
--> Finished Dependency Resolution
260
Amazon Elastic Compute Cloud User Guide for Linux
Instances
Managing Software](https://image.slidesharecdn.com/ec2-ug-151130152858-lva1-app6892/75/Amazan-Ec2-269-2048.jpg)
![Dependencies Resolved
================================================================================
Package Arch Version Repository
Size
================================================================================
Updating:
aws-apitools-ec2 noarch 1.6.10.0-1.0.amzn1 amzn-updates
14 M
gnupg2 x86_64 2.0.19-8.21.amzn1 amzn-updates
2.4 M
libgcrypt i686 1.4.5-9.12.amzn1 amzn-updates
248 k
libgcrypt x86_64 1.4.5-9.12.amzn1 amzn-updates
262 k
openssl x86_64 1:1.0.1e-4.54.amzn1 amzn-updates
1.7 M
python-boto noarch 2.13.3-1.0.amzn1 amzn-updates
1.6 M
Transaction Summary
================================================================================
Upgrade 6 Package(s)
Total download size: 20 M
Is this ok [y/N]:
3. Review the packages listed, and type y and Enter to accept the updates. Updating all of the packages
on a system can take several minutes. The yum output shows the status of the update while it is
running.
Downloading Packages:
(1/6): aws-apitools-ec2-1.6.10.0-1.0.amzn1.noarch.rpm | 14 MB 00:00
(2/6): gnupg2-2.0.19-8.21.amzn1.x86_64.rpm | 2.4 MB 00:00
(3/6): libgcrypt-1.4.5-9.12.amzn1.i686.rpm | 248 kB 00:00
(4/6): libgcrypt-1.4.5-9.12.amzn1.x86_64.rpm | 262 kB 00:00
(5/6): openssl-1.0.1e-4.54.amzn1.x86_64.rpm | 1.7 MB 00:00
(6/6): python-boto-2.13.3-1.0.amzn1.noarch.rpm | 1.6 MB 00:00
--------------------------------------------------------------------------
------
Total 28 MB/s | 20 MB 00:00
Running rpm_check_debug
Running Transaction Test
Transaction Test Succeeded
Running Transaction
Updating : libgcrypt-1.4.5-9.12.amzn1.x86_64
1/12
Updating : gnupg2-2.0.19-8.21.amzn1.x86_64
2/12
Updating : aws-apitools-ec2-1.6.10.0-1.0.amzn1.noarch
3/12
Updating : 1:openssl-1.0.1e-4.54.amzn1.x86_64
4/12
...
261
Amazon Elastic Compute Cloud User Guide for Linux
Instances
Managing Software](https://image.slidesharecdn.com/ec2-ug-151130152858-lva1-app6892/75/Amazan-Ec2-270-2048.jpg)
![Complete!
To update a single package on an Amazon Linux instance
Use this procedure to update a single package (and its dependencies) and not the entire system.
1. Run the yum update command with the name of the package you would like to update.
[ec2-user ~]$ sudo yum update openssl
Loaded plugins: priorities, security, update-motd, upgrade-helper
amzn-main | 2.1 kB 00:00
amzn-updates | 2.3 kB 00:00
Setting up Update Process
Resolving Dependencies
--> Running transaction check
---> Package openssl.x86_64 1:1.0.1e-4.53.amzn1 will be updated
---> Package openssl.x86_64 1:1.0.1e-4.54.amzn1 will be an update
--> Finished Dependency Resolution
Dependencies Resolved
================================================================================
Package Arch Version Repository
Size
================================================================================
Updating:
openssl x86_64 1:1.0.1e-4.54.amzn1 amzn-updates
1.7 M
Transaction Summary
================================================================================
Upgrade 1 Package(s)
Total download size: 1.7 M
Is this ok [y/N]:
2. Review the package information listed, and type y and Enter to accept the update or updates.
Sometimes there will be more than one package listed if there are package dependencies that must
be resolved. The yum output shows the status of the update while it is running.
Downloading Packages:
openssl-1.0.1e-4.54.amzn1.x86_64.rpm | 1.7 MB 00:00
Running rpm_check_debug
Running Transaction Test
Transaction Test Succeeded
Running Transaction
Updating : 1:openssl-1.0.1e-4.54.amzn1.x86_64
1/2
Cleanup : 1:openssl-1.0.1e-4.53.amzn1.x86_64
2/2
Verifying : 1:openssl-1.0.1e-4.54.amzn1.x86_64
1/2
262
Amazon Elastic Compute Cloud User Guide for Linux
Instances
Managing Software](https://image.slidesharecdn.com/ec2-ug-151130152858-lva1-app6892/75/Amazan-Ec2-271-2048.jpg)
![Verifying : 1:openssl-1.0.1e-4.53.amzn1.x86_64
2/2
Updated:
openssl.x86_64 1:1.0.1e-4.54.amzn1
Complete!
Adding Repositories
By default, Amazon Linux instances launch with two repositories enabled:amzn-main and amzn-updates.
While there are many packages available in these repositories that are updated by Amazon Web Services,
there may be a package that you wish to install that is contained in another repository.
Important
These procedures are intended for use with Amazon Linux. For more information about other
distributions, see their specific documentation.
To install a package from a different repository with yum, you need to add the repository information to
the /etc/yum.conf file or to its own repository.repo file in the /etc/yum.repos.d directory.You
can do this manually, but most yum repositories provide their own repository.repo file at their repository
URL.
To add a yum repository to /etc/yum.repos.d
1. Find the location of the .repo file. This will vary depending on the repository you are adding. In this
example, the .repo file is at https://www.example.com/repository.repo.
2. Add the repository with the yum-config-manager command.
[ec2-user ~]$ sudo yum-config-manager --add-repo https://www.example.com/re
pository.repo
Loaded plugins: priorities, update-motd, upgrade-helper
adding repo from: https://www.example.com/repository.repo
grabbing file https://www.example.com/repository.repo to /etc/yum.repos.d/re
pository.repo
repository.repo | 4.0 kB 00:00
repo saved to /etc/yum.repos.d/repository.repo
To enable a yum repository in /etc/yum.repos.d
• Use the yum-config-manager command with the --enable repository flag. The following
command enables the Extra Packages for Enterprise Linux (EPEL) repository from the Fedora project.
By default, this repository is present in /etc/yum.repos.d on Amazon Linux instances, but it is
not enabled.
[ec2-user ~]$ sudo yum-config-manager --enable epel
Note
For information on enabling the EPEL repository on other distributions, such as Red Hat and
CentOS, see the EPEL documentation at https://fedoraproject.org/wiki/EPEL.
263
Amazon Elastic Compute Cloud User Guide for Linux
Instances
Managing Software](https://image.slidesharecdn.com/ec2-ug-151130152858-lva1-app6892/75/Amazan-Ec2-272-2048.jpg)
![Finding Software Packages
You can use the yum search command to search the descriptions of packages that are available in your
configured repositories. This is especially helpful if you don't know the exact name of the package you
want to install. Simply append the keyword search to the command; for multiple word searches, wrap the
search query with quotation marks.
Important
These procedures are intended for use with Amazon Linux. For more information about other
distributions, see their specific documentation.
Multiple word search queries in quotation marks only return results that match the exact query. If you
don't see the expected package, simplify your search to one keyword and then scan the results.You can
also try keyword synonyms to broaden your search.
[ec2-user ~]$ sudo yum search "find"
Loaded plugins: priorities, security, update-motd, upgrade-helper
============================== N/S Matched: find ===============================
findutils.x86_64 : The GNU versions of find utilities (find and xargs)
perl-File-Find-Rule.noarch : Perl module implementing an alternative interface
: to File::Find
perl-Module-Find.noarch : Find and use installed modules in a (sub)category
libpuzzle.i686 : Library to quickly find visually similar images (gif, png,
jpg)
libpuzzle.x86_64 : Library to quickly find visually similar images (gif, png,
: jpg)
mlocate.x86_64 : An utility for finding files by name
The yum package manager also combines several packages into groups that you can install with one
command to perform a particular task, such as installing a web server or build tools for software compilation.
To list the groups that are already installed on your system and the available groups that you can install,
use the yum grouplist command.
[ec2-user ~]$ sudo yum grouplist
Loaded plugins: priorities, security, update-motd, upgrade-helper
Setting up Group Process
Installed Groups:
Development Libraries
Development tools
Editors
Legacy UNIX compatibility
Mail Server
MySQL Database
Network Servers
Networking Tools
PHP Support
Perl Support
System Tools
Web Server
Available Groups:
Console internet tools
DNS Name Server
FTP Server
Java Development
MySQL Database client
NFS file server
264
Amazon Elastic Compute Cloud User Guide for Linux
Instances
Managing Software](https://image.slidesharecdn.com/ec2-ug-151130152858-lva1-app6892/75/Amazan-Ec2-273-2048.jpg)
![Performance Tools
PostgreSQL Database client (version 8)
PostgreSQL Database server (version 8)
Scientific support
TeX support
Technical Writing
Web Servlet Engine
Done
You can see the different packages in a group by using the yum groupinfo "Group Name" command,
replacing Group Name with the name of the group to get information about.This command lists all of the
mandatory, default, and optional packages that can be installed with that group.
If you cannot find the software you need in the default amzn-main and amzn-updates repositories, you
can add more repositories, such as the Extra Packages for Enterprise Linux (EPEL) repository. For more
information, see Adding Repositories (p. 263).
Installing Software Packages
The yum package manager is a great tool for installing software, because it can search all of your enabled
repositories for different software packages and also handle any dependencies in the software installation
process.
Important
These procedures are intended for use with Amazon Linux. For more information about other
distributions, see their specific documentation.
To install a package from a repository, use the yum install package command, replacing package with
the name of the software to install. For example, to install the links text-based web browser, enter the
following command.
[ec2-user ~]$ sudo yum install links
To install a group of packages, use the yum groupinstall Group Name command, replacing Group
Name with the name of the group you would like to install. For example, to install the "Performance Tools"
group, enter the following command.
[ec2-user@ip-10-161-113-54 ~]$ sudo yum groupinstall "Performance Tools"
By default, yum will only install the mandatory and default packages in the group listing. If you would like
to install the optional packages in the group also, you can set the group_package_types configuration
parameter in the command when you execute it that adds the optional packages.
[ec2-user ~]$ sudo yum --setopt=group_package_types=mandatory,default,optional
groupinstall "Performance Tools"
You can also use yum install to install RPM package files that you have downloaded from the Internet.
To do this, simply append the path name of an RPM file to the installation command instead of a repository
package name.
[ec2-user ~]$ sudo yum install my-package.rpm
265
Amazon Elastic Compute Cloud User Guide for Linux
Instances
Managing Software](https://image.slidesharecdn.com/ec2-ug-151130152858-lva1-app6892/75/Amazan-Ec2-274-2048.jpg)
![Preparing to Compile Software
There is a wealth of open-source software available on the Internet that has not been pre-compiled and
made available for download from a package repository.You may eventually discover a software package
that you need to compile yourself, from its source code. For your system to be able to compile software,
you need to install several development tools, such as make, gcc, and autoconf.
Important
These procedures are intended for use with Amazon Linux. For more information about other
distributions, see their specific documentation.
Because software compilation is not a task that every Amazon EC2 instance requires, these tools are
not installed by default, but they are available in a package group called "Development Tools" that is
easily added to an instance with the yum groupinstall command.
[ec2-user ~]$ sudo yum groupinstall "Development Tools"
Software source code packages are often available for download (from web sites such as https://github.com/
and http://sourceforge.net/) as a compressed archive file, called a tarball.These tarballs will usually have
the .tar.gz file extension.You can decompress these archives with the tar command.
[ec2-user ~]$ tar -xzf software.tar.gz
After you have decompressed and unarchived the source code package, you should look for a README
or INSTALL file in the source code directory that can provide you with further instructions for compiling
and installing the source code.
To retrieve source code for Amazon Linux packages
Amazon Web Services provides the source code for maintained packages.You can download the source
code for any installed packages with the get_reference_source command.
• Run the get_reference_source -p package command to download the source code for package.
For example, to download the source code for the htop package, enter the following command.
[ec2-user ~]$ get_reference_source -p htop
Requested package: htop
Found package from local RPM database: htop-1.0.1-2.3.amzn1.x86_64
Corresponding source RPM to found package : htop-1.0.1-2.3.amzn1.src.rpm
Are these parameters correct? Please type 'yes' to continue: yes
Source RPM downloaded to: /usr/src/srpm/debug/htop-1.0.1-2.3.amzn1.src.rpm
The command output lists the location of the source RPM, in this case
/usr/src/srpm/debug/htop-1.0.1-2.3.amzn1.src.rpm.
Managing User Accounts on Your Linux Instance
Each Linux instance type launches with a default Linux system user account. For Amazon Linux, the user
name is ec2-user. For RHEL5, the user name is either root or ec2-user. For Ubuntu, the user name
is ubuntu. For Fedora, the user name is either fedora or ec2-user. For SUSE Linux, the user name
is either root or ec2-user. Otherwise, if ec2-user and root don't work, check with your AMI provider.
266
Amazon Elastic Compute Cloud User Guide for Linux
Instances
Managing Users](https://image.slidesharecdn.com/ec2-ug-151130152858-lva1-app6892/75/Amazan-Ec2-275-2048.jpg)
![Note
Linux system users should not be confused with AWS Identity and Access Management (IAM)
users. For more information, see IAM Users and Groups in the IAM User Guide.
Using the default user account is adequate for many applications, but you may choose to add user
accounts so that individuals can have their own files and workspaces. Creating user accounts for new
users is much more secure than granting multiple (possibly inexperienced) users access to the ec2-user
account, since that account can cause a lot of damage to a system when used improperly.
To add a new user to the system
Effectively adding users to a Linux instance involves two basic operations: adding the user to the system,
and providing that user with a way to log in remotely.
1. To add a new user to the system, use the adduser command followed by any relevant options and
the name of the user you wish to create.
Important
If you are adding a user to an Ubuntu system, you should add the --disabled-password
option to avoid adding a password to the account.
[ec2-user ~]$ sudo adduser newuser
This command adds the newuser account to the system (with an entry in the /etc/passwd file),
creates a newuser group, and creates a home directory for the account in /home/newuser.
2. To provide remote access to this account, you must create a .ssh directory in the newuser home
directory and create a file within it named "authorized_keys" that contains a public key.
a. Switch to the new account so that newly created files have the proper ownership.
[ec2-user ~]$ sudo su - newuser
[newuser ~]$
Note that the prompt now says newuser instead of ec2-user; you have switched the shell
session to the new account.
b. Create a .ssh directory for the authorized_keys file.
[newuser ~]$ mkdir .ssh
c. Change the file permissions of the .ssh directory to 700 (this means only the file owner can
read, write, or open the directory).
Important
This step is very important; without these exact file permissions, you will not be able to
log into this account using SSH.
[newuser ~]$ chmod 700 .ssh
d. Create a file named "authorized_keys" in the .ssh directory.
[newuser ~]$ touch .ssh/authorized_keys
e. Change the file permissions of the authorized_keys file to 600 (this means only the file owner
can read or write to the file).
267
Amazon Elastic Compute Cloud User Guide for Linux
Instances
Managing Users](https://image.slidesharecdn.com/ec2-ug-151130152858-lva1-app6892/75/Amazan-Ec2-276-2048.jpg)
![Important
This step is very important; without these exact file permissions, you will not be able to
log into this account using SSH.
[newuser ~]$ chmod 600 .ssh/authorized_keys
f. Edit the authorized_keys file with your favorite text editor and paste the public key for your
key pair into the file, for example:
ssh-rsa AAAAB3NzaC1yc2EAAAADAQABAAABAQClKsfkNkuSevGj3eYhCe53pcjqP3maAhD
FcvBS7O6V
hz2ItxCih+PnDSUaw+WNQn/mZphTk/a/gU8jEzoOWbkM4yxyb/wB96xbiFveSFJuOp/d6RJh
JOI0iBXr
lsLnBItntckiJ7FbtxJMXLvvwJryDUilBMTjYtwB+QhYXUMOzce5Pjz5/i8Se
JtjnV3iAoG/cQk+0FzZ
qaeJAAHco+CY/5WrUBkrHmFJr6HcXkvJdWPkYQS3xqC0+FmUZofz221CBt5IMucxXP
kX4rWi+z7wB3Rb
BQoQzd8v7yeb7OzlPnWOyN0qFU0XA246RA8QFYiCNYwI3f05p6KLxEXAMPLE
Note
For more information about creating a key pair, see Creating Your Key Pair Using
Amazon EC2 (p.416).For more information about retrieving a public key from an existing
key pair, see Retrieving the Public Key for Your Key Pair on Linux (p. 418).
You should now be able to log into the newuser account on your instance via SSH using the private key
that matches the public key from Step 2.f (p. 268).
To remove a user from the system
If a user account is no longer needed, you can remove that account so that it may no longer be used.
• To delete a user account, the user's home directory, and the user's mail spool, execute the userdel
-r command followed by the user name you wish to delete.
[ec2-user ~]$ sudo userdel -r olduser
Note
To keep the user's home directory and mail spool, omit the -r option.
Processor State Control for Your EC2 Instance
C-states control the sleep levels that a core can enter when it is idle. C-states are numbered starting with
C0 (the shallowest state where the core is totally awake and executing instructions) and go to C6 (the
deepest idle state where a core is powered off). P-states control the desired performance (in CPU
frequency) from a core. P-states are numbered starting from P0 (the highest performance setting where
the core is allowed to use Intel® Turbo Boost Technology to increase frequency if possible), and they go
from P1 (the P-state that requests the maximum baseline frequency) to P15 (the lowest possible frequency).
The following instance types provide the ability for an operating system to control processor C-states and
P-states:
268
Amazon Elastic Compute Cloud User Guide for Linux
Instances
Processor State Control](https://image.slidesharecdn.com/ec2-ug-151130152858-lva1-app6892/75/Amazan-Ec2-277-2048.jpg)
![• c4.8xlarge
• d2.8xlarge
• m4.10xlarge
You might want to change the C-state or P-state settings to increase processor performance consistency,
reduce latency, or tune your instance for a specific workload. The default C-state and P-state settings
provide maximum performance, which is optimal for most workloads. However, if your application would
benefit from reduced latency at the cost of higher single- or dual-core frequencies, or from consistent
performance at lower frequencies as opposed to bursty Turbo Boost frequencies, consider experimenting
with the C-state or P-state settings that are available to these instances.
The following sections describe the different processor state configurations and how to monitor the effects
of your configuration. These procedures were written for, and apply to Amazon Linux; however, they may
also work for other Linux distributions with a Linux kernel version of 3.9 or newer. For more information
about other Linux distributions and processor state control, see your system-specific documentation.
Note
The examples on this page use the turbostat utility (which is available on Amazon Linux by
default) to display processor frequency and C-state information, and the stress command (which
can be installed by running sudo yum install -y stress) to simulate a workload.
Contents
• Highest Performance with Maximum Turbo Boost Frequency (p. 269)
• High Performance and Low Latency by Limiting Deeper C-states (p. 270)
• Baseline Performance with the Lowest Variability (p. 271)
Highest Performance with MaximumTurbo Boost Frequency
This is the default processor state control configuration for the Amazon Linux AMI, and it is recommended
for most workloads. This configuration provides the highest performance with lower variability. Allowing
inactive cores to enter deeper sleep states provides the thermal headroom required for single or dual
core processes to reach their maximum Turbo Boost potential.
The following example shows a c4.8xlarge instance with two cores actively performing work reaching
their maximum processor Turbo Boost frequency.
[ec2-user ~]$ sudo turbostat stress -c 2 -t 10
stress: info: [30680] dispatching hogs: 2 cpu, 0 io, 0 vm, 0 hdd
stress: info: [30680] successful run completed in 10s
pk cor CPU %c0 GHz TSC SMI %c1 %c3 %c6 %c7 %pc2 %pc3
%pc6 %pc7 Pkg_W RAM_W PKG_% RAM_%
5.54 3.44 2.90 0 9.18 0.00 85.28 0.00 0.00 0.00
0.00 0.00 94.04 32.70 54.18 0.00
0 0 0 0.12 3.26 2.90 0 3.61 0.00 96.27 0.00 0.00 0.00
0.00 0.00 48.12 18.88 26.02 0.00
0 0 18 0.12 3.26 2.90 0 3.61
0 1 1 0.12 3.26 2.90 0 4.11 0.00 95.77 0.00
0 1 19 0.13 3.27 2.90 0 4.11
0 2 2 0.13 3.28 2.90 0 4.45 0.00 95.42 0.00
0 2 20 0.11 3.27 2.90 0 4.47
0 3 3 0.05 3.42 2.90 0 99.91 0.00 0.05 0.00
0 3 21 97.84 3.45 2.90 0 2.11
...
1 1 10 0.06 3.33 2.90 0 99.88 0.01 0.06 0.00
1 1 28 97.61 3.44 2.90 0 2.32
269
Amazon Elastic Compute Cloud User Guide for Linux
Instances
Processor State Control](https://image.slidesharecdn.com/ec2-ug-151130152858-lva1-app6892/75/Amazan-Ec2-278-2048.jpg)
![...
10.002556 sec
In this example, vCPUs 21 and 28 are running at their maximum Turbo Boost frequency because the
other cores have entered the C6 sleep state to save power and provide both power and thermal headroom
for the working cores. vCPUs 3 and 10 (each sharing a processor core with vCPUs 21 and 28) are in the
C1 state, waiting for instruction.
In the following example, all 18 cores are actively performing work, so there is no headroom for maximum
Turbo Boost, but they are all running at the "all core Turbo Boost" speed of 3.2 GHz.
[ec2-user ~]$ sudo turbostat stress -c 36 -t 10
stress: info: [30685] dispatching hogs: 36 cpu, 0 io, 0 vm, 0 hdd
stress: info: [30685] successful run completed in 10s
pk cor CPU %c0 GHz TSC SMI %c1 %c3 %c6 %c7 %pc2 %pc3
%pc6 %pc7 Pkg_W RAM_W PKG_% RAM_%
99.27 3.20 2.90 0 0.26 0.00 0.47 0.00 0.00 0.00
0.00 0.00 228.59 31.33 199.26 0.00
0 0 0 99.08 3.20 2.90 0 0.27 0.01 0.64 0.00 0.00 0.00
0.00 0.00 114.69 18.55 99.32 0.00
0 0 18 98.74 3.20 2.90 0 0.62
0 1 1 99.14 3.20 2.90 0 0.09 0.00 0.76 0.00
0 1 19 98.75 3.20 2.90 0 0.49
0 2 2 99.07 3.20 2.90 0 0.10 0.02 0.81 0.00
0 2 20 98.73 3.20 2.90 0 0.44
0 3 3 99.02 3.20 2.90 0 0.24 0.00 0.74 0.00
0 3 21 99.13 3.20 2.90 0 0.13
0 4 4 99.26 3.20 2.90 0 0.09 0.00 0.65 0.00
0 4 22 98.68 3.20 2.90 0 0.67
0 5 5 99.19 3.20 2.90 0 0.08 0.00 0.73 0.00
0 5 23 98.58 3.20 2.90 0 0.69
0 6 6 99.01 3.20 2.90 0 0.11 0.00 0.89 0.00
0 6 24 98.72 3.20 2.90 0 0.39
...
High Performance and Low Latency by Limiting Deeper
C-states
C-states control the sleep levels that a core may enter when it is inactive.You may want to control C-states
to tune your system for latency versus performance. Putting cores to sleep takes time, and although a
sleeping core allows more headroom for another core to boost to a higher frequency, it takes time for that
sleeping core to wake back up and perform work.For example, if a core that is assigned to handle network
packet interrupts is asleep, there may be a delay in servicing that interrupt.You can configure the system
to not use deeper C-states, which reduces the processor reaction latency, but that in turn also reduces
the headroom available to other cores for Turbo Boost.
A common scenario for disabling deeper sleep states is a Redis database application, which stores the
database in system memory for the fastest possible query response time.
To limit deeper sleep states on Amazon Linux
1. Open the /boot/grub/grub.conf file with your editor of choice.
[ec2-user ~]$ sudo vim /boot/grub/grub.conf
270
Amazon Elastic Compute Cloud User Guide for Linux
Instances
Processor State Control](https://image.slidesharecdn.com/ec2-ug-151130152858-lva1-app6892/75/Amazan-Ec2-279-2048.jpg)
![2. Edit the kernel line of the first entry and add the intel_idle.max_cstate=1 option to set C1 as
the deepest C-state for idle cores.
# created by imagebuilder
default=0
timeout=1
hiddenmenu
title Amazon Linux 2014.09 (3.14.26-24.46.amzn1.x86_64)
root (hd0,0)
kernel /boot/vmlinuz-3.14.26-24.46.amzn1.x86_64 root=LABEL=/ console=ttyS0
intel_idle.max_cstate=1
initrd /boot/initramfs-3.14.26-24.46.amzn1.x86_64.img
3. Save the file and exit your editor.
4. Reboot your instance to enable the new kernel option.
[ec2-user ~]$ sudo reboot
The following example shows a c4.8xlarge instance with two cores actively performing work at the "all
core Turbo Boost" core frequency.
[ec2-user ~]$ sudo turbostat stress -c 2 -t 10
stress: info: [5322] dispatching hogs: 2 cpu, 0 io, 0 vm, 0 hdd
stress: info: [5322] successful run completed in 10s
pk cor CPU %c0 GHz TSC SMI %c1 %c3 %c6 %c7 %pc2 %pc3
%pc6 %pc7 Pkg_W RAM_W PKG_% RAM_%
5.56 3.20 2.90 0 94.44 0.00 0.00 0.00 0.00 0.00
0.00 0.00 131.90 31.11 199.47 0.00
0 0 0 0.03 2.08 2.90 0 99.97 0.00 0.00 0.00 0.00 0.00
0.00 0.00 67.23 17.11 99.76 0.00
0 0 18 0.01 1.93 2.90 0 99.99
0 1 1 0.02 1.96 2.90 0 99.98 0.00 0.00 0.00
0 1 19 99.70 3.20 2.90 0 0.30
...
1 1 10 0.02 1.97 2.90 0 99.98 0.00 0.00 0.00
1 1 28 99.67 3.20 2.90 0 0.33
1 2 11 0.04 2.63 2.90 0 99.96 0.00 0.00 0.00
1 2 29 0.02 2.11 2.90 0 99.98
...
In this example, the cores for vCPUs 19 and 28 are running at 3.2 GHz, and the other cores are in the
C1 C-state, awaiting instruction. Although the working cores are not reaching their maximum Turbo Boost
frequency, the inactive cores will be much faster to respond to new requests than they would be in the
deeper C6 C-state.
Baseline Performance with the Lowest Variability
You can reduce the variability of processor frequency with P-states. P-states control the desired
performance (in CPU frequency) from a core. Most workloads perform better in P0, which requests Turbo
Boost. But you may want to tune your system for consistent performance rather than bursty performance
that can happen when Turbo Boost frequencies are enabled.
271
Amazon Elastic Compute Cloud User Guide for Linux
Instances
Processor State Control](https://image.slidesharecdn.com/ec2-ug-151130152858-lva1-app6892/75/Amazan-Ec2-280-2048.jpg)
![Intel Advanced Vector Extensions (AVX or AVX2) workloads can perform well at lower frequencies, and
AVX instructions can use more power. Running the processor at a lower frequency, by disabling Turbo
Boost, can reduce the amount of power used and keep the speed more consistent. For more information
about optimizing your instance configuration and workload for AVX, see http://www.intel.com/content/
dam/www/public/us/en/documents/white-papers/
performance-xeon-e5-v3-advanced-vector-extensions-paper.pdf.
This section describes how to limit deeper sleep states and disable Turbo Boost (by requesting the P1
P-state) to provide low-latency and the lowest processor speed variability for these types of workloads.
To limit deeper sleep states and disable Turbo Boost on Amazon Linux
1. Open the /boot/grub/grub.conf file with your editor of choice.
[ec2-user ~]$ sudo vim /boot/grub/grub.conf
2. Edit the kernel line of the first entry and add the intel_idle.max_cstate=1 option to set C1 as
the deepest C-state for idle cores.
# created by imagebuilder
default=0
timeout=1
hiddenmenu
title Amazon Linux 2014.09 (3.14.26-24.46.amzn1.x86_64)
root (hd0,0)
kernel /boot/vmlinuz-3.14.26-24.46.amzn1.x86_64 root=LABEL=/ console=ttyS0
intel_idle.max_cstate=1
initrd /boot/initramfs-3.14.26-24.46.amzn1.x86_64.img
3. Save the file and exit your editor.
4. Reboot your instance to enable the new kernel option.
[ec2-user ~]$ sudo reboot
5. When you need the low processor speed variability that the P1 P-state provides, execute the following
command to disable Turbo Boost.
[ec2-user ~]$ sudo sh -c "echo 1 > /sys/devices/system/cpu/in
tel_pstate/no_turbo"
6. When your workload is finished, you can re-enable Turbo Boost with the following command.
[ec2-user ~]$ sudo sh -c "echo 0 > /sys/devices/system/cpu/in
tel_pstate/no_turbo"
The following example shows a c4.8xlarge instance with two vCPUs actively performing work at the
baseline core frequency, with no Turbo Boost.
272
Amazon Elastic Compute Cloud User Guide for Linux
Instances
Processor State Control](https://image.slidesharecdn.com/ec2-ug-151130152858-lva1-app6892/75/Amazan-Ec2-281-2048.jpg)
![[ec2-user ~]$ sudo turbostat stress -c 2 -t 10
stress: info: [5389] dispatching hogs: 2 cpu, 0 io, 0 vm, 0 hdd
stress: info: [5389] successful run completed in 10s
pk cor CPU %c0 GHz TSC SMI %c1 %c3 %c6 %c7 %pc2 %pc3
%pc6 %pc7 Pkg_W RAM_W PKG_% RAM_%
5.59 2.90 2.90 0 94.41 0.00 0.00 0.00 0.00 0.00
0.00 0.00 128.48 33.54 200.00 0.00
0 0 0 0.04 2.90 2.90 0 99.96 0.00 0.00 0.00 0.00 0.00
0.00 0.00 65.33 19.02 100.00 0.00
0 0 18 0.04 2.90 2.90 0 99.96
0 1 1 0.05 2.90 2.90 0 99.95 0.00 0.00 0.00
0 1 19 0.04 2.90 2.90 0 99.96
0 2 2 0.04 2.90 2.90 0 99.96 0.00 0.00 0.00
0 2 20 0.04 2.90 2.90 0 99.96
0 3 3 0.05 2.90 2.90 0 99.95 0.00 0.00 0.00
0 3 21 99.95 2.90 2.90 0 0.05
...
1 1 28 99.92 2.90 2.90 0 0.08
1 2 11 0.06 2.90 2.90 0 99.94 0.00 0.00 0.00
1 2 29 0.05 2.90 2.90 0 99.95
The cores for vCPUs 21 and 28 are actively performing work at the baseline processor speed of 2.9 GHz,
and all inactive cores are also running at the baseline speed in the C1 C-state, ready to accept instructions.
Setting the Time for Your Linux Instance
A consistent and accurate time reference is crucial for many server tasks and processes. Most system
logs include a time stamp that you can use to determine when problems occur and in what order the
events take place. If you use the AWS CLI, EC2 CLI, or an AWS SDK to make requests from your instance,
these tools sign requests on your behalf. If your instance's date and time are not set correctly, the date
in the signature may not match the date of the request, and AWS rejects the request. Network Time
Protocol (NTP) is configured by default on Amazon Linux instances, and the system time is synchronized
with a load-balanced pool of public servers on the Internet and set to the UTC time zone. For more
information about NTP, go to http://www.ntp.org/.
Tasks
• Changing the Time Zone (p. 273)
• Configuring Network Time Protocol (NTP) (p. 274)
Important
These procedures are intended for use with Amazon Linux. For more information about other
distributions, see their specific documentation.
Changing the Time Zone
Amazon Linux instances are set to the UTC (Coordinated Universal Time) time zone by default, but you
may wish to change the time on an instance to the local time or to another time zone in your network.
To change the time zone on an instance
1. Identify the time zone to use on the instance. The /usr/share/zoneinfo directory contains a
hierarchy of time zone data files. Browse the directory structure at that location to find a file for your
time zone.
273
Amazon Elastic Compute Cloud User Guide for Linux
Instances
Setting the Time](https://image.slidesharecdn.com/ec2-ug-151130152858-lva1-app6892/75/Amazan-Ec2-282-2048.jpg)
![[ec2-user ~]$ ls /usr/share/zoneinfo
Africa Chile GB Indian Mideast posixrules US
America CST6CDT GB-Eire Iran MST PRC UTC
Antarctica Cuba GMT iso3166.tab MST7MDT PST8PDT WET
Arctic EET GMT0 Israel Navajo right W-SU
...
Some of the entries at this location are directories (such as America), and these directories contain
time zone files for specific cities. Find your city (or a city in your time zone) to use for the instance.
In this example, you can use the time zone file for Los Angeles,
/usr/share/zoneinfo/America/Los_Angeles.
2. Update the /etc/sysconfig/clock file with the new time zone.
a. Open the /etc/sysconfig/clock file with your favorite text editor (such as vim or nano).
You need to use sudo with your editor command because /etc/sysconfig/clock is owned
by root.
b. Locate the ZONE entry, and change it to the time zone file (omitting the /usr/share/zoneinfo
section of the path). For example, to change to the Los Angeles time zone, change the ZONE
entry to the following.
ZONE="America/Los_Angeles"
c. Locate the UTC entry, and change it to false.
UTC=false
d. Save the file and exit the text editor.
3. Create a symbolic link between /etc/localtime and your time zone file so that the instance finds
the time zone file when it references local time information.
[ec2-user ~]$ sudo ln -sf /usr/share/zoneinfo/America/Los_Angeles /etc/loc
altime
4. Reboot the system to pick up the new time zone information in all services and applications.
[ec2-user ~]$ sudo reboot
Configuring Network Time Protocol (NTP)
Network Time Protocol (NTP) is configured by default on Amazon Linux instances; however, an instance
needs access to the Internet for the standard NTP configuration to work.Your instance's security group
must also allow outbound UDP traffic on port 123 (NTP). The procedures in this section show how to
verify that the default NTP configuration is working correctly. If your instance does not have access to
the Internet, you need to configure NTP to query a different server in your private network to keep accurate
time.
To verify that NTP is working properly
1. Use the ntpstat command to view the status of the NTP service on the instance.
274
Amazon Elastic Compute Cloud User Guide for Linux
Instances
Setting the Time](https://image.slidesharecdn.com/ec2-ug-151130152858-lva1-app6892/75/Amazan-Ec2-283-2048.jpg)
![[ec2-user ~]$ ntpstat
If your output resembles the output below, then NTP is working properly on the instance.
synchronised to NTP server (12.34.56.78) at stratum 3
time correct to within 399 ms
polling server every 64 s
If your output states, "unsynchronised", wait a minute and try again.The first synchronization may
take a minute to complete.
If your output states, "Unable to talk to NTP daemon. Is it running?", you probably need
to start the NTP service and enable it to automatically start at boot time.
2. (Optional) You can use the ntpq -p command to see a list of peers known to the NTP server and a
summary of their state.
[ec2-user ~]$ ntpq -p
remote refid st t when poll reach delay offset
jitter
==============================================================================
+lttleman.deekay 204.9.54.119 2 u 15 128 377 88.649 5.946
6.876
-bittorrent.tomh 91.189.94.4 3 u 133 128 377 182.673 8.001
1.278
*ntp3.junkemailf 216.218.254.202 2 u 68 128 377 29.377 4.726
11.887
+tesla.selinc.co 149.20.64.28 2 u 31 128 377 28.586 -1.215
1.435
If the output of this command shows no activity, check whether your security groups, network ACLs,
or firewalls block access to the NTP port.
To start and enable NTP
1. Start the NTP service with the following command.
[ec2-user ~]$ sudo service ntpd start
Starting ntpd: [ OK ]
2. Enable NTP to start at boot time with the chkconfig command.
[ec2-user ~]$ sudo chkconfig ntpd on
3. Verify that NTP is enabled with the following command.
[ec2-user ~]$ sudo chkconfig --list ntpd
ntpd 0:off 1:off 2:on 3:on 4:on 5:on 6:off
Here ntpd is on in runlevels 2, 3, 4, and 5, which is correct.
275
Amazon Elastic Compute Cloud User Guide for Linux
Instances
Setting the Time](https://image.slidesharecdn.com/ec2-ug-151130152858-lva1-app6892/75/Amazan-Ec2-284-2048.jpg)
![To change NTP servers
You may decide not to use the standard NTP servers or you may need to use your own NTP server within
your private network for instances that do not have Internet access.
1. Open the /etc/ntp.conf file in your favorite text editor (such as vim or nano).You need to use
sudo with the editor command because /etc/ntp.conf is owned by root.
2. Find the server section, which defines the servers to poll for NTP configuration.
# Use public servers from the pool.ntp.org project.
# Please consider joining the pool (http://www.pool.ntp.org/join.html).
server 0.amazon.pool.ntp.org iburst
server 1.amazon.pool.ntp.org iburst
server 2.amazon.pool.ntp.org iburst
server 3.amazon.pool.ntp.org iburst
Note
The n.amazon.pool.ntp.org DNS records are intended to load balance NTP traffic from
AWS. However, these are public NTP servers in the pool.ntp.org project, and they are
not owned or managed by AWS.There is no guarantee that they are geographically located
near your instances, or even within the AWS network. For more information, see http://
www.pool.ntp.org/en/.
3. Comment out the servers you don't want to use by adding a "#" character to the beginning of those
server definitions.
# Use public servers from the pool.ntp.org project.
# Please consider joining the pool (http://www.pool.ntp.org/join.html).
#server 0.amazon.pool.ntp.org iburst
#server 1.amazon.pool.ntp.org iburst
#server 2.amazon.pool.ntp.org iburst
#server 3.amazon.pool.ntp.org iburst
4. Add an entry for each server to poll for time synchronization.You can use a DNS name for this entry
or a dotted quad IP address (such as 10.0.0.254).
server my-ntp-server.my-domain.com iburst
5. Restart the NTP service to pick up the new servers.
[ec2-user ~]$ sudo service ntpd start
Starting ntpd: [ OK ]
6. Verify that your new settings work and that NTP is functioning.
[ec2-user ~]$ ntpstat
synchronised to NTP server (64.246.132.14) at stratum 2
time correct to within 99 ms
276
Amazon Elastic Compute Cloud User Guide for Linux
Instances
Setting the Time](https://image.slidesharecdn.com/ec2-ug-151130152858-lva1-app6892/75/Amazan-Ec2-285-2048.jpg)
![Changing the Hostname of Your Linux Instance
When you launch an instance, it is assigned a hostname that is a form of the private, internal IP address.
A typical Amazon EC2 private DNS name looks something like this:
ip-12-34-56-78.us-west-2.compute.internal, where the name consists of the internal domain,
the service (in this case, compute), the region, and a form of the private IP address. Part of this hostname
is displayed at the shell prompt when you log into your instance (for example, ip-12-34-56-78). Each
time you stop and restart your Amazon EC2 instance (unless you are using an Elastic IP address), the
public IP address changes, and so does your public DNS name, system hostname, and shell prompt.
Instances launched into EC2-Classic also receive a new private IP address, private DNS hostname, and
system hostname when they're stopped and restarted; instances launched into a VPC don't.
Important
These procedures are intended for use with Amazon Linux. For more information about other
distributions, see their specific documentation.
Changing the System Hostname
If you have a public DNS name registered for the IP address of your instance (such as
webserver.mydomain.com), you can set the system hostname so your instance identifies itself as a
part of that domain. This also changes the shell prompt so that it displays the first portion of this name
instead of the hostname supplied by AWS (for example, ip-12-34-56-78). If you do not have a public
DNS name registered, you can still change the hostname, but the process is a little different.
To change the system hostname to a public DNS name
Follow this procedure if you already have a public DNS name registered.
1. Open the /etc/sysconfig/network configuration file in your favorite text editor and change the
HOSTNAME entry to reflect the fully qualified domain name (such as webserver.mydomain.com).
HOSTNAME=webserver.mydomain.com
2. Reboot the instance to pick up the new hostname.
[ec2-user ~]$ sudo reboot
3. Log into your instance and verify that the hostname has been updated.Your prompt should show
the new hostname (up to the first ".") and the hostname command should show the fully qualified
domain name.
[ec2-user@webserver ~]$ hostname
webserver.mydomain.com
To change the system hostname without a public DNS name
1. Open the /etc/sysconfig/network configuration file in your favorite text editor and change the
HOSTNAME entry to reflect the desired system hostname (such as webserver).
HOSTNAME=webserver.localdomain
277
Amazon Elastic Compute Cloud User Guide for Linux
Instances
Changing the Hostname](https://image.slidesharecdn.com/ec2-ug-151130152858-lva1-app6892/75/Amazan-Ec2-286-2048.jpg)
![2. Open the /etc/hosts file in your favorite text editor and change the entry beginning with 127.0.0.1
to match the example below, substituting your own hostname.
127.0.0.1 webserver.localdomain webserver localhost localhost.localdomain
3. Reboot the instance to pick up the new hostname.
[ec2-user ~]$ sudo reboot
4. Log into your instance and verify that the hostname has been updated.Your prompt should show
the new hostname (up to the first ".") and the hostname command should show the fully qualified
domain name.
[ec2-user@webserver ~]$ hostname
webserver.localdomain
Changing the Shell Prompt Without Affecting the Hostname
If you do not want to modify the hostname for your instance, but you would like to have a more useful
system name (such as webserver) displayed than the private name supplied by AWS (for example,
ip-12-34-56-78), you can edit the shell prompt configuration files to display your system nickname
instead of the hostname.
To change the shell prompt to a host nickname
1. Create a file in /etc/profile.d that sets the environment variable called NICKNAME to the value
you want in the shell prompt. For example, to set the system nickname to webserver, execute the
following command.
[ec2-user ~]$ sudo sh -c 'echo "export NICKNAME=webserver" > /etc/pro
file.d/prompt.sh'
2. Open the /etc/bashrc file in your favorite text editor (such as vim or nano).You need to use sudo
with the editor command because /etc/bashrc is owned by root.
3. Edit the file and change the shell prompt variable (PS1) to display your nickname instead of the
hostname. Find the following line that sets the shell prompt in /etc/bashrc (several surrounding
lines are shown below for context; look for the line that starts with [ "$PS1"):
# Turn on checkwinsize
shopt -s checkwinsize
[ "$PS1" = "s-v$ " ] && PS1="[u@h W]$ "
# You might want to have e.g. tty in prompt (e.g. more virtual machines)
# and console windows
And change the h (the symbol for hostname) in that line to the value of the NICKNAME variable.
# Turn on checkwinsize
shopt -s checkwinsize
[ "$PS1" = "s-v$ " ] && PS1="[u@$NICKNAME W]$ "
278
Amazon Elastic Compute Cloud User Guide for Linux
Instances
Changing the Hostname](https://image.slidesharecdn.com/ec2-ug-151130152858-lva1-app6892/75/Amazan-Ec2-287-2048.jpg)
![# You might want to have e.g. tty in prompt (e.g. more virtual machines)
# and console windows
4. (Optional) To set the title on shell windows to the new nickname, complete the following steps.
a. Create a file called /etc/sysconfig/bash-prompt-xterm.
[ec2-user ~]$ sudo touch /etc/sysconfig/bash-prompt-xterm
b. Make the file executable with the following command.
[ec2-user ~]$ sudo chmod +x /etc/sysconfig/bash-prompt-xterm
c. Open the /etc/sysconfig/bash-prompt-xterm file in your favorite text editor (such as vim
or nano).You need to use sudo with the editor command because
/etc/sysconfig/bash-prompt-xterm is owned by root.
d. Add the following line to the file.
echo -ne "033]0;${USER}@${NICKNAME}:${PWD/#$HOME/~}007"
5. Log out and then log back in to pick up the new nickname value.
Setting Up Dynamic DNS on Your Linux Instance
When you launch an Amazon EC2 instance, it is assigned a public IP address and a public DNS (Domain
Name System) name that you can use to reach it from the Internet. Because there are so many hosts in
the Amazon Web Services domain, these public names must be quite long for each name to remain
unique. A typical Amazon EC2 public DNS name looks something like this:
ec2-12-34-56-78.us-west-2.compute.amazonaws.com, where the name consists of the Amazon
Web Services domain, the service (in this case, compute), the region, and a form of the public IP address.
Dynamic DNS services provide custom DNS host names within their domain area that can be easy to
remember and that can also be more relevant to your host's use case; some of these services are also
free of charge.You can use a dynamic DNS provider with Amazon EC2 and configure the instance to
update the IP address associated with a public DNS name each time the instance starts.There are many
different providers to choose from, and the specific details of choosing a provider and registering a name
with them are outside the scope of this guide. A simple web search of "dynamic DNS" should return
multiple results for service providers, many of whom provide this service for free.
Important
These procedures are intended for use with Amazon Linux. For more information about other
distributions, see their specific documentation.
To use dynamic DNS with Amazon EC2
1. Sign up with a dynamic DNS service provider and register a public DNS name with their service. In
this procedure, you can use the free service from no-ip.com/free.
2. Configure the dynamic DNS update client. After you have a dynamic DNS service provider and a
public DNS name registered with their service, point the DNS name to the IP address for your instance.
Many providers allow you to do this manually from your account page on their website, but many
279
Amazon Elastic Compute Cloud User Guide for Linux
Instances
Setting Up Dynamic DNS](https://image.slidesharecdn.com/ec2-ug-151130152858-lva1-app6892/75/Amazan-Ec2-288-2048.jpg)
![also allow you to do this automatically with a software update client. In this example, you can use
the noip2 client, which only works with the service provided by no-ip.com.
Note
Other service providers may offer their own client, or you may be able to configure the
ddclient update utility to work with their service. For more information, see the specific
documentation for your service provider and http://sourceforge.net/p/ddclient/wiki/Home/.
a. Enable the Extra Packages for Enterprise Linux (EPEL) repository to gain access to the noip
client. The ddclient package is also available in this repository, but the configuration steps
that follow are different.
Note
Amazon Linux instances have the GPG keys and repository information for the EPEL
repository installed by default; however, Red Hat and CentOS instances must first install
the epel-release package before you can enable the EPEL repository. For more
information and to download the latest version of this package, see https://
fedoraproject.org/wiki/EPEL.
[ec2-user ~]$ sudo yum-config-manager --enable epel
b. Install the noip package.
[ec2-user ~]$ sudo yum install -y noip
c. Create the noip2 configuration file. Enter the login and password information for when prompted
and answer the subsequent questions to configure the client.
[ec2-user ~]$ sudo noip2 -C
3. Enable the noip service with the chkconfig command.
[ec2-user ~]$ sudo chkconfig noip on
You can verify that the service is enabled with the chkconfig --list command.
[ec2-user ~]$ chkconfig --list noip
noip 0:off 1:off 2:on 3:on 4:on 5:on 6:off
Here, noip is on in runlevels 2, 3, 4, and 5 (which is correct). Now the update client starts at every
boot and updates the public DNS record to point to the IP address of the instance.
4. Start the noip service.
[ec2-user ~]$ sudo service noip start
Starting noip2: [ OK ]
This command starts the client, which reads the configuration file (/etc/no-ip2.conf) that you
created earlier and updates the IP address for the public DNS name that you chose.
5. Verify that the update client has set the correct IP address for your dynamic DNS name. Allow a few
minutes for the DNS records to update, and then try to connect to your instance via SSH with the
public DNS name that you configured in this procedure.
280
Amazon Elastic Compute Cloud User Guide for Linux
Instances
Setting Up Dynamic DNS](https://image.slidesharecdn.com/ec2-ug-151130152858-lva1-app6892/75/Amazan-Ec2-289-2048.jpg)

![output : { all : '| tee -a /var/log/cloud-init-output.log' }
This directive sends command output from your script to /var/log/cloud-init-output.log.
For more information on cloud-init data formats and creating Mime multi part archive, see
cloud-init Formats.
User Data and cloud-init Directives
The cloud-init package configures specific aspects of a new Amazon Linux instance when it is
launched; most notably, it configures the .ssh/authorized_keys file for the ec2-user so you can log
in with your own private key.
The cloud-init user directives can be passed to an instance at launch the same way that a script is
passed, although the syntax is different. For more information about cloud-init, go to http://
cloudinit.readthedocs.org/en/latest/index.html.
Important
User data scripts and cloud-init directives only run during the first boot cycle when an instance
is launched.
The Amazon Linux version of cloud-init does not support all of the directives that are available in the
base package, and some of the directives have been renamed (such as repo_update instead of
apt-upgrade).
Adding these tasks at boot time adds to the amount of time it takes to boot an instance.You should allow
a few minutes of extra time for the tasks to complete before you test that your user data directives have
completed.
To pass cloud-init directives to an instance with user data
1. Follow the procedure for launching an instance at Launching Your Instance from an AMI (p. 226), but
when you get to Step 6 (p. 228), paste your cloud-init directive text into the User data field and
then complete the launch procedure. For the example below, the directives create and configure a
web server.
#cloud-config
repo_update: true
repo_upgrade: all
packages:
- httpd24
- php56
- mysql55
- server
- php56-mysqlnd
runcmd:
- service httpd start
- chkconfig httpd on
- groupadd www
- [ sh, -c, "usermod -a -G www ec2-user" ]
- [ sh, -c, "chown -R root:www /var/www" ]
- chmod 2775 /var/www
- [ find, /var/www, -type, d, -exec, chmod, 2775, {}, + ]
- [ find, /var/www, -type, f, -exec, chmod, 0664, {}, + ]
- [ sh, -c, 'echo "<?php phpinfo(); ?>" > /var/www/html/phpinfo.php' ]
283
Amazon Elastic Compute Cloud User Guide for Linux
Instances
Running Commands at Launch](https://image.slidesharecdn.com/ec2-ug-151130152858-lva1-app6892/75/Amazan-Ec2-292-2048.jpg)


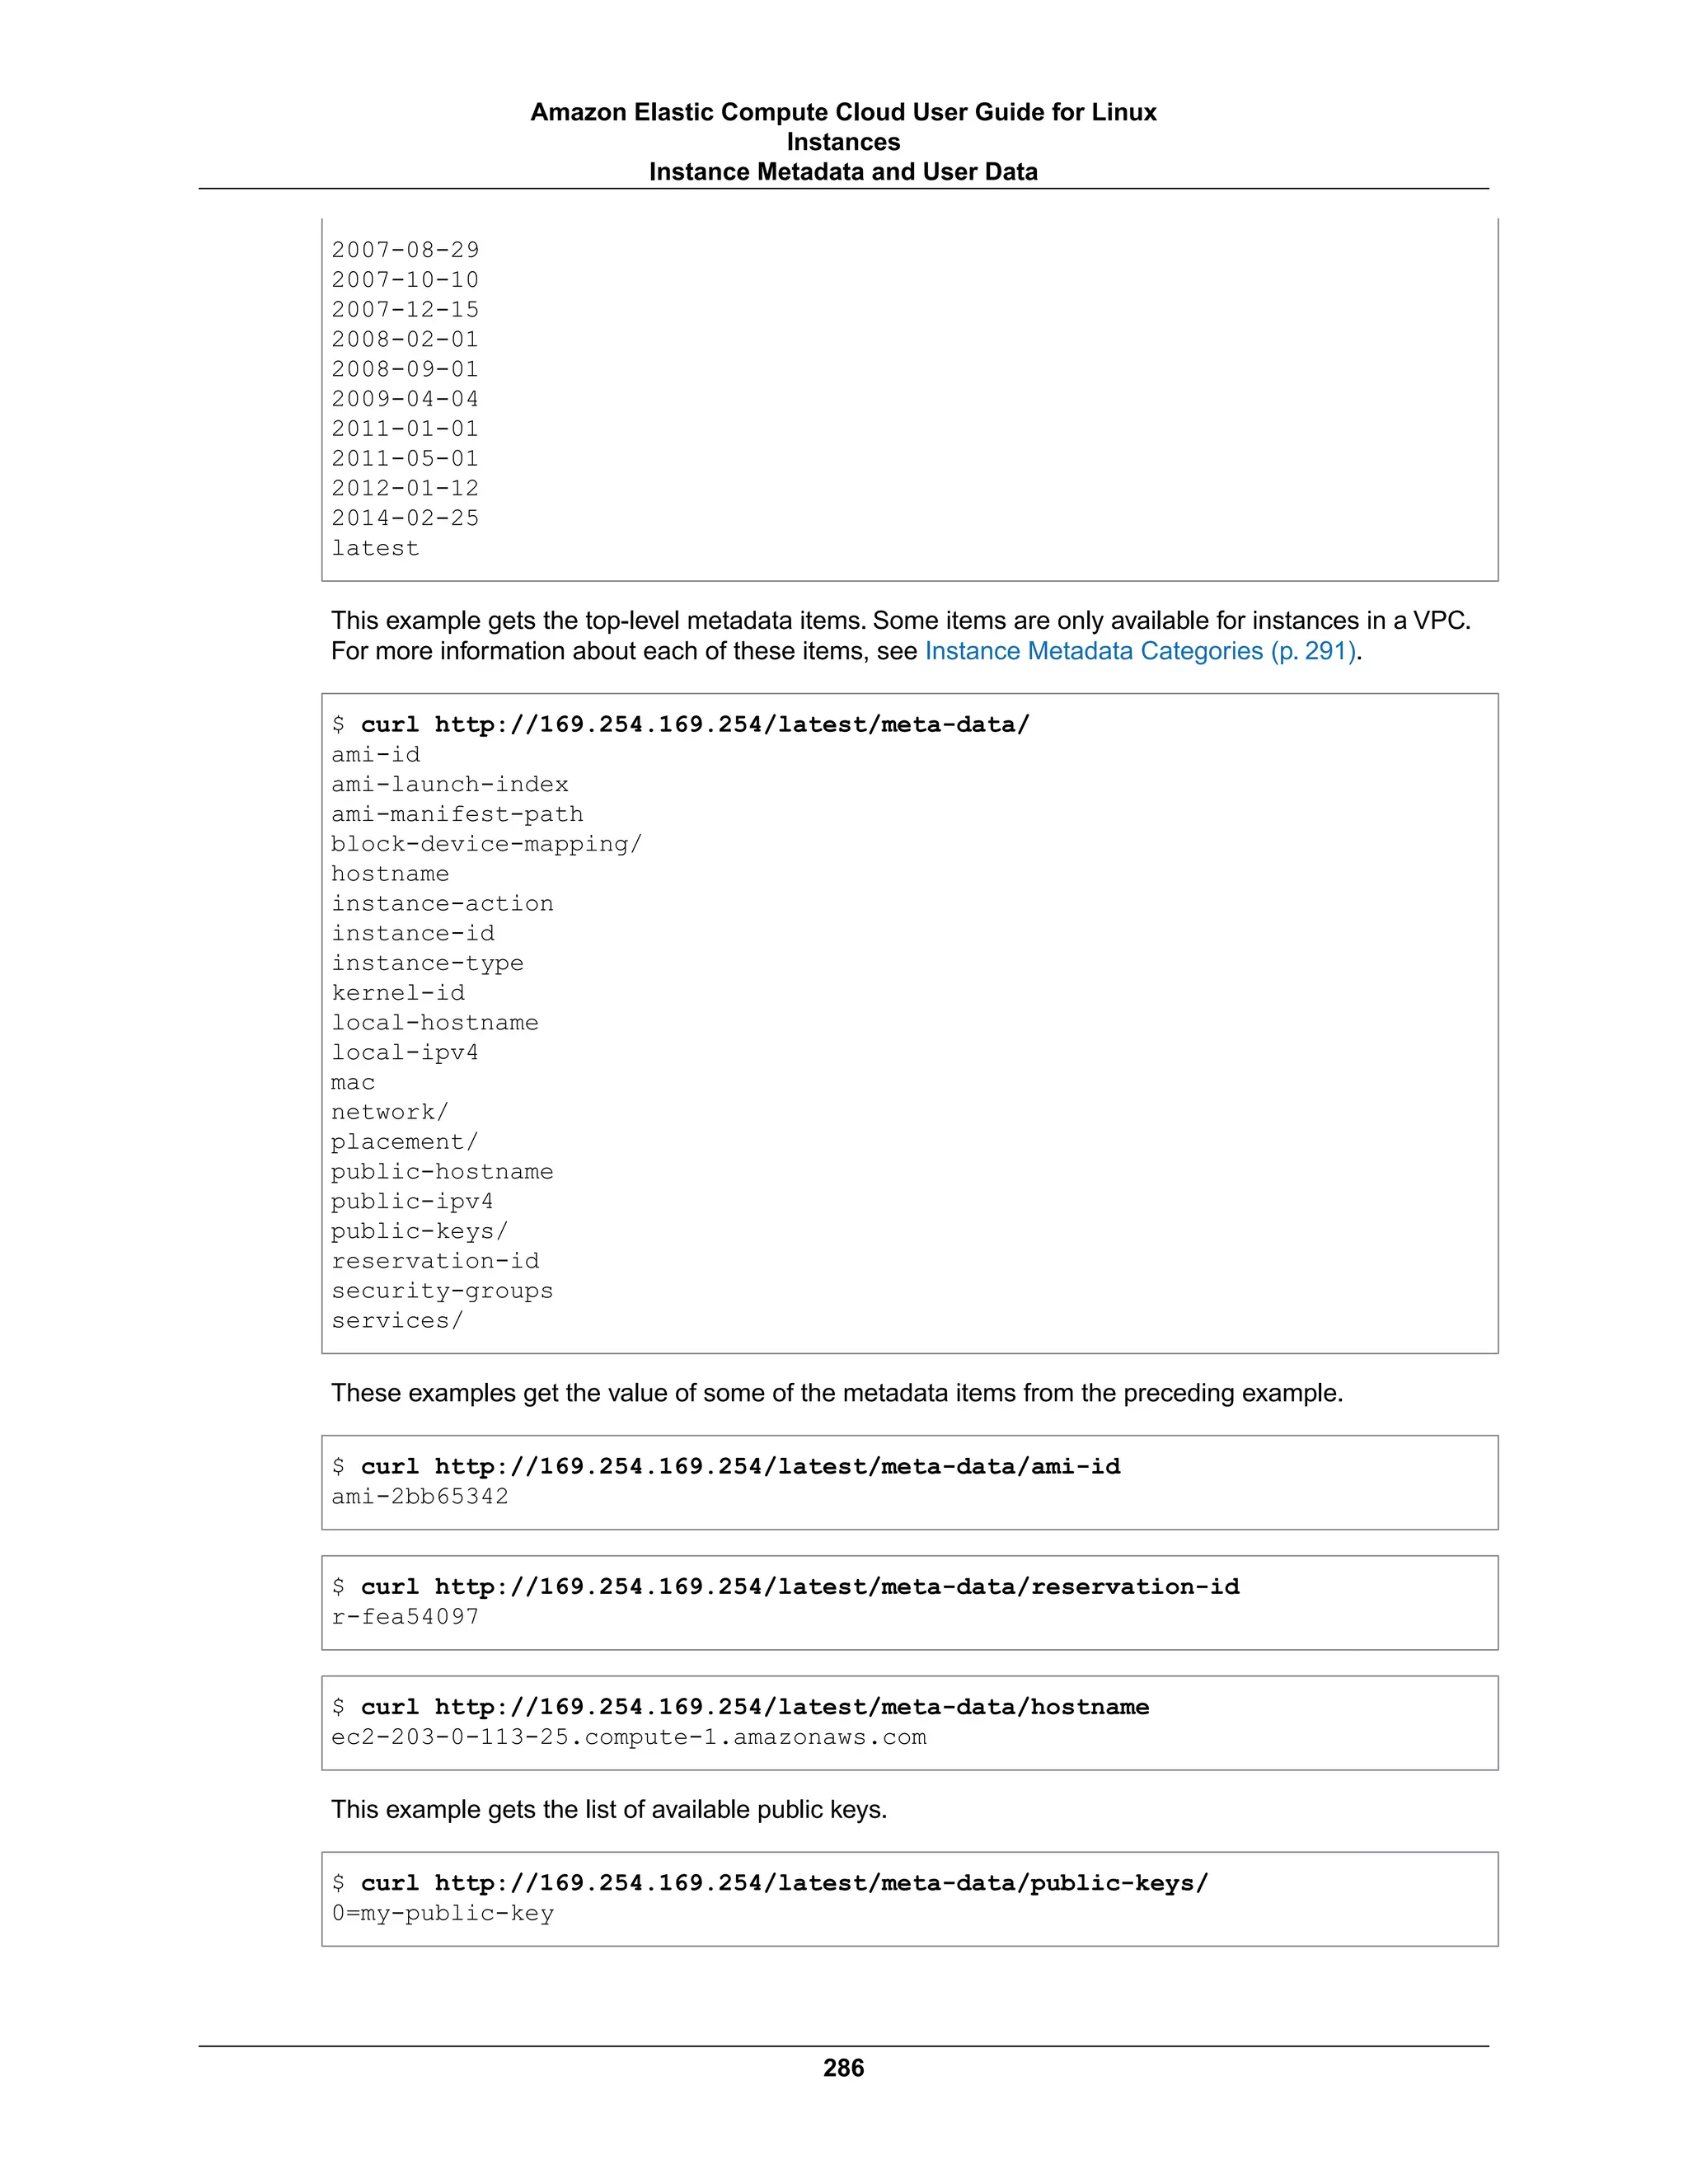

![To specify user data when you launch an instance
You can specify user data when you launch an instance. For more information, see Launching an
Instance (p.226), cloud-init (p.109), and Running Commands onYour Linux Instance at Launch (p.281).
To modify the user data for an Amazon EBS-backed instance
1. Open the Amazon EC2 console at https://console.aws.amazon.com/ec2/.
2. In the navigation pane, click Instances, and select the instance.
3. Click Actions, select Instance State, and then click Stop.
Warning
When you stop an instance, the data on any instance store volumes is erased. Therefore,
if you have any data on instance store volumes that you want to keep, be sure to back it up
to persistent storage.
4. In the confirmation dialog box, click Yes, Stop. It can take a few minutes for the instance to stop.
5. With the instance still selected, click Actions, select Instance Settings, and then click View/Change
User Data. Note that you can't change the user data if the instance is running, but you can view it.
6. In the View/Change User Data dialog box, update the user data, and then click Save.
Retrieving User Data
To retrieve user data, use the following URI:
http://169.254.169.254/latest/user-data
Requests for user data returns the data as it is (content type application/x-octetstream).
This shows an example of returning comma-separated user data.
$ curl http://169.254.169.254/latest/user-data
1234,john,reboot,true | 4512,richard, | 173,,,
This shows an example of returning line-separated user data.
$ curl http://169.254.169.254/latest/user-data
[general]
instances: 4
[instance-0]
s3-bucket: <user_name>
[instance-1]
reboot-on-error: yes
Retrieving Dynamic Data
To retrieve dynamic data from within a running instance, use the following URI:
http://169.254.169.254/latest/dynamic/
This example shows how to retrieve the high-level instance identity categories:
288
Amazon Elastic Compute Cloud User Guide for Linux
Instances
Instance Metadata and User Data](https://image.slidesharecdn.com/ec2-ug-151130152858-lva1-app6892/75/Amazan-Ec2-297-2048.jpg)
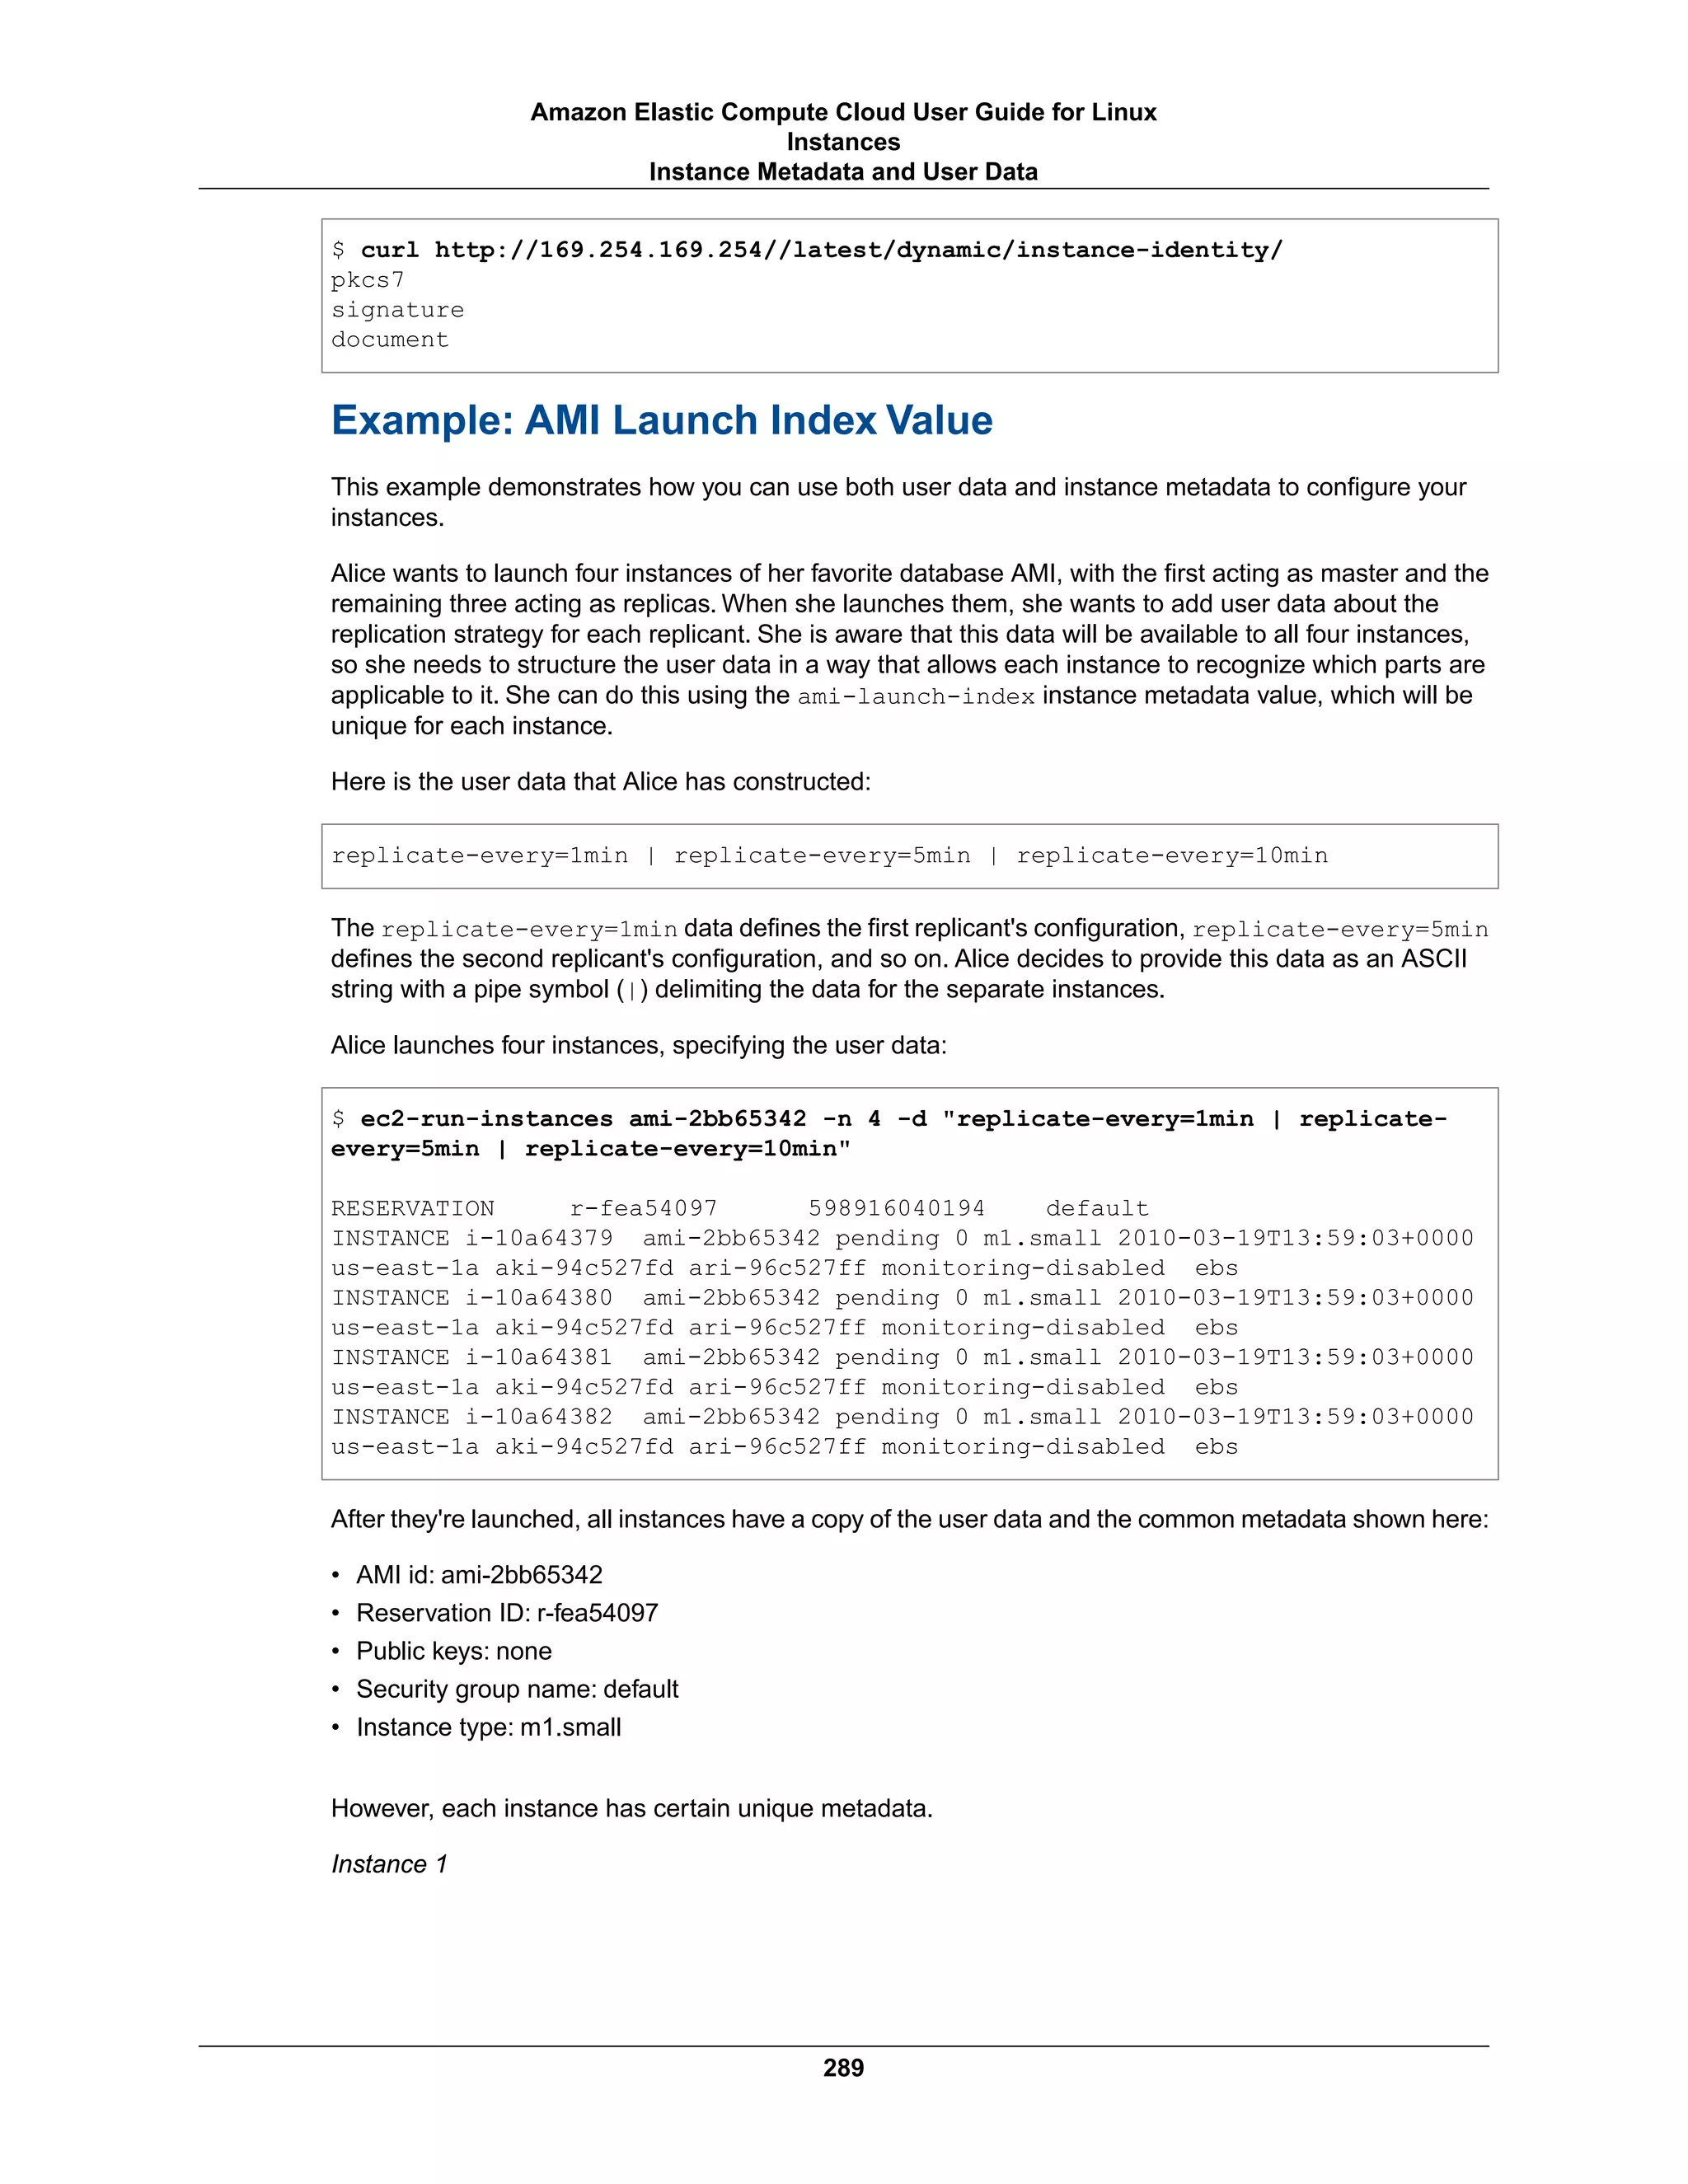

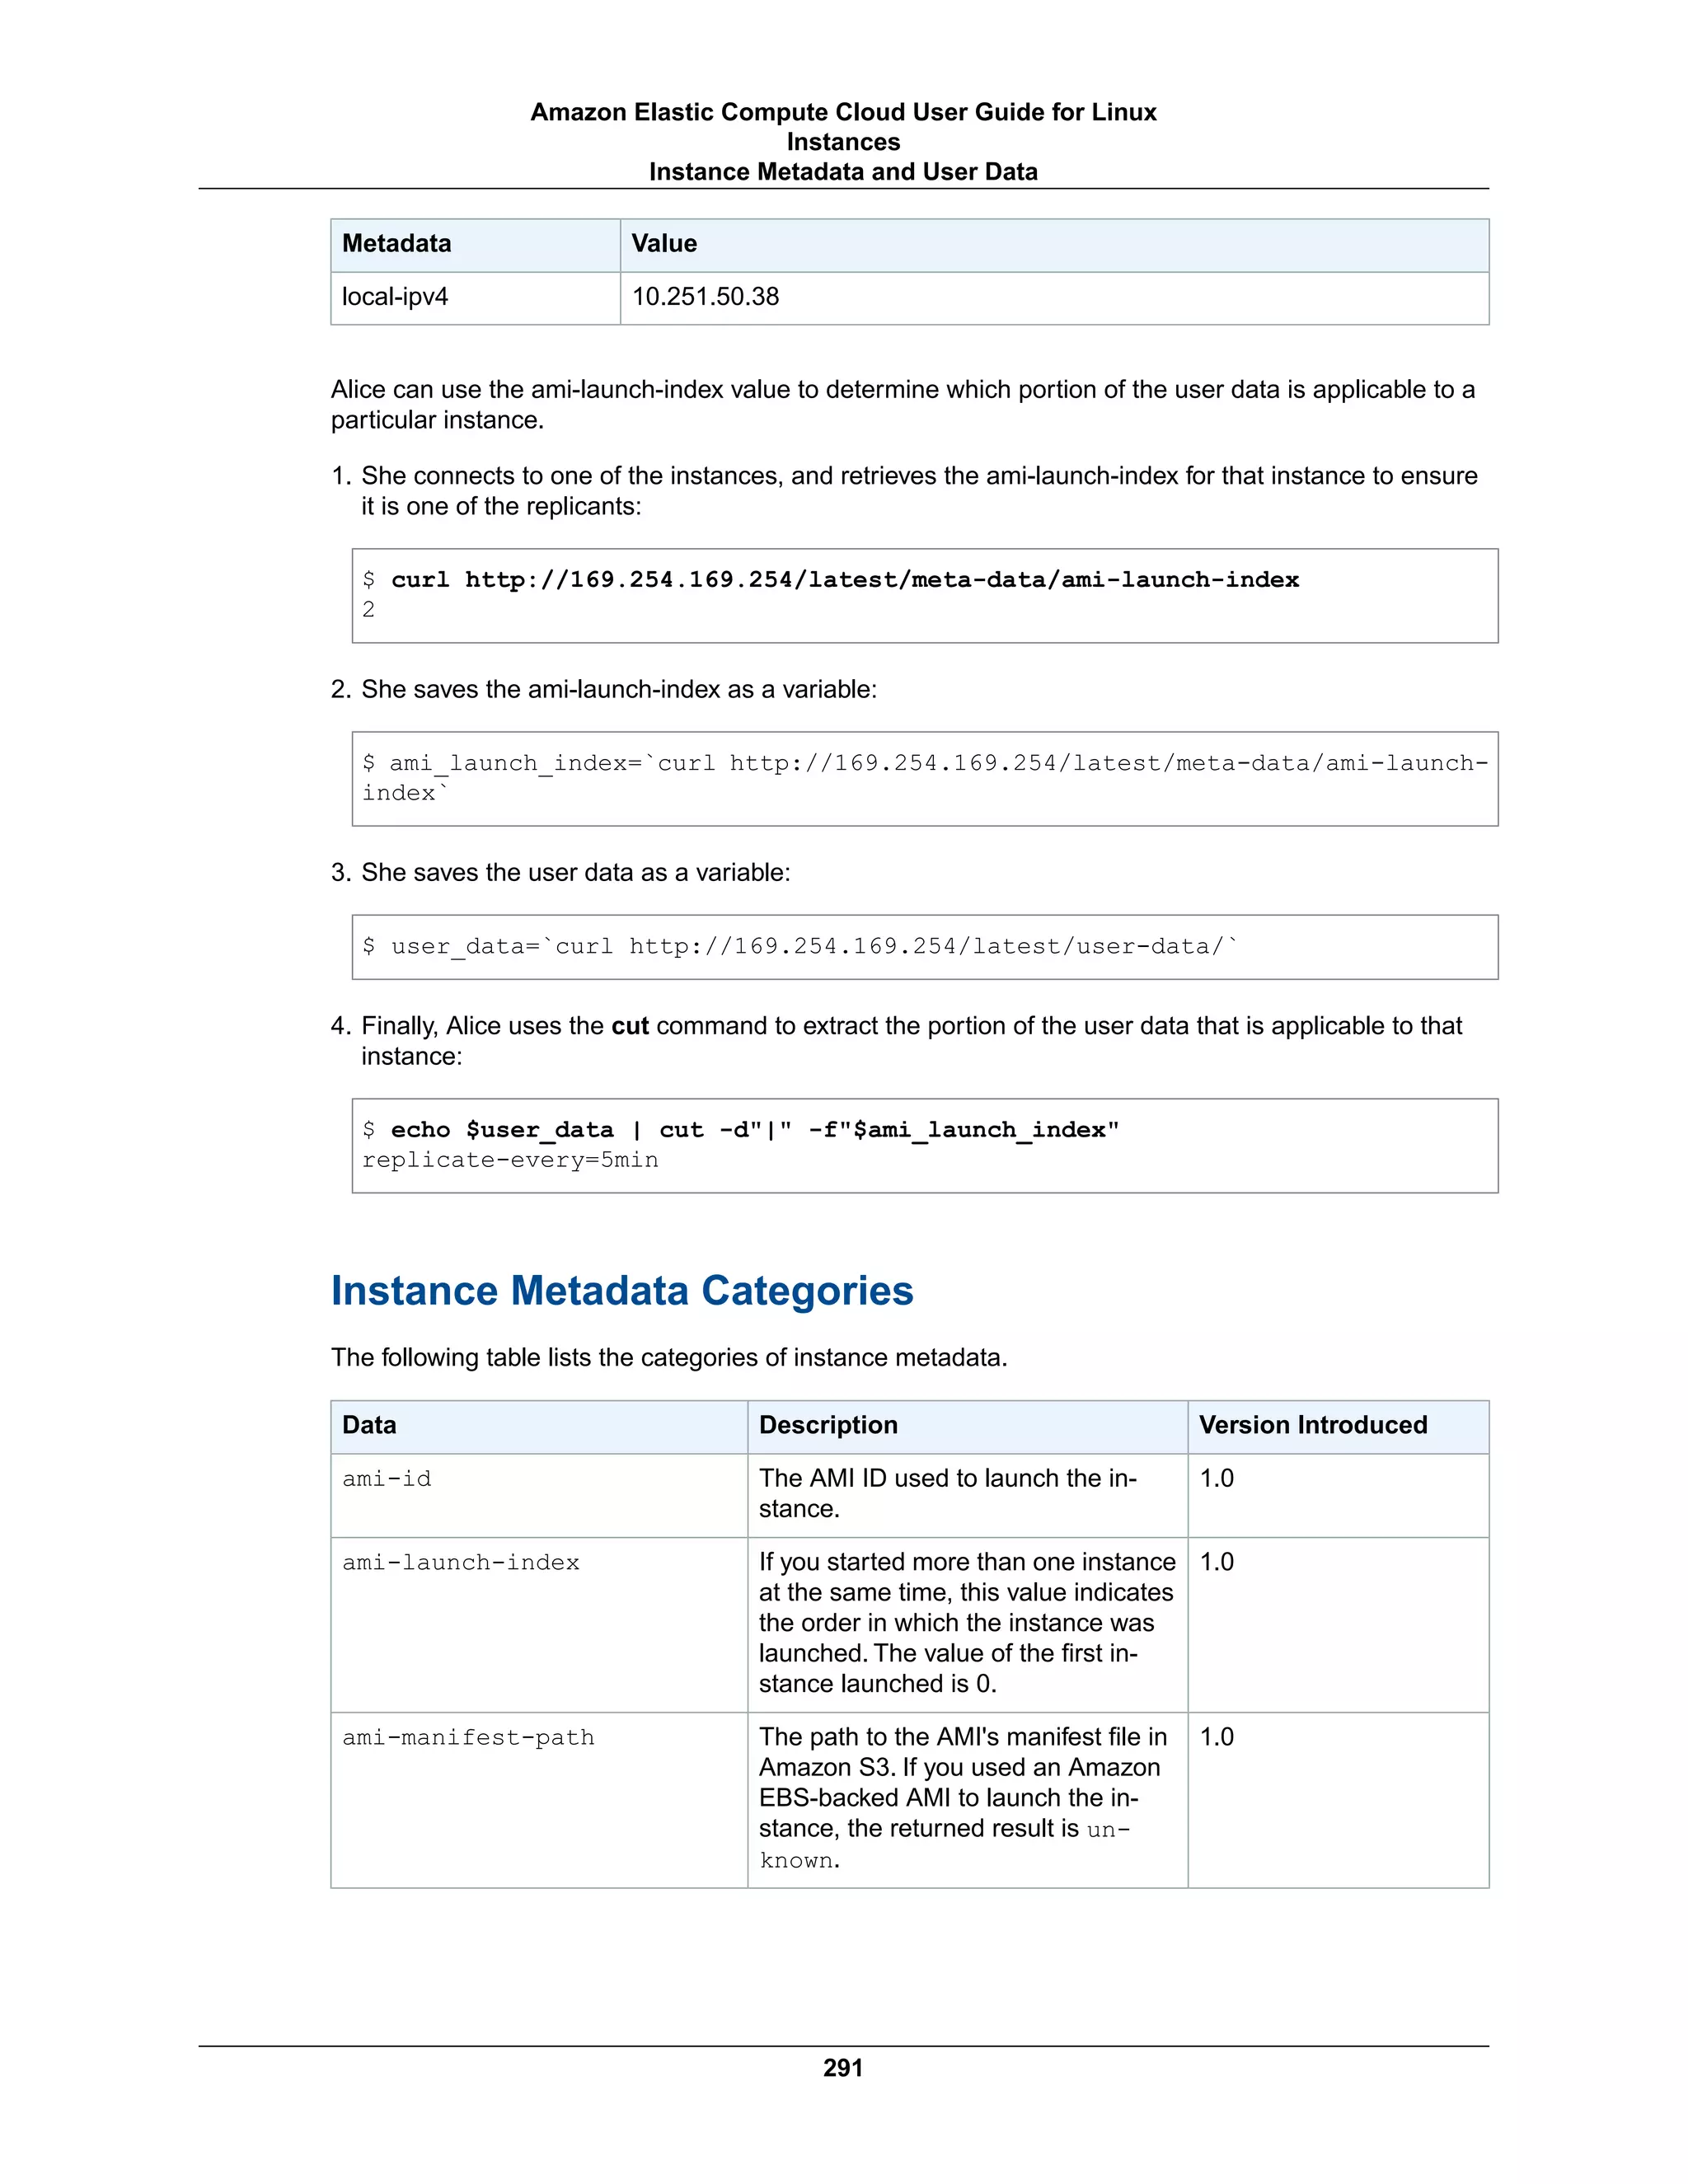
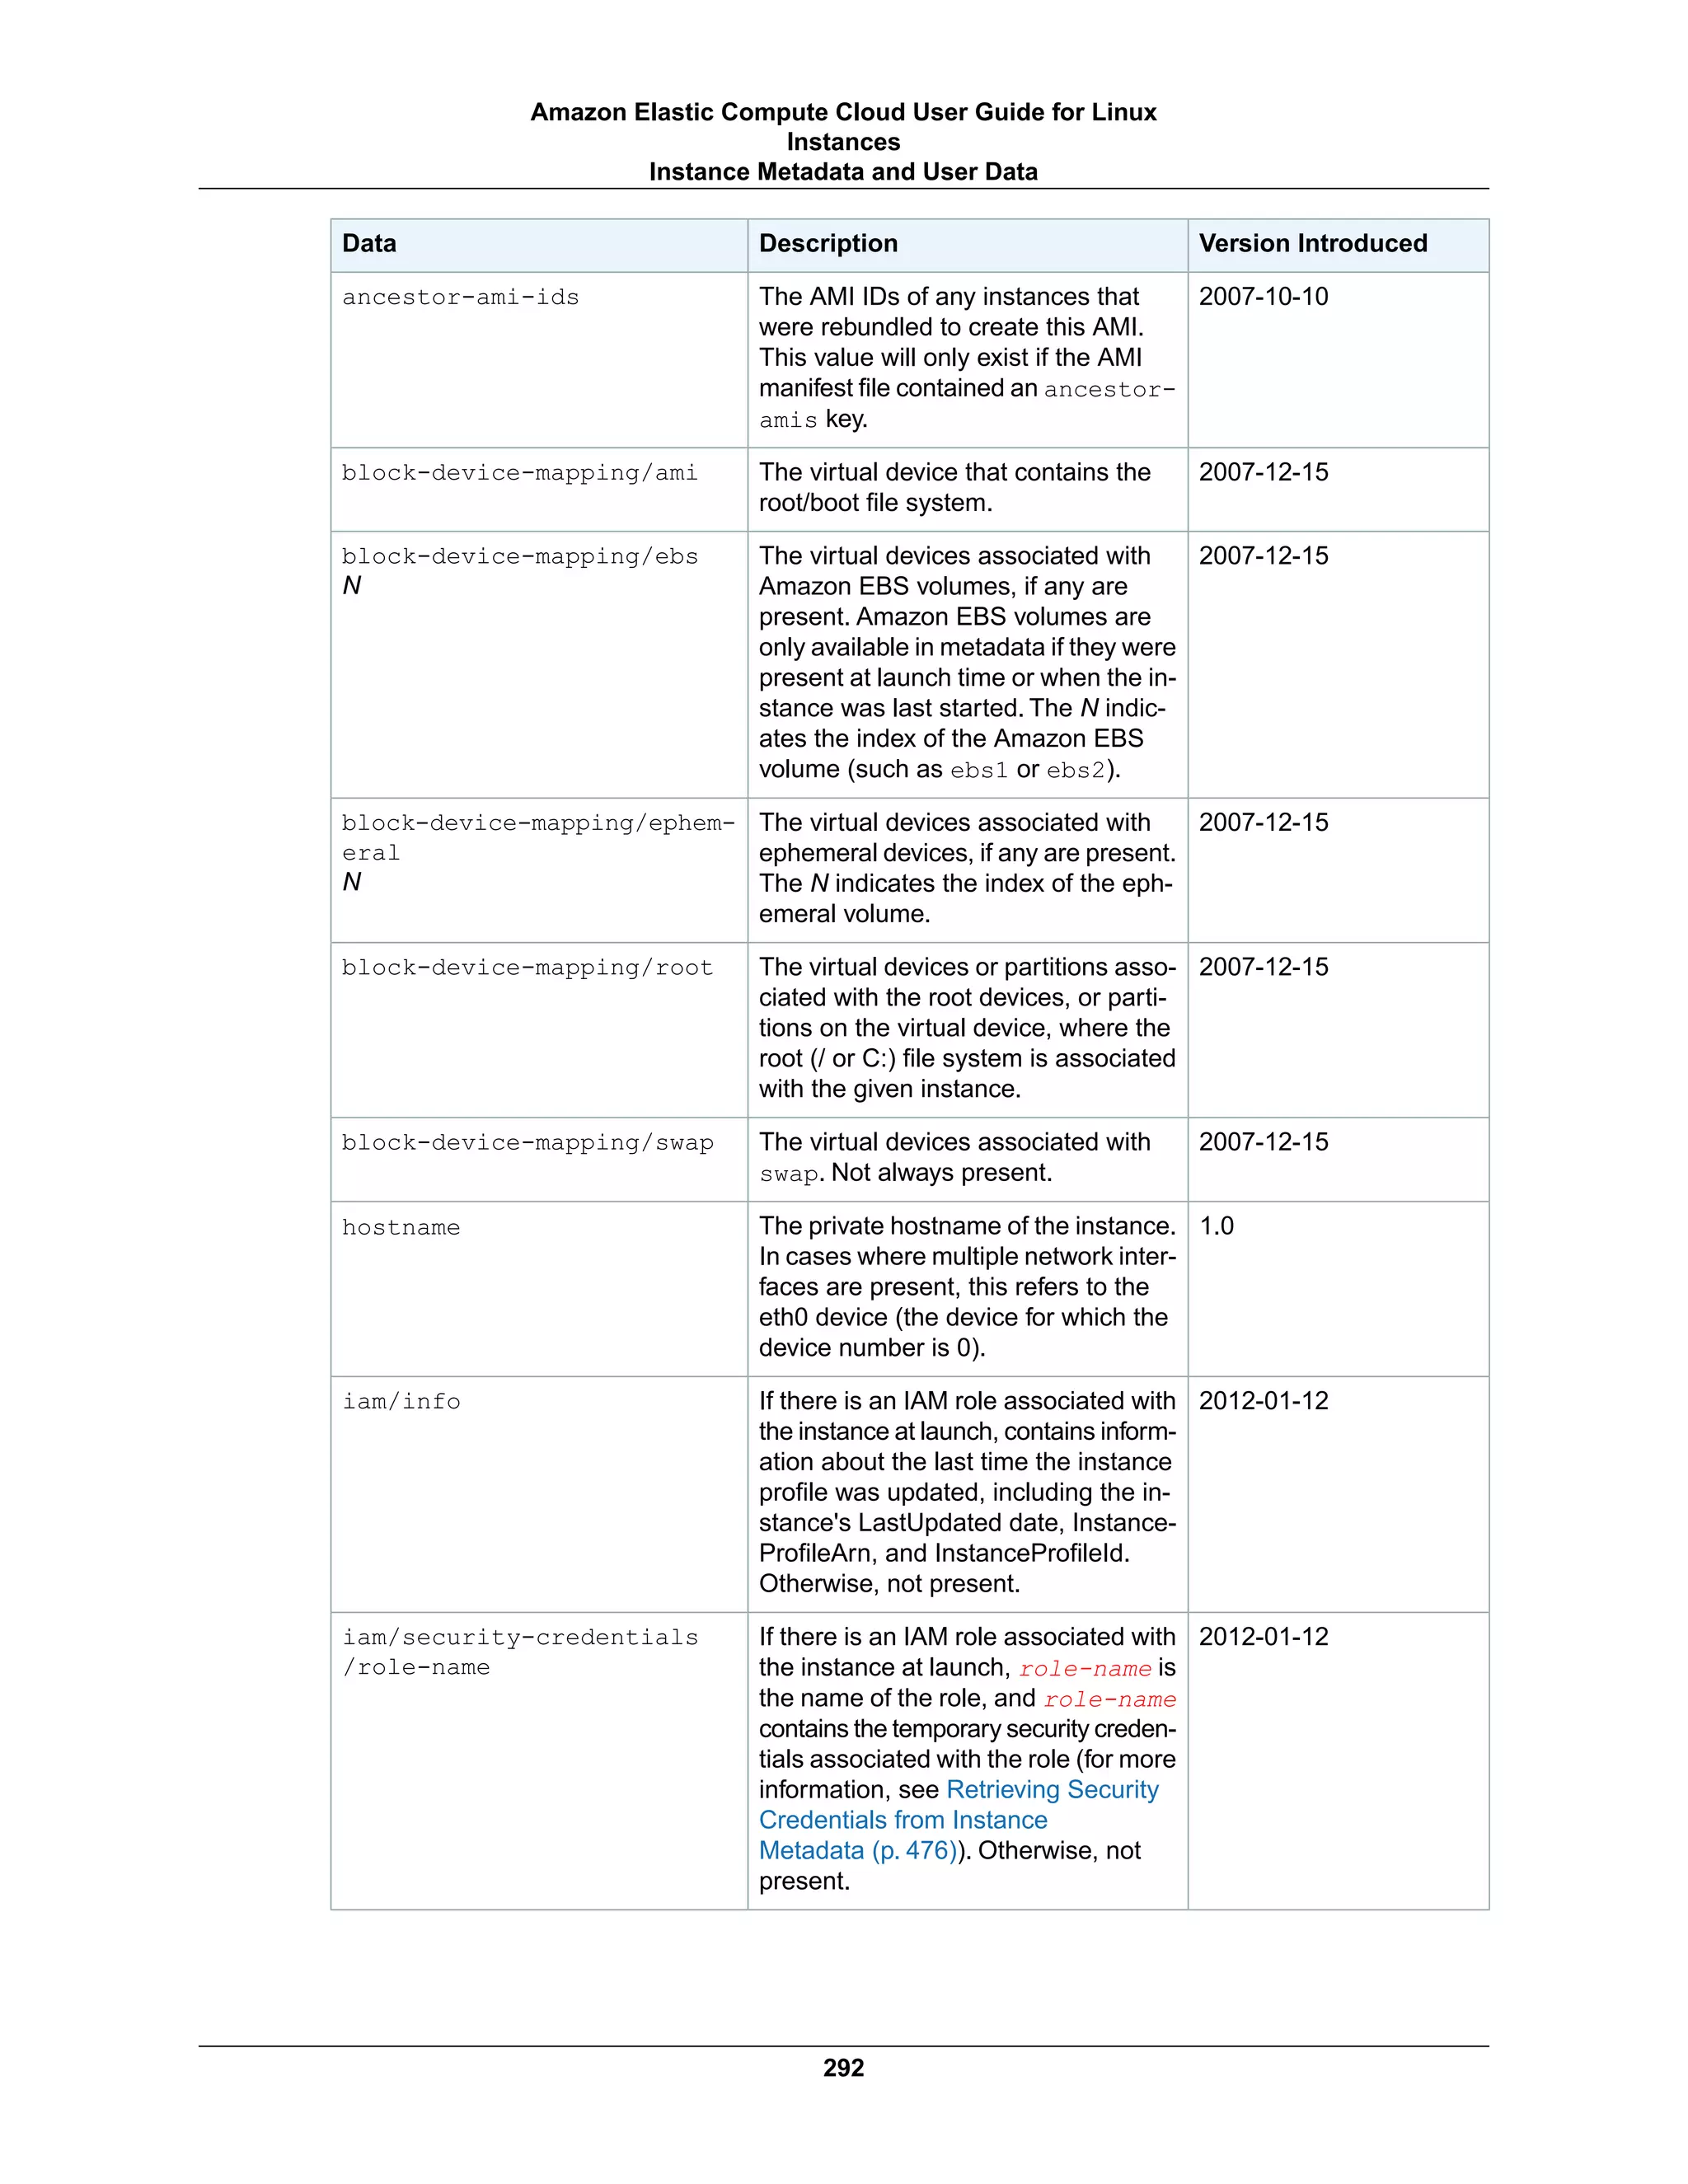


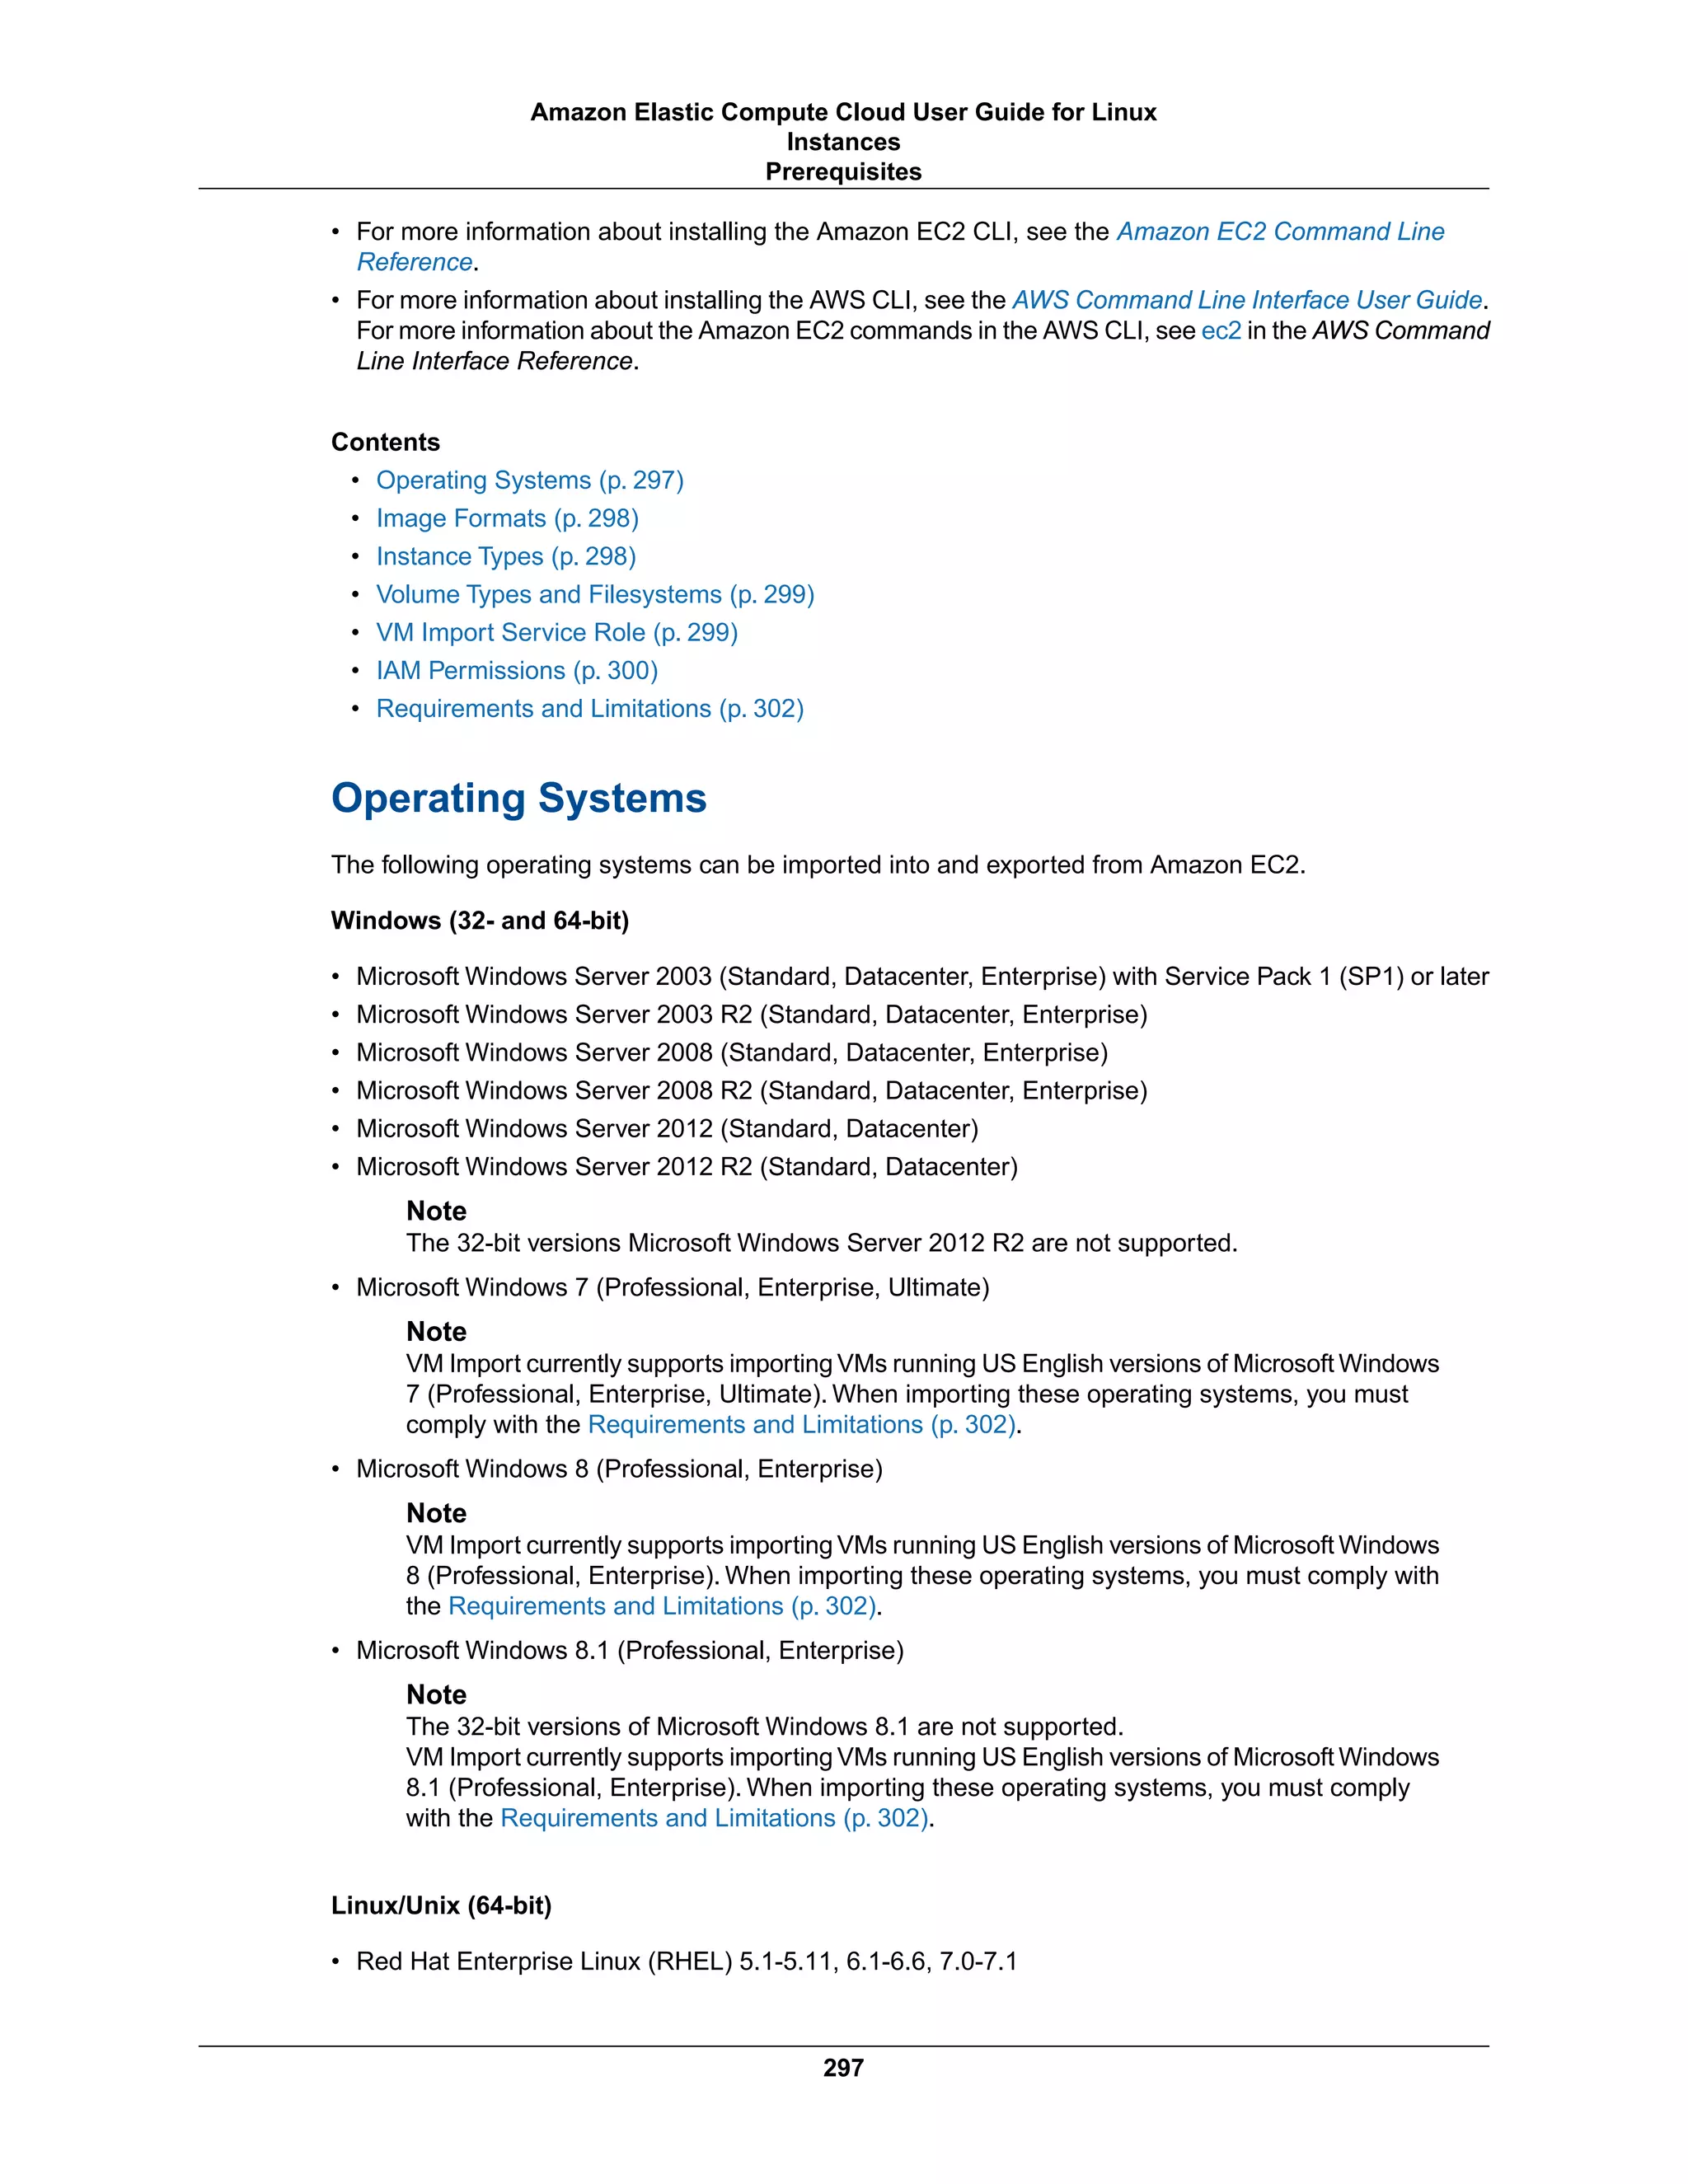

![• General purpose: t2.micro | t2.small | t2.medium | m3.medium | m3.large | m3.xlarge |
m3.2xlarge
• Compute optimized: c3.large | c3.xlarge | c3.2xlarge | c3.4xlarge | cc2.8xlarge
• Memory optimized: cr1.8xlarge
• Storage optimized: hi1.4xlarge | hs1.8xlarge | i2.xlarge | i2.2xlarge | i2.4xlarge
• GPU: cg1.4xlarge
Volume Types and Filesystems
AWS supports importing Windows and Linux instances with the following filesystems:
Windows (32- and 64-bit)
VM Import/Export supports MBR-partitioned volumes that are formatted using the NTFS filesystem. GUID
Partition Table (GPT) partitioned volumes are not supported.
Linux/Unix (64-bit)
VM Import/Export supports MBR-partitioned volumes that are formatted using ext2, ext3, ext4, Btrfs, JFS,
or XFS filesystem. GUID Partition Table (GPT) partitioned volumes are not supported.
VM Import Service Role
VM Import uses a role in your AWS account to perform certain operations (e.g: downloading disk images
from an Amazon S3 bucket).You must create a role with the name vmimport with the following policy
and trusted entities. Create a file named trust-policy.json with the following policy:
{
"Version":"2012-10-17",
"Statement":[
{
"Sid":"",
"Effect":"Allow",
"Principal":{
"Service":"vmie.amazonaws.com"
},
"Action":"sts:AssumeRole",
"Condition":{
"StringEquals":{
"sts:ExternalId":"vmimport"
}
}
}
]
}
Use the aws iam create-role command to create a role named vmimport and give VM Import/Export
access to it.
Note
The external id must be named vmimport.
aws iam create-role --role-name vmimport --assume-role-policy-document
file://trust-policy.json
299
Amazon Elastic Compute Cloud User Guide for Linux
Instances
Prerequisites](https://image.slidesharecdn.com/ec2-ug-151130152858-lva1-app6892/75/Amazan-Ec2-308-2048.jpg)
![Note
You must include file:// before the policy document name (e.g., file://trust-policy.json), or the
command will return the error "A client error (MalformedPolicyDocument) occurred when calling
the CreateRole operation: Syntax errors in policy."
Creating a policy for the service role
Create a file named role-policy.json with the following policy:
{
"Version":"2012-10-17",
"Statement":[
{
"Effect":"Allow",
"Action":[
"s3:ListBucket",
"s3:GetBucketLocation"
],
"Resource":[
"arn:aws:s3:::<disk-image-file-bucket>"
]
},
{
"Effect":"Allow",
"Action":[
"s3:GetObject"
],
"Resource":[
"arn:aws:s3:::<disk-image-file-bucket>/*"
]
},
{
"Effect":"Allow",
"Action":[
"ec2:ModifySnapshotAttribute",
"ec2:CopySnapshot",
"ec2:RegisterImage",
"ec2:Describe*"
],
"Resource":"*"
}
]
}
Replace <disk-image-file-bucket> with the appropriate Amazon S3 bucket where the disk files are
stored. Run the following command to attach the policy to the role created above:
aws iam put-role-policy --role-name vmimport --policy-name vmimport --policy-
document file://role-policy.json
For more information about IAM roles, see IAM Roles (Delegation and Federation) in the IAM User Guide.
IAM Permissions
If you're logged on as an AWS Identity and Access Management (IAM) user, you'll need the following
permissions in your IAM policy to import or export a VM:
300
Amazon Elastic Compute Cloud User Guide for Linux
Instances
Prerequisites](https://image.slidesharecdn.com/ec2-ug-151130152858-lva1-app6892/75/Amazan-Ec2-309-2048.jpg)
![{
"Version": "2012-10-17",
"Statement": [
{
"Effect": "Allow",
"Action": [
"s3:ListAllMyBuckets"
],
"Resource": "*"
},
{
"Effect": "Allow",
"Action": [
"s3:CreateBucket",
"s3:DeleteBucket",
"s3:DeleteObject",
"s3:GetBucketLocation",
"s3:GetObject",
"s3:ListBucket",
"s3:PutObject"
],
"Resource": ["arn:aws:s3:::mys3bucket","arn:aws:s3:::mys3bucket/*"]
},
{
"Effect": "Allow",
"Action": [
"ec2:CancelConversionTask",
"ec2:CancelExportTask",
"ec2:CreateImage",
"ec2:CreateInstanceExportTask",
"ec2:CreateTags",
"ec2:DeleteTags",
"ec2:DescribeConversionTasks",
"ec2:DescribeExportTasks",
"ec2:DescribeInstanceAttribute",
"ec2:DescribeInstanceStatus",
"ec2:DescribeInstances",
"ec2:DescribeTags",
"ec2:ImportInstance",
"ec2:ImportVolume",
"ec2:StartInstances",
"ec2:StopInstances",
"ec2:TerminateInstances",
"ec2:ImportImage",
"ec2:ImportSnapshot",
"ec2:DescribeImportImageTasks",
"ec2:DescribeImportSnapshotTasks",
"ec2:CancelImportTask"
],
"Resource": "*"
}
]
}
For more information about IAM users and policies, see IAM Users and Groups and Managing IAM
Policies in the IAM User Guide.
301
Amazon Elastic Compute Cloud User Guide for Linux
Instances
Prerequisites](https://image.slidesharecdn.com/ec2-ug-151130152858-lva1-app6892/75/Amazan-Ec2-310-2048.jpg)


![$ aws ec2 import-image --cli-input-json "{ "Description": "Windows 2008
OVA", "DiskContainers": [ { "Description": "First CLI task", "UserBuck
et": { "S3Bucket": "my-import-bucket", "S3Key" : "my-windows-2008-
vm.ova" } } ]}"
Example response
<ImportImageResponse xmlns="http://ec2.amazonaws.com/doc/2015-03-01/">
<progress>2</progress>
<importTaskId>import-ami-fgxn195v</importTaskId>
<status>active</status>
<description>Windows 2008 OVA</description>
<snapshotTaskDetailSet>
<item>
<diskImageSize>0.0</diskImageSize>
<userBucket>
<s3Bucket>my-import-bucket</s3Bucket>
<s3Key>my-windows-2008-vm.ova</s3Key>
</userBucket>
</item>
</snapshotTaskDetailSet>
<licenseType>AWS</licenseType>
<statusMessage>pending</statusMessage>
<requestId>1571e127-d6d8-4984-b4f1-3a21e9dbdcb5</requestId>
</ImportImageResponse>
To import a VM with multiple explicit disks into Amazon EC2
After you upload your VM disk images to Amazon S3, you can use the AWS CLI to import your disk
images or snapshots. These tools accept either a URL (public Amazon S3 file, a signed GET URL for
private Amazon S3 files) or the Amazon S3 bucket and path to the disk file.You can also use Amazon
EBS snapshots as input to the ImportImage API.
Example using the aws ec2 import-image command with multiple explicit disks
Use aws ec2 import-image command to a new import instance task.
$ aws ec2 import-image --cli-input-json "{ "Description": "Windows 2008
VMDKs", "DiskContainers": [ { "Description": "Second CLI task", "User
Bucket": { "S3Bucket": "my-import-bucket", "S3Key" : "my-windows-2008-
vm-disk1.vmdk" } }, { "Description": "First CLI task", "UserBucket": {
"S3Bucket": "my-import-bucket", "S3Key" : "my-windows-2008-vm-disk2.vmdk"
} } ] }"
Example response
<ImportImageResponse xmlns="http://ec2.amazonaws.com/doc/2015-03-01/">
<progress>2</progress>
<importTaskId>import-ami-fgxn591c</importTaskId>
<status>active</status>
<description>Windows 2008 VMDKs</description>
<snapshotTaskDetailSet>
<item>
<diskImageSize>0.0</diskImageSize>
308
Amazon Elastic Compute Cloud User Guide for Linux
Instances
Importing a VM into Amazon EC2 Using ImportImage](https://image.slidesharecdn.com/ec2-ug-151130152858-lva1-app6892/75/Amazan-Ec2-317-2048.jpg)
![<userBucket>
<s3Bucket>my-import-bucket</s3Bucket>
<s3Key>my-windows-2008-vm-disk1.vmdk</s3Key>
</userBucket>
</item>
<item>
<diskImageSize>0.0</diskImageSize>
<userBucket>
<s3Bucket>my-import-bucket</s3Bucket>
<s3Key>my-windows-2008-vm-disk2.vmdk</s3Key>
</userBucket>
</item>
</snapshotTaskDetailSet>
<licenseType>AWS</licenseType>
<statusMessage>pending</statusMessage>
<requestId>1571e127-d6d8-4984-b4f1-3a21e9dbdcb5</requestId>
</ImportImageResponse>
Checking on the Status of Your Import Image Task
The aws ec2 describe-import-image-tasks command returns the status of an import task. Status
values include the following:
• active—Your task is active and currently in progress.
• deleting—Your task is currently being cancelled.
• deleted—Your task is canceled.
• completed—Your task is complete and the AMI is ready to use.
To check the status of your import task
Use the aws ec2 describe-import-image-tasks command to return the status of the task. The
syntax of the command is as follows:
Example using the aws ec2 describe-import-image-tasks command:
The following example enables you to see the status of your import task.
$ aws ec2 describe-import-image-tasks --cli-input-json "{ "ImportTaskIds":
["import-ami-fgxn195v"], "NextToken": "abc", "MaxResults": 10 } "
Example Response
The following response shows the output from the aws ec2 describe-import-image-tasks command.
<DescribeImportImageTasksResponse xmlns="http://ec2.amazonaws.com/doc/2015-03-
01/">
<importImageTaskSet>
<item>
<platform>Windows</platform>
<importTaskId>import-ami-fgs8im0c</importTaskId>
<imageId>ami-4a6c2722</imageId>
<status>completed</status>
<description>Linux OVA</description>
<architecture>x86_64</architecture>
<snapshotTaskDetailSet>
309
Amazon Elastic Compute Cloud User Guide for Linux
Instances
Importing a VM into Amazon EC2 Using ImportImage](https://image.slidesharecdn.com/ec2-ug-151130152858-lva1-app6892/75/Amazan-Ec2-318-2048.jpg)

![2. Use the aws ec2 describe-import-snapshot-tasks command to confirm that your snapshot
imported successfully.
Example using the aws ec2 describe-import-snapshot-tasks command
$ aws ec2 describe-import-snapshot-tasks --cli-input-json "{ "Import
TaskIds": ["import-snap-fgr1mmg7"], "NextToken": "abc", "MaxResults":
10 } "
Example response
<DescribeImportSnapshotTasksResponse xmlns="http://ec2.amazonaws.com/doc/2015-
03-01/">
<importSnapshotTaskSet>
<item>
<snapshotTaskDetail>
<diskImageSize>3.115815424E9</diskImageSize>
<progress>22</progress>
<status>active</status>
<description>Windows 2008 VMDK</description>
<format>VMDK</format>
<url>https://mys3bucket/vms/Win_2008_Server_Enterprise_R2_64-
bit.vmdk?AWSAccessKeyId=myaccesskey&Expires=expirationdate&Signature=signa
ture</url>
<statusMessage>validated</statusMessage>
</snapshotTaskDetail>
<importTaskId>import-snap-fgr1mmg7</importTaskId>
<description>Windows 2008 VMDK</description>
</item>
</importSnapshotTaskSet>
<requestId>3ec7adc5-001a-454f-abc3-820c8a91c353</requestId>
</DescribeImportSnapshotTasksResponse>
The status in this example is active, which means the import is still ongoing.
3. Use aws ec2 create-volume to create a volume from the Amazon EBS snapshot. The following
example creates a volume from a snapshot. Make sure you select an availability zone where the
instance resides so that the Amazon EBS volume can be attached to the Amazon EC2 instance.
$ aws ec2 create-volume --availability-zone us-east-1a –snapshot-id snap-
abcd1234
Example output
{
"AvailabilityZone": "us-east-1a",
"VolumeId": "vol-1234abcd",
"State": "creating",
"SnapshotId": "snap-abcd1234"
}
4. Use aws ec2 attach-volume to attach the Amazon EBS volume to one of your existing Amazon
EC2 instances.The following example attaches the volume, vol-1234abcd, to the i-abcd1234 instance
on the device, /dev/sdf.
311
Amazon Elastic Compute Cloud User Guide for Linux
Instances
Importing a VM into Amazon EC2 Using ImportImage](https://image.slidesharecdn.com/ec2-ug-151130152858-lva1-app6892/75/Amazan-Ec2-320-2048.jpg)


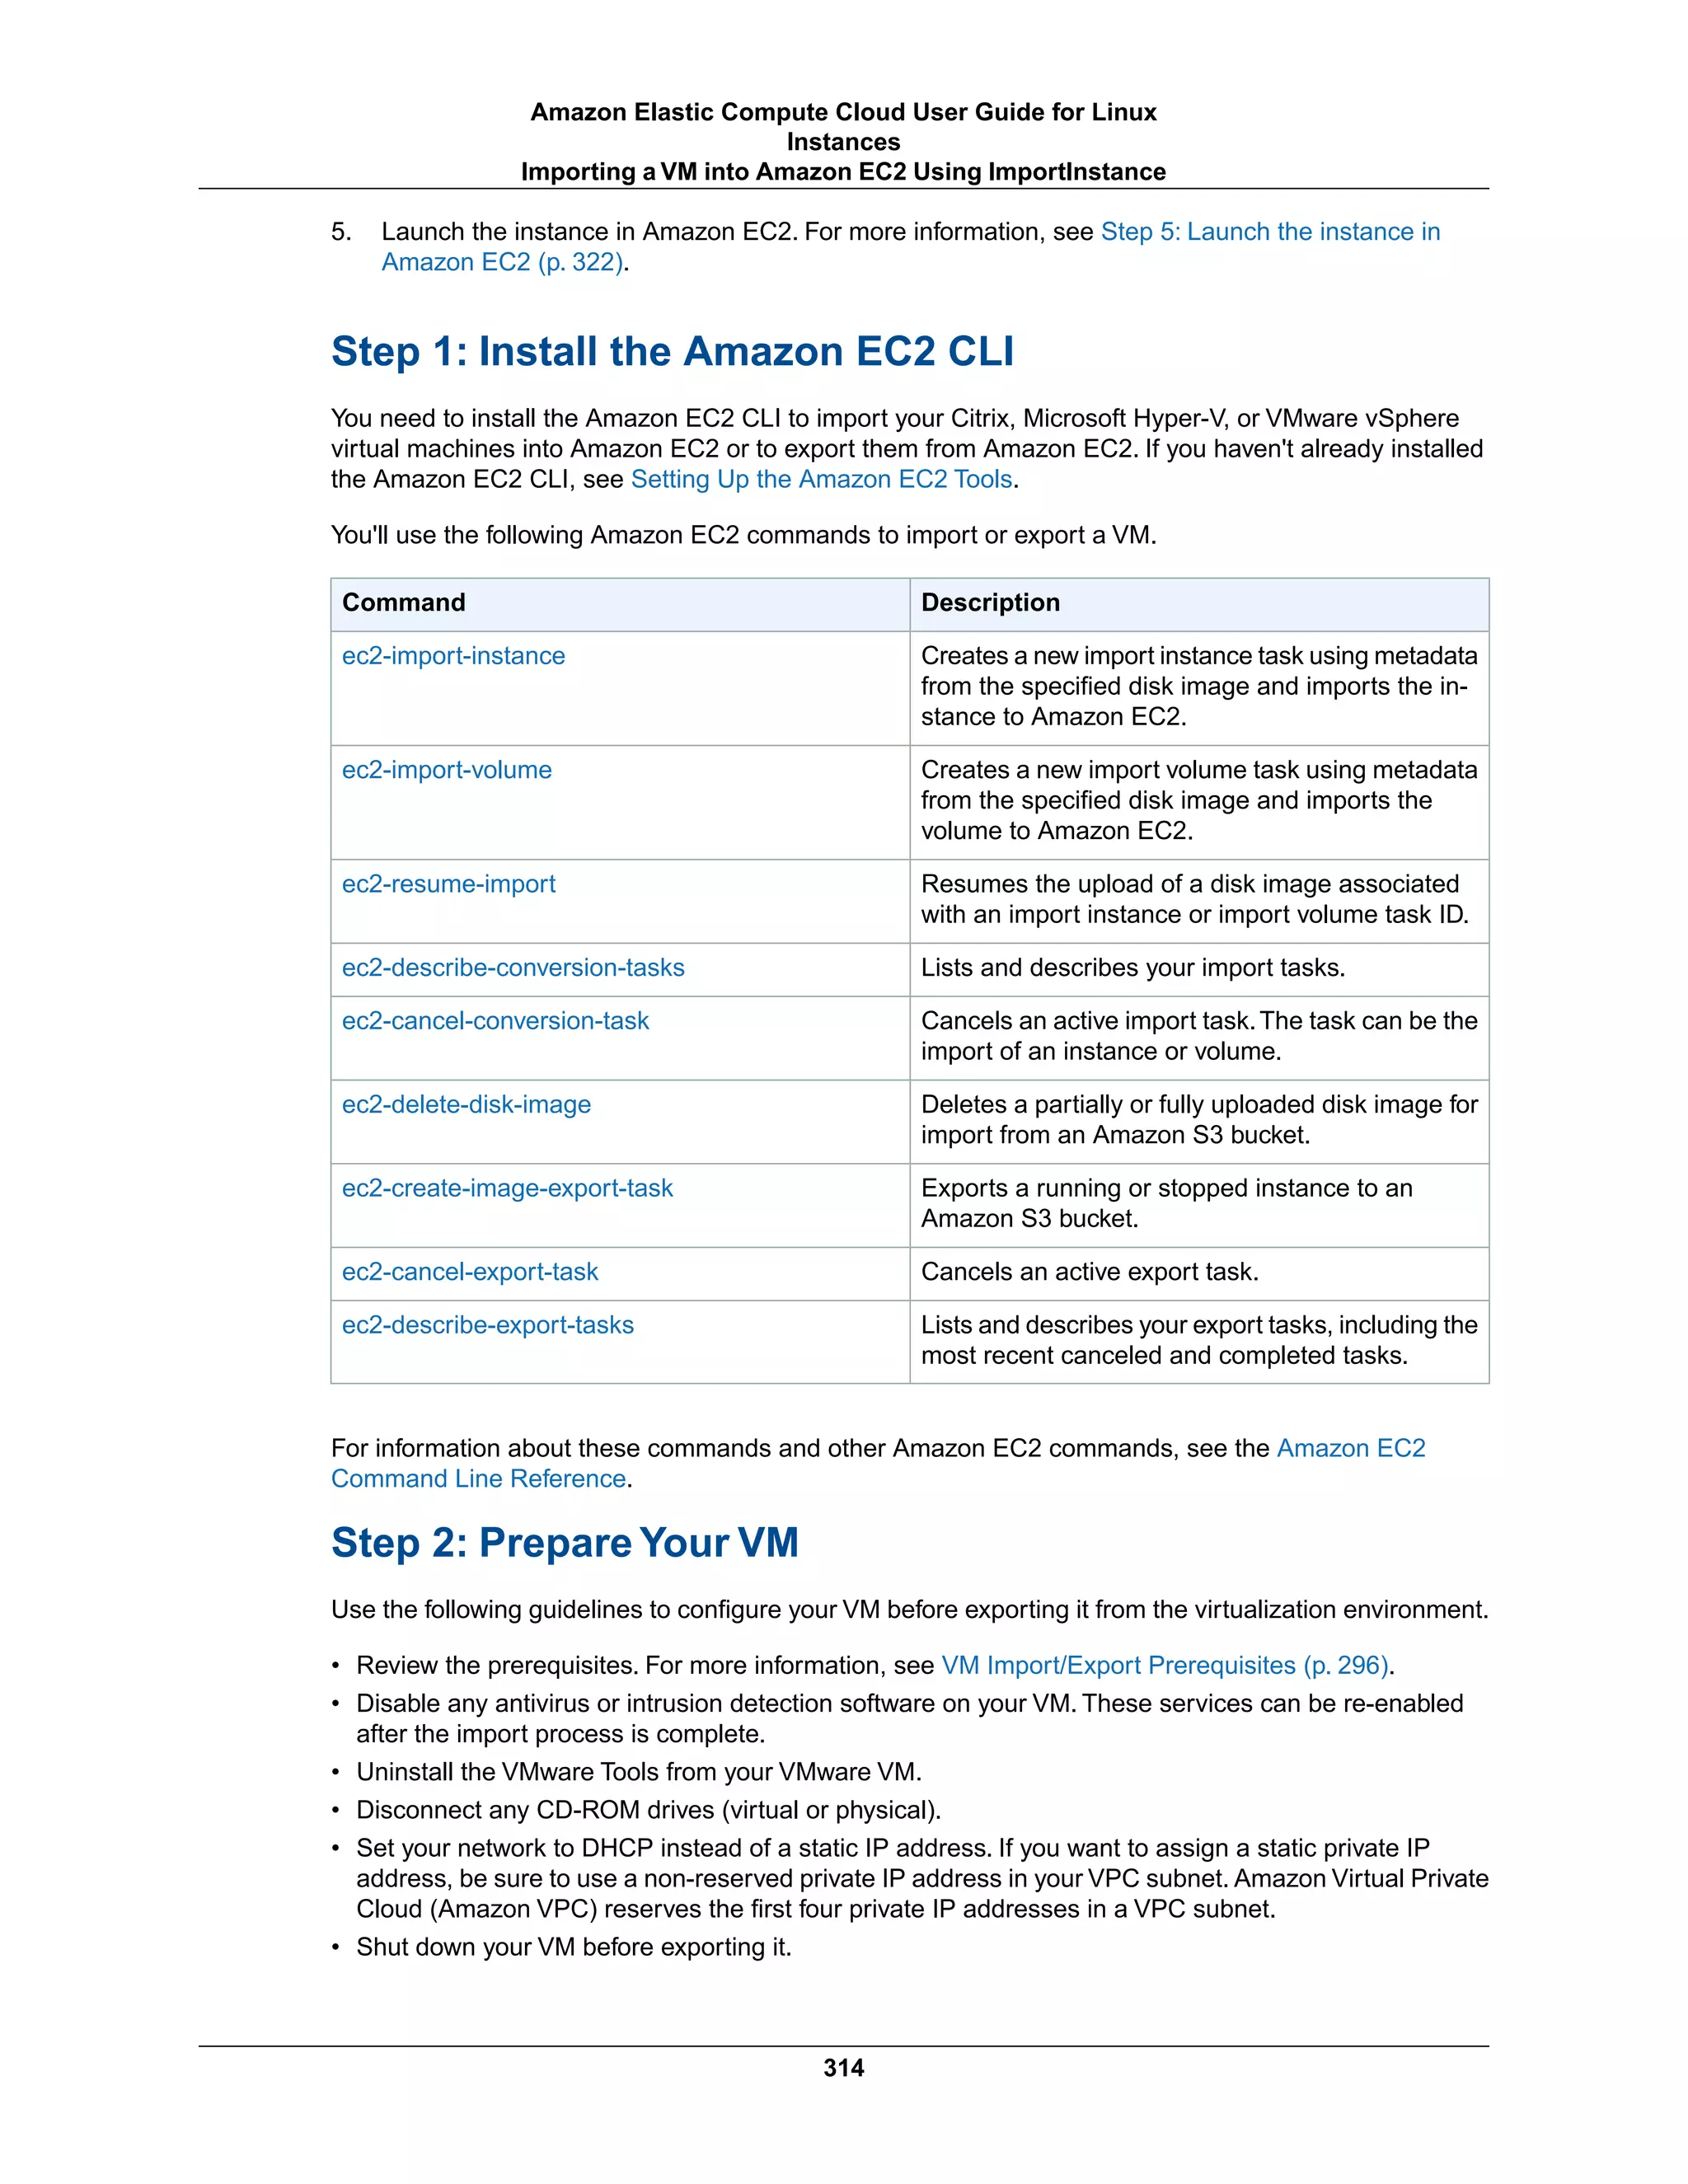
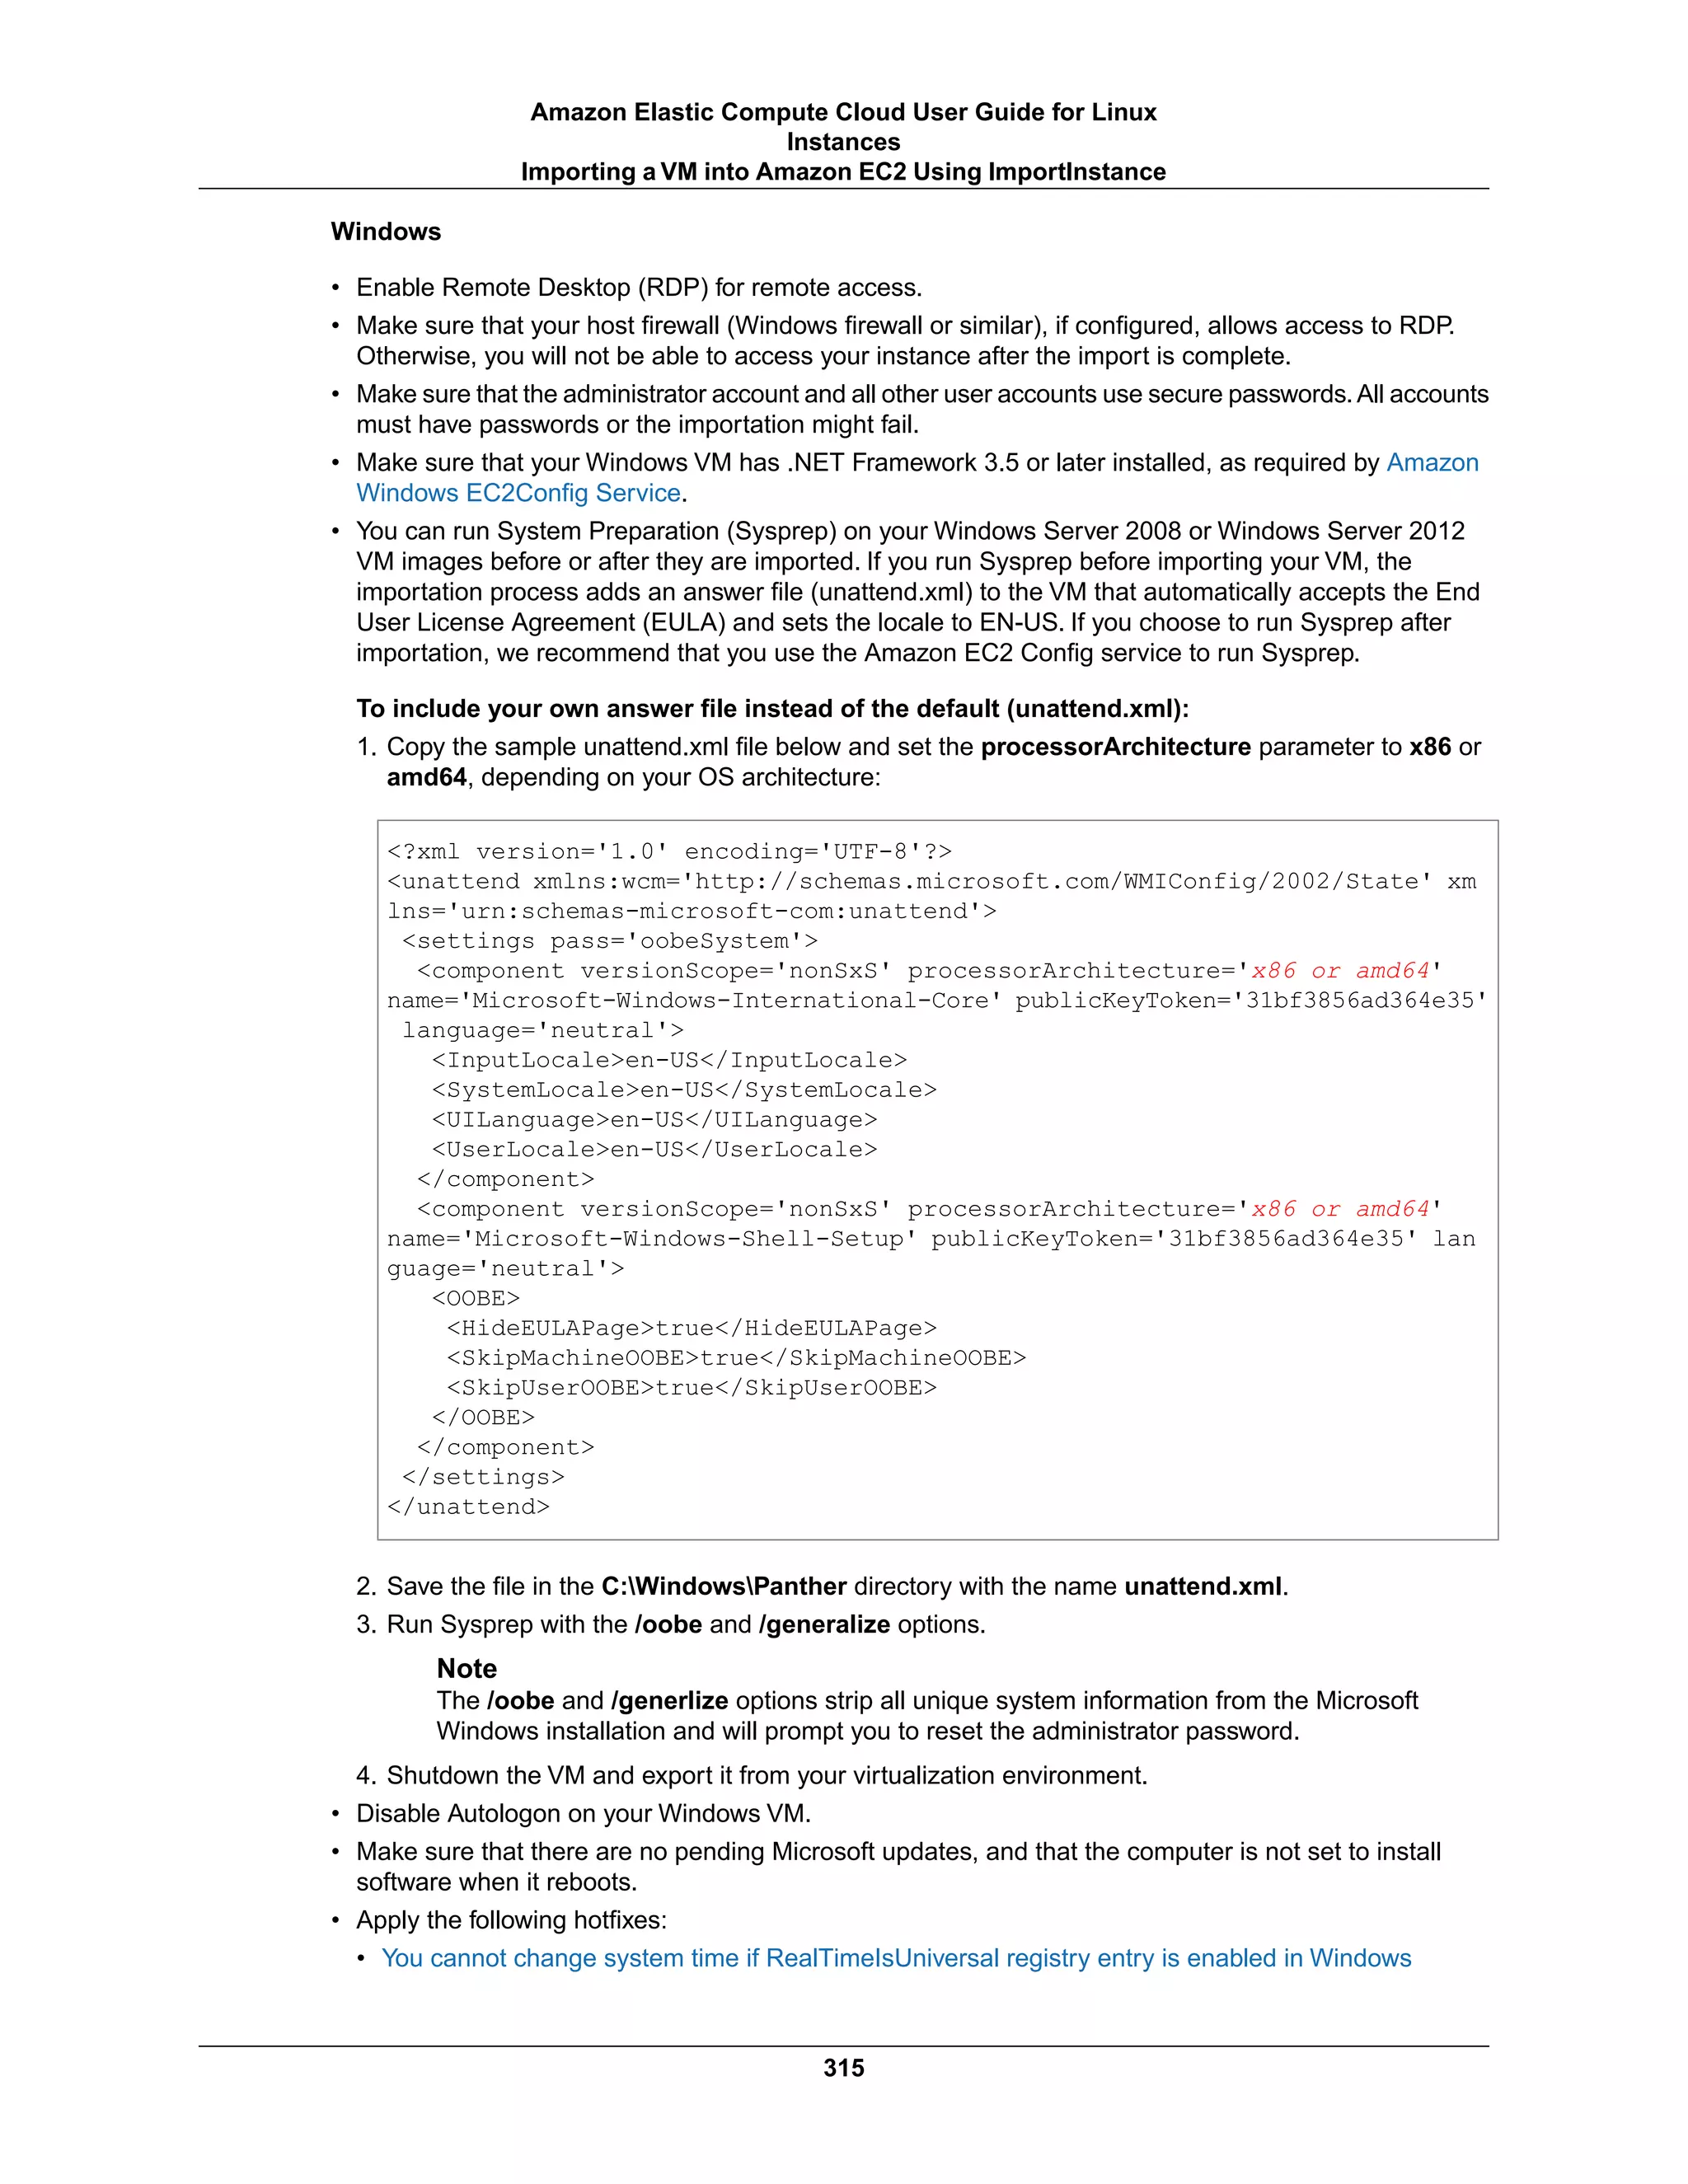


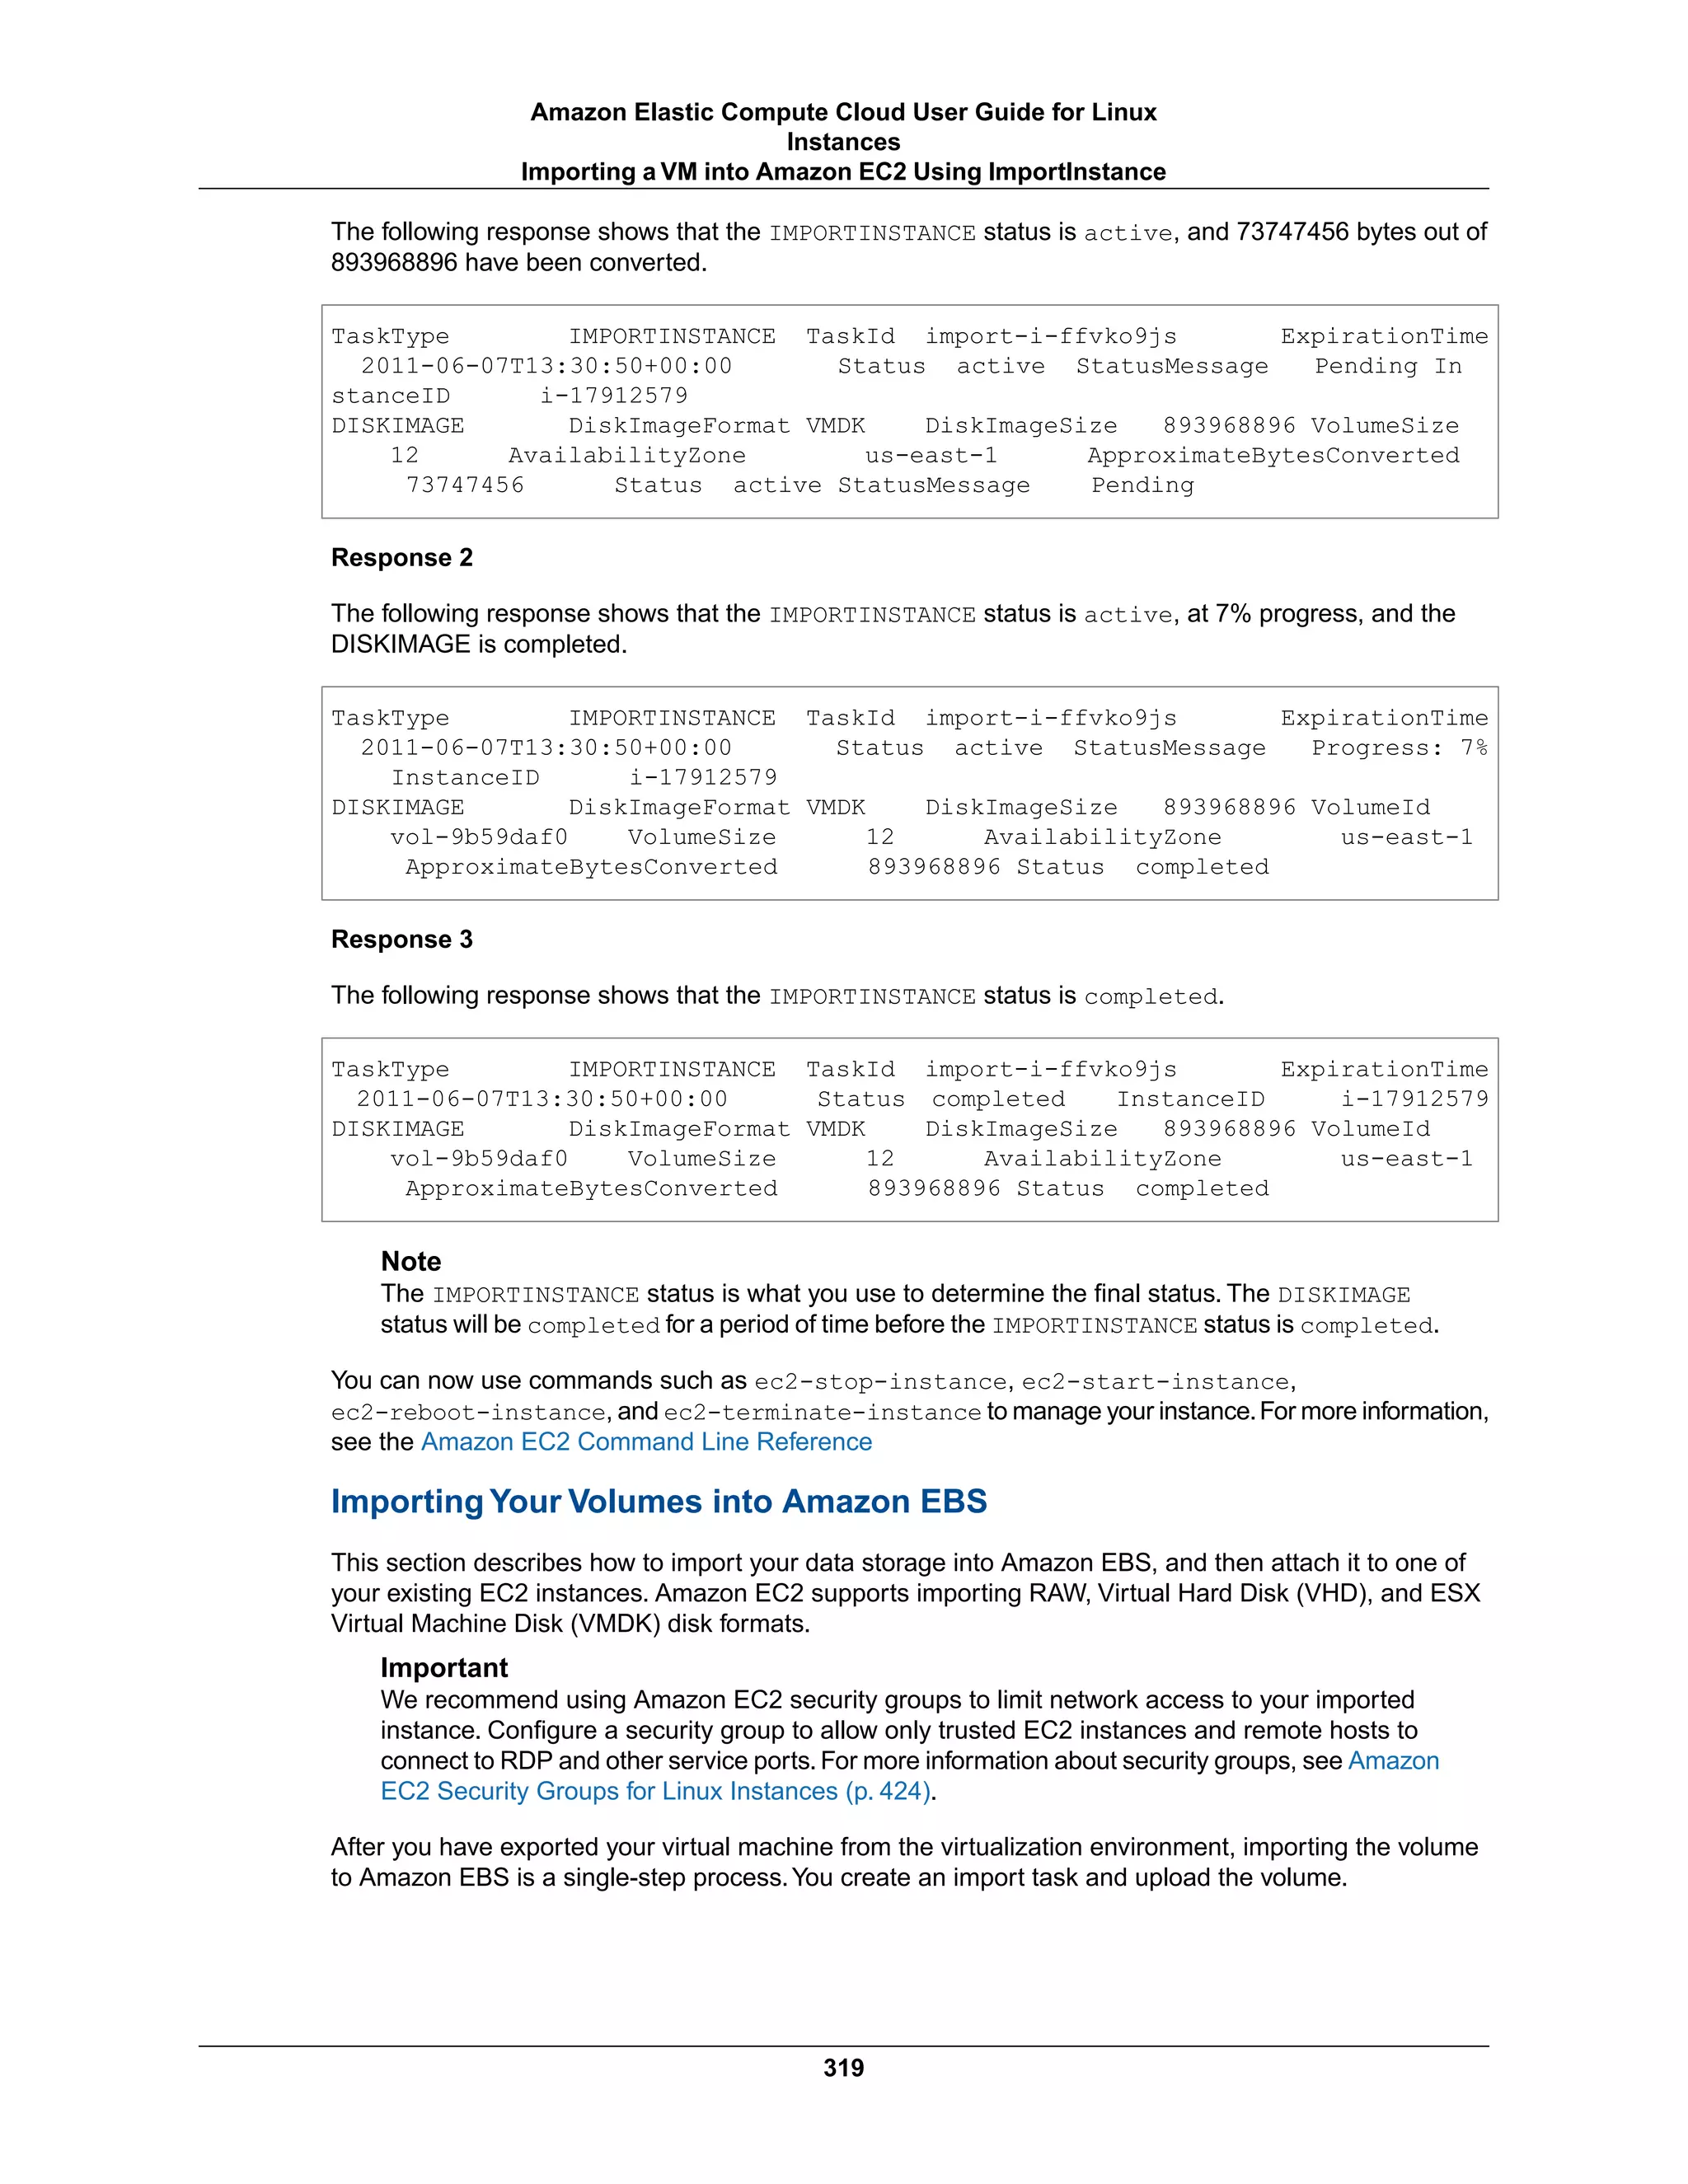

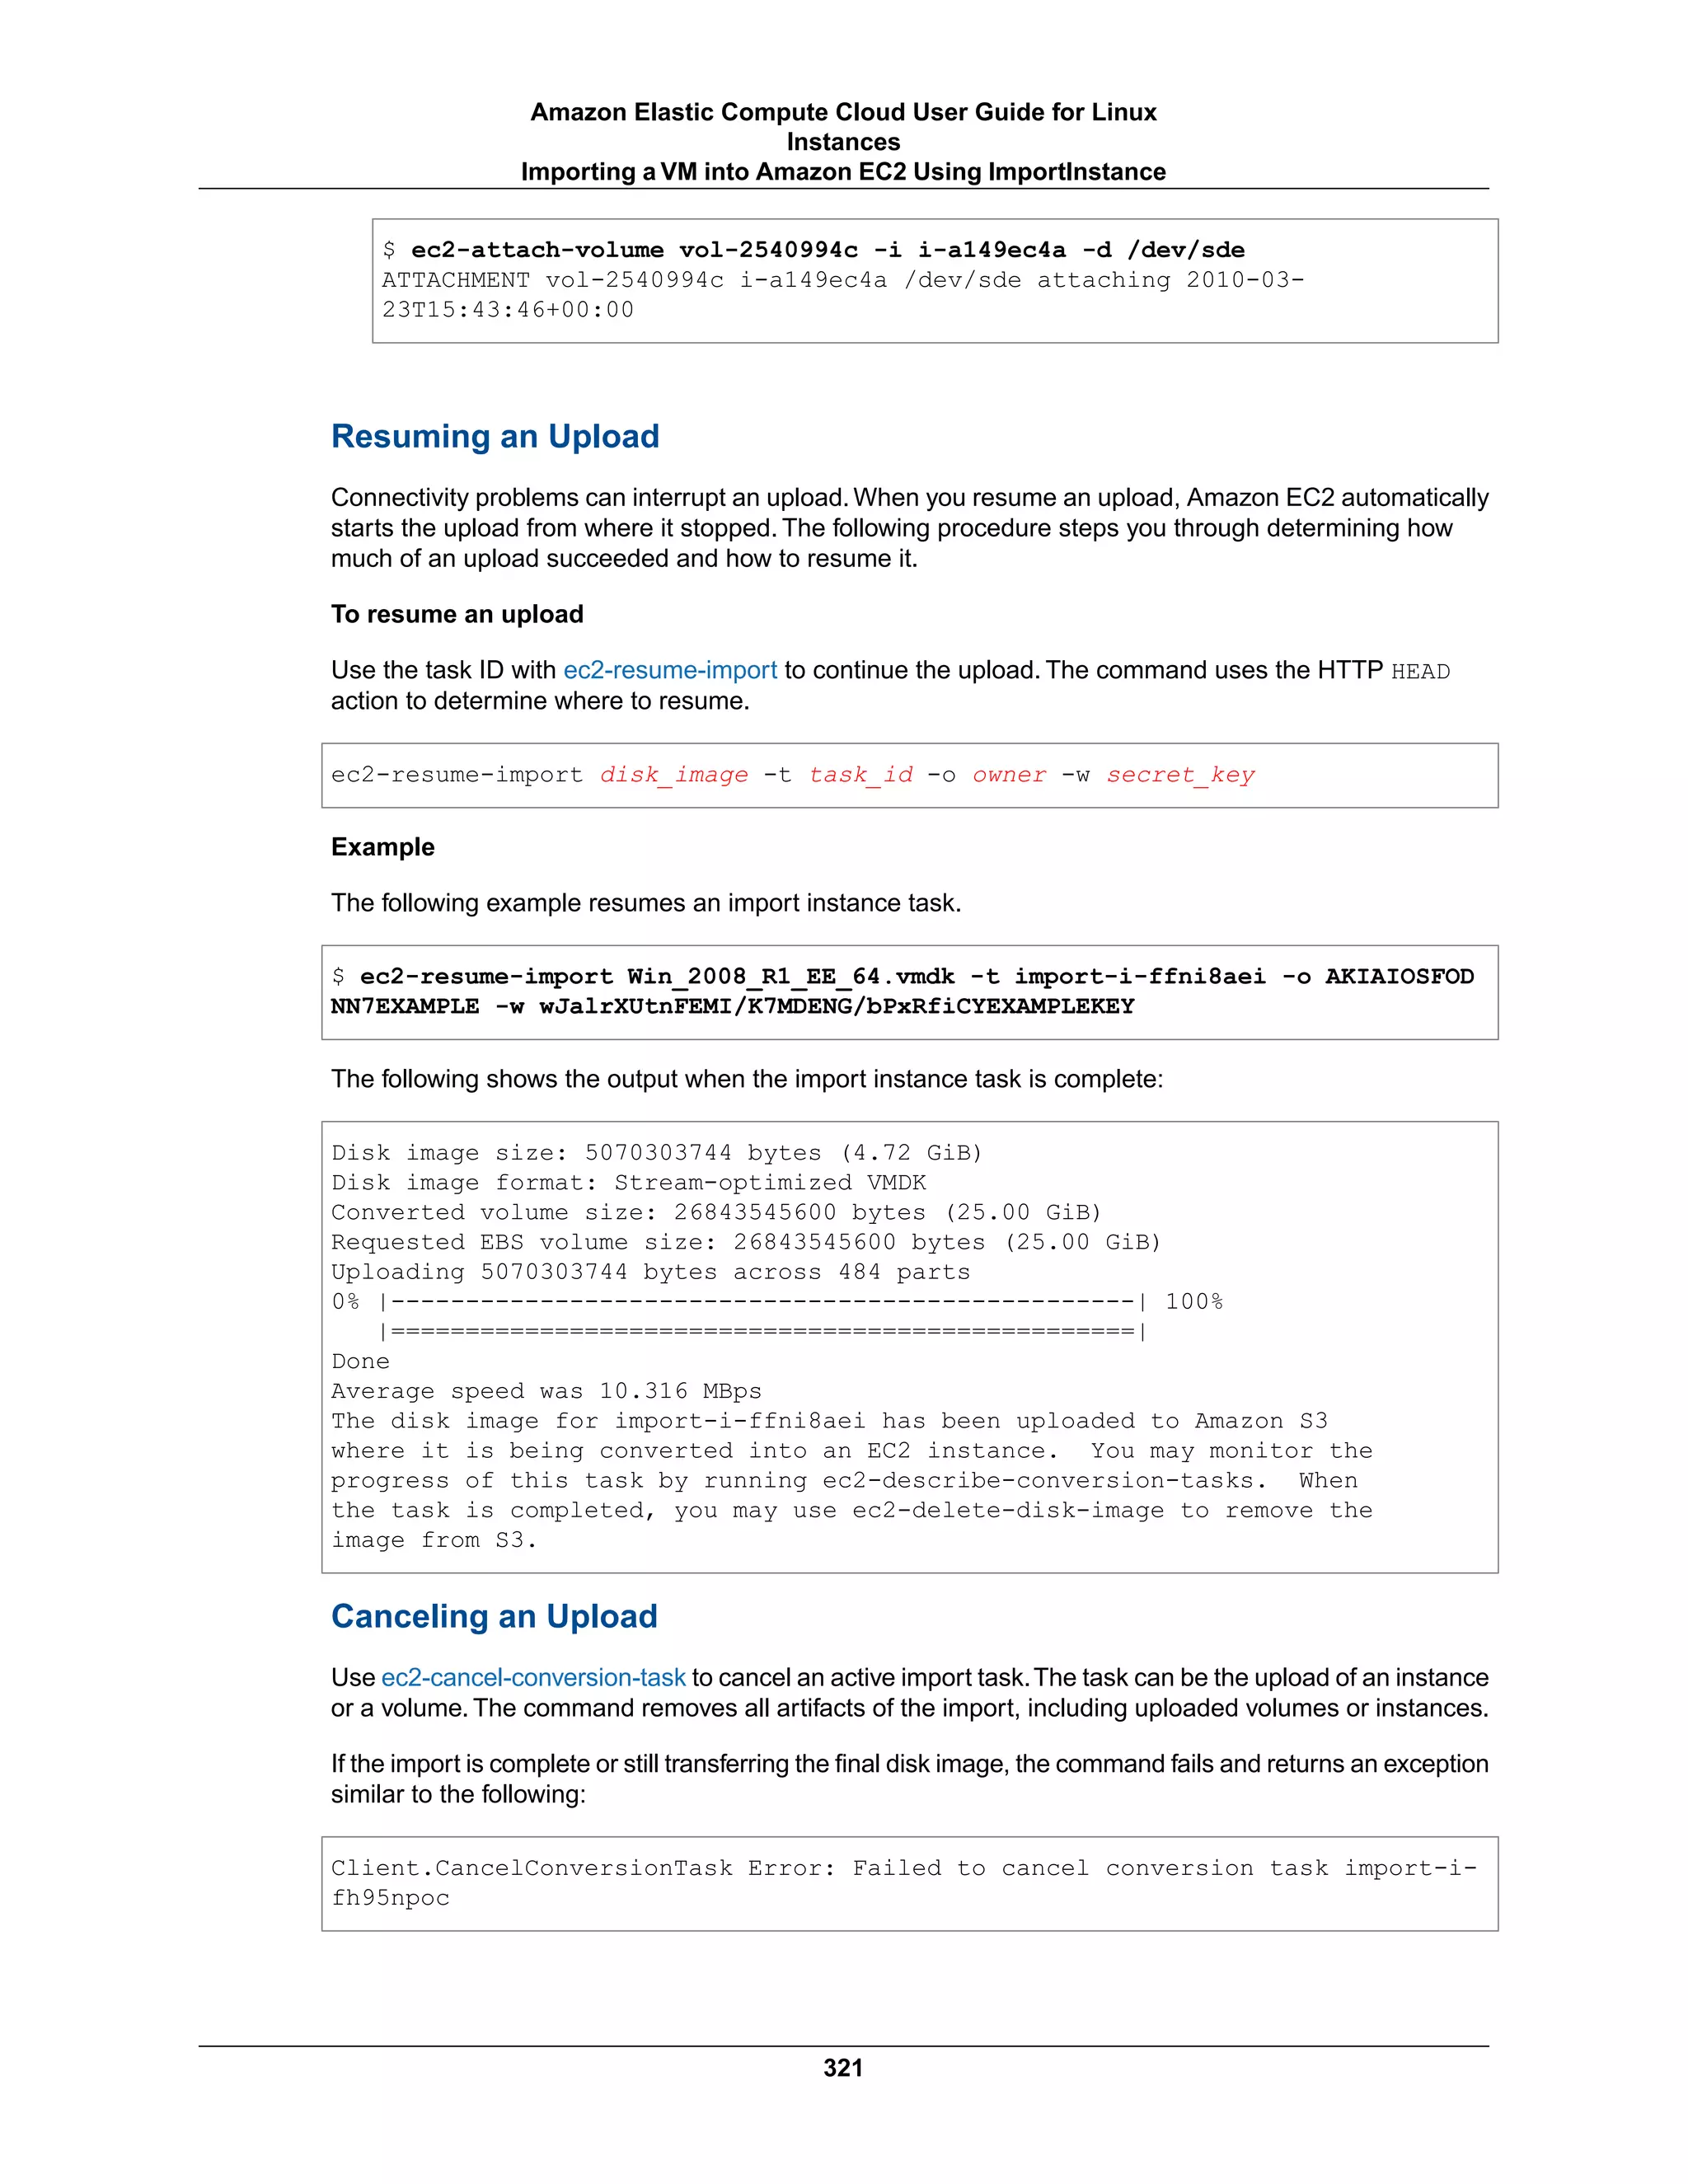


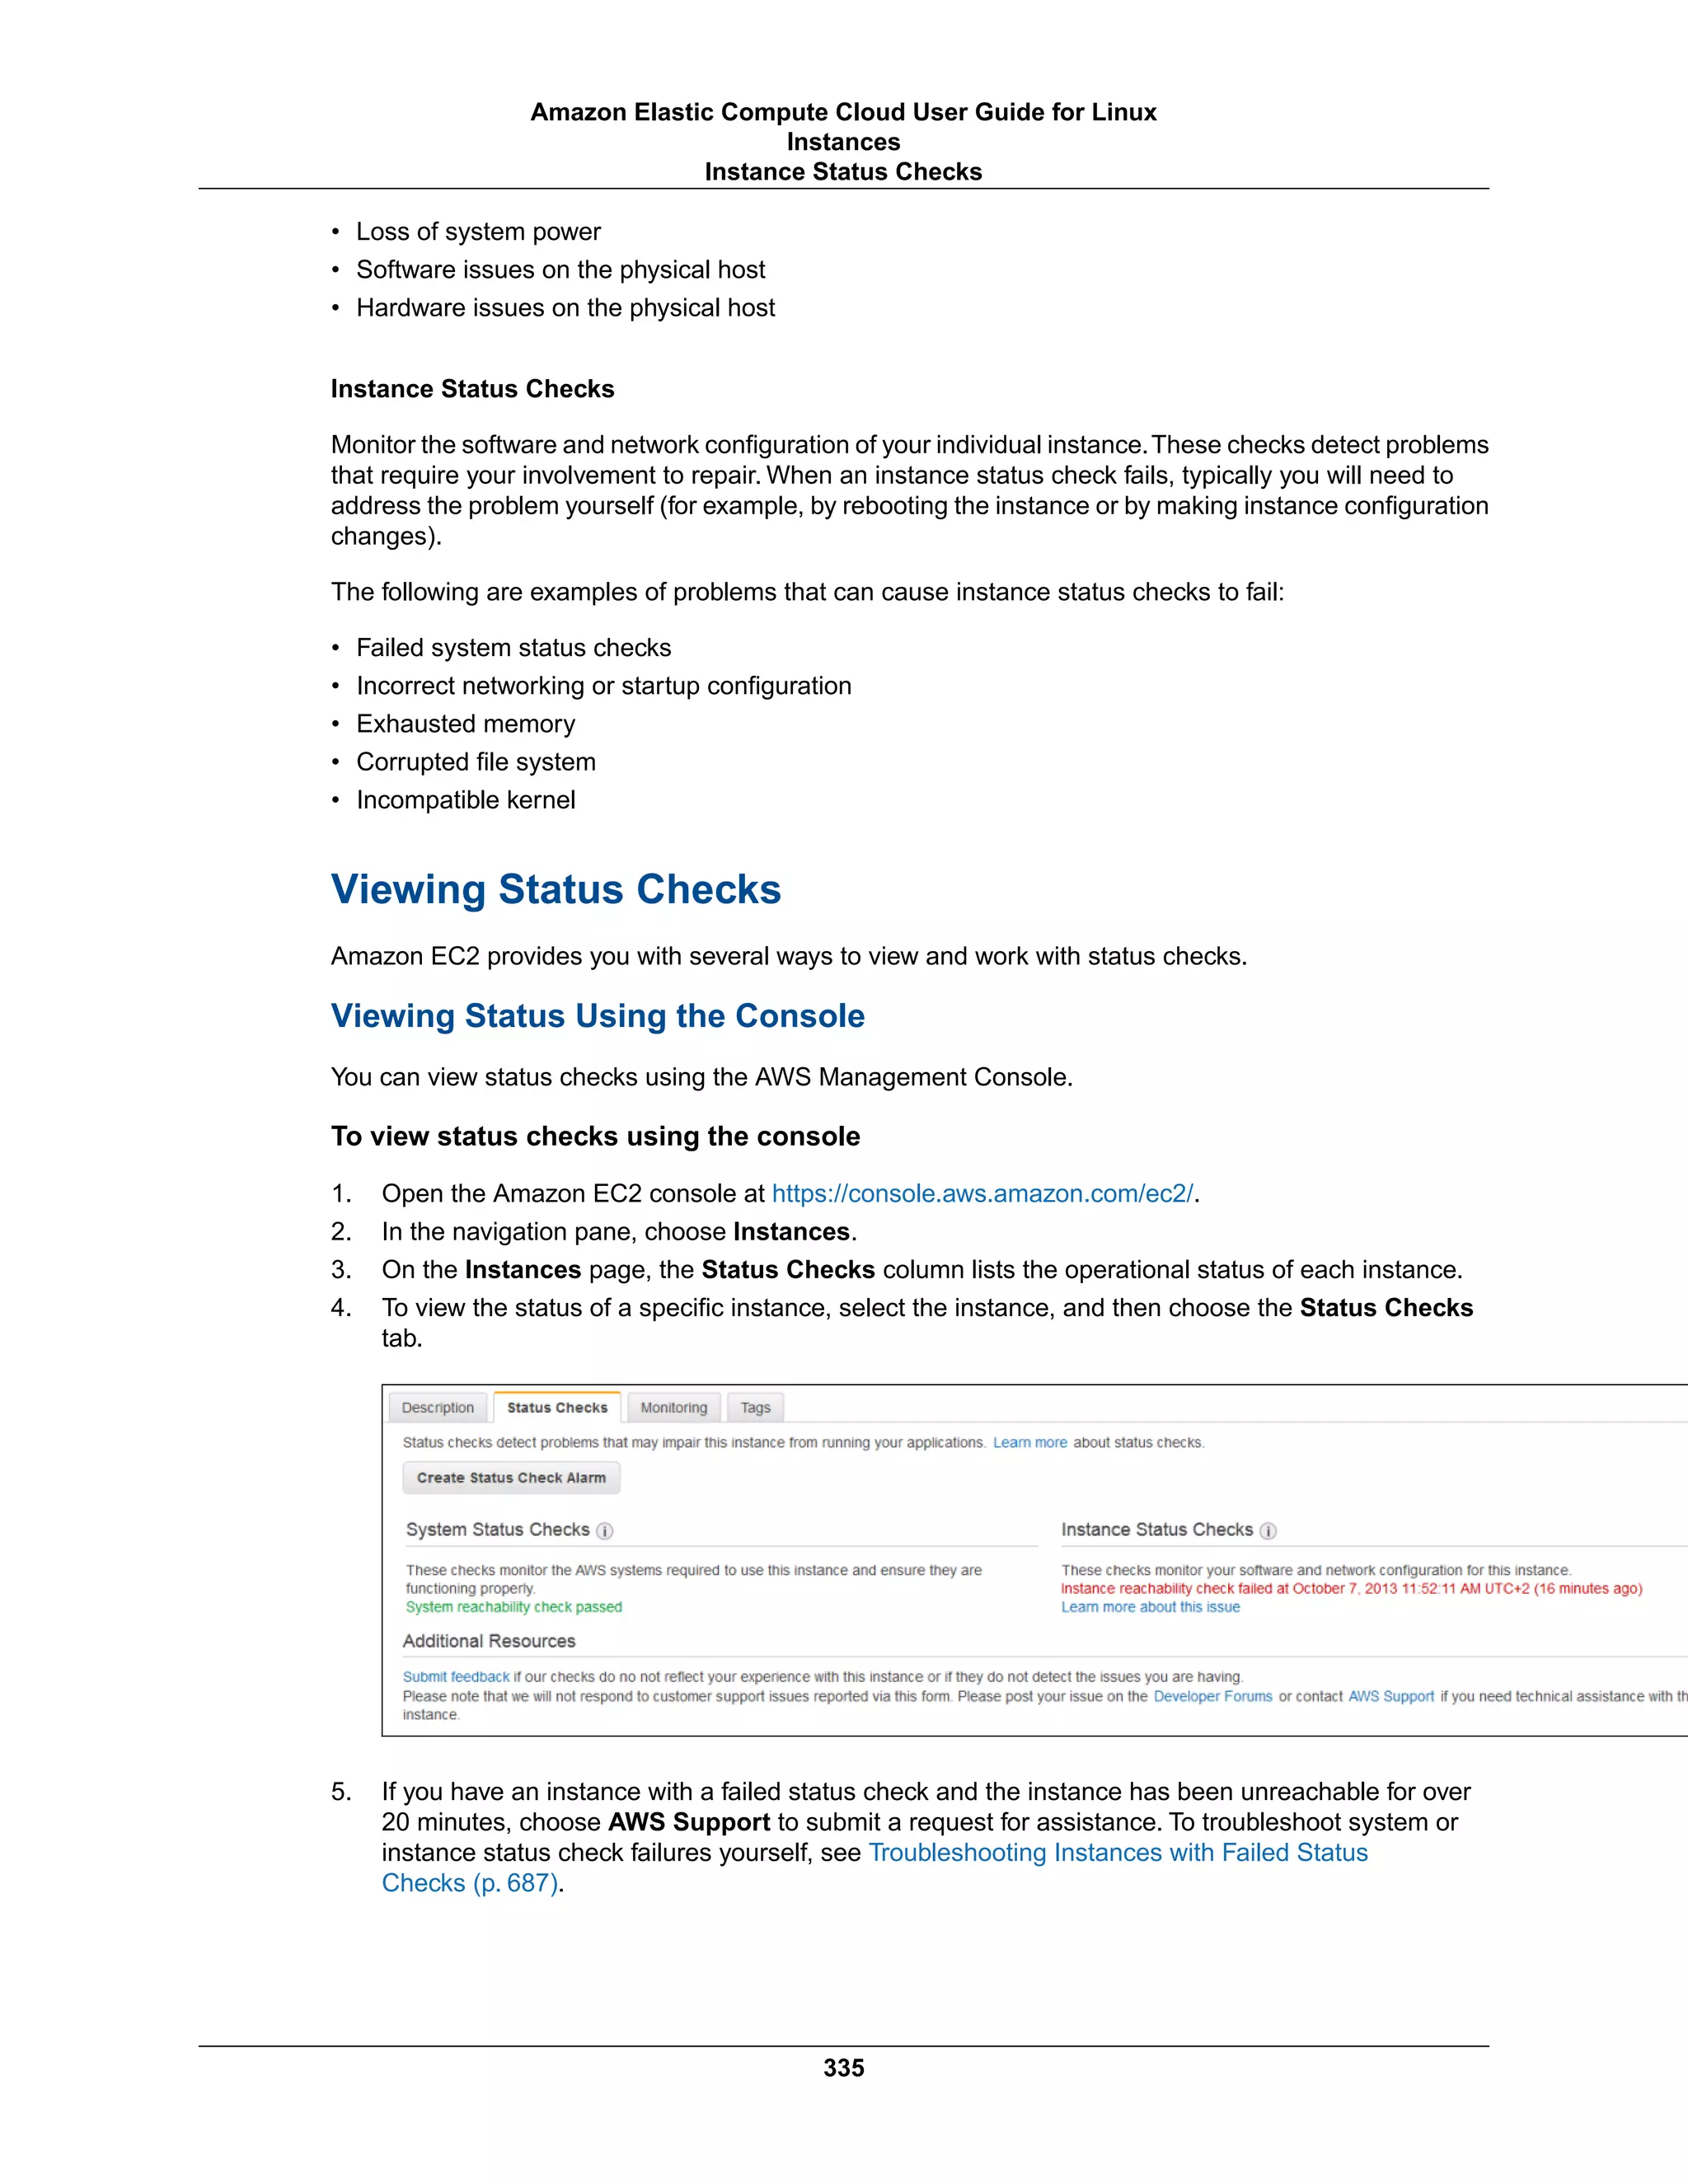


![To view scheduled events for your instances using the AWS CLI
Use the following describe-instance-status command:
aws ec2 describe-instance-status --instance-id i-1a2b3c4d
The following is example output showing an instance retirement event:
{
"InstanceStatuses": [
{
"InstanceStatus": {
"Status": "ok",
"Details": [
{
"Status": "passed",
"Name": "reachability"
}
]
},
"AvailabilityZone": "us-west-2a",
"InstanceId": "i-1a2b3c4d",
"InstanceState": {
"Code": 16,
"Name": "running"
},
"SystemStatus": {
"Status": "ok",
"Details": [
{
"Status": "passed",
"Name": "reachability"
}
]
},
"Events": [
{
"Code": "instance-stop",
"Description": "The instance is running on degraded hard
ware",
"NotBefore": "2015-05-23T00:00:00.000Z"
}
]
}
]
}
Working with Instances Scheduled for Retirement
When AWS detects irreparable failure of the underlying host computer for your instance, it schedules the
instance to stop or terminate, depending on the type of root device for the instance. If the root device is
340
Amazon Elastic Compute Cloud User Guide for Linux
Instances
Scheduled Events](https://image.slidesharecdn.com/ec2-ug-151130152858-lva1-app6892/75/Amazan-Ec2-349-2048.jpg)

![Working with Instances Scheduled for Maintenance
When AWS needs to maintain the underlying host computer for an instance, it schedules the instance
for maintenance. There are two types of maintenance events: network maintenance and power
maintenance.
During network maintenance, scheduled instances lose network connectivity for a brief period of time.
Normal network connectivity to your instance will be restored after maintenance is complete.
During power maintenance, scheduled instances are taken offline for a brief period, and then rebooted.
When a reboot is performed, all of your instance's configuration settings are retained.
After your instance has rebooted (this normally takes a few minutes), verify that your application is working
as expected. At this point, your instance should no longer have a scheduled event associated with it, or
the description of the scheduled event begins with [Completed]. It sometimes takes up to 1 hour for this
instance status to refresh. Completed maintenance events are displayed on the Amazon EC2 console
dashboard for up to a week.
Actions for Instances Backed by Amazon EBS
You can wait for the maintenance to occur as scheduled.Alternatively, you can stop and start the instance,
which migrates it to a new host computer. For more information about stopping your instance, as well as
information about the changes to your instance configuration when it's stopped, see Stop and Start Your
Instance (p. 246).
Actions for Instances Backed by Instance Store
You can wait for the maintenance to occur as scheduled. Alternatively, if you want to maintain normal
operation during a scheduled maintenance window, you can launch a replacement instance from your
most recent AMI, migrate all necessary data to the replacement instance before the scheduled maintenance
window, and then terminate the original instance.
Monitoring Your Instances with CloudWatch
You can monitor your Amazon EC2 instances using Amazon CloudWatch, which collects and processes
raw data from Amazon EC2 into readable, near real-time metrics. These statistics are recorded for a
period of two weeks, so that you can access historical information and gain a better perspective on how
your web application or service is performing. By default, Amazon EC2 metric data is automatically sent
to CloudWatch in 5-minute periods.You can, however, enable detailed monitoring on an Amazon EC2
instance, which sends data to CloudWatch in 1-minute periods. For more information about Amazon
CloudWatch, see the Amazon CloudWatch Developer Guide.
The following table describes basic and detailed monitoring for Amazon EC2 instances.
DescriptionType
Data is available automatically in 5-minute periods
at no charge.
Basic
342
Amazon Elastic Compute Cloud User Guide for Linux
Instances
Monitoring Your Instances with CloudWatch](https://image.slidesharecdn.com/ec2-ug-151130152858-lva1-app6892/75/Amazan-Ec2-351-2048.jpg)

![Detailed data (collected with a 1-minute period) is then available for the instance in the AWS
Management Console graphs or through the API.
To enable detailed monitoring when launching an EC2 instance
When launching an instance with the AWS Management Console, select the Monitoring check box on
the Configure Instance Details page of the launch wizard.
After the instance is launched, you can select the instance in the console and view its monitoring graphs
on the instance's Monitoring tab in the lower pane.
To disable detailed monitoring of an EC2 instance
When you no longer want to monitor your instances at 1-minute intervals, you can disable detailed
monitoring and use basic monitoring instead. Basic monitoring provides data in 5-minute periods at no
charge.
1. Open the Amazon EC2 console at https://console.aws.amazon.com/ec2/.
2. In the navigation pane, click Instances.
3. In the list of instances, select a running or stopped instance, click Actions, select CloudWatch
Monitoring, and then click Disable Detailed Monitoring.
4. In the Disable Detailed Monitoring dialog box, click Yes, Disable.
5. In the Disable Detailed Monitoring confirmation dialog box, click Close.
For information about launching instances, see Launch Your Instance (p. 225).
Command Line Interface
To enable detailed monitoring on an existing instance
Use the monitor-instances command with one or more instance IDs. For more information about
using the monitor-instances command, see monitor-instances in the AWS Command Line Interface
Reference.
$ aws ec2 monitor-instances --instance-ids i-570e5a28
{
"InstanceMonitorings": [
{
"InstanceId": "i-570e5a28",
"Monitoring": {
"State": "pending"
}
}
]
}
Detailed data (collected with a 1-minute period) is then available for the instance in the AWS Management
Console graphs or through the API.
To enable detailed monitoring when launching an instance
Use the run-instances command with the --monitoring flag. For more information about using the
run-instances command, see run-instances in the AWS Command Line Interface Reference.
344
Amazon Elastic Compute Cloud User Guide for Linux
Instances
Enabling or Disabling Detailed Monitoring on an Amazon
EC2 Instance](https://image.slidesharecdn.com/ec2-ug-151130152858-lva1-app6892/75/Amazan-Ec2-353-2048.jpg)
![$ aws ec2 run-instances --image-id ami-09092360 --key-name MyKeyPair --monitoring
Enabled=value
Amazon EC2 returns output similar to the following example.The status of monitoring is listed as pending.
{
"OwnerId": "111122223333",
"ReservationId": "r-25fad905",
"Groups": [
{
"GroupName": "default",
"GroupId": "sg-eafe1b82"
}
],
"Instances": [
{
"Monitoring": {
"State": "pending"
},
"PublicDnsName": null,
"Platform": "windows",
"State": {
"Code": 0,
"Name": "pending"
},
"EbsOptimized": false,
"LaunchTime": "2014-02-24T18:02:49.000Z",
"ProductCodes": [],
"StateTransitionReason": null,
"InstanceId": "i-31283b11",
"ImageId": "ami-09092360",
"PrivateDnsName": null,
"KeyName": "MyKeyPair",
"SecurityGroups": [
{
"GroupName": "default",
"GroupId": "sg-eafe1b82"
}
],
"ClientToken": null,
"InstanceType": "m1.small",
"NetworkInterfaces": [],
"Placement": {
"Tenancy": "default",
"GroupName": null,
"AvailabilityZone": "us-east-1b"
},
"Hypervisor": "xen",
"BlockDeviceMappings": [],
"Architecture": "x86_64",
"StateReason": {
"Message": "pending",
"Code": "pending"
},
"VirtualizationType": "hvm",
"RootDeviceType": "instance-store",
"AmiLaunchIndex": 0
345
Amazon Elastic Compute Cloud User Guide for Linux
Instances
Enabling or Disabling Detailed Monitoring on an Amazon
EC2 Instance](https://image.slidesharecdn.com/ec2-ug-151130152858-lva1-app6892/75/Amazan-Ec2-354-2048.jpg)
![}
]
}
After the instance is running, detailed data (collected with a 1-minute period) is then available for the
instance in the AWS Management Console graphs or through the API.
To disable detailed monitoring of an instance
Use the unmonitor-instances command with one or more instance IDs. For more information about
using the unmonitor-instances command, see unmonitor-instances in the AWS Command Line Interface
Reference.
$ aws ec2 unmonitor-instances --instance-ids i-570e5a28
{
"InstanceMonitorings": [
{
"InstanceId": "i-570e5a28",
"Monitoring": {
"State": "disabling"
}
}
]
}
View Amazon EC2 Metrics
Only those services in AWS that you're using send metrics to Amazon CloudWatch.You can use the
Amazon CloudWatch console, the mon-list-metrics command, or the ListMetrics API to view the
metrics that Amazon EC2 sends to CloudWatch. If you've enabled detailed monitoring, each data point
covers the instance's previous 1 minute of activity. Otherwise, each data point covers the instance's
previous 5 minutes of activity.
DescriptionMetric
(Only valid for T2 instances) The number of CPU credits consumed
during the specified period.
This metric identifies the amount of time during which physical CPUs
were used for processing instructions by virtual CPUs allocated to
the instance.
Note
CPU Credit metrics are available at a 5 minute frequency.
Units: Count
CPUCreditUsage
(Only valid for T2 instances) The number of CPU credits that an in-
stance has accumulated.
This metric is used to determine how long an instance can burst
beyond its baseline performance level at a given rate.
Note
CPU Credit metrics are available at a 5 minute frequency.
Units: Count
CPUCreditBalance
346
Amazon Elastic Compute Cloud User Guide for Linux
Instances
View Amazon EC2 Metrics](https://image.slidesharecdn.com/ec2-ug-151130152858-lva1-app6892/75/Amazan-Ec2-355-2048.jpg)


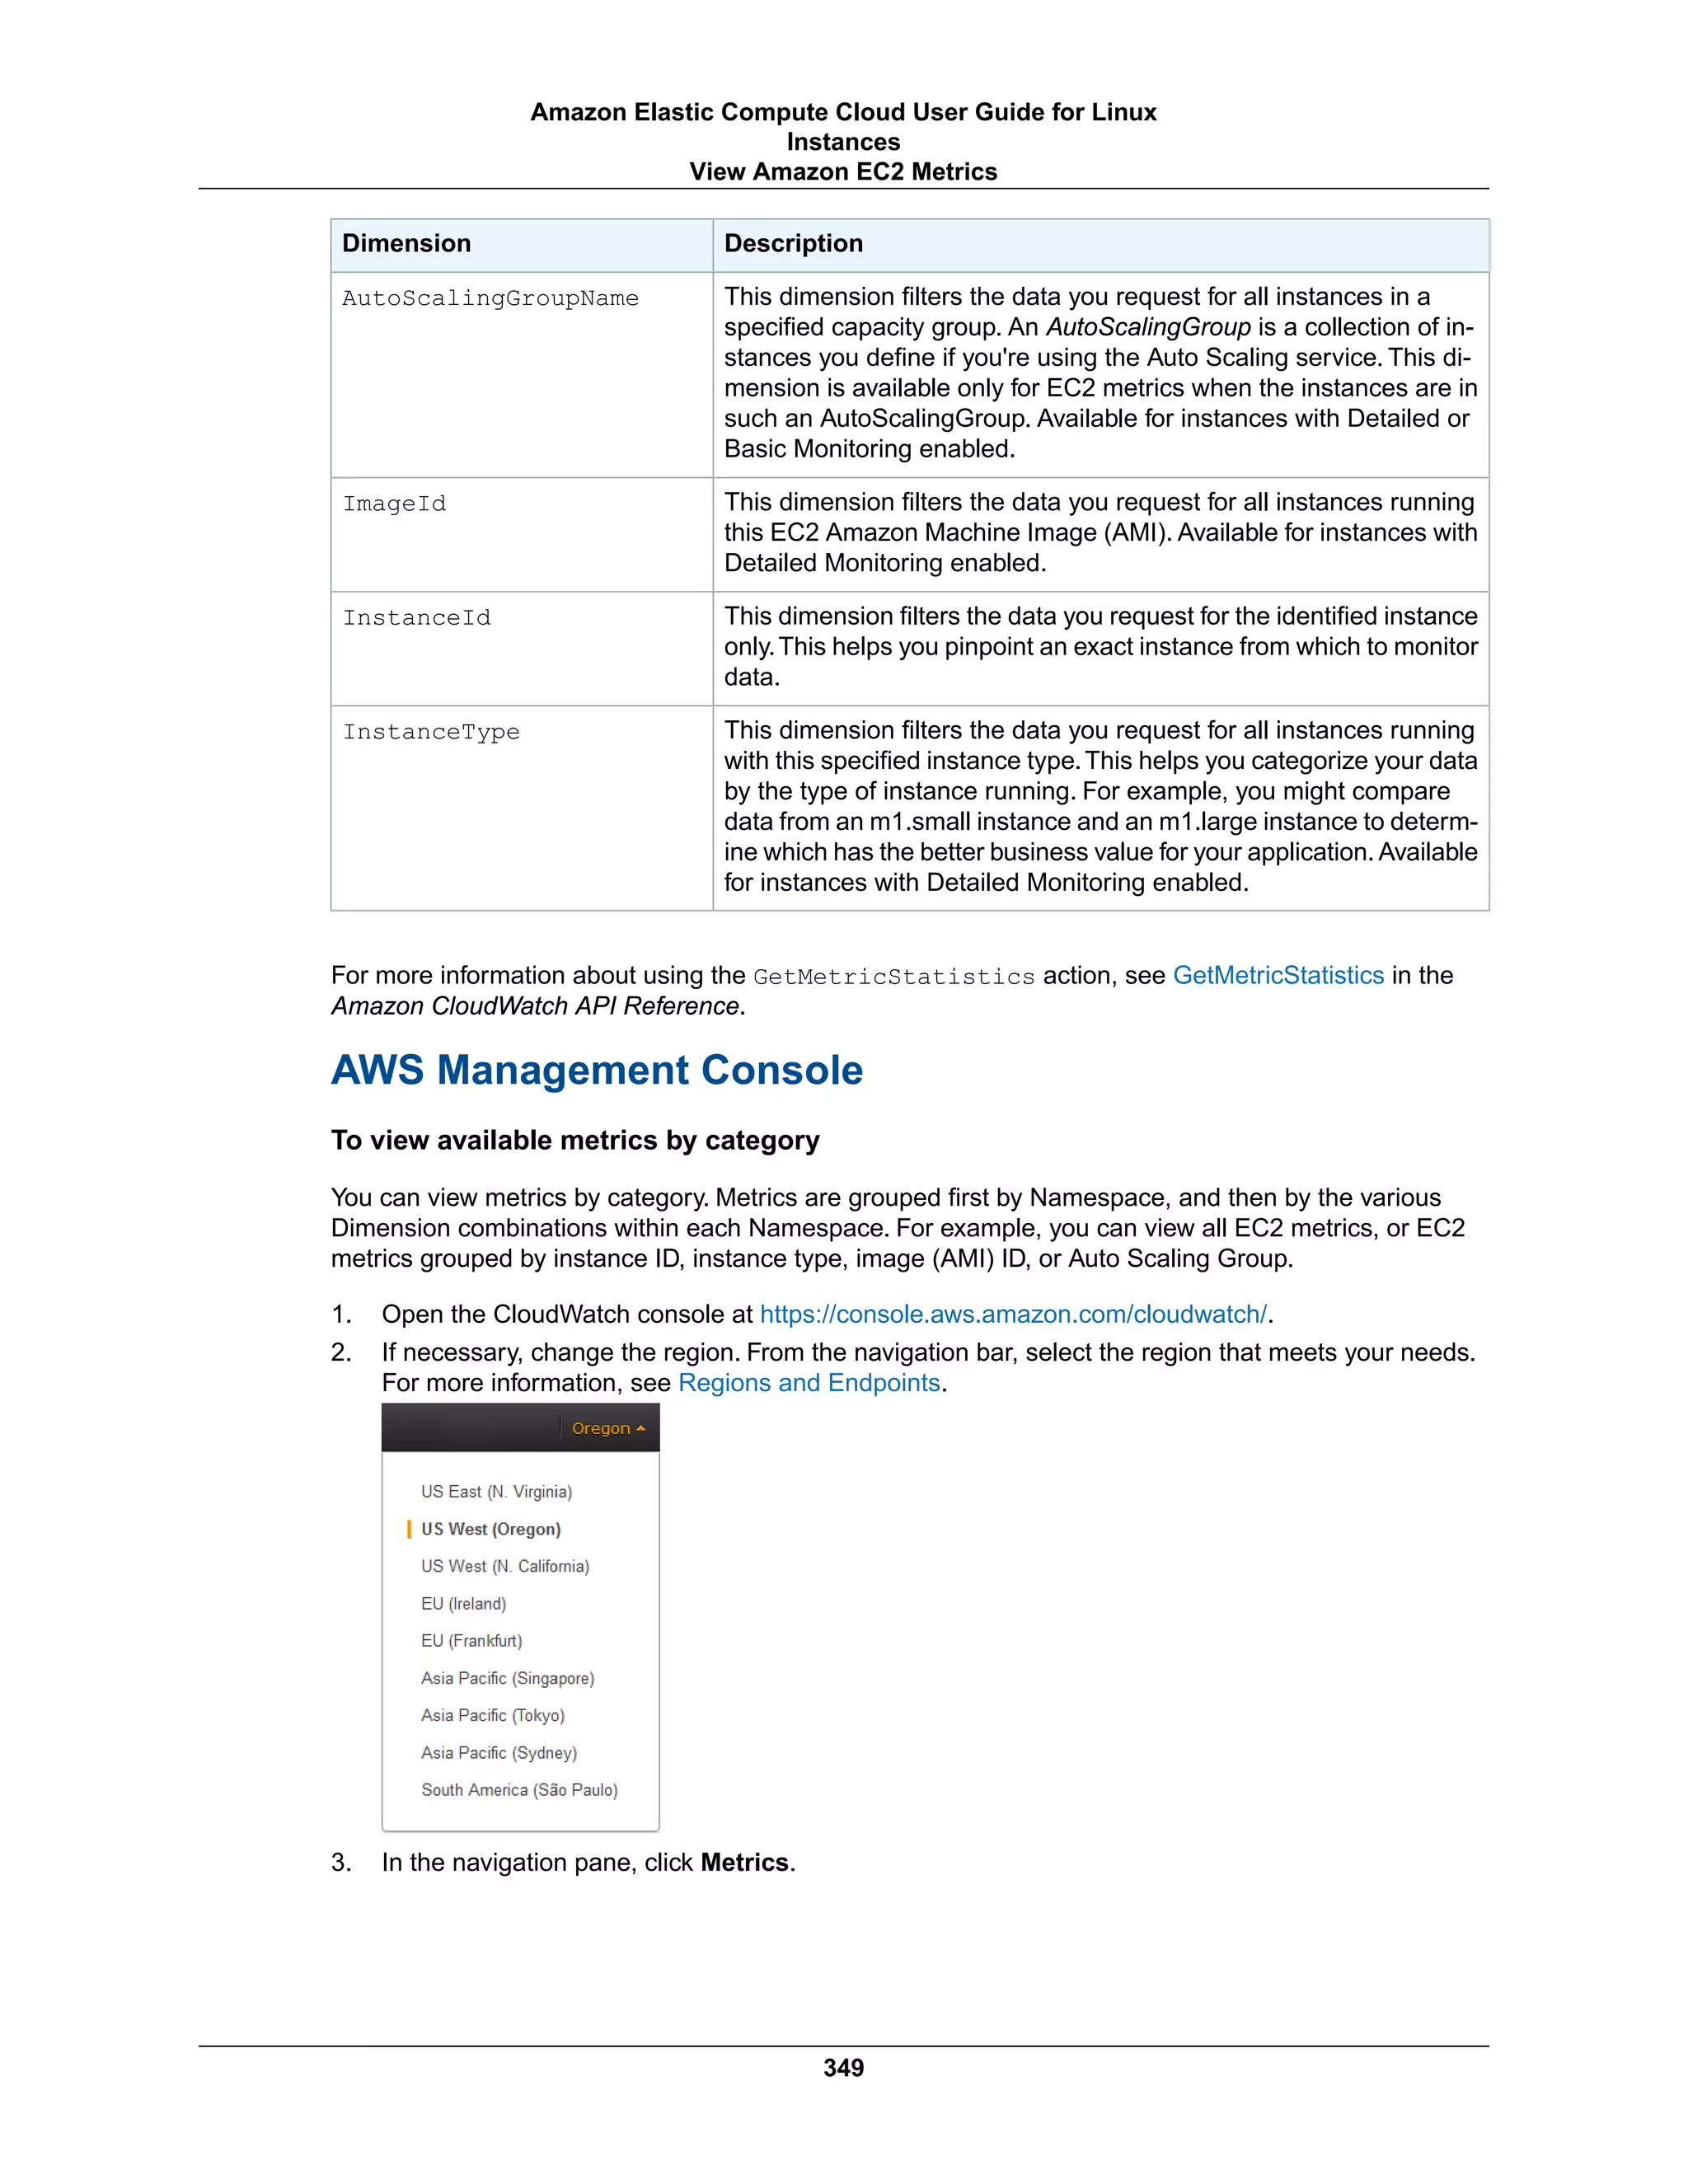

![CloudWatch returns the following (partial listing):
{
"Namespace": "AWS/EC2",
"Dimensions": [
{
"Name": "InstanceType",
"Value": "t1.micro"
}
],
"MetricName": "CPUUtilization"
},
{
"Namespace": "AWS/EC2",
"Dimensions": [
{
"Name": "InstanceId",
"Value": "i-570e5a28"
}
],
"MetricName": "DiskWriteOps"
},
{
"Namespace": "AWS/EC2",
"Dimensions": [
{
"Name": "InstanceType",
"Value": "t1.micro"
}
],
"MetricName": "NetworkOut"
},
{
"Namespace": "AWS/EC2",
"Dimensions": [
{
"Name": "ImageId",
"Value": "ami-6cb90605"
}
],
"MetricName": "CPUUtilization"
},
{
"Namespace": "AWS/EC2",
"Dimensions": [
{
"Name": "ImageId",
"Value": "ami-6cb90605"
}
],
"MetricName": "NetworkIn"
},
{
"Namespace": "AWS/EC2",
"Dimensions": [
{
"Name": "InstanceType",
"Value": "t1.micro"
351
Amazon Elastic Compute Cloud User Guide for Linux
Instances
View Amazon EC2 Metrics](https://image.slidesharecdn.com/ec2-ug-151130152858-lva1-app6892/75/Amazan-Ec2-360-2048.jpg)
![}
],
"MetricName": "DiskReadBytes"
},
{
"Namespace": "AWS/EC2",
"Dimensions": [
{
"Name": "InstanceId",
"Value": "i-570e5a28"
}
],
"MetricName": "StatusCheckFailed_System"
},
{
"Namespace": "AWS/EC2",
"Dimensions": [
{
"Name": "InstanceId",
"Value": "i-570e5a28"
}
],
"MetricName": "NetworkOut"
},
{
"Namespace": "AWS/EC2",
"Dimensions": [
{
"Name": "InstanceId",
"Value": "i-0c986c72"
}
],
"MetricName": "DiskWriteBytes"
}
]
}
Get Statistics for Metrics
This set of scenarios shows you how you can use the AWS Management Console, the
get-metric-statistics command, or the GetMetricStatistics API to get a variety of statistics.
Note
Start and end times must be within the last 14 days.
Contents
• Get Statistics for a Specific EC2 Instance (p. 353)
• Aggregating Statistics Across Instances (p. 357)
• Get Statistics Aggregated by Auto Scaling Group (p. 361)
• Get Statistics Aggregated by Image (AMI) ID (p. 364)
352
Amazon Elastic Compute Cloud User Guide for Linux
Instances
Get Statistics for Metrics](https://image.slidesharecdn.com/ec2-ug-151130152858-lva1-app6892/75/Amazan-Ec2-361-2048.jpg)


!["Unit": "Percent"
},
{
"Timestamp": "2014-02-19T18:18:00Z",
"Maximum": 6.6699999999999999,
"Unit": "Percent"
}
],
"Label": "CPUUtilization"
}
The returned statistics are six-minute values for the requested two-day time interval.Each value represents
the maximum CPU utilization percentage for a single EC2 instance.
Aggregating Statistics Across Instances
Aggregate statistics are available for the instances that have detailed monitoring enabled. Instances that
use basic monitoring are not included in the aggregates. In addition, Amazon CloudWatch does not
aggregate data across Regions. Therefore, metrics are completely separate between Regions. Before
you can get statistics aggregated across instances, you must enable detailed monitoring (at an additional
charge), which provides data in 1-minute periods.This scenario shows you how to use detailed monitoring
with either the AWS Management Console, the GetMetricStatistics API, or the
get-metric-statistics command to get the average CPU usage for your EC2 instances. Because
no dimension is specified, CloudWatch returns statistics for all dimensions in the AWS/EC2 namespace.
To get statistics for other metrics, see Amazon CloudWatch Namespaces, Dimensions, and Metrics
Reference.
Important
This technique for retrieving all dimensions across an AWS namespace does not work for custom
namespaces that you publish to Amazon CloudWatch. With custom namespaces, you must
specify the complete set of dimensions that are associated with any given data point to retrieve
statistics that include the data point.
AWS Management Console
To display average CPU utilization for your Amazon EC2 instances
1. Open the CloudWatch console at https://console.aws.amazon.com/cloudwatch/.
2. If necessary, change the region. From the navigation bar, select the region that meets your needs.
For more information, see Regions and Endpoints.
3. In the navigation pane, click Metrics.
4. In the CloudWatch Metrics by Category pane, under EC2 Metrics, select Across All Instances.
357
Amazon Elastic Compute Cloud User Guide for Linux
Instances
Get Statistics for Metrics](https://image.slidesharecdn.com/ec2-ug-151130152858-lva1-app6892/75/Amazan-Ec2-366-2048.jpg)
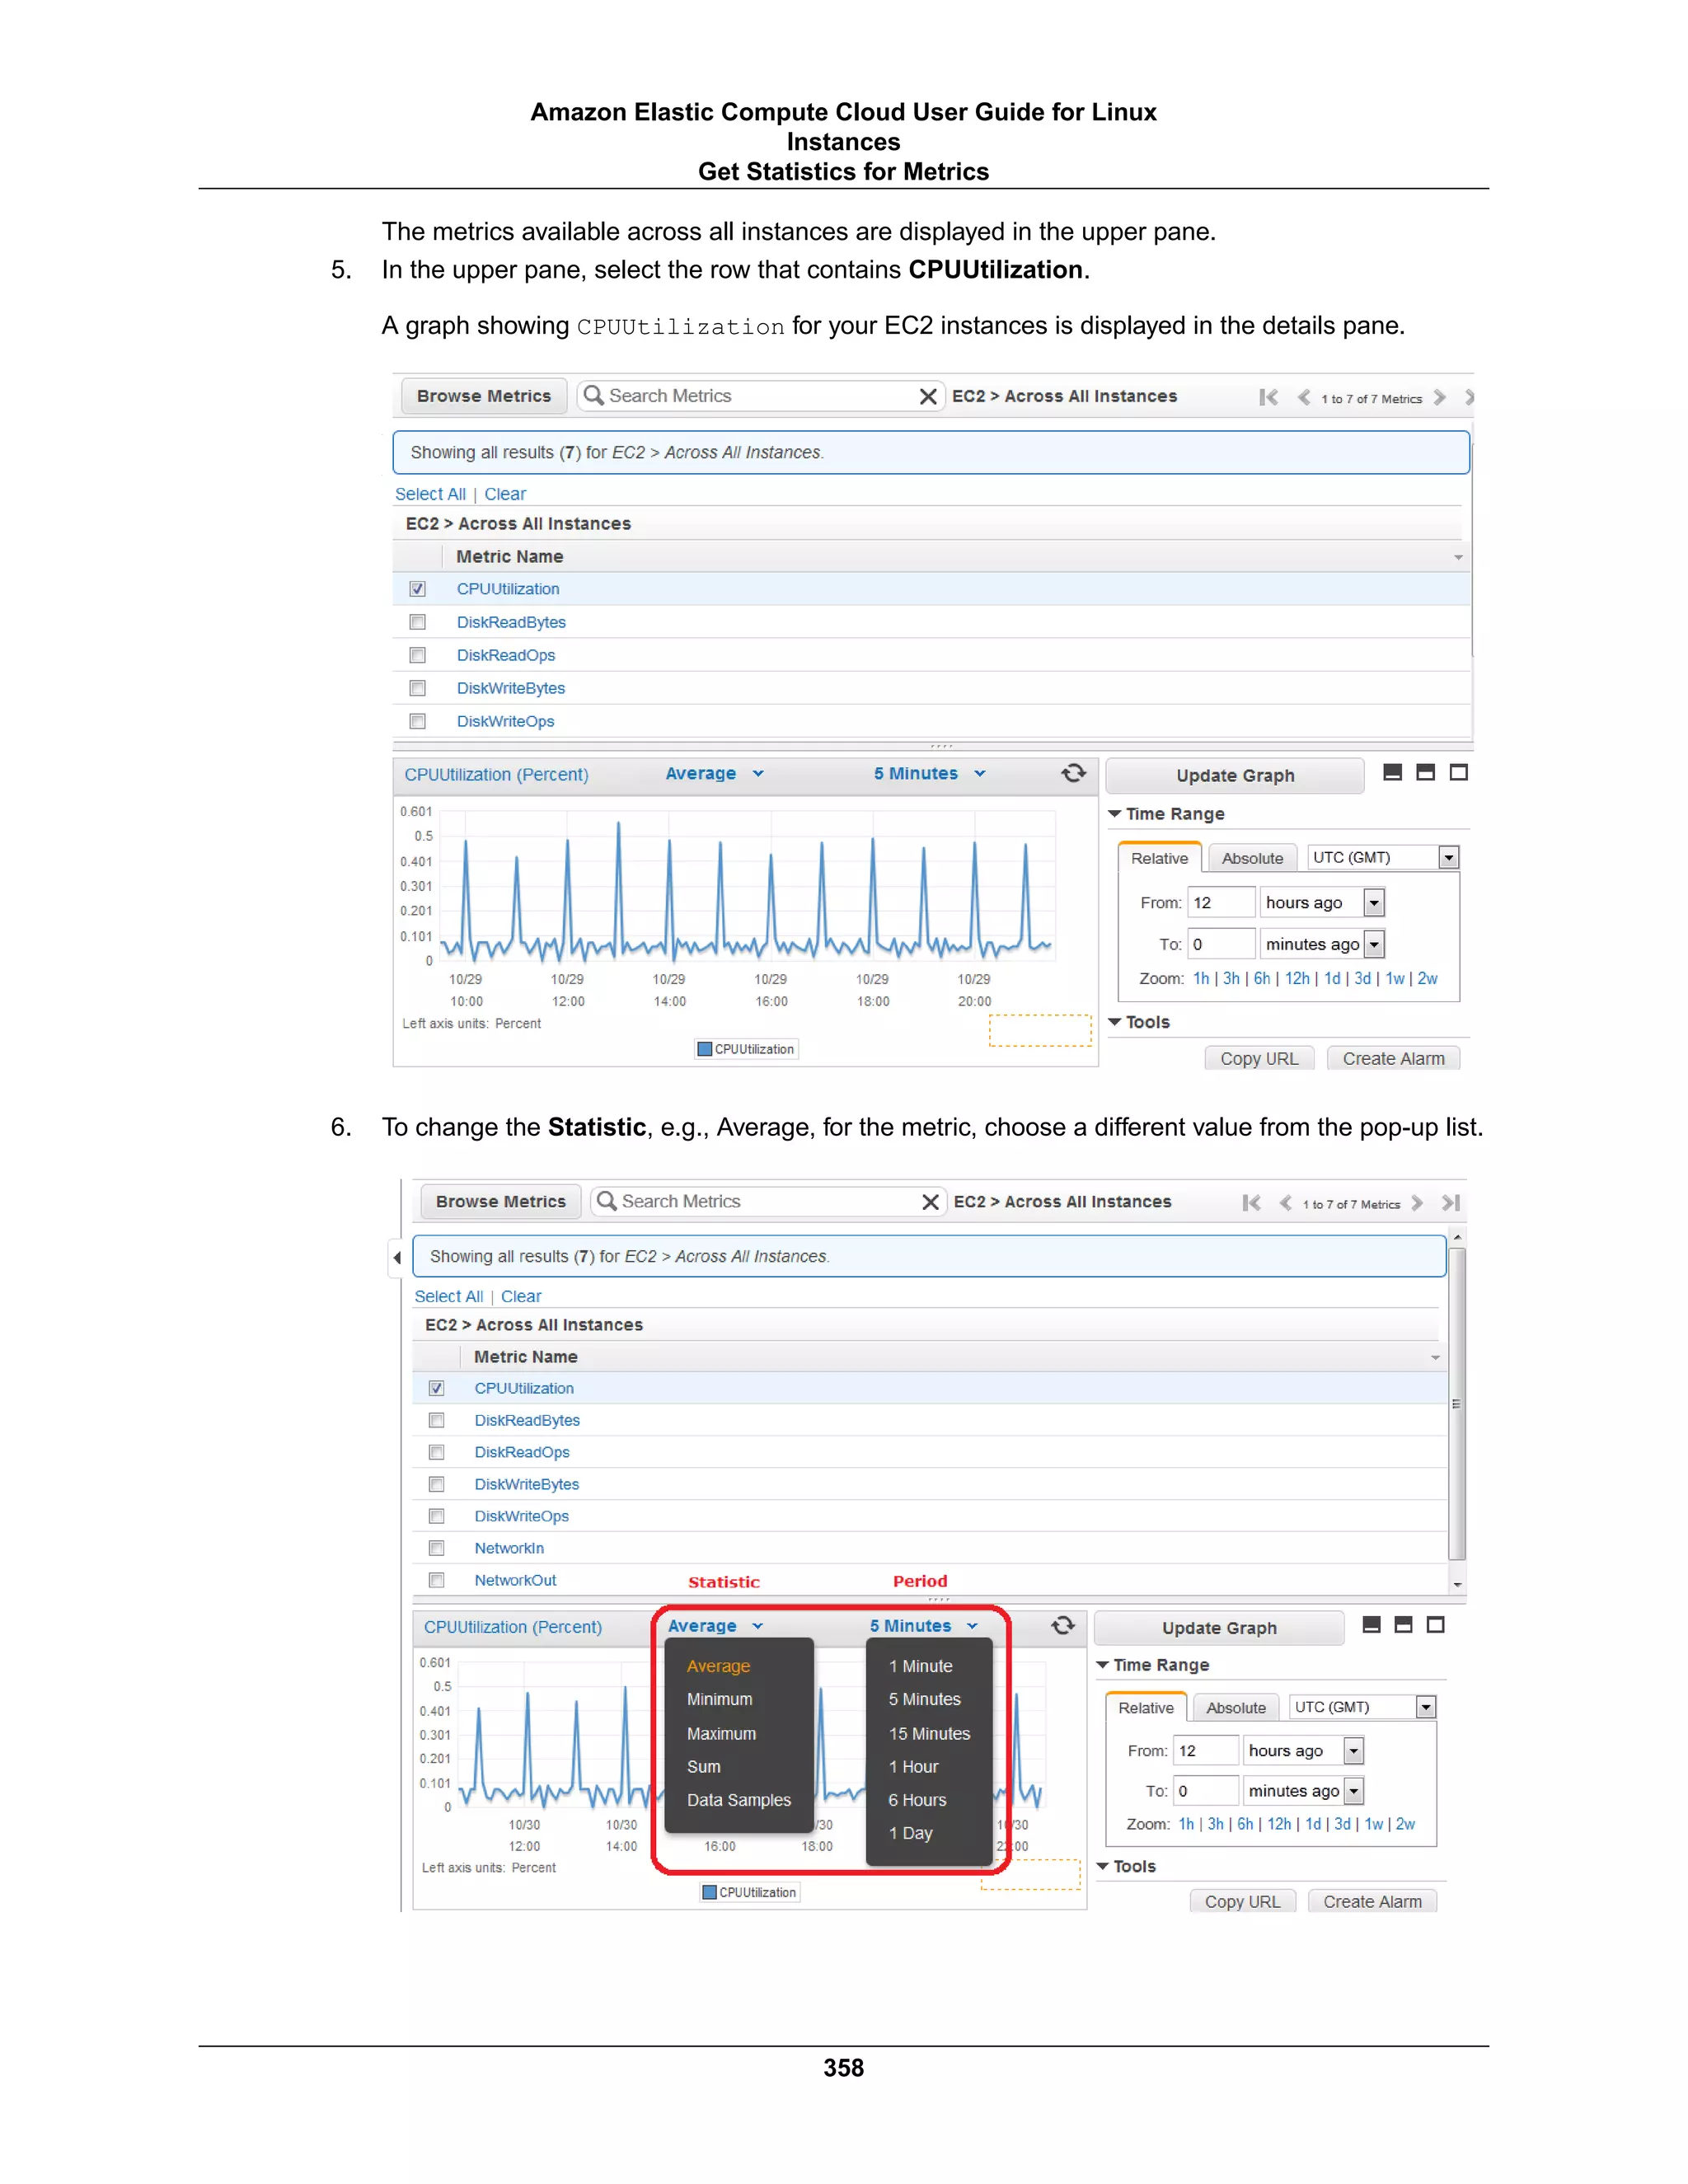

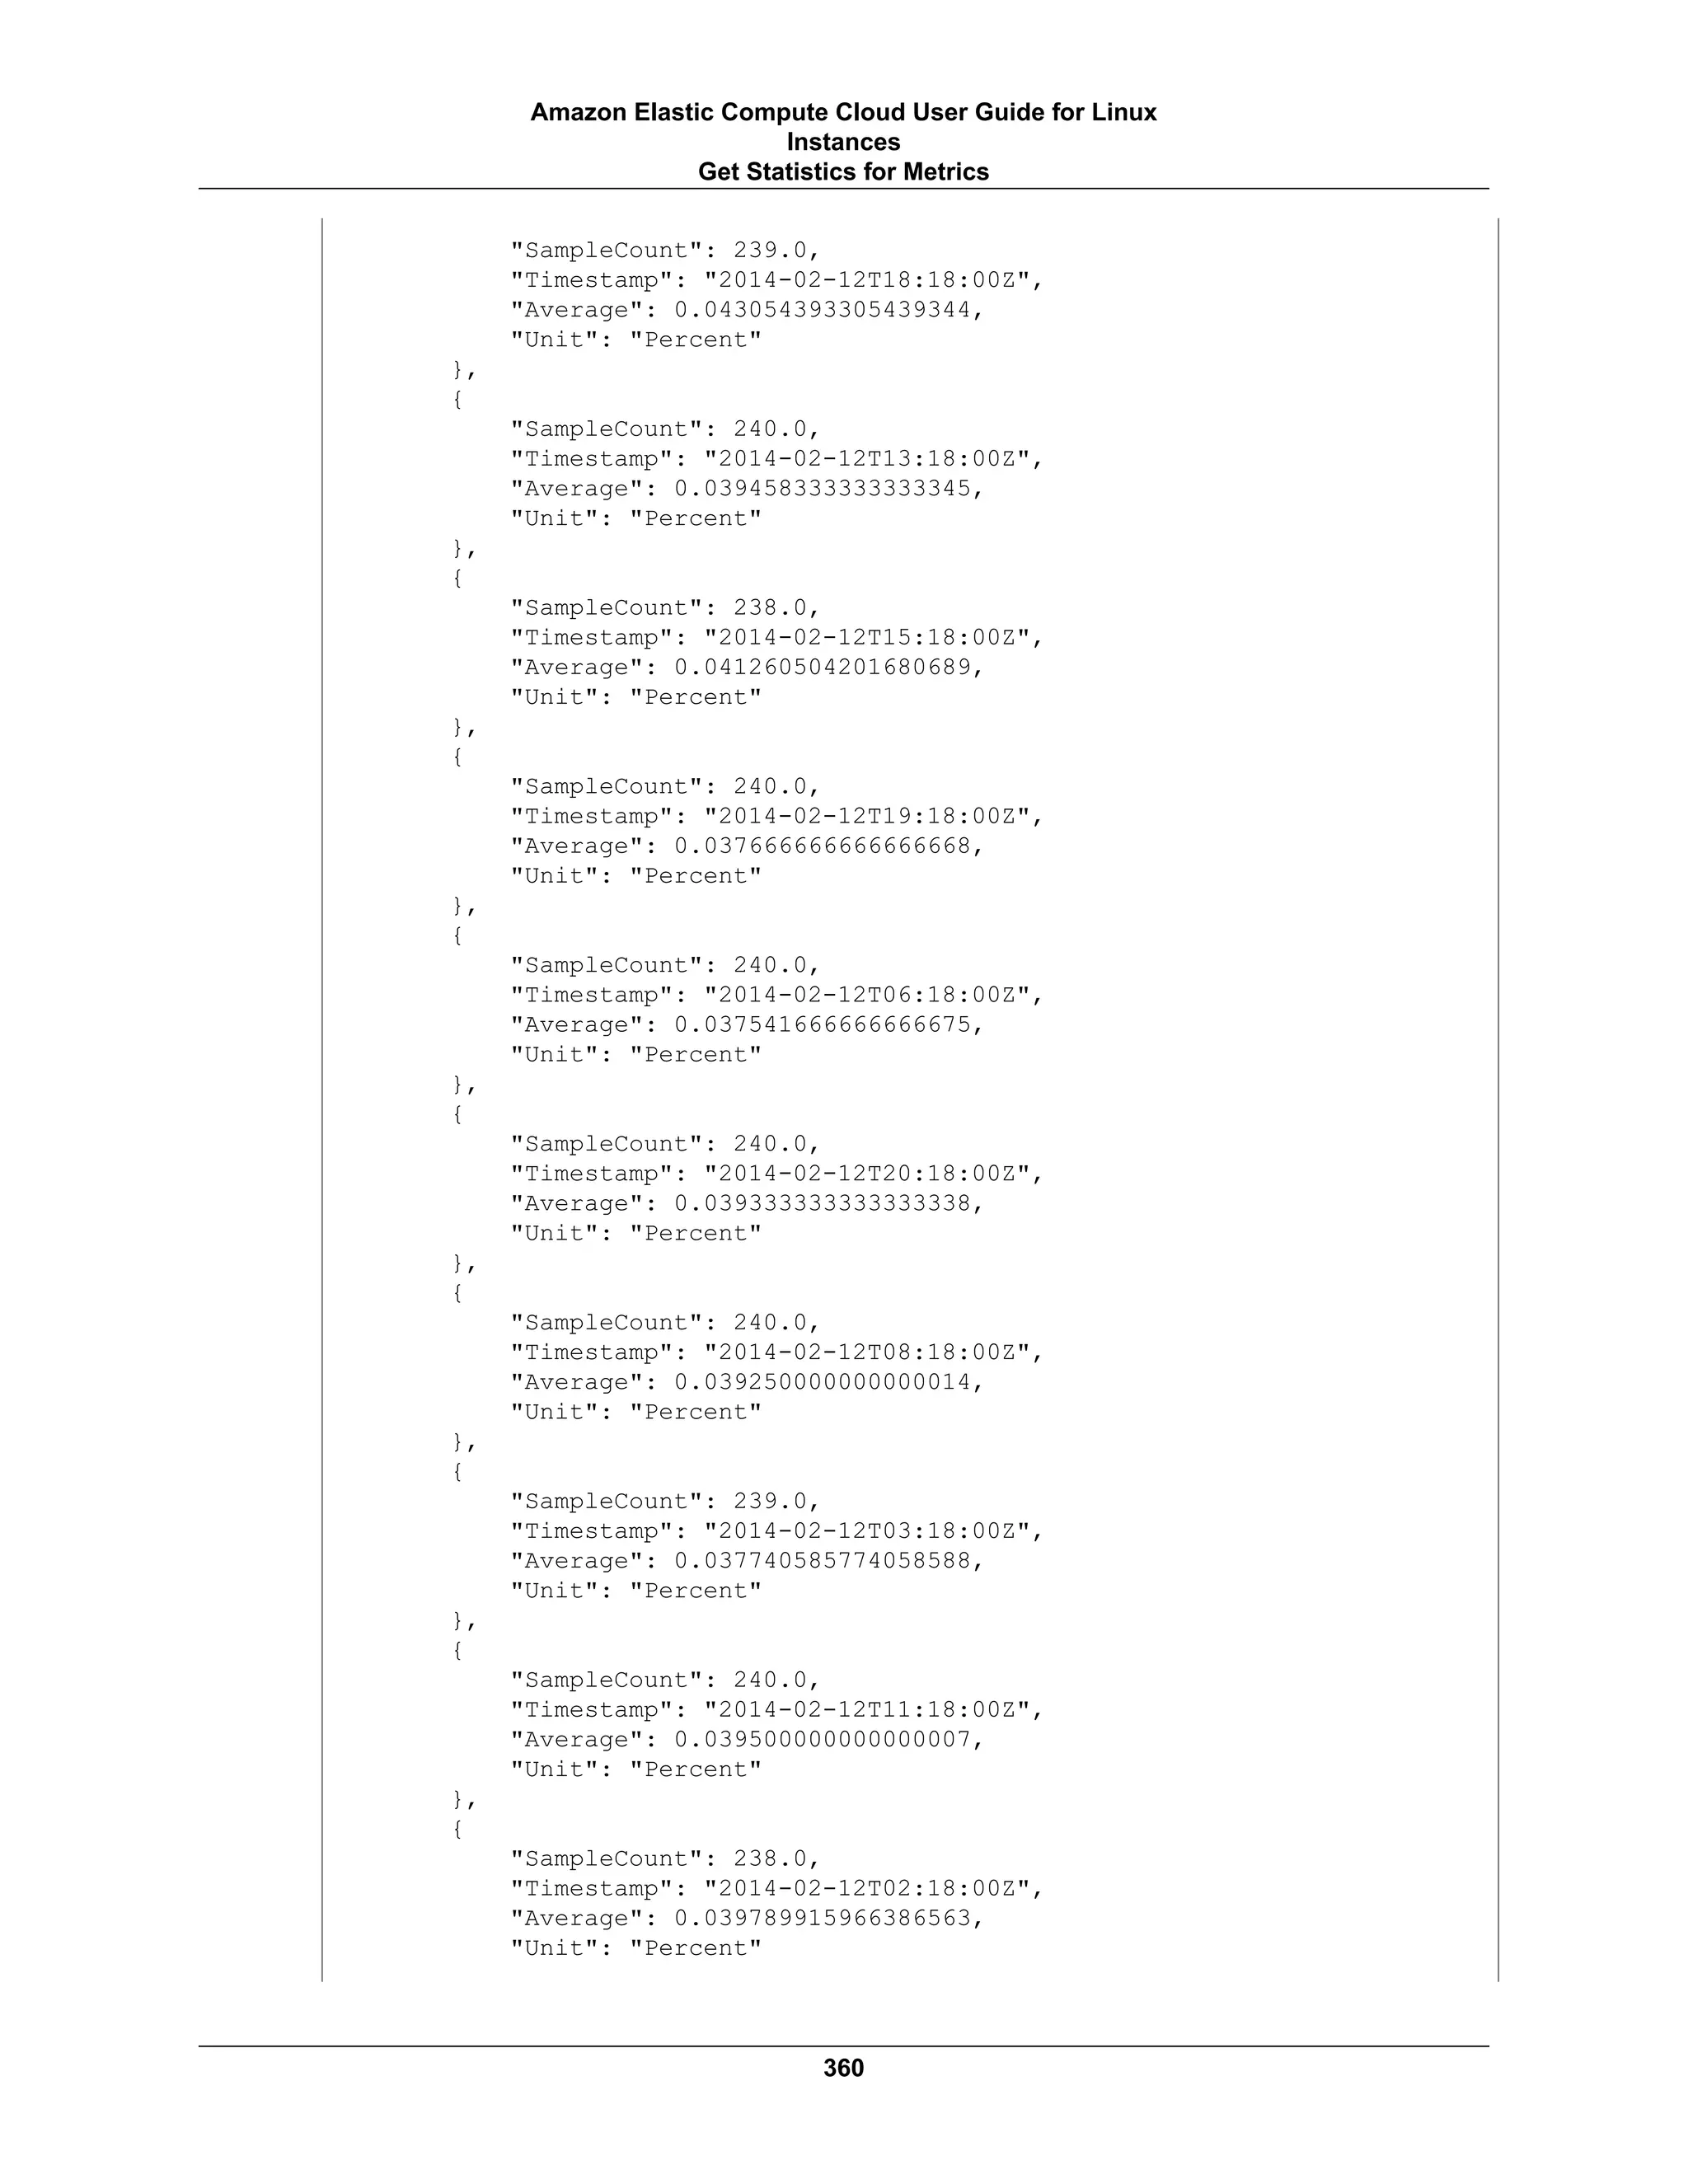
![},
{
"SampleCount": 238.0,
"Timestamp": "2014-02-12T22:18:00Z",
"Average": 0.039705882352941181,
"Unit": "Percent"
},
{
"SampleCount": 240.0,
"Timestamp": "2014-02-12T14:18:00Z",
"Average": 0.082458333333333328,
"Unit": "Percent"
},
{
"SampleCount": 240.0,
"Timestamp": "2014-02-12T05:18:00Z",
"Average": 0.04287500000000001,
"Unit": "Percent"
},
{
"SampleCount": 240.0,
"Timestamp": "2014-02-12T17:18:00Z",
"Average": 0.039458333333333345,
"Unit": "Percent"
},
{
"SampleCount": 240.0,
"Timestamp": "2014-02-12T10:18:00Z",
"Average": 0.083416666666666667,
"Unit": "Percent"
},
{
"SampleCount": 236.0,
"Timestamp": "2014-02-12T00:18:00Z",
"Average": 0.036567796610169498,
"Unit": "Percent"
},
{
"SampleCount": 240.0,
"Timestamp": "2014-02-12T12:18:00Z",
"Average": 0.039541666666666676,
"Unit": "Percent"
},
{
"SampleCount": 240.0,
"Timestamp": "2014-02-12T04:18:00Z",
"Average": 0.043000000000000003,
"Unit": "Percent"
}
],
"Label": "CPUUtilization"
}
Get Statistics Aggregated by Auto Scaling Group
Aggregate statistics are available for the instances that have detailed monitoring enabled. Instances that
use basic monitoring are not included in the aggregates. In addition, Amazon CloudWatch does not
361
Amazon Elastic Compute Cloud User Guide for Linux
Instances
Get Statistics for Metrics](https://image.slidesharecdn.com/ec2-ug-151130152858-lva1-app6892/75/Amazan-Ec2-370-2048.jpg)


![Command Line Interface
To get total DiskWriteBytes for an auto-scaled EC2 application
Enter the get-metric-statistics command with the following parameters. For more information
about the get-metric-statistics command, see get-metric-statistics in the AWS Command Line
Interface Reference.
$ aws cloudwatch get-metric-statistics --metric-name DiskWriteBytes --start-
time 2014-02-16T23:18:00 --end-time 2014-02-18T23:18:00 --period 360 --namespace
AWS/EC2 --statistics "Sum" "SampleCount" --dimensions Name=AutoScalingGroup
Name,Value=test-group-1
The AWS CLI returns the following:
{
"Datapoints": [
{
"SampleCount": 18.0,
"Timestamp": "2014-02-19T21:36:00Z",
"Sum": 0.0,
"Unit": "Bytes"
},
{
"SampleCount": 5.0,
"Timestamp": "2014-02-19T21:42:00Z",
"Sum": 0.0,
"Unit": "Bytes"
}
],
"Label": "DiskWriteBytes"
}
Get Statistics Aggregated by Image (AMI) ID
Aggregate statistics are available for the instances that have detailed monitoring enabled. Instances that
use basic monitoring are not included in the aggregates. In addition, Amazon CloudWatch does not
aggregate data across Regions. Therefore, metrics are completely separate between Regions. Before
you can get statistics aggregated across instances, you must enable detailed monitoring (at an additional
charge), which provides data in 1-minute periods.
This scenario shows you how to use the AWS Management Console, the get-metric-statistics
command, or the GetMetricStatistics API to determine average CPU utilization for all instances
that match a given image ID. The average is over 60-second time intervals for a one-day period.
Note
Start and end times must be within the last 14 days.
In this scenario, the EC2 instances are running an image ID of ami-c5e40dac.
AWS Management Console
To display the average CPU utilization for an image ID
1. Open the CloudWatch console at https://console.aws.amazon.com/cloudwatch/.
364
Amazon Elastic Compute Cloud User Guide for Linux
Instances
Get Statistics for Metrics](https://image.slidesharecdn.com/ec2-ug-151130152858-lva1-app6892/75/Amazan-Ec2-373-2048.jpg)

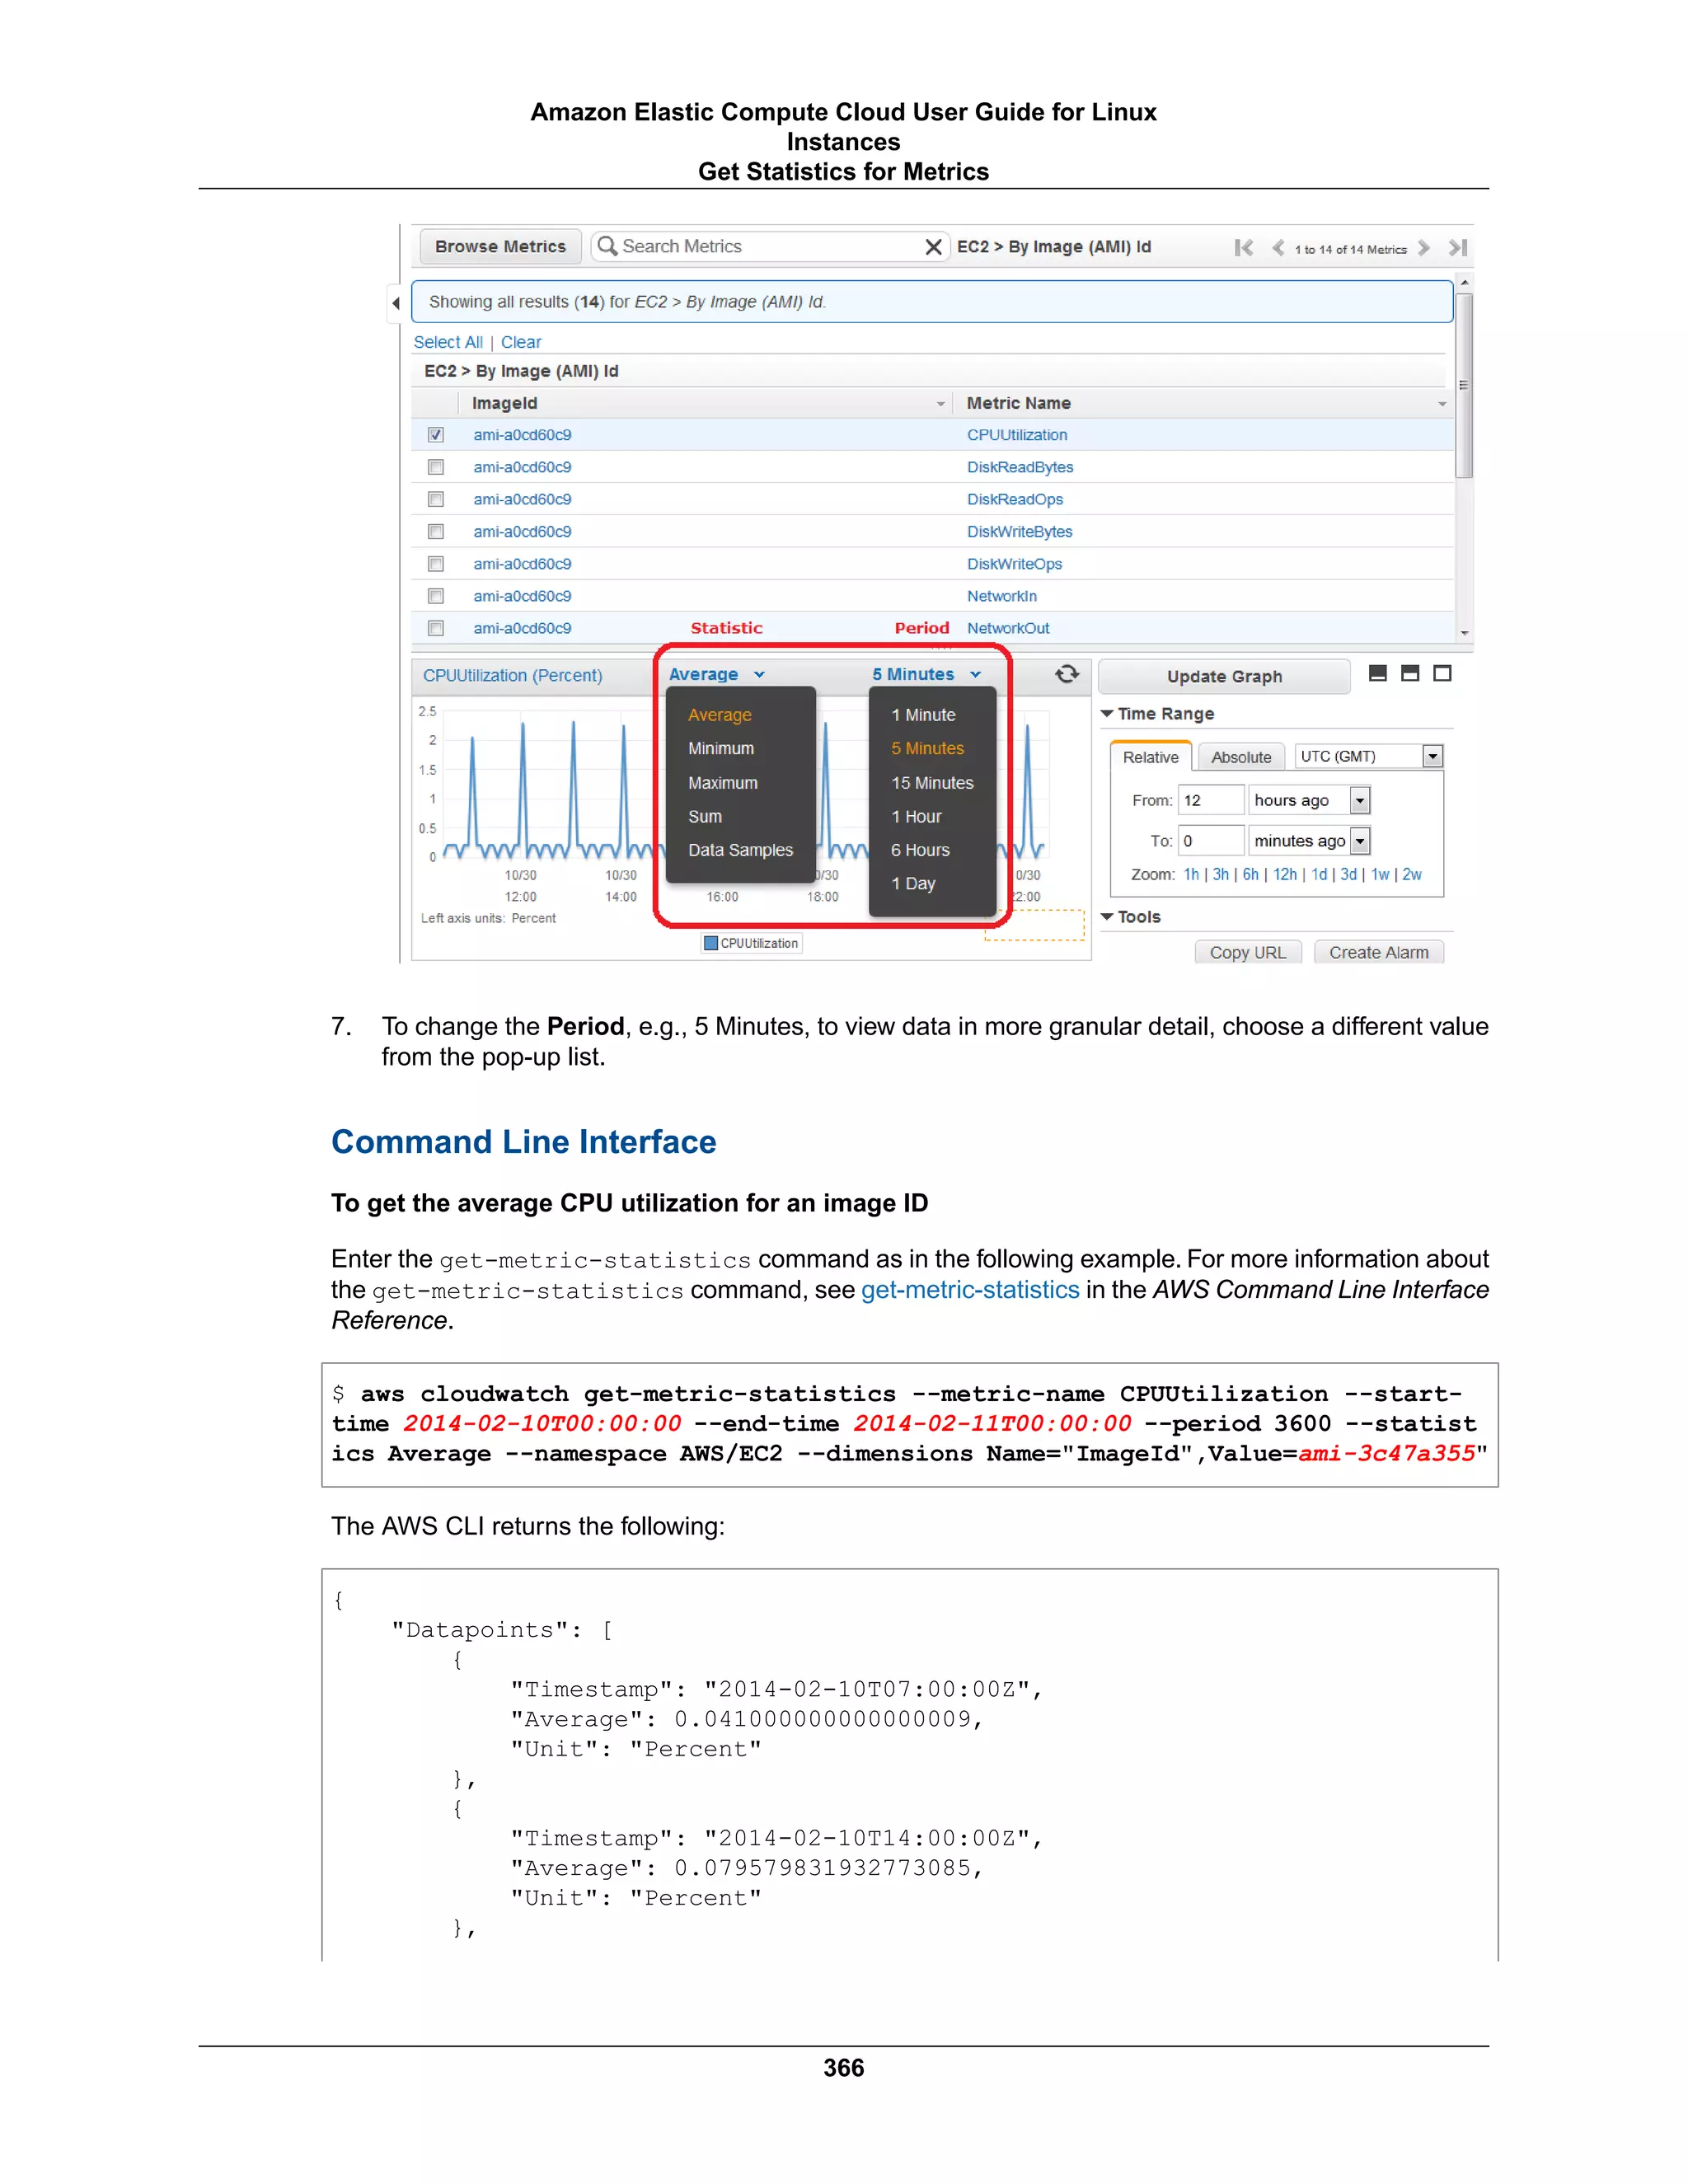

!["Unit": "Percent"
},
{
"Timestamp": "2014-02-10T19:00:00Z",
"Average": 0.038305084745762719,
"Unit": "Percent"
},
{
"Timestamp": "2014-02-10T22:00:00Z",
"Average": 0.039291666666666676,
"Unit": "Percent"
},
{
"Timestamp": "2014-02-10T09:00:00Z",
"Average": 0.17126050420168065,
"Unit": "Percent"
},
{
"Timestamp": "2014-02-10T08:00:00Z",
"Average": 0.041166666666666678,
"Unit": "Percent"
},
{
"Timestamp": "2014-02-10T11:00:00Z",
"Average": 0.082374999999999962,
"Unit": "Percent"
},
{
"Timestamp": "2014-02-10T17:00:00Z",
"Average": 0.037625000000000013,
"Unit": "Percent"
},
{
"Timestamp": "2014-02-10T10:00:00Z",
"Average": 0.039458333333333345,
"Unit": "Percent"
},
{
"Timestamp": "2014-02-10T05:00:00Z",
"Average": 0.039250000000000007,
"Unit": "Percent"
},
{
"Timestamp": "2014-02-10T00:00:00Z",
"Average": 0.037625000000000013,
"Unit": "Percent"
},
{
"Timestamp": "2014-02-10T16:00:00Z",
"Average": 0.041512605042016815,
"Unit": "Percent"
}
],
"Label": "CPUUtilization"
}
The operation returns statistics that are one-minute values for the one-day interval.Each value represents
an average CPU utilization percentage for EC2 instances running the specified machine image.
368
Amazon Elastic Compute Cloud User Guide for Linux
Instances
Get Statistics for Metrics](https://image.slidesharecdn.com/ec2-ug-151130152858-lva1-app6892/75/Amazan-Ec2-377-2048.jpg)


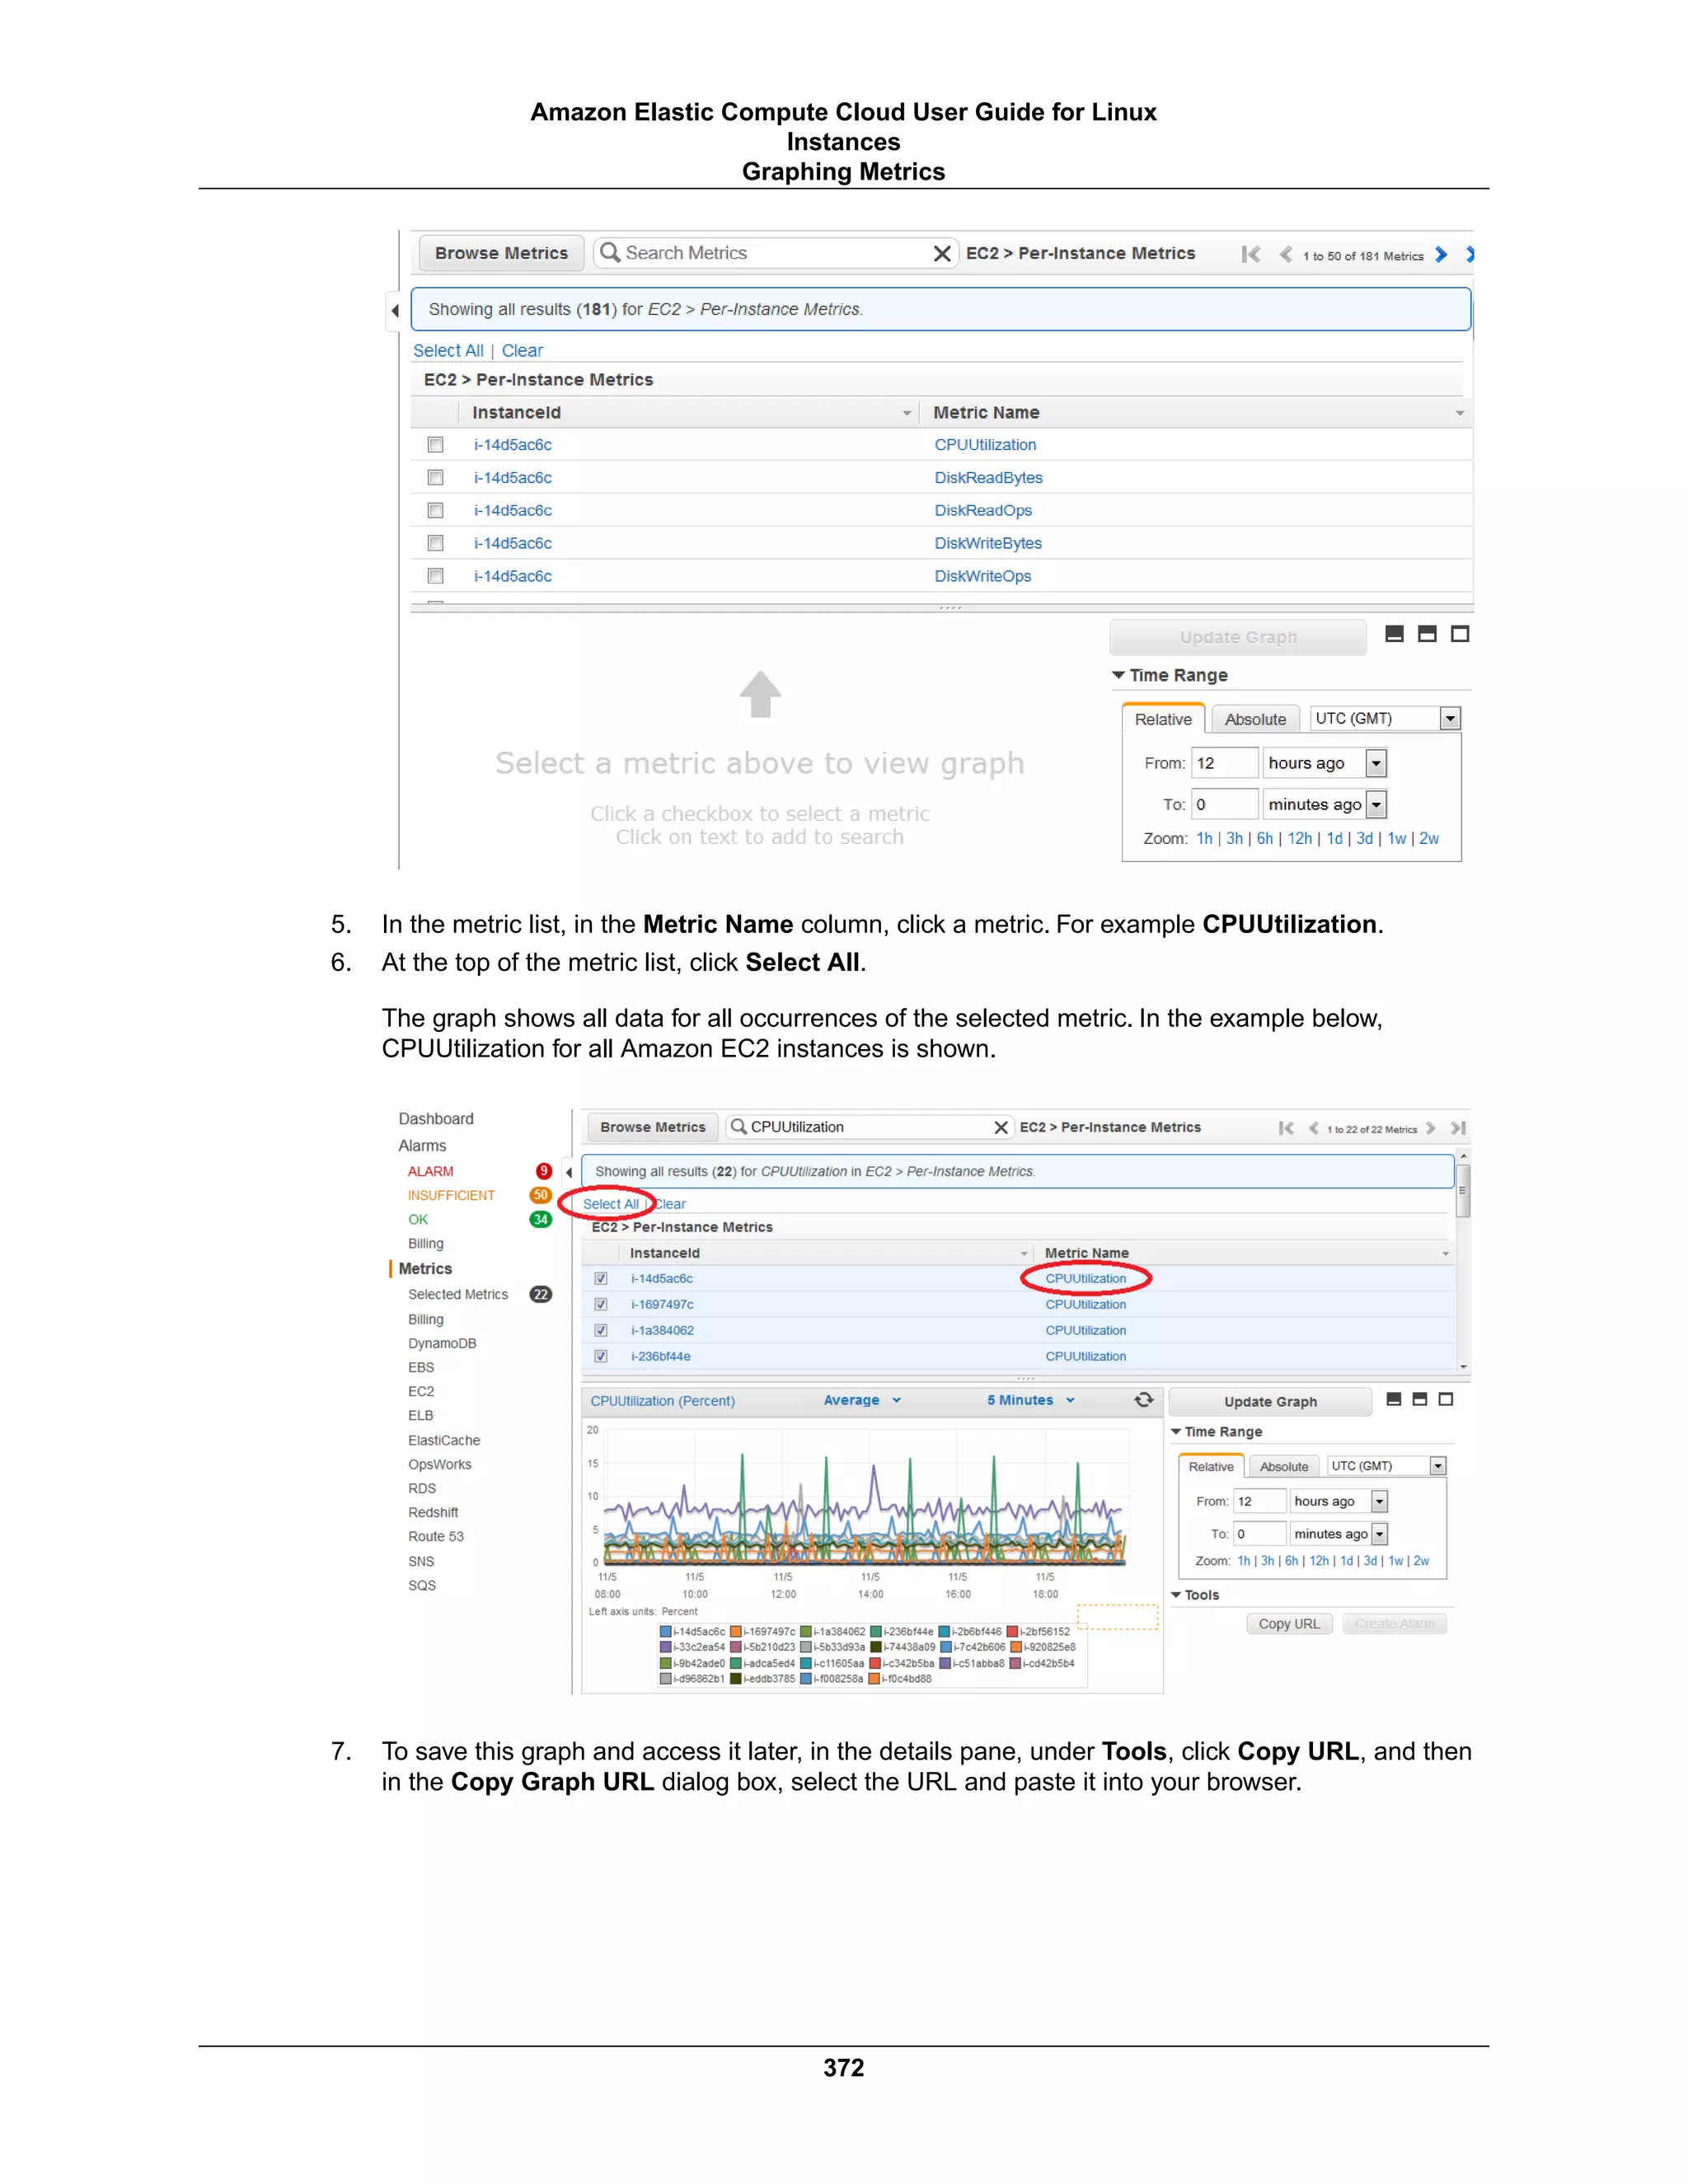


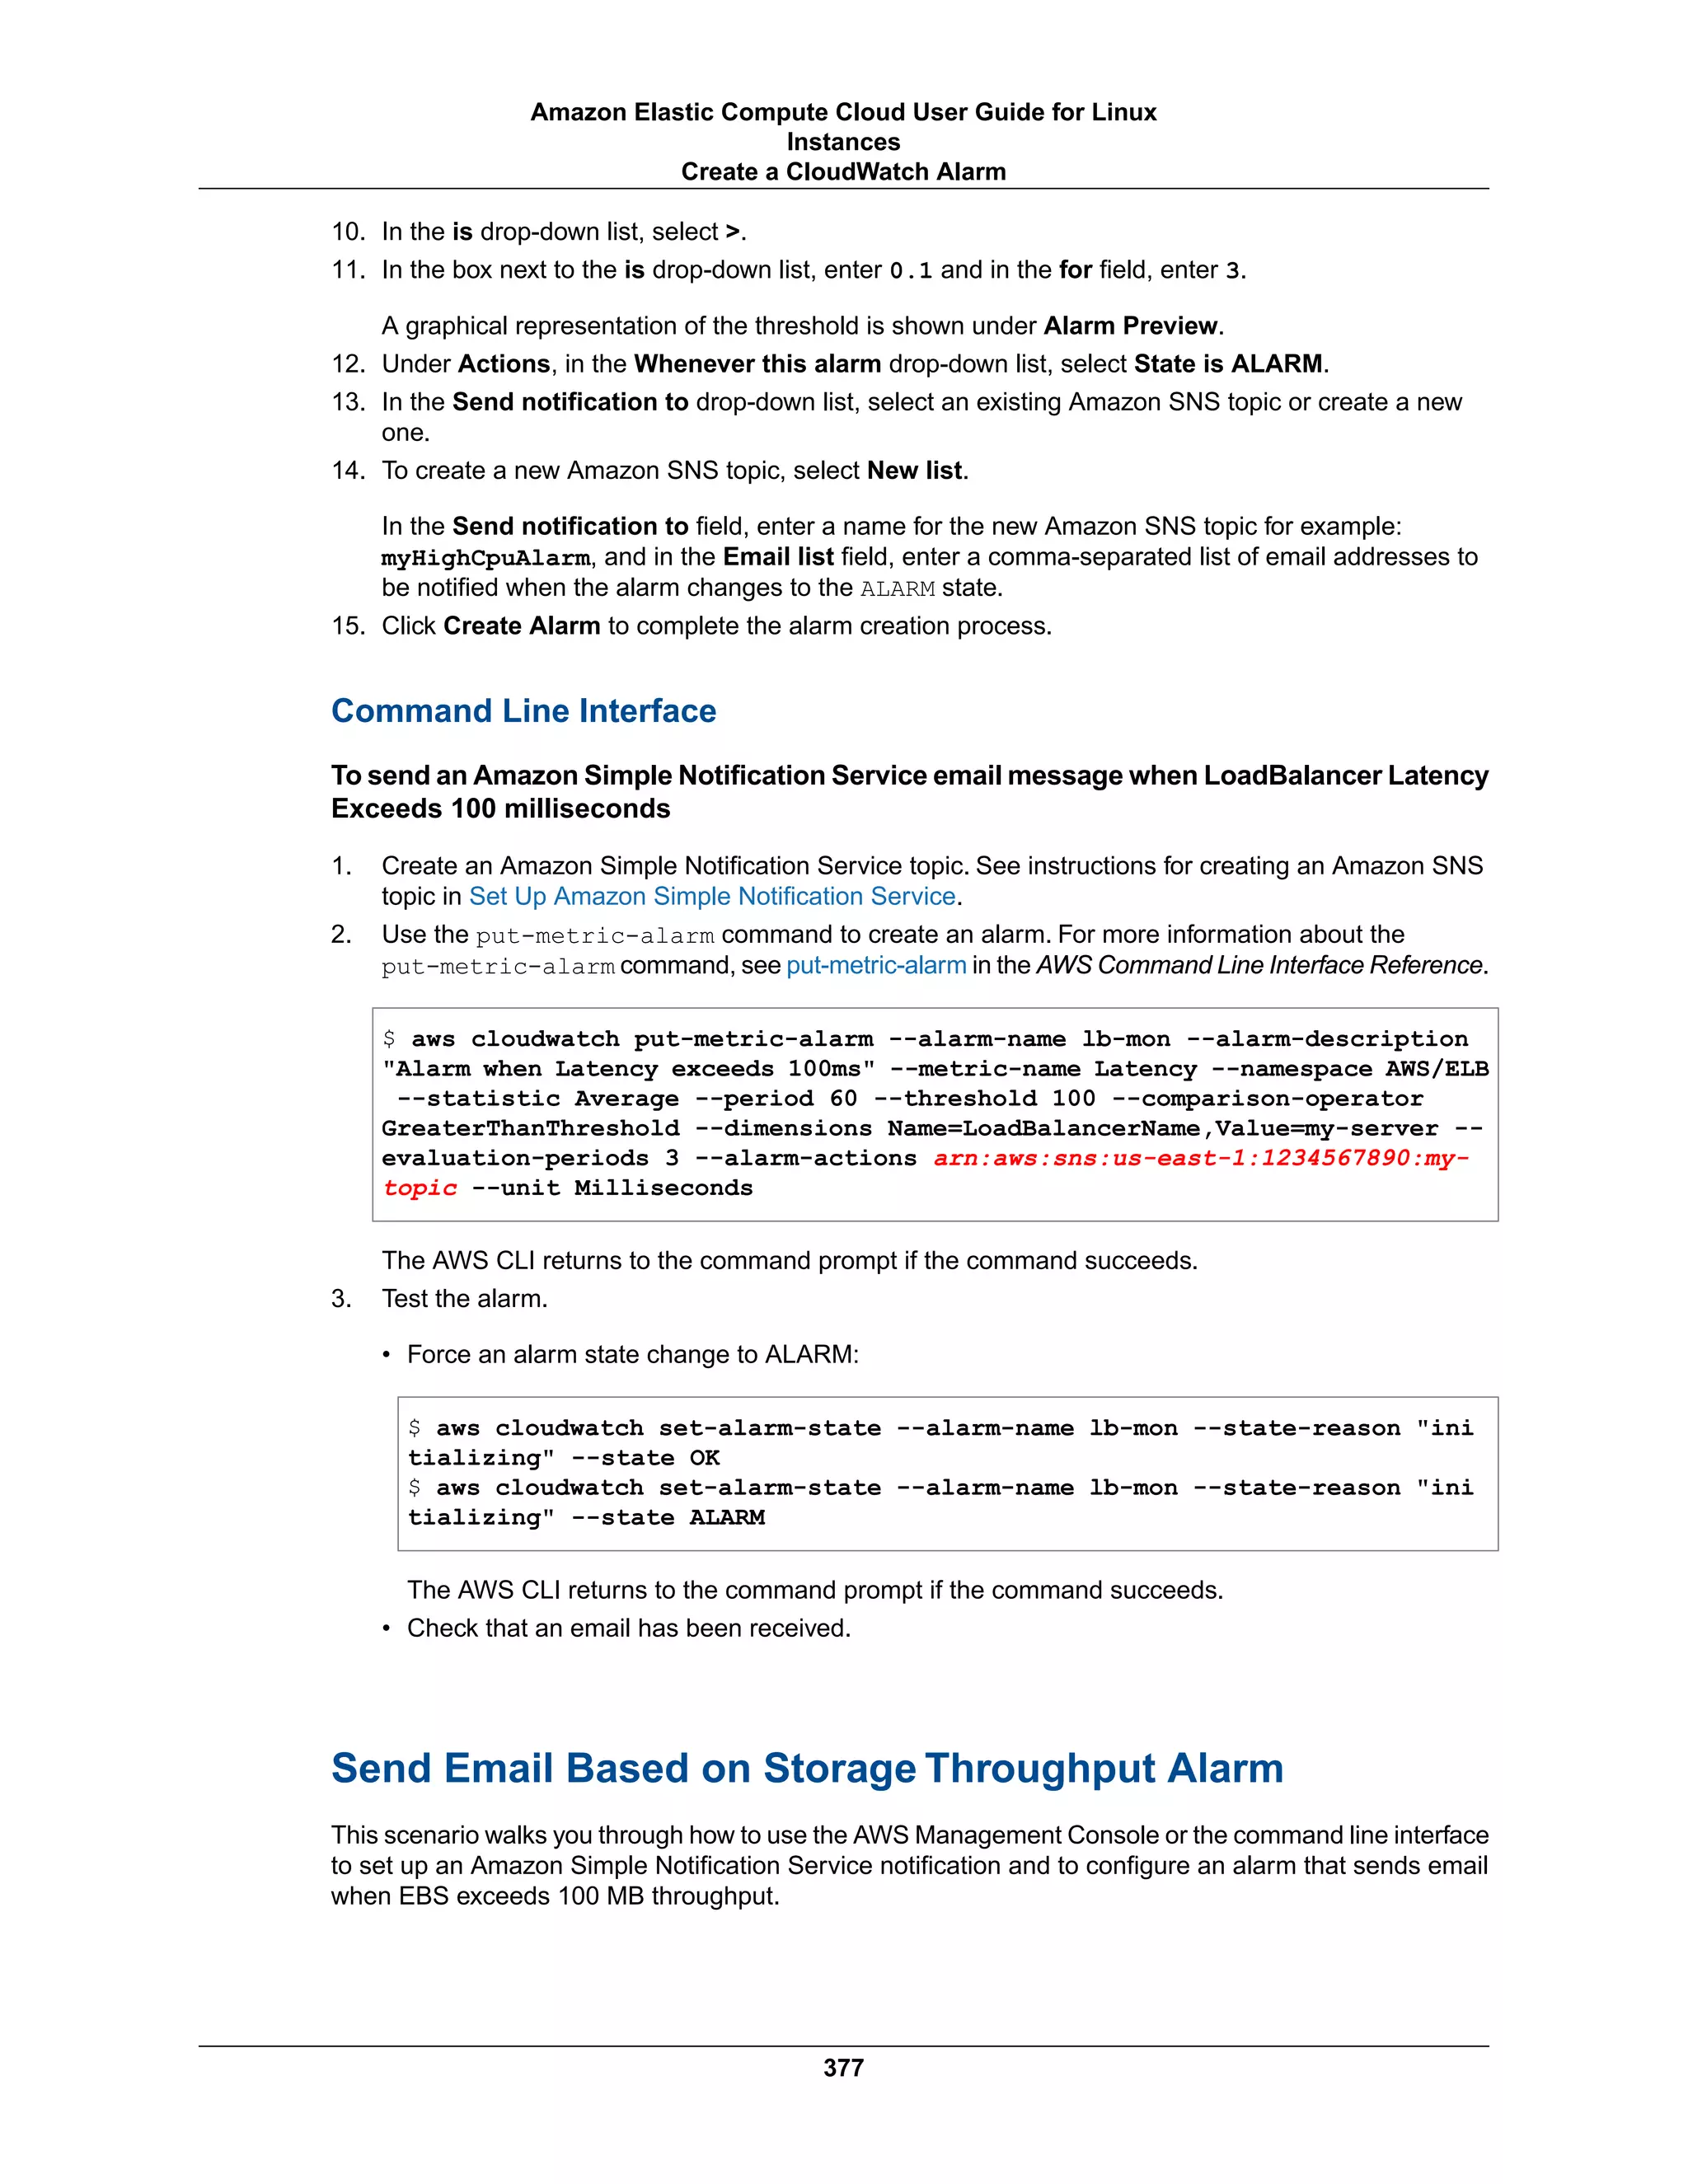

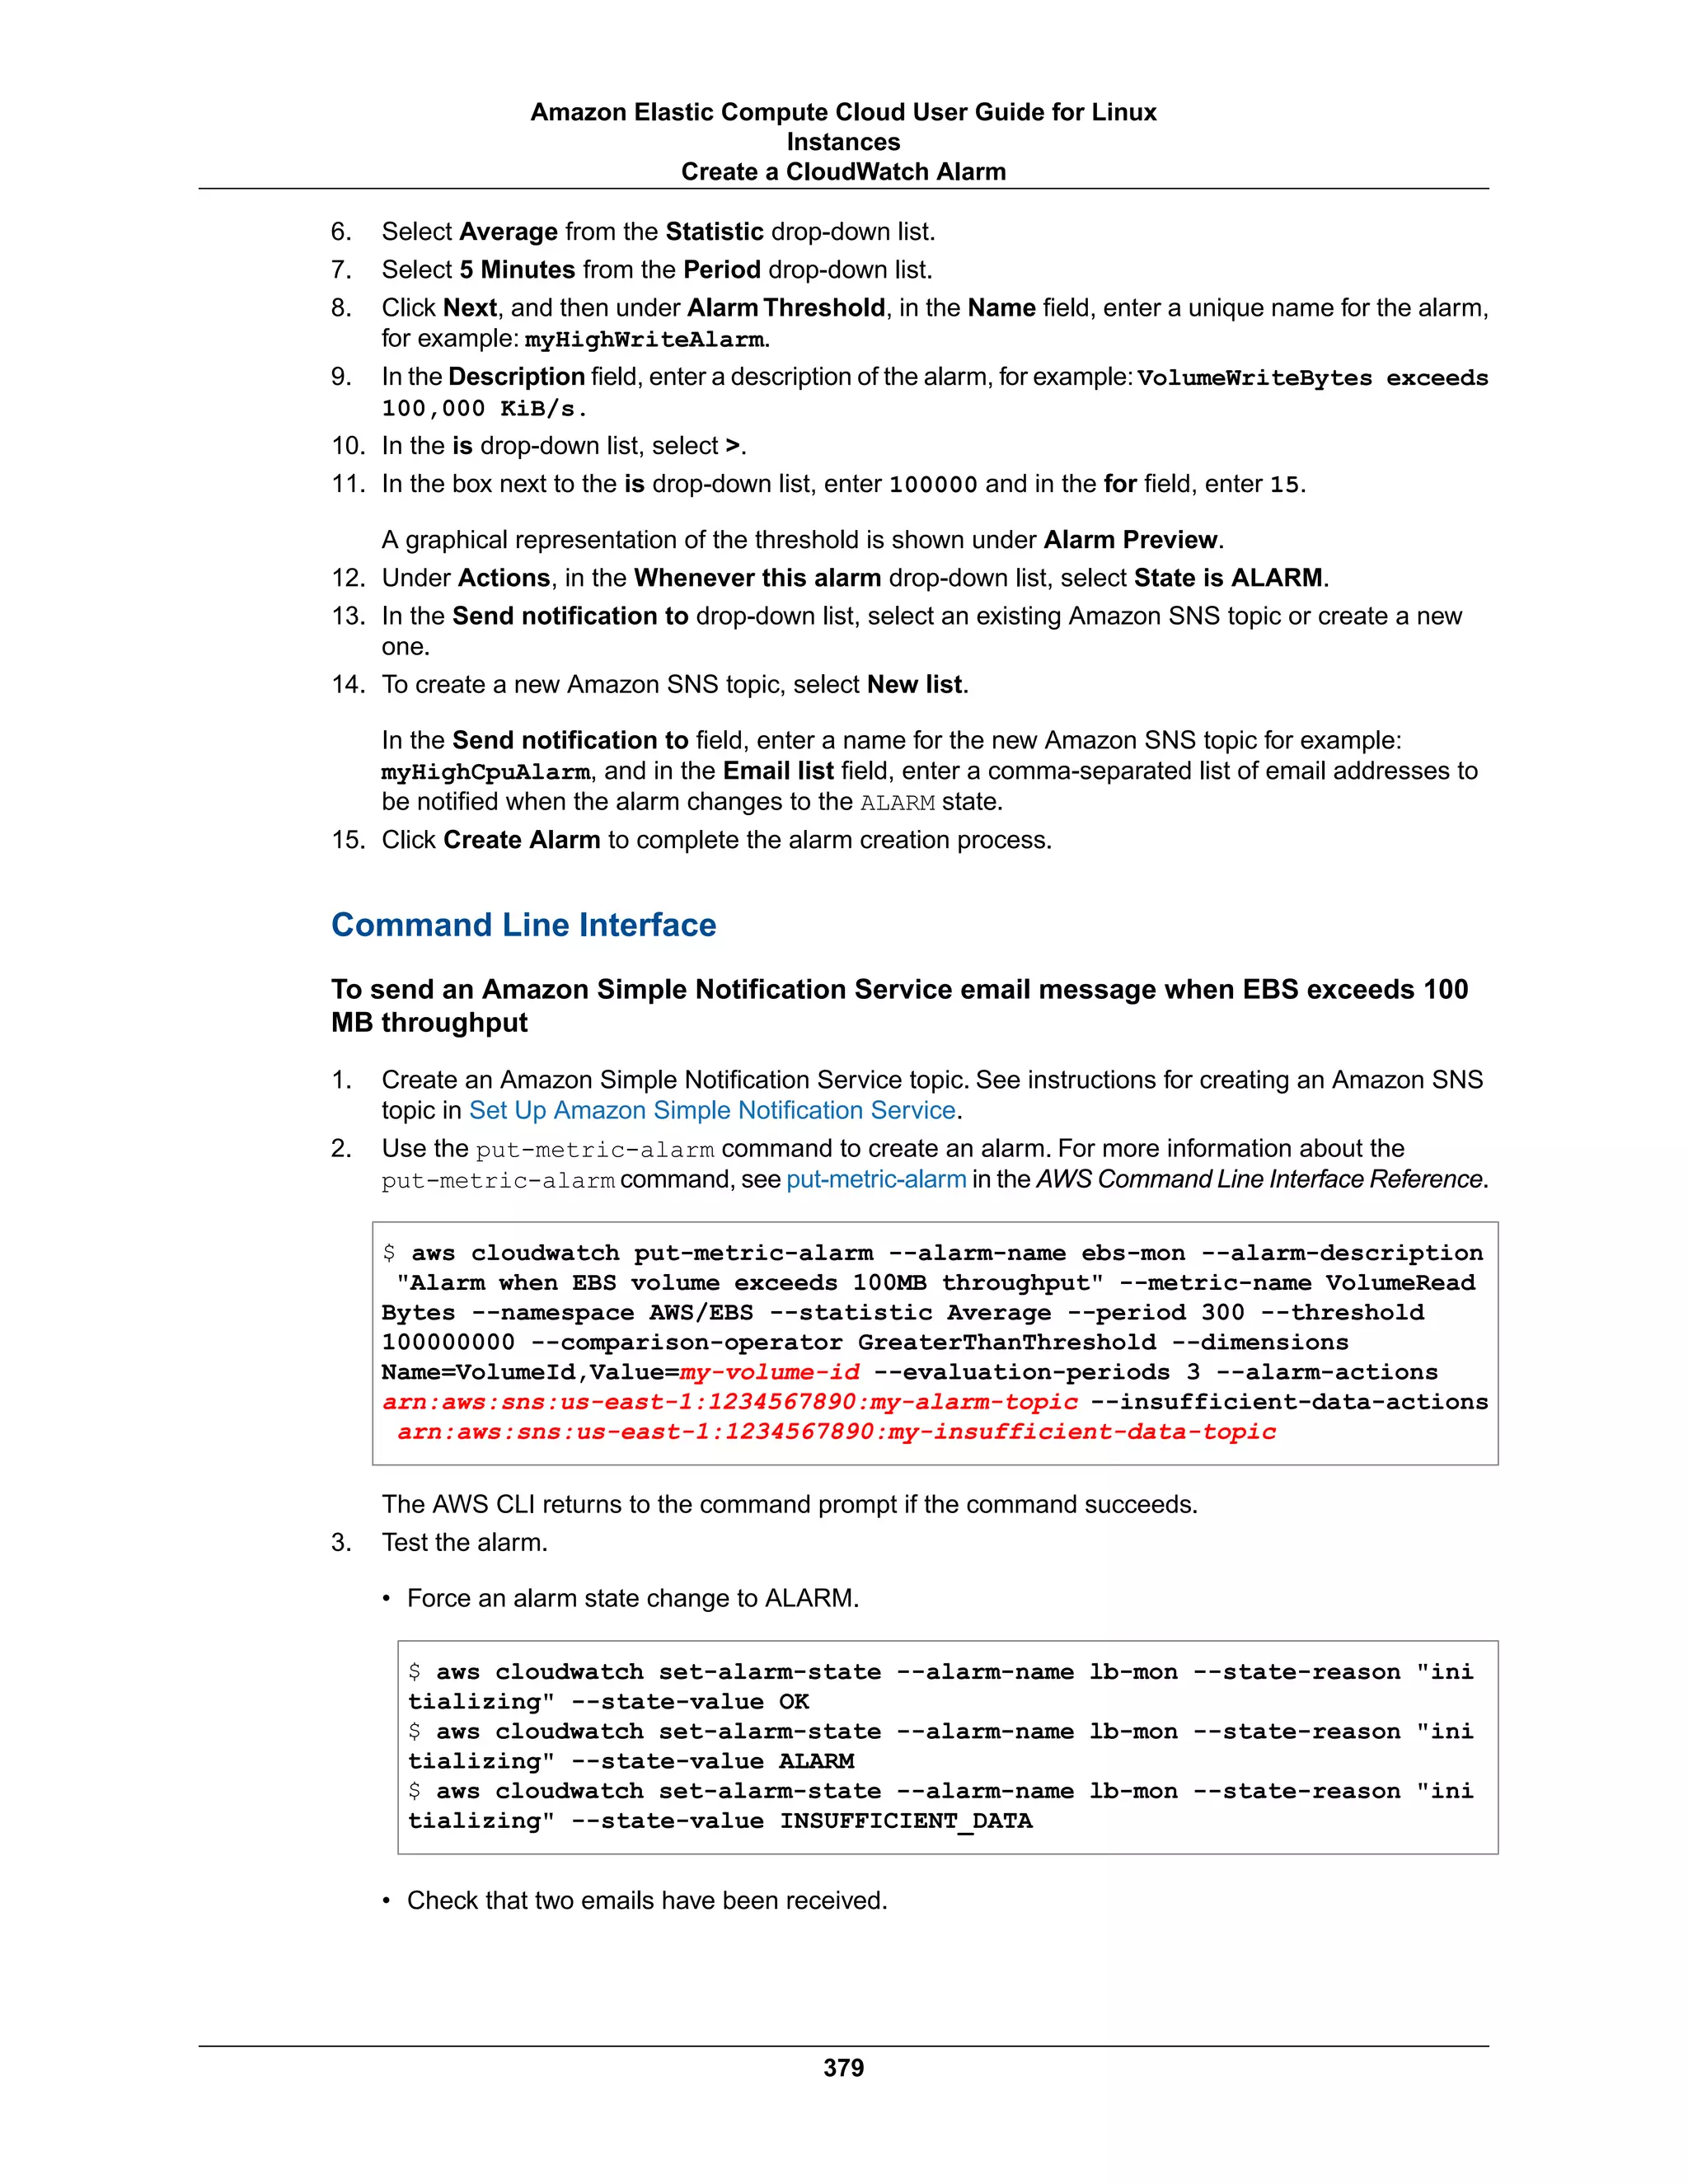


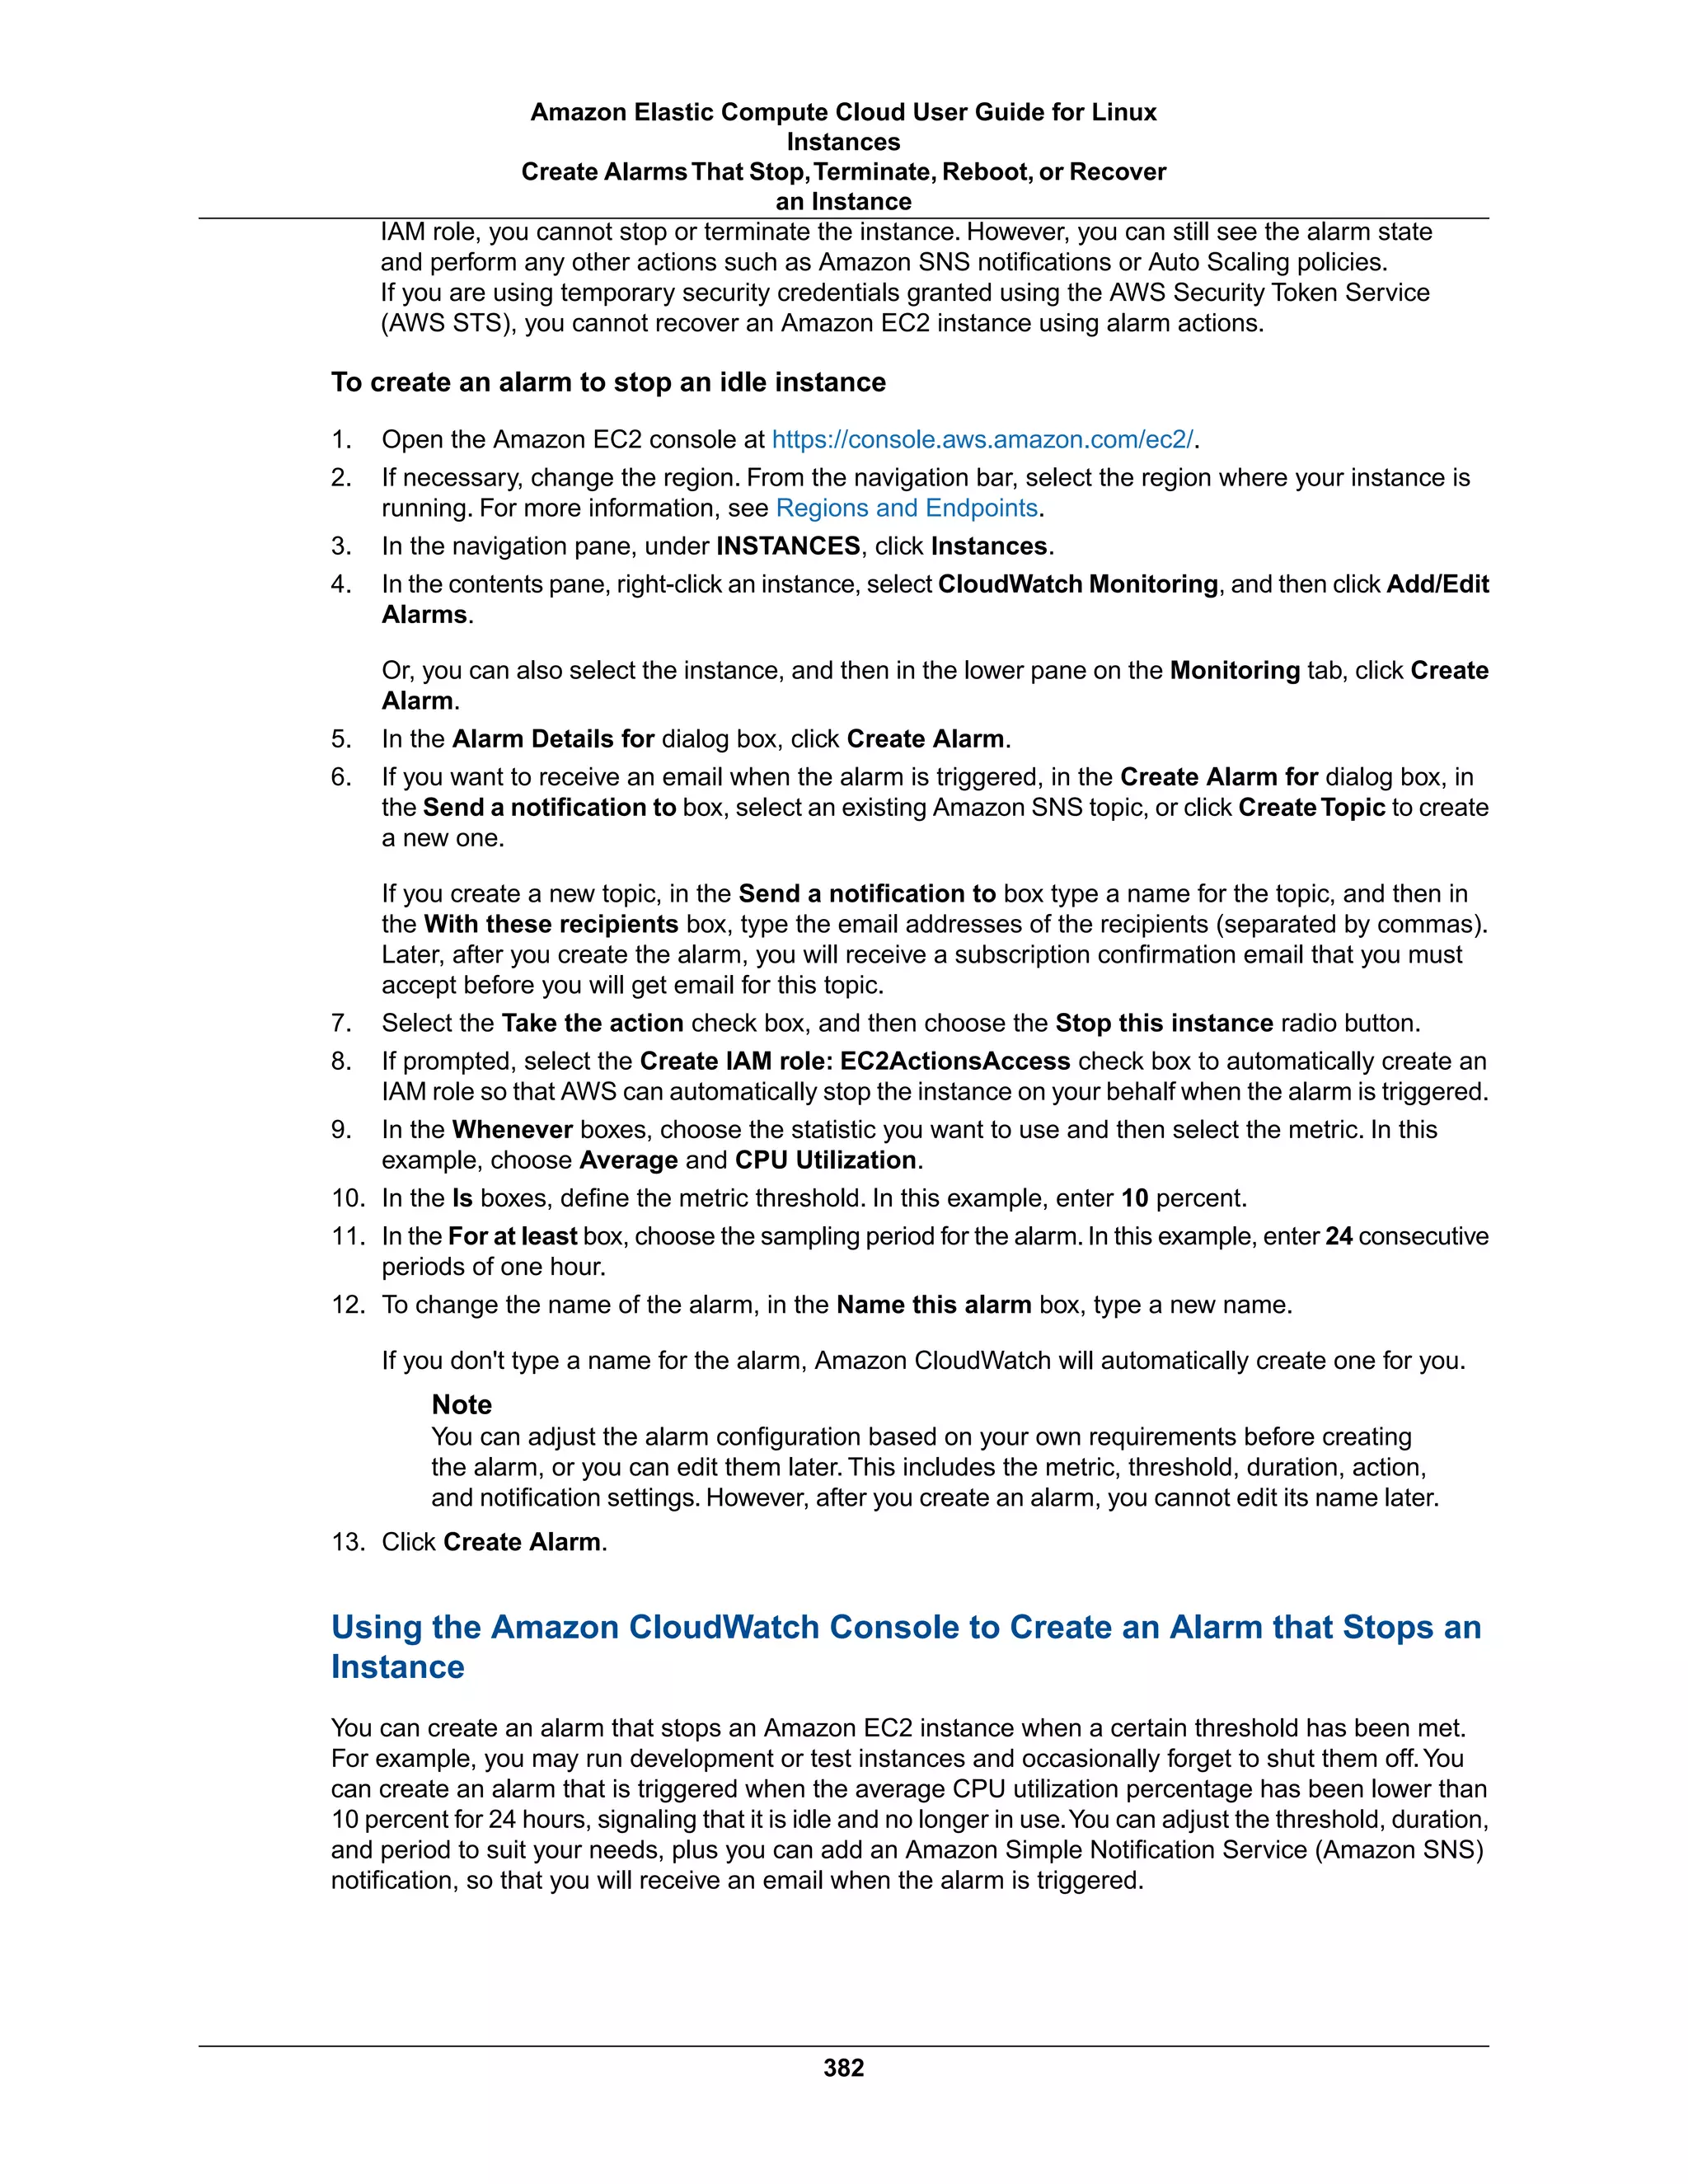


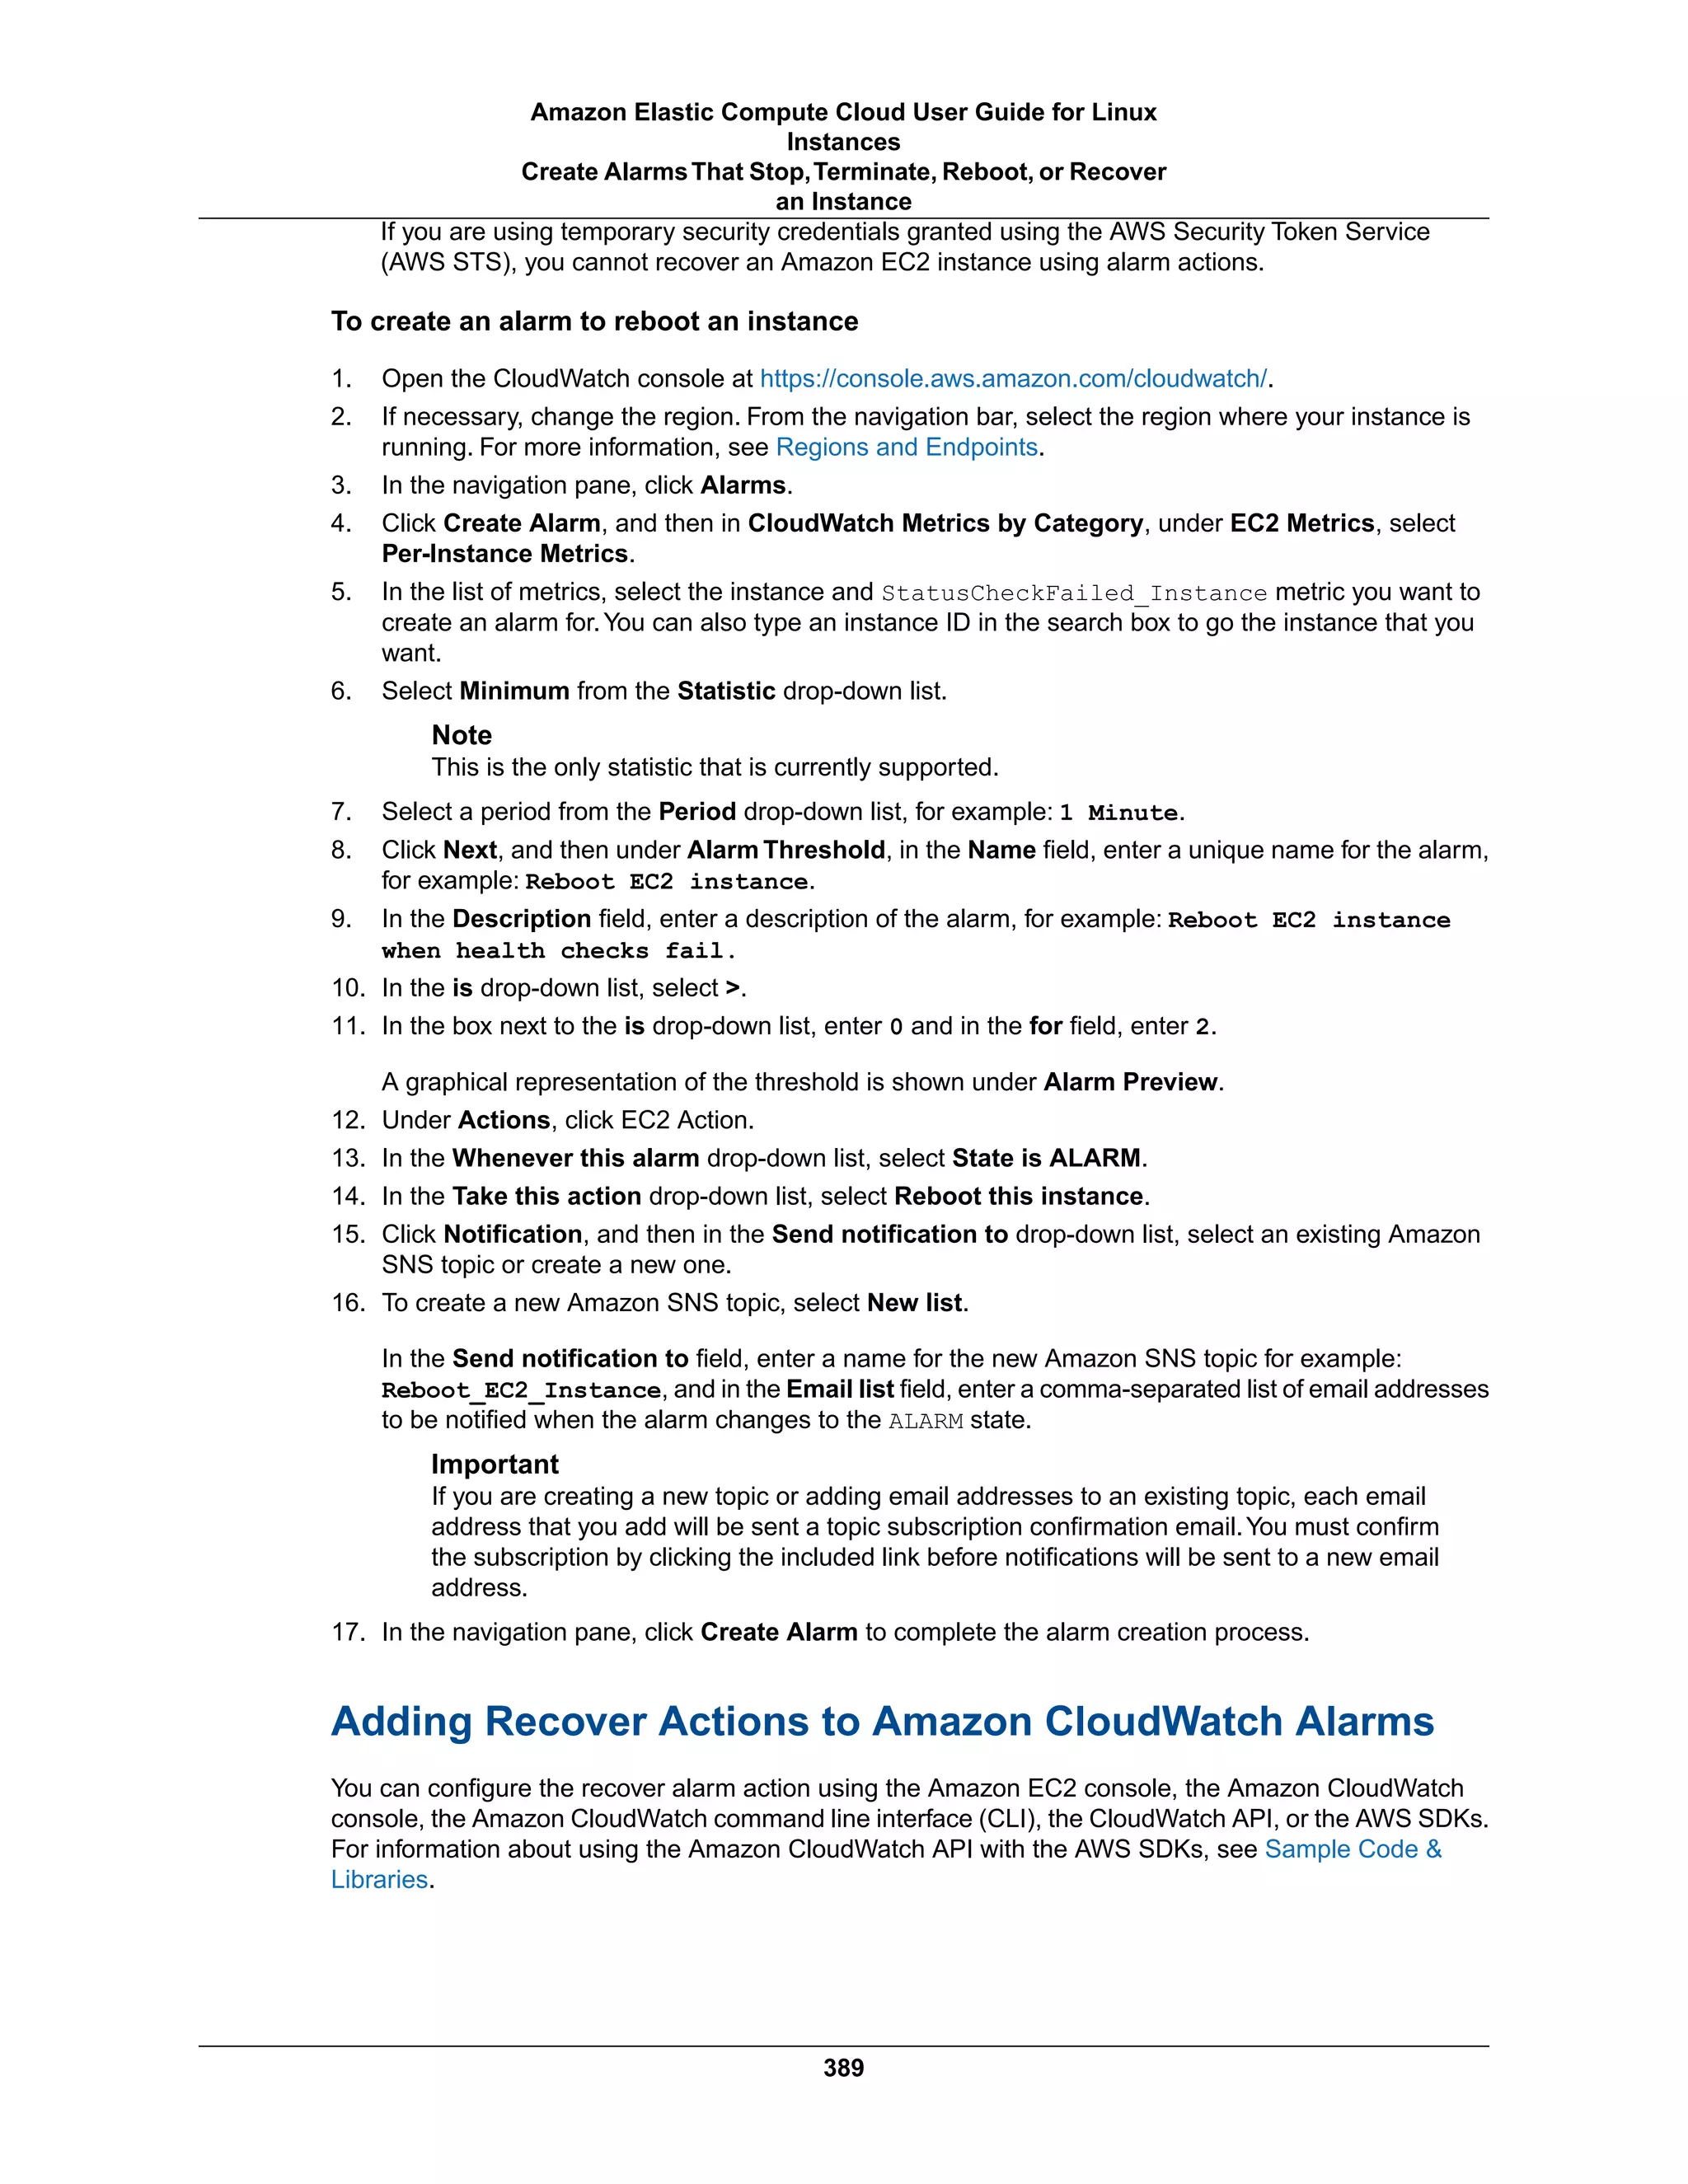
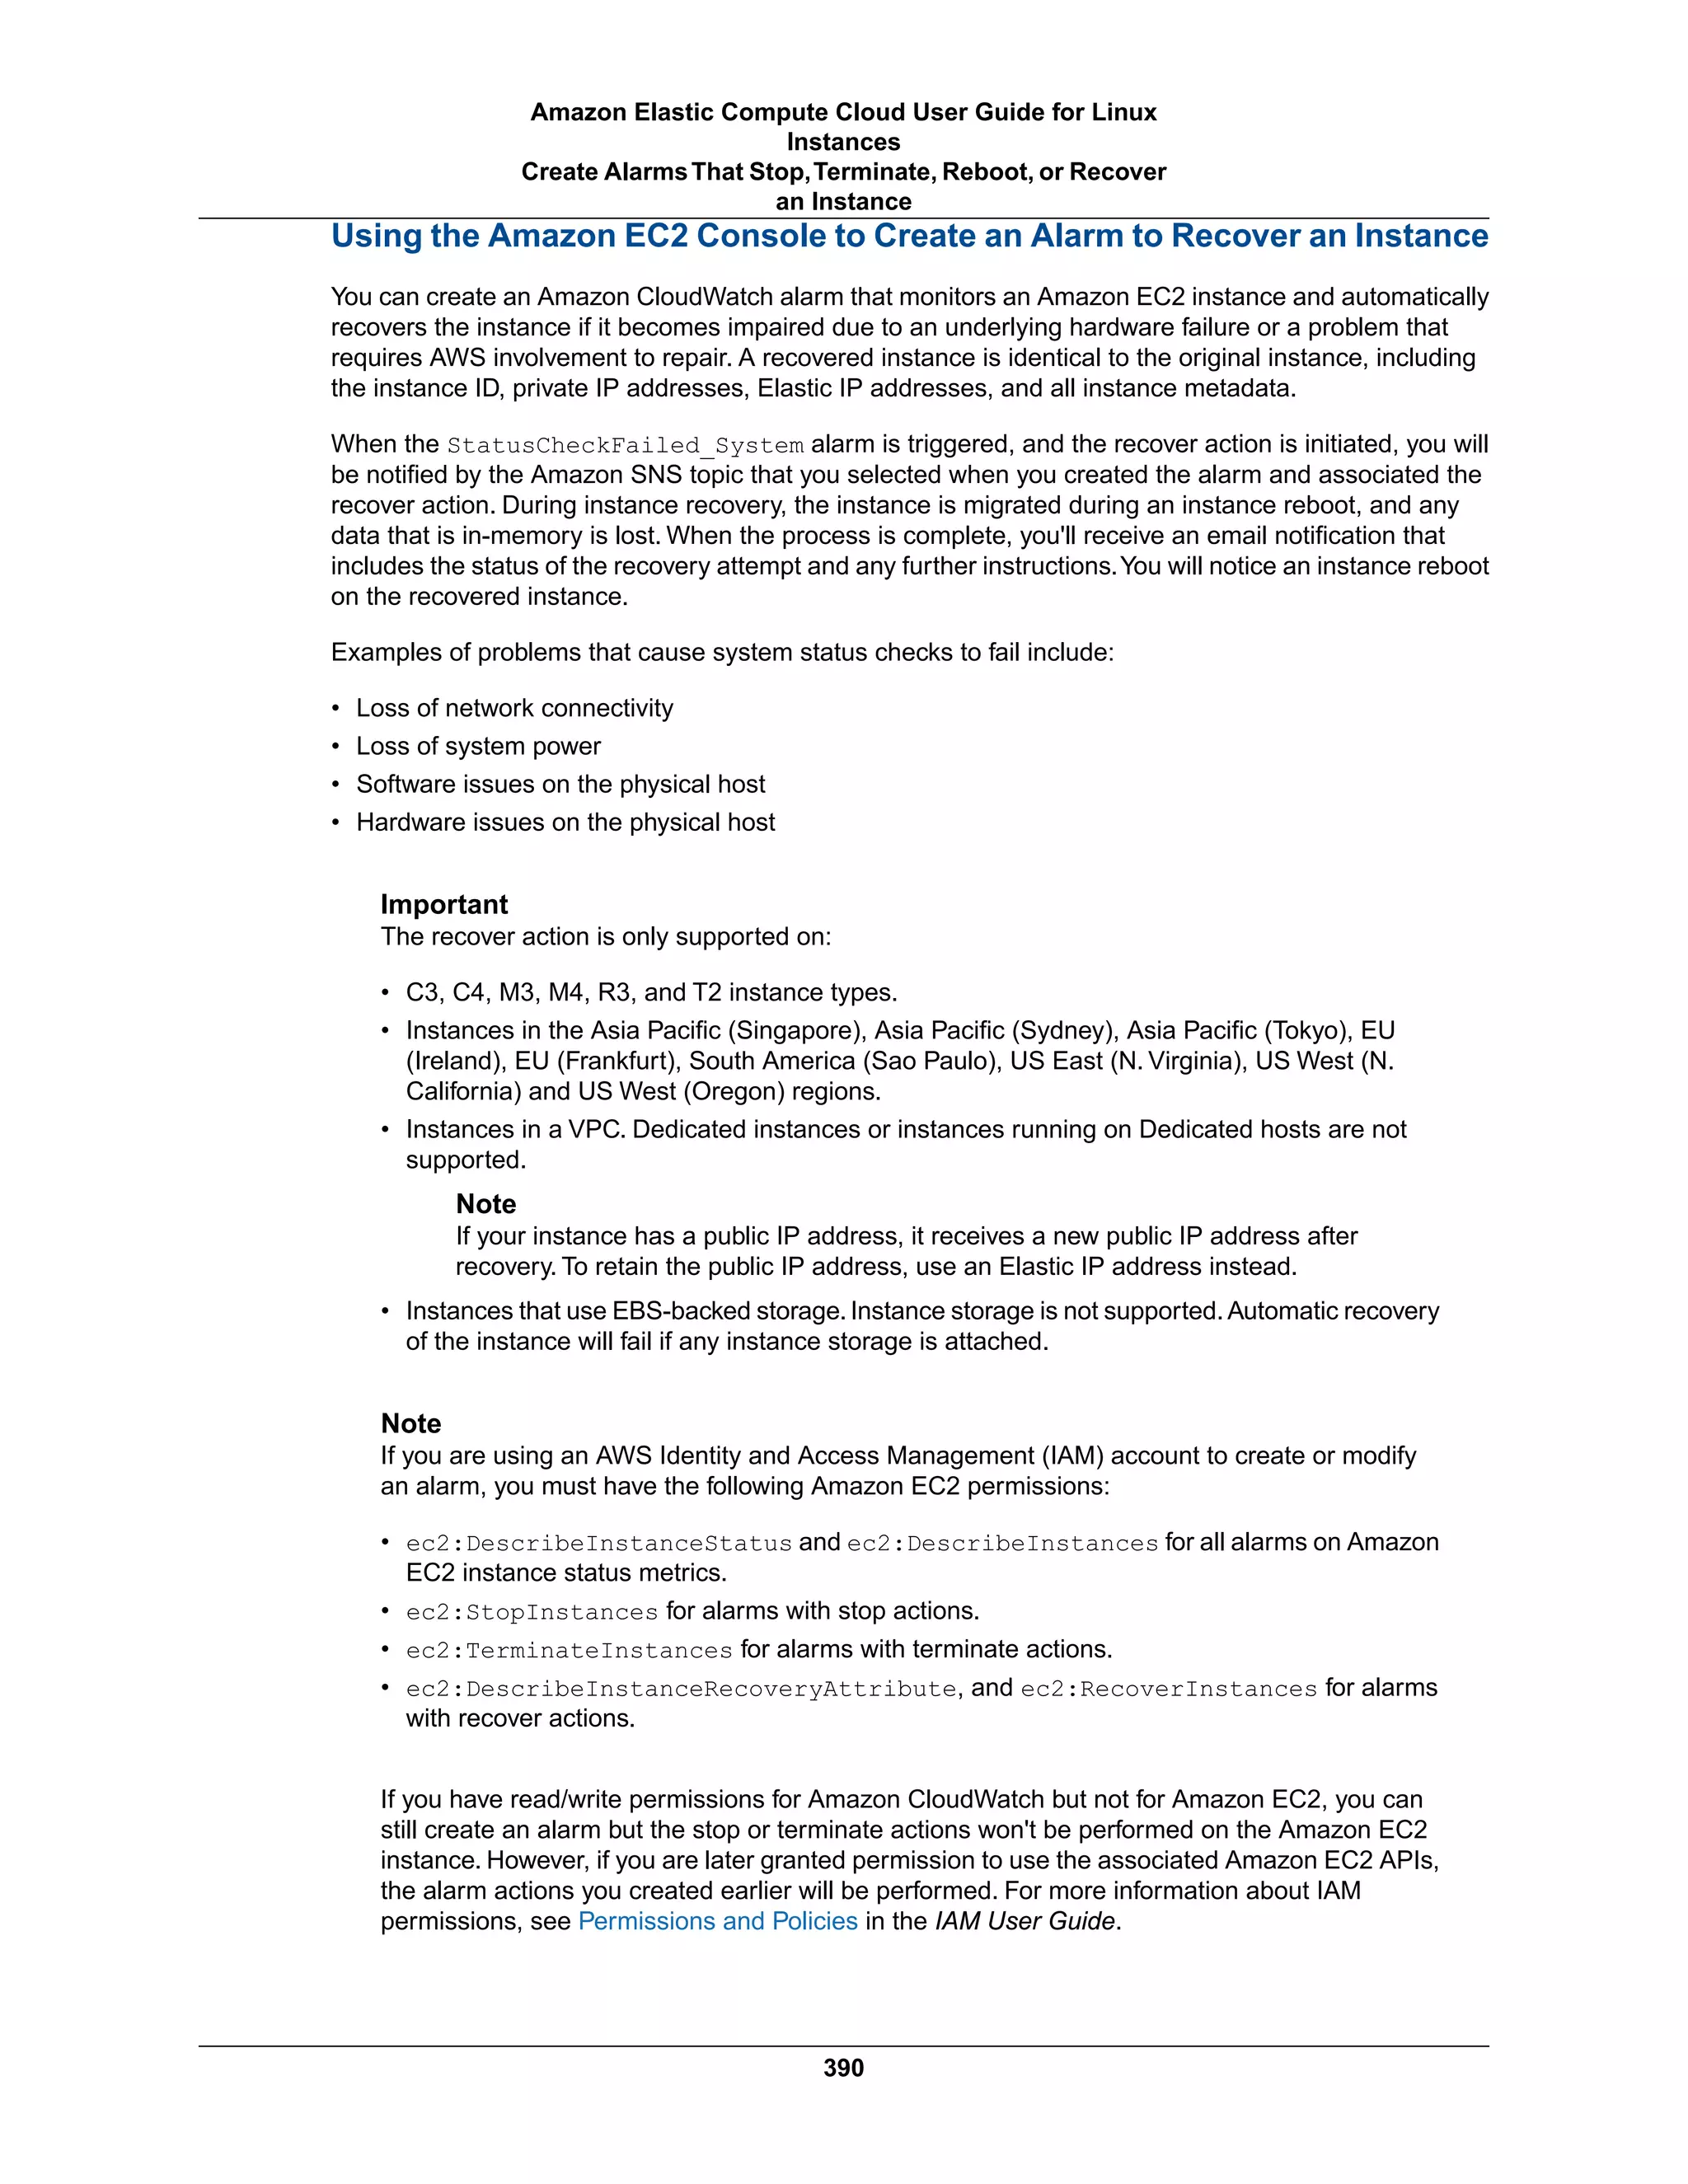

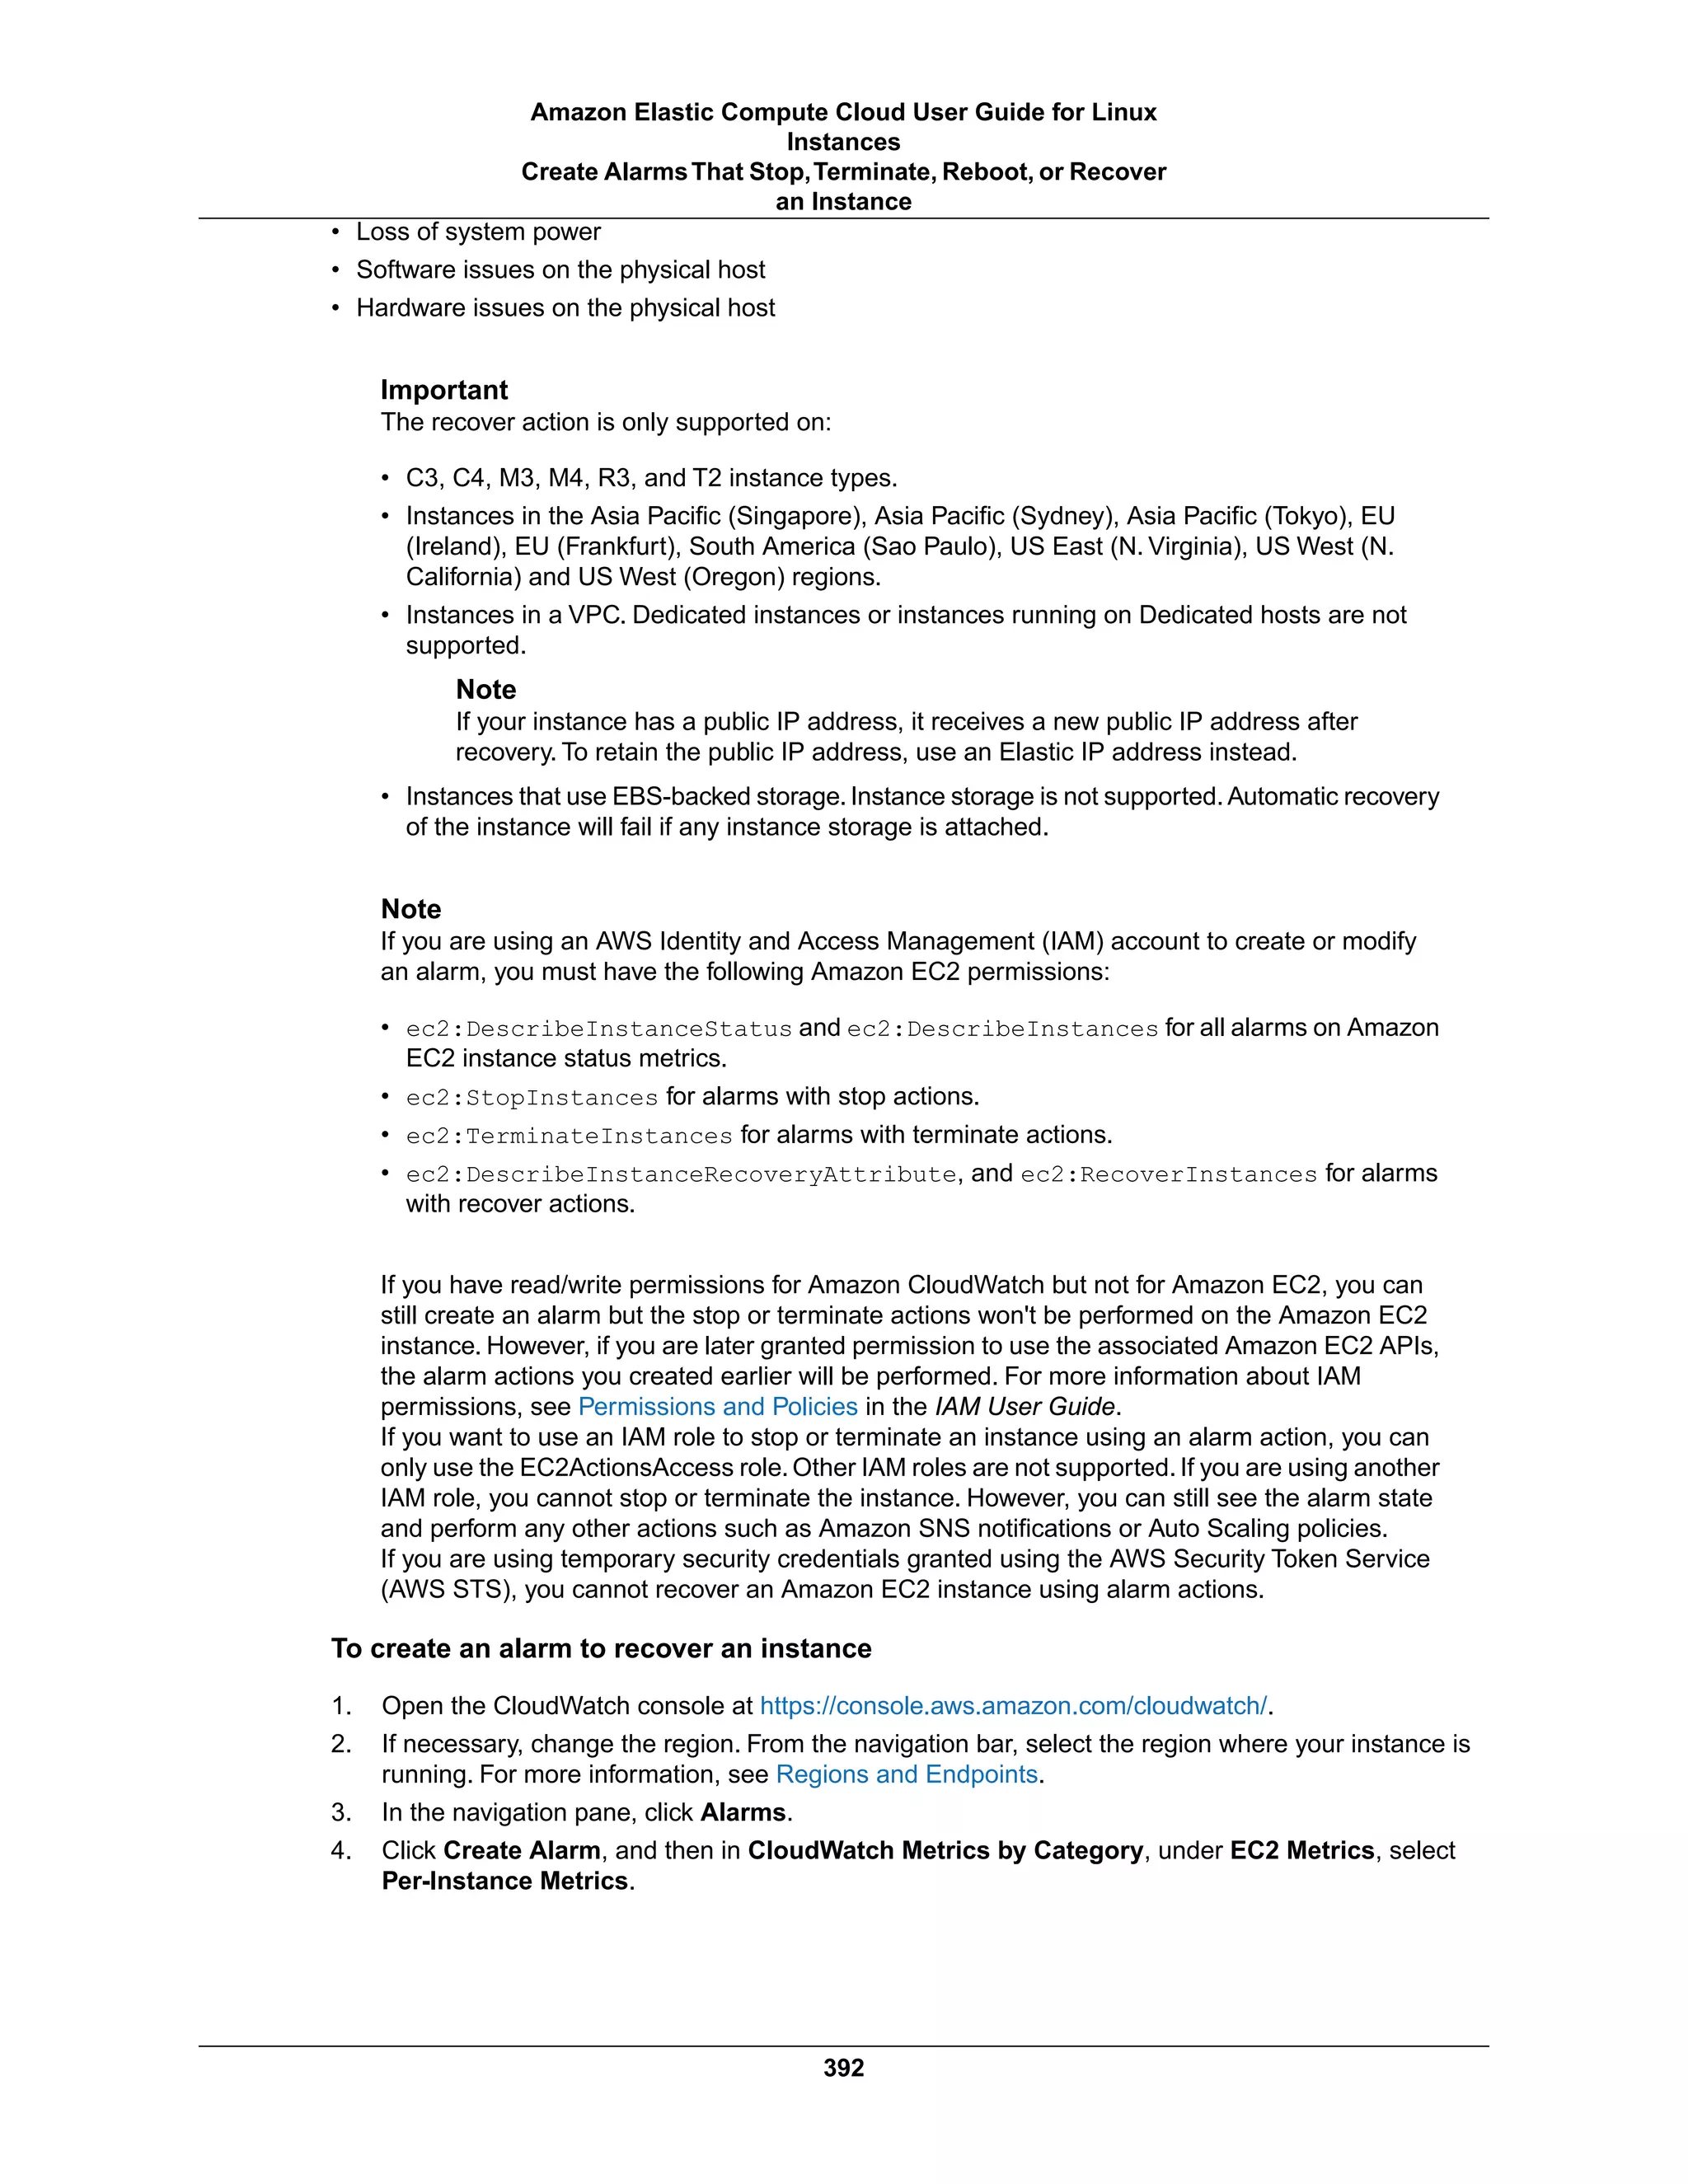


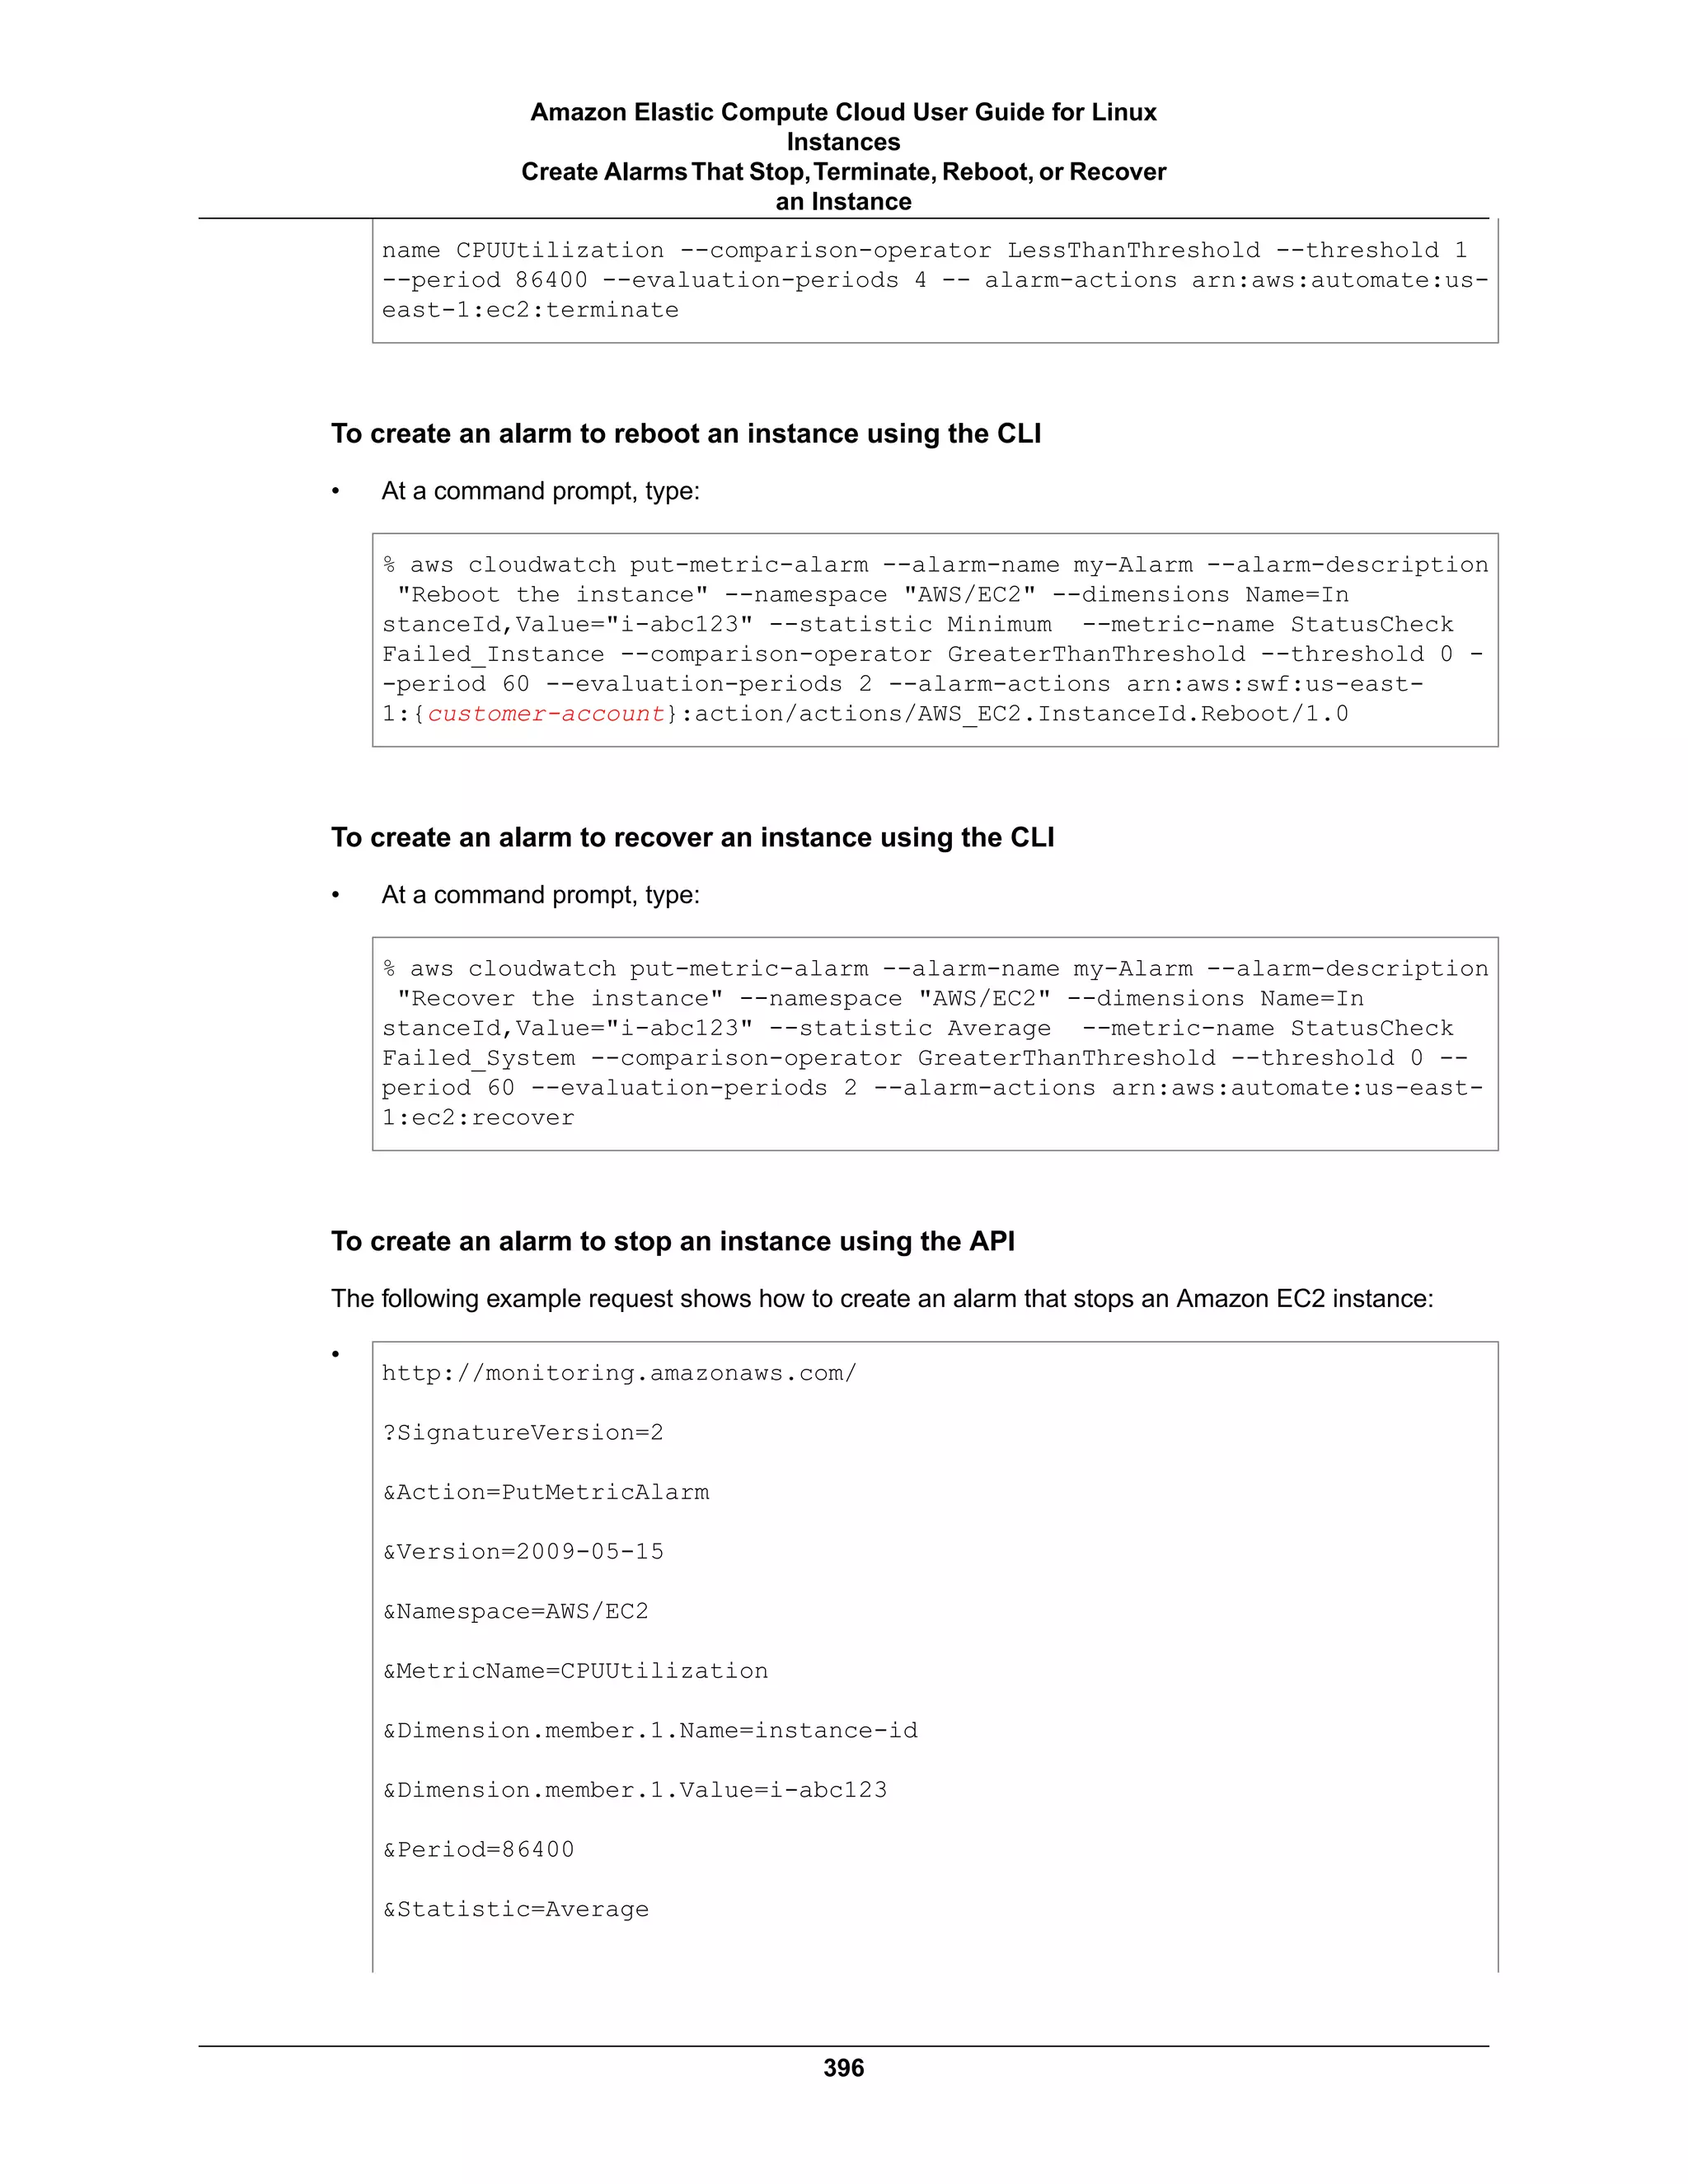
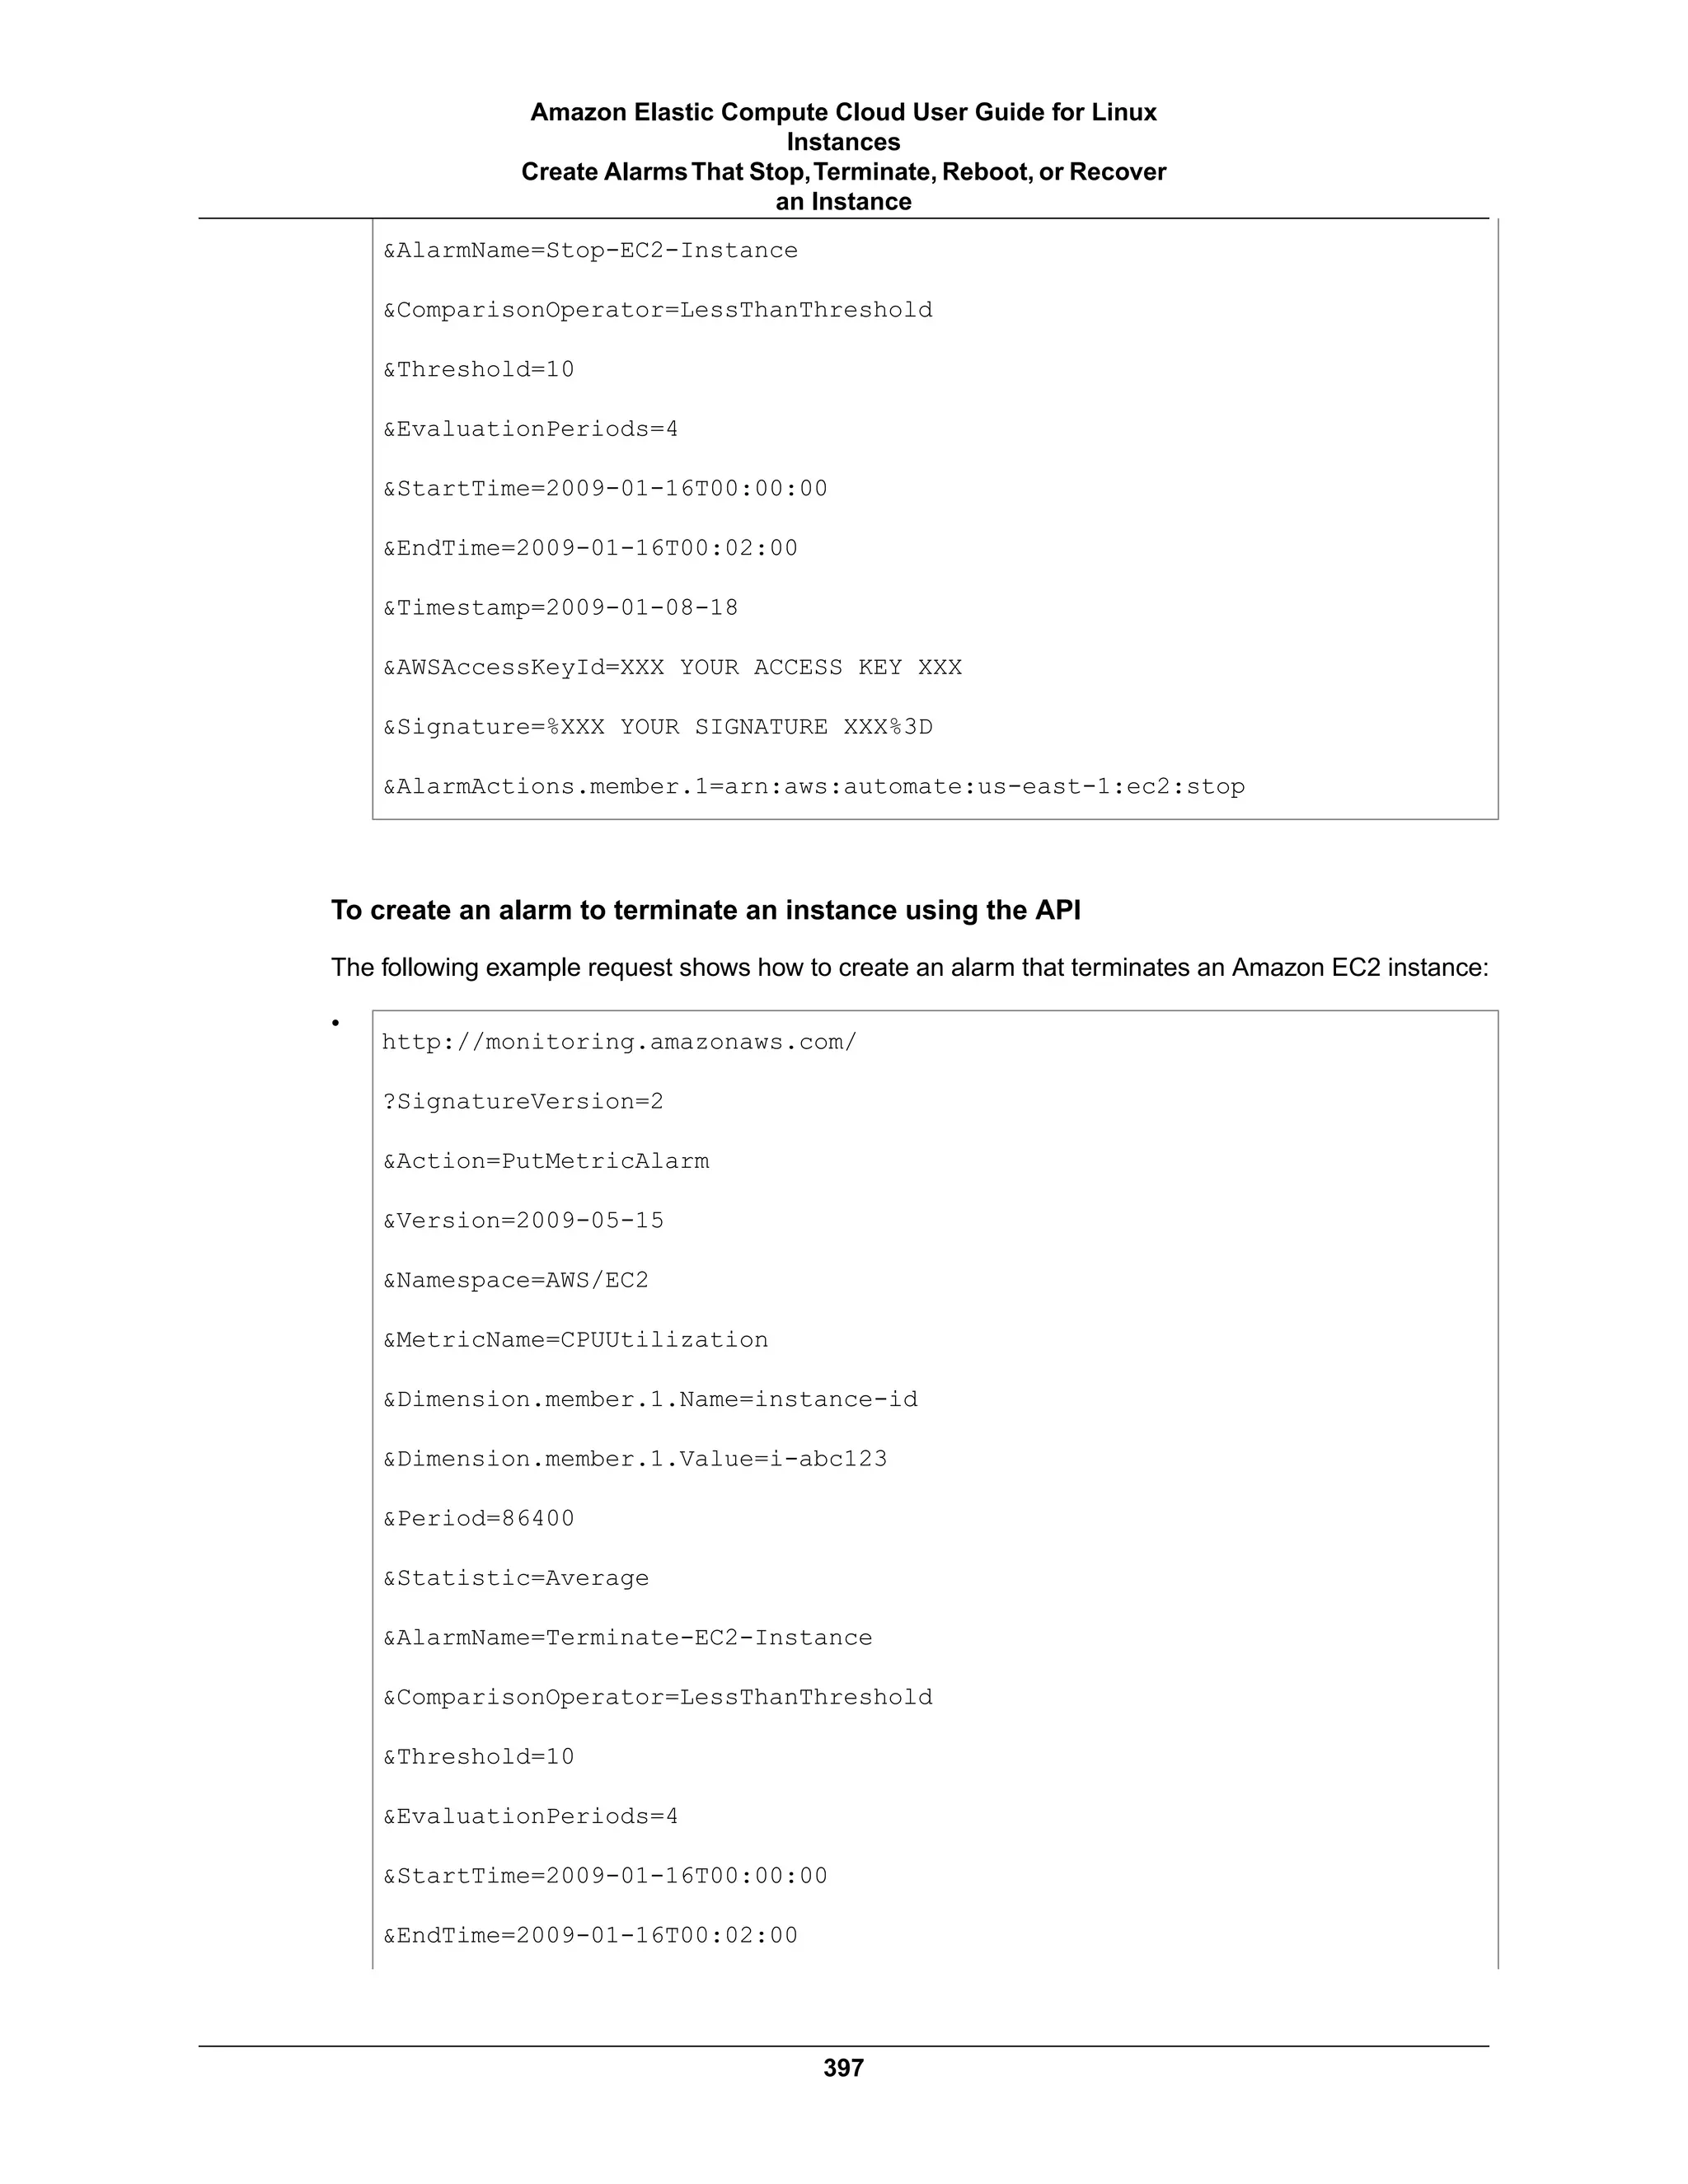

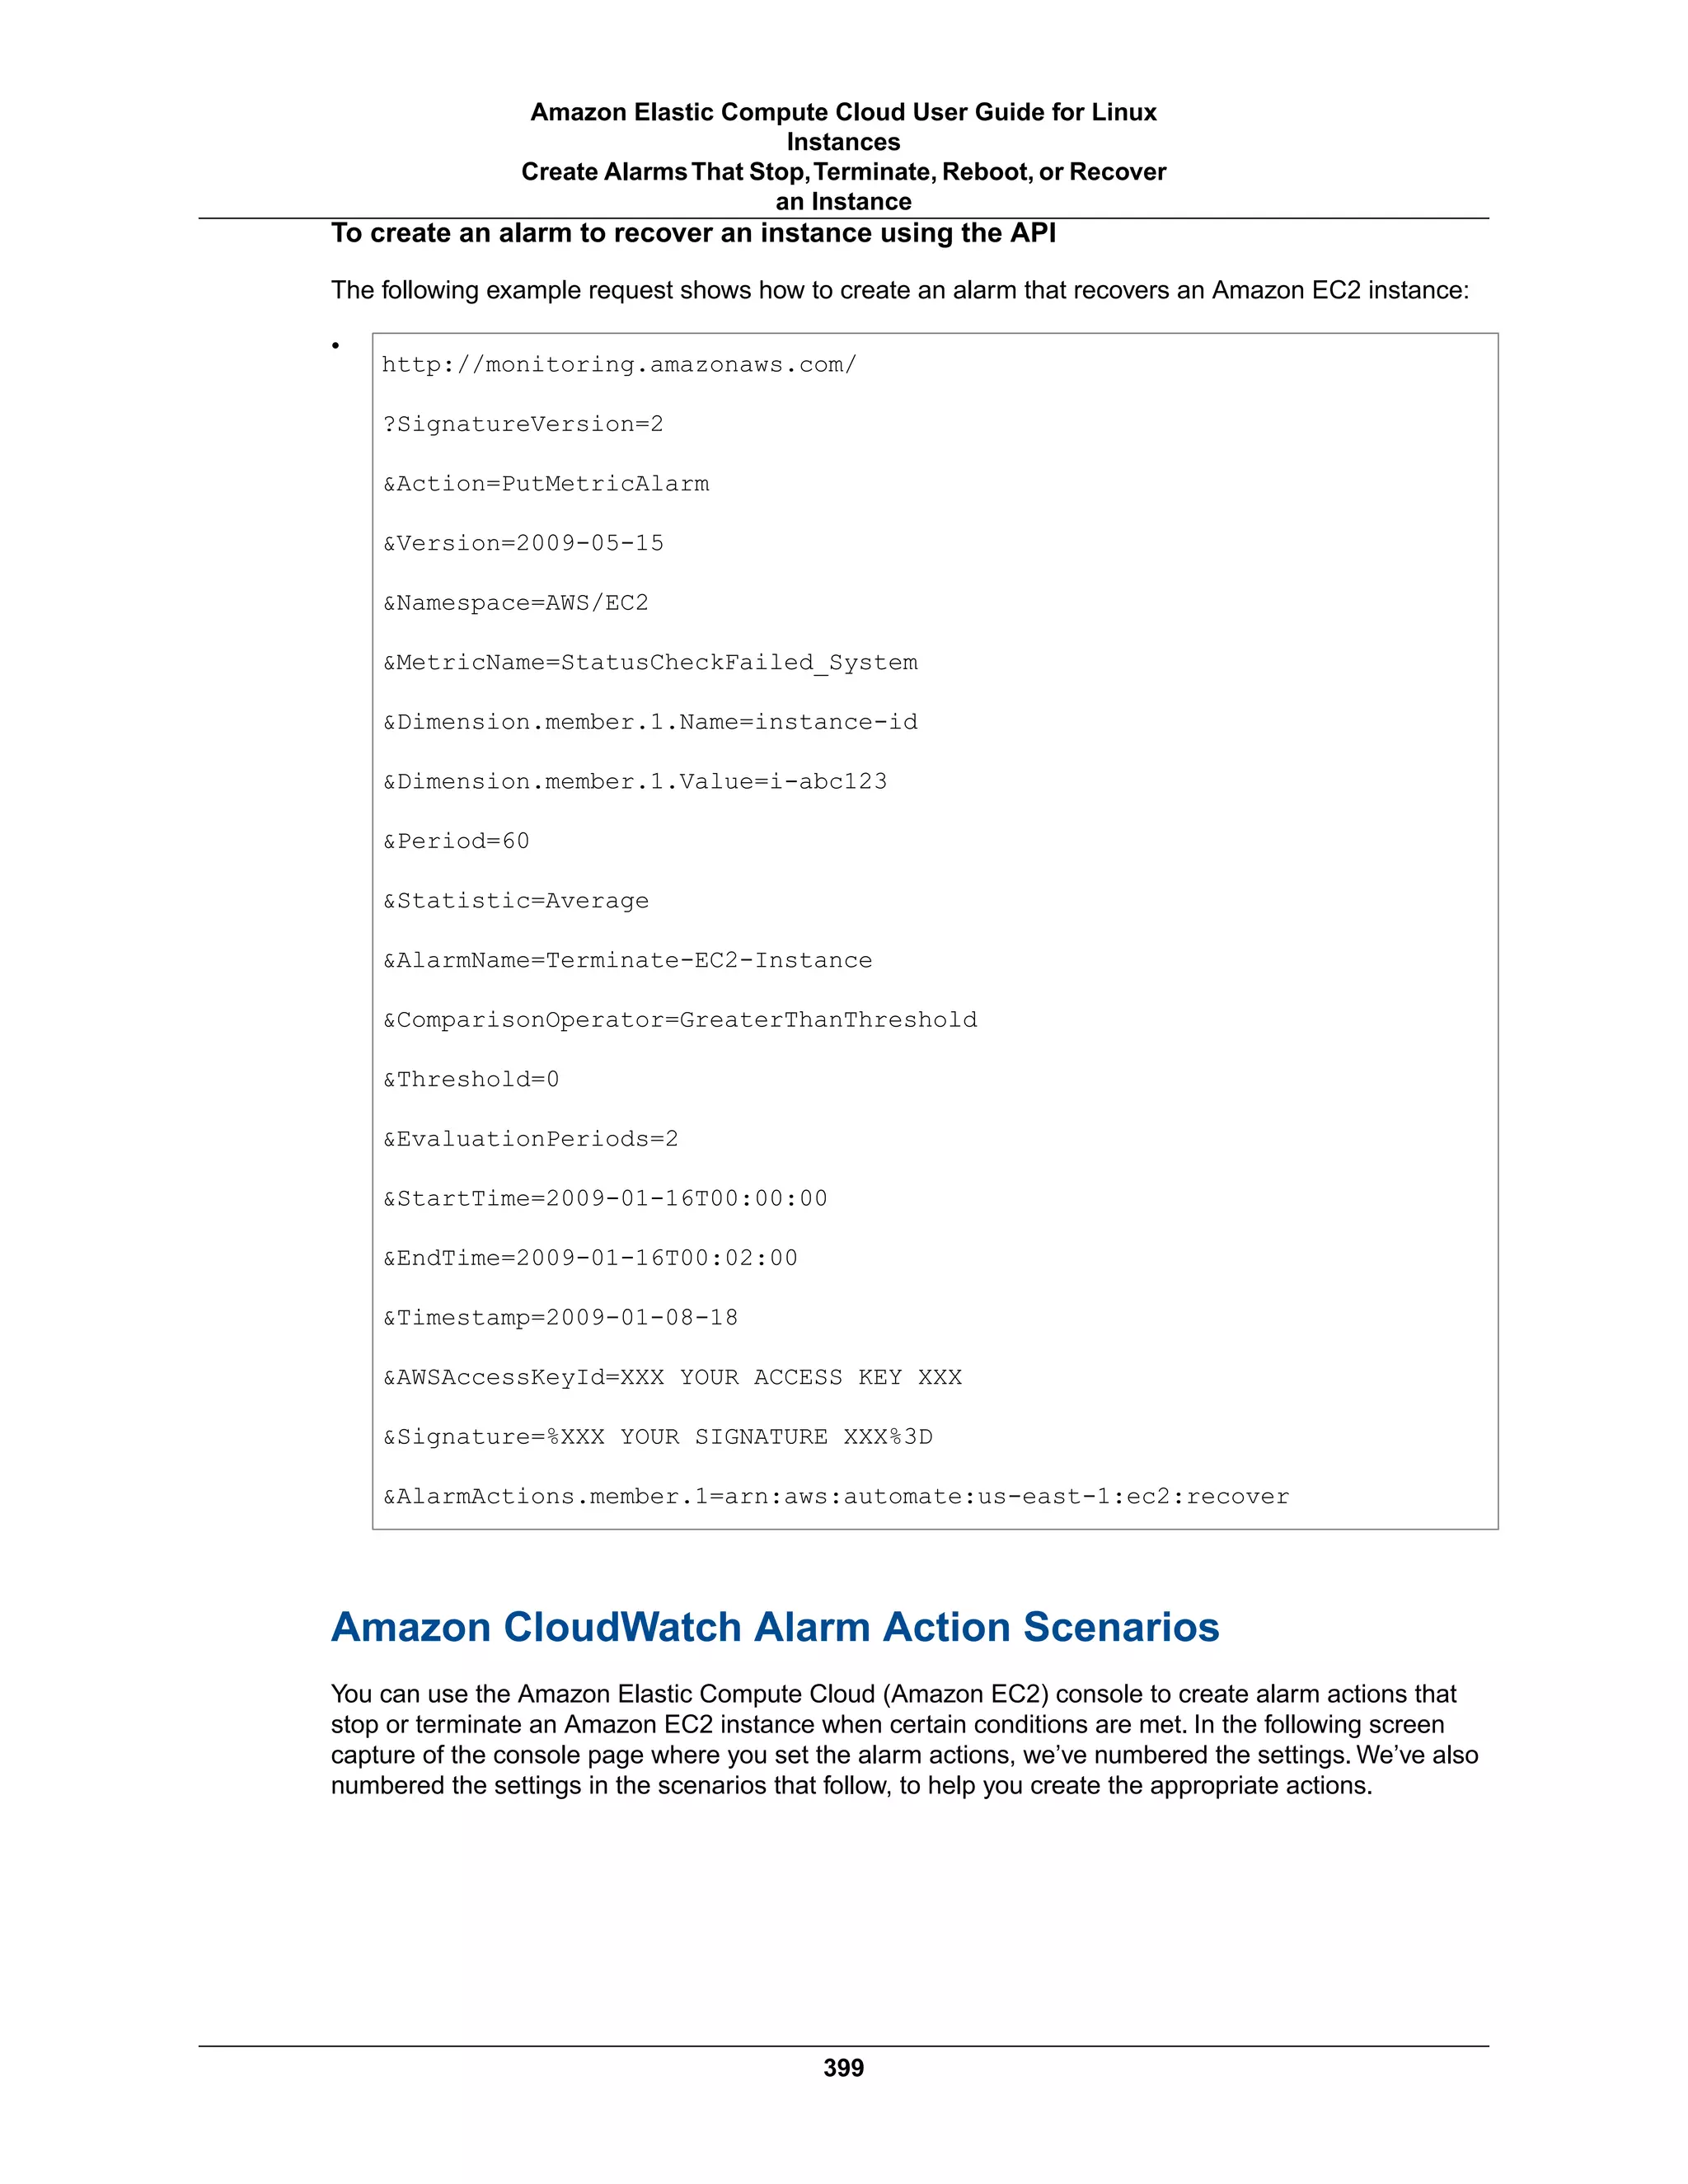


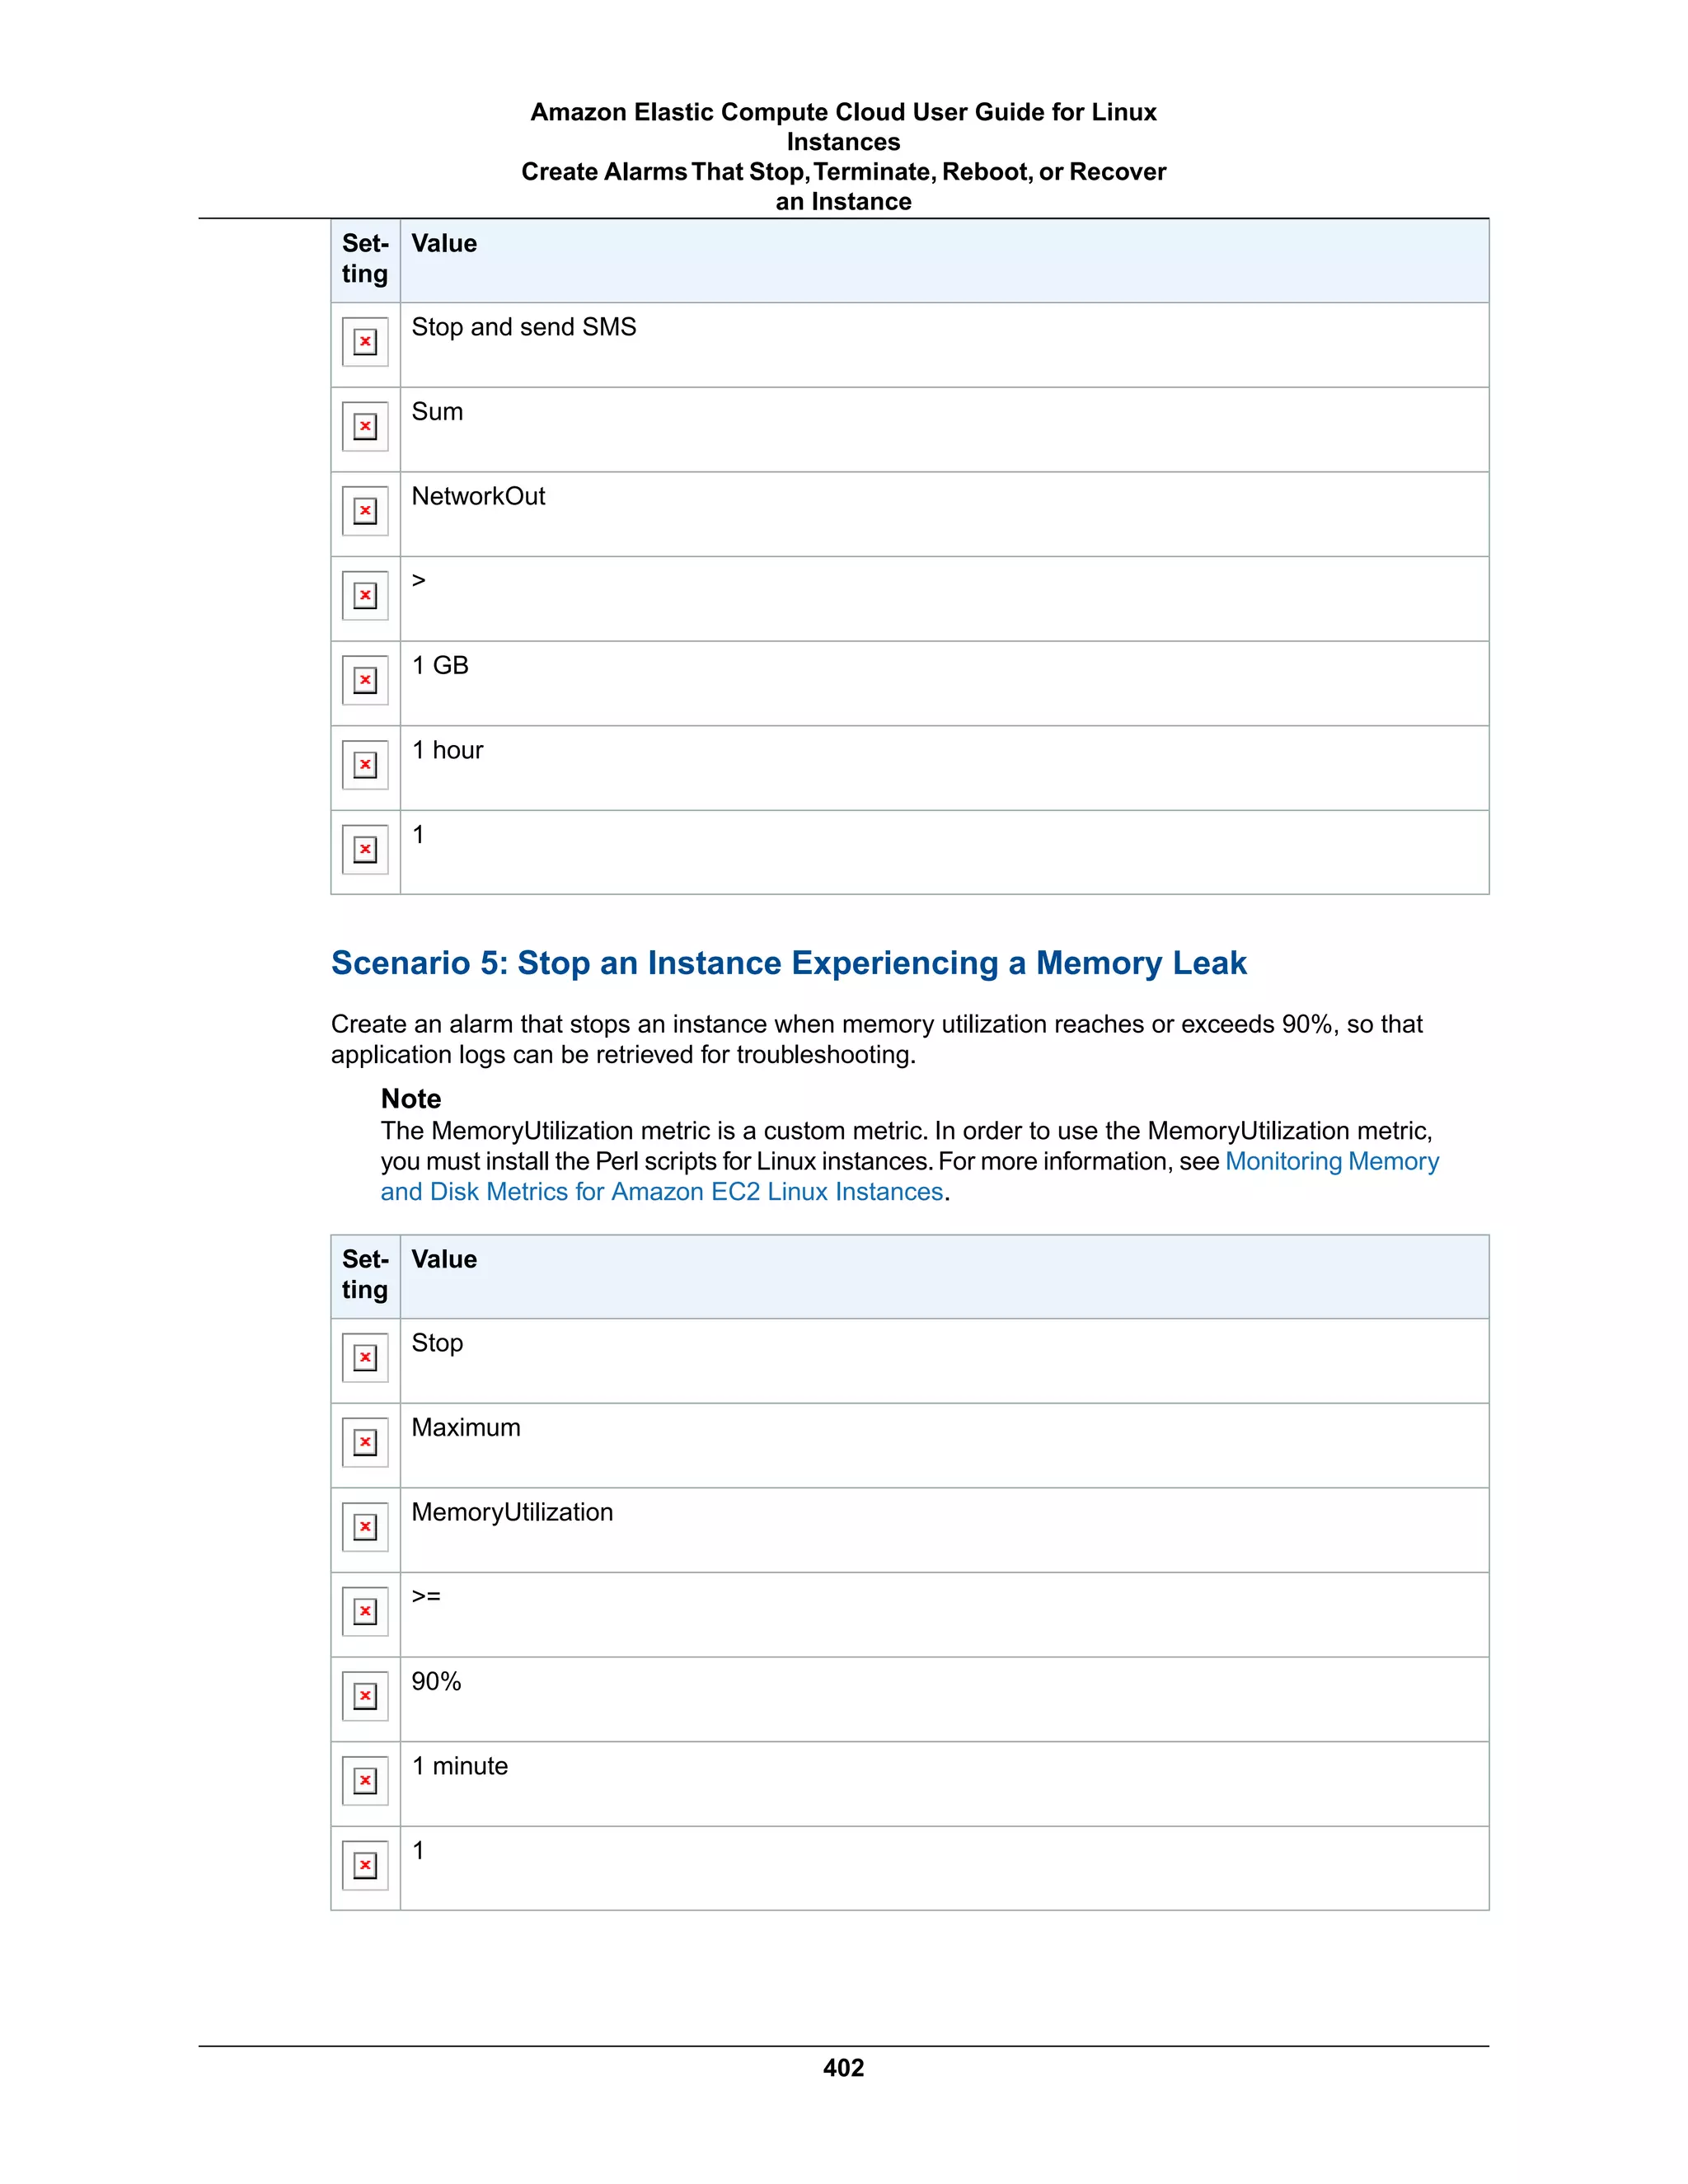

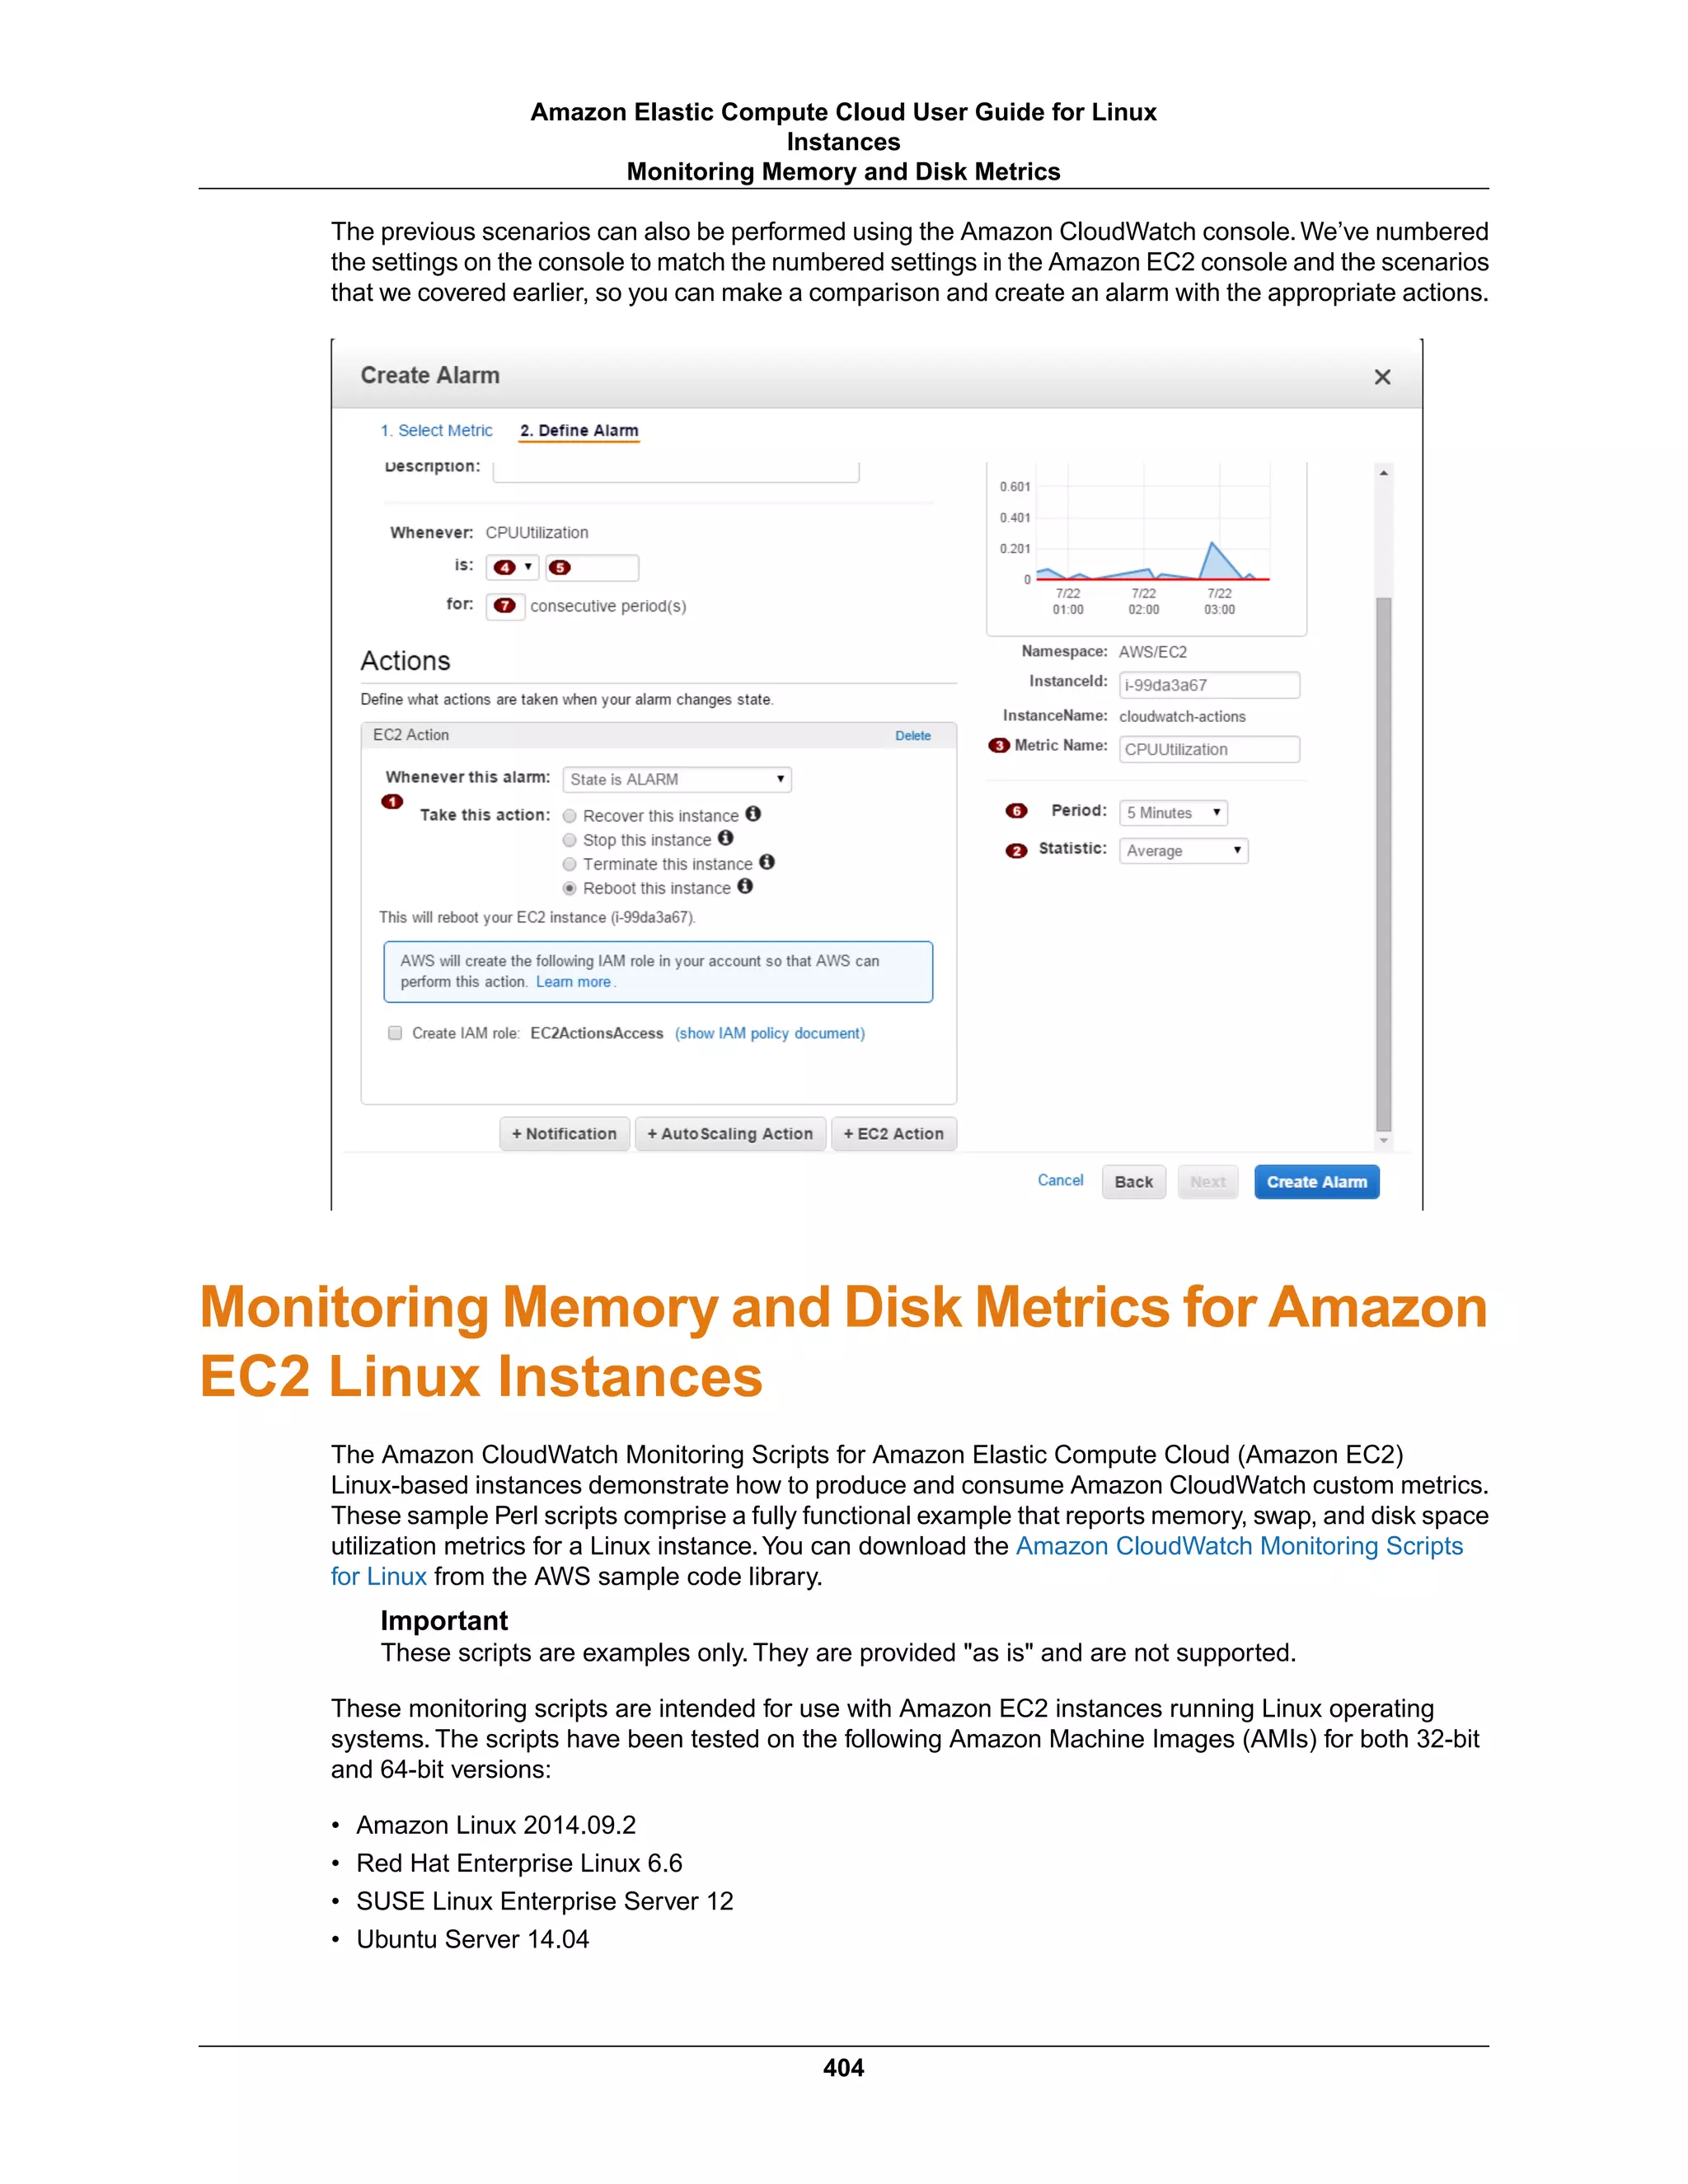

![To upgrade from a previous version of the scripts
1. Log on to your Red Hat Enterprise Linux instance.
2. At a command prompt, install the following package:
$ sudo yum install perl-DateTime
3. Type sudo perl -MCPAN -e shell, and then type yes at every prompt.
4. At the cpan[1]> prompt, type install Bundle::LWP6 LWP to install the LWP bundle and update
to LWP version 6.13. Type yes at every prompt.
5. Install the following package.
$ sudo yum install perl-DateTime perl-Sys-Syslog
To install the scripts for the first time
1. Log on to your Red Hat Enterprise Linux instance.
2. At a command prompt, type sudo perl -MCPAN -e shell, and then type yes at every prompt.
3. At the cpan[1]> prompt, type install Bundle::LWP6 LWP to install the LWP bundle and update
to LWP version 6.13. Type yes at every prompt.
4. Install the following package.
$ sudo yum install perl-DateTime perl-Sys-Syslog
SUSE Linux Enterprise Server
If you are running SUSE Linux Enterprise Server, you’ll need to add some additional Perl modules in
order for the monitoring scripts to work. Use the following procedures to configure your server.
To upgrade from a previous version of the scripts
• Log on to your SUSE Linux Enterprise Server instance and install the following package:
$ sudo zypper install perl-DateTime
To install the scripts for the first time
• Log on to your SUSE Linux Enterprise Server instance and install the following packages:
$ sudo zypper install perl-DateTime
$ sudo zypper install –y "perl(LWP::Protocol::https)"
Ubuntu Server
406
Amazon Elastic Compute Cloud User Guide for Linux
Instances
Prerequisites](https://image.slidesharecdn.com/ec2-ug-151130152858-lva1-app6892/75/Amazan-Ec2-415-2048.jpg)
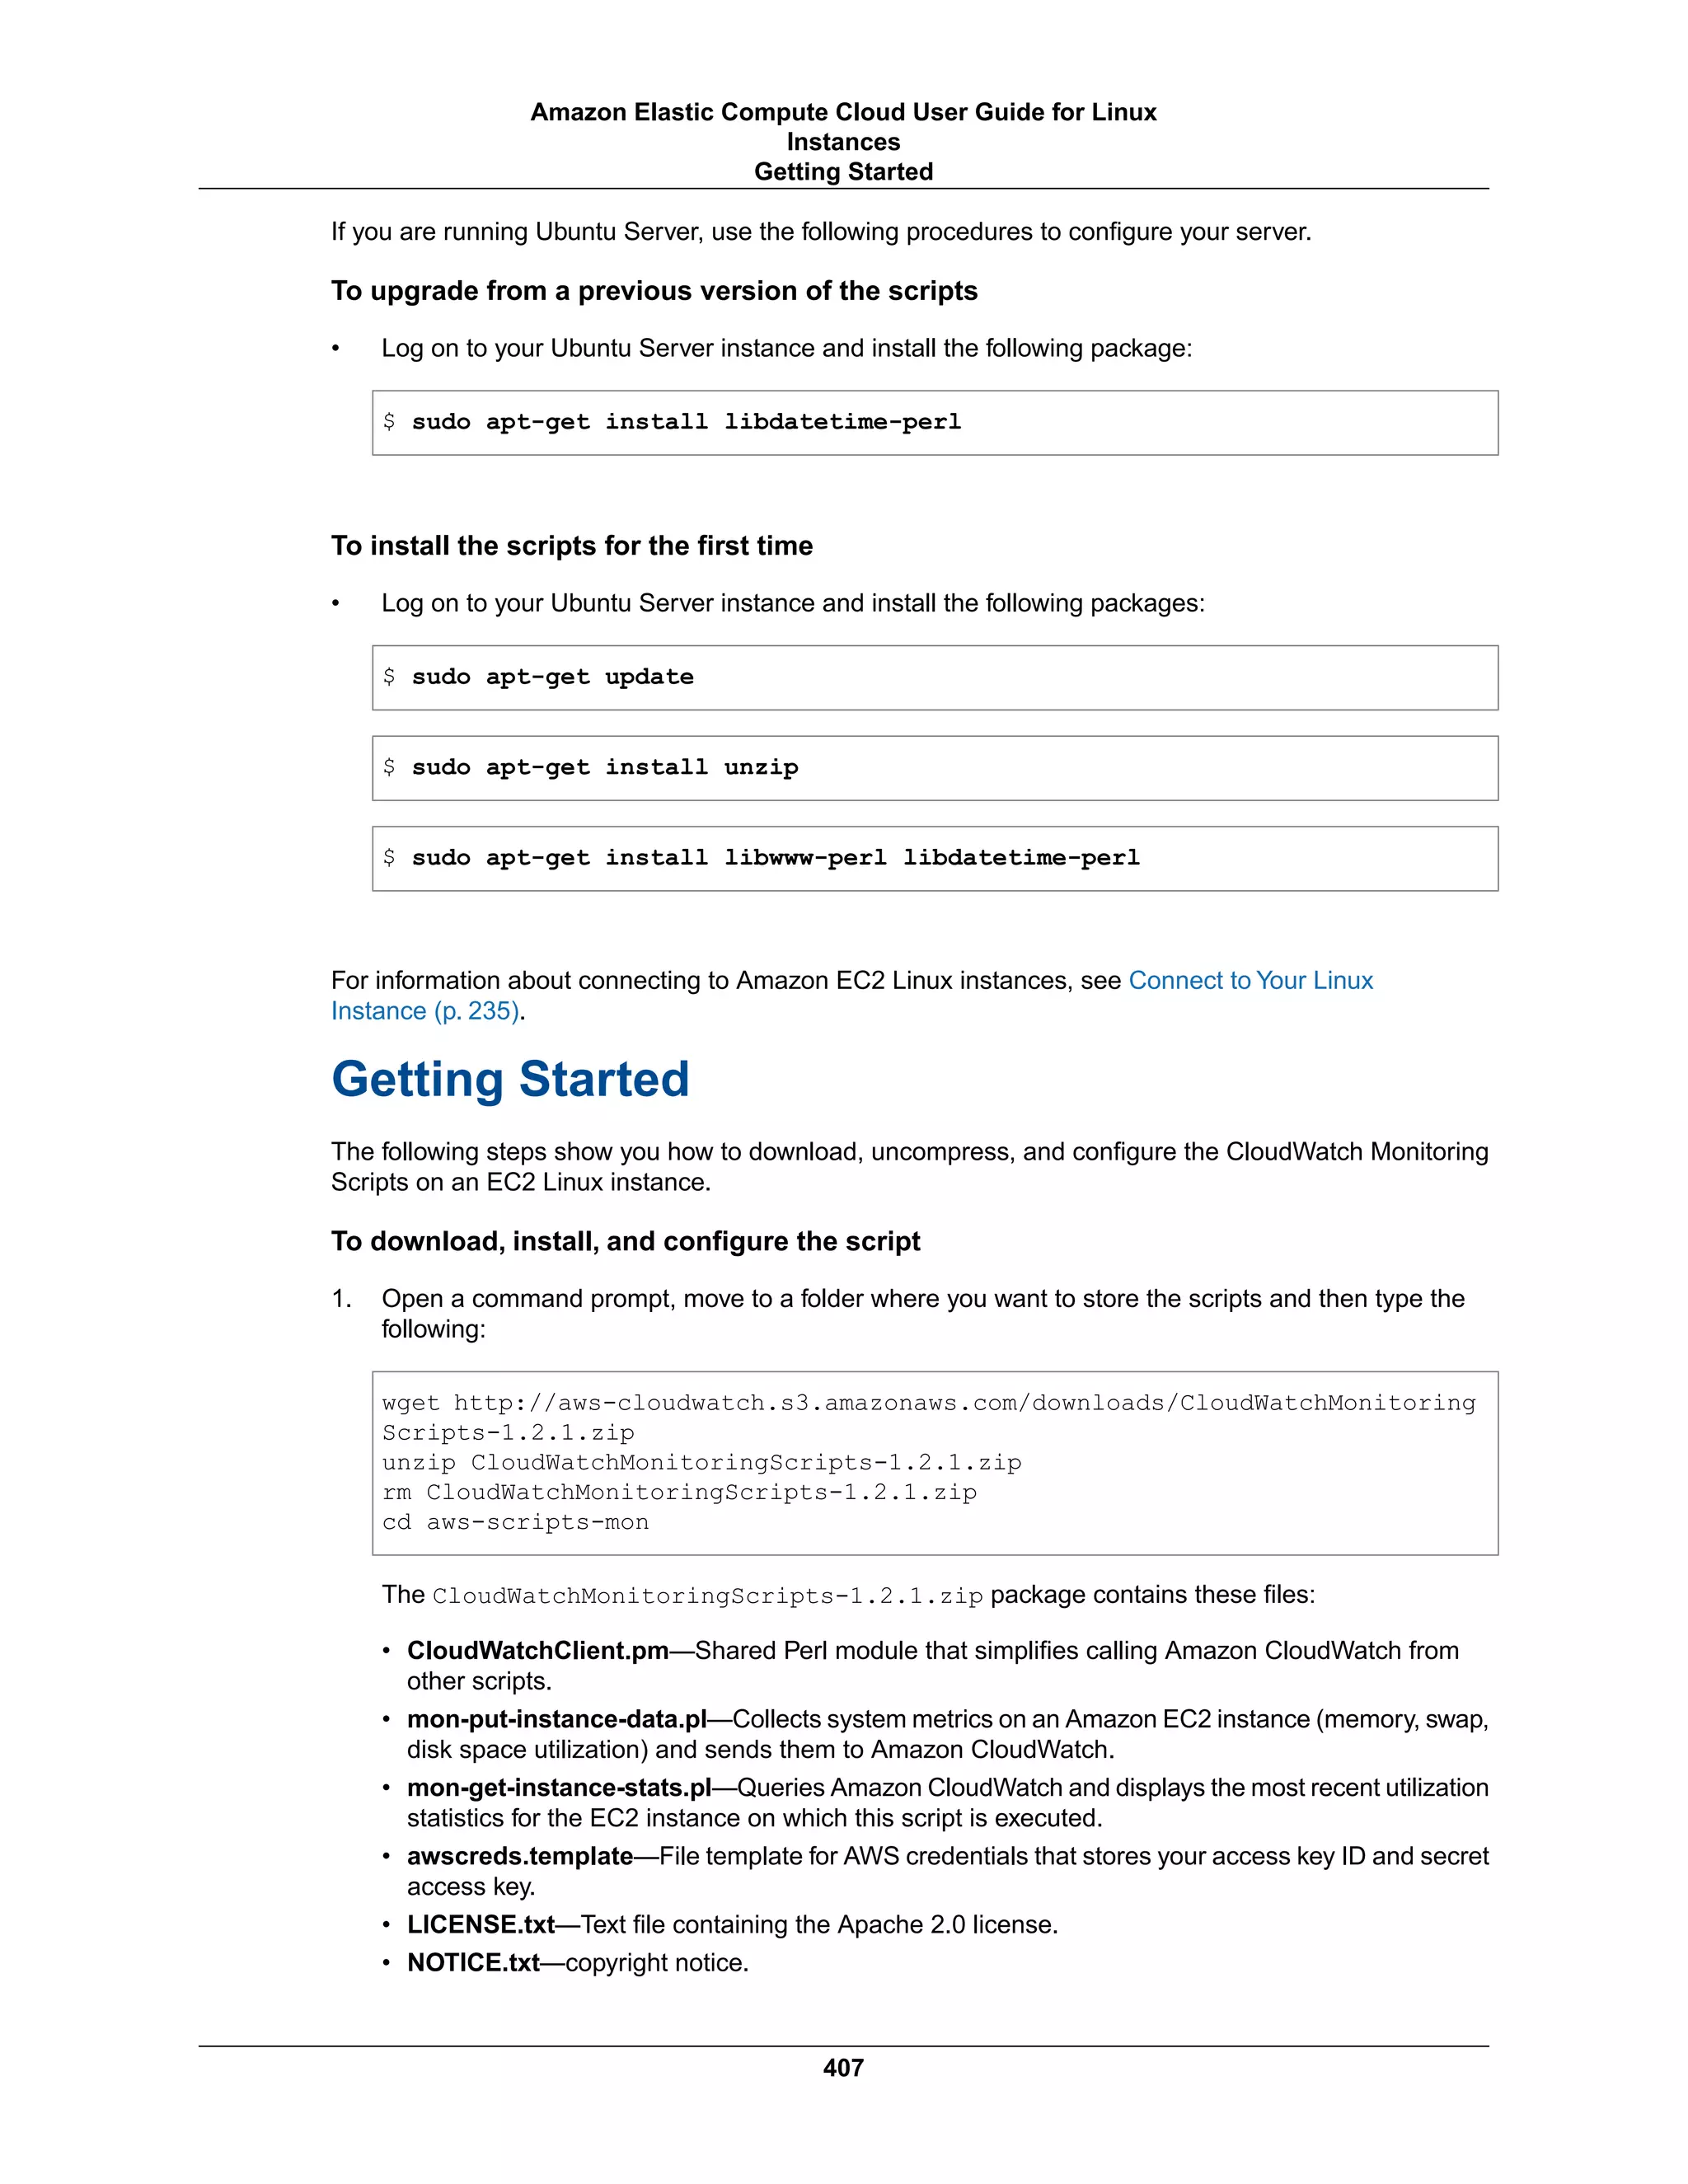
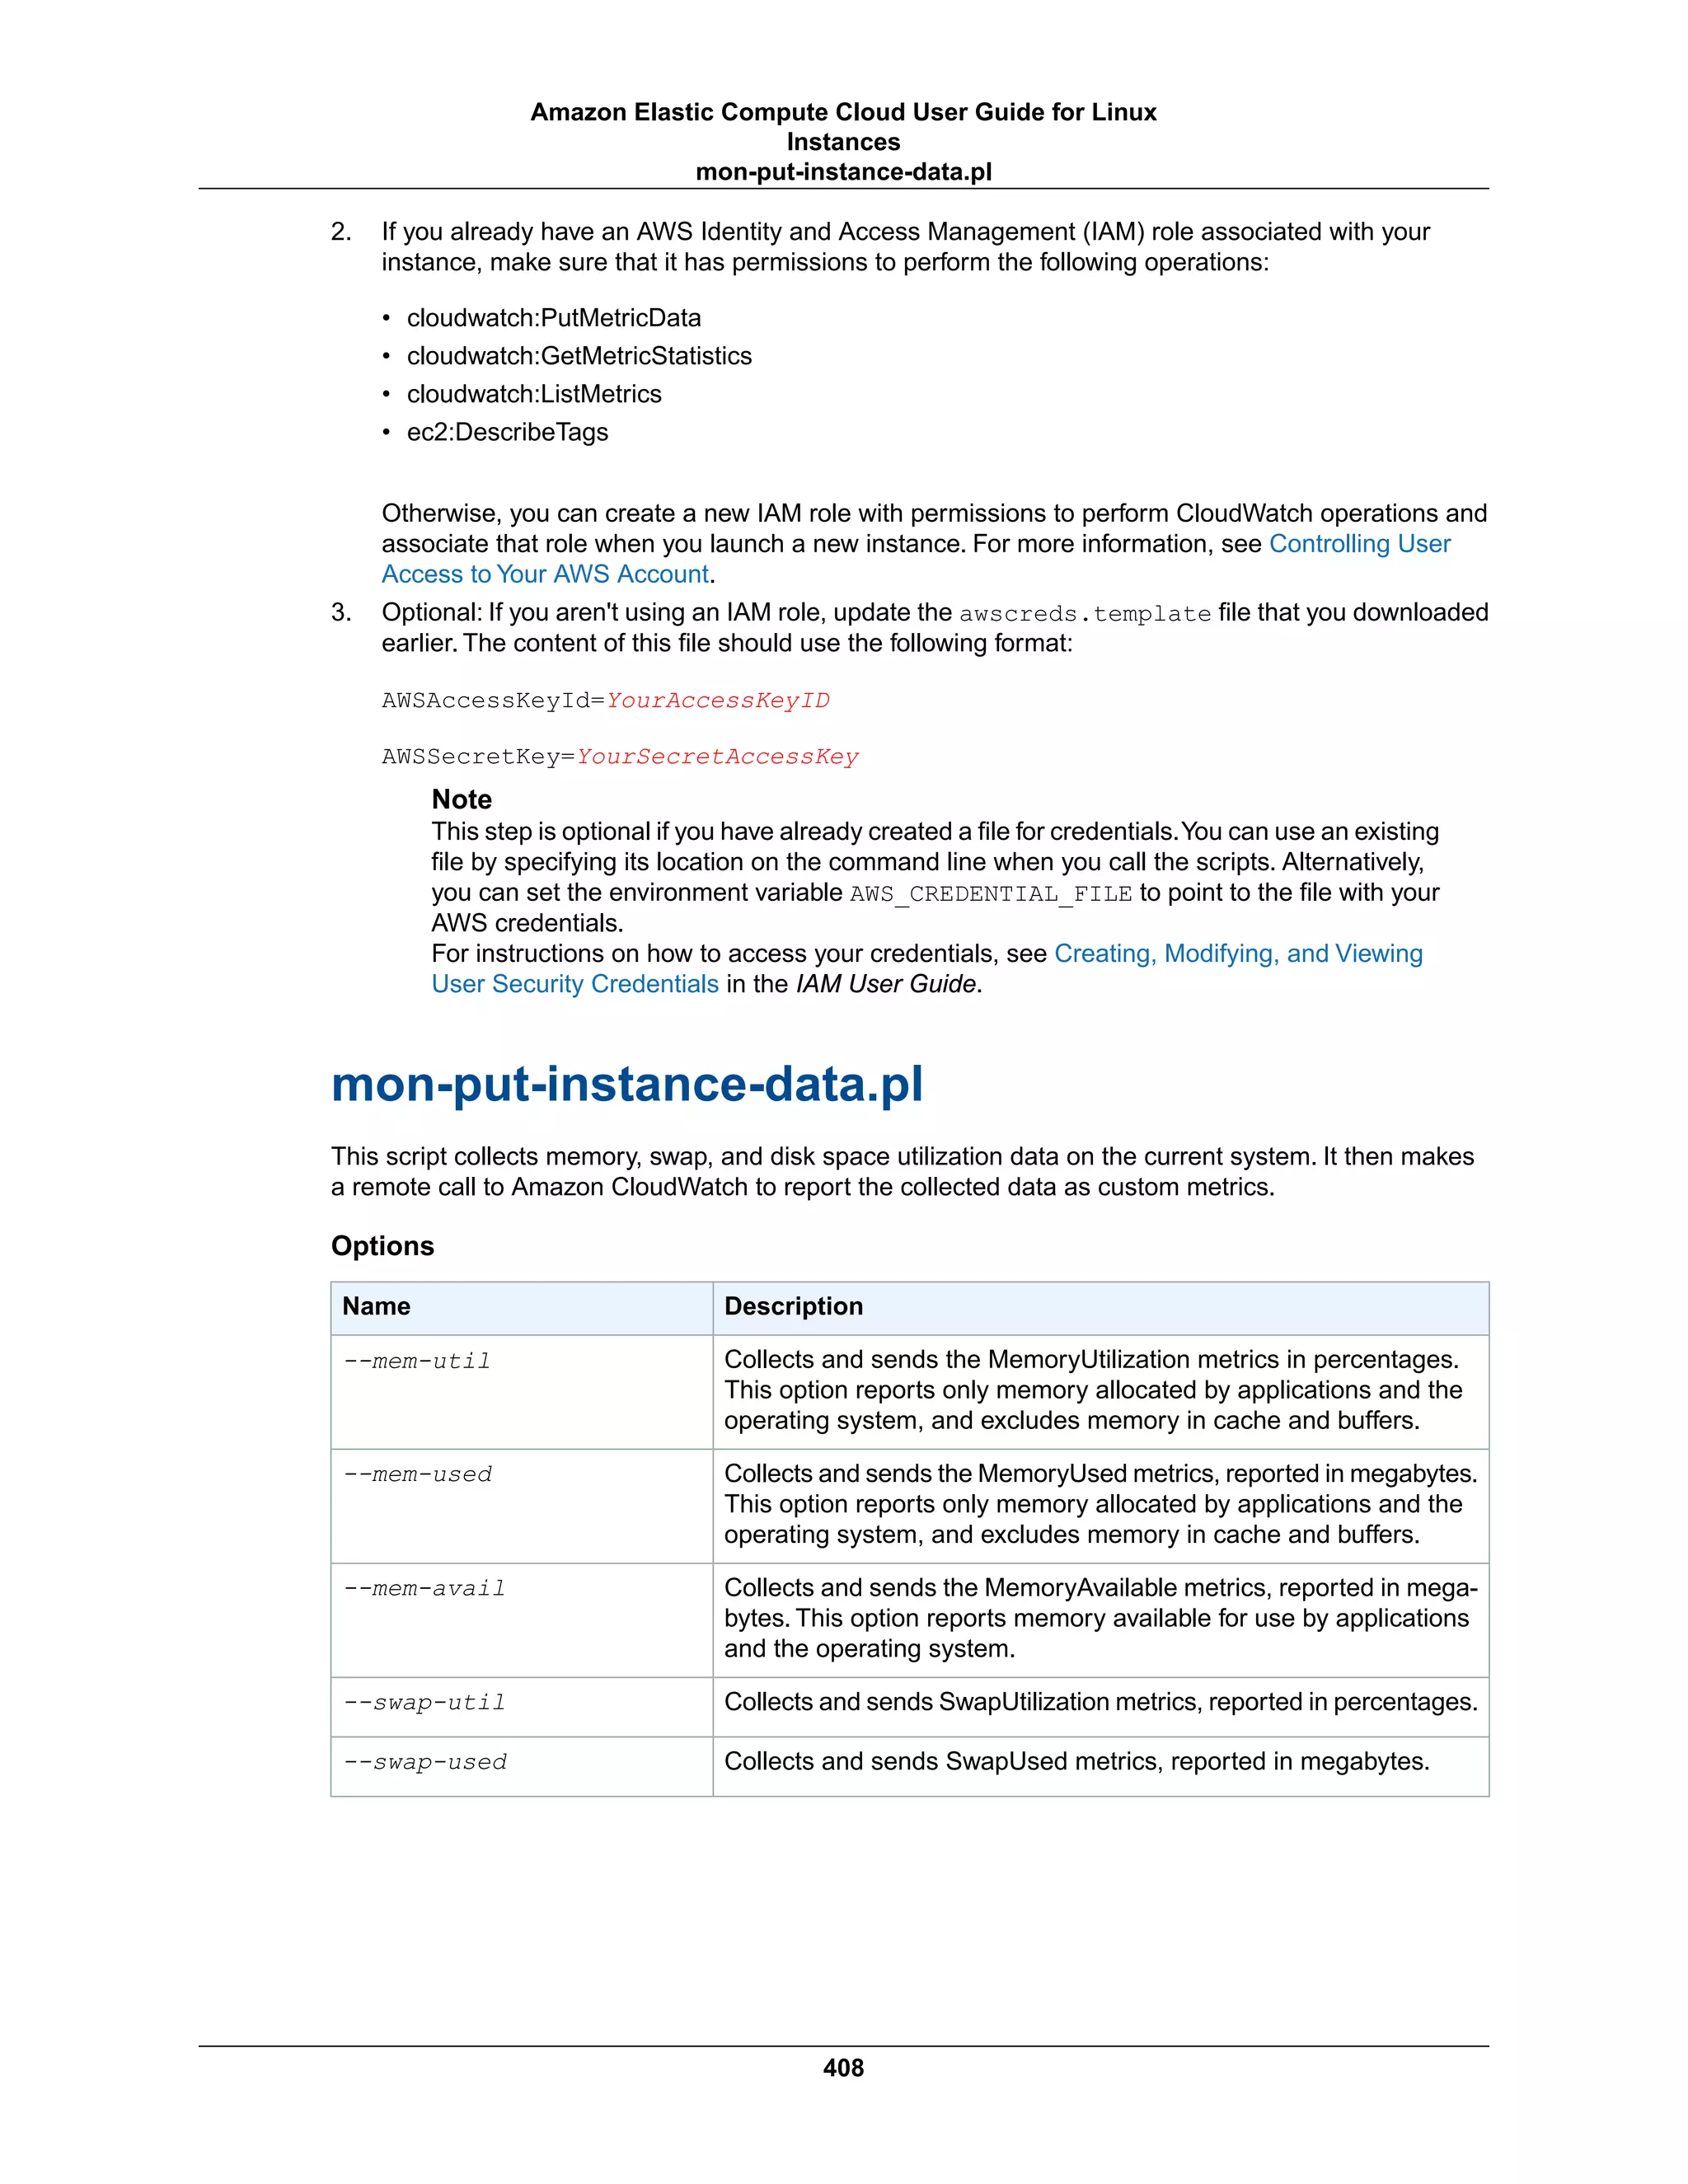
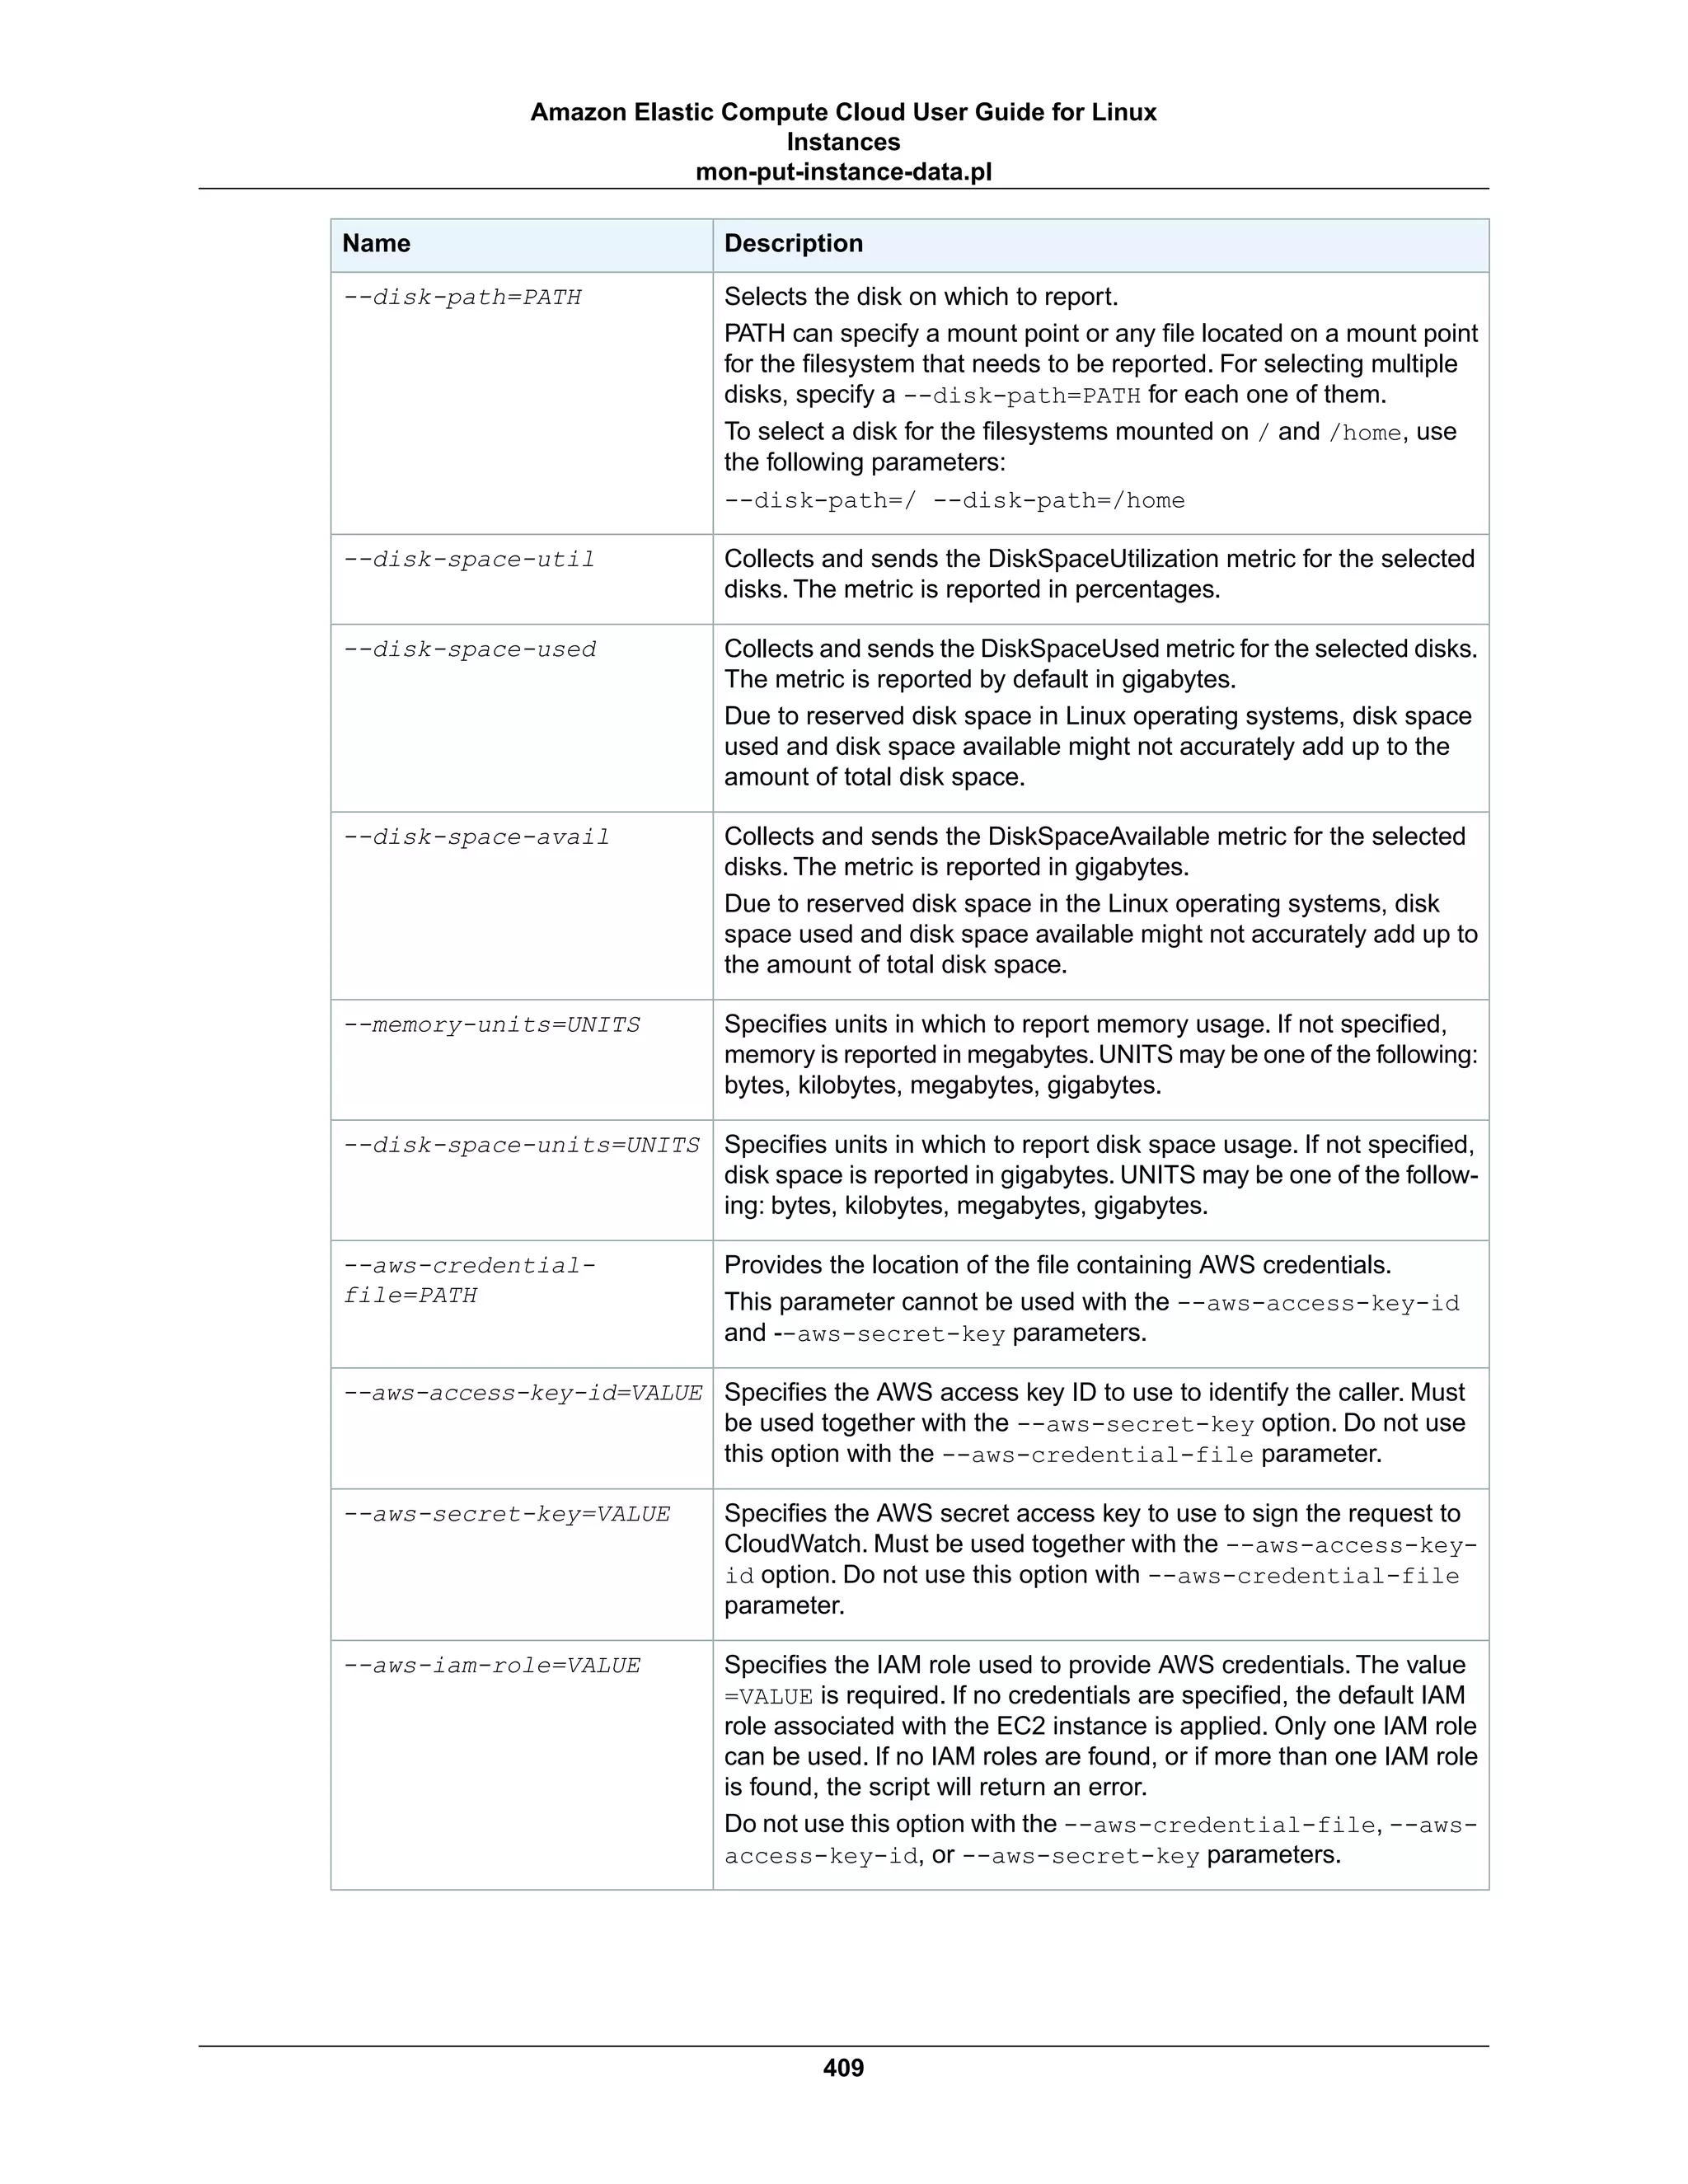
![DescriptionName
Adds aggregated metrics for instance type, AMI ID, and overall for
the region.The value =only is optional; if specified, the script reports
only aggregated metrics.
--aggregated[=only]
Adds aggregated metrics for the Auto Scaling group.The value =only
is optional; if specified, the script reports only Auto Scaling metrics.
The IAM policy associated with the IAM account or role using the
scripts need to have permissions to call the EC2 action DescribeTags.
--auto-scaling[=only]
Performs a test run of the script that collects the metrics, prepares
a complete HTTP request, but does not actually call CloudWatch to
report the data.This option also checks that credentials are provided.
When run in verbose mode, this option outputs the metrics that will
be sent to CloudWatch.
--verify
Use this option when calling the script from cron. When this option
is used, all diagnostic output is suppressed, but error messages are
sent to the local system log of the user account.
--from-cron
Displays detailed information about what the script is doing.--verbose
Displays usage information.--help
Displays the version number of the script.--version
Examples
The following examples assume that you have already updated the awscreds.conf file with valid AWS
credentials. If you are not using the awscreds.conf file, provide credentials using the
--aws-access-key-id and --aws-secret-key arguments.
To perform a simple test run without posting data to CloudWatch
• Run the following command:
./mon-put-instance-data.pl --mem-util --verify --verbose
To collect all available memory metrics and send them to CloudWatch
• Run the following command:
./mon-put-instance-data.pl --mem-util --mem-used --mem-avail
To set a cron schedule for metrics reported to CloudWatch
1. Start editing the crontab using the following command:
crontab -e
410
Amazon Elastic Compute Cloud User Guide for Linux
Instances
mon-put-instance-data.pl](https://image.slidesharecdn.com/ec2-ug-151130152858-lva1-app6892/75/Amazan-Ec2-419-2048.jpg)


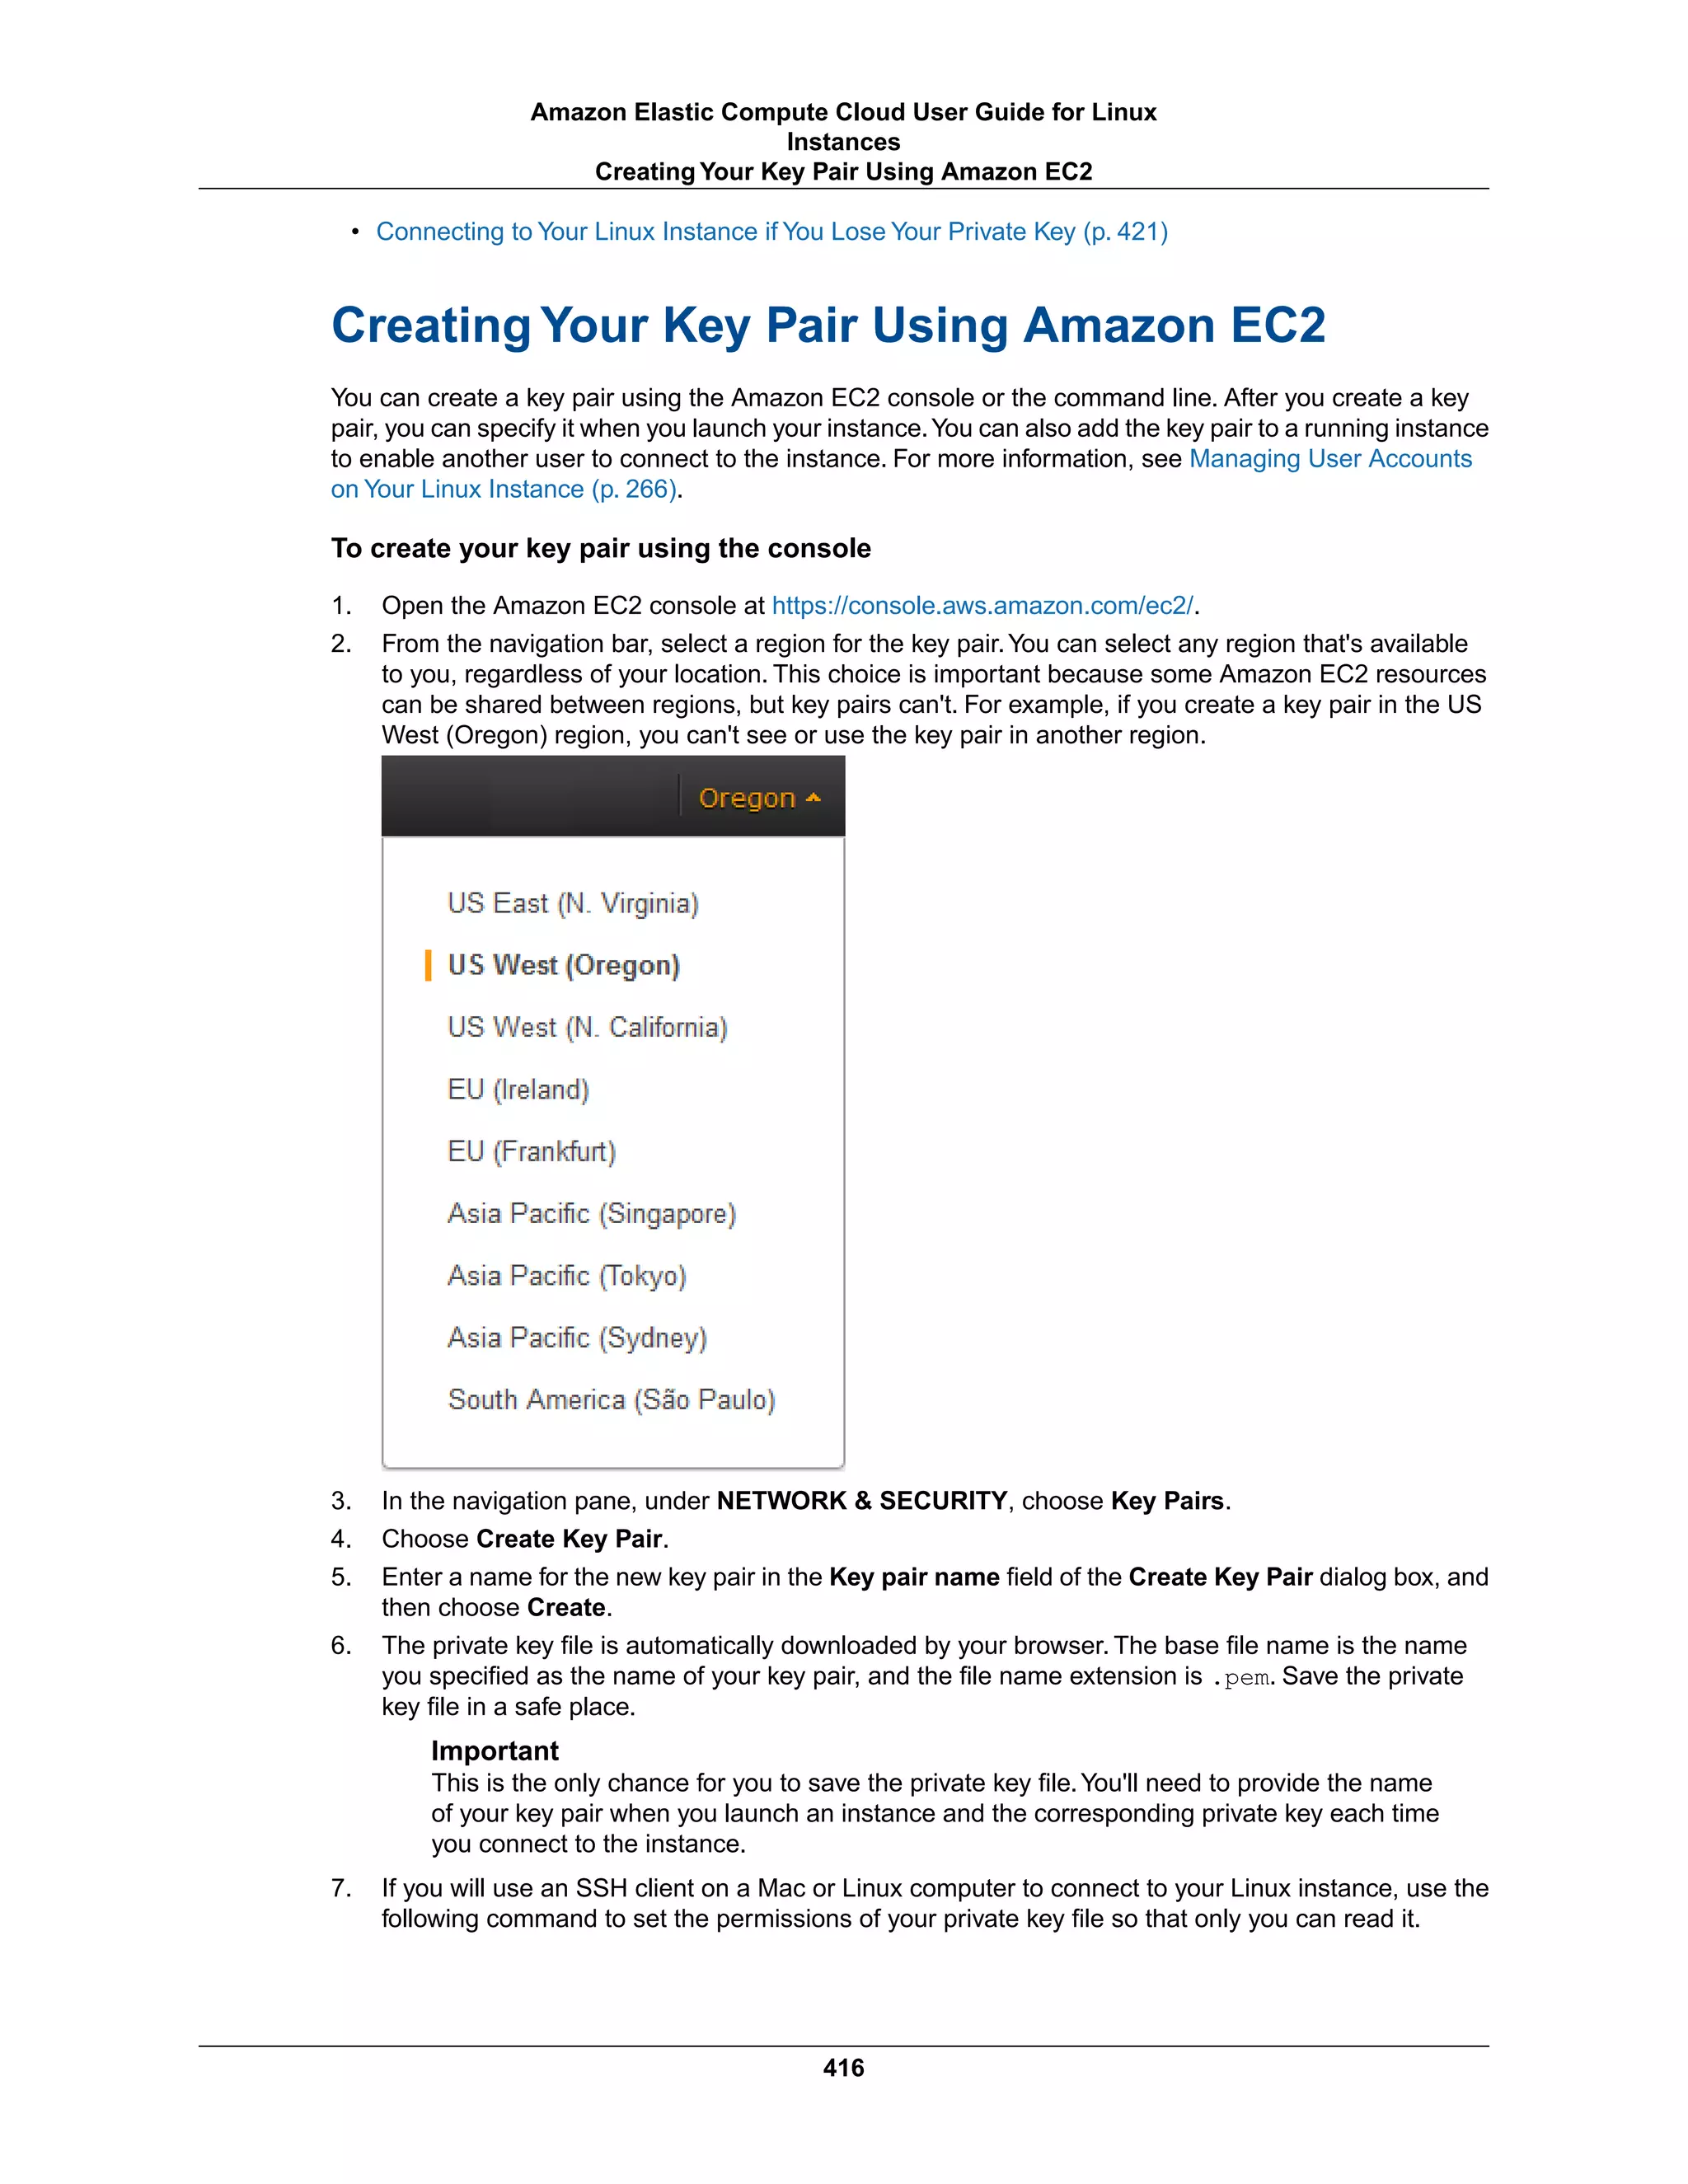

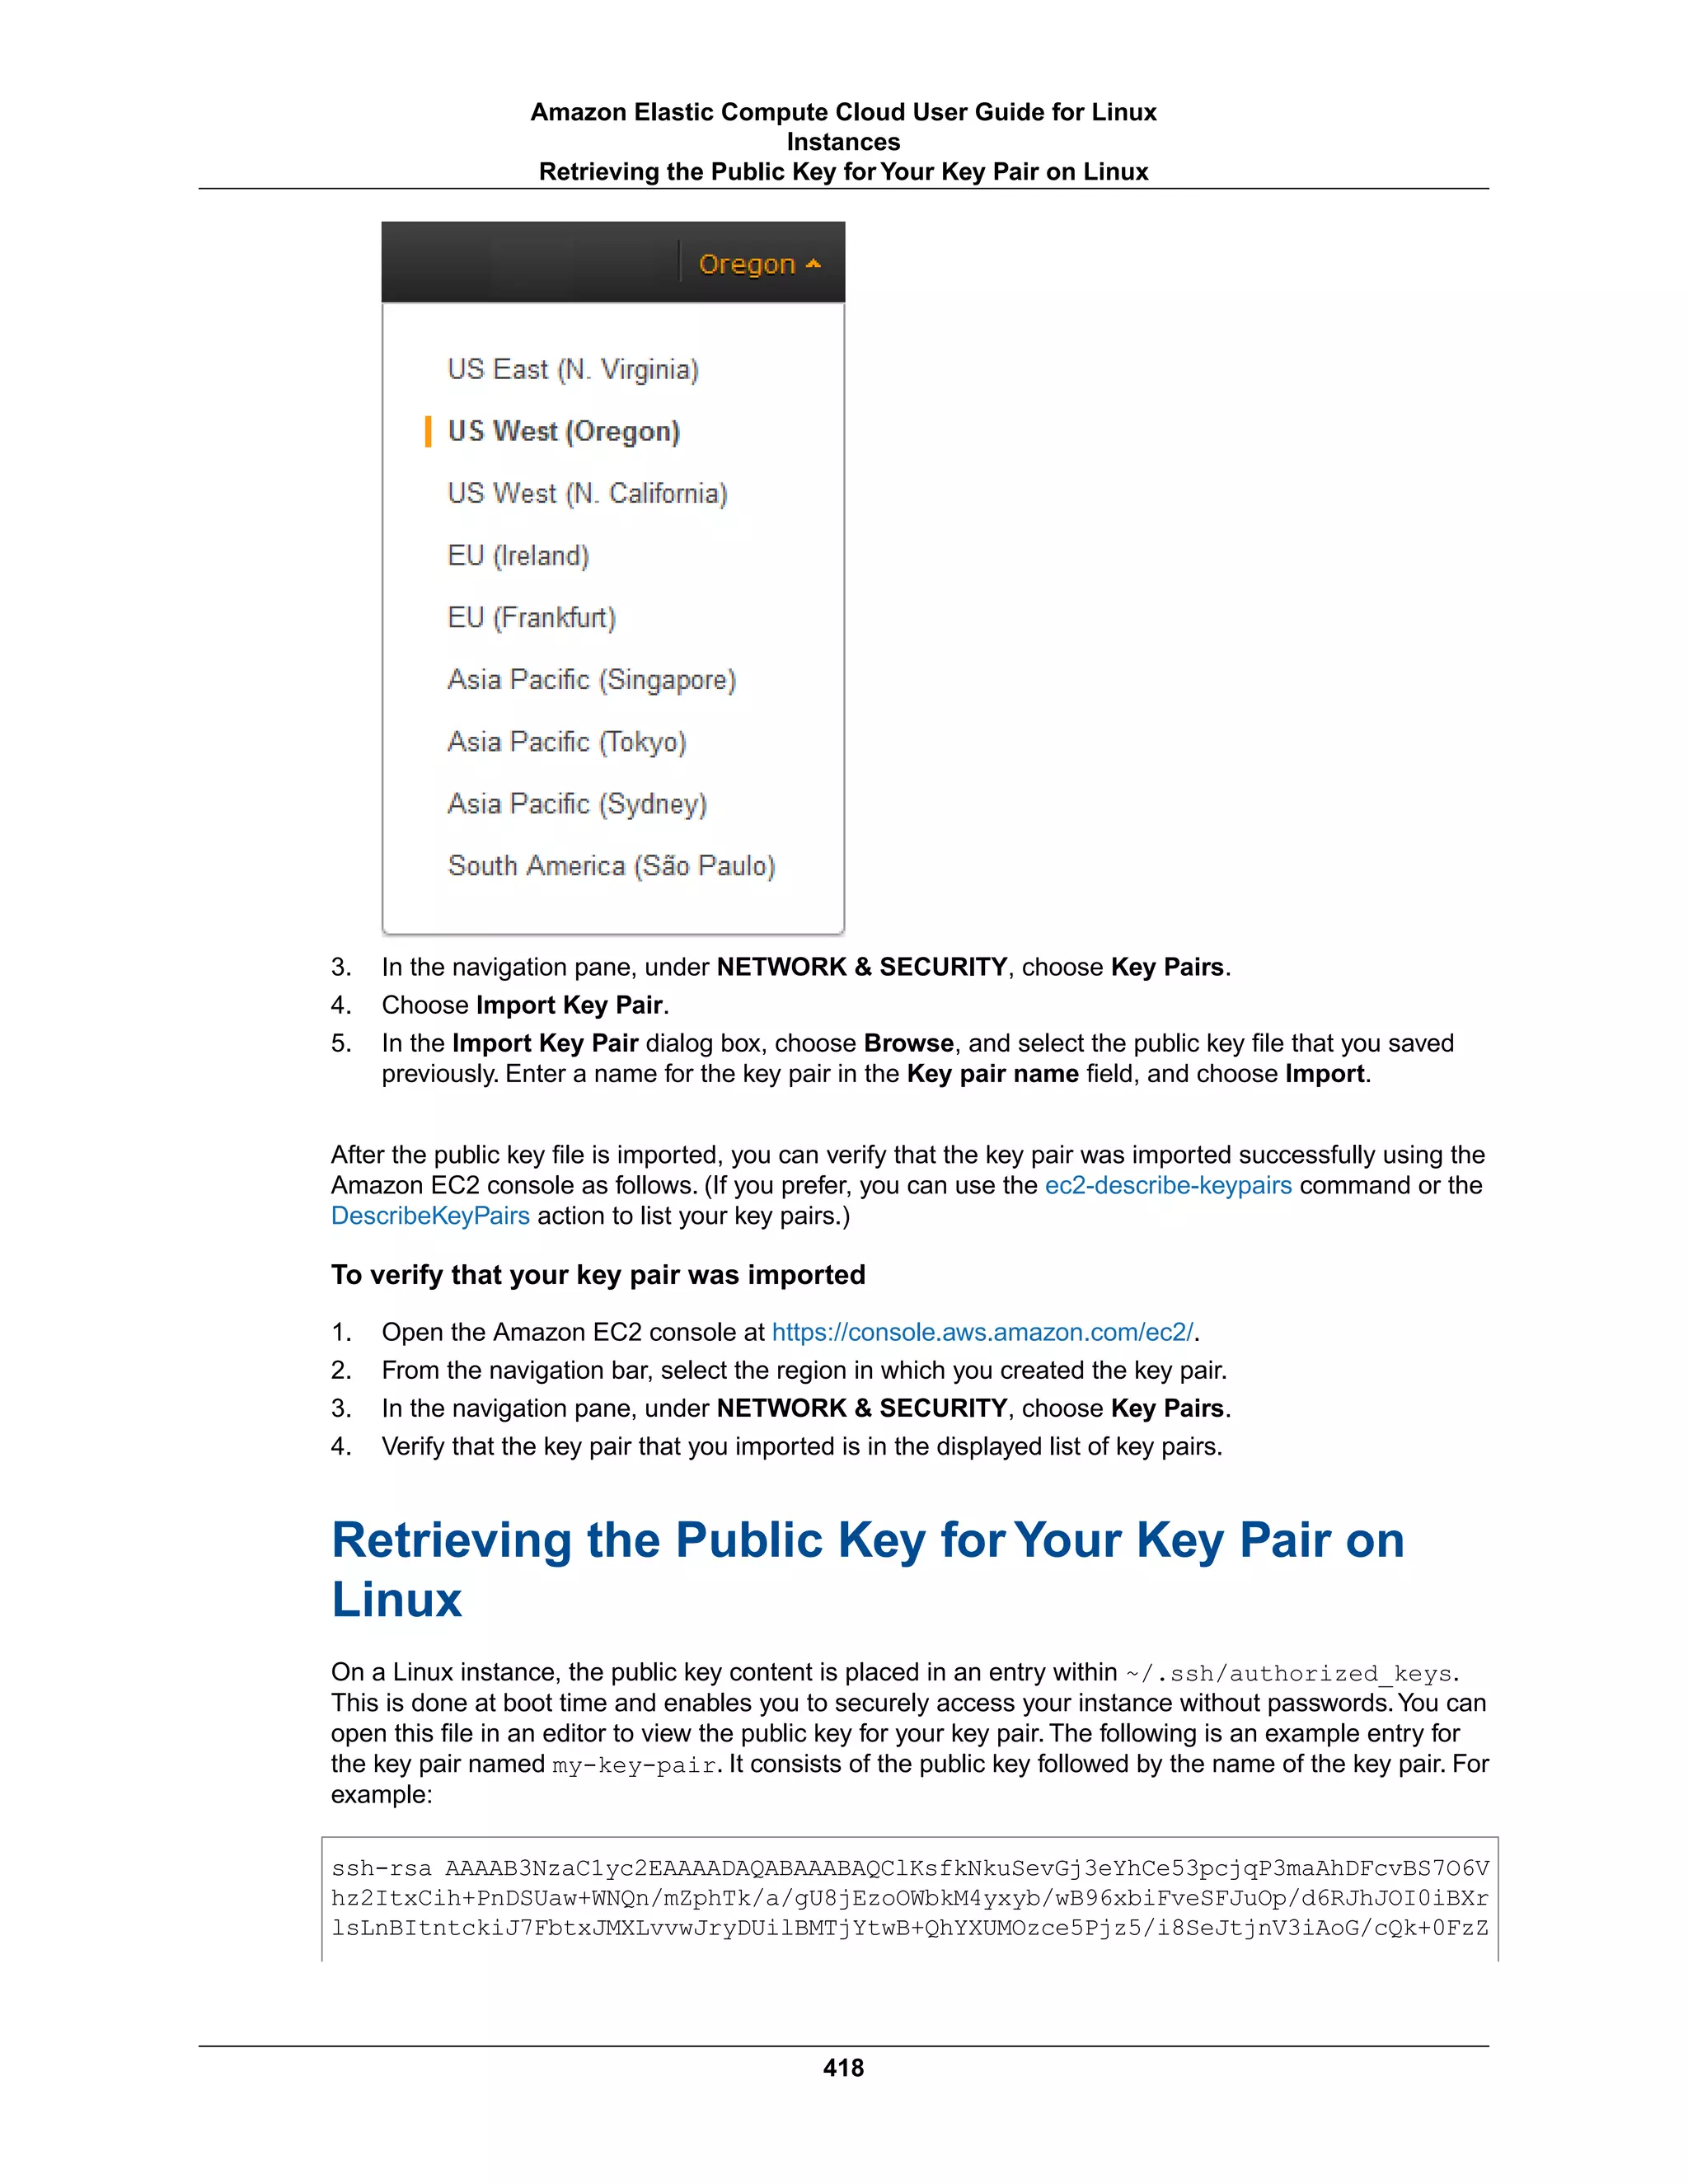
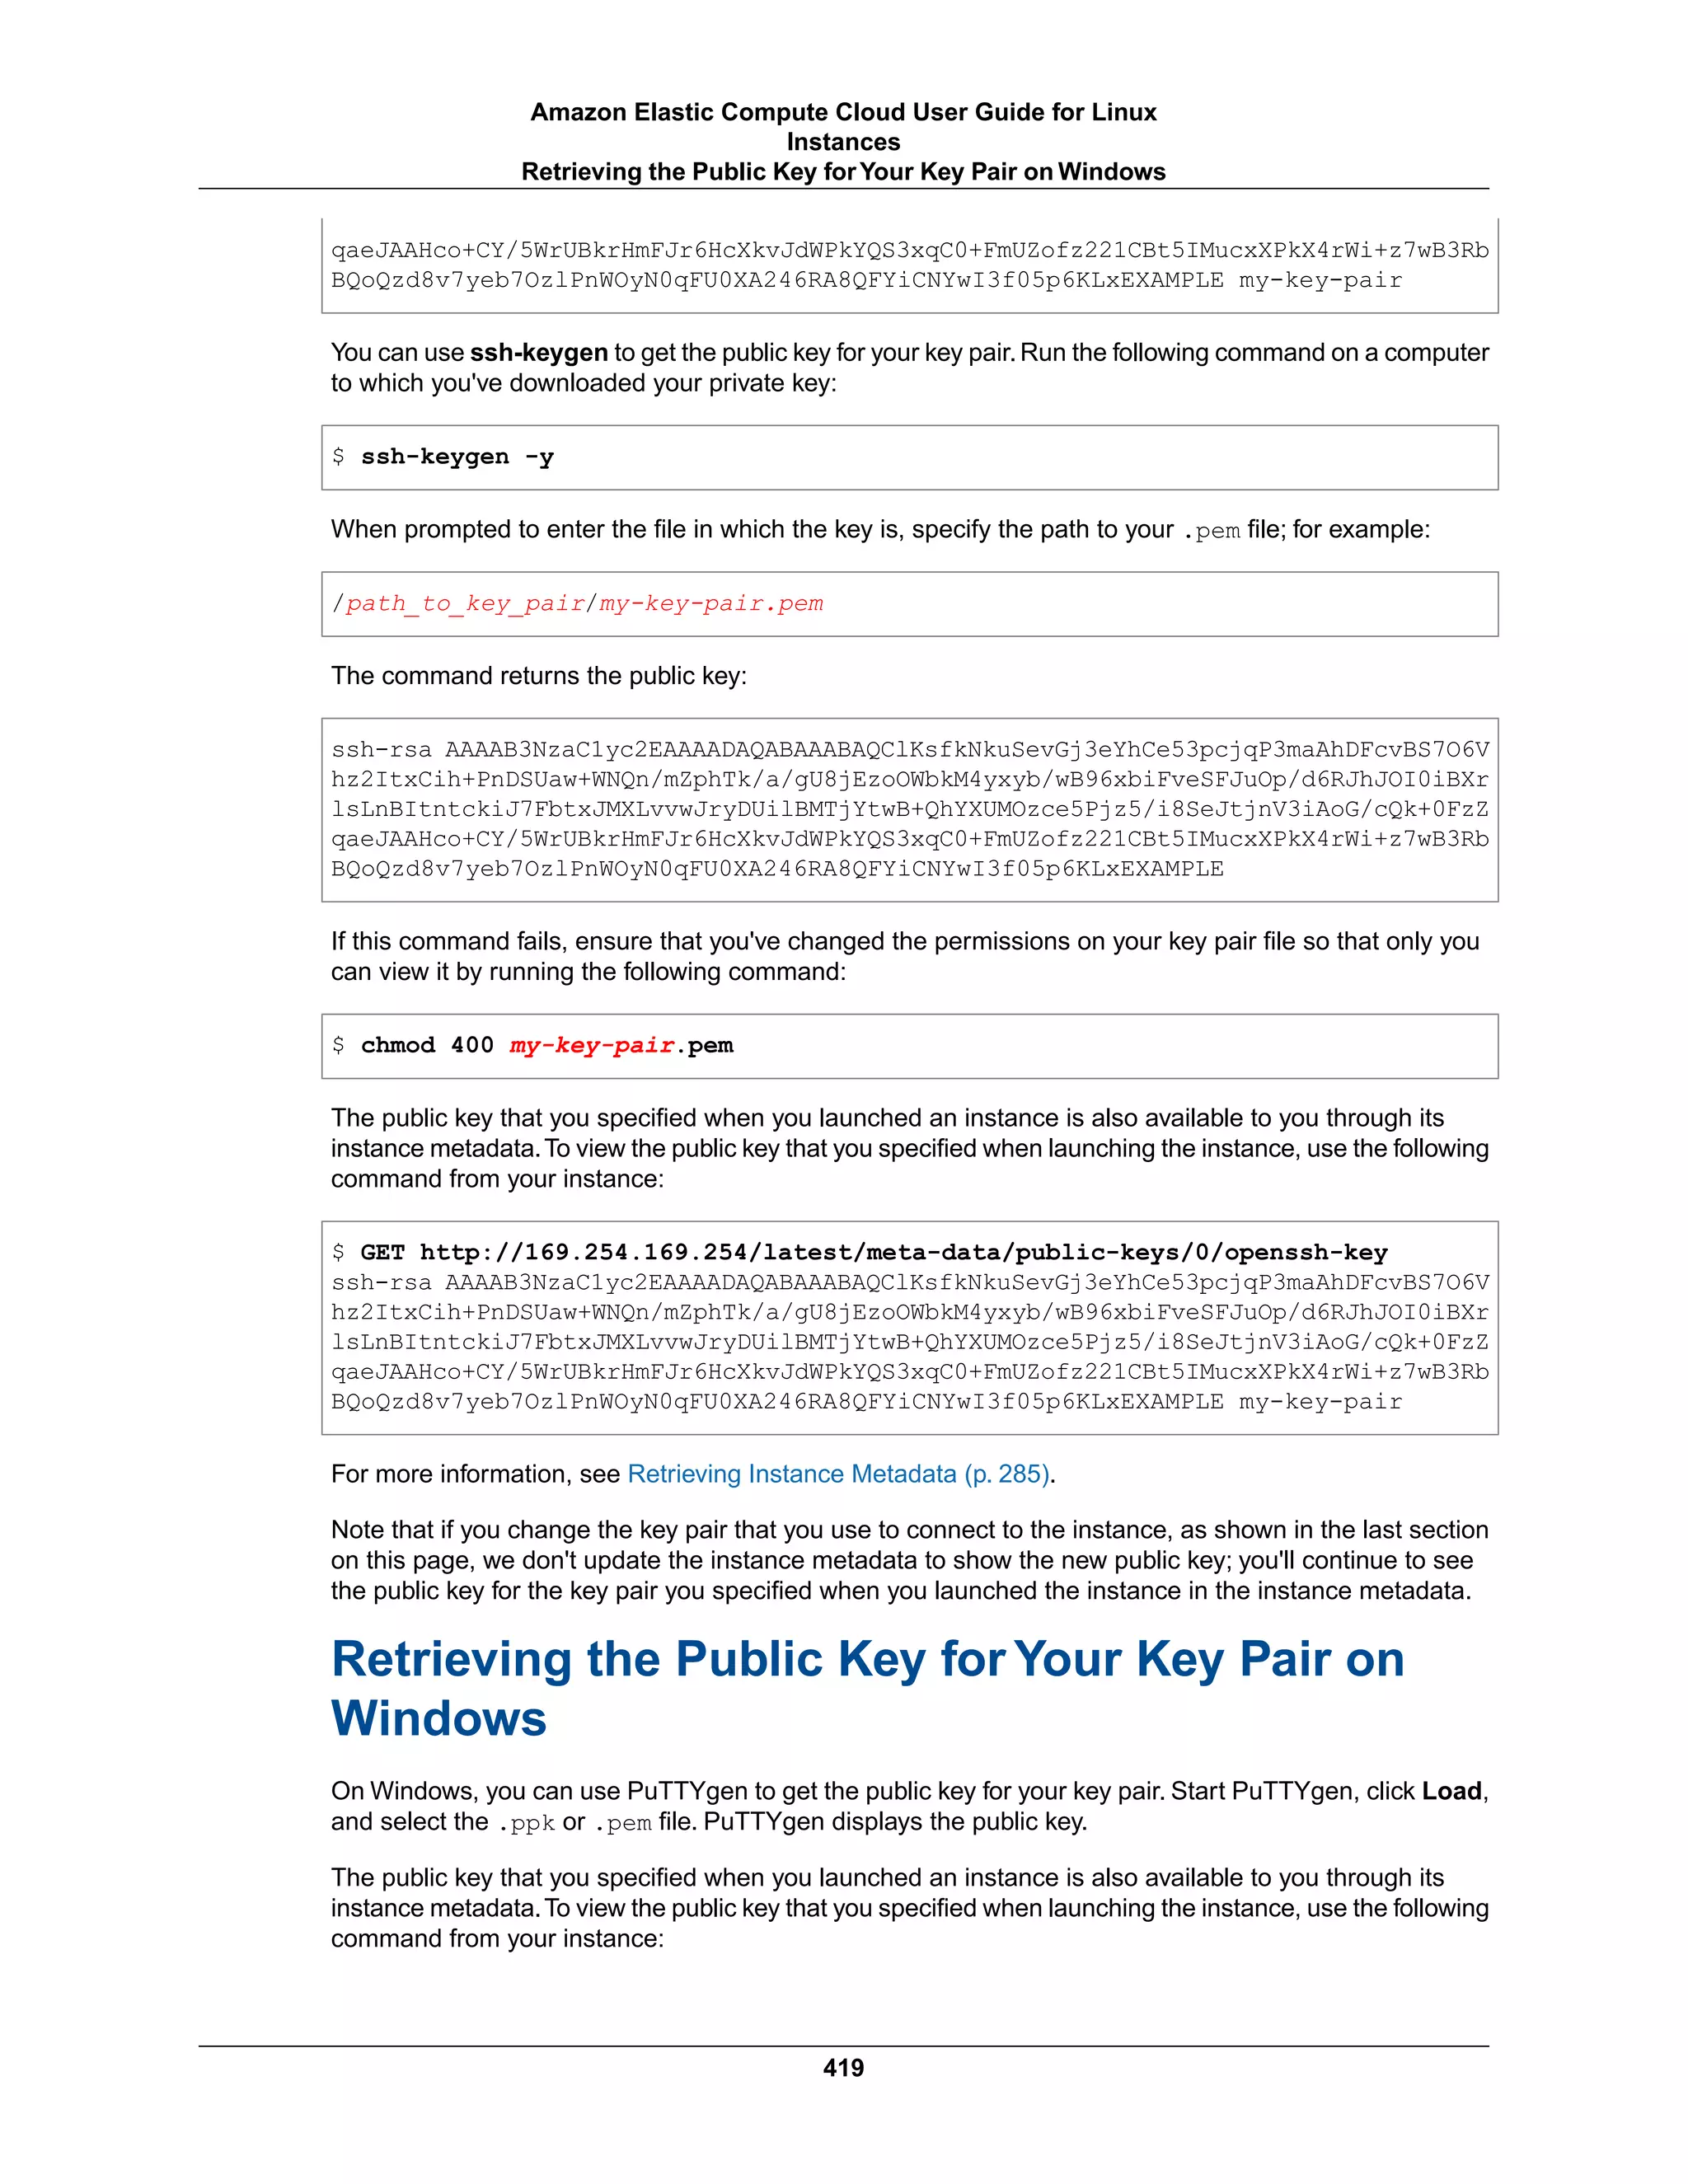

![2. In the navigation pane, under NETWORK & SECURITY, choose Key Pairs.
3. Select the key pair and choose Delete.
4. When prompted, choose Yes.
To delete your key pair using the command line
You can use one of the following commands. For more information about these command line interfaces,
see Accessing Amazon EC2 (p. 3).
• delete-key-pair (AWS CLI)
• ec2-delete-keypair (Amazon EC2 CLI)
• Remove-EC2KeyPair (AWS Tools for Windows PowerShell)
Note
If you create a Linux AMI from an instance, and then use the AMI to launch a new instance in a
different region or account, the new instance includes the public key from the original instance.
This enables you to connect to the new instance using the same private key file as your original
instance.You can remove this public key from your instance by removing its entry from the
.ssh/authorized_keys file using a text editor of your choice. For more information about
managing users on your instance and providing remote access using a specific key pair, see
Managing User Accounts on Your Linux Instance (p. 266).
Connecting to Your Linux Instance if You Lose
Your Private Key
If you lose the private key for an EBS-backed instance, you can regain access to your instance.You must
stop the instance, detach its root volume and attach it to another instance as a data volume, modify the
authorized_keys file, move the volume back to the original instance, and restart the instance. For
more information about launching, connecting to, and stopping instances, see Instance Lifecycle (p. 222).
This procedure isn't supported for instance store-backed instances. To determine the root device type of
your instance, open the Amazon EC2 console, choose Instances, select the instance, and check the
value of Root device type in the details pane. The value is either ebs or instance store. If the root
device is an instance store volume, you must have the private key in order to connect to the instance.
Prerequisites
Create a new key pair using either the Amazon EC2 console or a third-party tool.
To connect to an EBS-backed instance with a different key pair
1. Open the Amazon EC2 console at https://console.aws.amazon.com/ec2/.
2. Choose Instances in the navigation pane, and then select the instance that you'd like to connect to.
(We'll refer to this as the original instance.)
3. Save the following information that you'll need to complete this procedure.
• Write down the instance ID (i-xxxxxxxx), AMI ID (ami-xxxxxxxx), and Availability Zone of the original
instance.
• Choose the entry for sda1 (the root volume) under Block devices in the details pane and write
down the volume ID in the EBS ID field (vol-xxxxxxxx).
• [EC2-Classic] If the original instance has an associated Elastic IP address, write down the Elastic
IP address shown in the Elastic IP field in the details pane.
421
Amazon Elastic Compute Cloud User Guide for Linux
Instances
Connecting to Your Linux Instance if You Lose Your
Private Key](https://image.slidesharecdn.com/ec2-ug-151130152858-lva1-app6892/75/Amazan-Ec2-430-2048.jpg)
![4. Choose Actions, select Instance State, and then select Stop.If Stop is disabled, either the instance
is already stopped or its root device is an instance store volume.
Warning
When you stop an instance, the data on any instance store volumes is erased. Therefore,
if you have any data on instance store volumes that you want to keep, be sure to back it up
to persistent storage.
5. Choose Launch Instance, and then use the launch wizard to launch a temporary instance with the
following options:
• On the Choose an AMI page, select the same AMI that you used to launch the original instance.
If this AMI is unavailable, you can create an AMI that you can use from the stopped instance. For
more information, see Creating an Amazon EBS-Backed Linux AMI (p. 87) .
• On the Choose an Instance Type page, leave the default instance type that the wizard selects
for you.
• On the Configure Instance Details page, specify the same Availability Zone as the instance you'd
like to connect to. If you're launching an instance in a VPC, select a subnet in this Availability Zone.
• On the Tag Instance page, add the tag Name=Temporary to the instance to indicate that this is
a temporary instance.
• On the Review page, choose Launch. Create a new key pair, download it to a safe location on
your computer, and then choose Launch Instances.
6. In the navigation pane, choose Volumes and select the root device volume for the original instance
(you wrote down its volume ID in a previous step). Choose Actions, and then select DetachVolume.
Wait for the state of the volume to become available. (You might need to choose the Refresh
icon.)
7. With the volume still selected, choose Actions, and then select Attach Volume. Select the instance
ID of the temporary instance, write down the device name specified under Device (for example,
/dev/sdf), and then choose Yes, Attach.
8. Connect to the temporary instance.
9. From the temporary instance, mount the volume that you attached to the instance so that you can
access its file system. For example, if the device name is /dev/sdf, use the following commands
to mount the volume as /mnt/tempvol.
Note
The device name may appear differently on your instance. For example, devices mounted
as /dev/sdf may show up as /dev/xvdf on the instance. Some versions of Red Hat (or
its variants, such as CentOS) may even increment the trailing letter by 4 characters, where
/dev/sdf becomes /dev/xvdk.
a. Use the lsblk command to determine if the volume is partitioned.
[ec2-user ~]$ lsblk
NAME MAJ:MIN RM SIZE RO TYPE MOUNTPOINT
xvda 202:0 0 8G 0 disk
xvda1 202:1 0 8G 0 part /
xvdf 202:80 0 101G 0 disk
xvdf1 202:81 0 101G 0 part
xvdg 202:96 0 30G 0 disk
In the above example, /dev/xvda and /dev/xvdf are partitioned volumes, and /dev/xvdg
is not. If your volume is partitioned, you mount the partition (/dev/xvdf1) instead of the raw
device (/dev/xvdf) in the next steps.
b. Create a temporary directory to mount the volume.
422
Amazon Elastic Compute Cloud User Guide for Linux
Instances
Connecting to Your Linux Instance if You Lose Your
Private Key](https://image.slidesharecdn.com/ec2-ug-151130152858-lva1-app6892/75/Amazan-Ec2-431-2048.jpg)
![[ec2-user ~]$ sudo mkdir /mnt/tempvol
c. Mount the volume (or partition) at the temporary mount point, using the volume name or device
name you identified earlier.
[ec2-user ~]$ sudo mount /dev/xvdf1 /mnt/tempvol
10. From the temporary instance, use the following command to update authorized_keys on the
mounted volume with the new public key from the authorized_keys for the temporary instance
(you may need to substitute a different user name in the following command, such as ubuntu for
Ubuntu instances):
[ec2-user ~]$ cp .ssh/authorized_keys /mnt/tempvol/home/ec2-user/.ssh/author
ized_keys
If this copy succeeded, you can go to the next step.
(Optional) Otherwise, if you don't have permission to edit files in /mnt/tempvol, you'll need to
update the file using sudo and then check the permissions on the file to verify that you'll be able to
log into the original instance. Use the following command to check the permissions on the file:
[ec2-user ~]$ sudo ls -l /mnt/tempvol/home/ec2-user/.ssh
total 4
-rw------- 1 222 500 398 Sep 13 22:54 authorized_keys
In this example output, 222 is the user ID and 500 is the group ID. Next, use sudo to re-run the copy
command that failed:
[ec2-user ~]$ sudo cp .ssh/authorized_keys /mnt/tempvol/home/ec2-
user/.ssh/authorized_keys
Run the following command again to determine whether the permissions changed:
[ec2-user ~]$ sudo ls -l /mnt/tempvol/home/ec2-user/.ssh
If the user ID and group ID have changed, use the following command to restore them:
[ec2-user ~]$ sudo chown 222:500 /mnt/tempvol/home/ec2-user/.ssh/author
ized_keys
11. From the temporary instance, unmount the volume that you attached so that you can reattach it to
the original instance. For example, use the following command to unmount the volume at
/mnt/tempvol:
[ec2-user ~]$ sudo umount /mnt/tempvol
12. From the Amazon EC2 console, select the volume with the volume ID that you wrote down, choose
Actions, and then select Detach Volume. Wait for the state of the volume to become available.
(You might need to choose the Refresh icon.)
423
Amazon Elastic Compute Cloud User Guide for Linux
Instances
Connecting to Your Linux Instance if You Lose Your
Private Key](https://image.slidesharecdn.com/ec2-ug-151130152858-lva1-app6892/75/Amazan-Ec2-432-2048.jpg)
![13. With the volume still selected, choose Actions, and then select Attach Volume. Select the instance
ID of the original instance, specify the device name /dev/sda1, and then choose Yes, Attach.
Warning
If you don't specify sda1 as the device name, you'll be unable to start the original instance.
This is because Amazon EC2 expects the root device volume at sda1.
14. Select the original instance, choose Actions, select Instance State, and then choose Start. After
the instance enters the running state, you can connect to it using the private key file for your new
key pair.
15. [EC2-Classic] If the original instance had an associated Elastic IP address before you stopped it,
you must re-associate it with the instance as follows:
a. In the navigation pane, choose Elastic IPs.
b. Select the Elastic IP address that you wrote down at the beginning of this procedure.
c. Choose Actions, and then select Associate Address.
d. Select the ID of the original instance, and then choose Associate.
16. (Optional) You can terminate the temporary instance if you have no further use for it. Select the
temporary instance, choose Actions, select Instance State, and then choose Terminate.
Amazon EC2 Security Groups for Linux
Instances
A security group acts as a virtual firewall that controls the traffic for one or more instances. When you
launch an instance, you associate one or more security groups with the instance.You add rules to each
security group that allow traffic to or from its associated instances.You can modify the rules for a security
group at any time; the new rules are automatically applied to all instances that are associated with the
security group. When we decide whether to allow traffic to reach an instance, we evaluate all the rules
from all the security groups that are associated with the instance.
If you need to allow traffic to a Windows instance, see Amazon EC2 Security Groups for Windows Instances
in the Amazon EC2 User Guide for Microsoft Windows Instances.
Topics
• Security Groups for EC2-Classic (p. 425)
• Security Groups for EC2-VPC (p. 425)
• Security Group Rules (p. 425)
• Default Security Groups (p. 427)
• Custom Security Groups (p. 428)
• Creating a Security Group (p. 429)
• Describing Your Security Groups (p. 429)
• Adding Rules to a Security Group (p. 430)
• Deleting Rules from a Security Group (p. 431)
• Deleting a Security Group (p. 431)
• API and Command Overview (p. 431)
If you have requirements that aren't met by security groups, you can maintain your own firewall on any
of your instances in addition to using security groups.
424
Amazon Elastic Compute Cloud User Guide for Linux
Instances
Security Groups](https://image.slidesharecdn.com/ec2-ug-151130152858-lva1-app6892/75/Amazan-Ec2-433-2048.jpg)


![Custom Security Groups
If you don't want all your instances to use the default security group, you can create your own security
groups and specify them when you launch your instances.You can create multiple security groups to
reflect the different roles that your instances play; for example, a web server or a database server. For
instructions that help you create security groups for web servers and database servers, see Recommended
Security Groups in the Amazon VPC User Guide.
Note
In EC2-Classic, you can create up to 500 security groups in each region for each account. In
EC2-VPC, you can create up to 100 security groups per VPC.The security groups for EC2-Classic
do not count against the security group limit for EC2-VPC.
When you create a security group, you must provide it with a name and a description. Security group
names and descriptions can be up to 255 characters in length, and are limited to the following characters:
• EC2-Classic: ASCII characters
• EC2-VPC: a-z, A-Z, 0-9, spaces, and ._-:/()#,@[]+=&;{}!$*
AWS assigns each security group a unique ID in the form sg-xxxxxxxx.The following are the initial settings
for a security group that you create:
• Allow no inbound traffic
• Allow all outbound traffic
After you've created a security group, you can change its inbound rules to reflect the type of inbound
traffic that you want to reach the associated instances. In EC2-VPC, you can also change its outbound
rules.
To allow instances that have the same security group to communicate with each other, you must explicitly
add rules for this. The following table describes the rules that you must add to your security group to
enable instances in EC2-Classic to communicate with each other.
Inbound
CommentsPort RangeProtocolSource
Allow inbound ICMP access from other
instances associated with this security
group
AllICMPThe ID of the security group
Allow inbound TCP access from other
instances associated with this security
group
0 - 65535TCPThe ID of the security group
Allow inbound UDP access from other
instances associated with this security
group
0 - 65535UDPThe ID of the security group
The following table describes the rules that you must add to your security group to enable instances in a
VPC to communicate with each other.
Inbound
CommentsPort RangeProtocolSource
428
Amazon Elastic Compute Cloud User Guide for Linux
Instances
Custom Security Groups](https://image.slidesharecdn.com/ec2-ug-151130152858-lva1-app6892/75/Amazan-Ec2-437-2048.jpg)

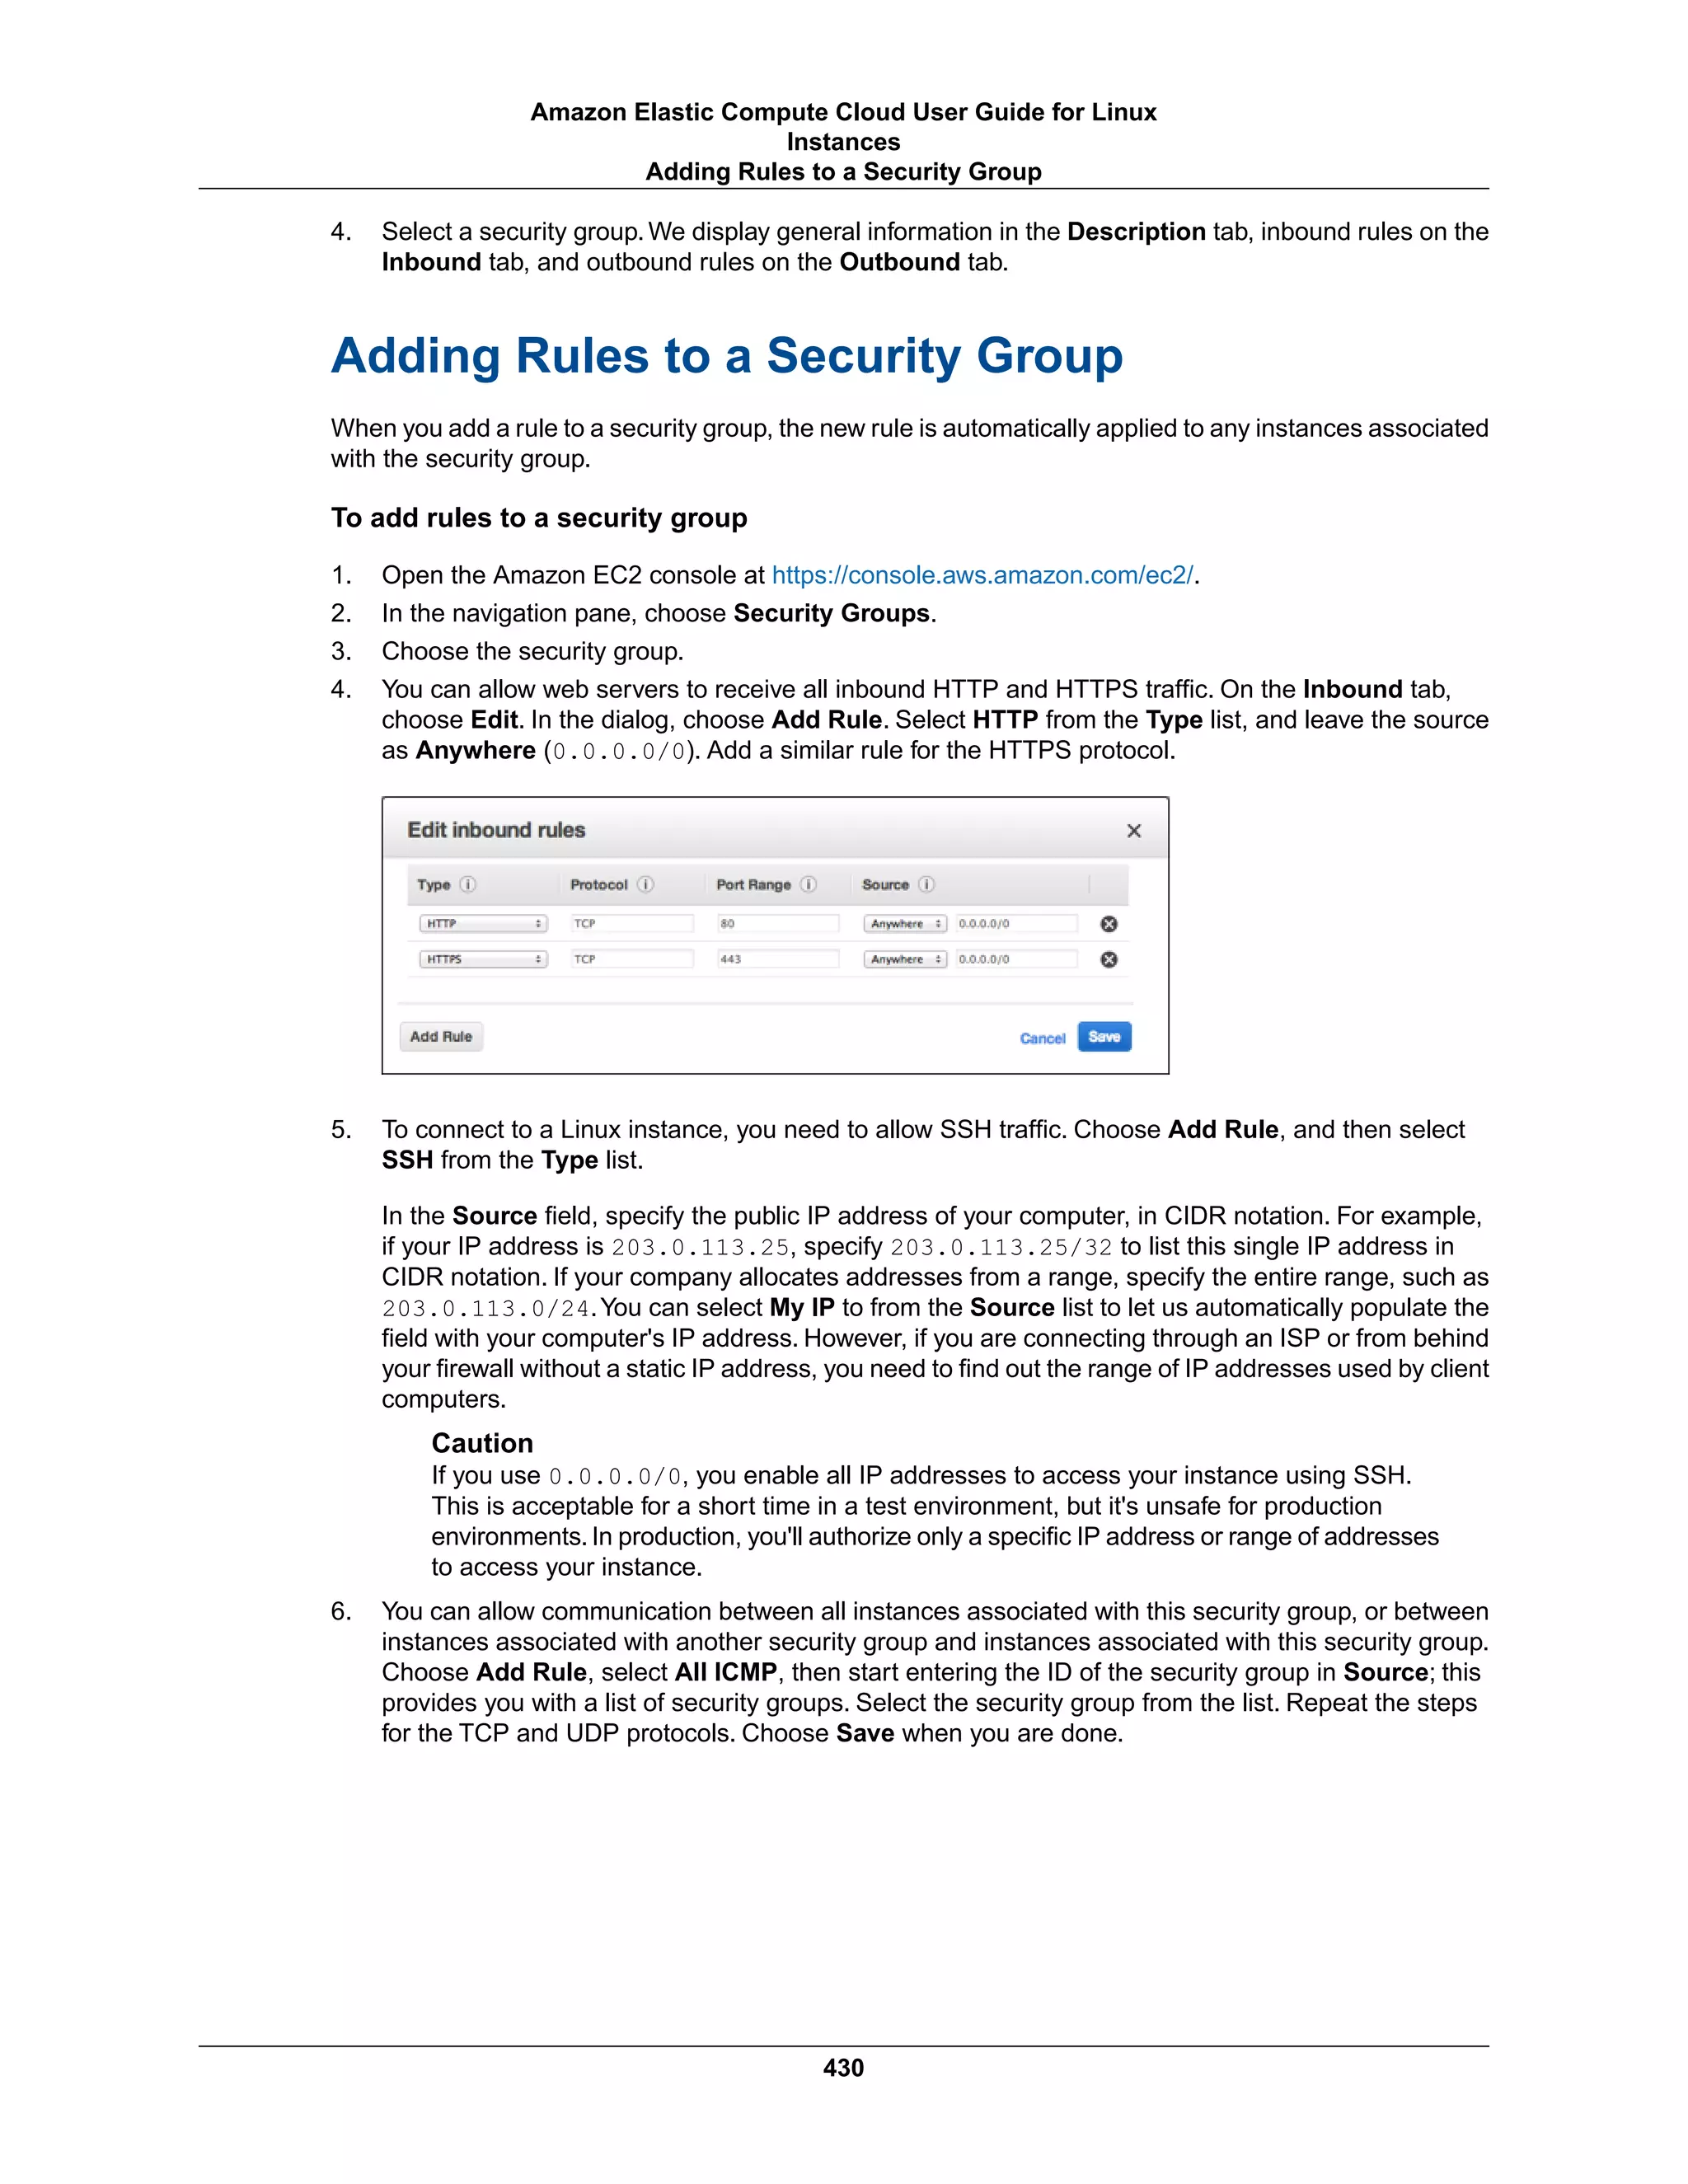

![Create a security group
• create-security-group (AWS CLI)
• ec2-create-group (Amazon EC2 CLI)
• New-EC2SecurityGroup (AWS Tools for Windows PowerShell)
Add one or more ingress rules to a security group
• authorize-security-group-ingress (AWS CLI)
• ec2-authorize (Amazon EC2 CLI)
• Grant-EC2SecurityGroupIngress (AWS Tools for Windows PowerShell)
[EC2-VPC] Add one or more egress rules to a security group
• authorize-security-group-egress (AWS CLI)
• ec2-authorize (Amazon EC2 CLI)
• Grant-EC2SecurityGroupIngress (AWS Tools for Windows PowerShell)
Describe one or more security groups
• describe-security-groups (AWS CLI)
• ec2-describe-group (Amazon EC2 CLI)
• Get-EC2SecurityGroup (AWS Tools for Windows PowerShell)
[EC2-VPC] Modify the security groups for an instance
• modify-instance-attribute (AWS CLI)
• ec2-modify-instance-attribute (Amazon EC2 CLI)
• Edit-EC2InstanceAttribute (AWS Tools for Windows PowerShell)
Remove one or more ingress rules from a security group
• revoke-security-group-ingress (AWS CLI)
• ec2-revoke (Amazon EC2 CLI)
• Revoke-EC2SecurityGroupIngress (AWS Tools for Windows PowerShell)
[EC2-VPC] Remove one or more egress rules from a security group
• revoke-security-group-egress(AWS CLI)
• ec2-revoke (Amazon EC2 CLI)
• Revoke-EC2SecurityGroupEgress (AWS Tools for Windows PowerShell)
Delete a security group
• delete-security-group (AWS CLI)
• ec2-delete-group (Amazon EC2 CLI)
• Remove-EC2SecurityGroup (AWS Tools for Windows PowerShell)
432
Amazon Elastic Compute Cloud User Guide for Linux
Instances
API and Command Overview](https://image.slidesharecdn.com/ec2-ug-151130152858-lva1-app6892/75/Amazan-Ec2-441-2048.jpg)