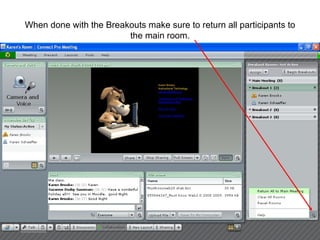
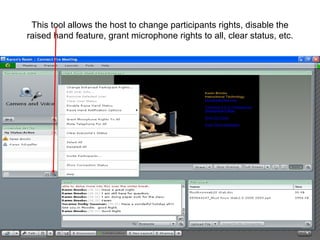
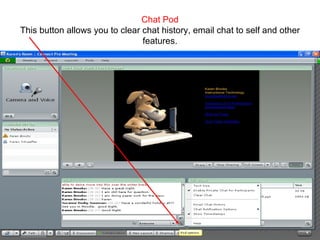
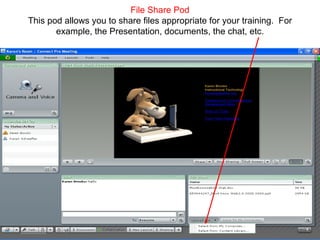
Downloaded 86 times


![Presentation Locations: Teaching 2.0:Professional Development Blog Tell SlideShare Karen Brooks [email_address]](https://image.slidesharecdn.com/adobe-acrobat-connect-pro-1229453249040528-1/85/Adobe-Acrobat-Connect-Pro-46-320.jpg)

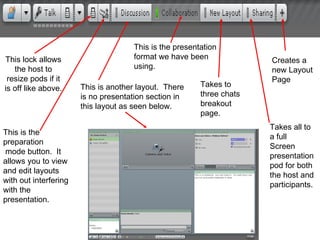
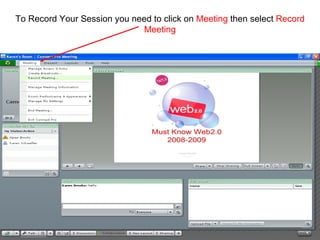
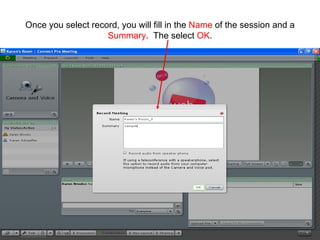
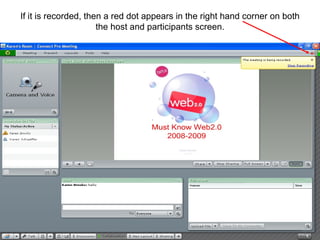
This document provides an overview of the participant and host views in Adobe Acrobat Connect Pro 2008. It describes the various pods/sections that users see, including the presentation pod, chat pod, file share pod, and attendee pod. It also covers features like recording sessions, using breakout rooms, sharing screens, and adjusting audio and microphone settings. The document is intended as a guide for both hosts and participants on navigating and making use of the different tools available in an Acrobat Connect session.