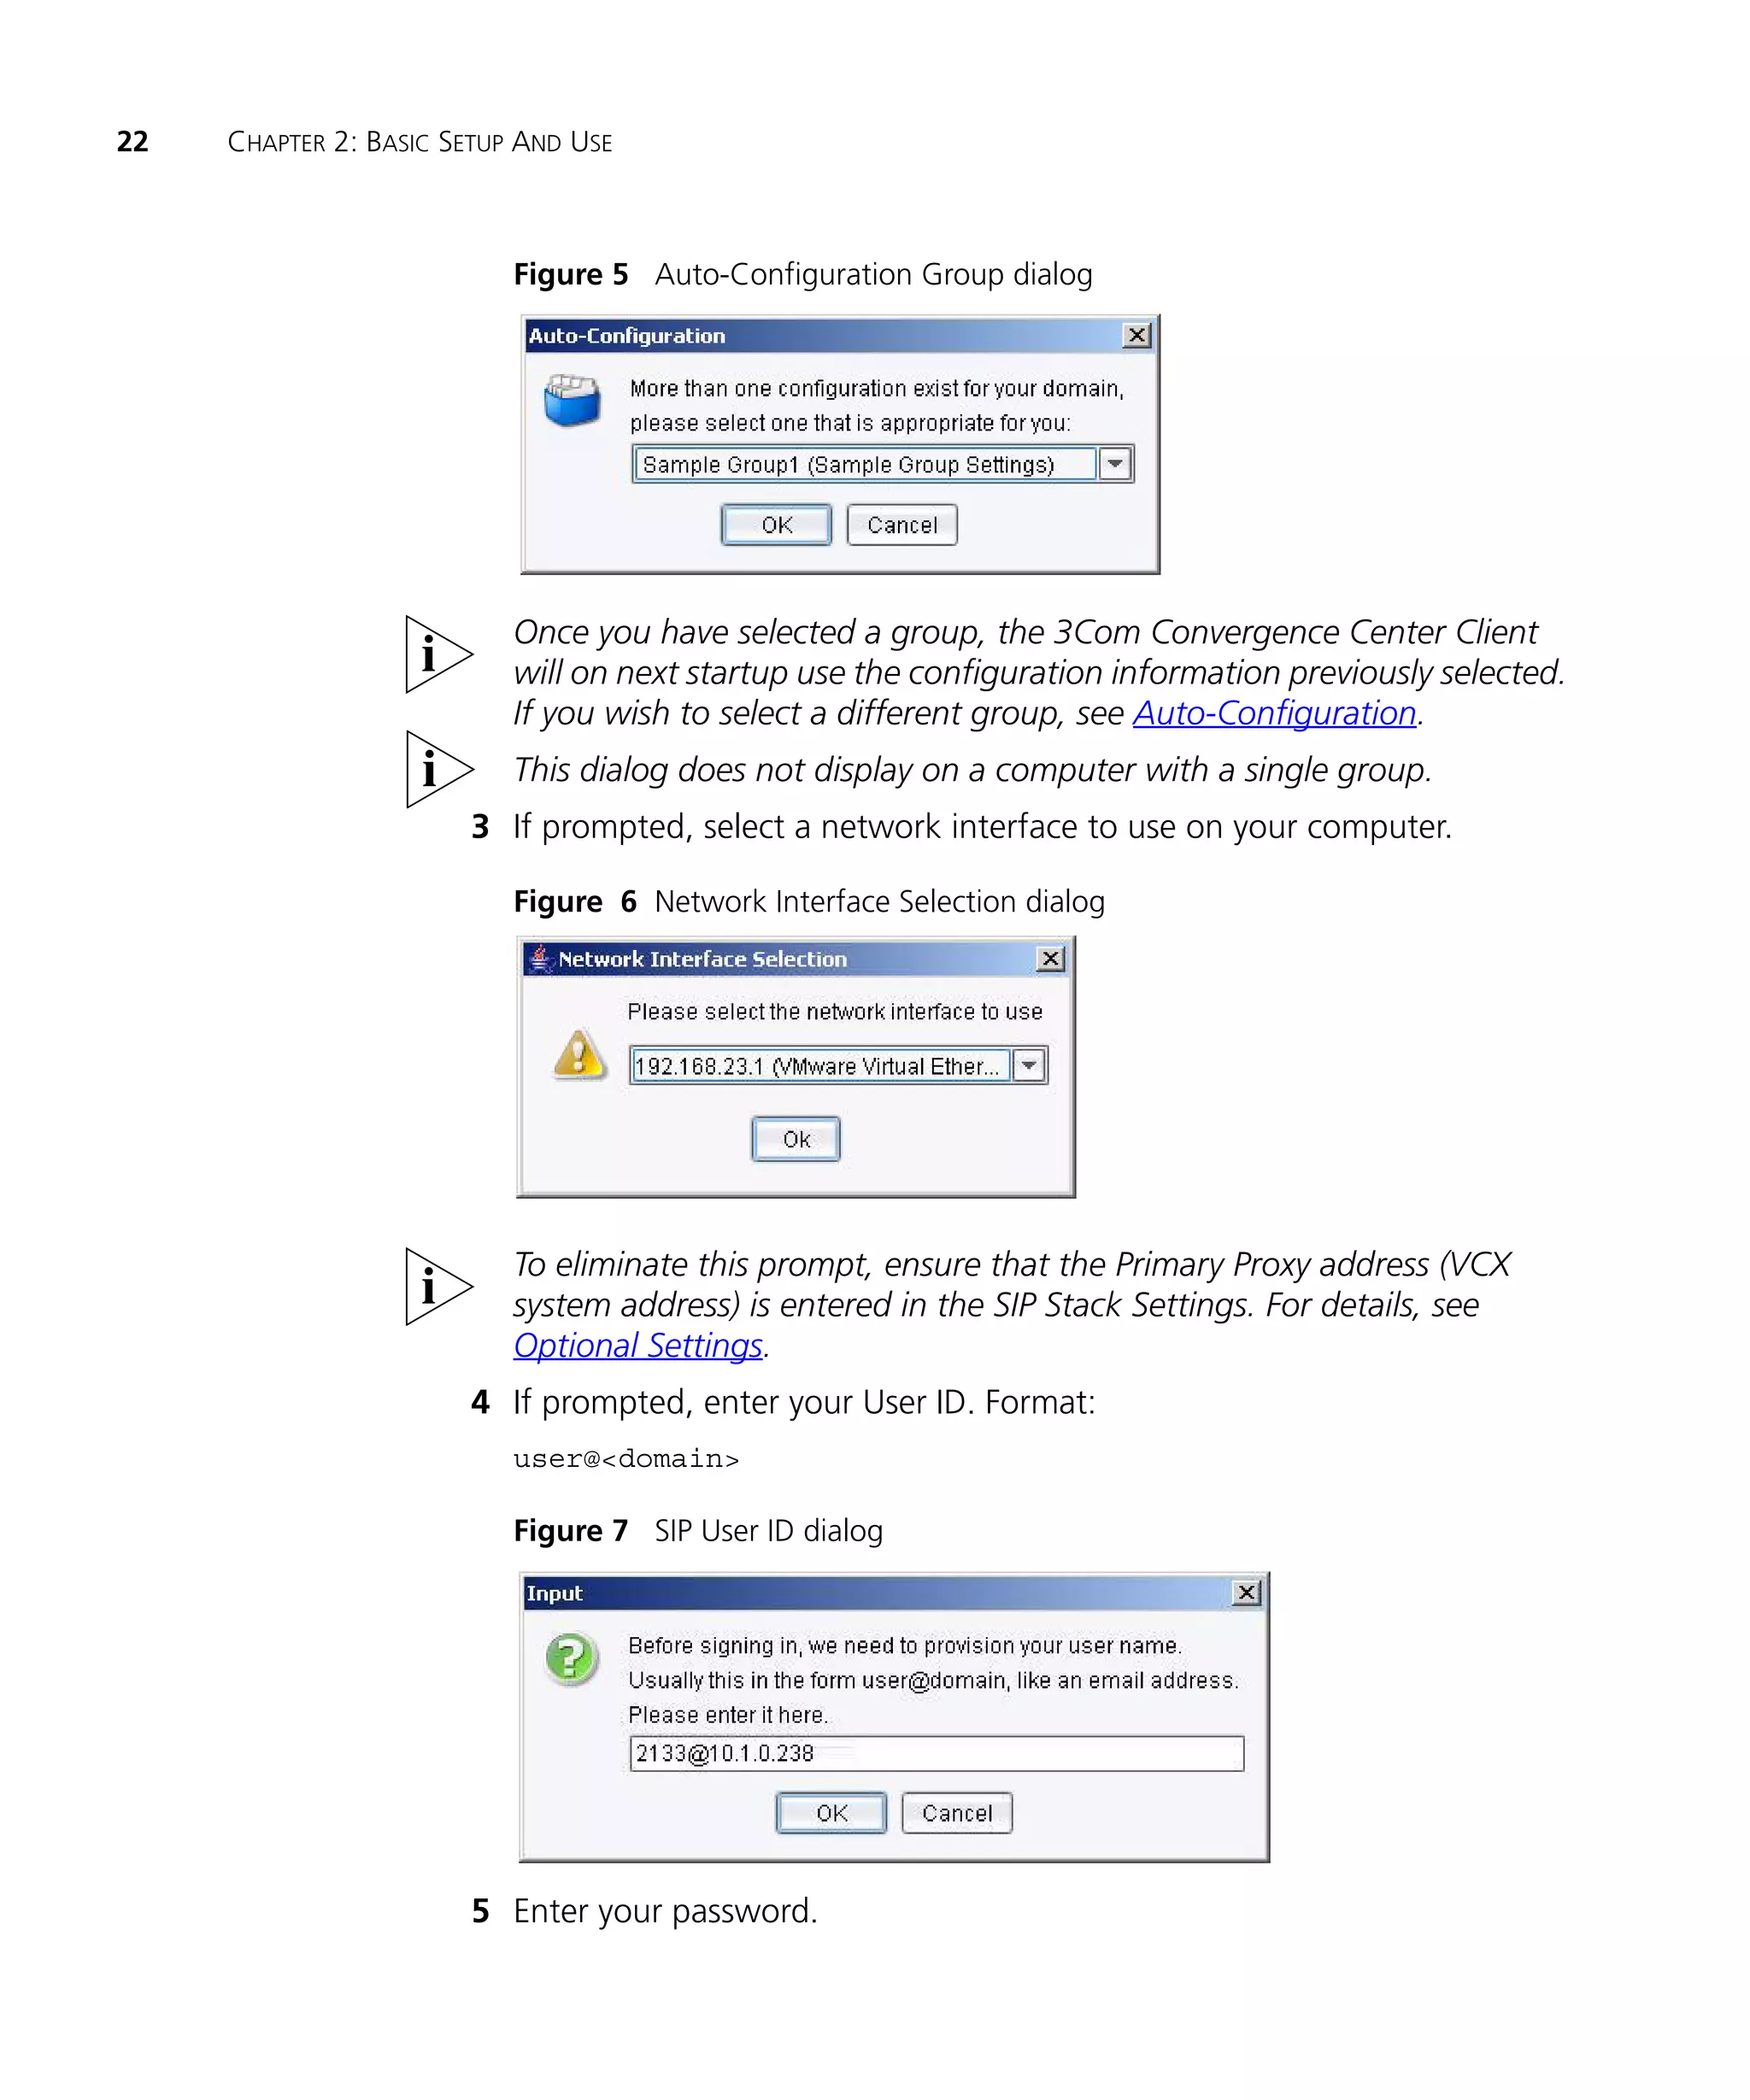
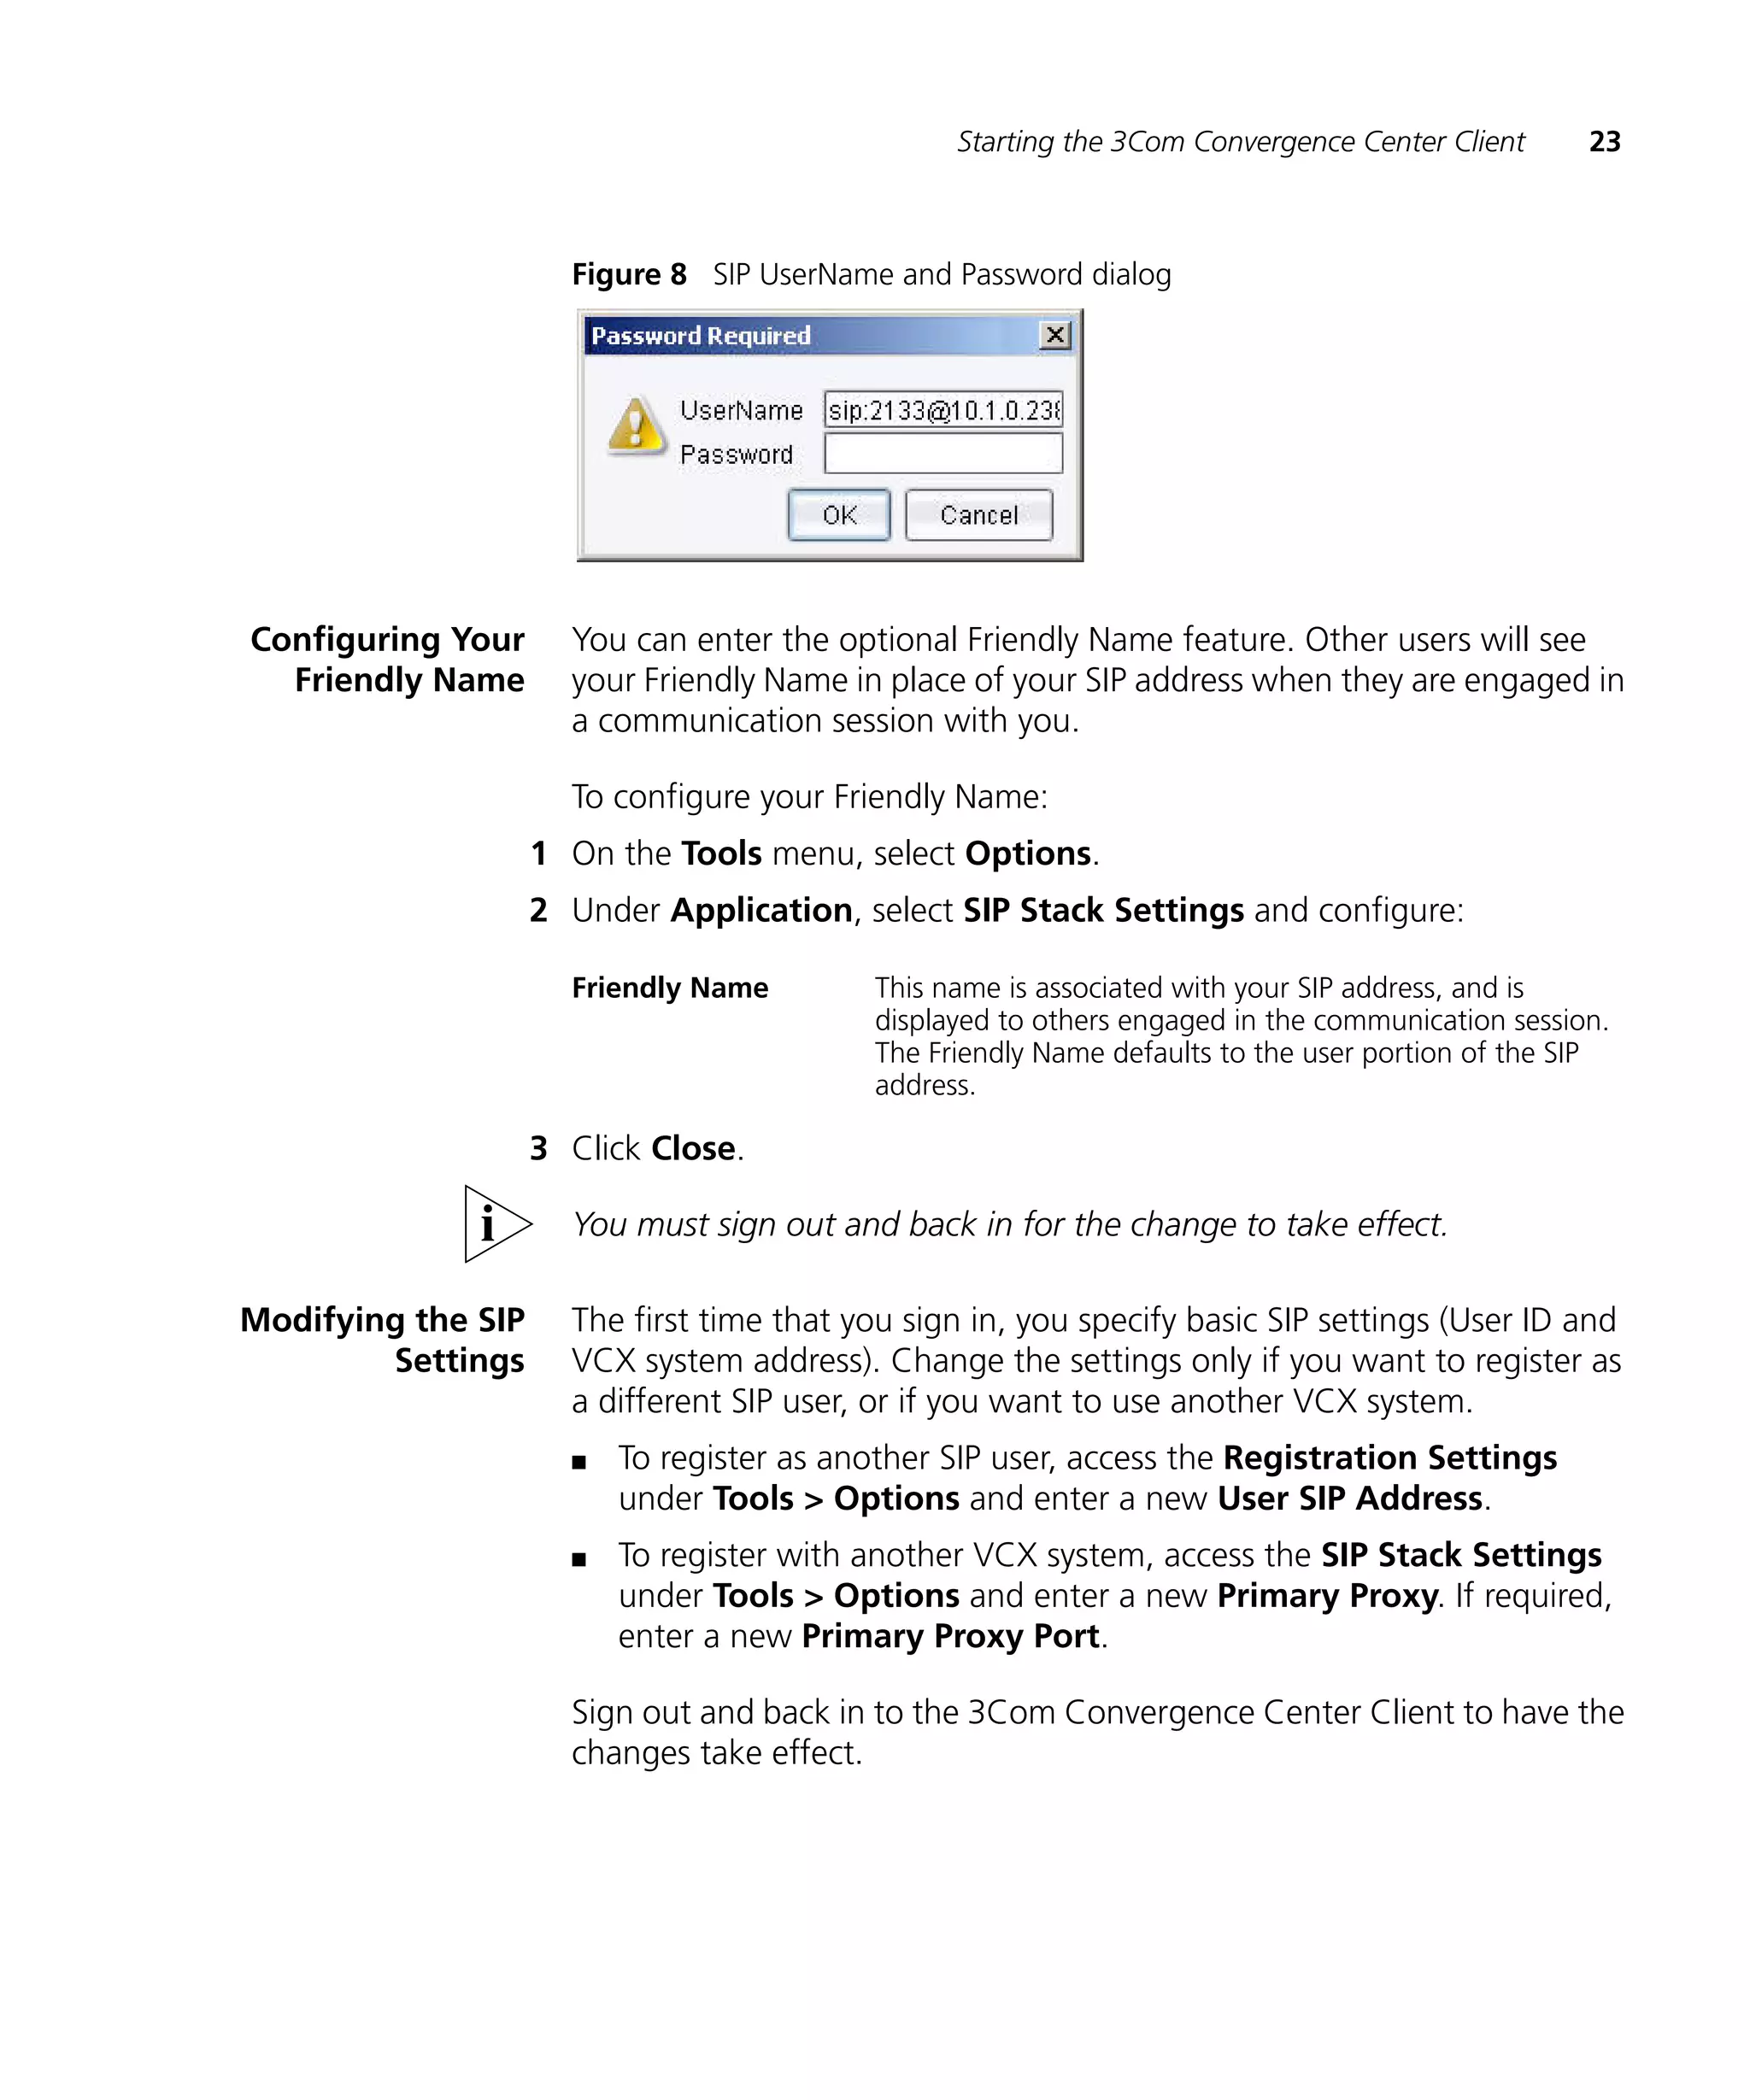
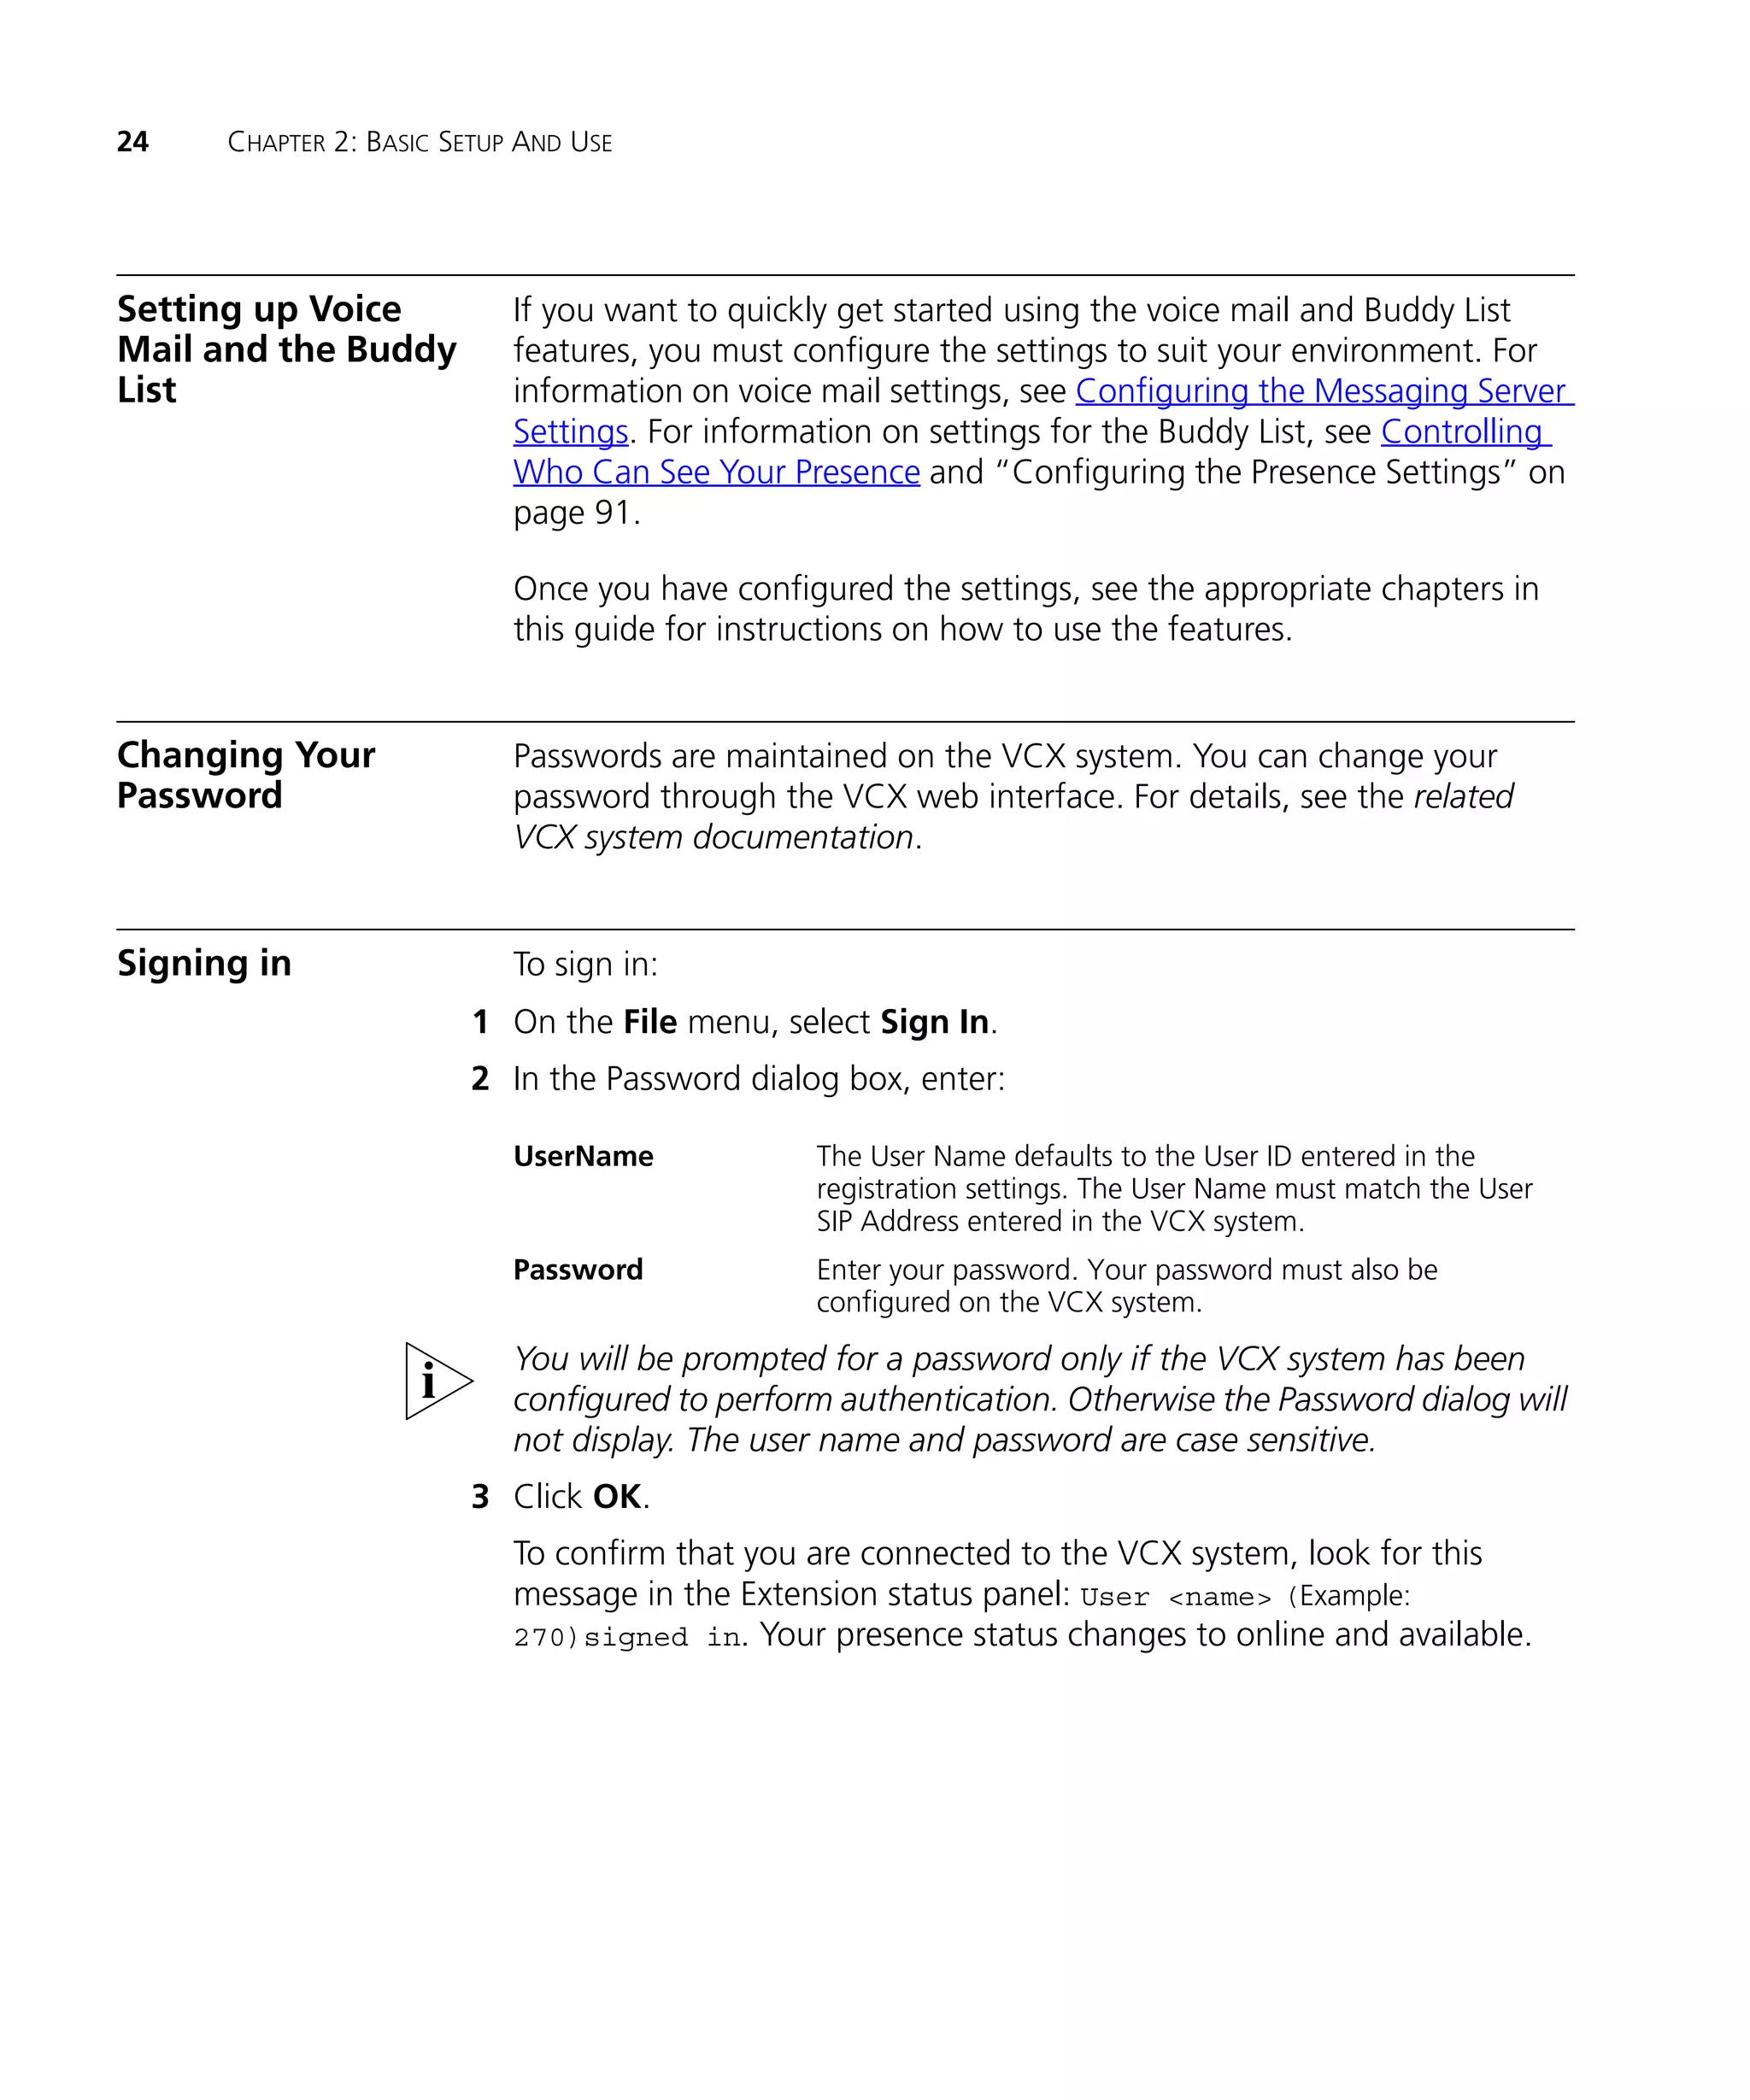
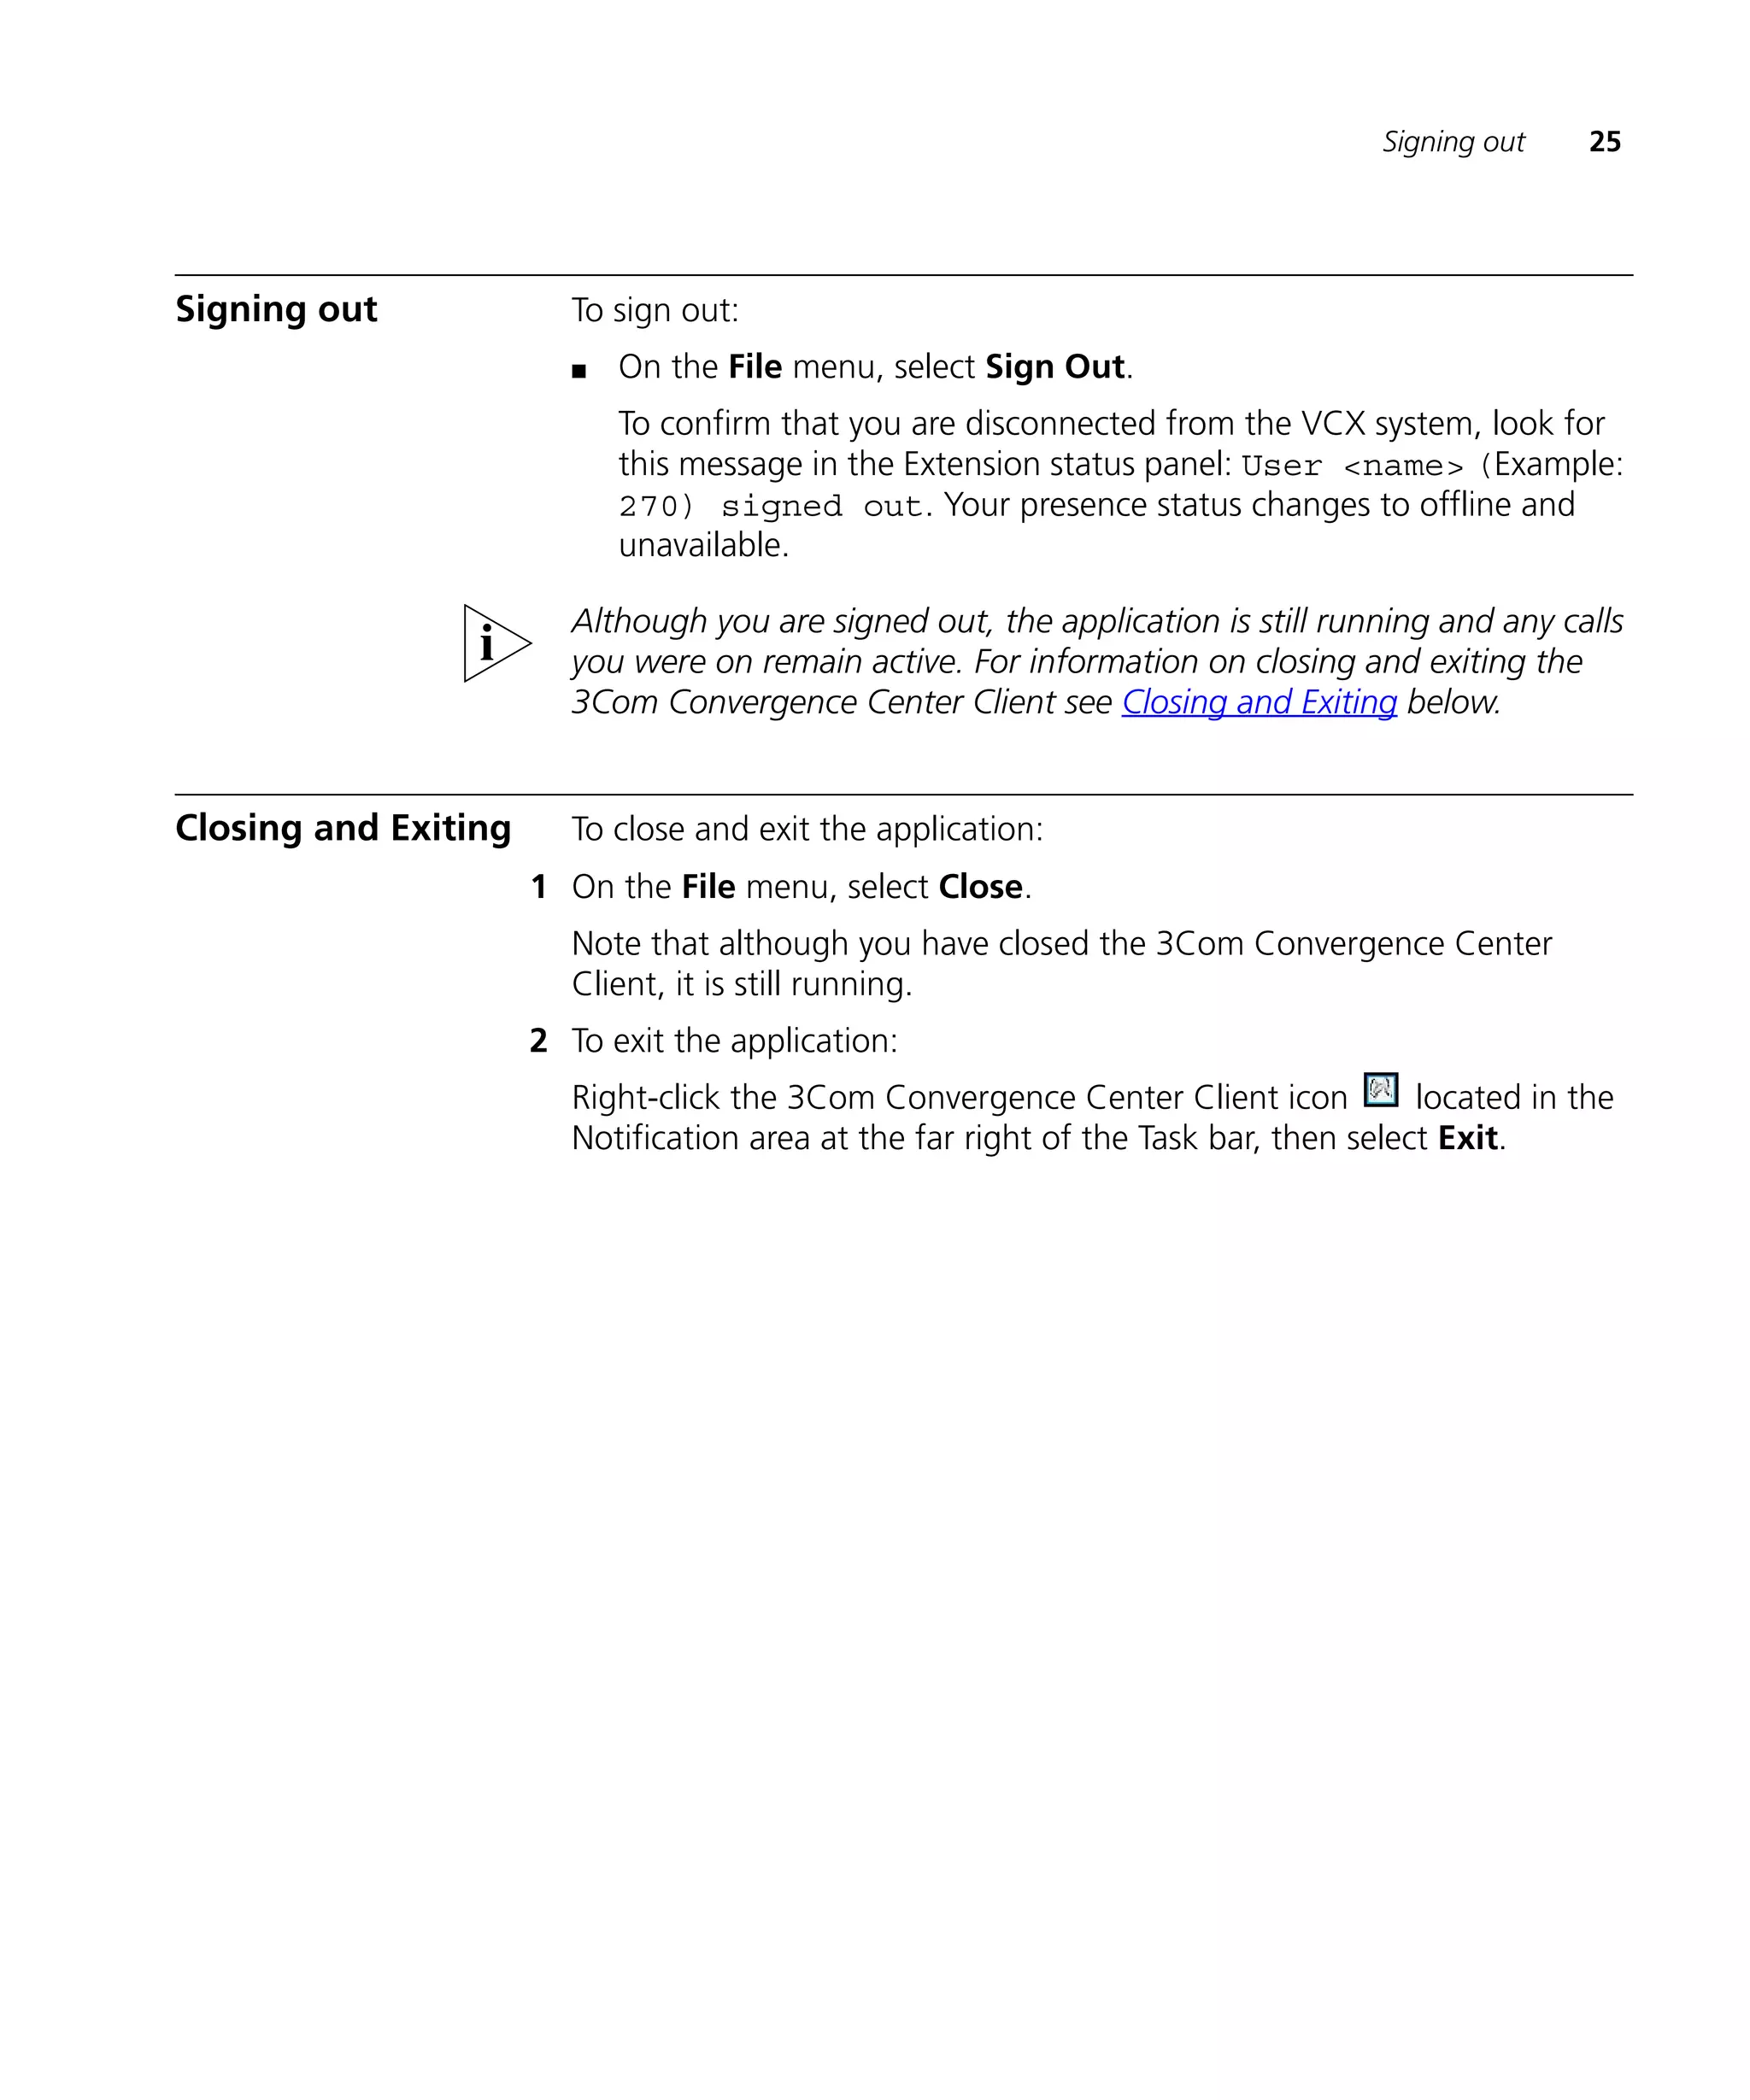
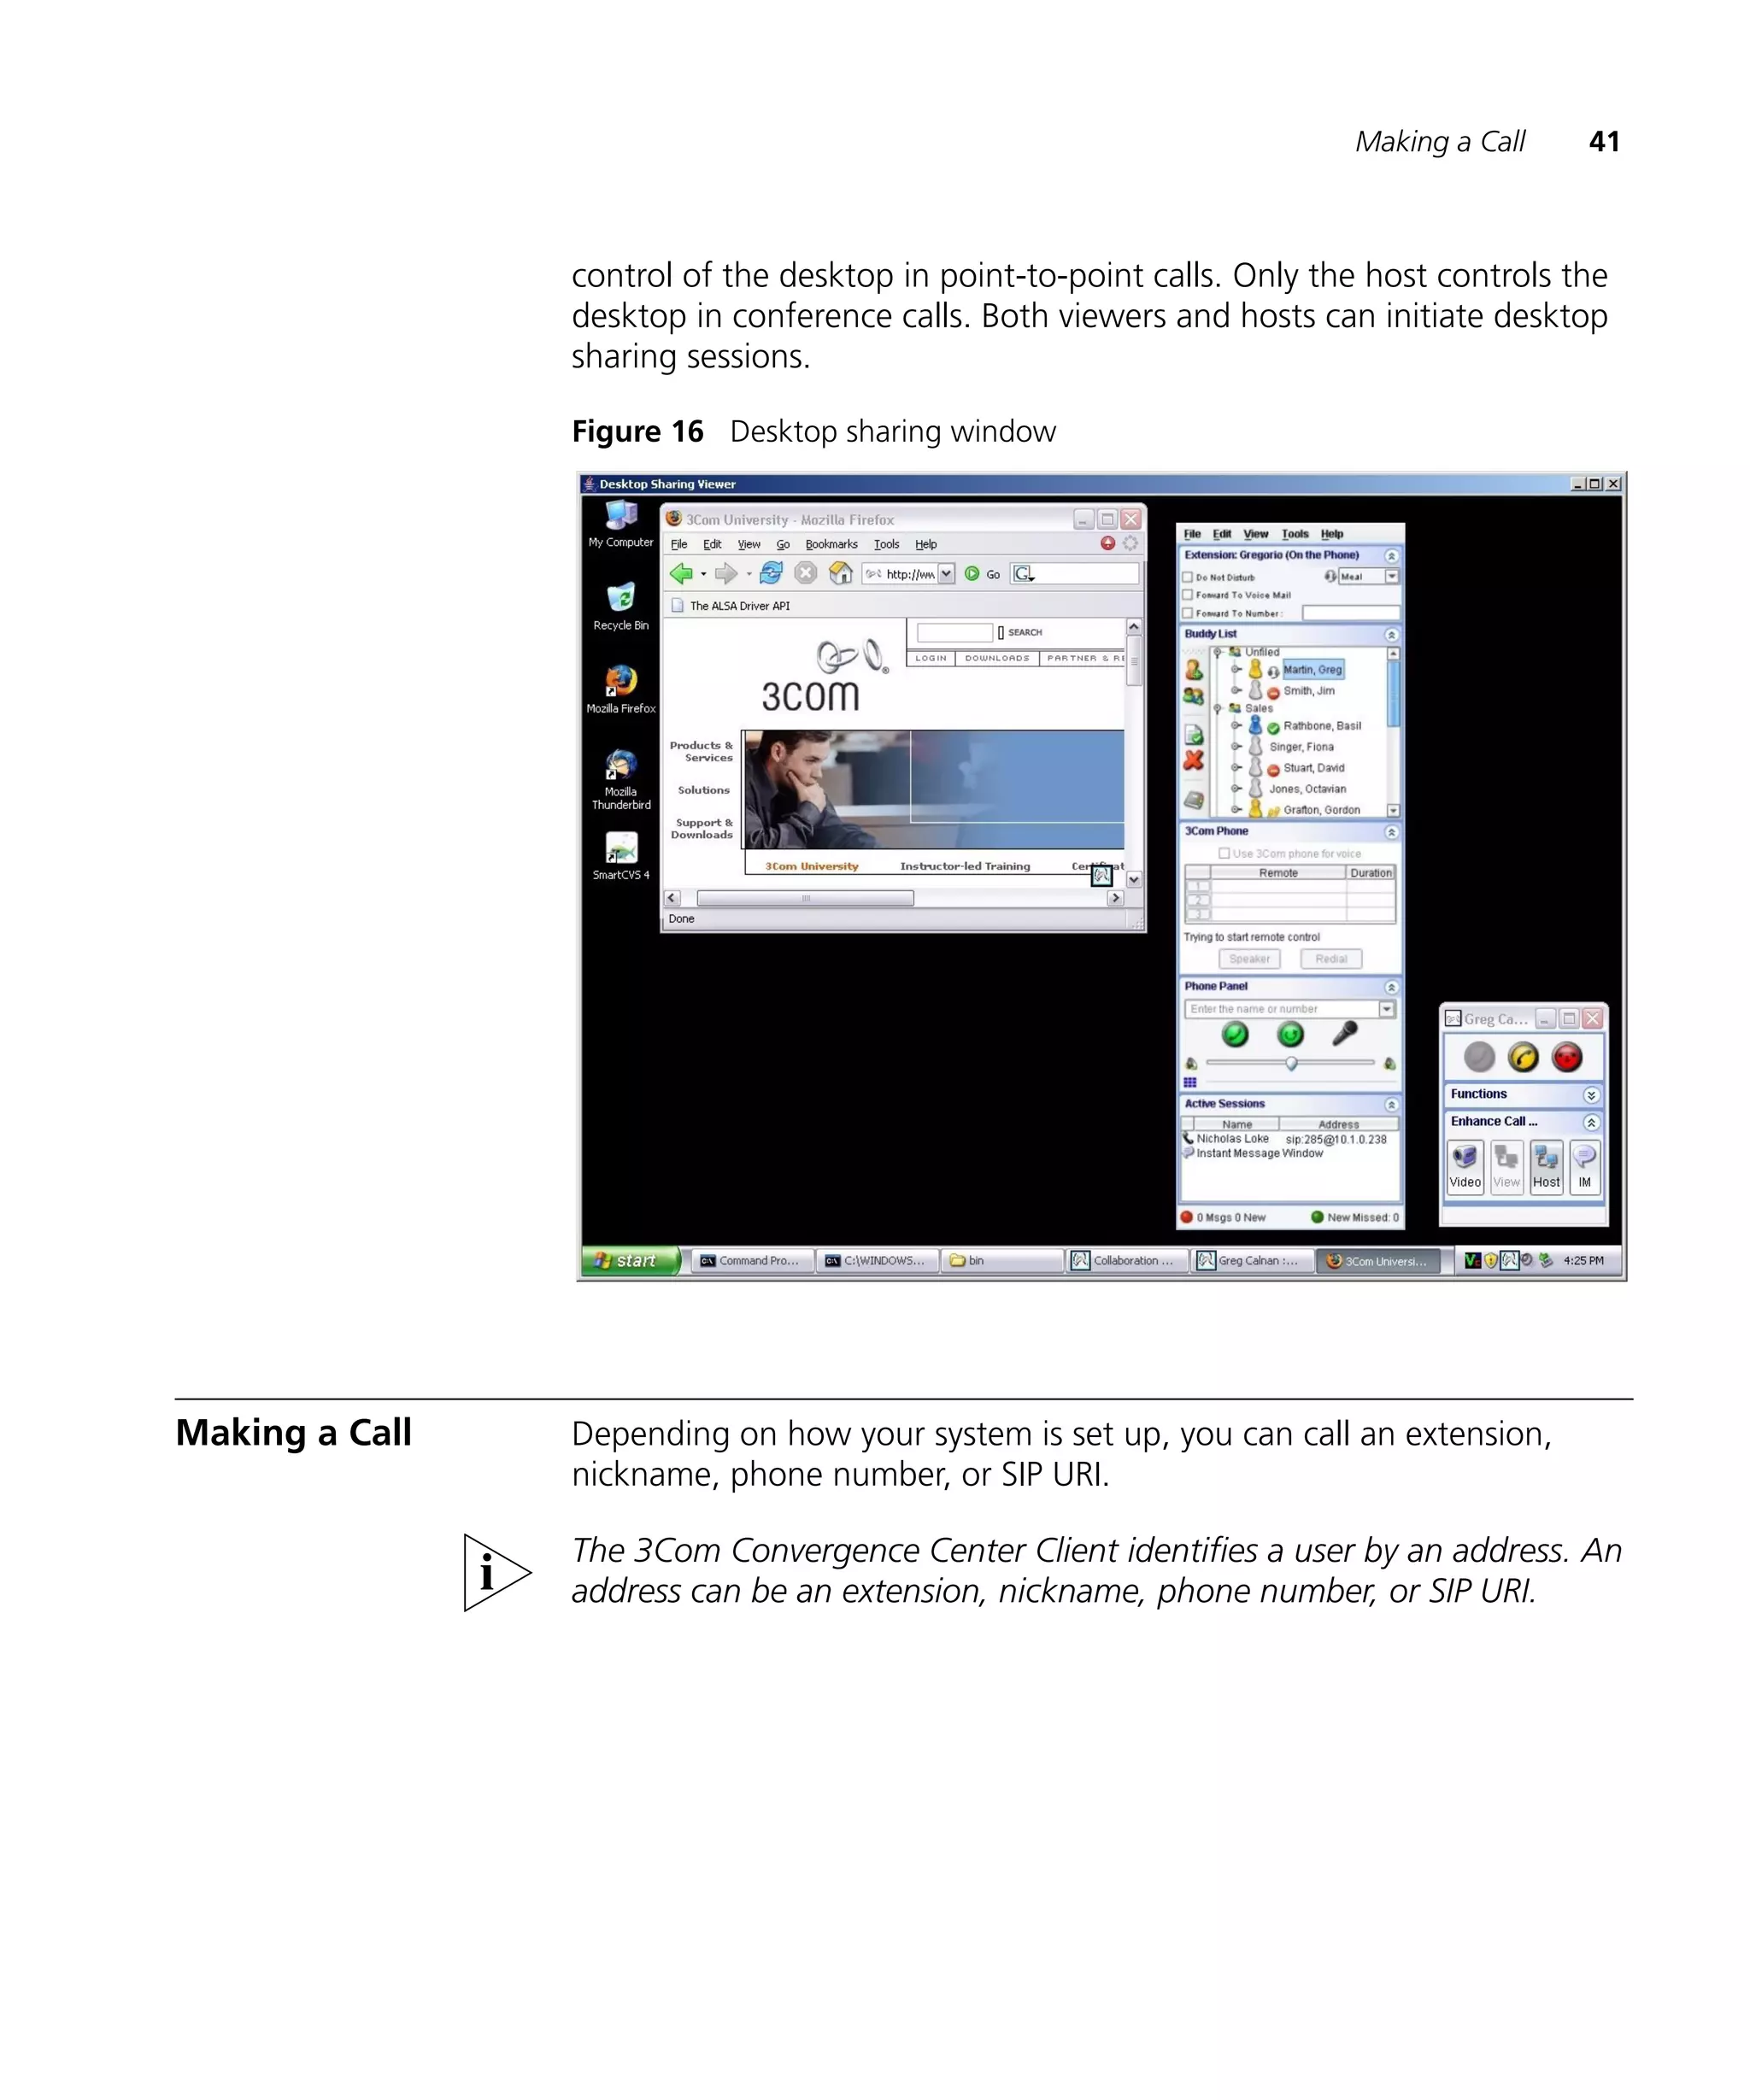
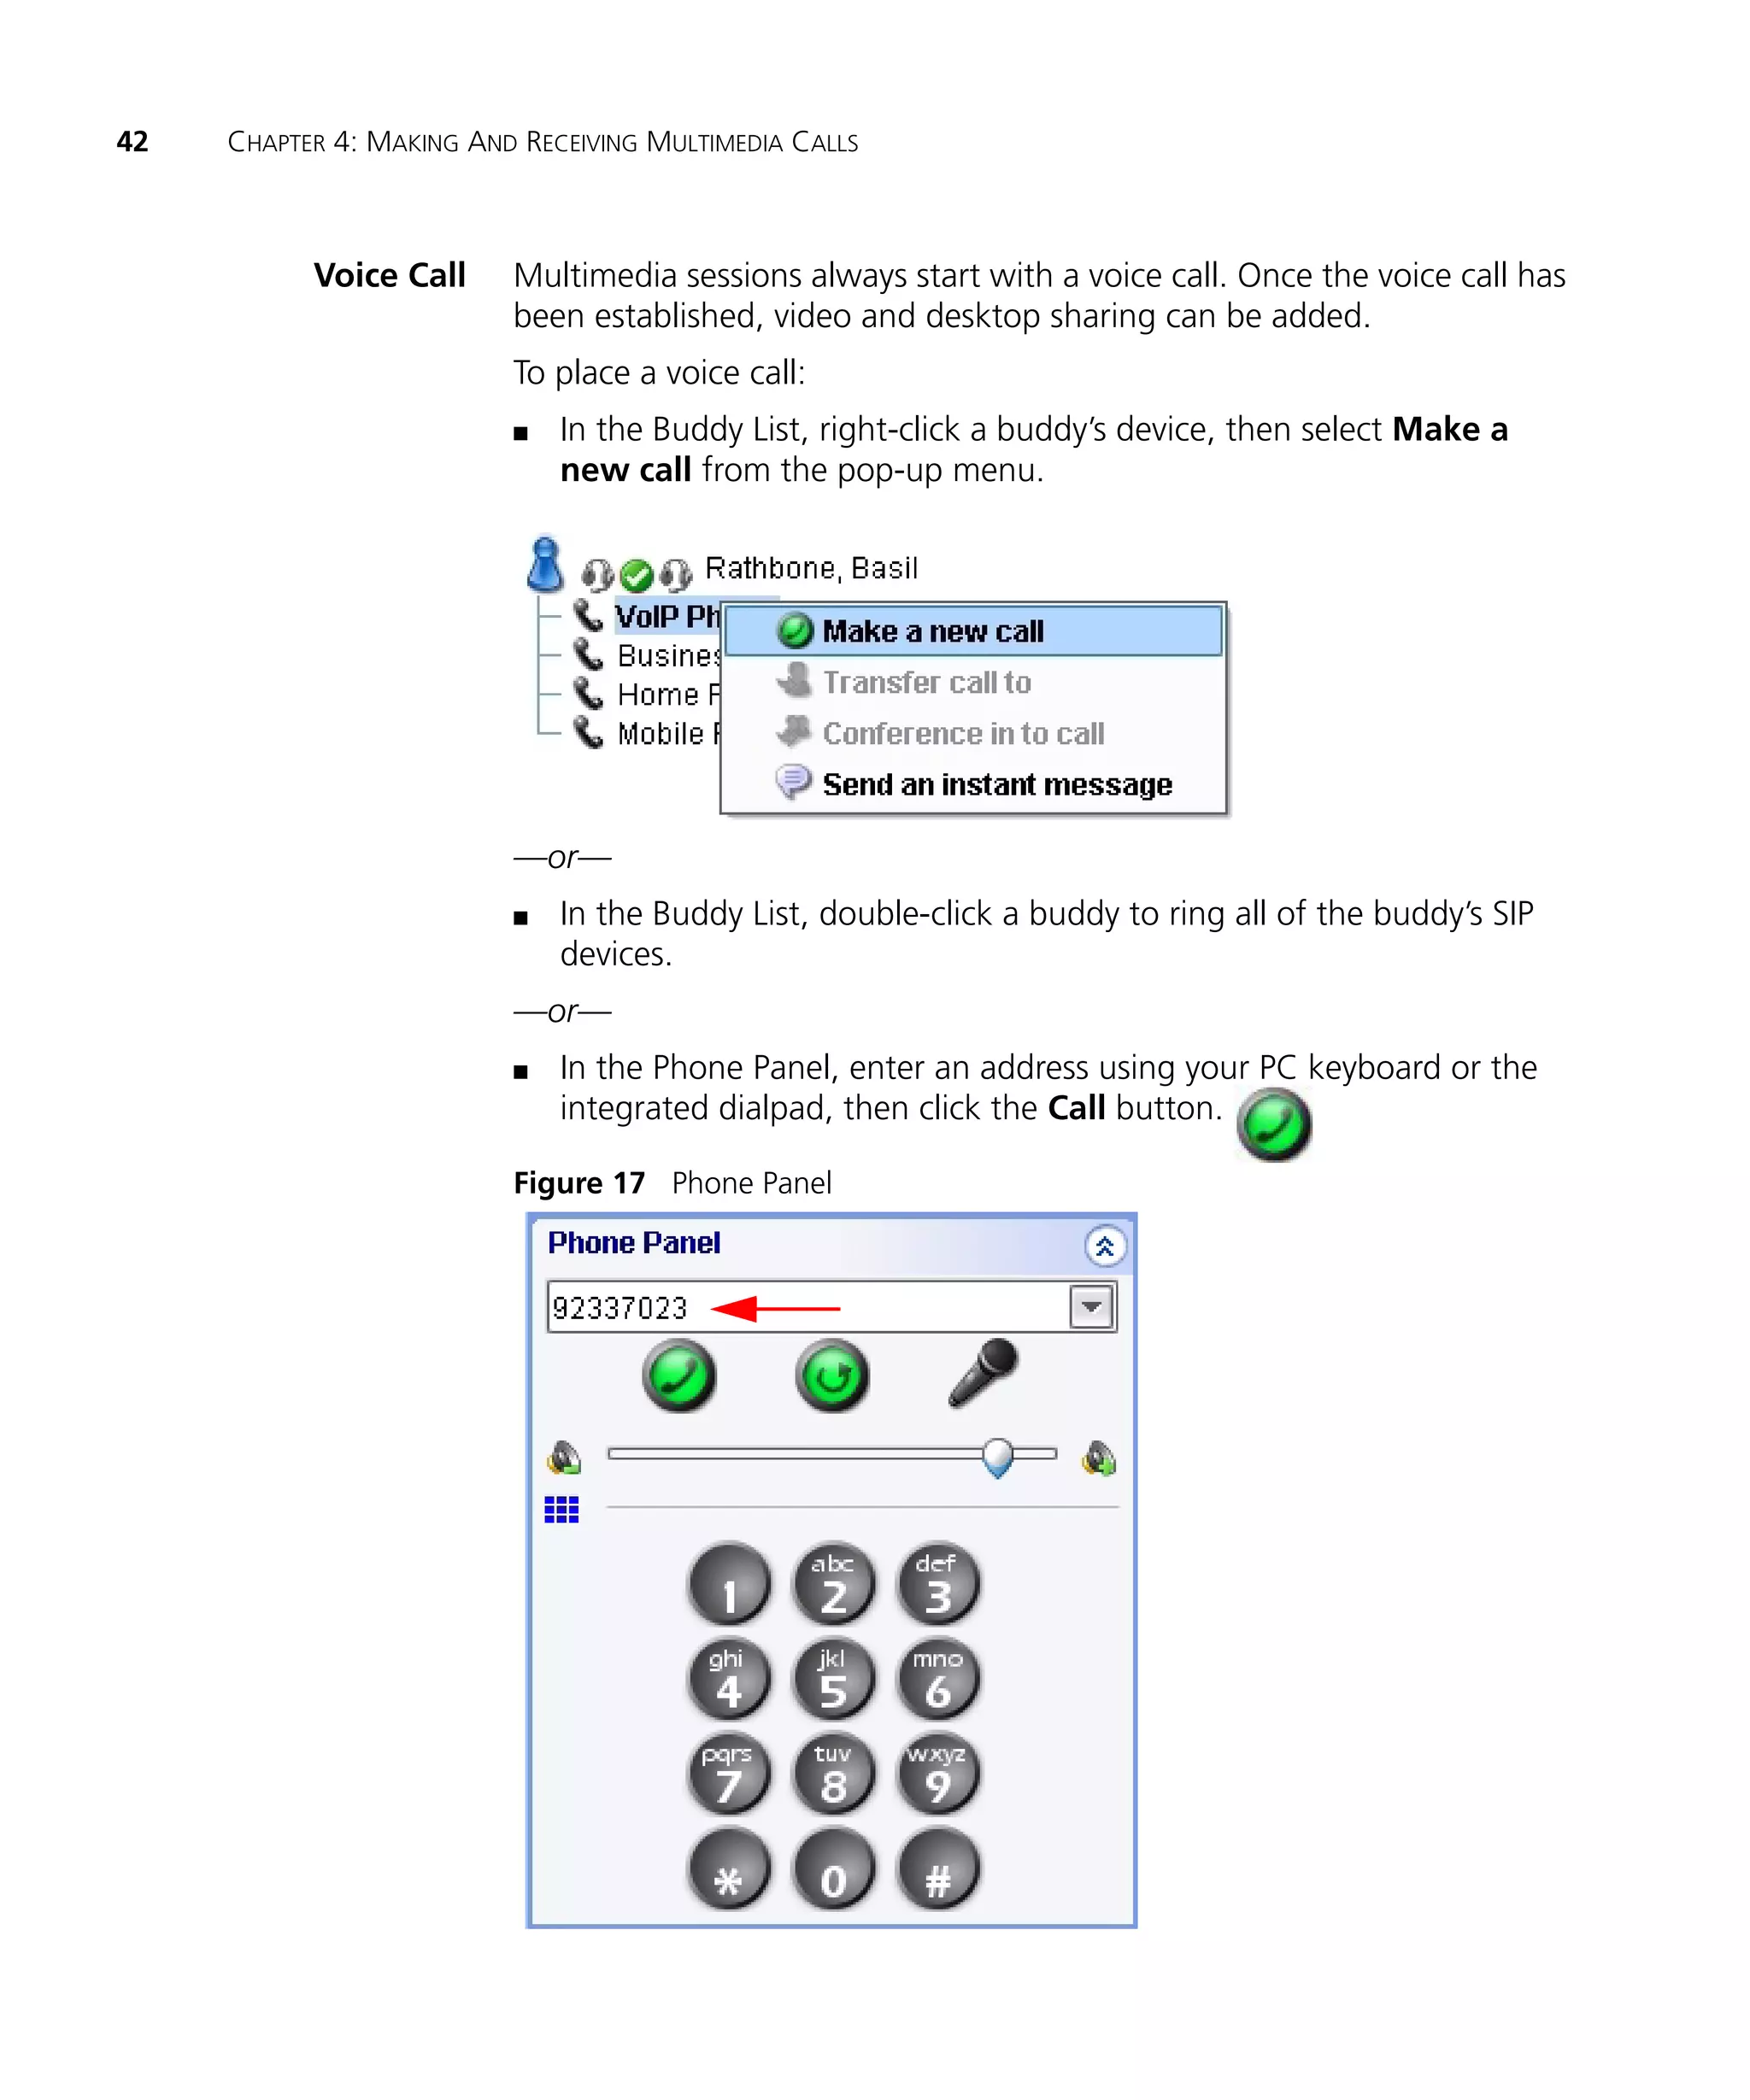
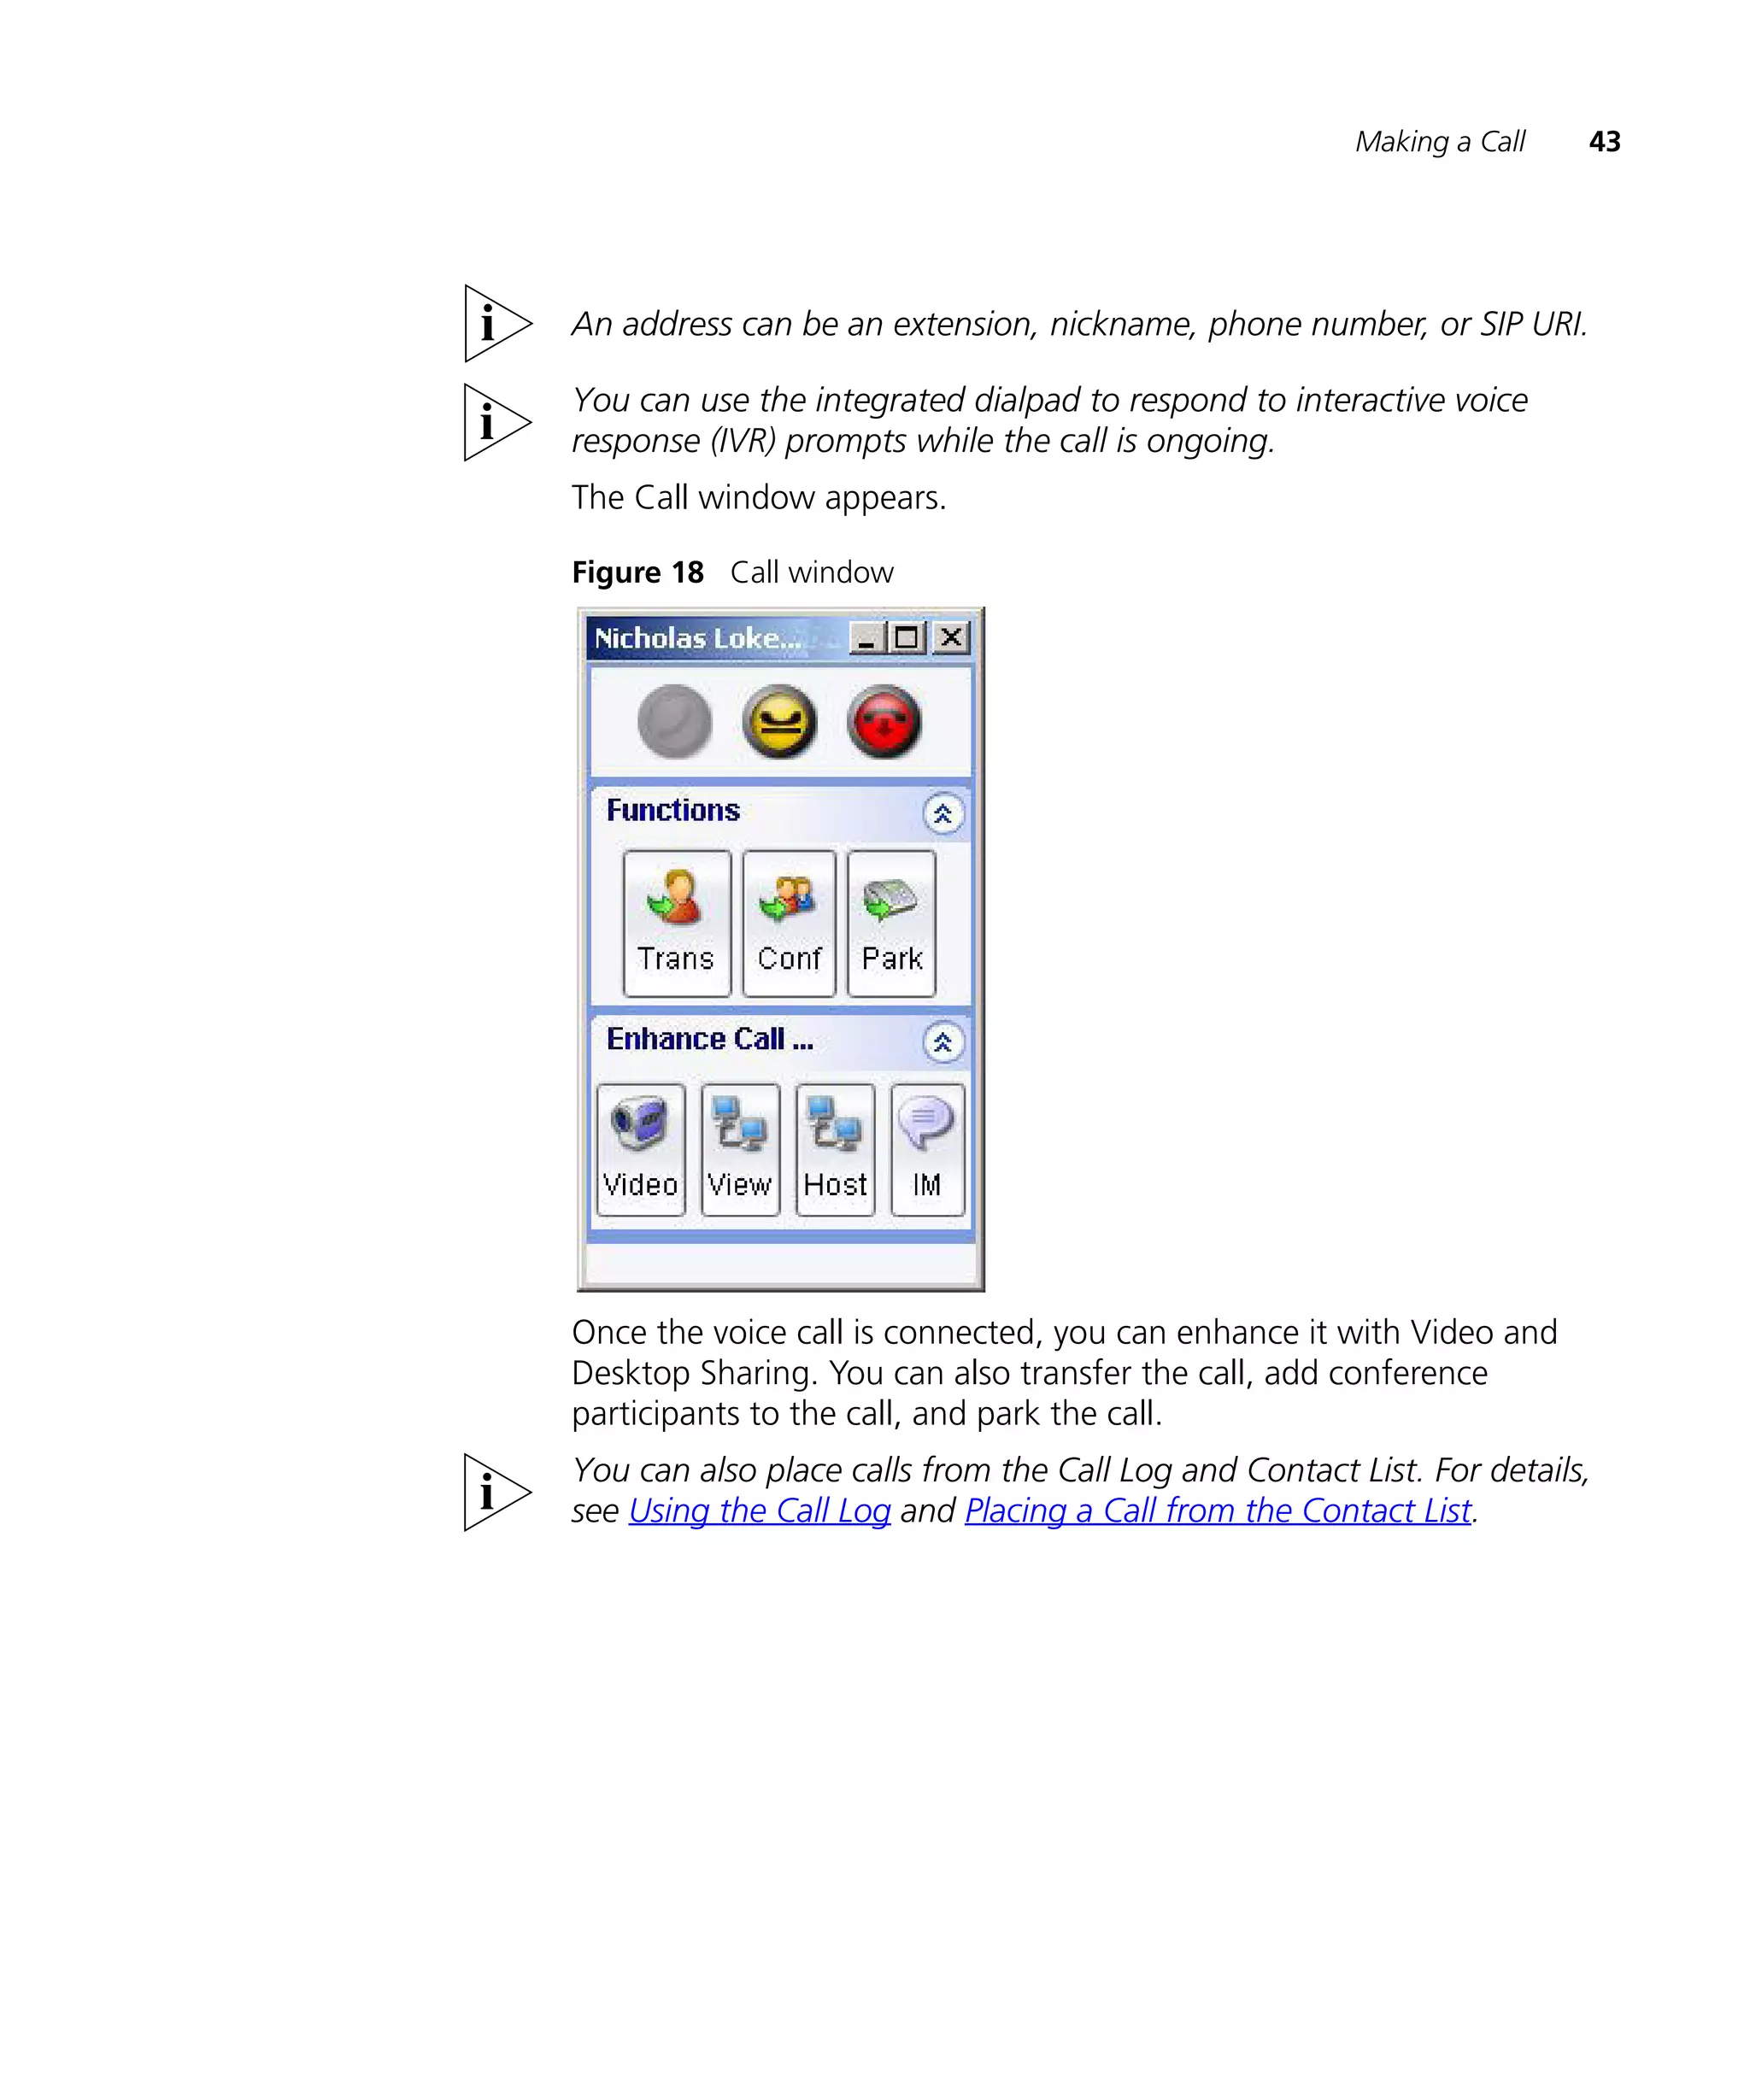
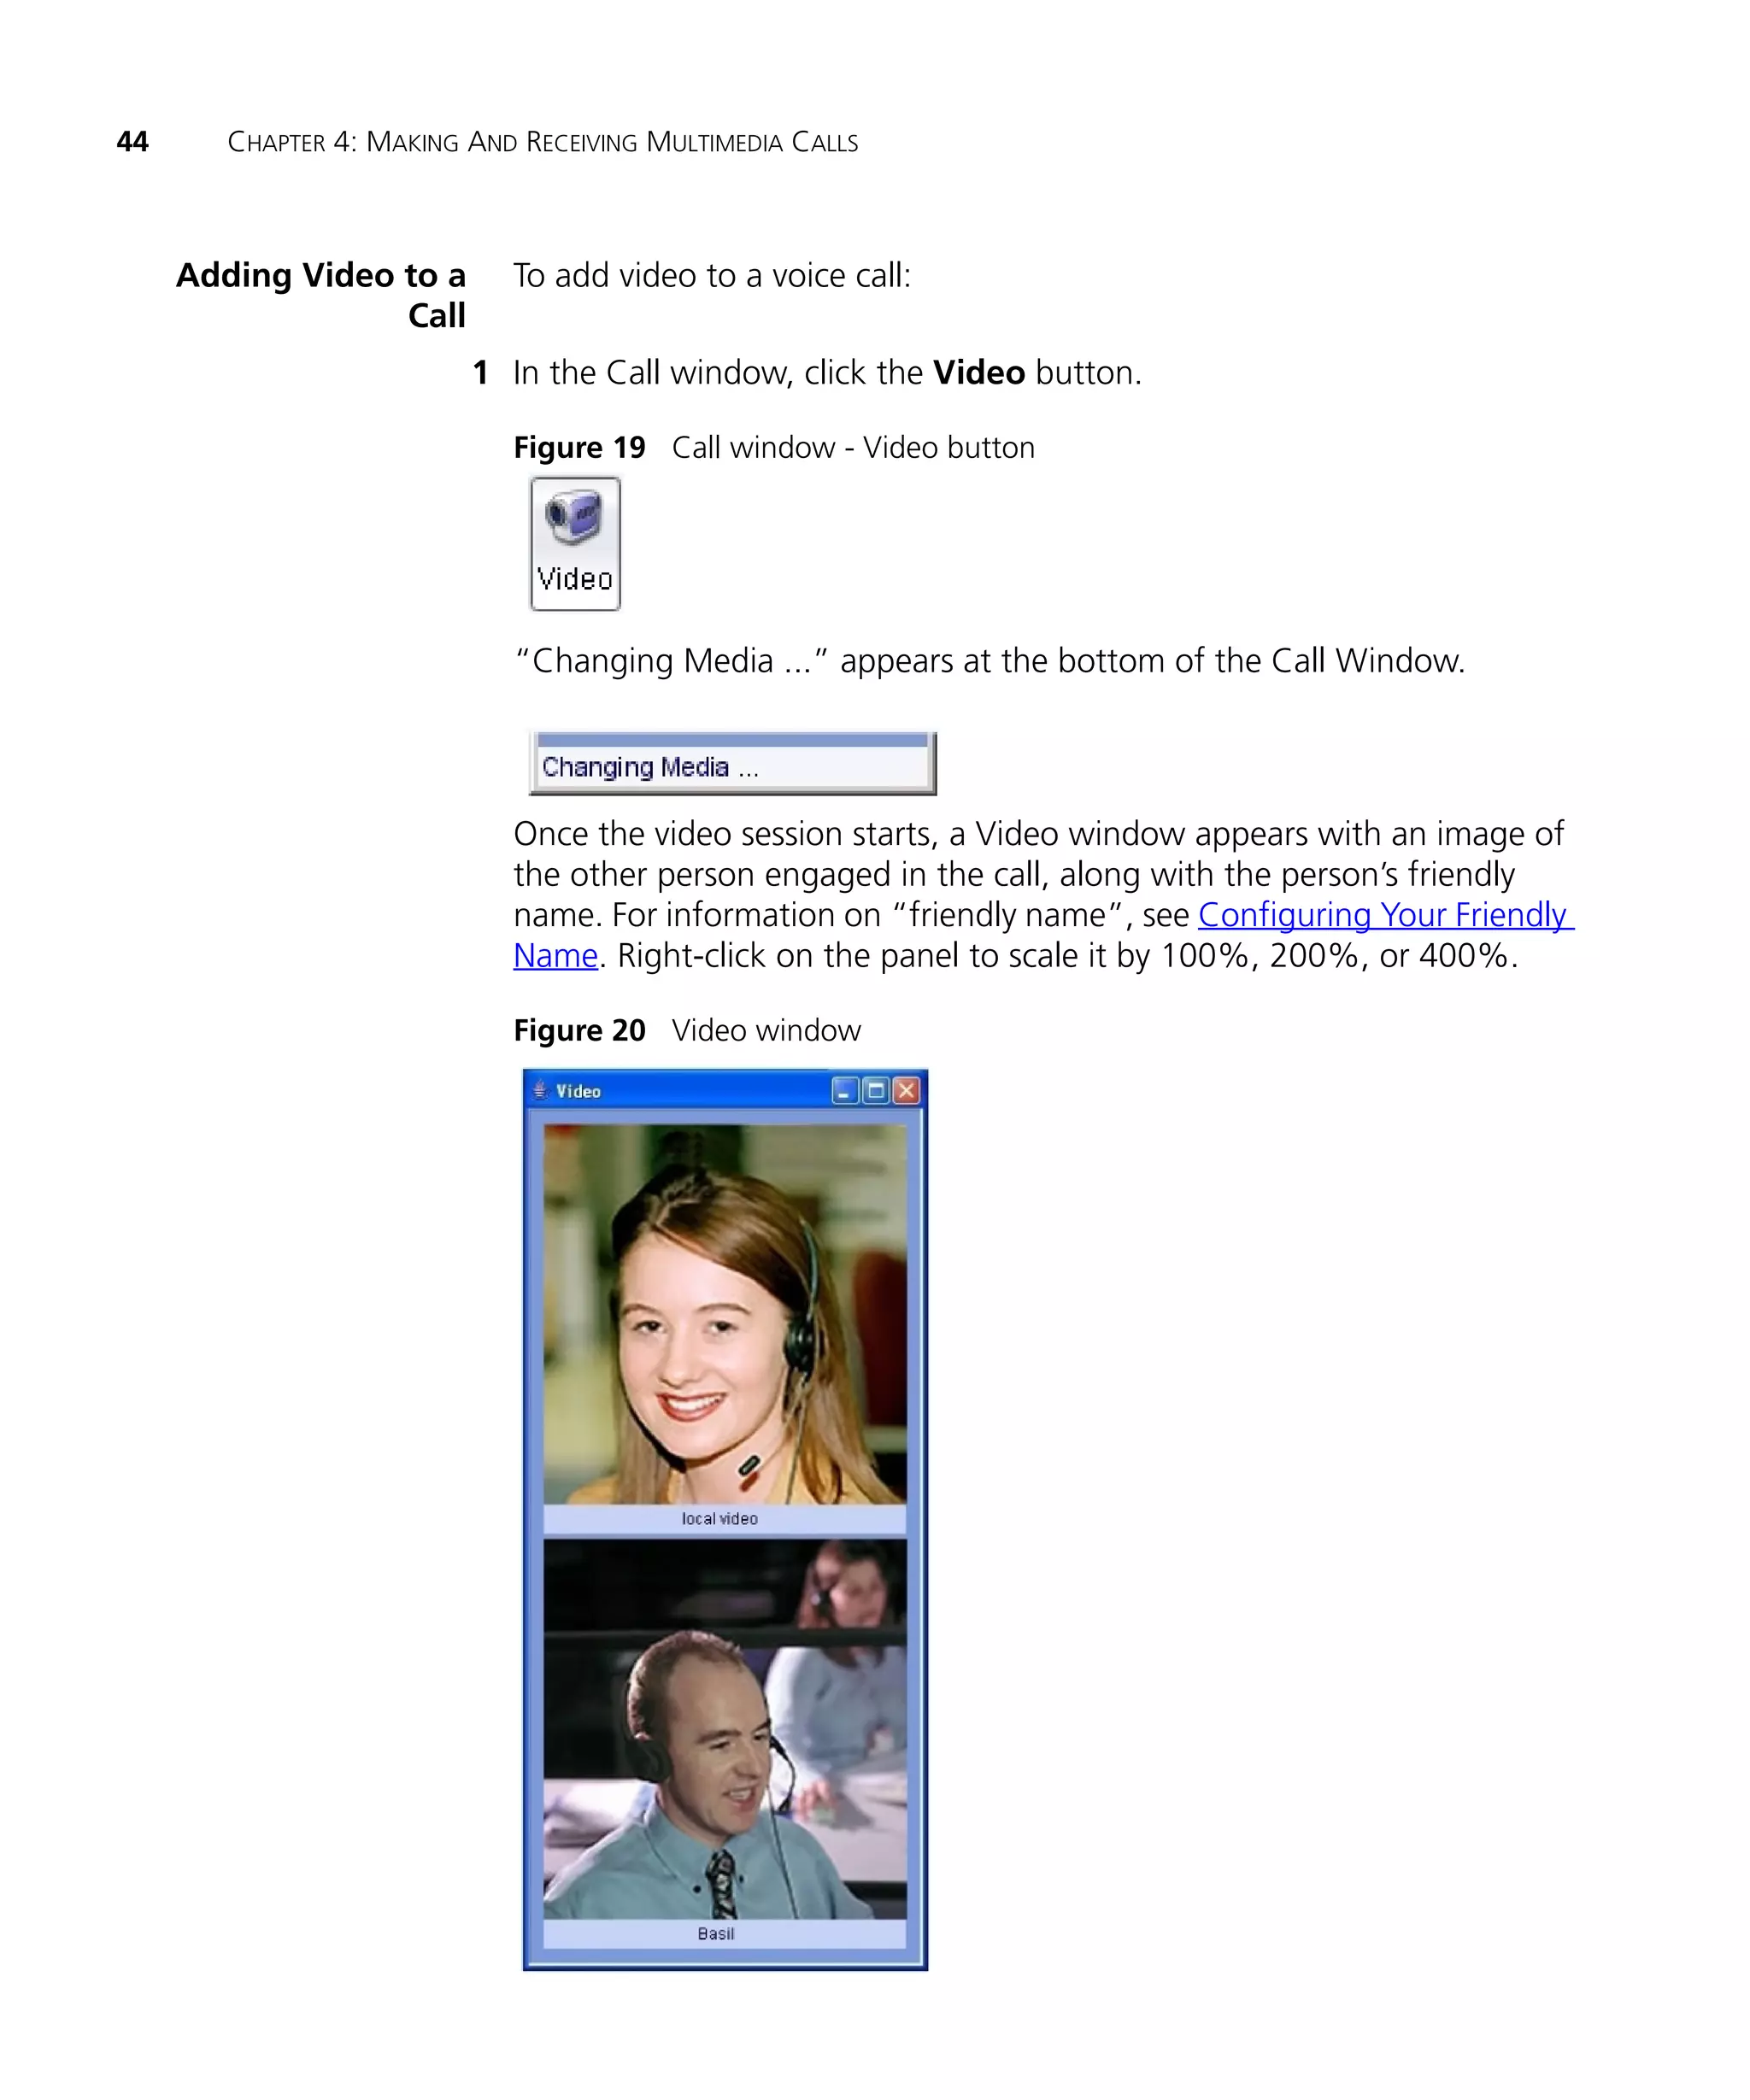
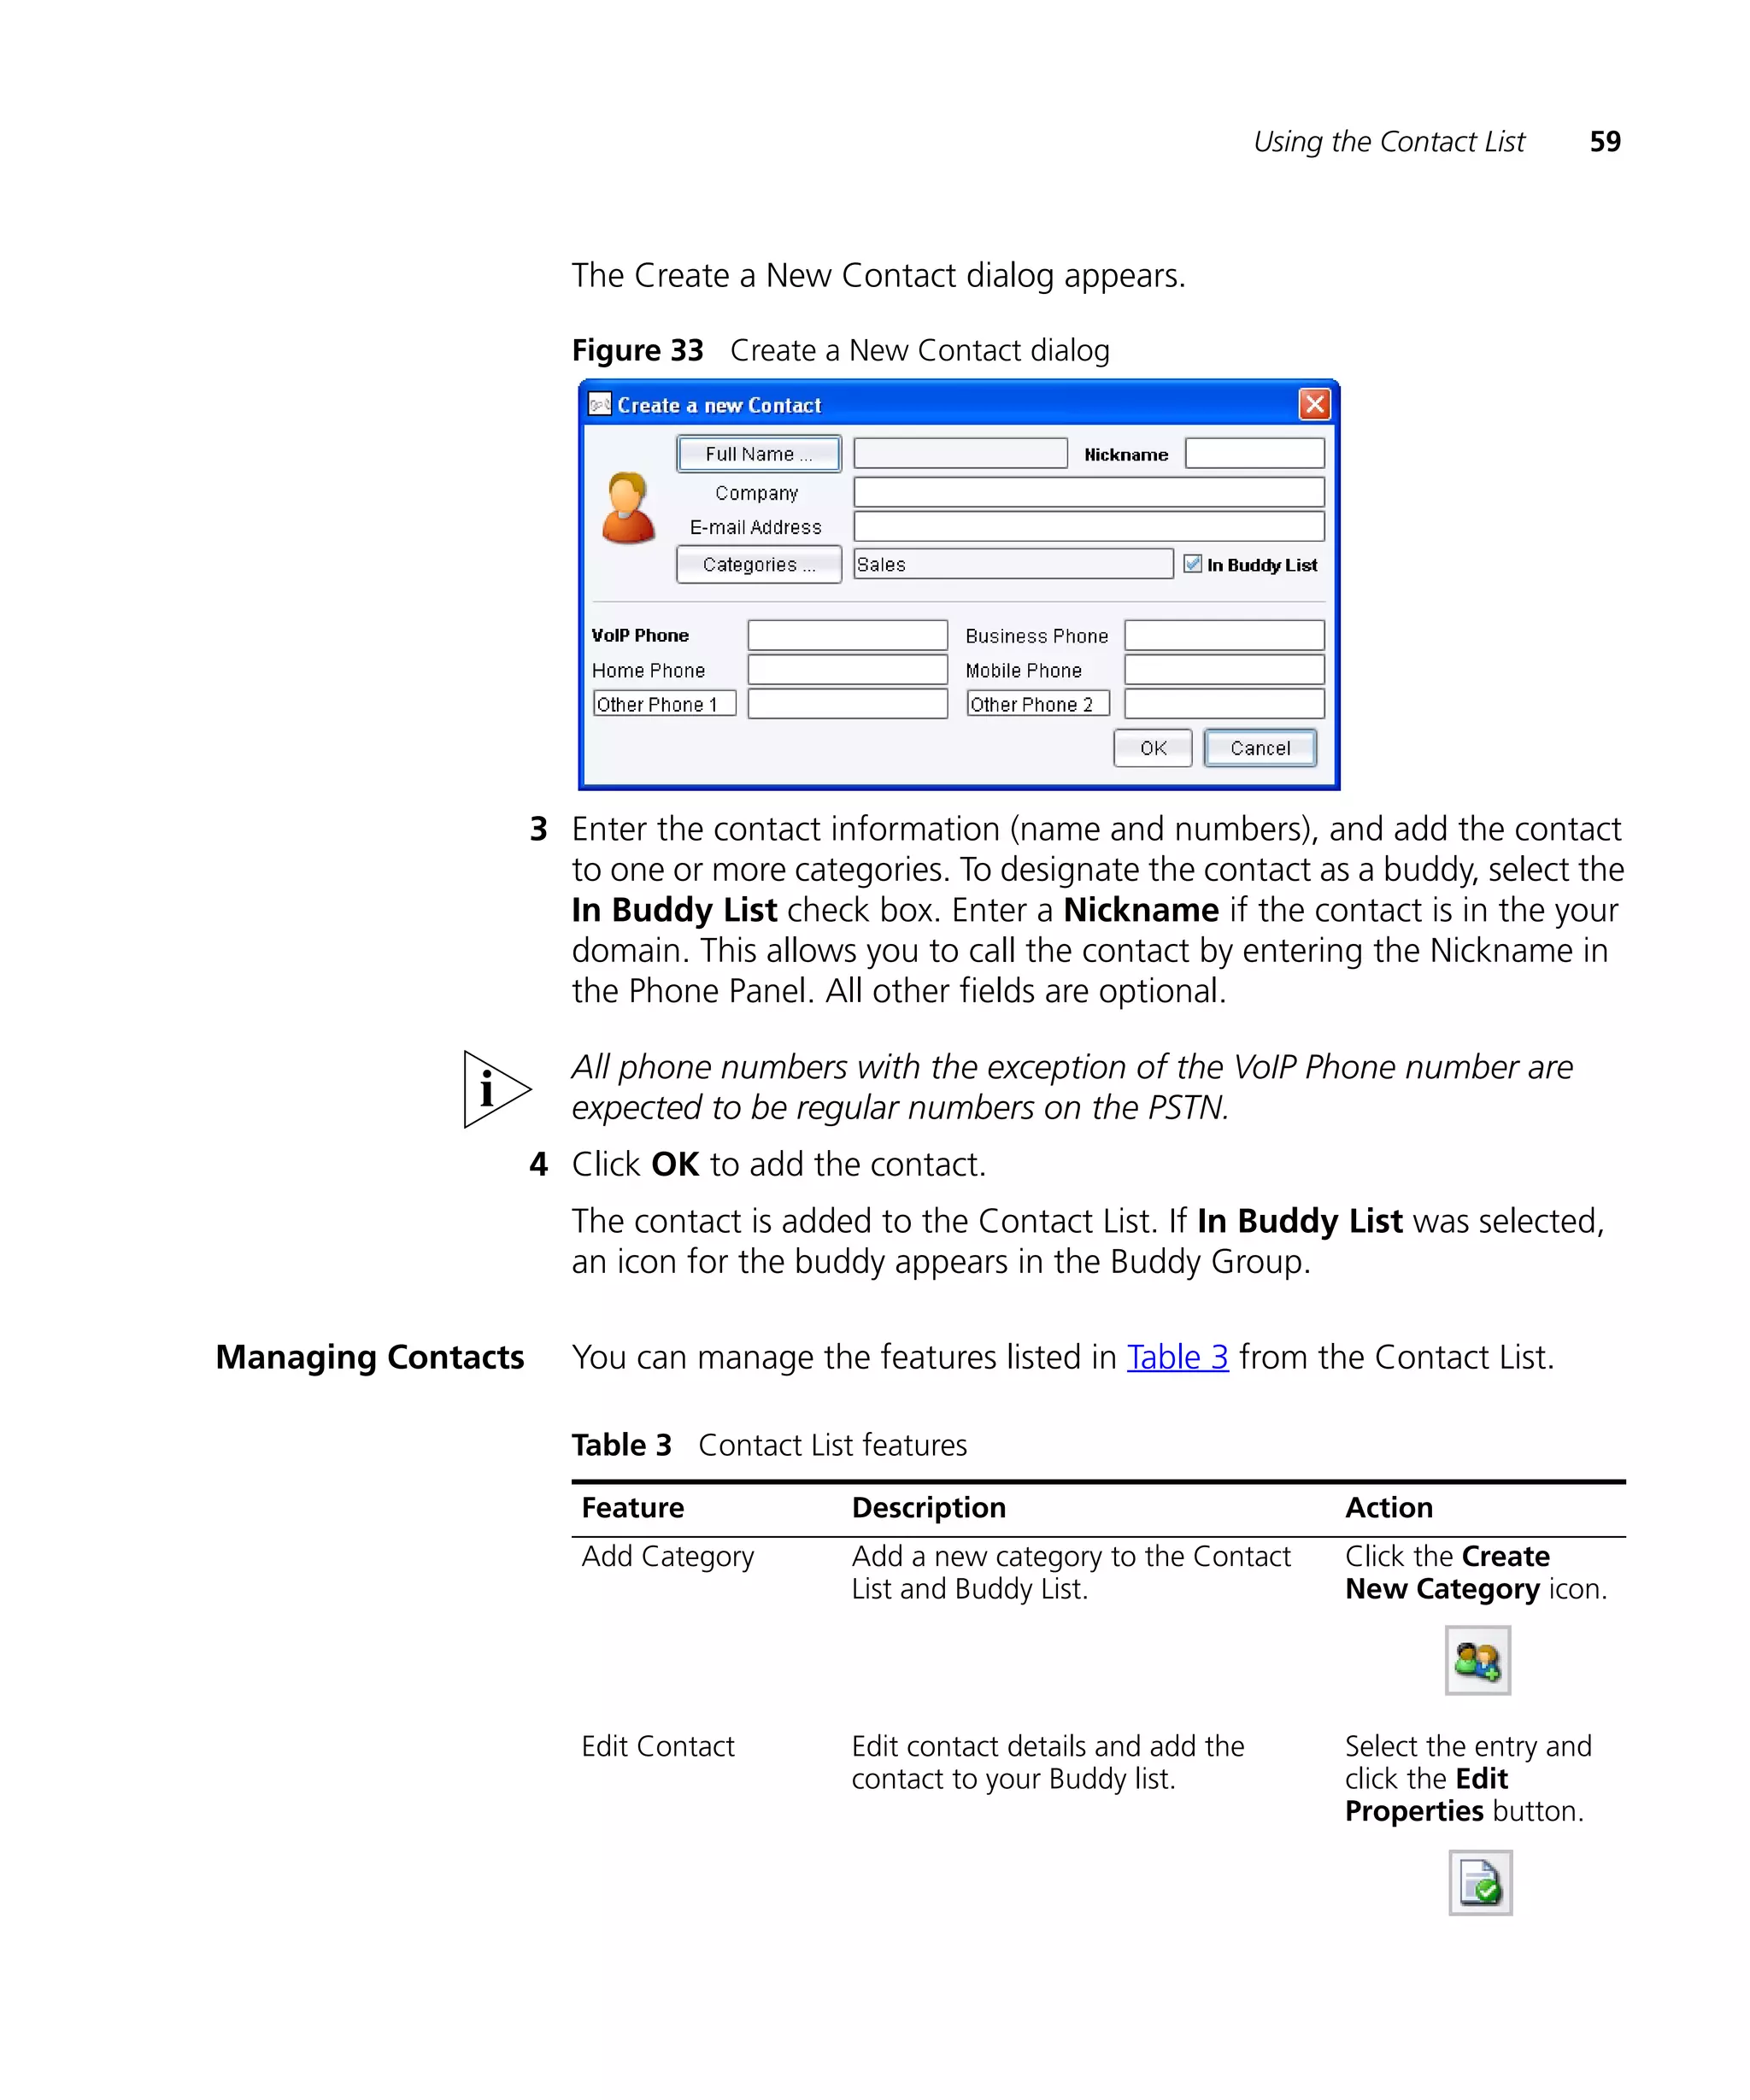
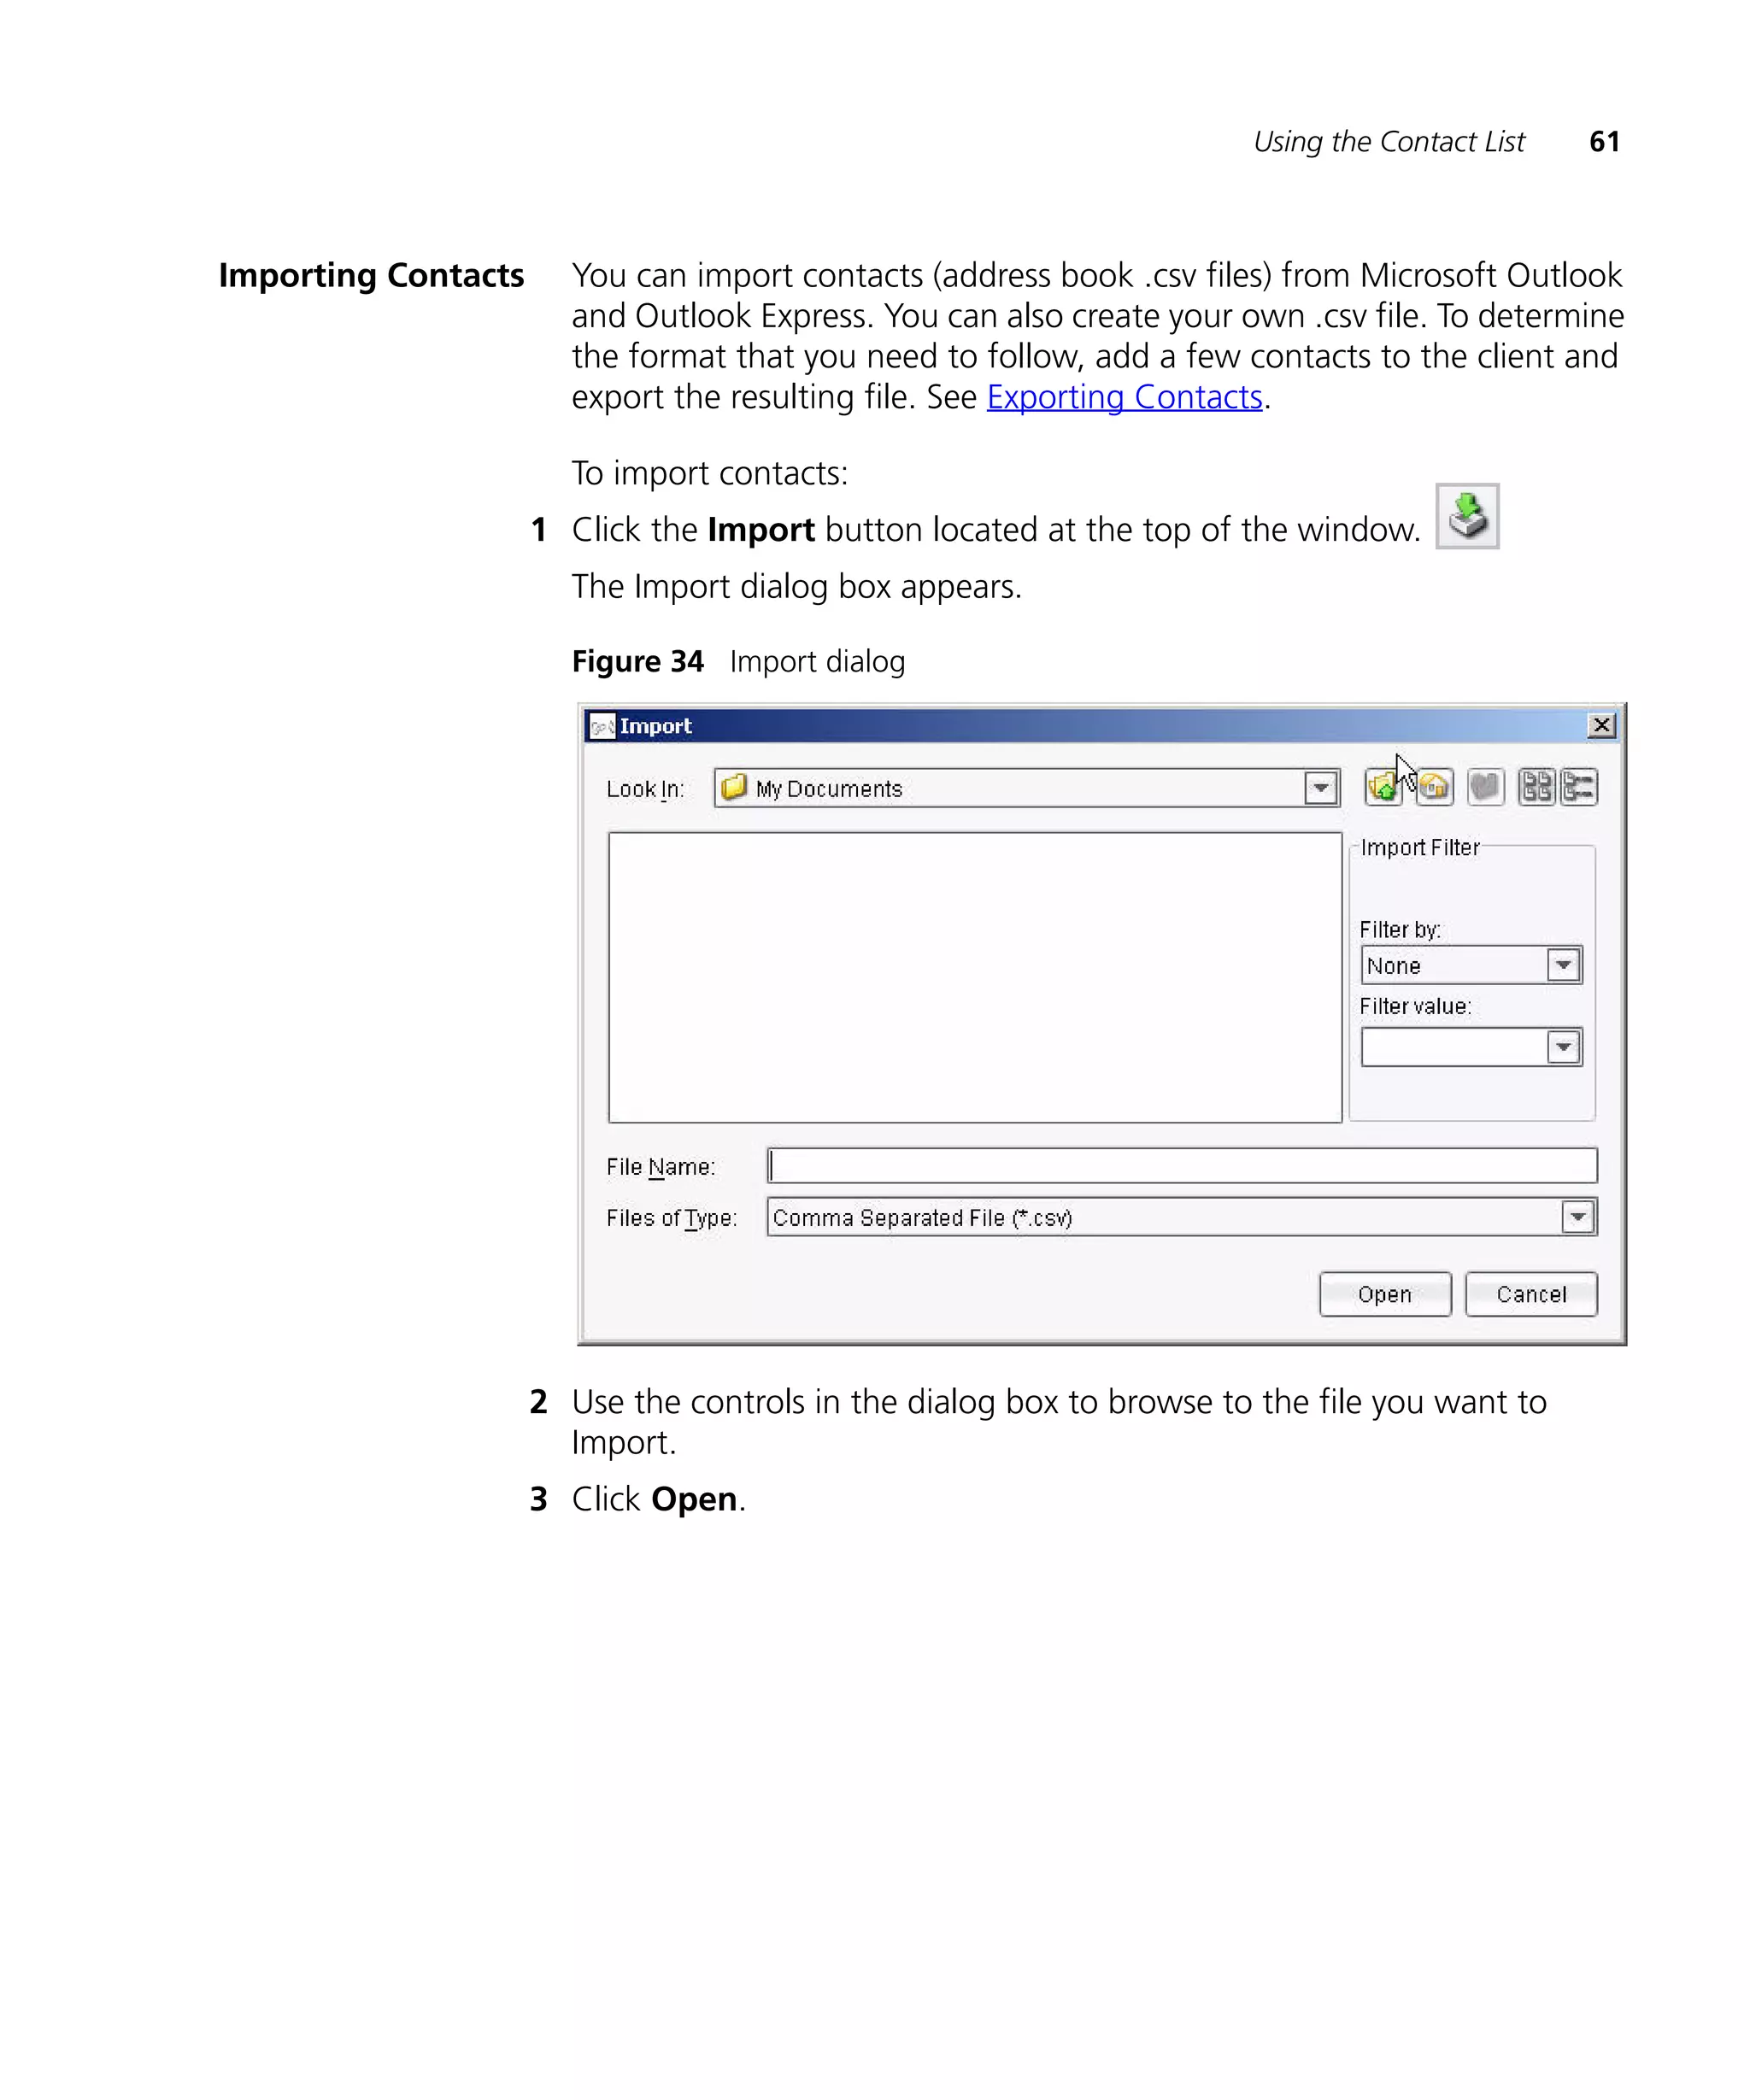
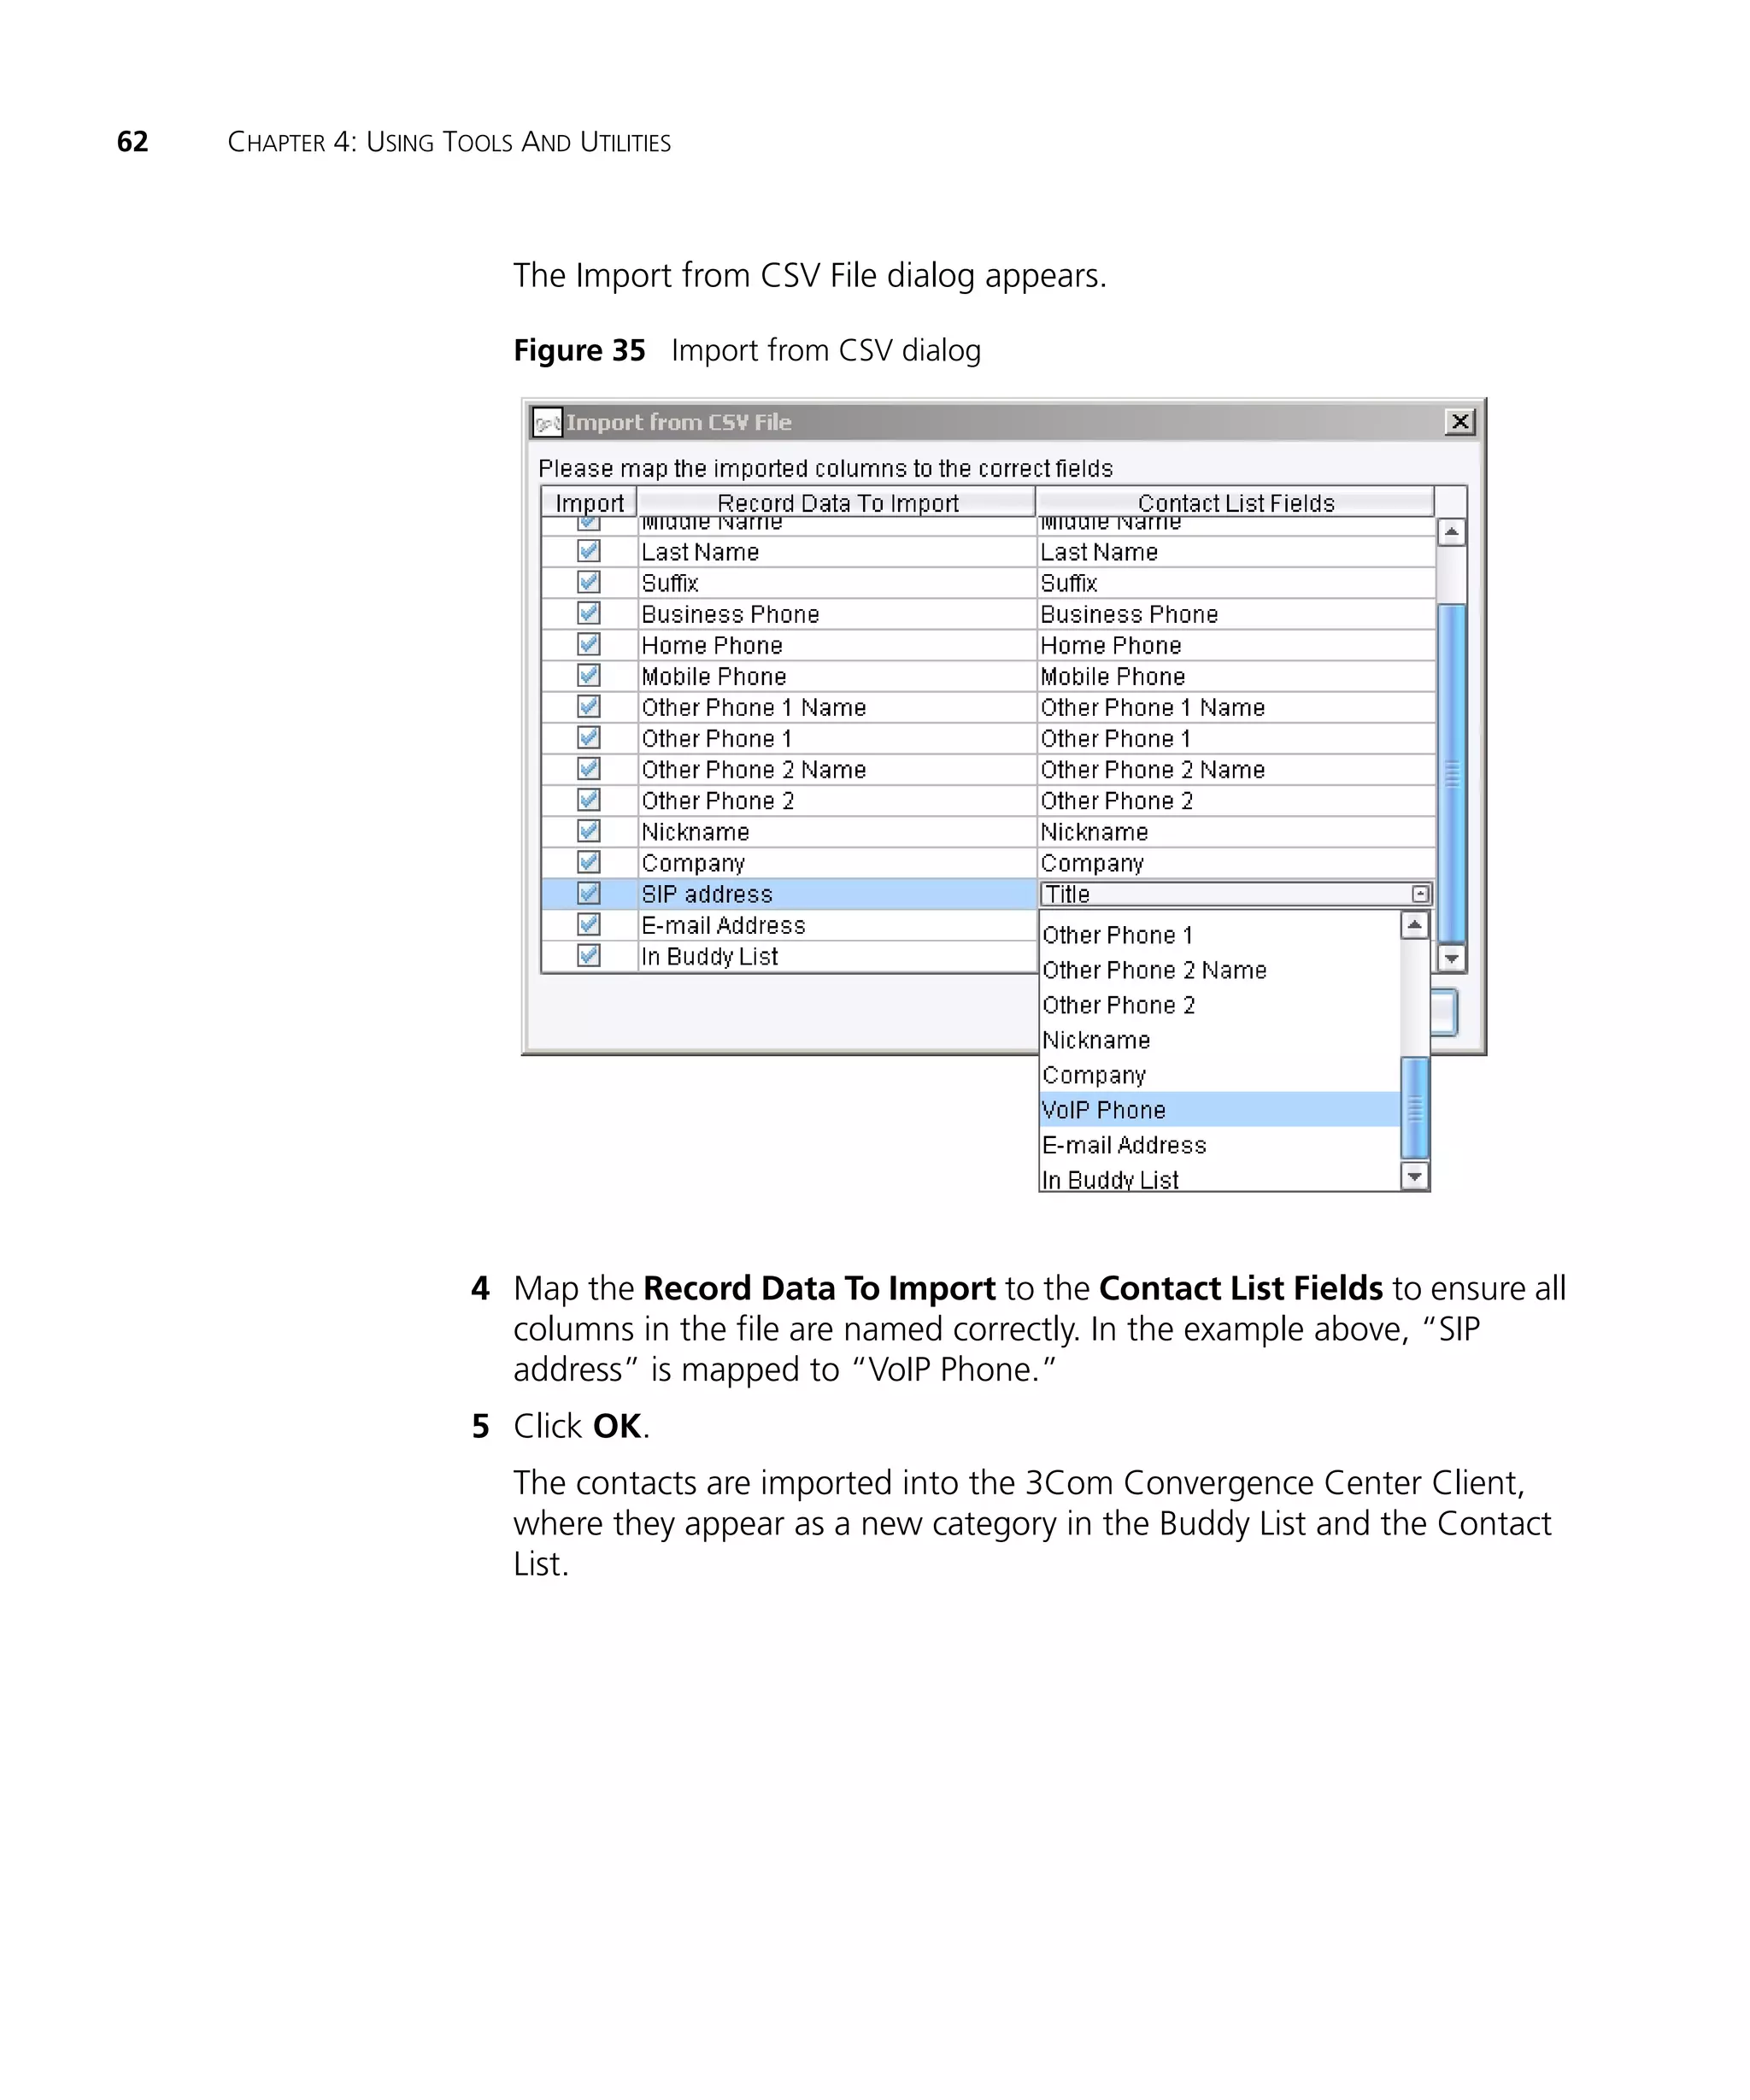
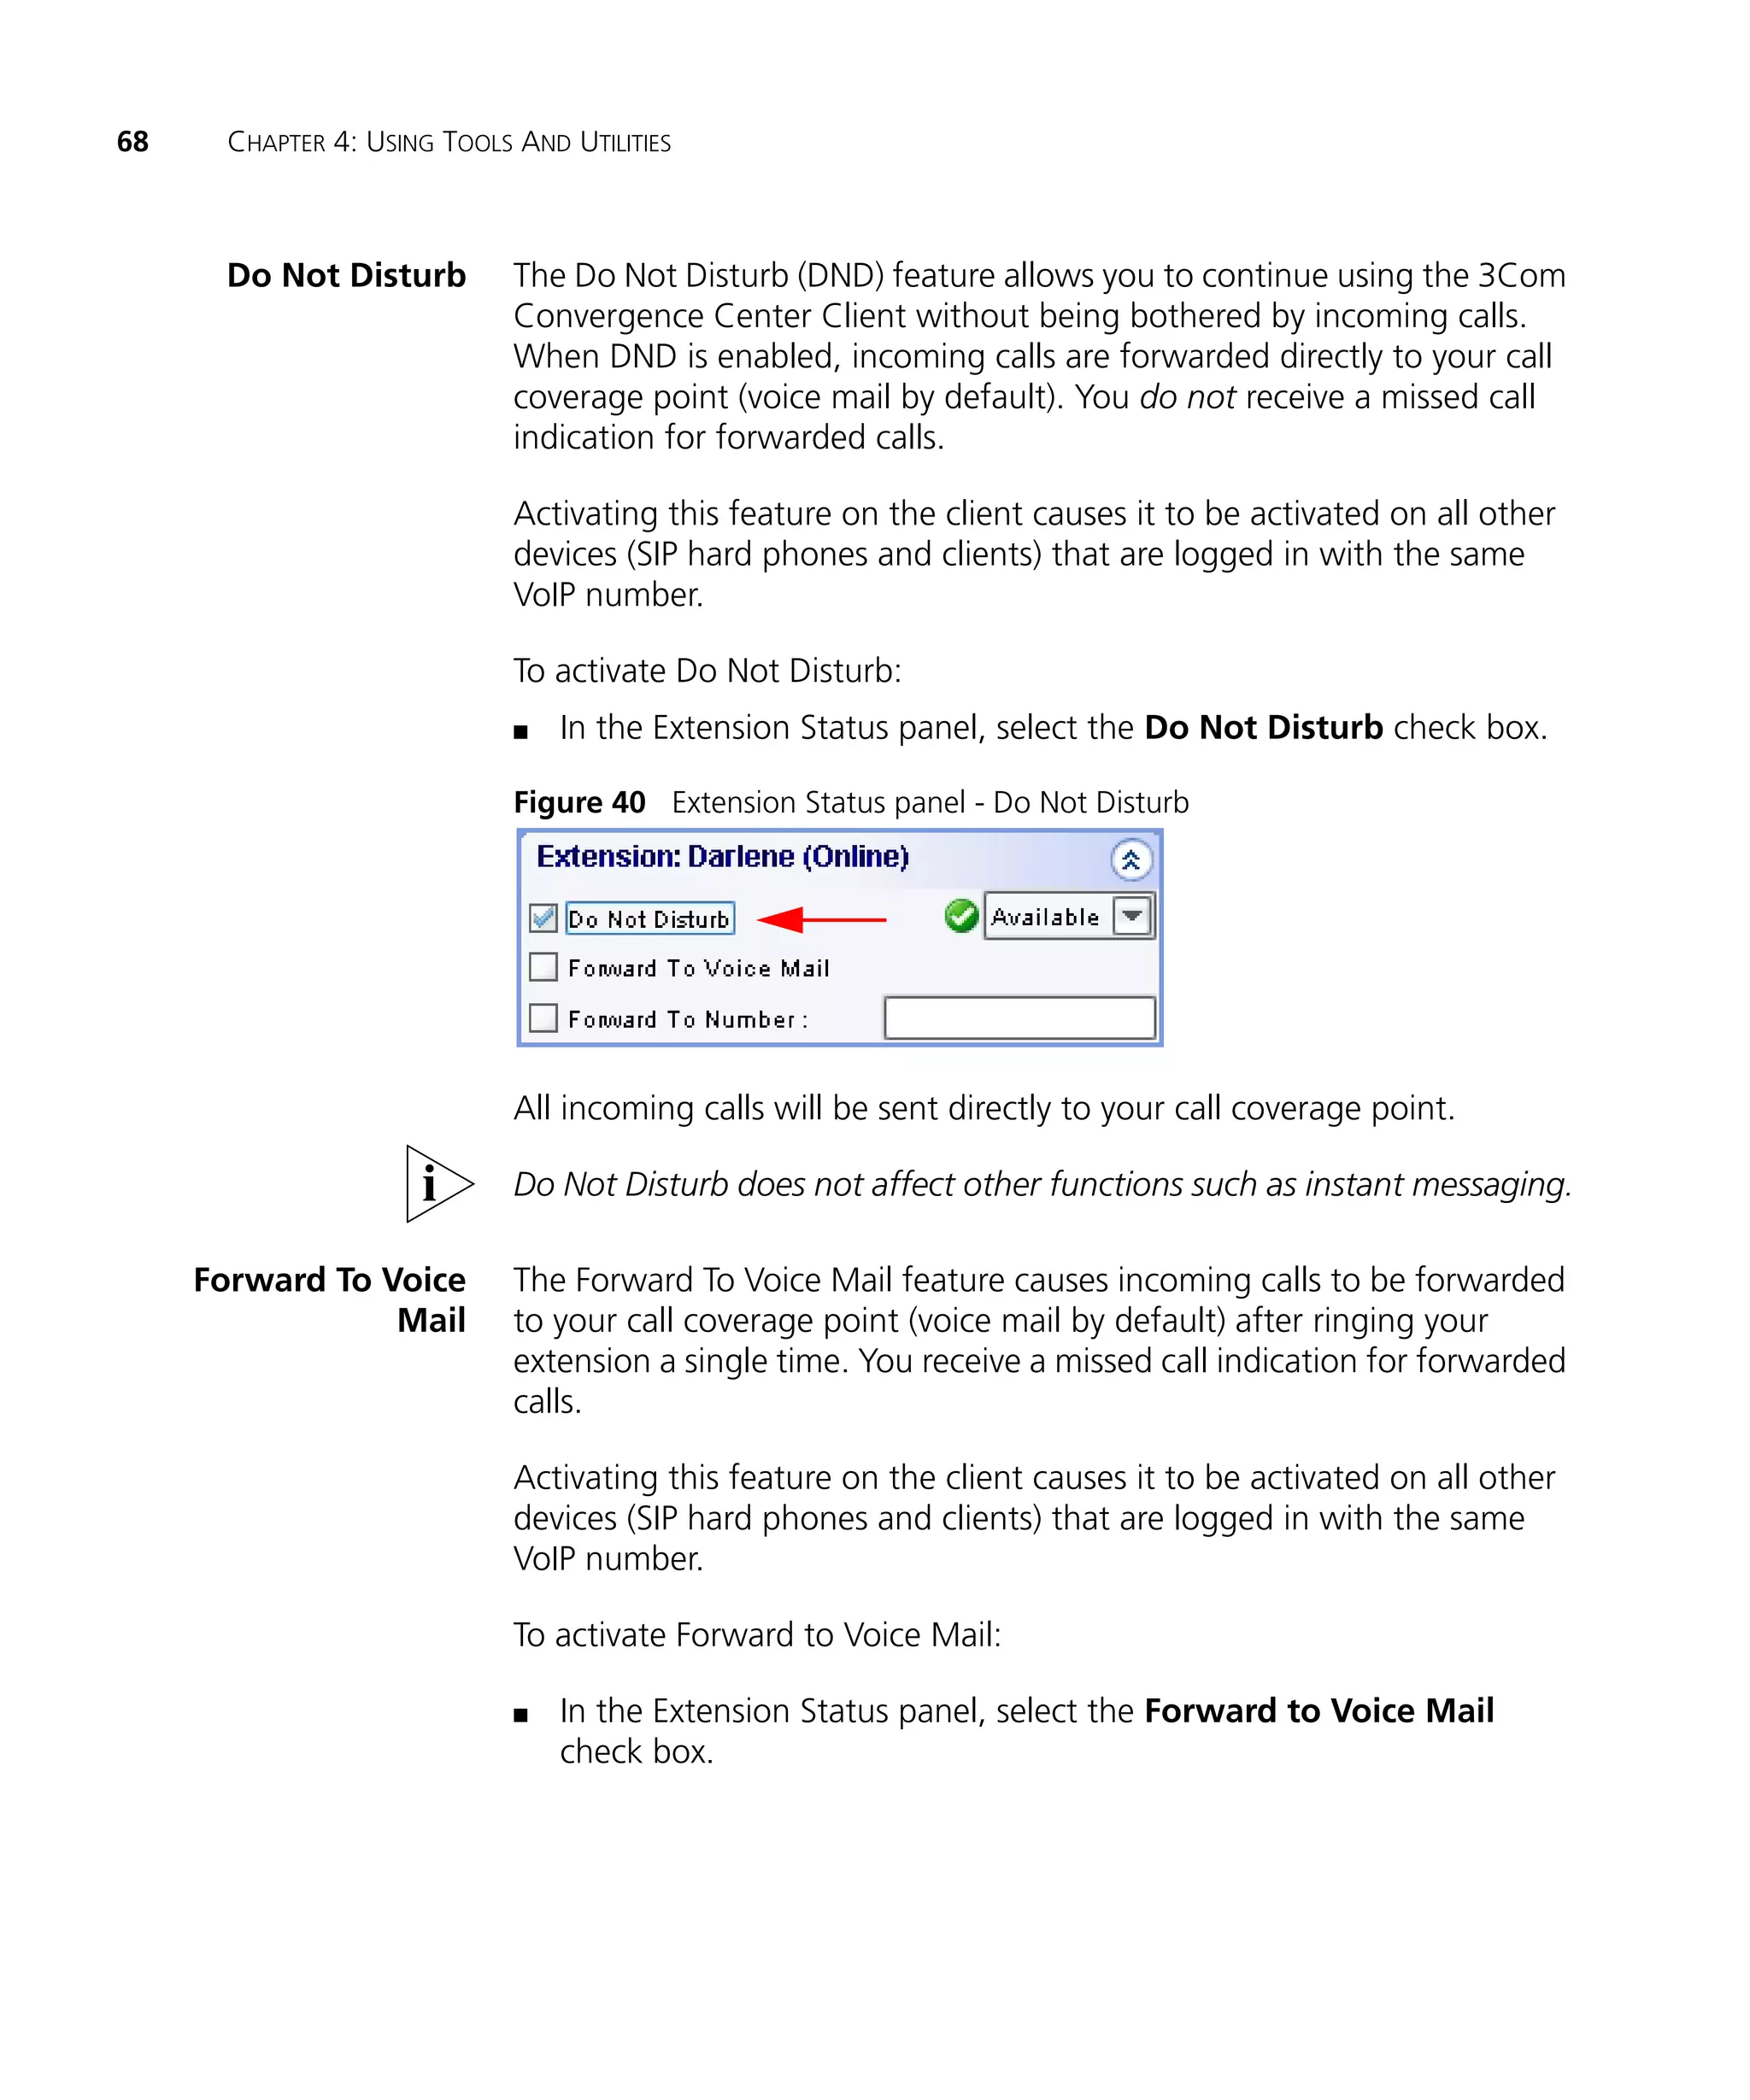
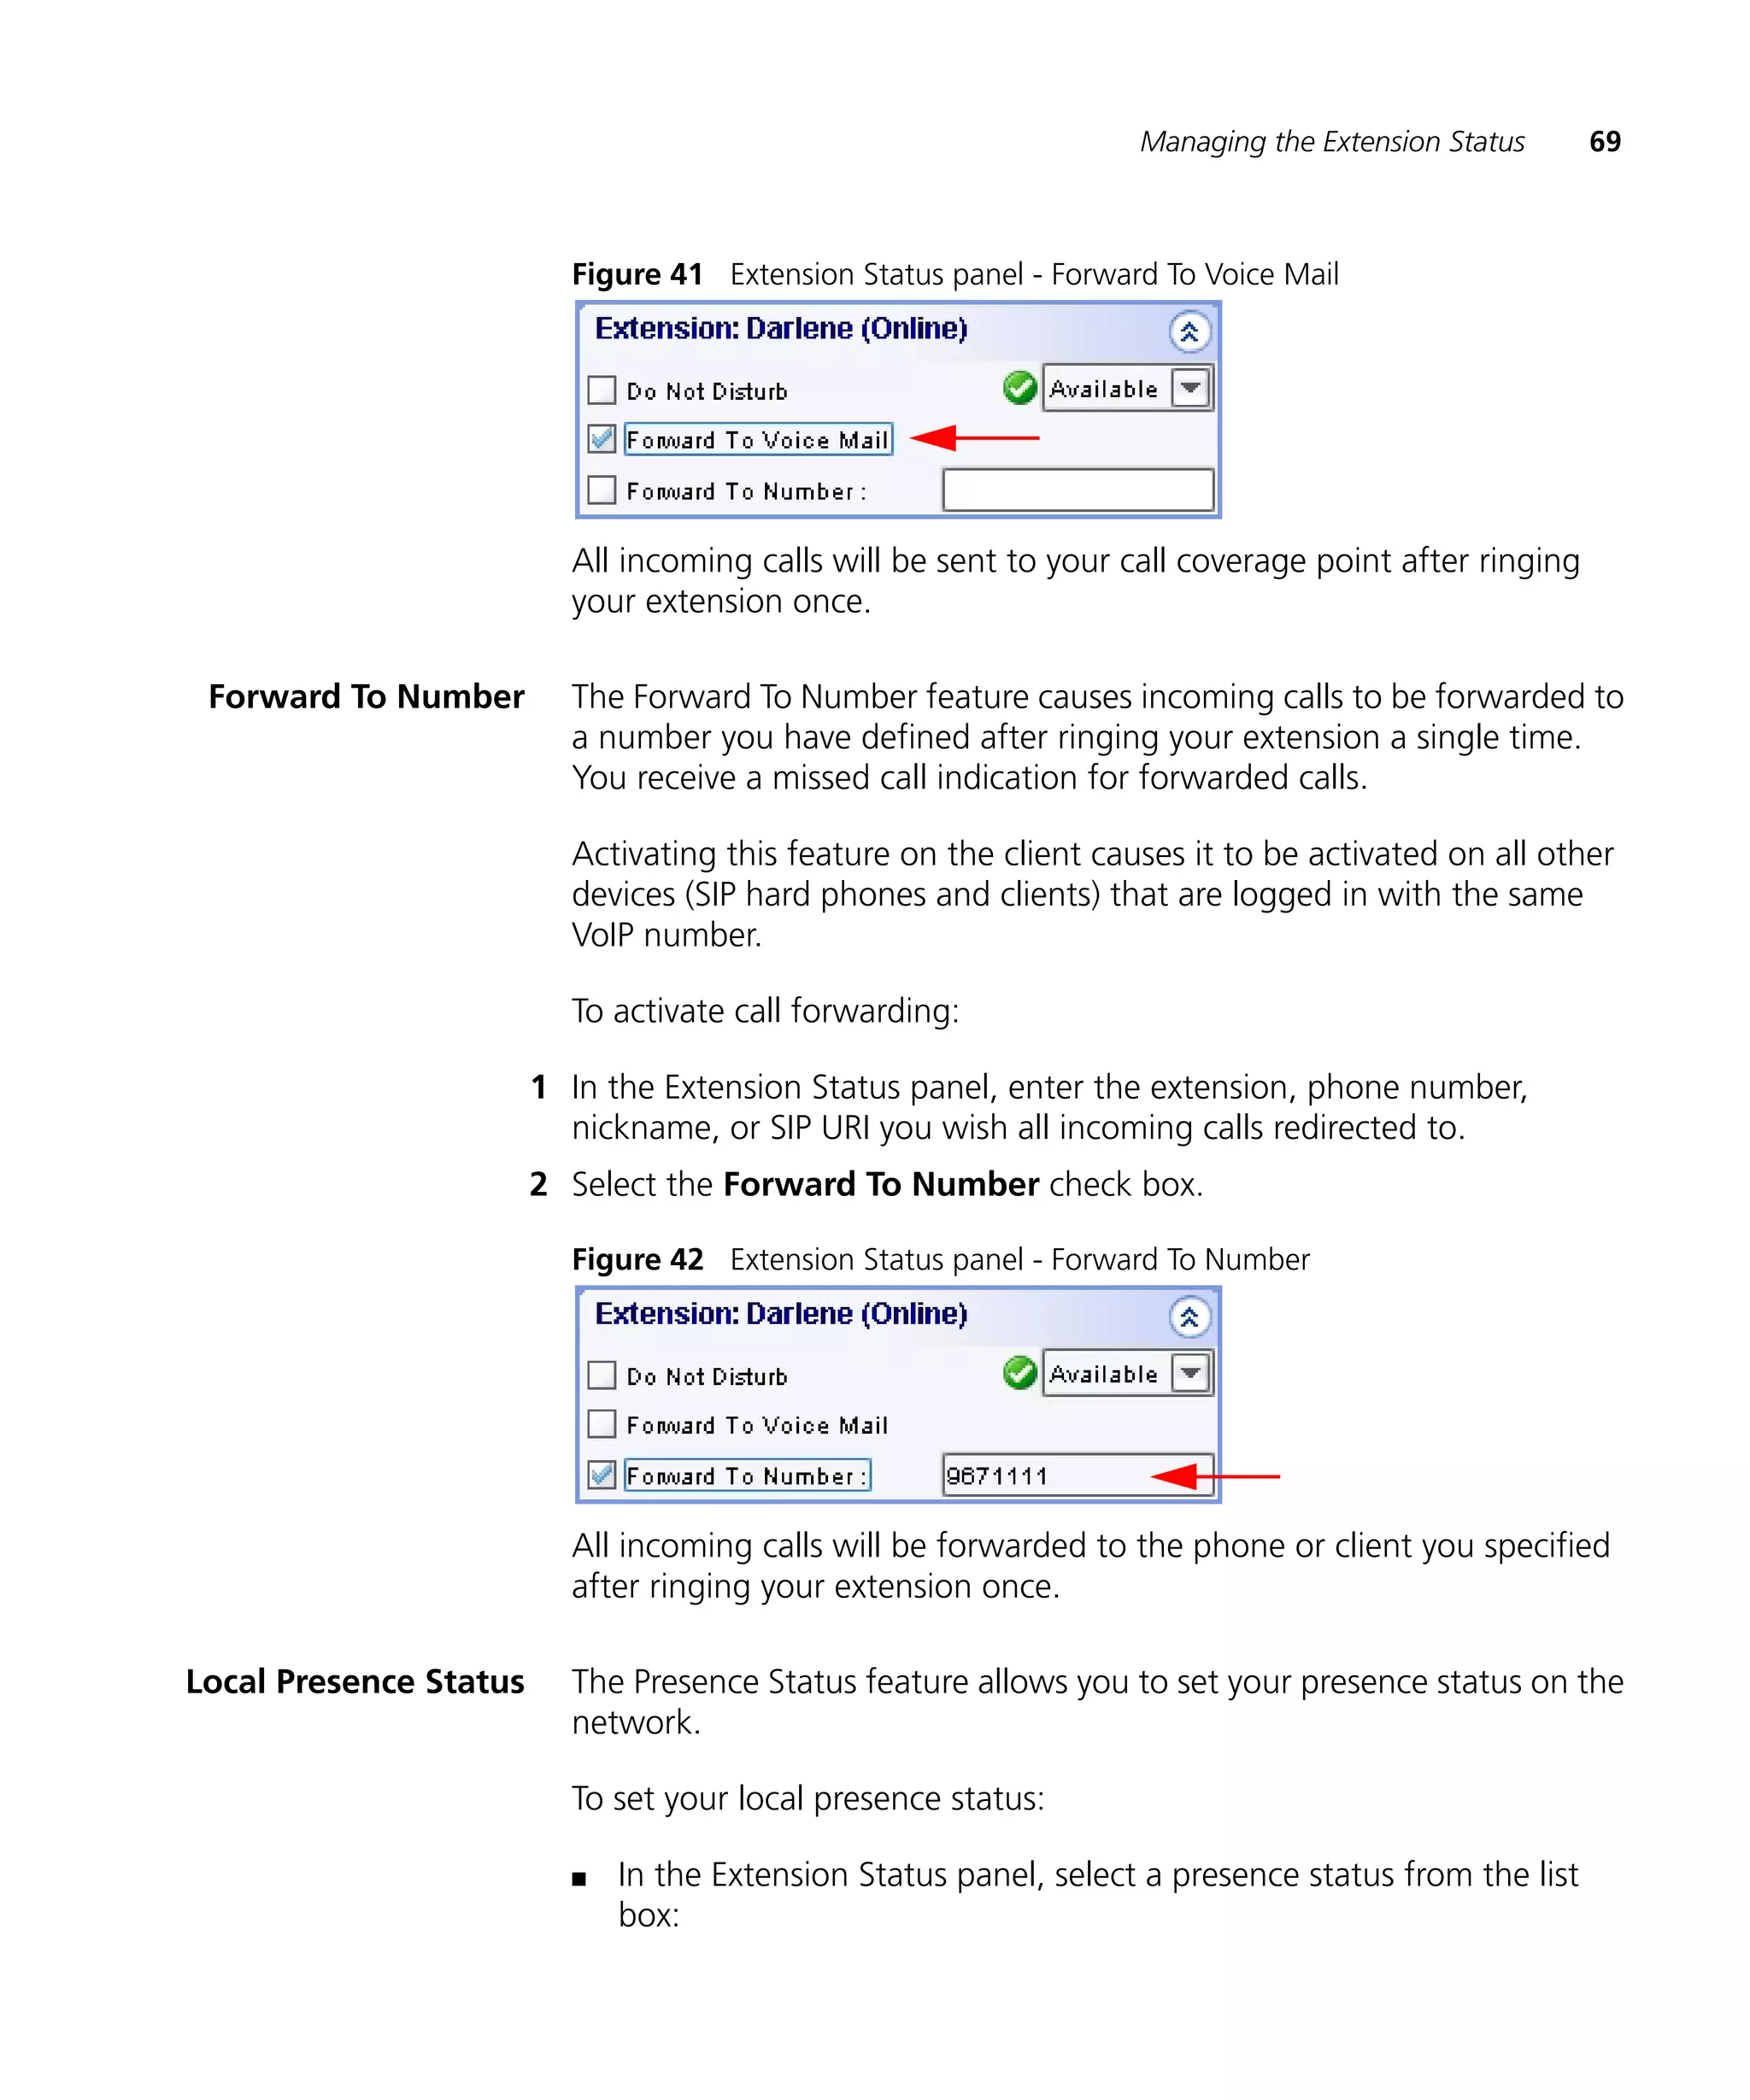
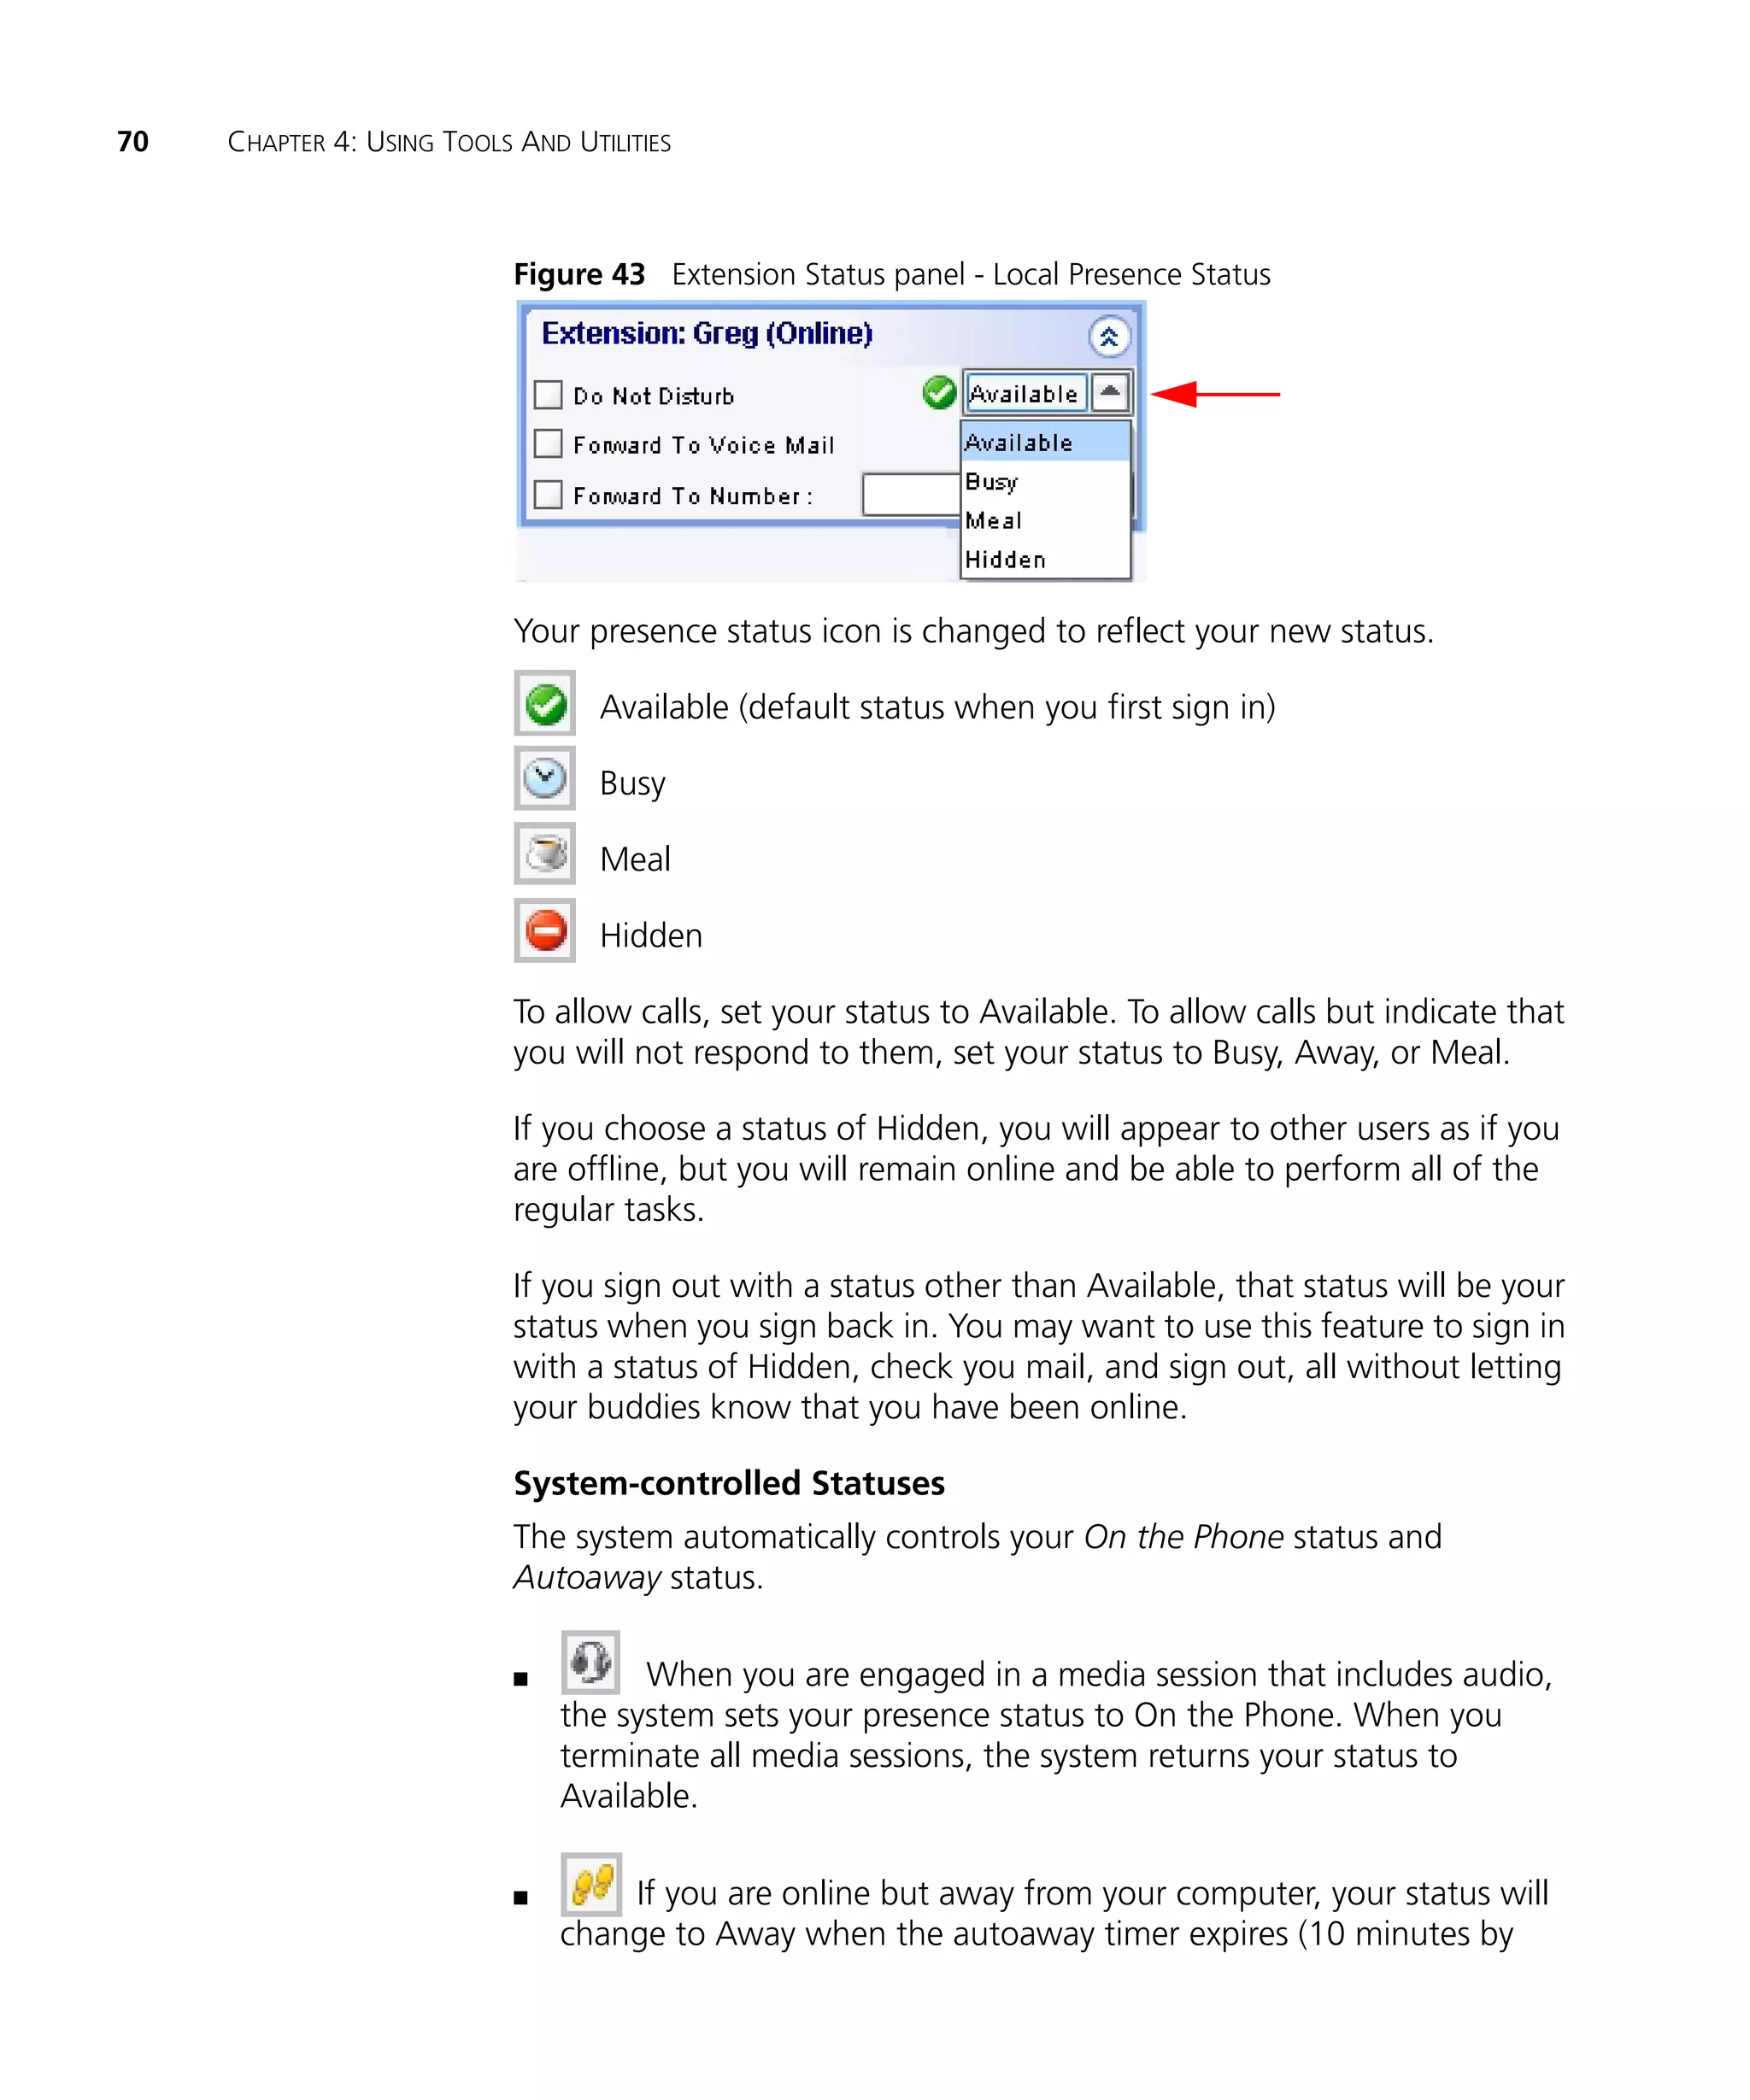
Download to read offline

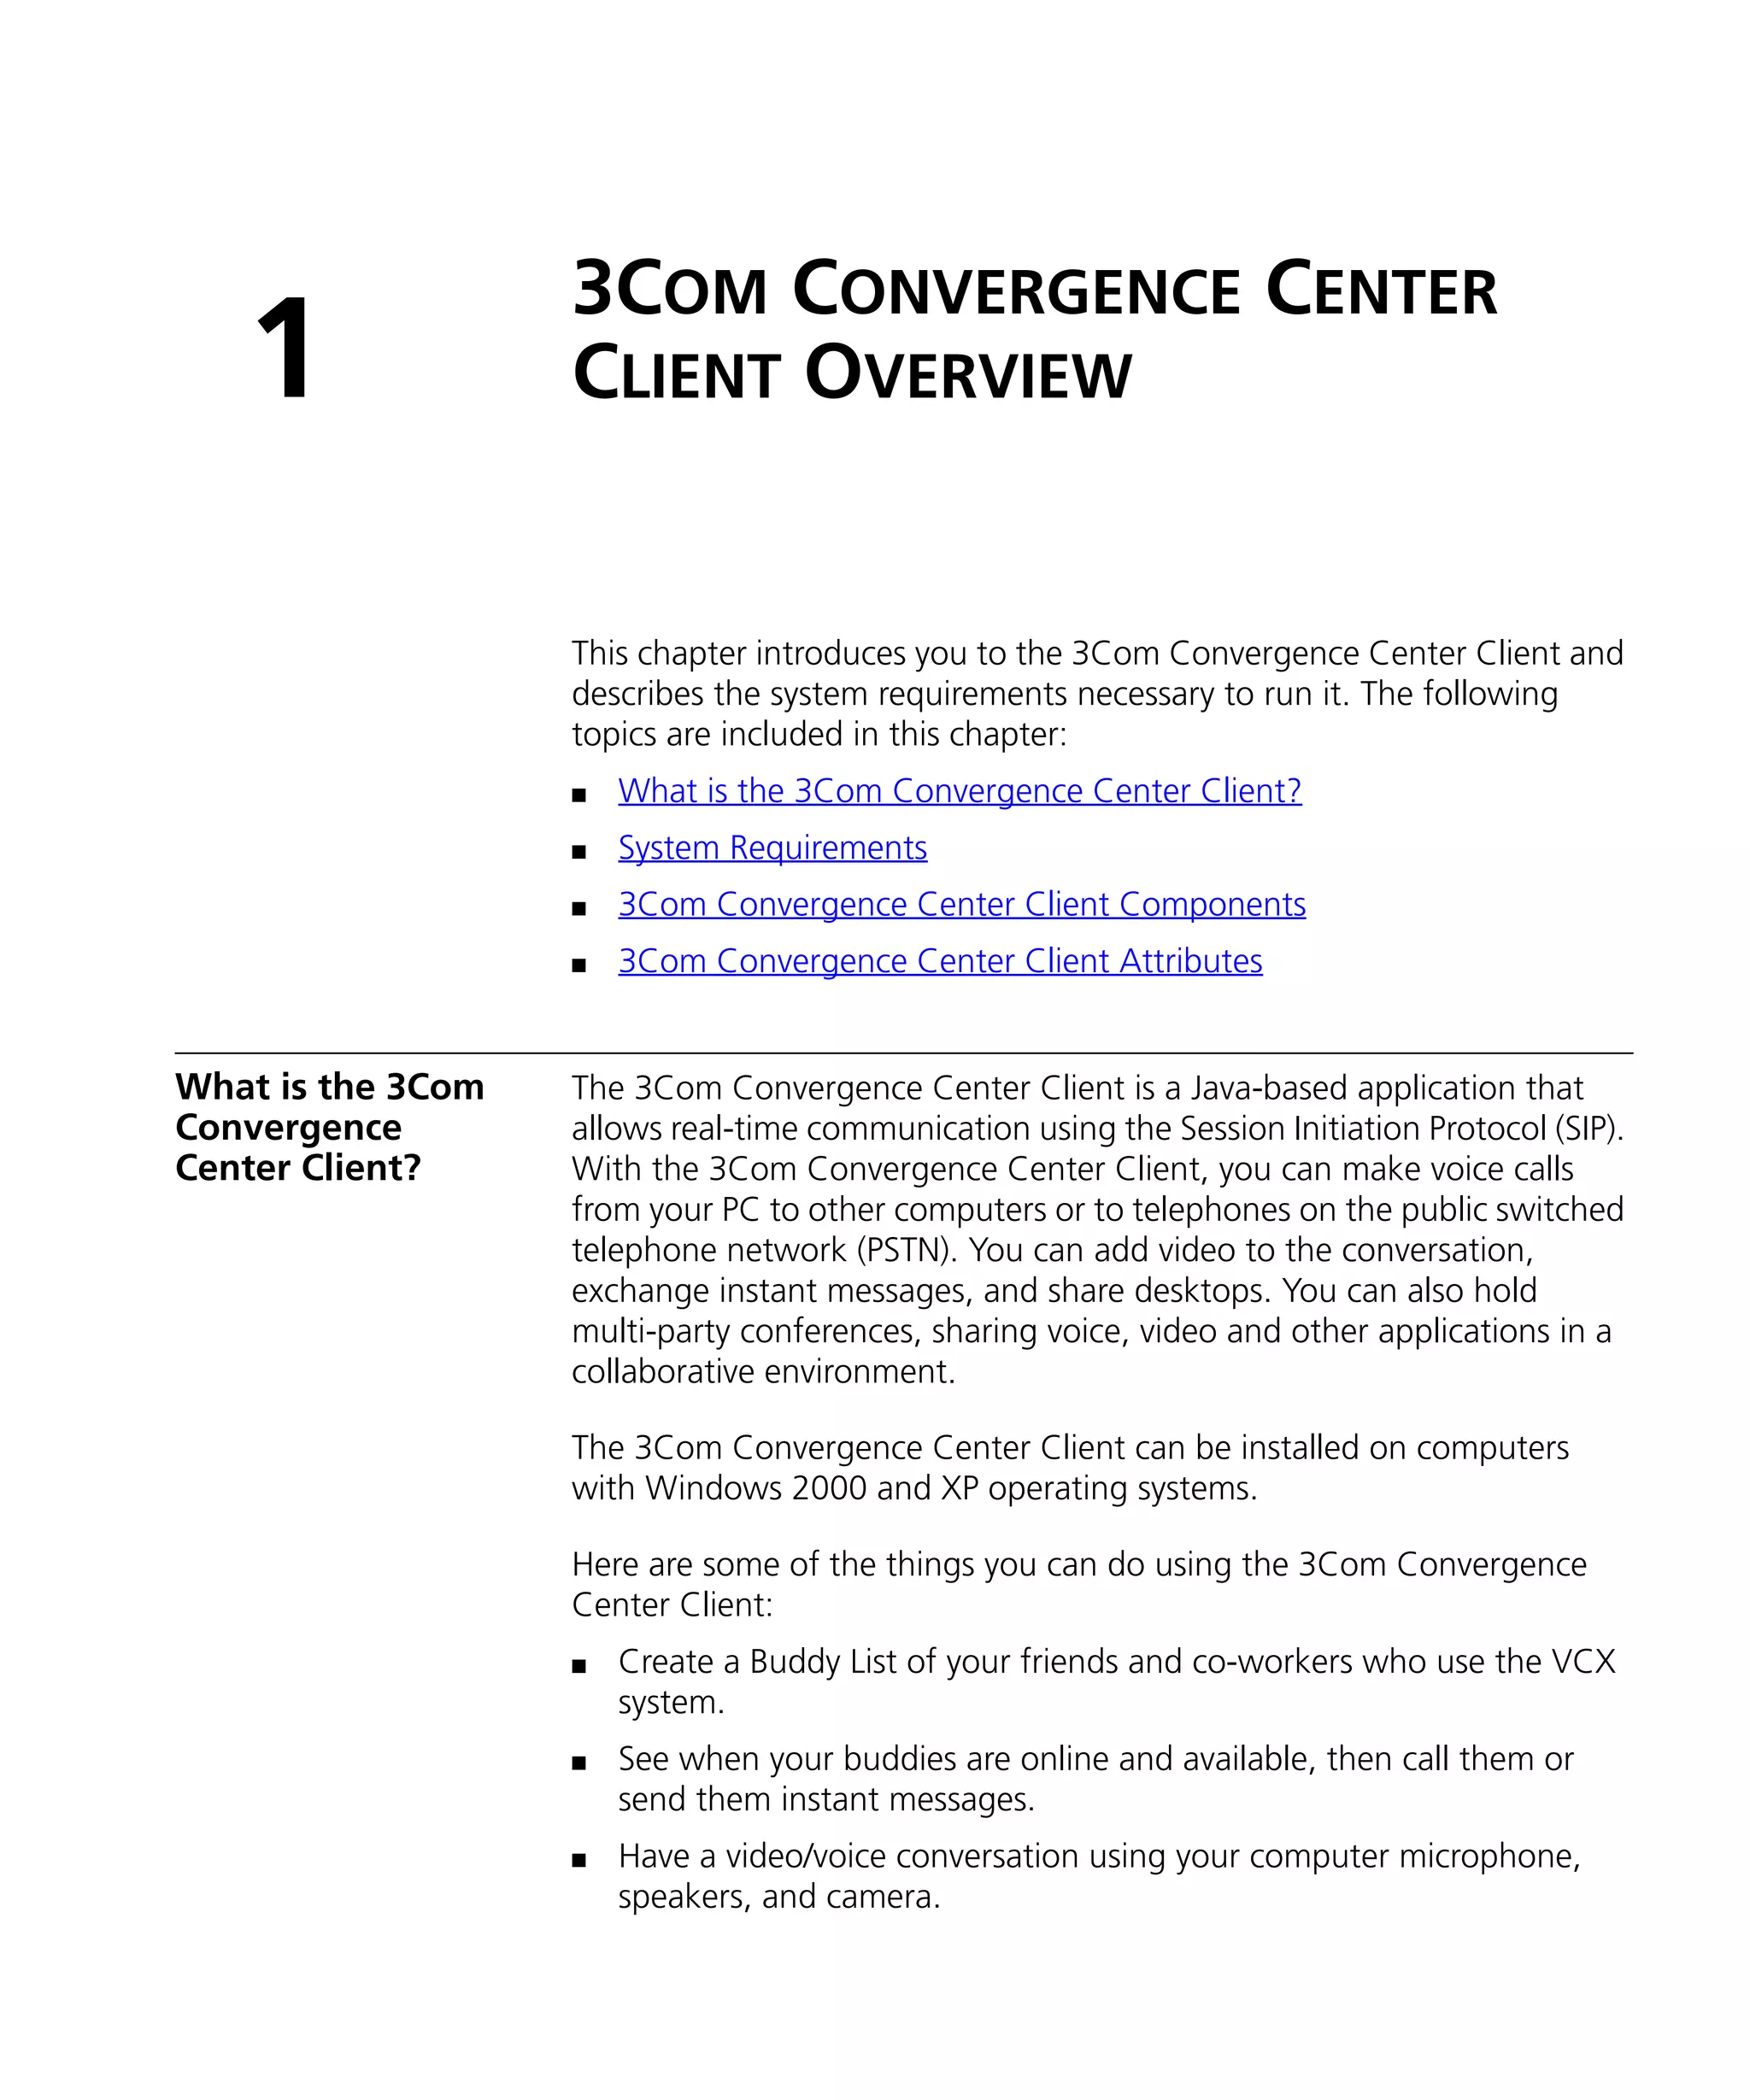
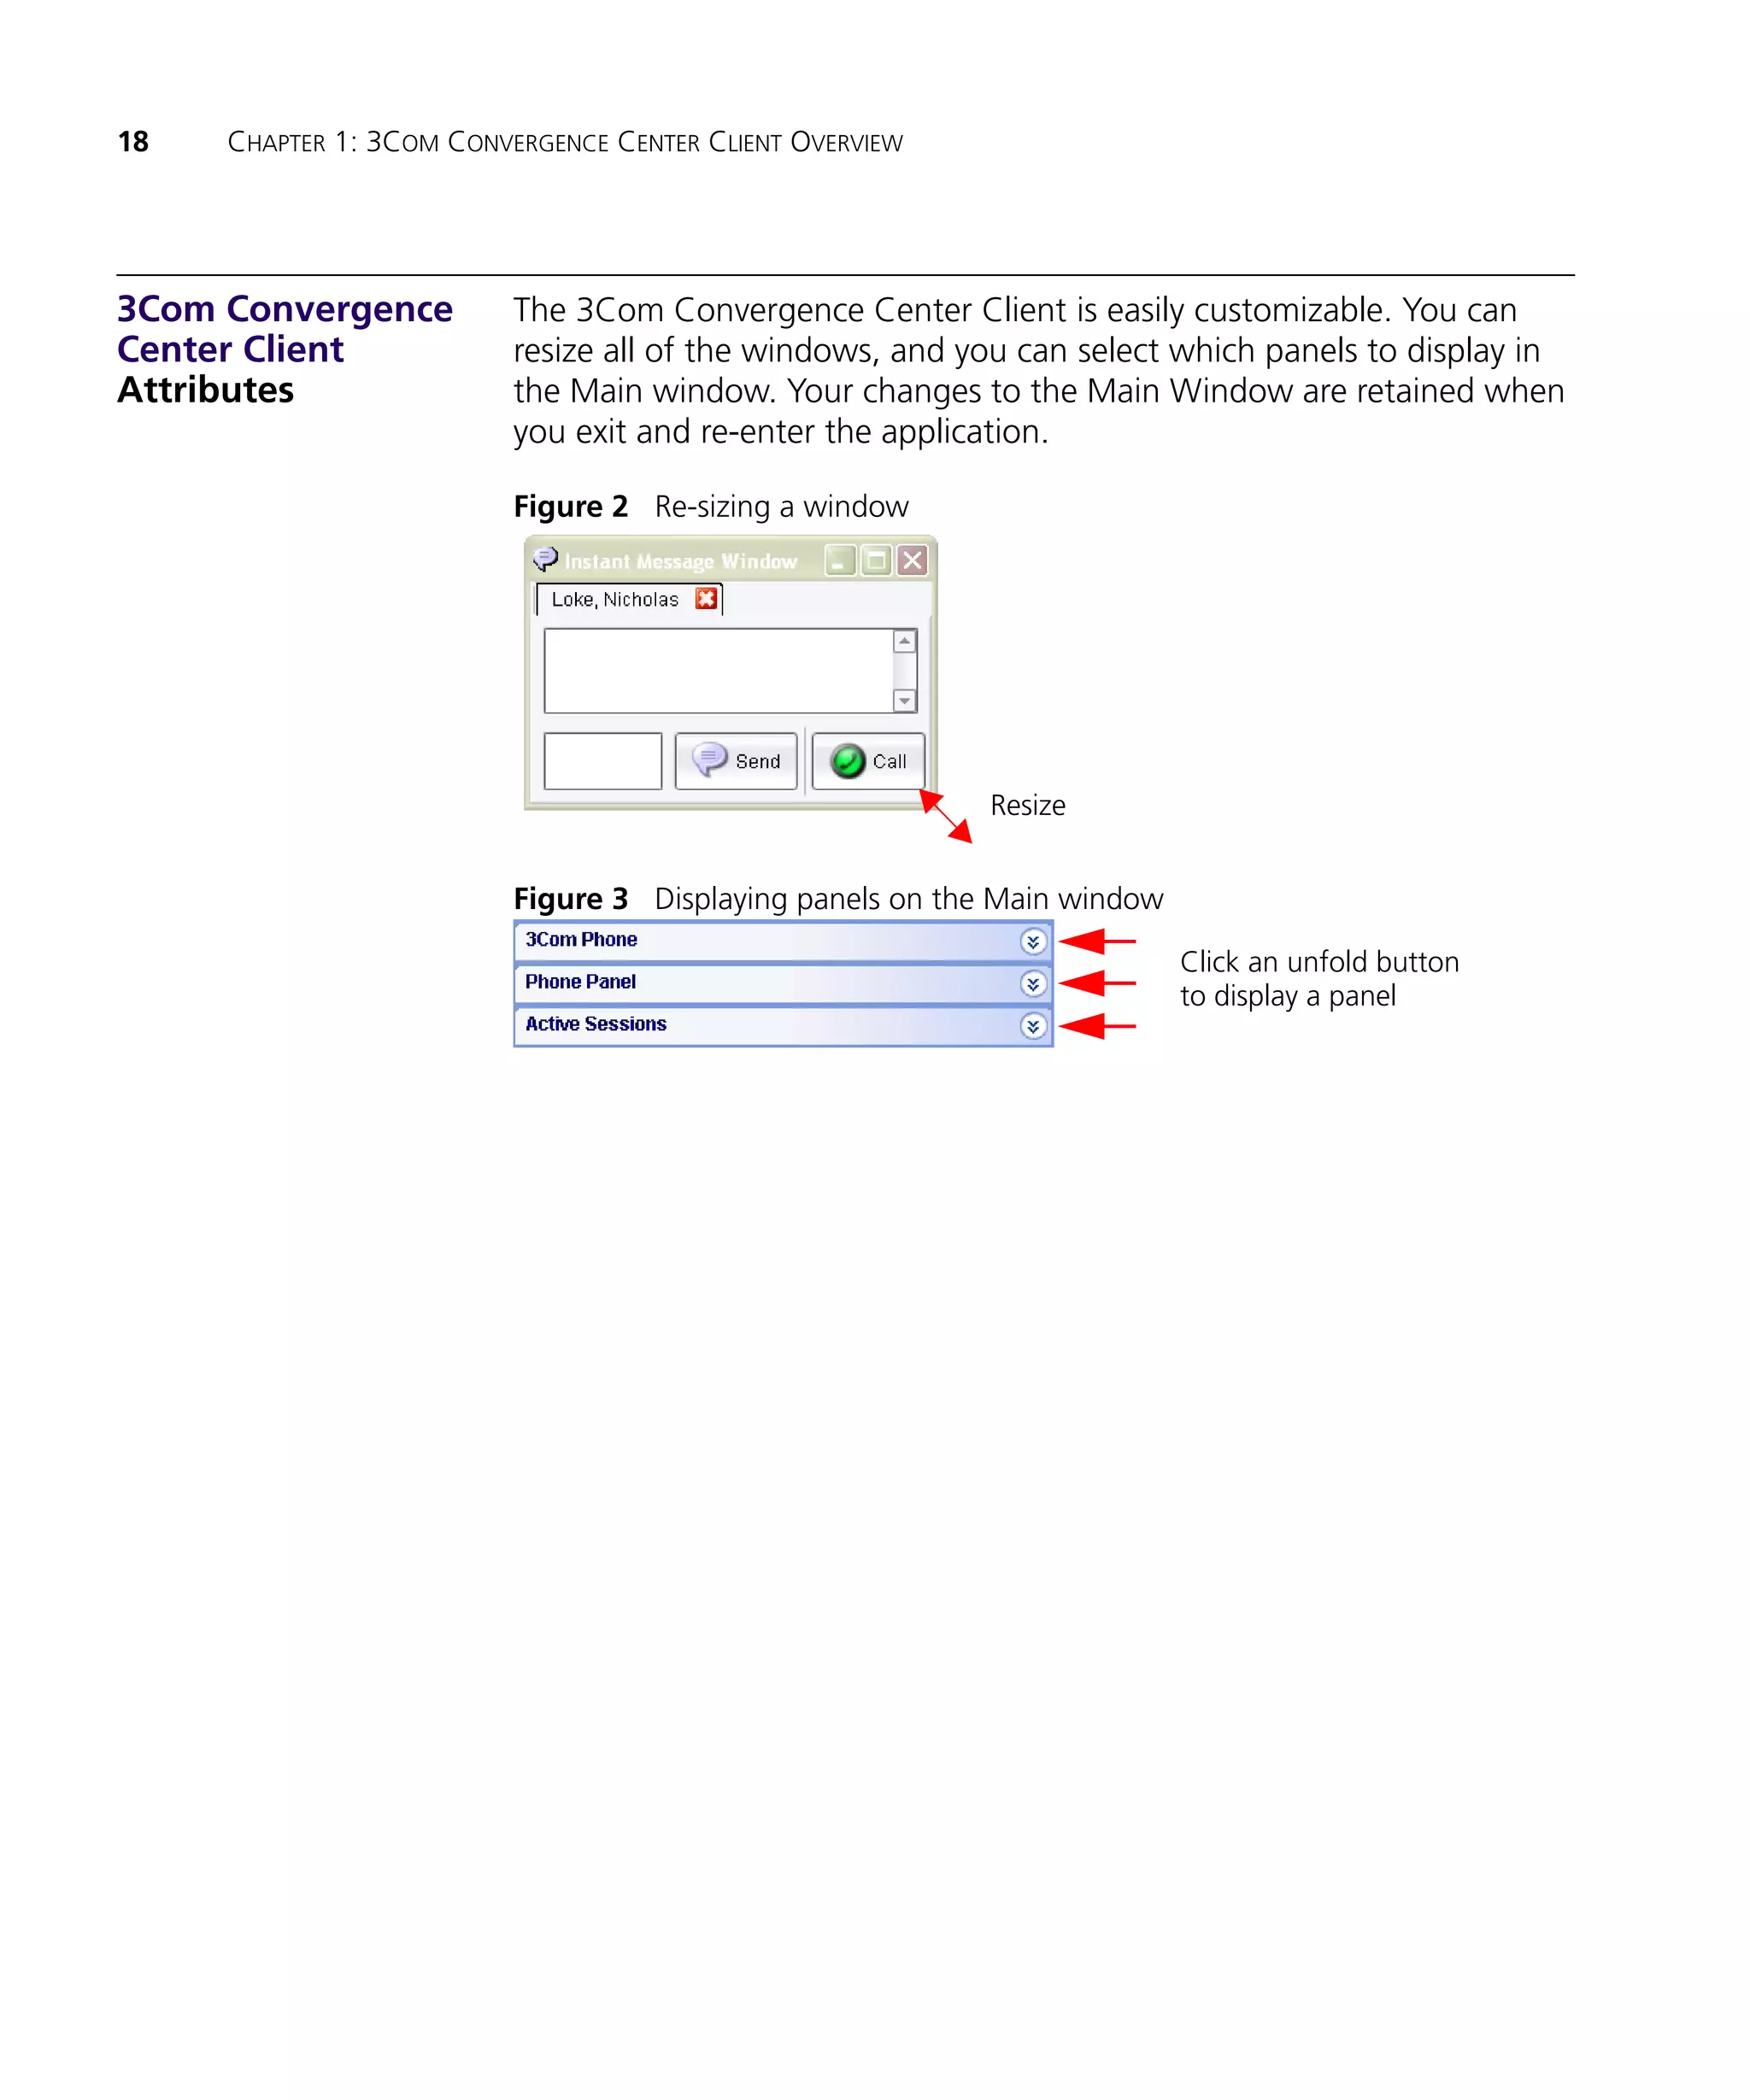

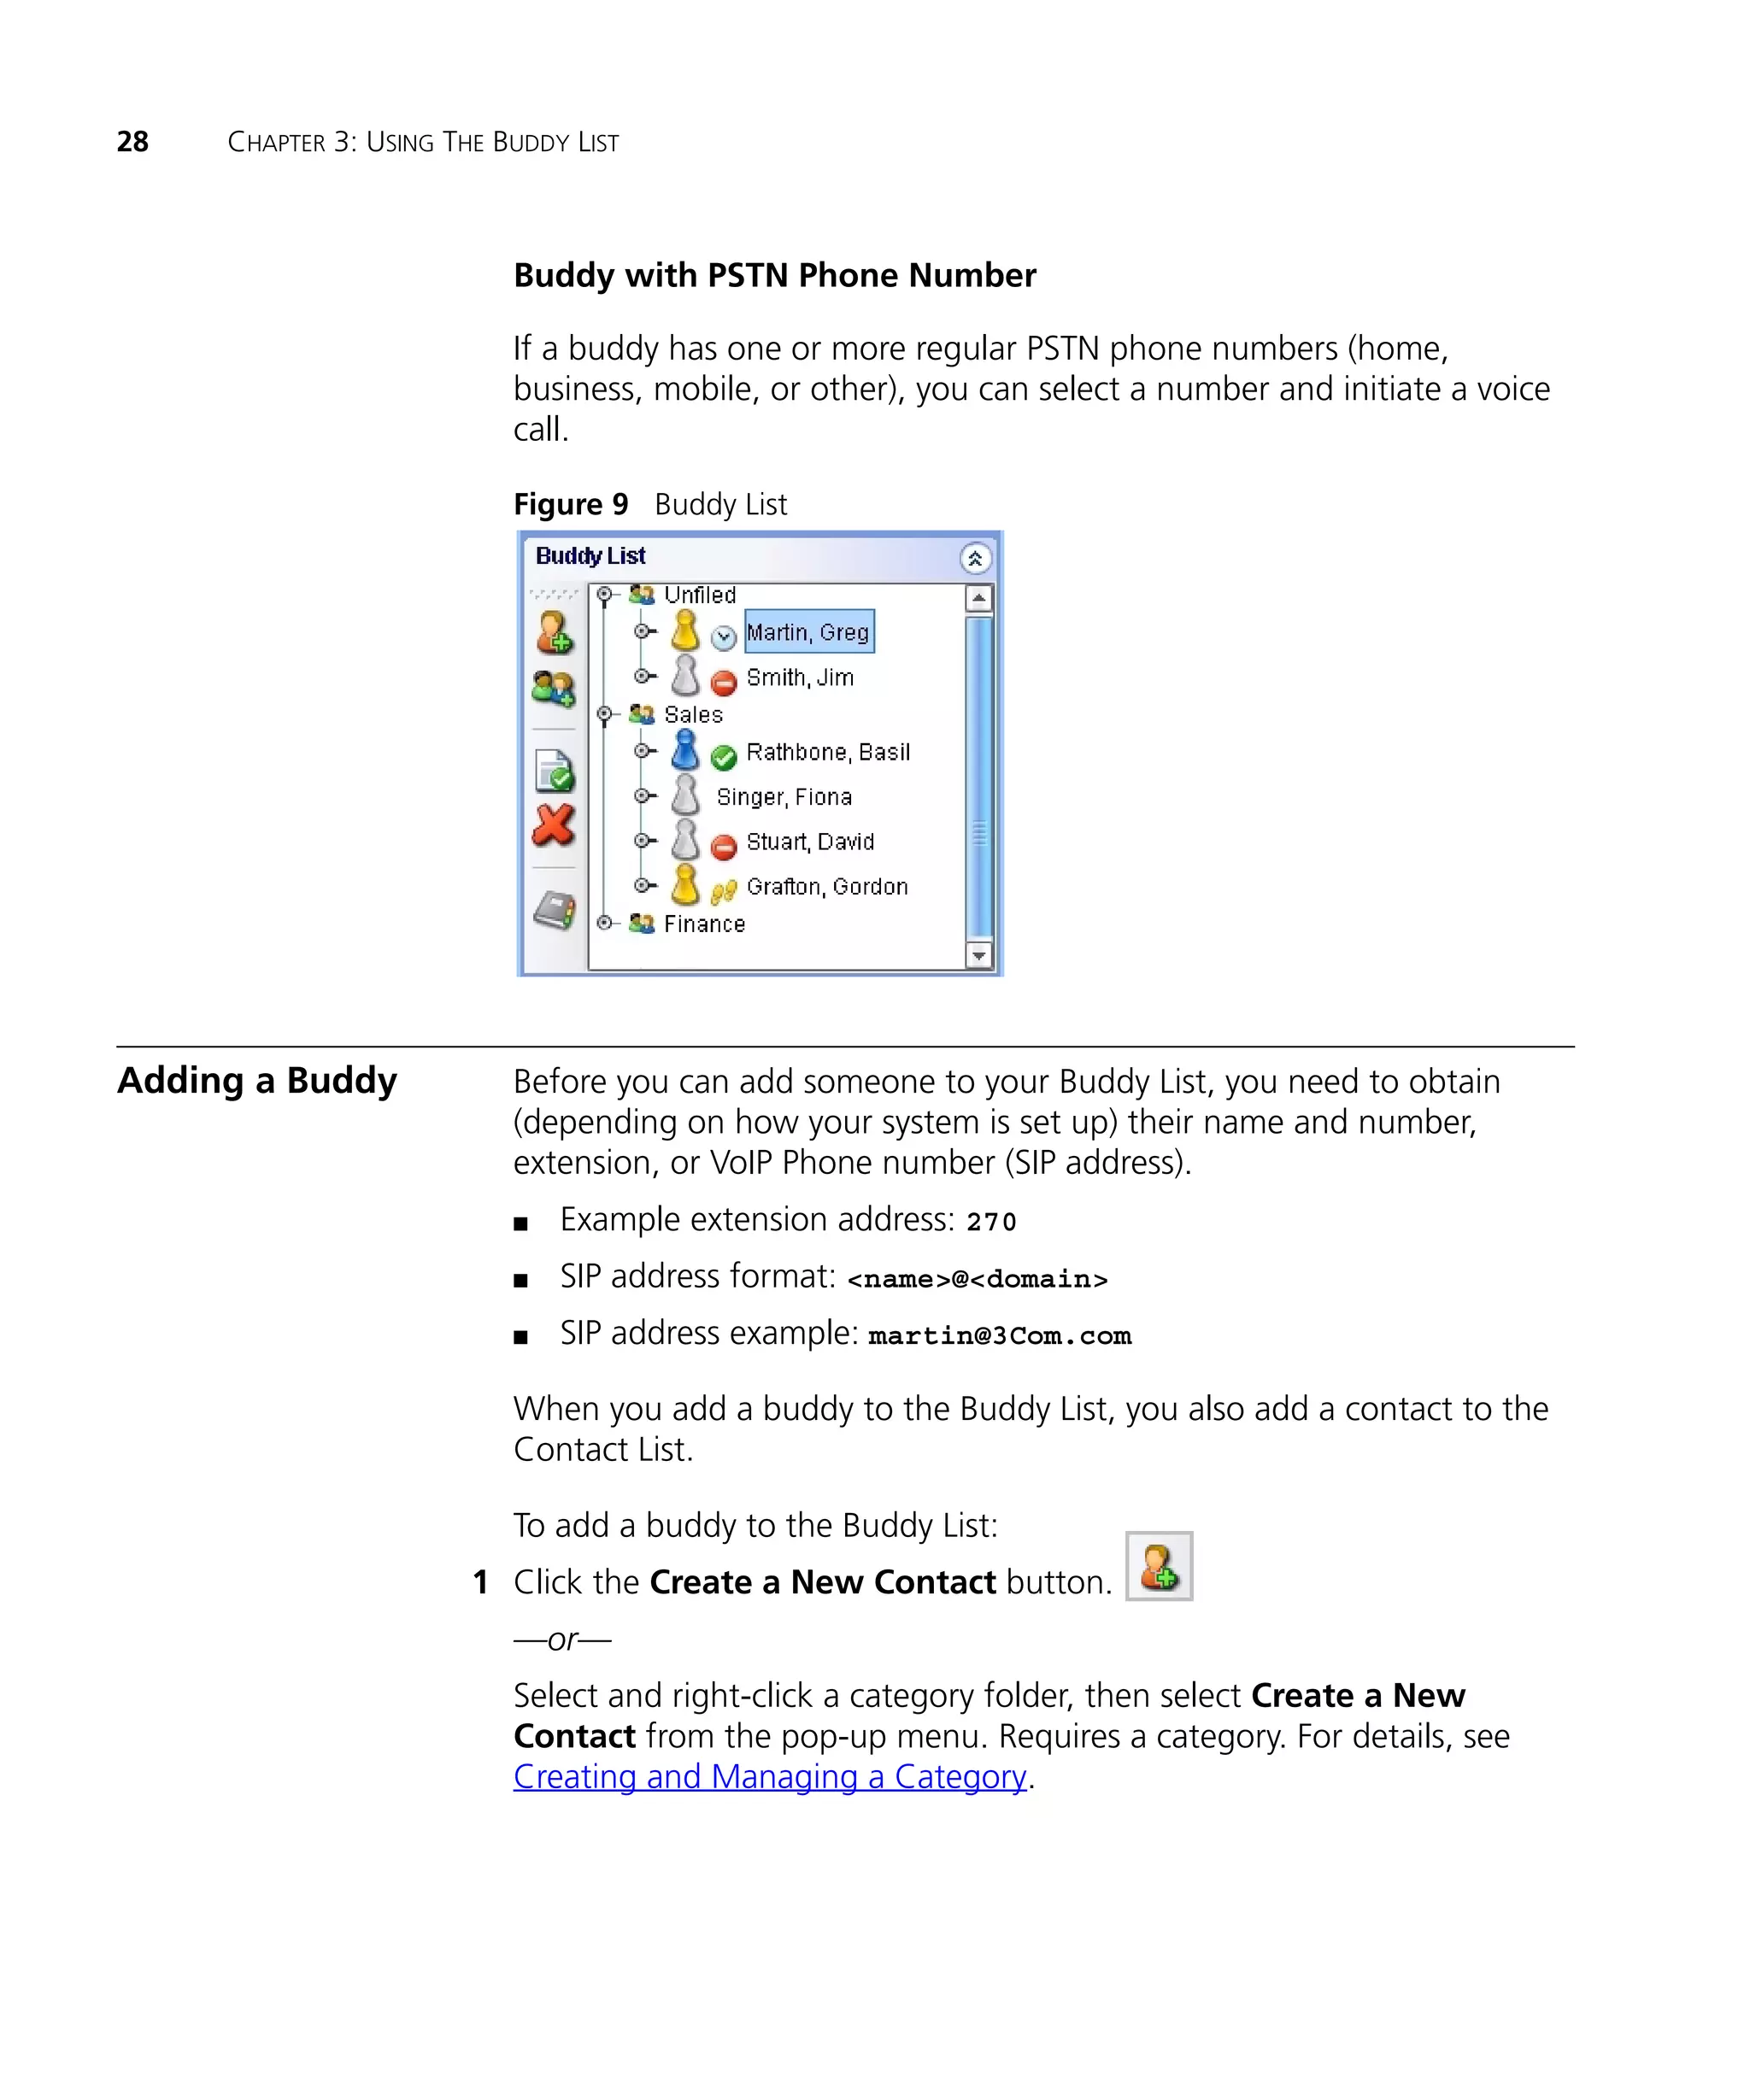
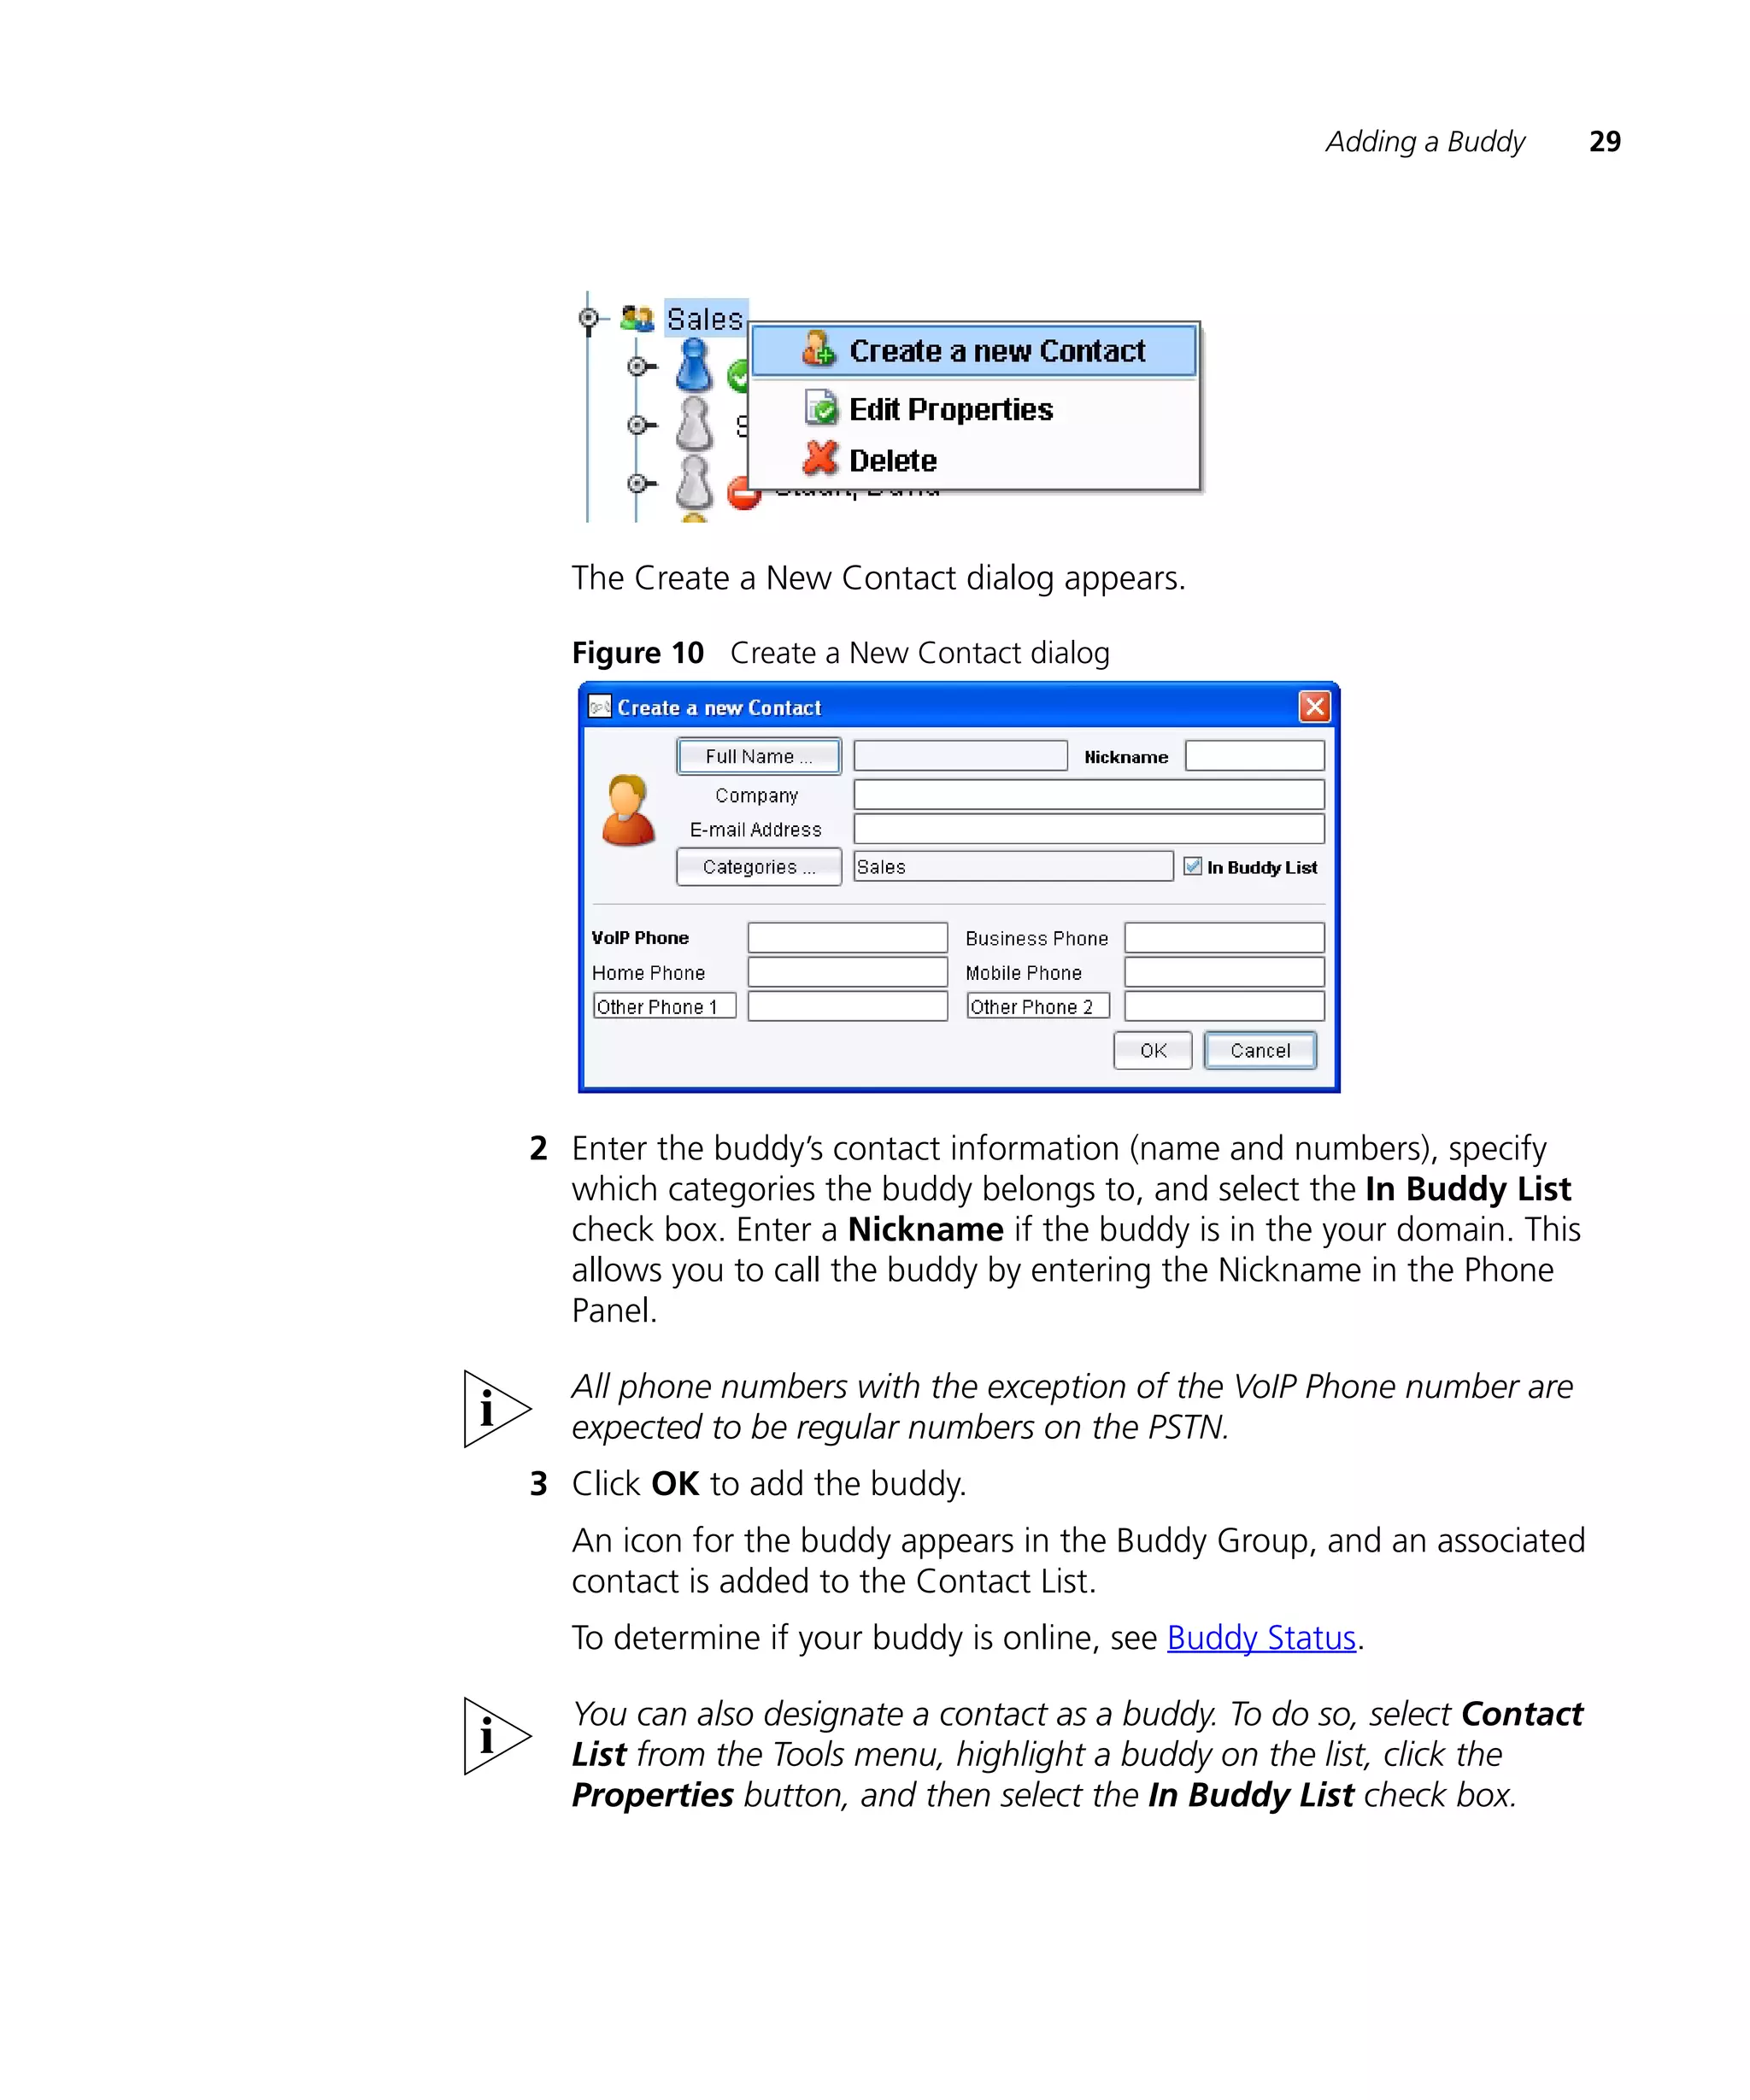

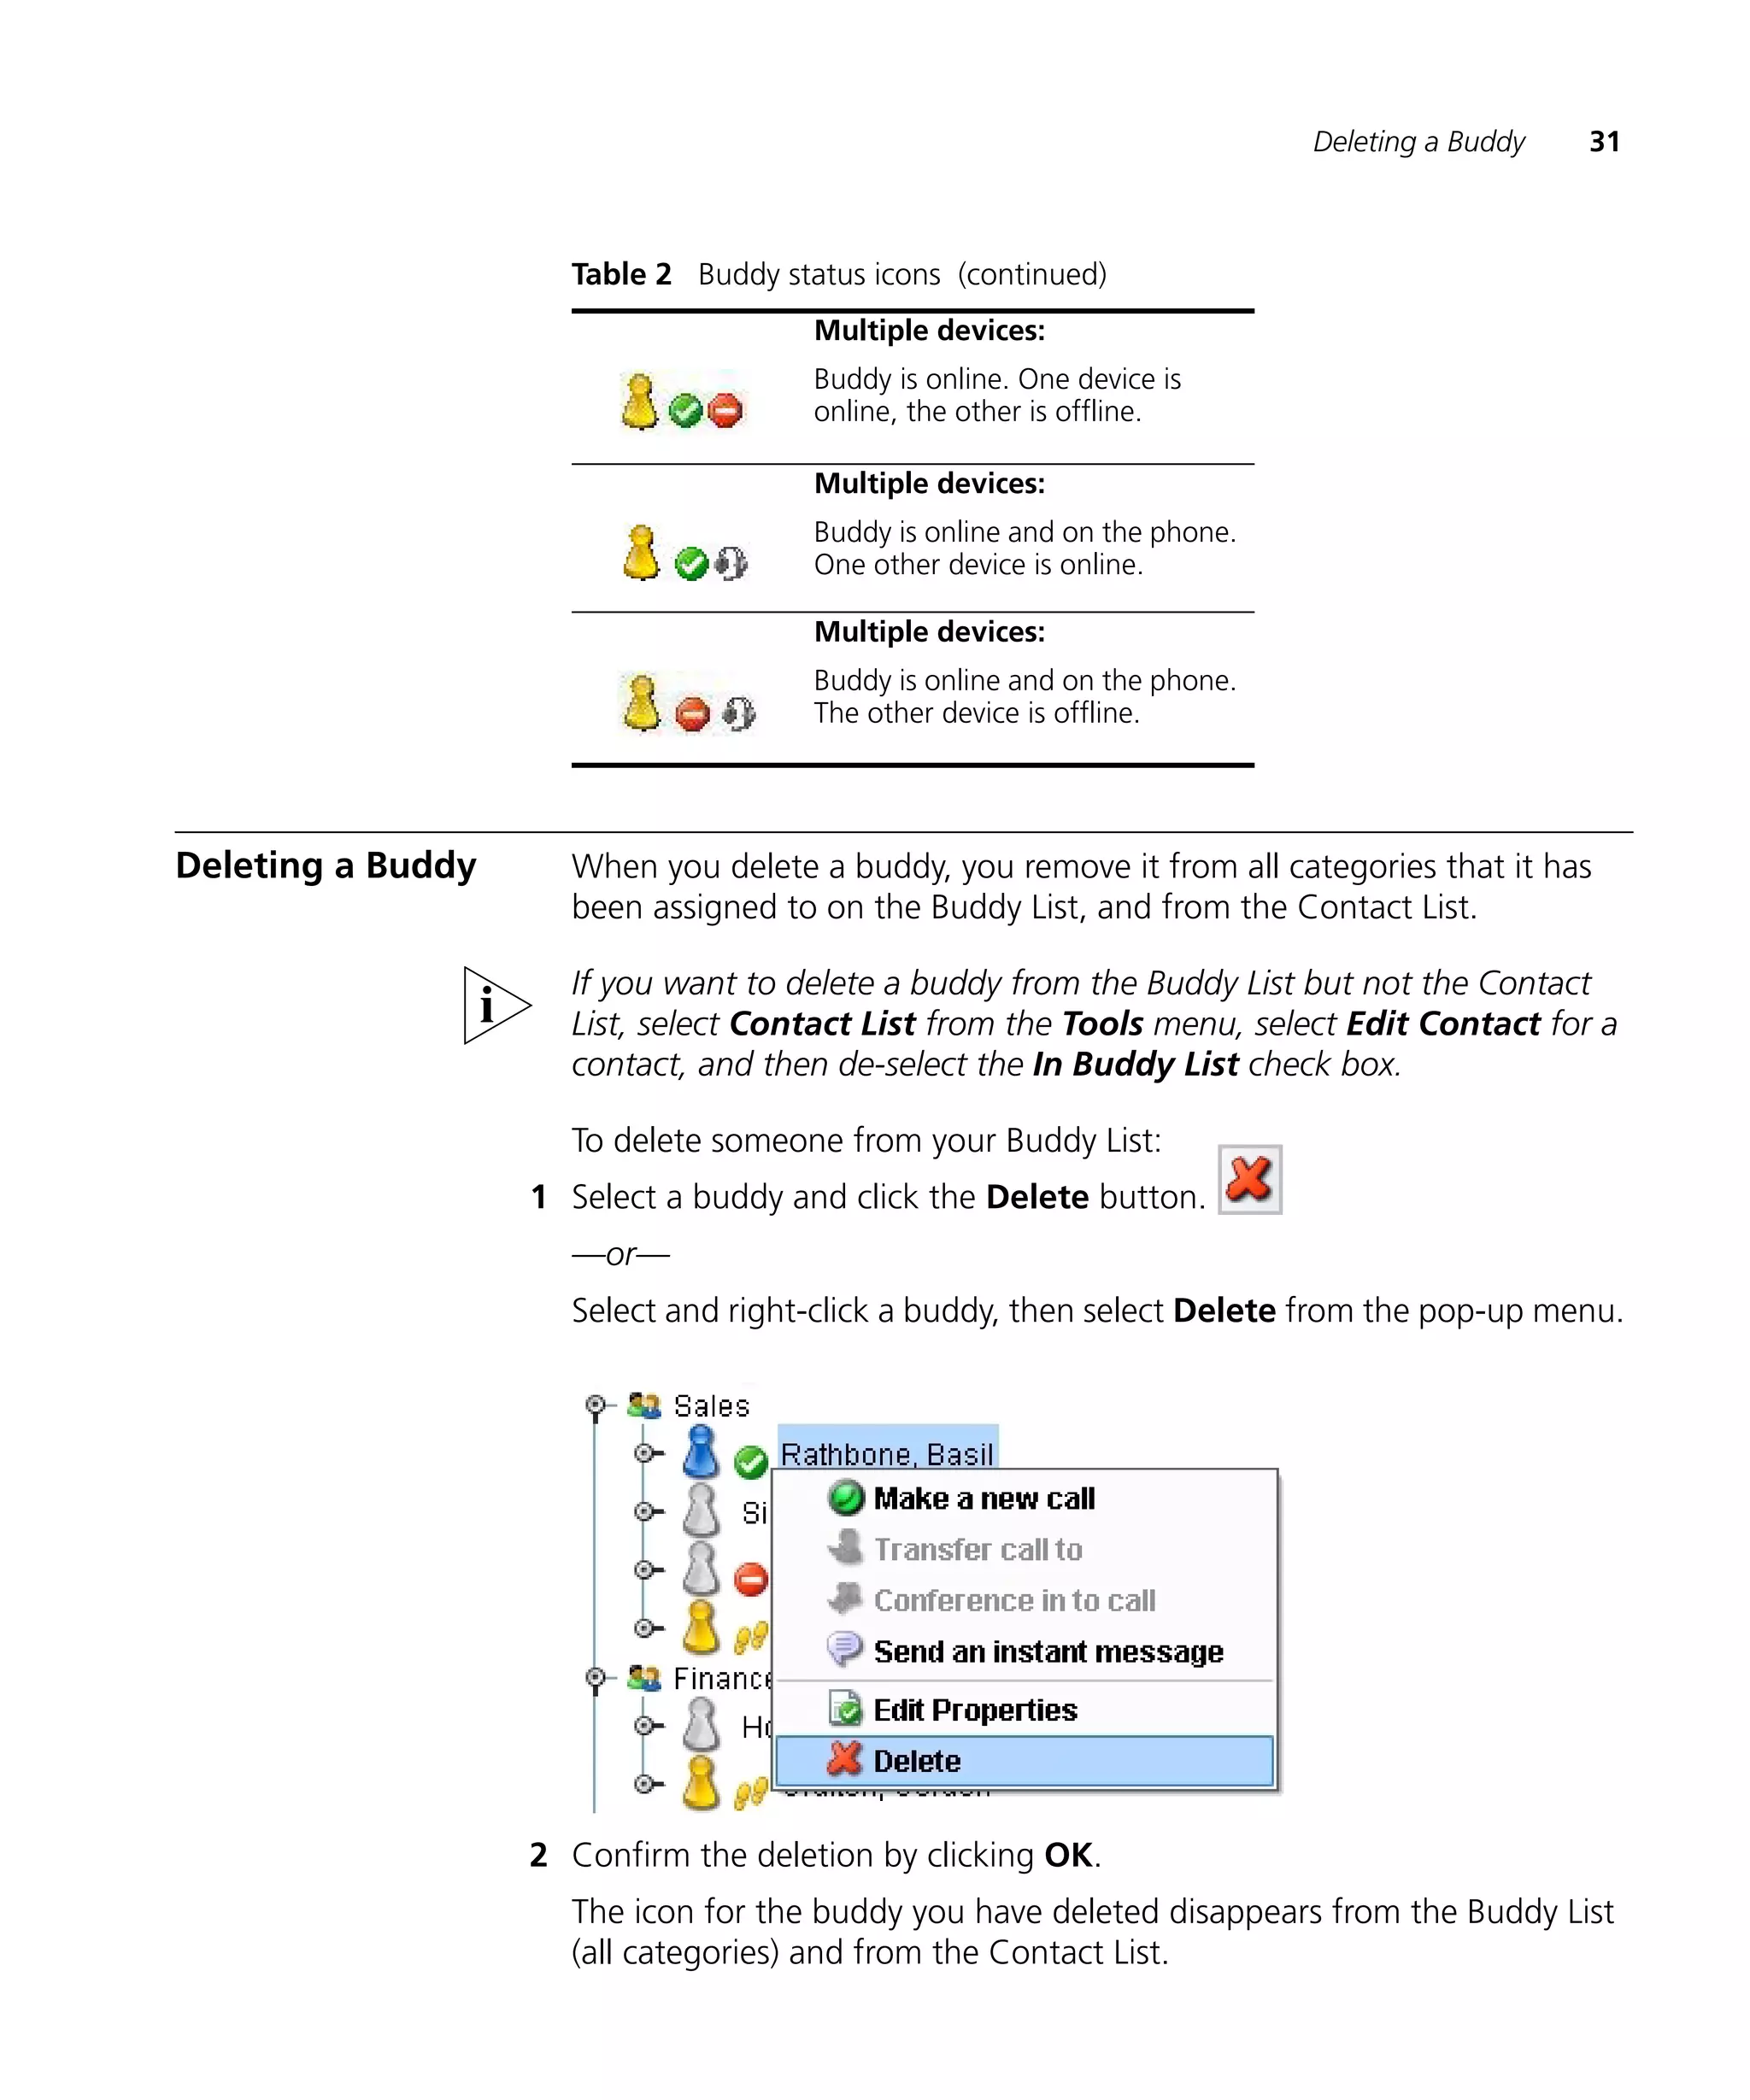

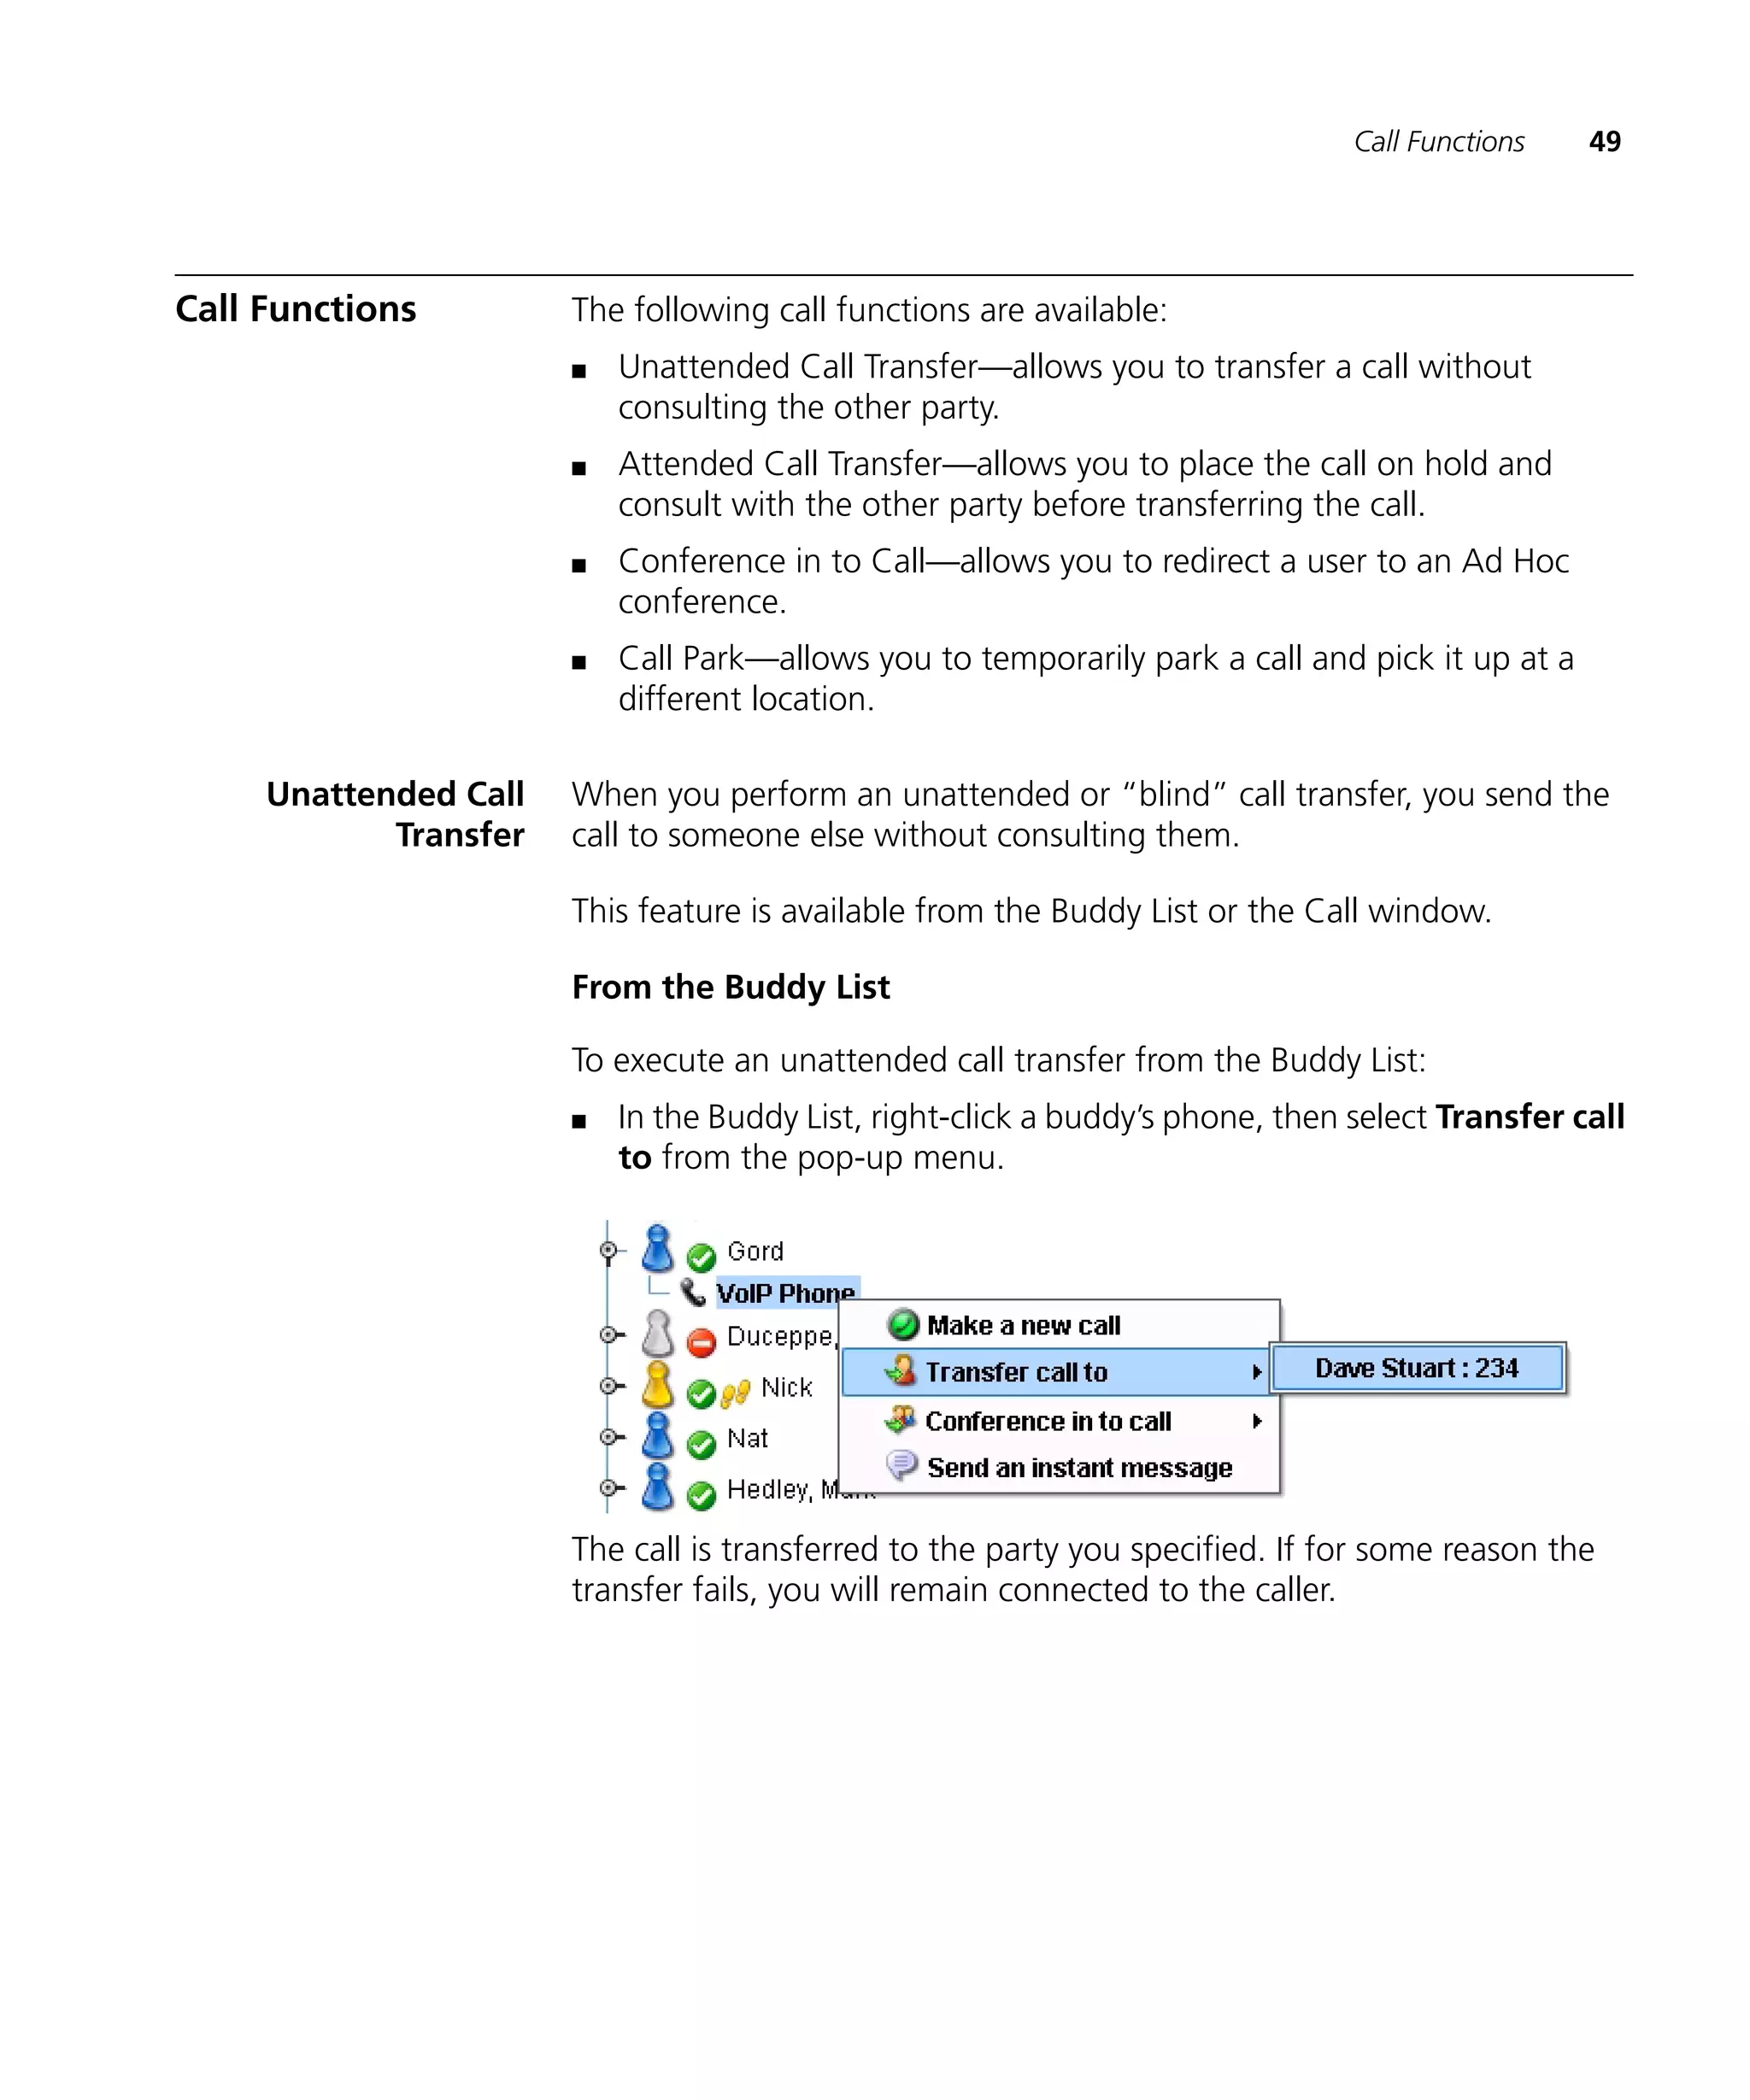
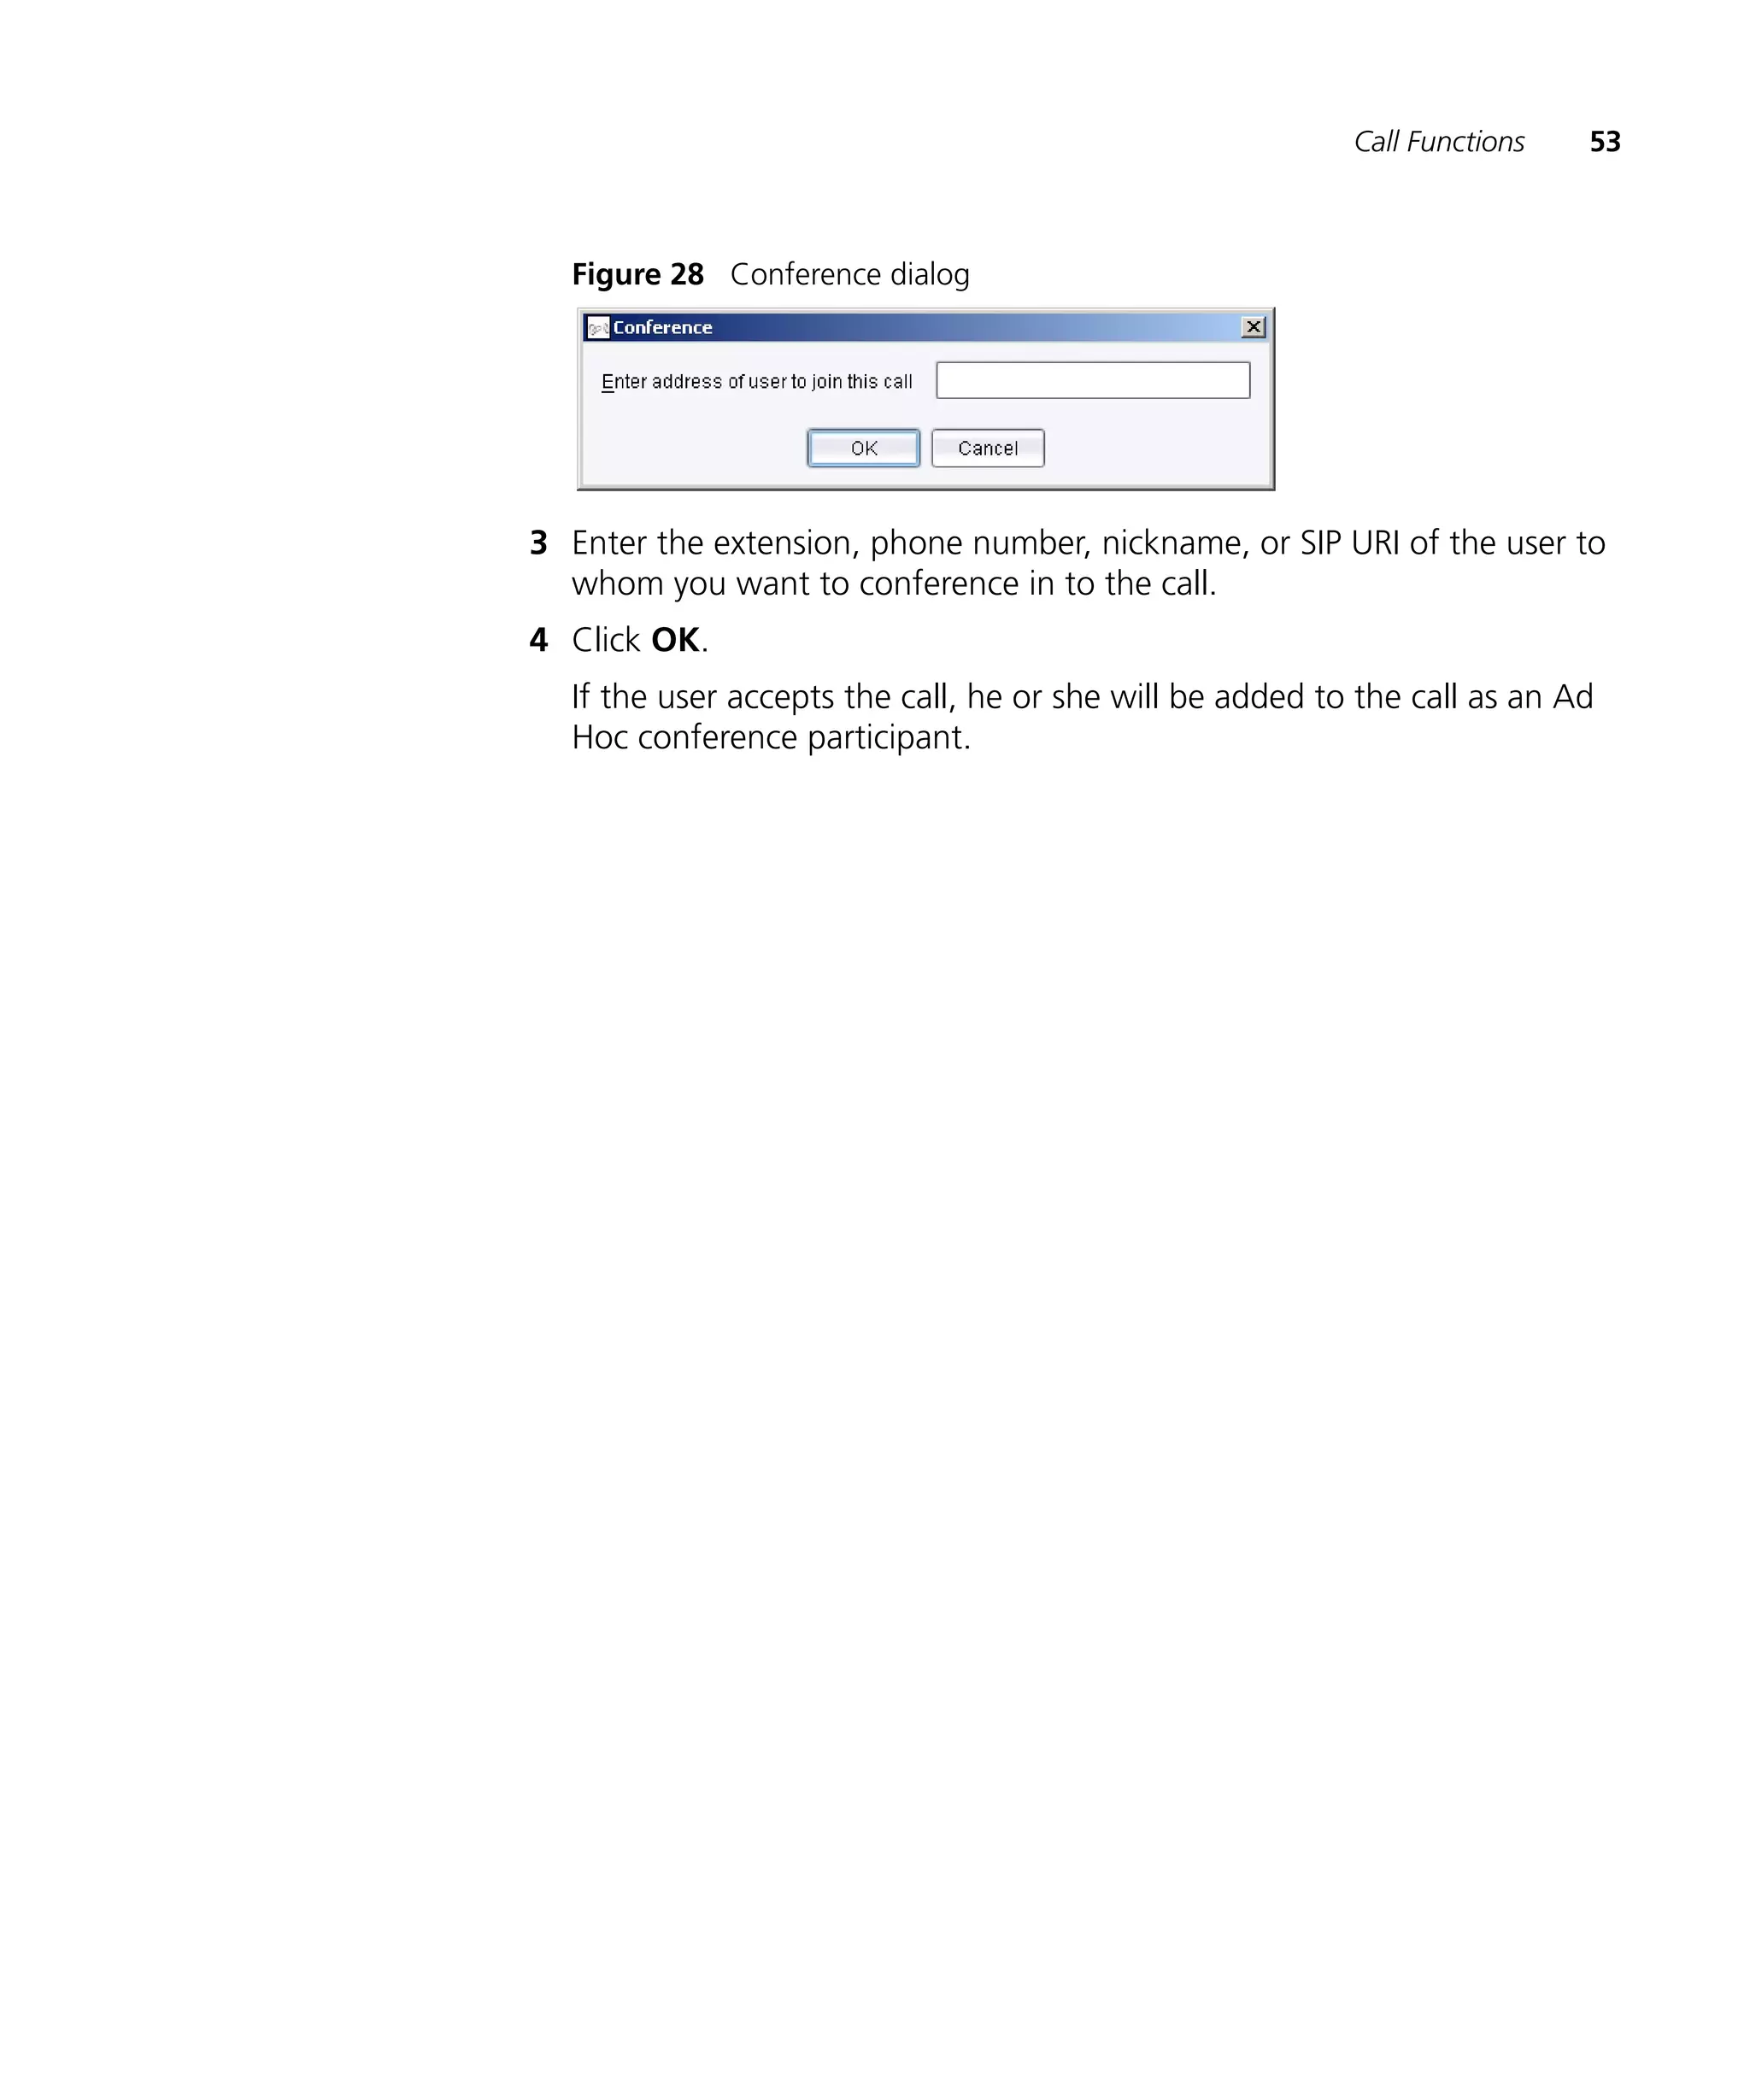


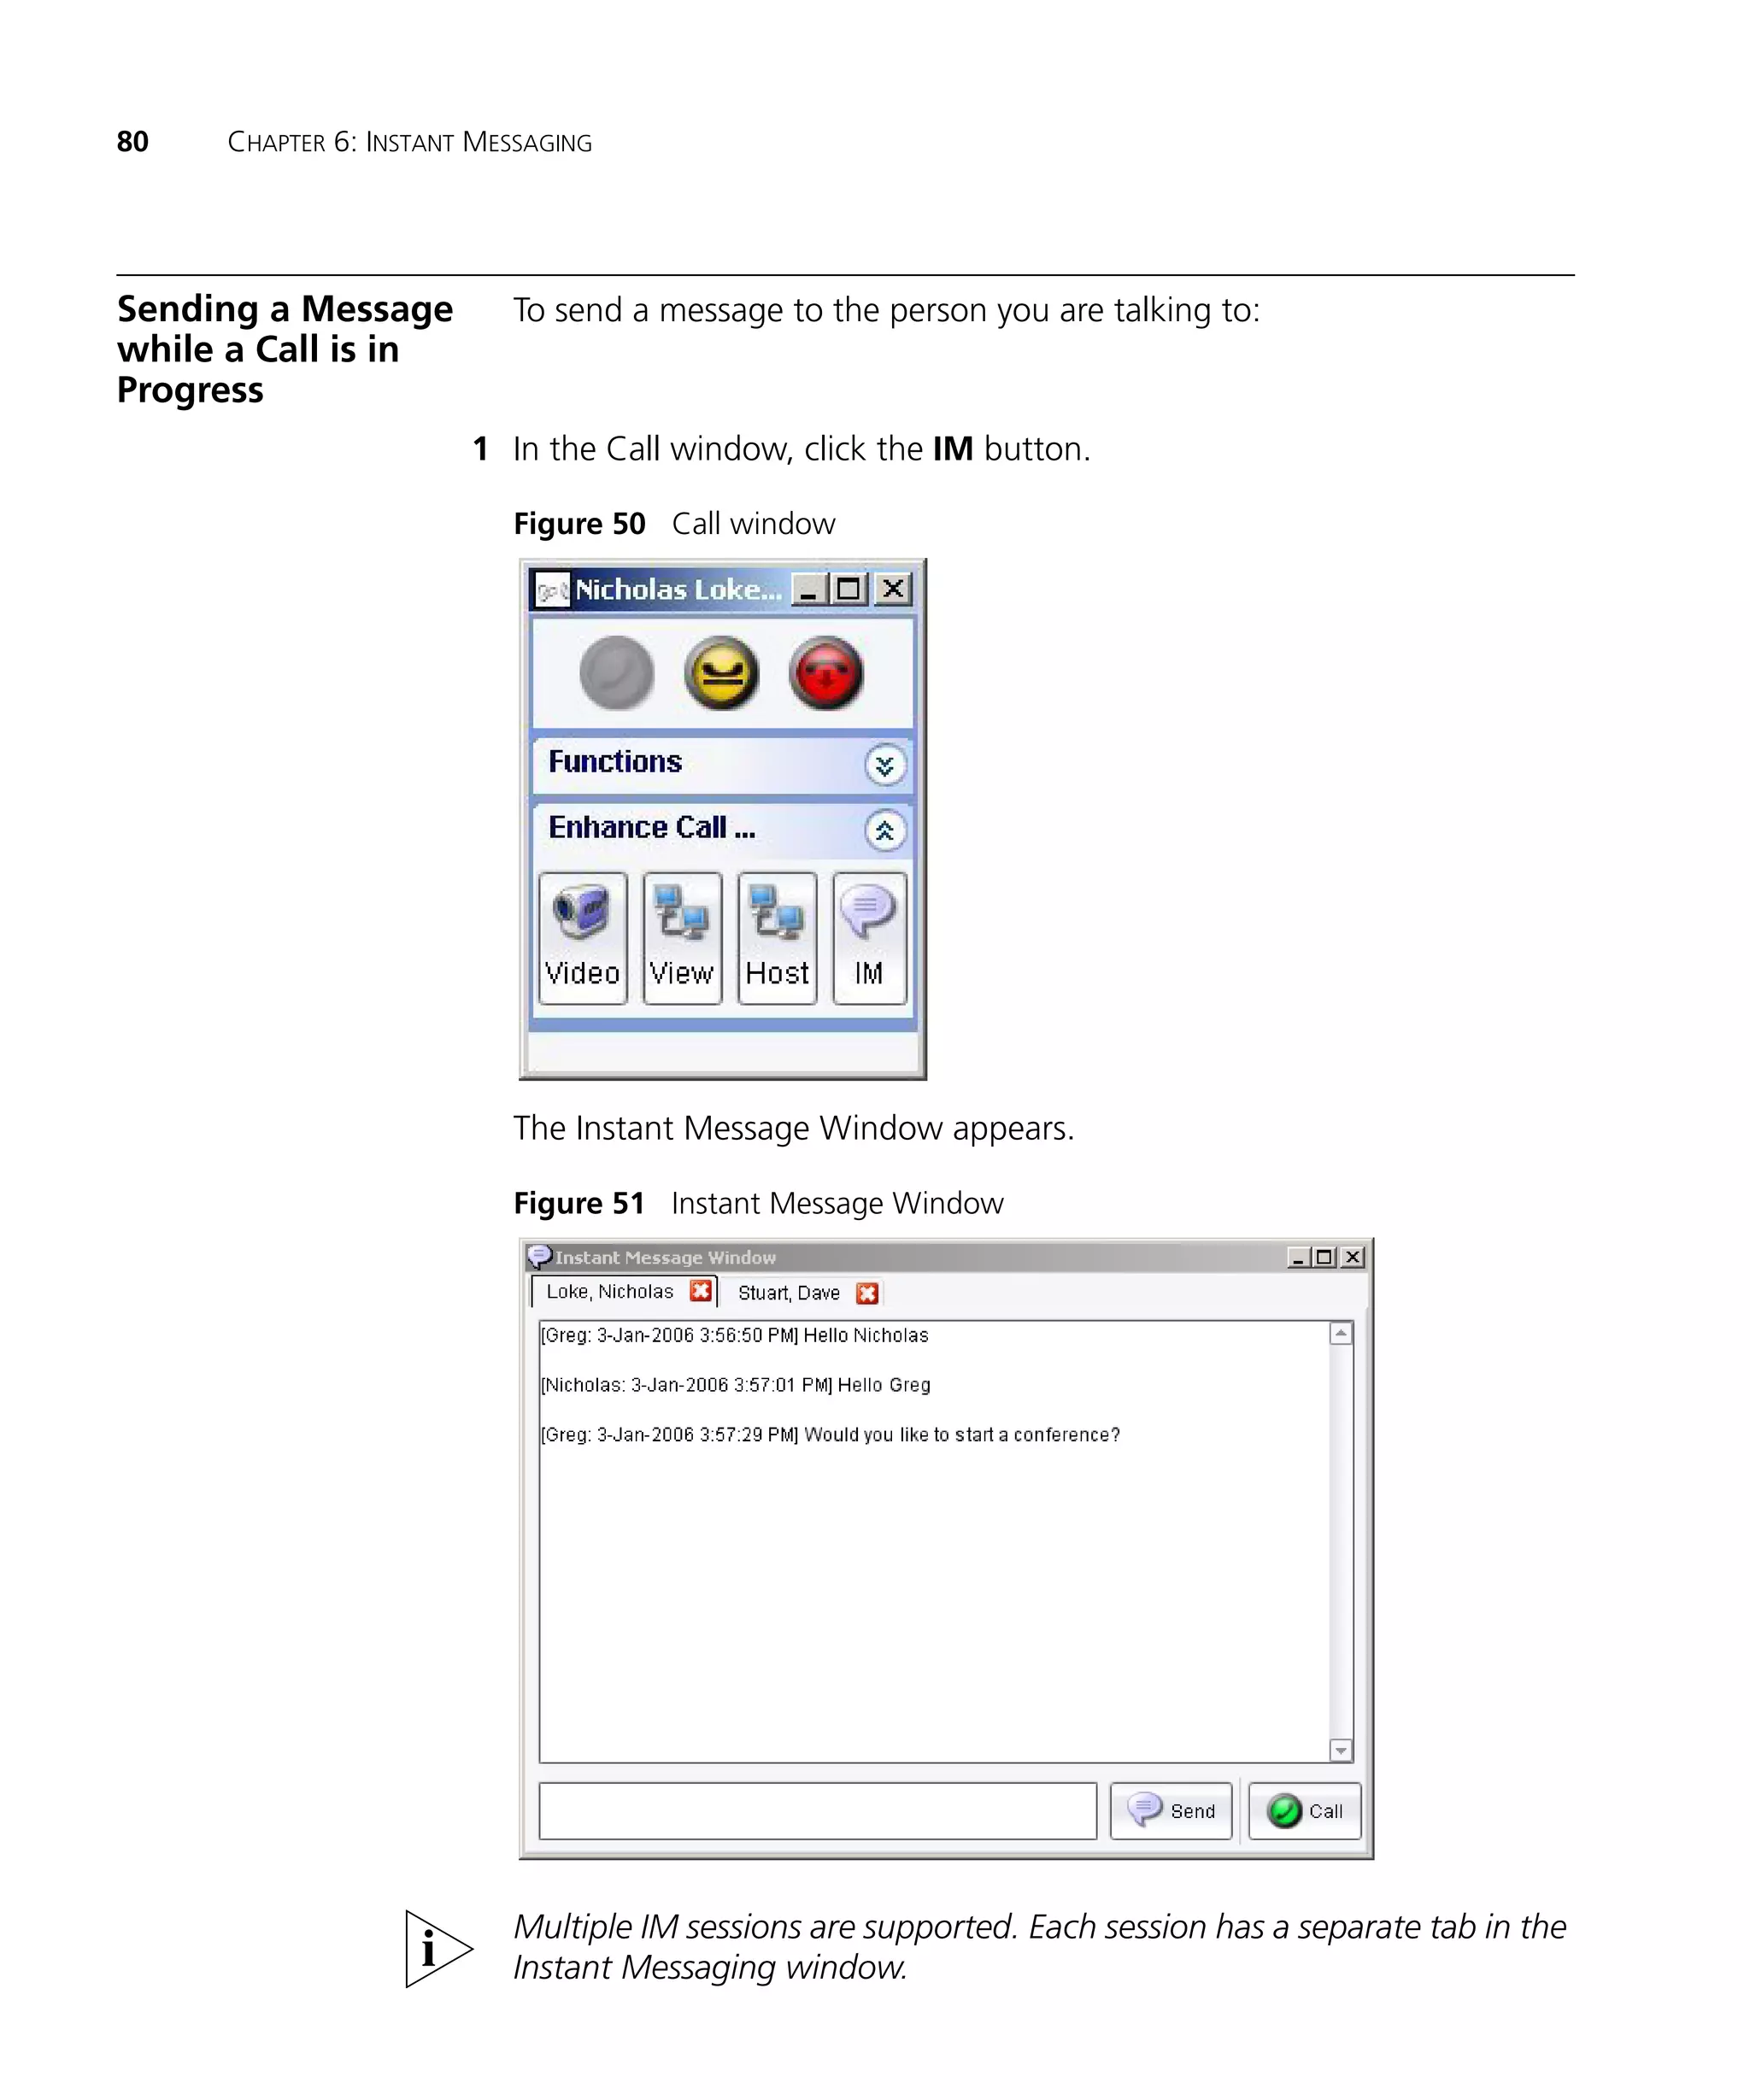
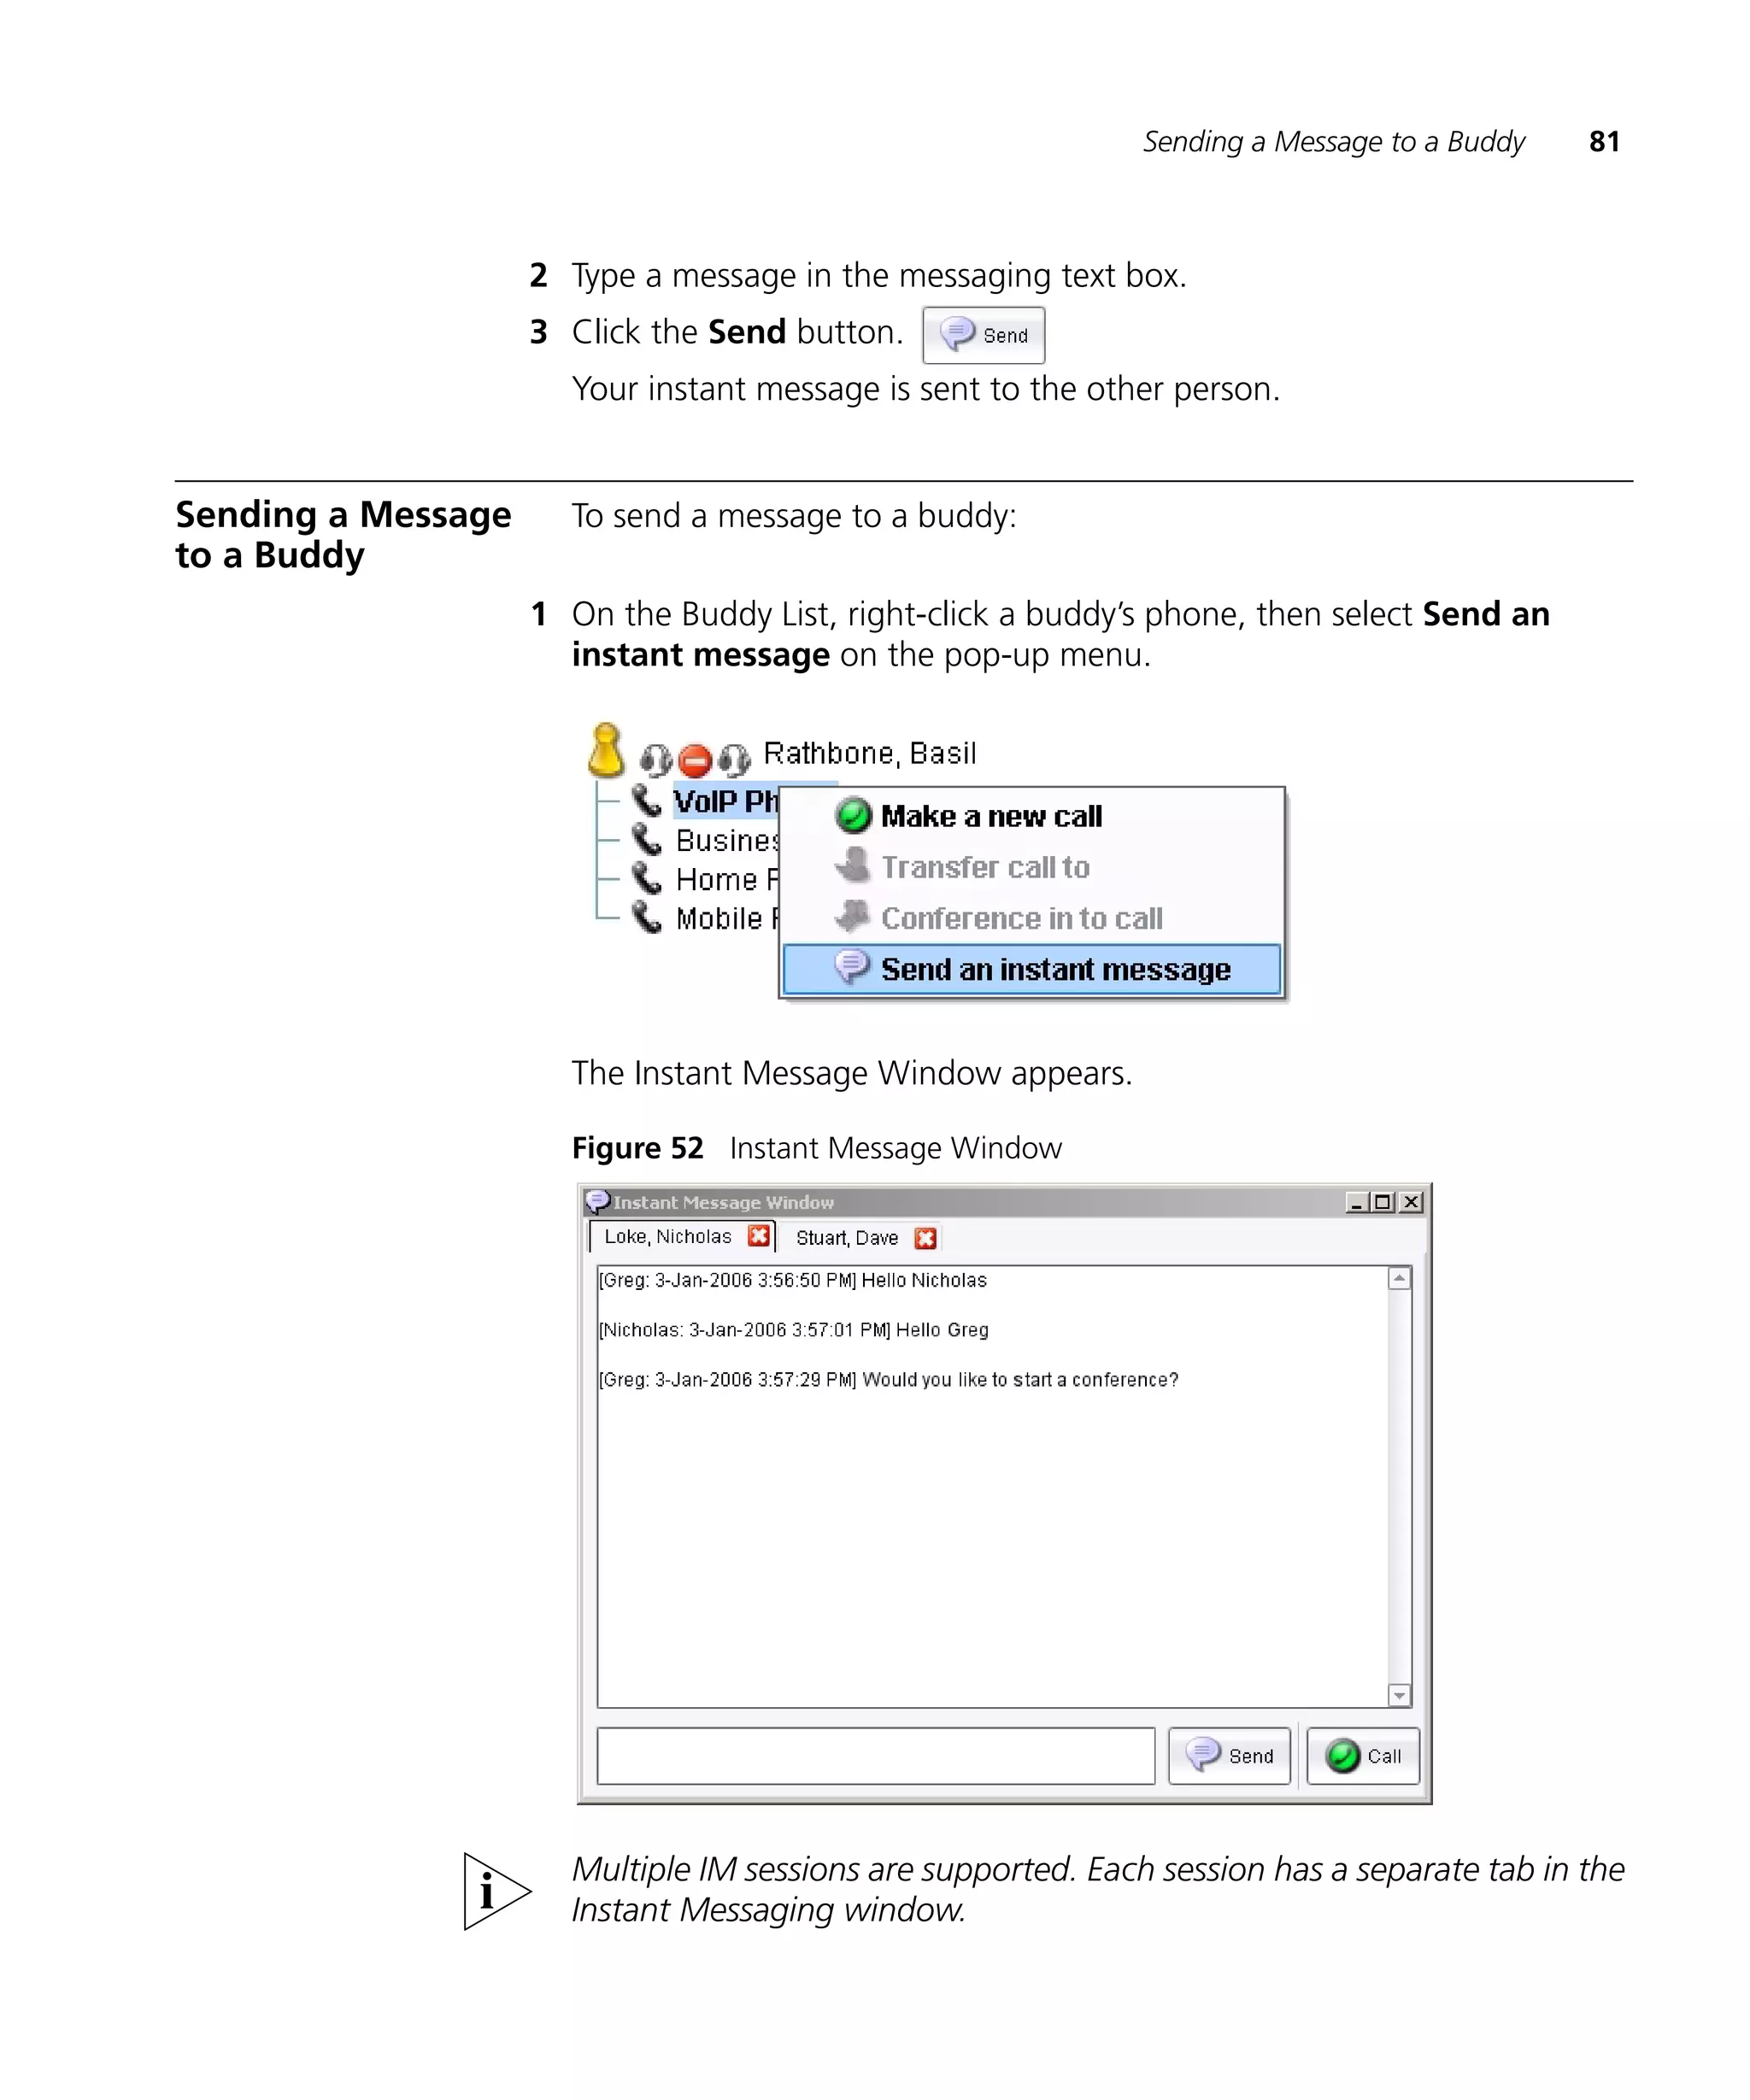


The 3Com Convergence Center Client is a Java application that allows users to make voice and video calls, share desktops, and exchange instant messages over IP networks. It integrates unified communications features like presence, contacts, voicemail, and conferencing. The client works with Windows 2000/XP and requires a sound card, microphone, and webcam (optional) for multimedia functionality. It connects users to the 3Com VCX IP telephony system for real-time collaboration.


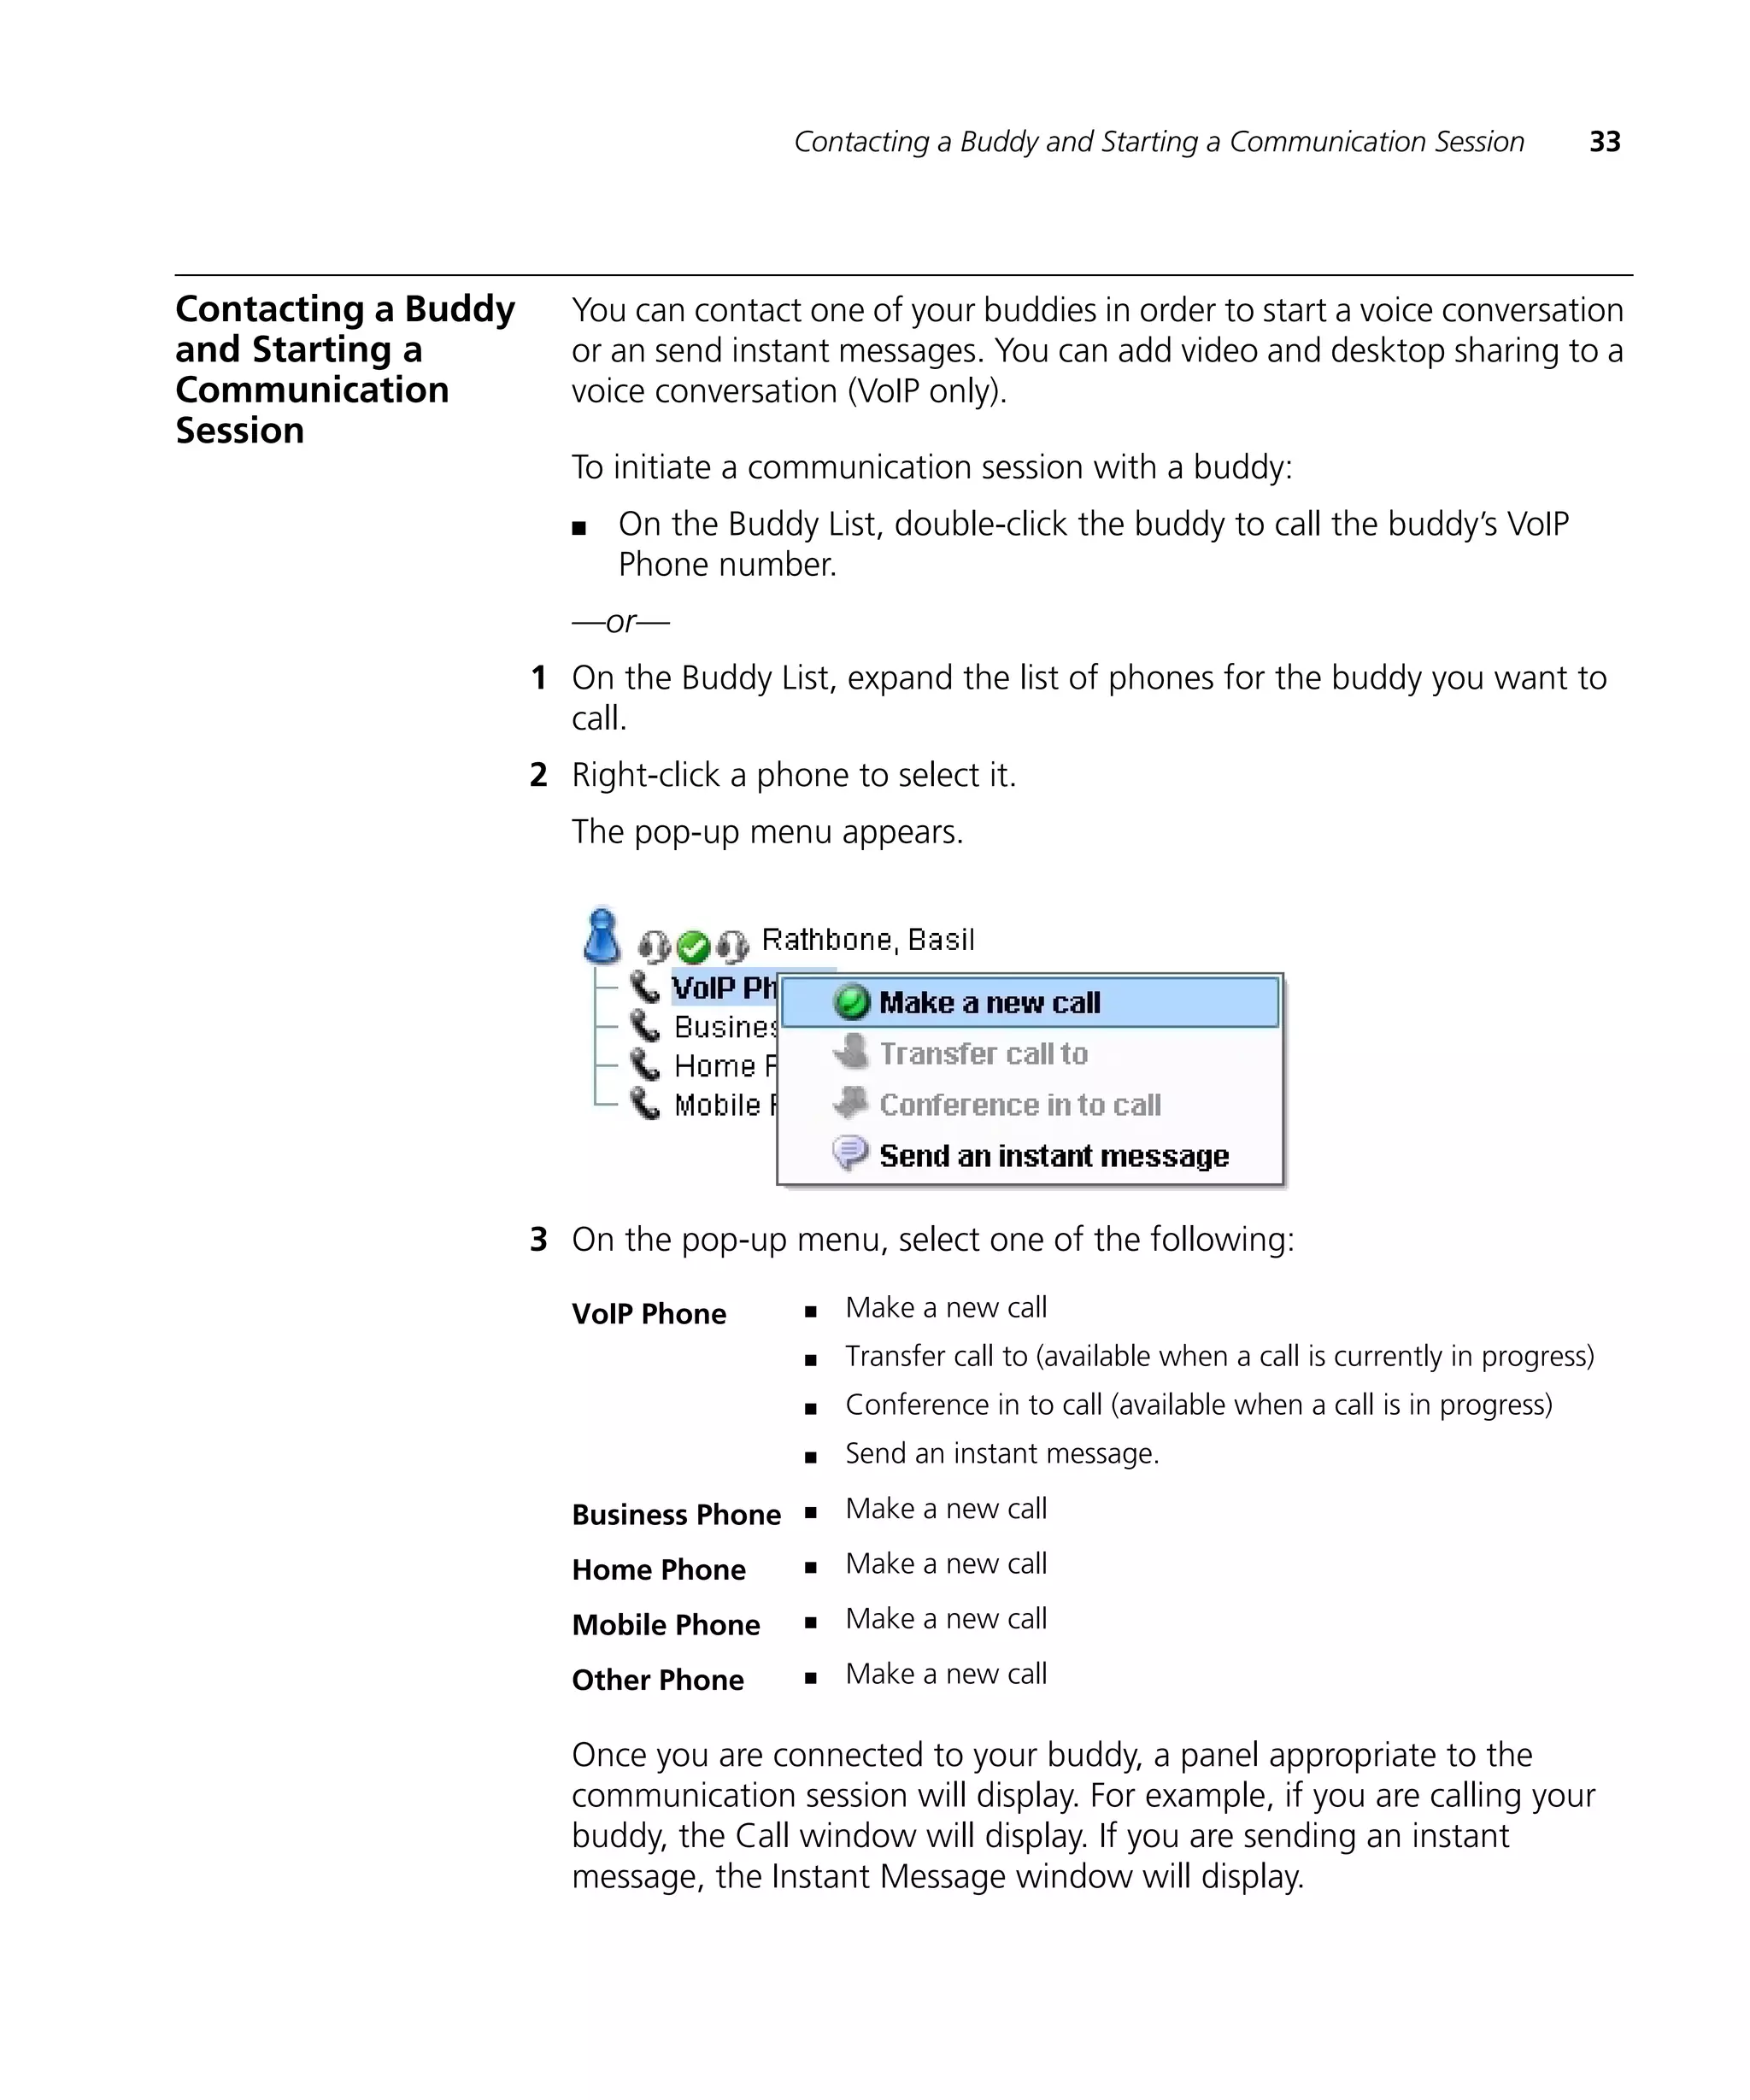
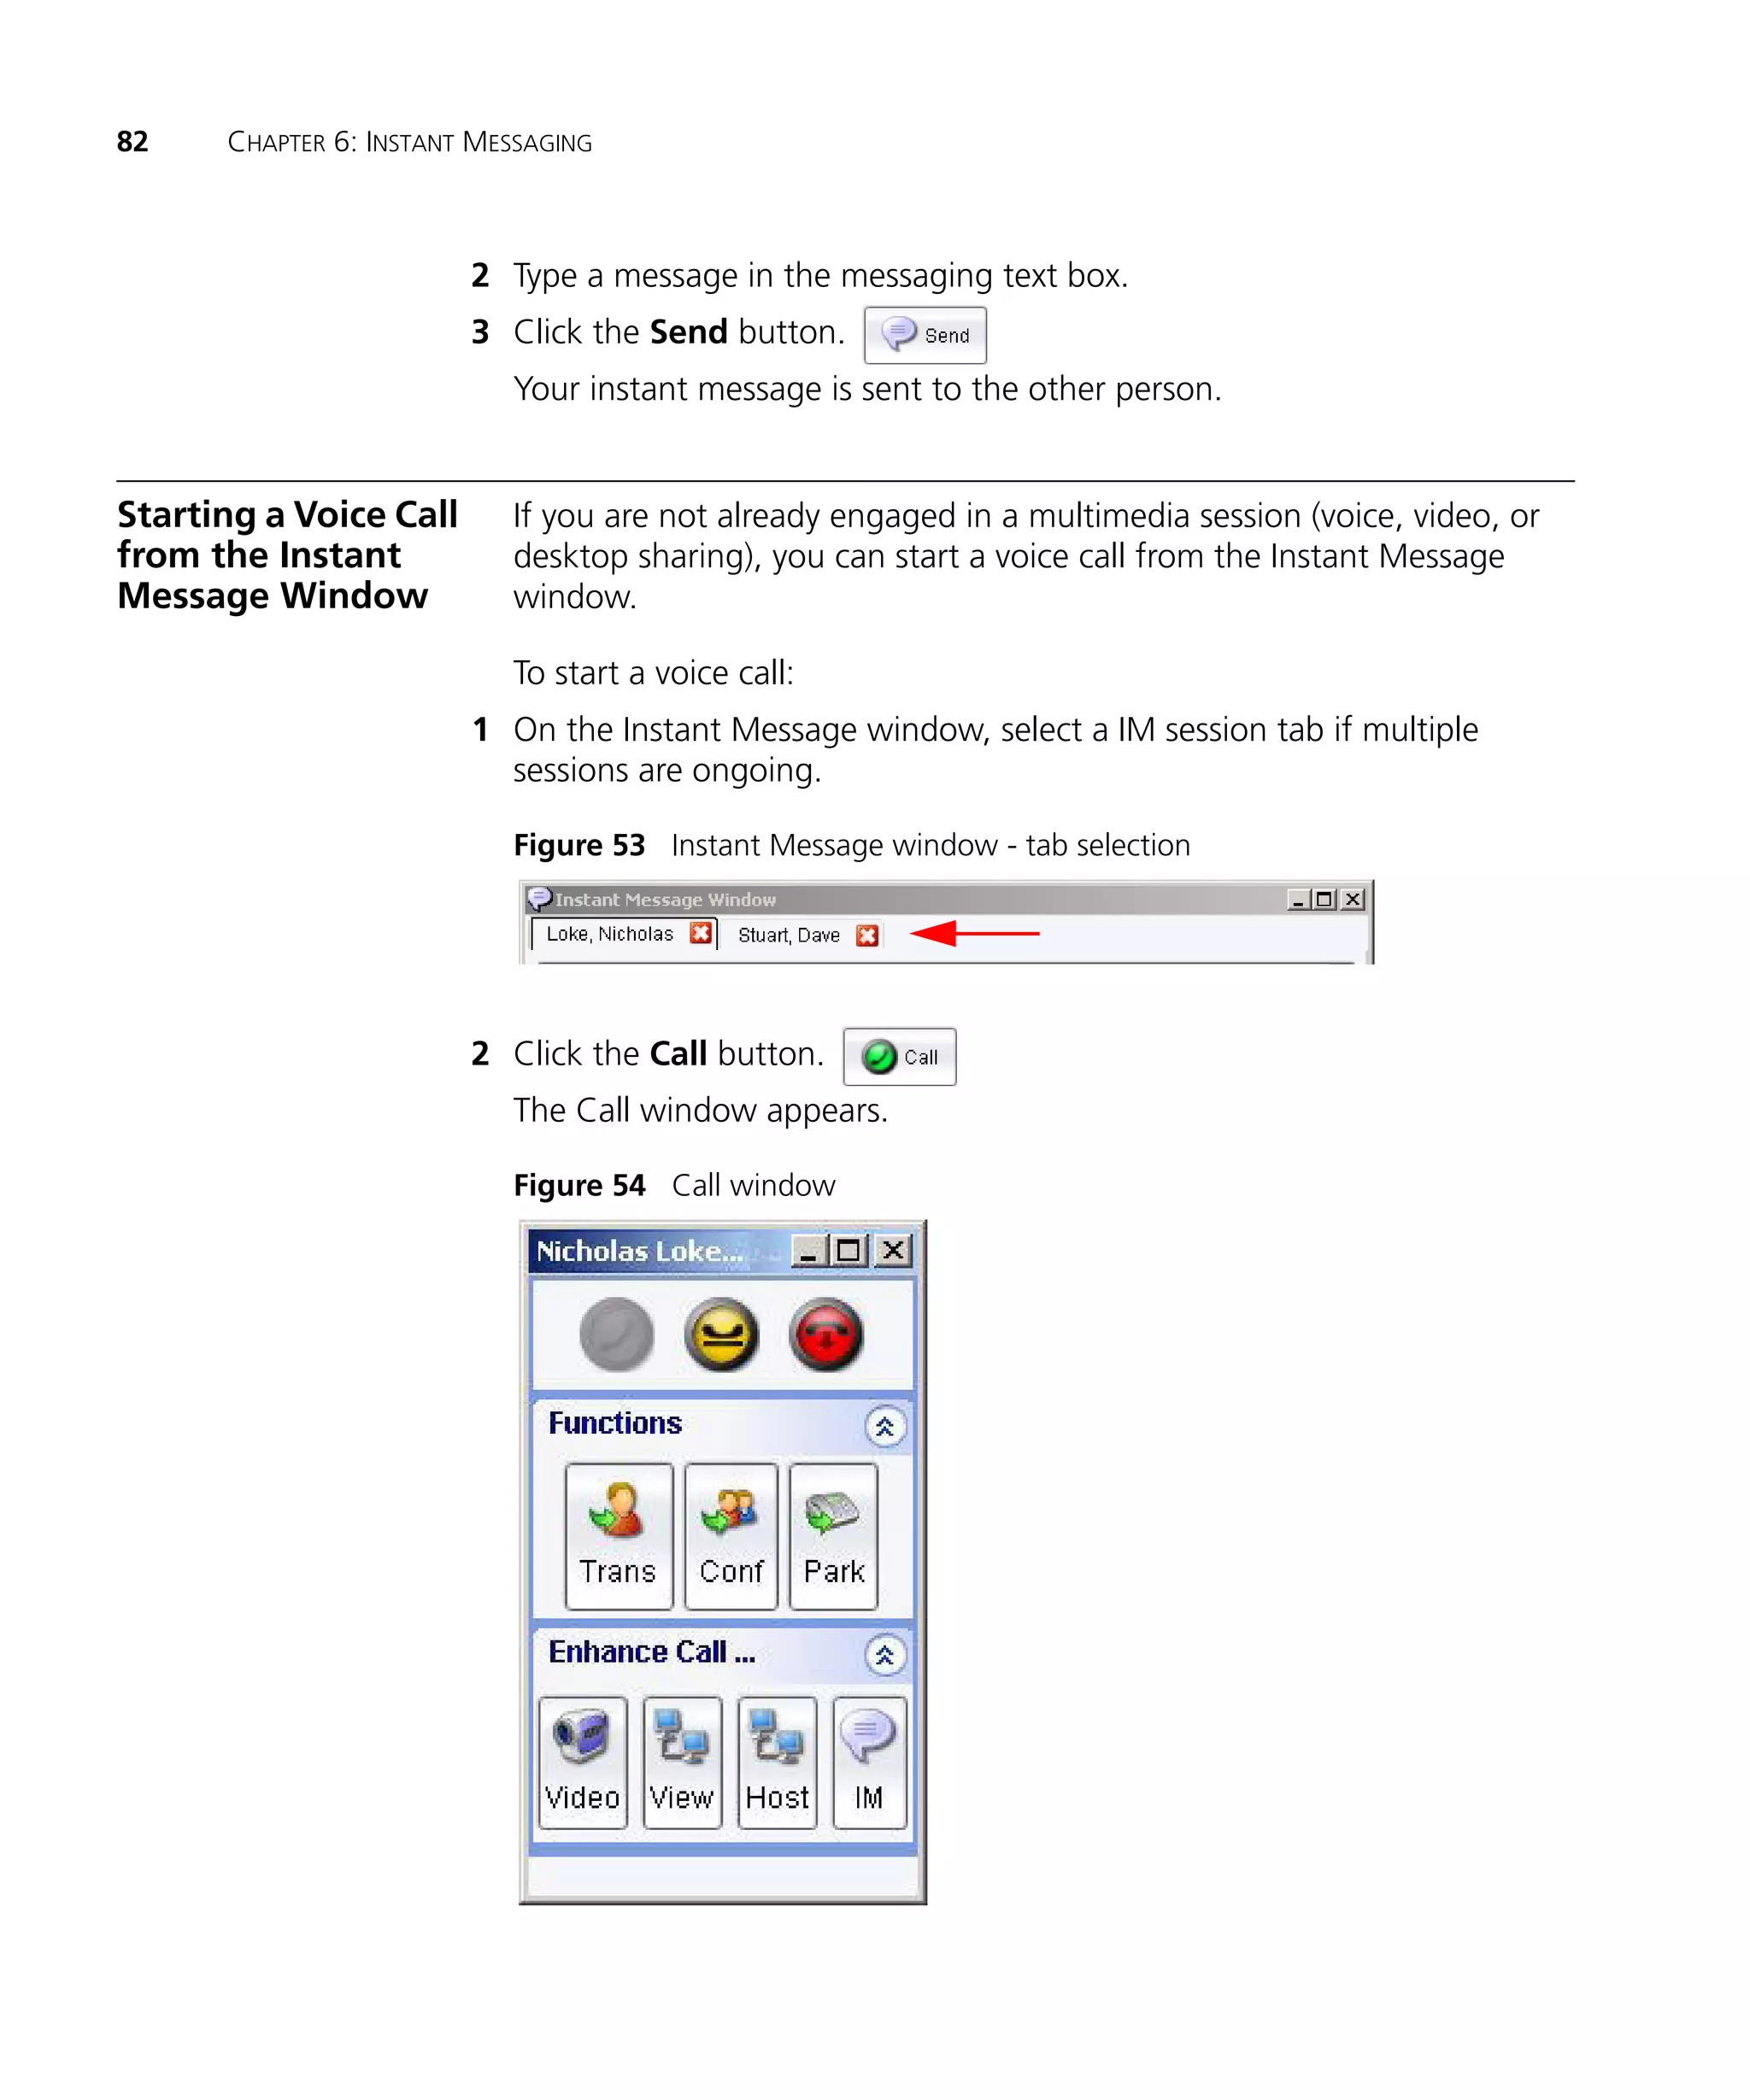
![Coded Agents – with UiPath SDK + LangGraph [Virtual Hands-on Workshop]](https://cdn.slidesharecdn.com/ss_thumbnails/codedagentsdeck-251215155422-5497c599-thumbnail.jpg?width=640&height=640&fit=bounds)


