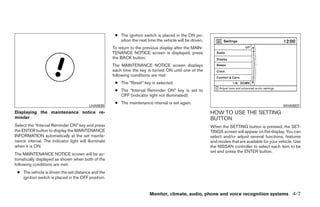
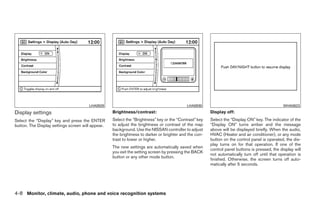
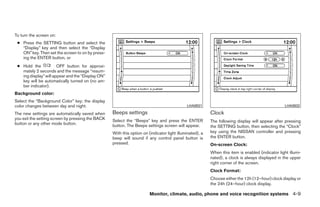
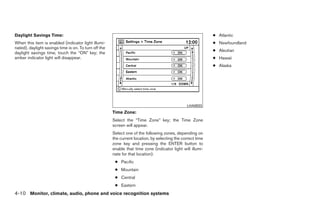
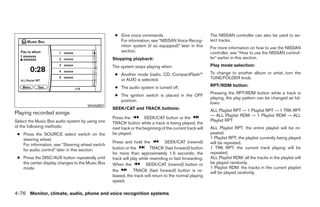
Download as PDF, PPTX


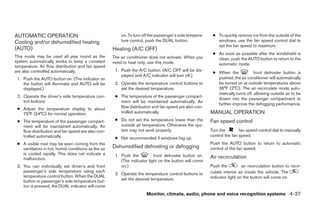
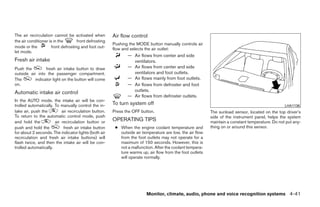
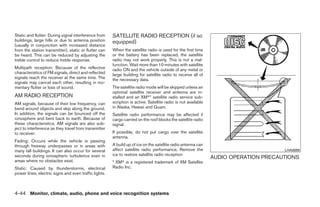
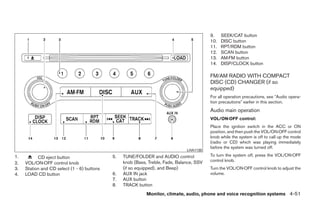


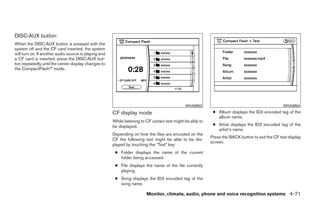
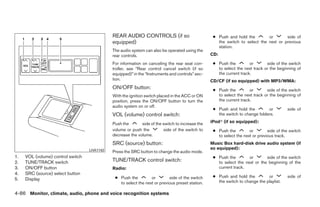
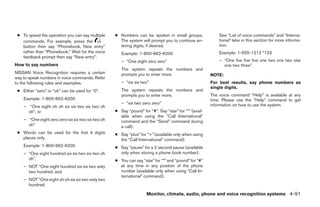
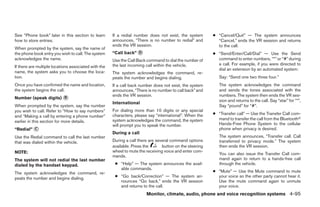
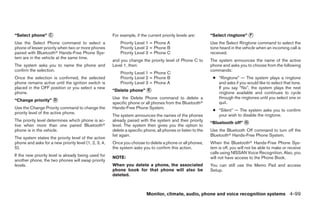
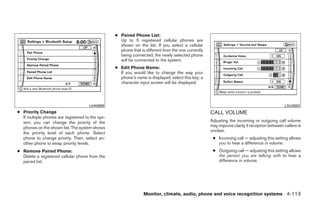
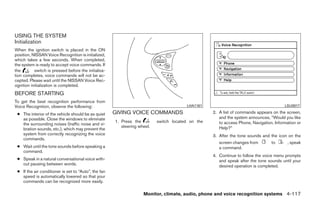
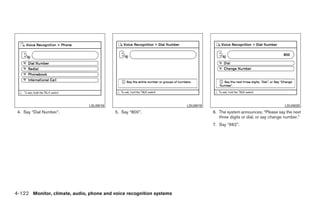
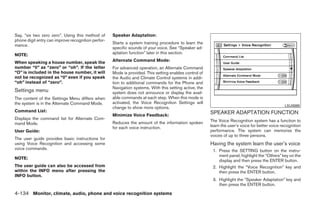
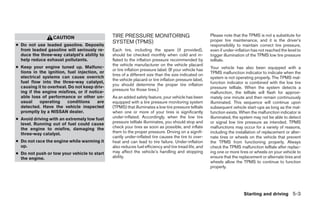
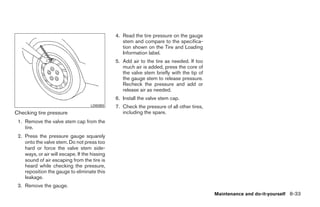
![● Albums RPT/RDM button: MUSIC BOX HARD-DISK DRIVE
● Artists When the RPT/RDM button is pressed while a AUDIO SYSTEM (if so equipped)
track is being played, the play pattern can be
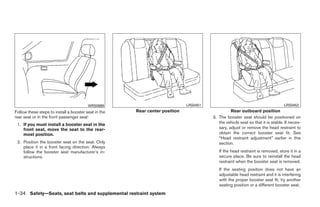
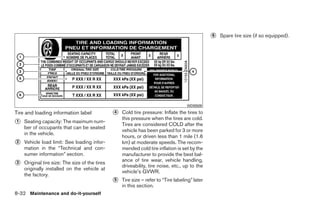
● Genres changed as follows:
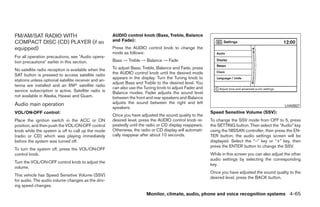
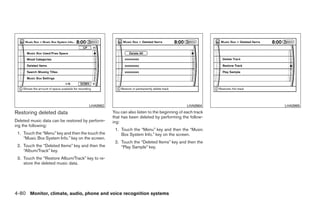
The Music Box hard-disk drive audio system can
store songs from CDs being played. The system
● Composers SHUFFLE OFF/RPT OFF → SHUFFLE OFF/1 has a 9.3 gigabyte (GB) storage capacity and
● Audiobooks TRK RPT → SHUFFLE OFF/ALL RPT → TRK can record up to 200 hours (approximately 2,900
SHUFFLE/RPT OFF → TRK SHUFFLE/ALL RPT songs).
The following keys shown on the screen are also → ALBUM SHUFFLE/RPT OFF → ALBUM The following CDs can be recorded in the Music
available: SHUFFLE/ALL RPT → SHUFFLE OFF/RPT OFF Box hard-disk drive audio system:
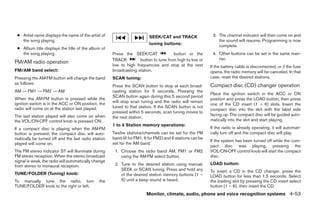
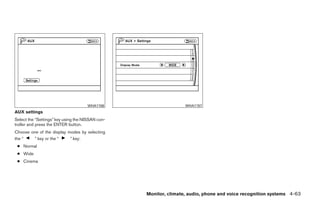
● MENU: returns to the previous screen. SHUFFLE OFF/RPT OFF: the iPodா will be ● CDs without MP3/WMA files.
played normally.
● : plays/pauses the music selected. SHUFFLE OFF/1 TRK RPT: the current track ● Hybrid Compact Disc Digital Audio (Hybrid
SEEK/CAT and TRACK buttons: playing will be repeated. CD-DA) specification in Super Audio CDs.
SHUFFLE OFF/ALL RPT: All tracks will be re-
● Compact Disc Digital Audio (CD-DA) speci-
When the SEEK/CAT button or peated.
fication in CD-Extras.
TRACK button is pressed for less than 1.5 sec- TRK SHUFFLE/RPT OFF: the tracks will be
onds while the iPodா is playing, the next track or played in a mixed order. ● First session of multisession disc.
TRK SHUFFLE/ALL RPT: the tracks will be
the beginning of the current track on the iPodா Extreme temperature conditions [below Ϫ4°F
will be played. played in a mixed order and will be repeated.
(Ϫ20°C) and above 158°F (70°C)] could affect
ALBUM SHUFFLE/RPT OFF: the albums on the
the performance of the hard disk.
When the SEEK/CAT button or iPodா will be played in a mixed order.
TRACK button is pressed for more than 1.5 sec- ALBUM SHUFFLE/ALL RPT: the albums on the
NOTE:
onds while the iPodா is playing, the iPodா will iPodா will be played in a mixed order and re-
play while fast forwarding or rewinding. When the peated. If the hard disk needs to be replaced due to
a malfunction, all stored music data will be
button is released, the iPodா will return to the
erased.
normal play speed.
The NISSAN controller can also be used to se-
lect tracks when the iPodா is playing.
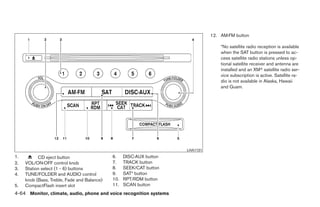
4-74 Monitor, climate, audio, phone and voice recognition systems
੬ REVIEW COPY—2009 Maxima (max)
Owners Manual—USA_English (nna)
11/03/08—debbie ੭](https://image.slidesharecdn.com/2009-maxima-120818113325-phpapp02/85/2009-MAXIMA-OWNER-S-MANUAL-229-320.jpg)
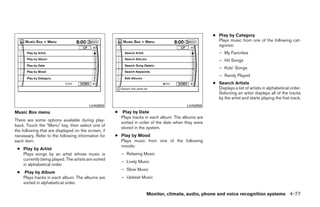
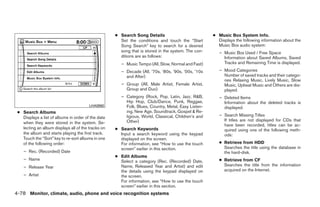
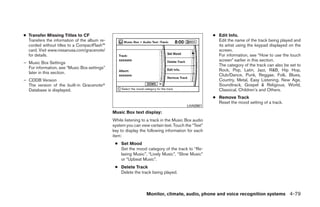


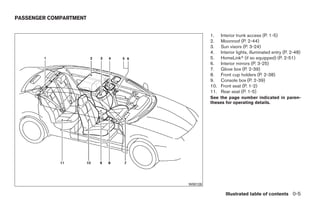
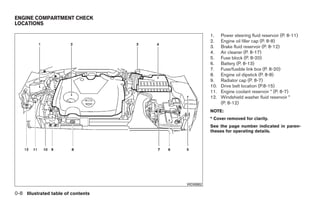
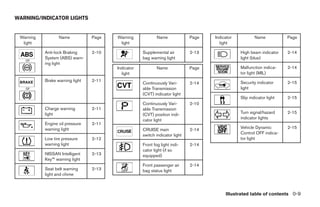
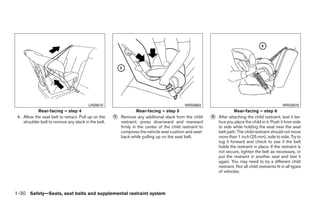
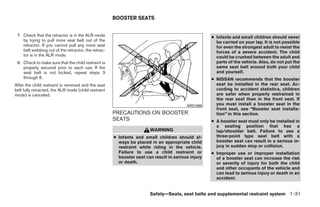
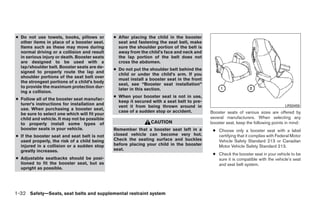
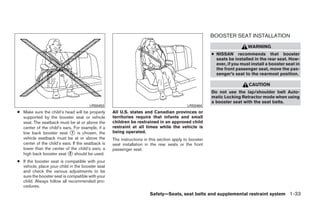
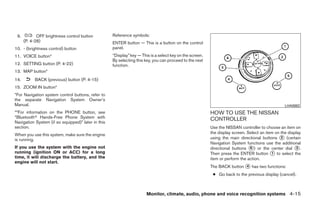
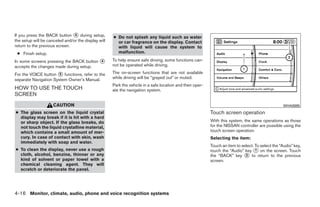
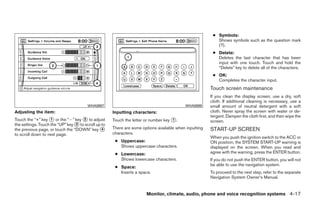
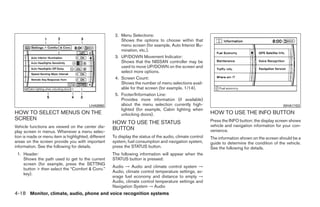
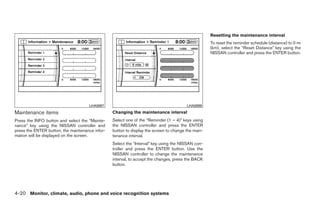
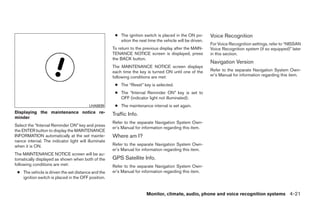
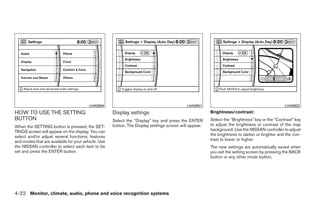
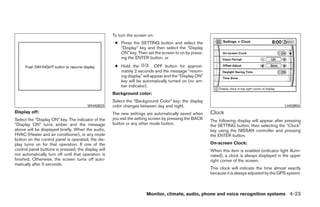
This document provides an overview of vehicle features and safety information for drivers. It begins with forewords about reading the manual and vehicle safety. The main sections describe vehicle modifications, important safety reminders, and how to get assistance from Nissan. Diagrams illustrate airbags, seat belts, child restraints, vehicle exteriors, the passenger compartment, and the instrument panel. The document emphasizes the importance of understanding vehicle features for safe driving.


