Success in endodontictreatment depends almost completely on how
well the root canal is shaped and cleaned. Because cleaning and
shaping is the most important phase of endodontic treatment.
o Cleaning refers to use of antimicrobial agents to remove
microorganisms and pulpal debris from the entire root canal
system.
Shaping produces a gradual smooth taper in the root canal with
its widest part coronally and the narrowest part at the apical
constriction, which is normally about 1 mm short of the apex.
.
3.
SCHILDER described fiveMECHANICAL objectives:
I. Continuously tapering funnel from the
apex to the access cavity.
II. Cross-sectional diameter should be
narrower at every point apically.
III. The root canal preparation should flow with the
shape of the original canal.
IV. The apical foramen should remain in its original
position.
V. The apical opening should be kept as small as
practical.
4.
I. Confinement ofinstrumentation to the
roots themselves.
II. No forcing of necrotic debris beyond
the foramen.
III. Removal of all tissue and potential
irritants from the root canal space.
IV. Creation of sufficient space for intra-
canal medicaments.
5.
According to Grossman–
Thorough debridement of root canal.
Specific shaping of root canal preparation to
receive a specific type of filling.
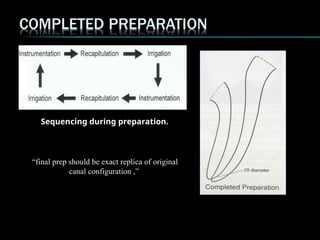
To ensure thorough debridement and proper
shaping for obturation certain principles must
be followed.
6.
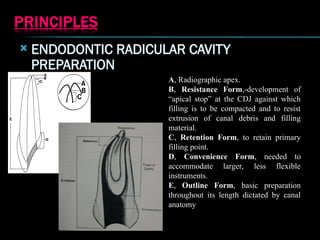
ENDODONTIC RADICULARCAVITY
PREPARATION
A, Radiographic apex.
B, Resistance Form,-development of
“apical stop” at the CDJ against which
filling is to be compacted and to resist
extrusion of canal debris and filling
material.
C, Retention Form, to retain primary
filling point.
D, Convenience Form, needed to
accommodate larger, less flexible
instruments.
E, Outline Form, basic preparation
throughout its length dictated by canal
anatomy
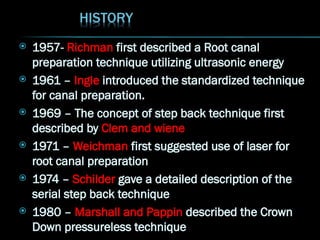
7.
1957- Richmanfirst described a Root canal
preparation technique utilizing ultrasonic energy
1961 – Ingle introduced the standardized technique
for canal preparation.
1969 – The concept of step back technique first
described by Clem and wiene
1971 – Weichman first suggested use of laser for
root canal preparation
1974 – Schilder gave a detailed description of the
serial step back technique
1980 – Marshall and Pappin described the Crown
Down pressureless technique
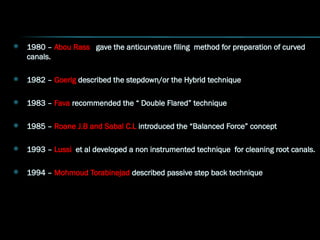
8.
1980 –Abou Rass gave the anticurvature filing method for preparation of curved
canals.
1982 – Goerig described the stepdown/or the Hybrid technique
1983 – Fava recommended the “ Double Flared” technique
1985 – Roane J.B and Sabal C.L introduced the “Balanced Force” concept
1993 – Lussi et al developed a non instrumented technique for cleaning root canals.
1994 – Mohmoud Torabinejad described passive step back technique
9.
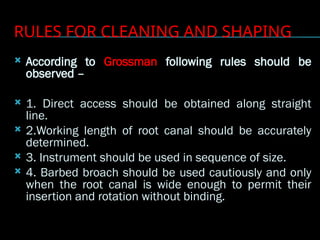
RULES FOR CLEANINGAND SHAPING
According to Grossman following rules should be
observed –
1. Direct access should be obtained along straight
line.
2.Working length of root canal should be accurately
determined.
3. Instrument should be used in sequence of size.
4. Barbed broach should be used cautiously and only
when the root canal is wide enough to permit their
insertion and rotation without binding.
10.
5. Instrumentshould be used with a quarter to
half turn and withdrawn with a pull stroke.
6. Instrument should be fitted with instrument
stop.
7. One must not force an instrument if it bind.
11.
8. Instrumentshould be confined to the root canal to
prevent trauma to periradicular tissue.
9. Periodic recapitulation helps to prevent the packing
of dentin filings and ensure patency of the root canal
through to the apical foramen.
10. The apical portion of a root canal, 3 to 4 mm
should be enlarged to facilitate the flow of irrigant to
the biologically crucial apical third.
11. The remainder of root canal should be enlarged to
maintain the original tapered canal configuration.
12.
12. Debrisshould not be force through the
apical foramen
13. All instrumentation should be done using
sterile instrument in a wet canal.
14. Instrument should be checked for
deformation and discarded if strain is present.
15.Always precurve the file before
instrumentation.
13.
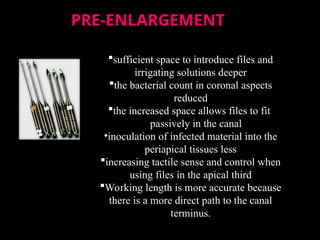
PRE-ENLARGEMENT
PRE-ENLARGEMENT
sufficient space tointroduce files and
irrigating solutions deeper
the bacterial count in coronal aspects
reduced
the increased space allows files to fit
passively in the canal
•inoculation of infected material into the
periapical tissues less
increasing tactile sense and control when
using files in the apical third
Working length is more accurate because
there is a more direct path to the canal
terminus.
14.
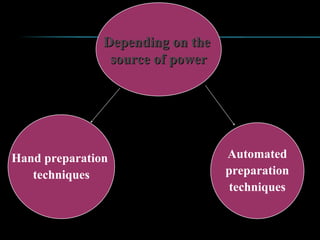
1.
1. Manual
Manual
2.
2. Automatedor rotary
Automated or rotary
3.
3. Ultrasonic and sonic preparation
Ultrasonic and sonic preparation
4.
4. LASER preparation
LASER preparation
5.
5. Non Instrumentation Technique (NIT)
Non Instrumentation Technique (NIT)
15.
Hybrid technique
Hybrid technique
Stepback step down combination procedure
Step back step down combination procedure
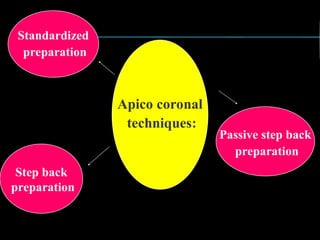
Apical coronal preparation technique
Apical coronal preparation technique
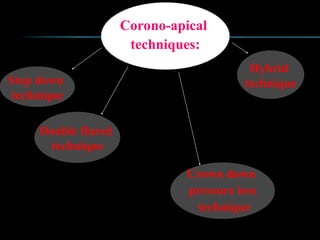
Coronal apical preparation technique
Coronal apical preparation technique
Apical coronal
Apical coronal
Standardized preparation
Standardized preparation
Step back preparation & modifications
Step back preparation & modifications
Coronal apical
Coronal apical
Step down tech
Step down tech
Double flare tech
Double flare tech
crown down pressureless tech
crown down pressureless tech
Manual
Manual
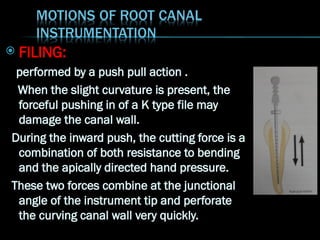
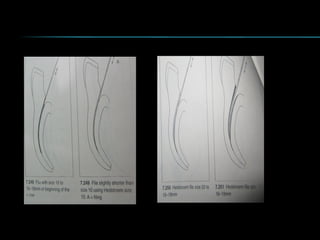
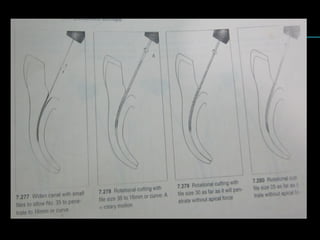
FILING:
performed bya push pull action .
When the slight curvature is present, the
forceful pushing in of a K type file may
damage the canal wall.
During the inward push, the cutting force is a
combination of both resistance to bending
and the apically directed hand pressure.
These two forces combine at the junctional
angle of the instrument tip and perforate
the curving canal wall very quickly.
20.
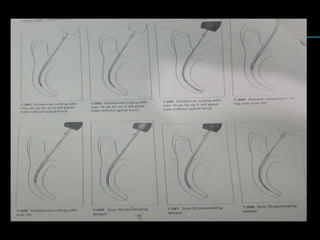
With Hedstromtype instruments, filing is
effective during withdrawal motions as they do
not engage during insertion action. A major
limitation of filing with a Hedstrom is that it can
cut through only the middle of a curvature.
Excessive filing can cause strip perforation of
the side of the root.
21.
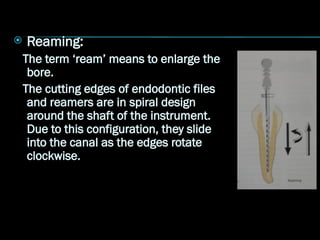
Reaming:
The term‘ream’ means to enlarge the
bore.
The cutting edges of endodontic files
and reamers are in spiral design
around the shaft of the instrument.
Due to this configuration, they slide
into the canal as the edges rotate
clockwise.
22.
As they slideinto the canal, more and more of the
length of the instrument is engaged into the canal.
This in turn increases the strain or working load on
the instrument.
If it gets stuck, stop any further rotation at once. It
should be gradually and gently withdrawn after
giving one quarter anti clock wise turn.
23.
The leastaggressive instrument action
Quarter turn using small size #8 and #10 to reach
working length
24.
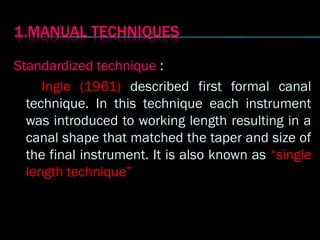
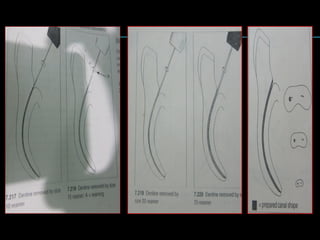
Standardized technique :
Ingle(1961) described first formal canal
technique. In this technique each instrument
was introduced to working length resulting in a
canal shape that matched the taper and size of
the final instrument. It is also known as “single
length technique”
26.
Currently usedwith Protaper and MTwo NiTi
rotary instruments.
After final shaping of canal with last instrument
used in canal, a single matching gutta percha
point may then be used for root canal filling.
27.
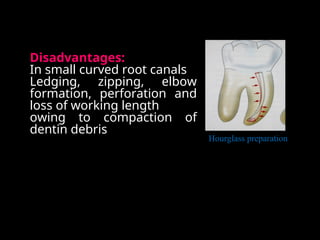
Disadvantages:
In small curvedroot canals
Ledging, zipping, elbow
formation, perforation and
loss of working length
owing to compaction of
dentin debris
Hourglass preparation
28.
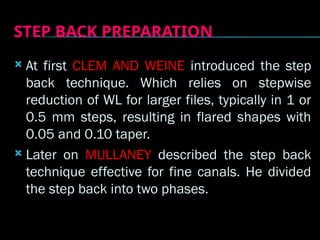
STEP BACK PREPARATION
At first CLEM AND WEINE introduced the step
back technique. Which relies on stepwise
reduction of WL for larger files, typically in 1 or
0.5 mm steps, resulting in flared shapes with
0.05 and 0.10 taper.
Later on MULLANEY described the step back
technique effective for fine canals. He divided
the step back into two phases.
29.
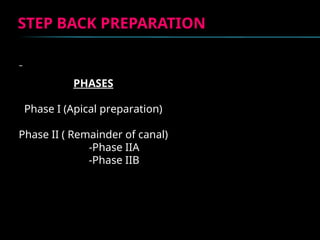
STEP BACK PREPARATION
STEPBACK PREPARATION
PHASES
Phase I (Apical preparation)
Phase II ( Remainder of canal)
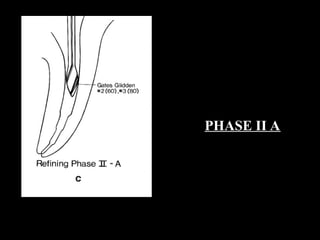
-Phase IIA
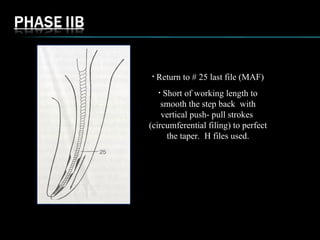
-Phase IIB
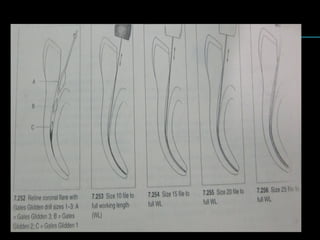
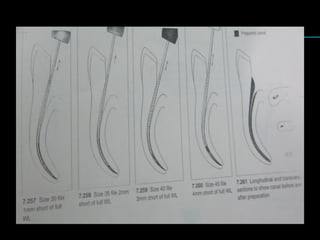
30.
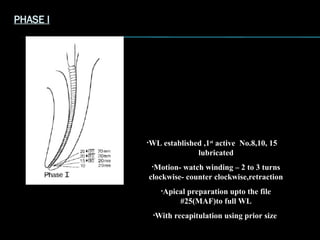
PHASE I
•WL established,1st
active No.8,10, 15
lubricated
•Motion- watch winding – 2 to 3 turns
clockwise- counter clockwise,retraction
•Apical preparation upto the file
#25(MAF)to full WL
•With recapitulation using prior size
31.
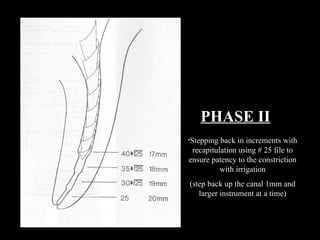
PHASE II
•Stepping backin increments with
recapitulation using # 25 file to
ensure patency to the constriction
with irrigation
(step back up the canal 1mm and
larger instrument at a time)
• Return to# 25 last file (MAF)
• Short of working length to
smooth the step back with
vertical push- pull strokes
(circumferential filing) to perfect
the taper. H files used.
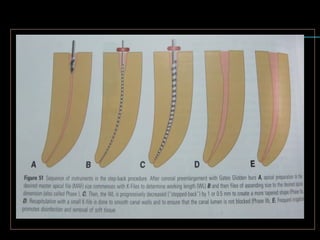
34.
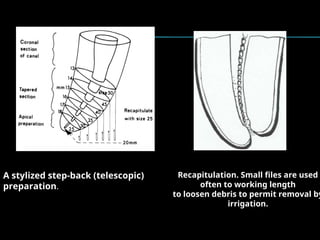
Recapitulation. Small filesare used
often to working length
to loosen debris to permit removal by
irrigation.
A stylized step-back (telescopic)
preparation.
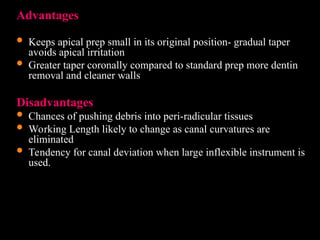
Advantages
Advantages
Keeps apicalprep small in its original position- gradual taper
Keeps apical prep small in its original position- gradual taper
avoids apical irritation
avoids apical irritation
Greater taper coronally compared to standard prep more dentin
Greater taper coronally compared to standard prep more dentin
removal and cleaner walls
removal and cleaner walls
Disadvantages
Disadvantages
Chances of pushing debris into peri-radicular tissues
Chances of pushing debris into peri-radicular tissues
Working Length likely to change as canal curvatures are
Working Length likely to change as canal curvatures are
eliminated
eliminated
Tendency for canal deviation when large inflexible instrument is
Tendency for canal deviation when large inflexible instrument is
used.
used.
38.
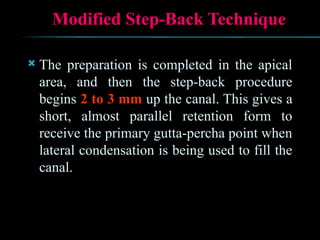
Modified Step-Back Technique
The preparation is completed in the apical
area, and then the step-back procedure
begins 2 to 3 mm up the canal. This gives a
short, almost parallel retention form to
receive the primary gutta-percha point when
lateral condensation is being used to fill the
canal.
39.
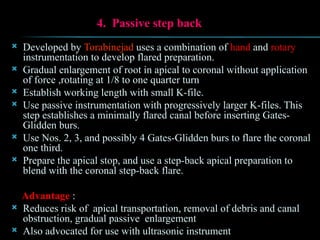
4. Passive stepback
Developed by Torabinejad uses a combination of hand and rotary
instrumentation to develop flared preparation.
Gradual enlargement of root in apical to coronal without application
of force ,rotating at 1/8 to one quarter turn
Establish working length with small K-file.
Use passive instrumentation with progressively larger K-files. This
step establishes a minimally flared canal before inserting Gates-
Glidden burs.
Use Nos. 2, 3, and possibly 4 Gates-Glidden burs to flare the coronal
one third.
Prepare the apical stop, and use a step-back apical preparation to
blend with the coronal step-back flare.
Advantage :
Reduces risk of apical transportation, removal of debris and canal
obstruction, gradual passive enlargement
Also advocated for use with ultrasonic instrument
40.
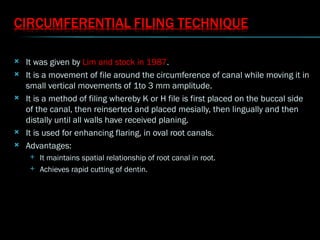
It wasgiven by Lim and stock in 1987.
It is a movement of file around the circumference of canal while moving it in
small vertical movements of 1to 3 mm amplitude.
It is a method of filing whereby K or H file is first placed on the buccal side
of the canal, then reinserted and placed mesially, then lingually and then
distally until all walls have received planing.
It is used for enhancing flaring, in oval root canals.
Advantages:
It maintains spatial relationship of root canal in root.
Achieves rapid cutting of dentin.
41.
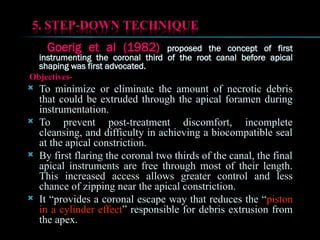
Goerig et al(1982) proposed the concept of first
instrumenting the coronal third of the root canal before apical
shaping was first advocated.
Objectives-
To minimize or eliminate the amount of necrotic debris
that could be extruded through the apical foramen during
instrumentation.
To prevent post-treatment discomfort, incomplete
cleansing, and difficulty in achieving a biocompatible seal
at the apical constriction.
By first flaring the coronal two thirds of the canal, the final
apical instruments are free through most of their length.
This increased access allows greater control and less
chance of zipping near the apical constriction.
It “provides a coronal escape way that reduces the “piston
in a cylinder effect” responsible for debris extrusion from
the apex.
42.
Advantages
Permit straight lineaccess to apical region
Eliminates coronal interference
Elimination of debris and microorganisms from
the more coronal parts of the root canal system
thereby preventing inoculation of apical tissues
with contaminated debris;
43.
Early movementof large volumes of irrigant and lubricant to
the apical part of the canal;
Facilitation of accurate working length determination as coronal
curvature is eliminated early in the preparation.
Decreased deviation of instruments in canal curvatures by
reducing root wall contact.
Decrease in canal blockages;
Minimization of instrument separation by reducing contact with
canal walls;
Faster preparation which may allow one-visit root canal
treatment.
44.
PROCEDURE OF CROWNDOWN
Patency with small file
Preparation of coronal two third of canal using H files
of size 15,20 and 25 to a point where the file start
binding.
Flaring of the coronal segment of the canal with the
help of GG drill
Apical instrumentation with a small size 10 or 15 k file
followed by WL determination.
Large size file 60 is placed into canal and
instrumented using a watch winding motion untill
resistance is encounterd.
48.
The processis repeated with sequentially
smaller files until the working length is
reached.
Canal should be irrigated with appropriate
irrigants in between each change of the
instruments to facilitate debridement and
cleaning of canals.
49.
This techniquesuggested by MARSHALL AND PAPPIN
this involves the early coronal flaring with GG drill
followed by incremental removal of dentin from
coronal to apical direction.
Straight K files are then used in a large to small
sequence with a reaming motion with no apical pressure
hence called pressureless technique.
After completion of coronal access a provisional WL is
determined and a size 35 k file is introduced into the
canal with no apical directed pressure.
50.
GG drillno 2 is used to the depth explored with
a size 35 k file followed by no 3 and 4
sequentially shorten the established length.
Use the 60 file to enlarge the canal followed by
sequentially smaller file deeper into the canal.
56.
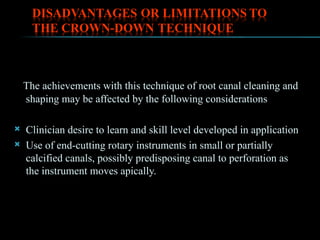
The achievements withthis technique of root canal cleaning and
shaping may be affected by the following considerations
Clinician desire to learn and skill level developed in application
Use of end-cutting rotary instruments in small or partially
calcified canals, possibly predisposing canal to perforation as
the instrument moves apically.
57.
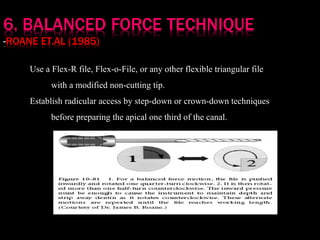
Use a Flex-Rfile, Flex-o-File, or any other flexible triangular file
with a modified non-cutting tip.
Establish radicular access by step-down or crown-down techniques
before preparing the apical one third of the canal.
58.
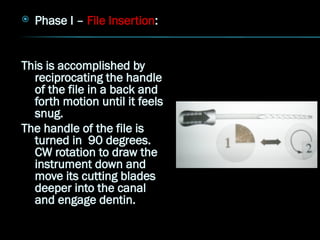
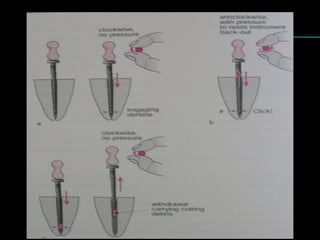
Phase I– File Insertion:
This is accomplished by
reciprocating the handle
of the file in a back and
forth motion until it feels
snug.
The handle of the file is
turned in 90 degrees.
CW rotation to draw the
instrument down and
move its cutting blades
deeper into the canal
and engage dentin.
59.
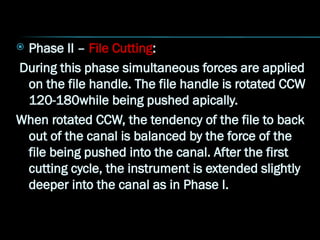
Phase II– File Cutting:
During this phase simultaneous forces are applied
on the file handle. The file handle is rotated CCW
120-180while being pushed apically.
When rotated CCW, the tendency of the file to back
out of the canal is balanced by the force of the
file being pushed into the canal. After the first
cutting cycle, the instrument is extended slightly
deeper into the canal as in Phase I.
60.
The Phase IIcutting cycle is then repeated.
Phase I and II can be repeated between 2-4
times.
Phase III – Flute Loading – The cut dentin lies
partially in the inner blade space of the file
and partially in the canal just apical to the
instrument.
61.
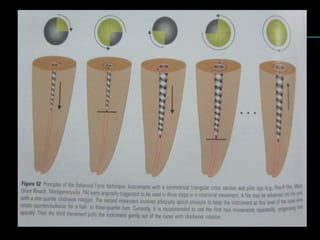
• Step 1:After pressureless insertion of a Flex-R or NiTi Flex
Step 1: After pressureless insertion of a Flex-R or NiTi Flex
K-file, the instrument is rotated clockwise 90 degrees
K-file, the instrument is rotated clockwise 90 degrees
using only light apical pressure.
using only light apical pressure.
• Step 2: The instrument is rotated counterclockwise 180 to
Step 2: The instrument is rotated counterclockwise 180 to
270 degrees; sufficient apical pressure is used to keep the
270 degrees; sufficient apical pressure is used to keep the
file at the same insertion depth during this step. Dentin
file at the same insertion depth during this step. Dentin
shavings are removed with a characteristic clicking sound.
shavings are removed with a characteristic clicking sound.
• Step 3: This step is similar to step 1 and advances the
Step 3: This step is similar to step 1 and advances the
instrument more apically.
instrument more apically.
• Step 4: After two or three cycles, the file is loaded with
Step 4: After two or three cycles, the file is loaded with
dentin shavings and is removed from the canal with a
dentin shavings and is removed from the canal with a
prolonged clockwise rotation.
prolonged clockwise rotation.
64.
The main advantagesof the Balanced force
technique are
Good apical control of the file tip as the
instrument does not cut over the complete
length,
good centring of the instrument because of
the non-cutting safety tip, and
no need to pre-curve the instrument
65.
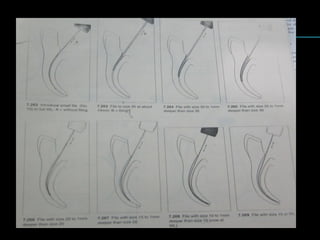
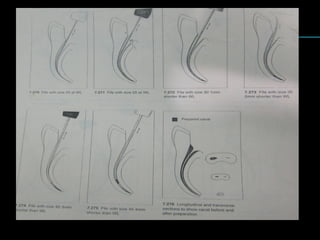
8.DOUBLE FLARED TECHNIQUE
Use straight files in a larger-to-smaller sequence,
progressively and passively, moving them further into
the canal until the apical one third is reached. No
binding of instruments should occur.
Use frequent irrigation to remove contents and to aid
in cleaning apical one third.
Establish working length with small K-file.
Use larger-to-smaller files until full working length is
reached.
Prepare the apical stop, and use a step-back apical
preparation to blend with the coronal step-down flare.
Circumferentially file the canal with the master K-file.
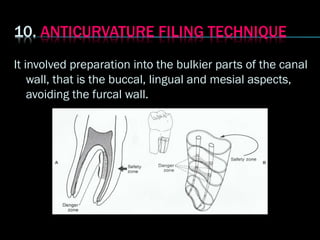
68.
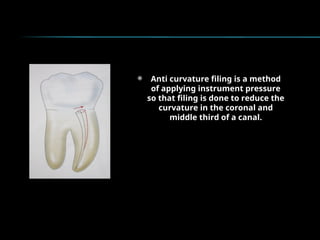
It involved preparationinto the bulkier parts of the canal
wall, that is the buccal, lingual and mesial aspects,
avoiding the furcal wall.
69.
Anti curvaturefiling is a method
of applying instrument pressure
so that filing is done to reduce the
curvature in the coronal and
middle third of a canal.
71.
Richman (1957)1st
use of ultrasonics in endodontics.
Endosonics is based on a system in which sound as an energy
source (at 20- 40kHz) activates an endodontic file resulting in
3D activation of the file in the surrounding medium.
Ultrasonic devices are driven by magnetostriction or
piezoelectricity, resulting in oscillation (25–40 kHz) of the
inserted file which initiates acoustic microstreaming in the
irrigation fluid
72.
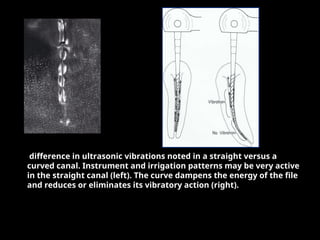
difference in ultrasonicvibrations noted in a straight versus a
curved canal. Instrument and irrigation patterns may be very active
in the straight canal (left). The curve dampens the energy of the file
and reduces or eliminates its vibratory action (right).
73.
The major advantageto ultrasonics is the relative
ease of operation. If the file can vibrate freely;
they can effectively and efficiently remove dentin
and debris from the canal walls. Also; there is the
potential for increased irrigant action if they
vibrate freely.
74.
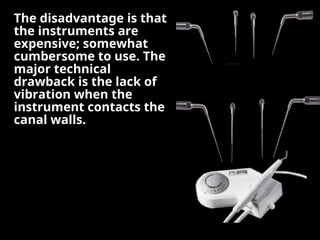
The disadvantage isthat
The disadvantage is that
the instruments are
the instruments are
expensive; somewhat
expensive; somewhat
cumbersome to use. The
cumbersome to use. The
major technical
major technical
drawback is the lack of
drawback is the lack of
vibration when the
vibration when the
instrument contacts the
instrument contacts the
canal walls.
canal walls.
75.
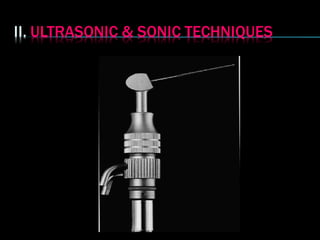
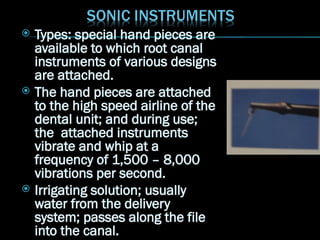
Types: specialhand pieces are
available to which root canal
instruments of various designs
are attached.
The hand pieces are attached
to the high speed airline of the
dental unit; and during use;
the attached instruments
vibrate and whip at a
frequency of 1,500 – 8,000
vibrations per second.
Irrigating solution; usually
water from the delivery
system; passes along the file
into the canal.
76.
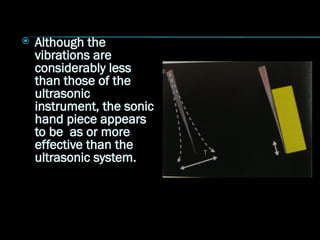
Although the
vibrationsare
considerably less
than those of the
ultrasonic
instrument, the sonic
hand piece appears
to be as or more
effective than the
ultrasonic system.
78.
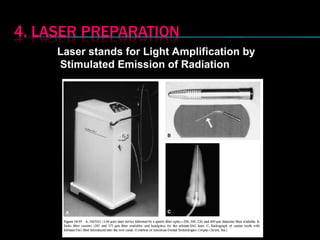
Laser stands forLight Amplification by
Stimulated Emission of Radiation
79.
Laser lighttravels in straight direction therefore
specific light emitting probes have been developed to
direct laser energy not only straight but also into
curved canal.
Kesler et al (2002) observed that enlargement and
cleaning of straight canals with an Er;YAG laser was
found to be effective and in fact faster than with step
back preparation with K files.
80.
The techniquerequires widening the root canal by
The technique requires widening the root canal by
conventional methods before the laser probe can be placed
conventional methods before the laser probe can be placed
in the canal. The fiber’s diameter, used inside the canal
in the canal. The fiber’s diameter, used inside the canal
space, ranges from 200 to 400 µm, equivalent to a No. 20-
space, ranges from 200 to 400 µm, equivalent to a No. 20-
40 file
40 file
82.
However, theperformance of this equipment, concerning
However, the performance of this equipment, concerning
safe and effective wavelength and energy levels related to
safe and effective wavelength and energy levels related to
temperature rise, morphologic changes, and microbial
temperature rise, morphologic changes, and microbial
reduction, should be well documented before it becomes a
reduction, should be well documented before it becomes a
current method of treatment.
current method of treatment.
Safety precautions used during laser irradiation include
Safety precautions used during laser irradiation include
safety glasses specific for each wavelength (compatible
safety glasses specific for each wavelength (compatible
optical density to filtrate that wavelength), warning signs,
optical density to filtrate that wavelength), warning signs,
and high-volume evacuation close to the treated area (used
and high-volume evacuation close to the treated area (used
in soft tissue procedures, cavity preparation, etc).
in soft tissue procedures, cavity preparation, etc).
83.
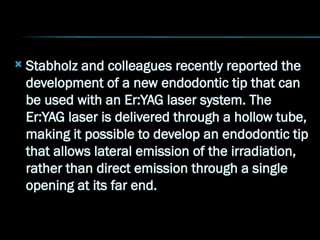
Stabholz andcolleagues recently reported the
development of a new endodontic tip that can
be used with an Er:YAG laser system. The
Er:YAG laser is delivered through a hollow tube,
making it possible to develop an endodontic tip
that allows lateral emission of the irradiation,
rather than direct emission through a single
opening at its far end.
84.
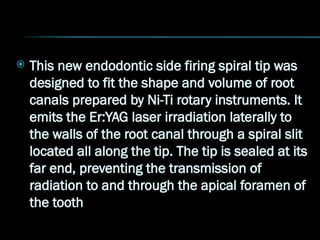
This newendodontic side firing spiral tip was
designed to fit the shape and volume of root
canals prepared by Ni-Ti rotary instruments. It
emits the Er:YAG laser irradiation laterally to
the walls of the root canal through a spiral slit
located all along the tip. The tip is sealed at its
far end, preventing the transmission of
radiation to and through the apical foramen of
the tooth
85.
Limitations
Notaccessible for severely curved canal
Cost of equipment is high
Operator and patient safety are of concern
86.
Based on thepremise that “Optimal cleansing
of the root canal system is a prime
prerequisite for long term success in
endodontics,” Lussi and his associates at
the University of Bern, Switzerland,
introduced devices to cleanse the root canal
“without the need of endodontic
instrumentation.”
87.
NON INSTRUMENTATION
NON INSTRUMENTATION
TECHNIQUE
TECHNIQUE
(NIT )
( NIT )
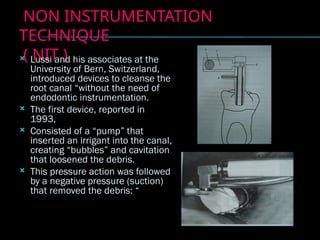
Lussi and his associates at the
University of Bern, Switzerland,
introduced devices to cleanse the
root canal “without the need of
endodontic instrumentation.
The first device, reported in
1993,
Consisted of a “pump” that
inserted an irrigant into the canal,
creating “bubbles” and cavitation
that loosened the debris.
This pressure action was followed
by a negative pressure (suction)
that removed the debris: “
89.
Loss of WorkingLength
It is a very common and frustrating error usually noted on a
master cone radiograph.
It is actually secondary to the other procedural errors.
Maintaining Proper Working Length During Canal Cleaning
and Shaping
Sound reproducible reference points should be used.
Firm or secure rubber stops should be placed at right angles to
the shaft of the instruments.
All instruments should be curved with sterile 2 x 2-inch gauze,
over curving them in the apical one third will compensate for
some loss of curvature once in the canal. .
The instrument stops should be continually observed as they
approach the reference points.
90.
Directional instrumentstops should be used. The direction
of the stop must be observed constantly to maintain files in
their proper relationship to the canal anatomy
Consistent radiographic angles should be used when
radiographically verifying the instrument position.
The original preoperative shape of the canal should be
maintained and cleaning and shaping should be done within
these confines.
Copious irrigation and recapitulation should be used
throughout cleaning and shaping procedures.
Sequential file sizes should be used
91.
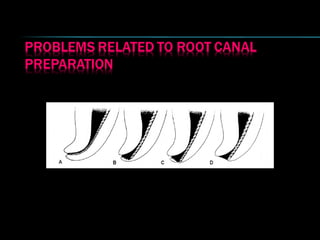
Blockage of theCanal System
Blockage of the Canal System
A blockage is an obstruction in a previously patent canal
A blockage is an obstruction in a previously patent canal
system that prevents access to the apical constriction or
system that prevents access to the apical constriction or
apical stop.
apical stop.
The packing of dentin chips, tissue debris, restorative
The packing of dentin chips, tissue debris, restorative
materials, cotton pellets, paper points, or a fractured
materials, cotton pellets, paper points, or a fractured
instrument in the canal are common causes of blockages.
instrument in the canal are common causes of blockages.
92.
To avoid canalblockage-
Always use the smaller sized instruments first.
Use instruments in sequential order.
Always precurve stainless steel hand
instruments.
Use reproducible reference points and silicon
stopper on instruments while cleaning and
shaping.
93.
Use copiousamounts of irrigants and always
work in a wet canal.
Recapitulate repeatedly.
Disposed off used instruments.
94.
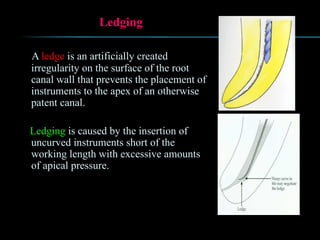
Ledging
A ledge isan artificially created
irregularity on the surface of the root
canal wall that prevents the placement of
instruments to the apex of an otherwise
patent canal.
Ledging is caused by the insertion of
uncurved instruments short of the
working length with excessive amounts
of apical pressure.
95.
Common causesfor ledging-
Incorrect assessment of root canal curvature.
Erroneous root canal length determination.
Forcing the instrument into the canal.
Inadequate irrigation and lubrication during
instrumentation.
Over relying on chelating agents
Attempt to retrieve broken instruments
Attempting to prepare calcified canals.
96.
Prevention ofledge formation-
Assess the usual root curvature by
preoperative radiograph.
Maintained the patency of canal
Periodic recapitulation
Work passively without forcing the
instrument
Work sequentially increasing the size of
instrument.
97.
Ledge management
Early recognition of ledge
Precurve the apical 3-4 mm of the file with the
same curvature as seen in radiograph and tease
the file until it able to bypass the ledge.
If the ledge is closer to apical terminus complete
the canal cleaning and obturate with an injectable
thermoplasticize obturation technique.
98.
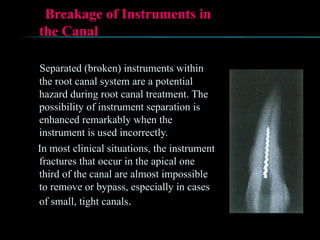
Breakage of Instrumentsin
the Canal
Separated (broken) instruments within
the root canal system are a potential
hazard during root canal treatment. The
possibility of instrument separation is
enhanced remarkably when the
instrument is used incorrectly.
In most clinical situations, the instrument
fractures that occur in the apical one
third of the canal are almost impossible
to remove or bypass, especially in cases
of small, tight canals.
99.
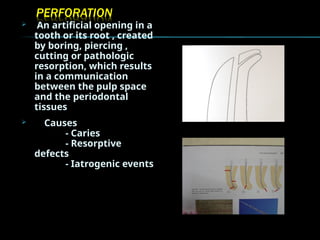
An artificialopening in a
tooth or its root , created
by boring, piercing ,
cutting or pathologic
resorption, which results
in a communication
between the pulp space
and the periodontal
tissues
Causes
- Caries
- Resorptive
defects
- Iatrogenic events
100.
This type ofperforation occurs
through the apical foramen or
through the body of the root.
Etiology: Instrumentation of canal
beyond the apical foramen.
Incorrect WL or inability to
maintain proper WL causes
blowing out of the apical
foramen
Treatment: establish a new WL,
creating an apical seat and
obturating the canal to its new
length. The new WL should be
established 1-2mm short of the
point of perforation.
101.
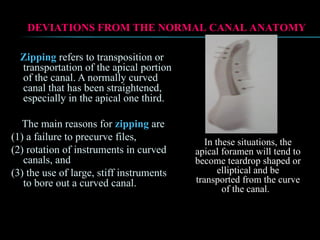
Zipping refers totransposition or
transportation of the apical portion
of the canal. A normally curved
canal that has been straightened,
especially in the apical one third.
The main reasons for zipping are
(1) a failure to precurve files,
(2) rotation of instruments in curved
canals, and
(3) the use of large, stiff instruments
to bore out a curved canal.
DEVIATIONS FROM THE NORMAL CANAL ANATOMY
DEVIATIONS FROM THE NORMAL CANAL ANATOMY
In these situations, the
In these situations, the
apical foramen will tend to
apical foramen will tend to
become teardrop shaped or
become teardrop shaped or
elliptical and be
elliptical and be
transported from the curve
transported from the curve
of the canal.
of the canal.
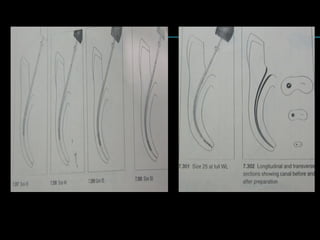
102.
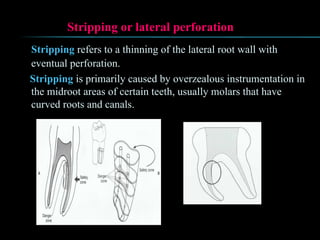
Stripping or lateralperforation
Stripping refers to a thinning of the lateral root wall with
eventual perforation.
Stripping is primarily caused by overzealous instrumentation in
the midroot areas of certain teeth, usually molars that have
curved roots and canals.
103.
Mechanical preparation ofthe root canal may result in a
Mechanical preparation of the root canal may result in a
significant reduction of bacteria but will not
significant reduction of bacteria but will not
reproducibly leave bacteria-free root canals.
reproducibly leave bacteria-free root canals.
Mechanical preparation of the root canal must be
Mechanical preparation of the root canal must be
assisted and completed by intense disinfection
assisted and completed by intense disinfection
protocols using appropriate irrigants and intracanal
protocols using appropriate irrigants and intracanal
medicaments.
medicaments.
104.
Ingle Endodontics6
Pathways of pulp 10th
edition
Endodontic practice 12th
edition
Castalluci vol 2
Endodontic theraphy 5th
edition
DCNA modern endodntic practice 2004


![APPROACH TO FEVER IN PEDIATRICS[1].pptTT](https://cdn.slidesharecdn.com/ss_thumbnails/approachtofeverinpediatrics1-260125081456-d559e079-thumbnail.jpg?width=640&height=640&fit=bounds)


![Cells and Organs of immune system [Autosaved].pptx](https://cdn.slidesharecdn.com/ss_thumbnails/cellsandorgansofimmunesystemautosaved-260123152717-ea0cb261-thumbnail.jpg?width=640&height=640&fit=bounds)


![Hypothalamus short notes on location, function and disorders by Dr. Neha [PT]...](https://cdn.slidesharecdn.com/ss_thumbnails/hypothalamusbydr-260124142231-2b48143d-thumbnail.jpg?width=640&height=640&fit=bounds)


