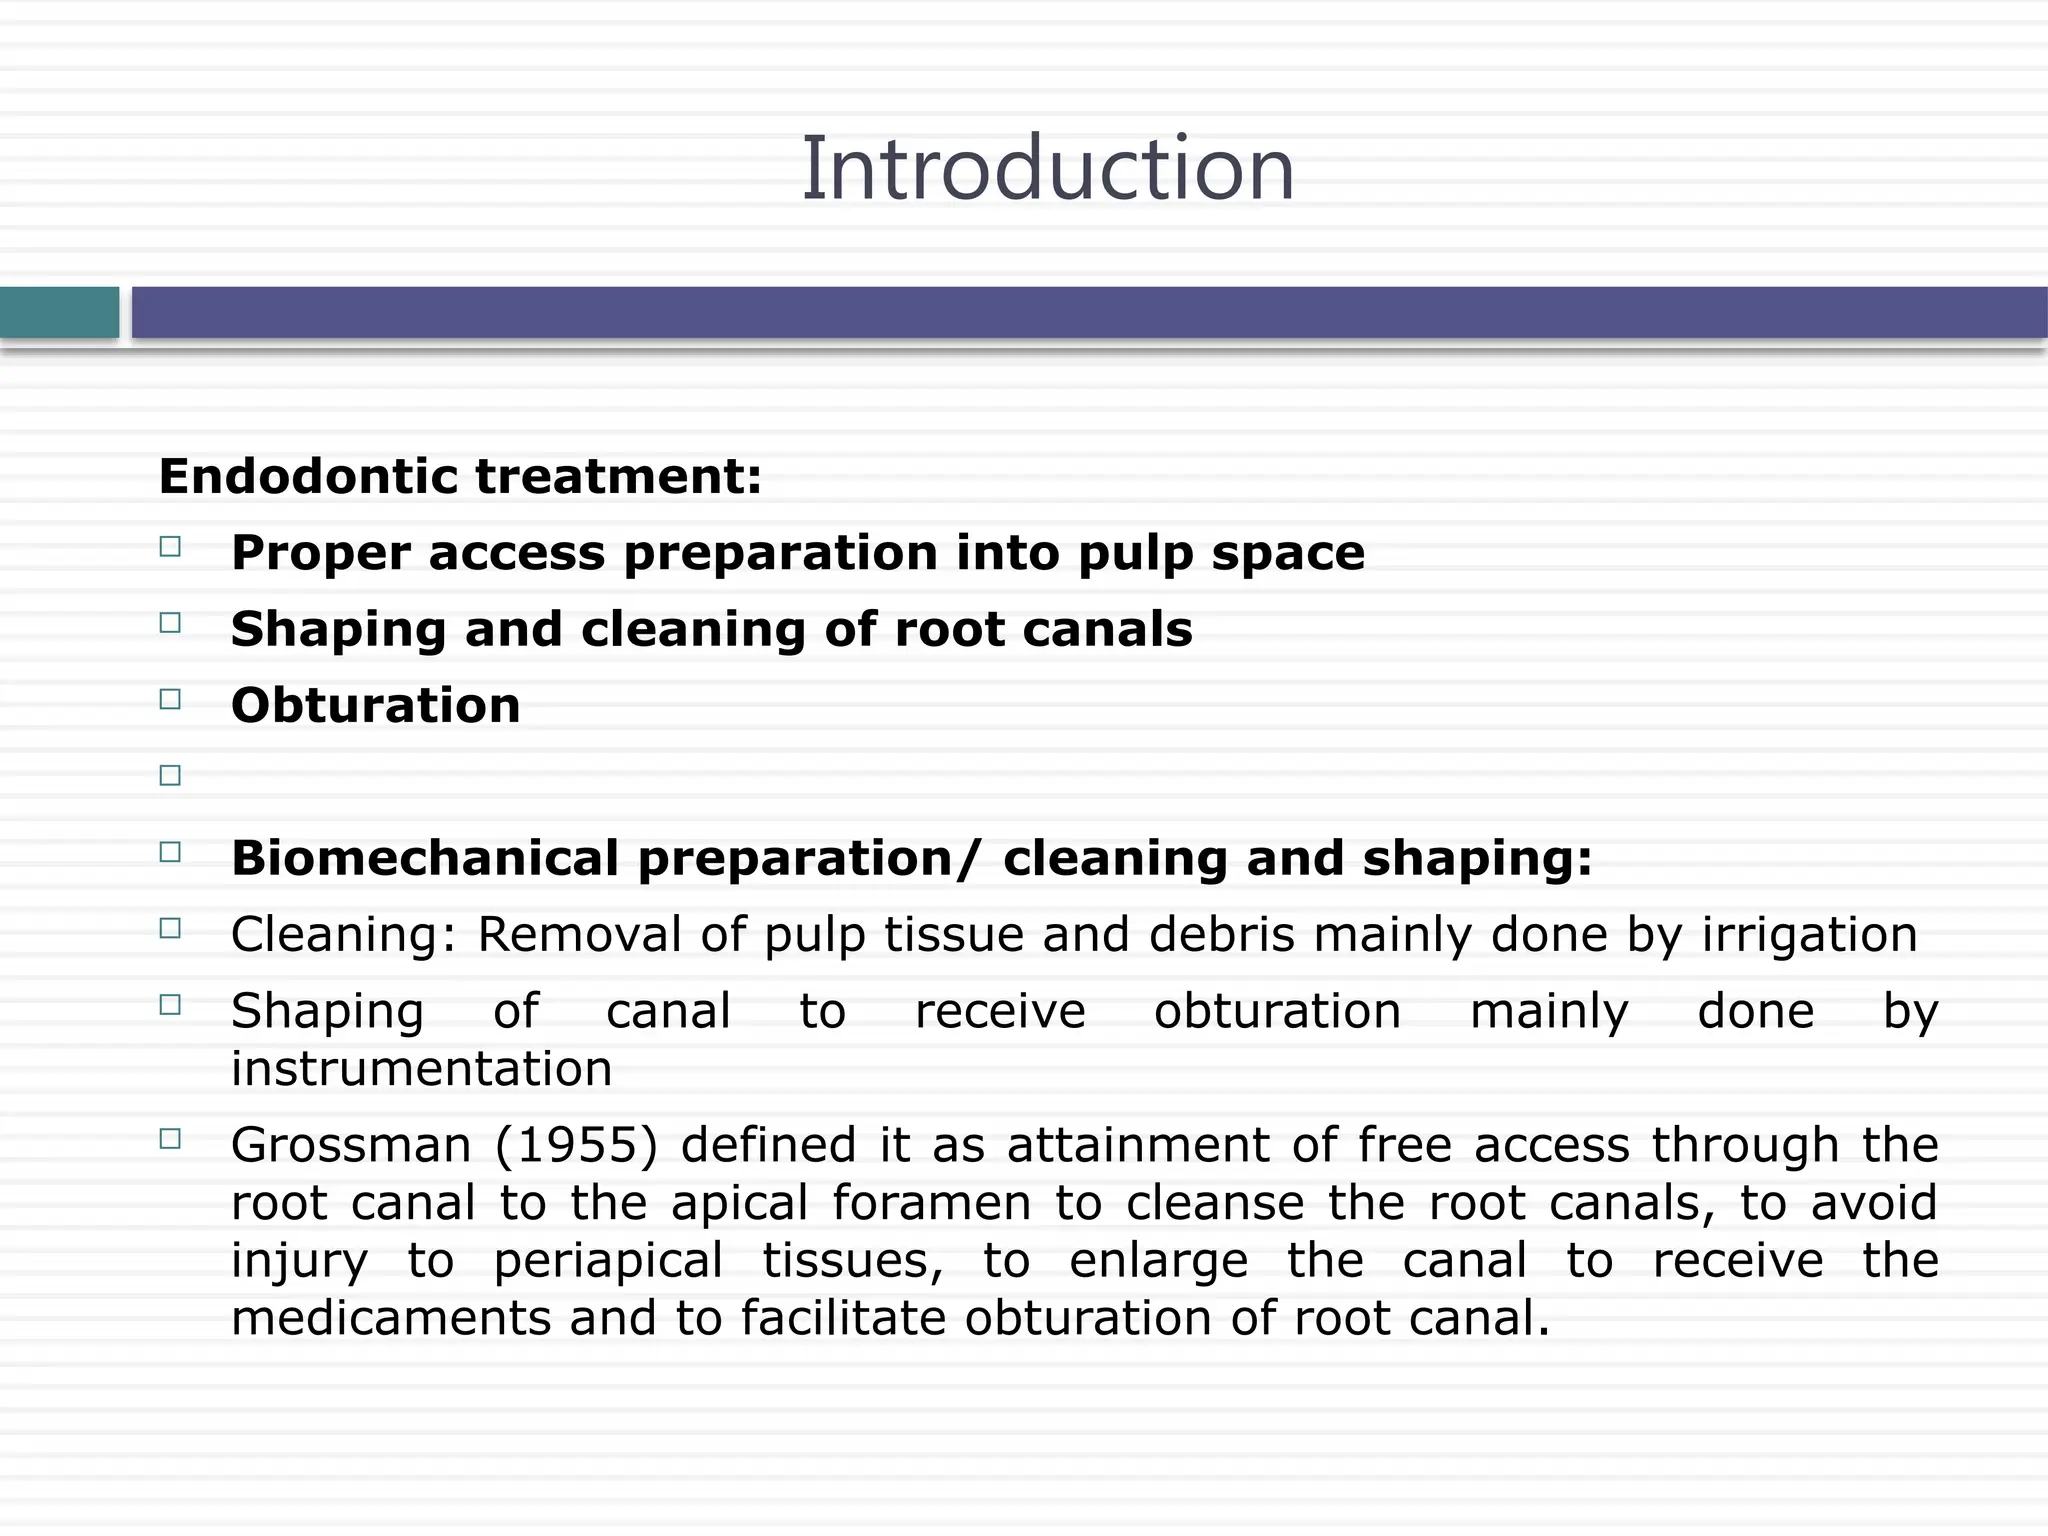
Endodontic treatment:
Properaccess preparation into pulp space
Shaping and cleaning of root canals
Obturation
Biomechanical preparation/ cleaning and shaping:
Cleaning: Removal of pulp tissue and debris mainly done by irrigation
Shaping of canal to receive obturation mainly done by
instrumentation
Grossman (1955) defined it as attainment of free access through the
root canal to the apical foramen to cleanse the root canals, to avoid
injury to periapical tissues, to enlarge the canal to receive the
medicaments and to facilitate obturation of root canal.
Introduction
3.
To debrideand disinfect the root canal system
Shape and contour root canal walls: facilitate the
sealing of root canal completely with well
compacted inert filling material.
Objectives
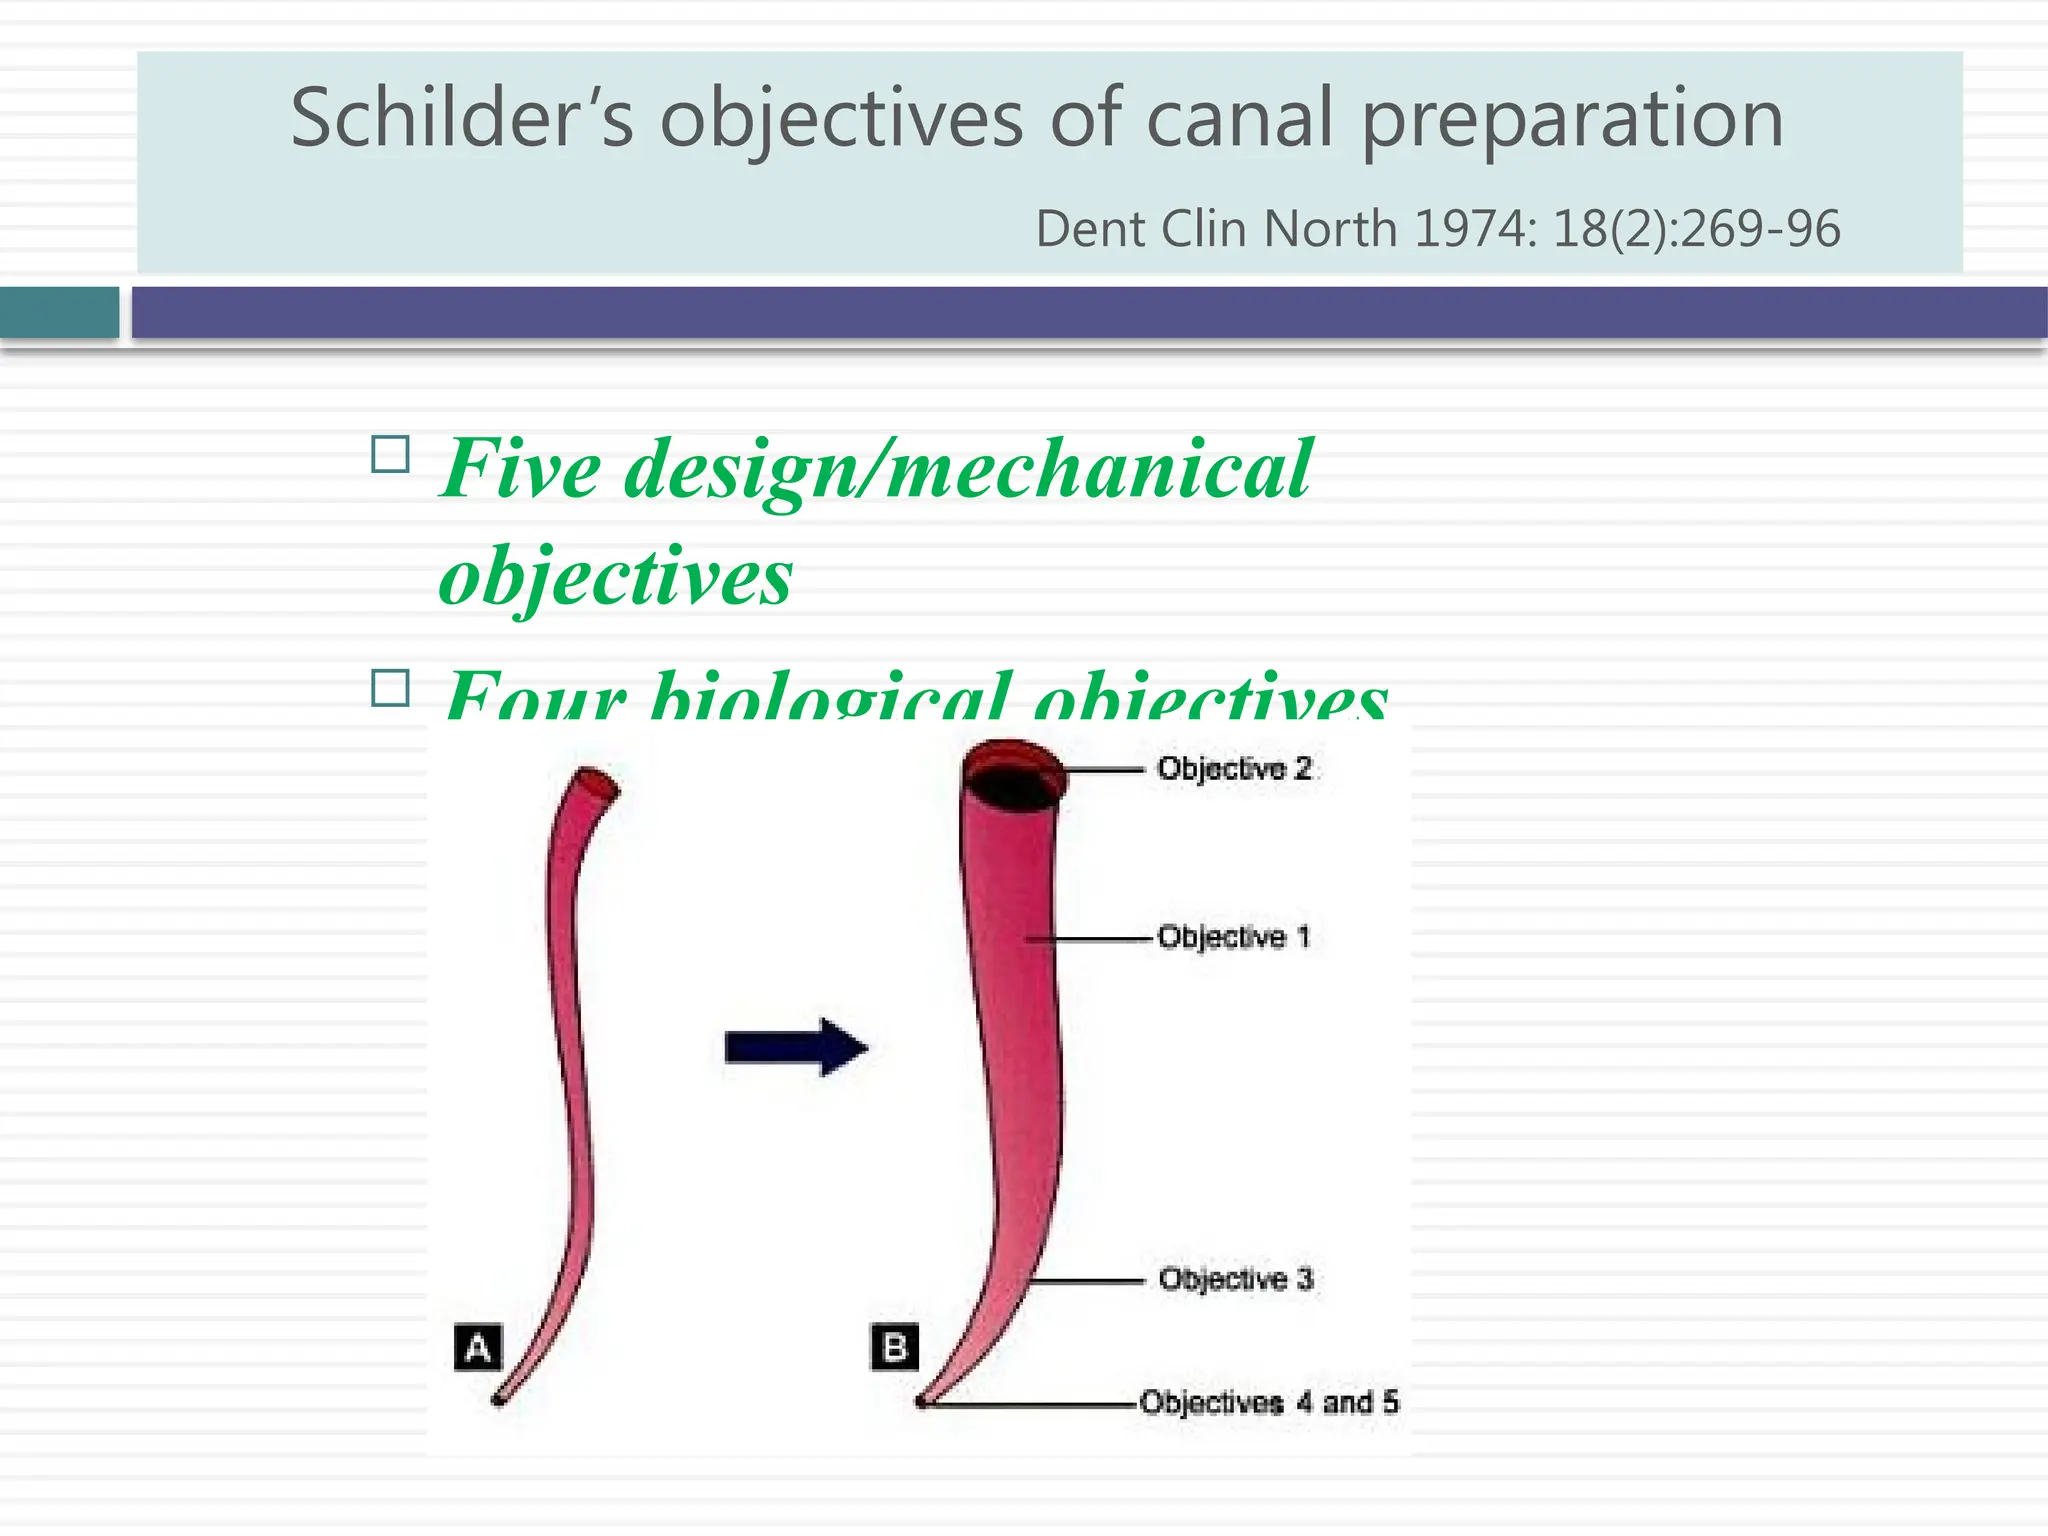
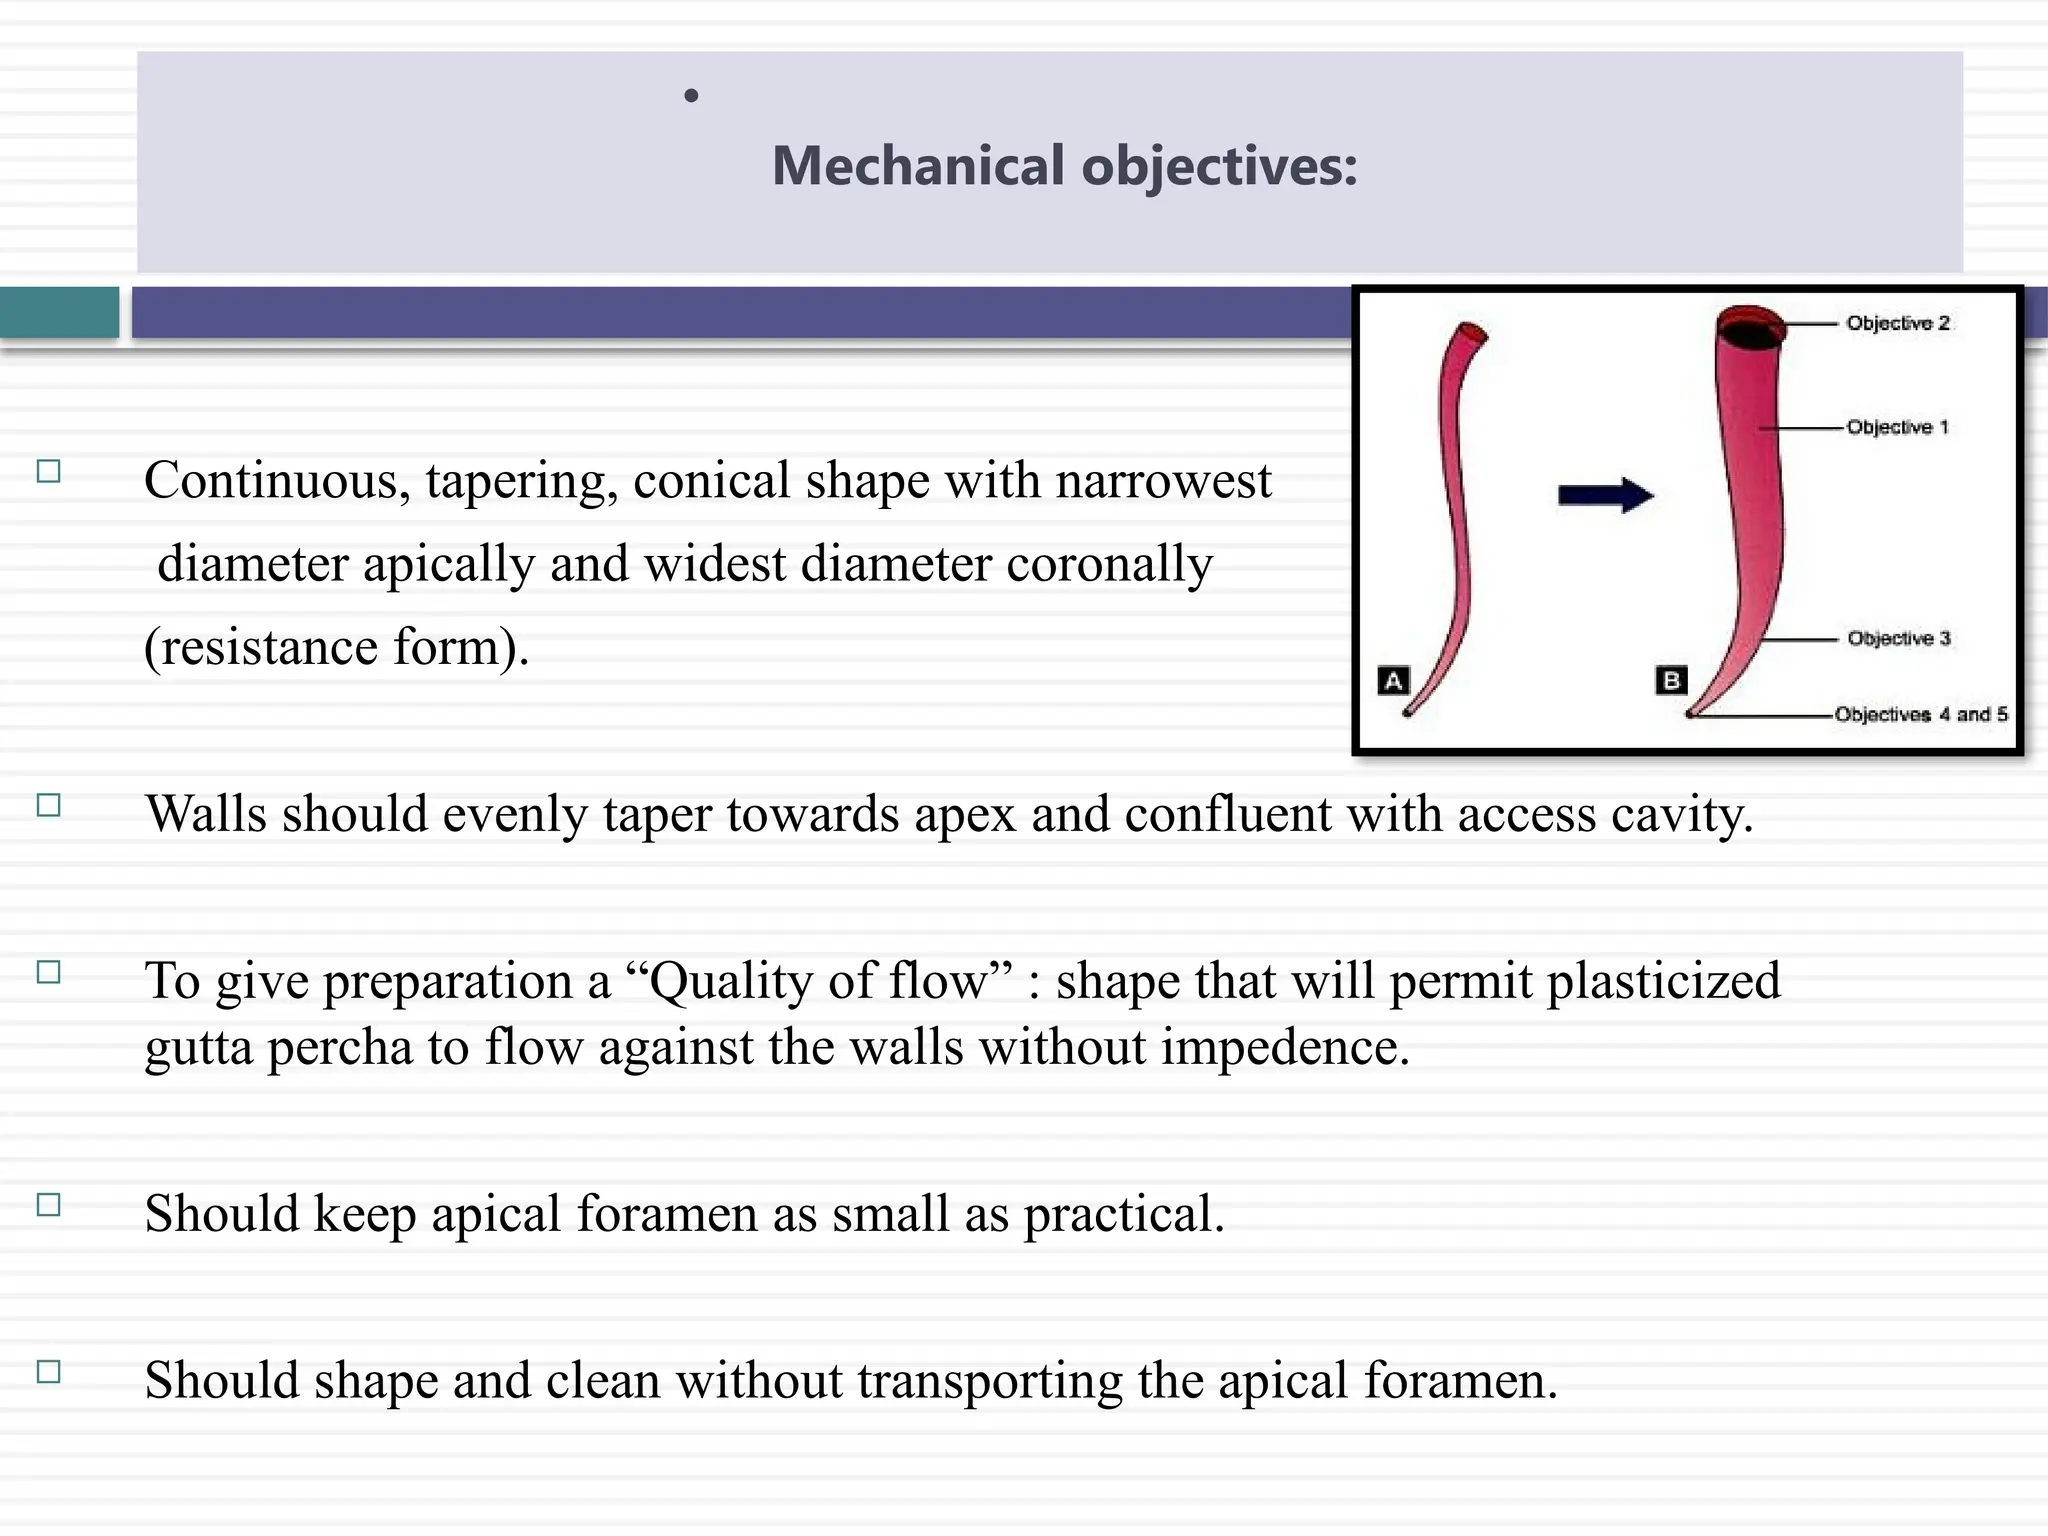
Continuous, tapering,conical shape with narrowest
diameter apically and widest diameter coronally
(resistance form).
Walls should evenly taper towards apex and confluent with access cavity.
To give preparation a “Quality of flow” : shape that will permit plasticized
gutta percha to flow against the walls without impedence.
Should keep apical foramen as small as practical.
Should shape and clean without transporting the apical foramen.
•
Mechanical objectives:
6.
1. Confinement ofinstrumentation to the roots themselves
2. Ensuring that all the necrotic debris are not forced
beyond foramen
3. Removal of all tissues from root canal space
4. Creation of sufficient space for optimal obturation of
radicular space
Biological objectives
7.
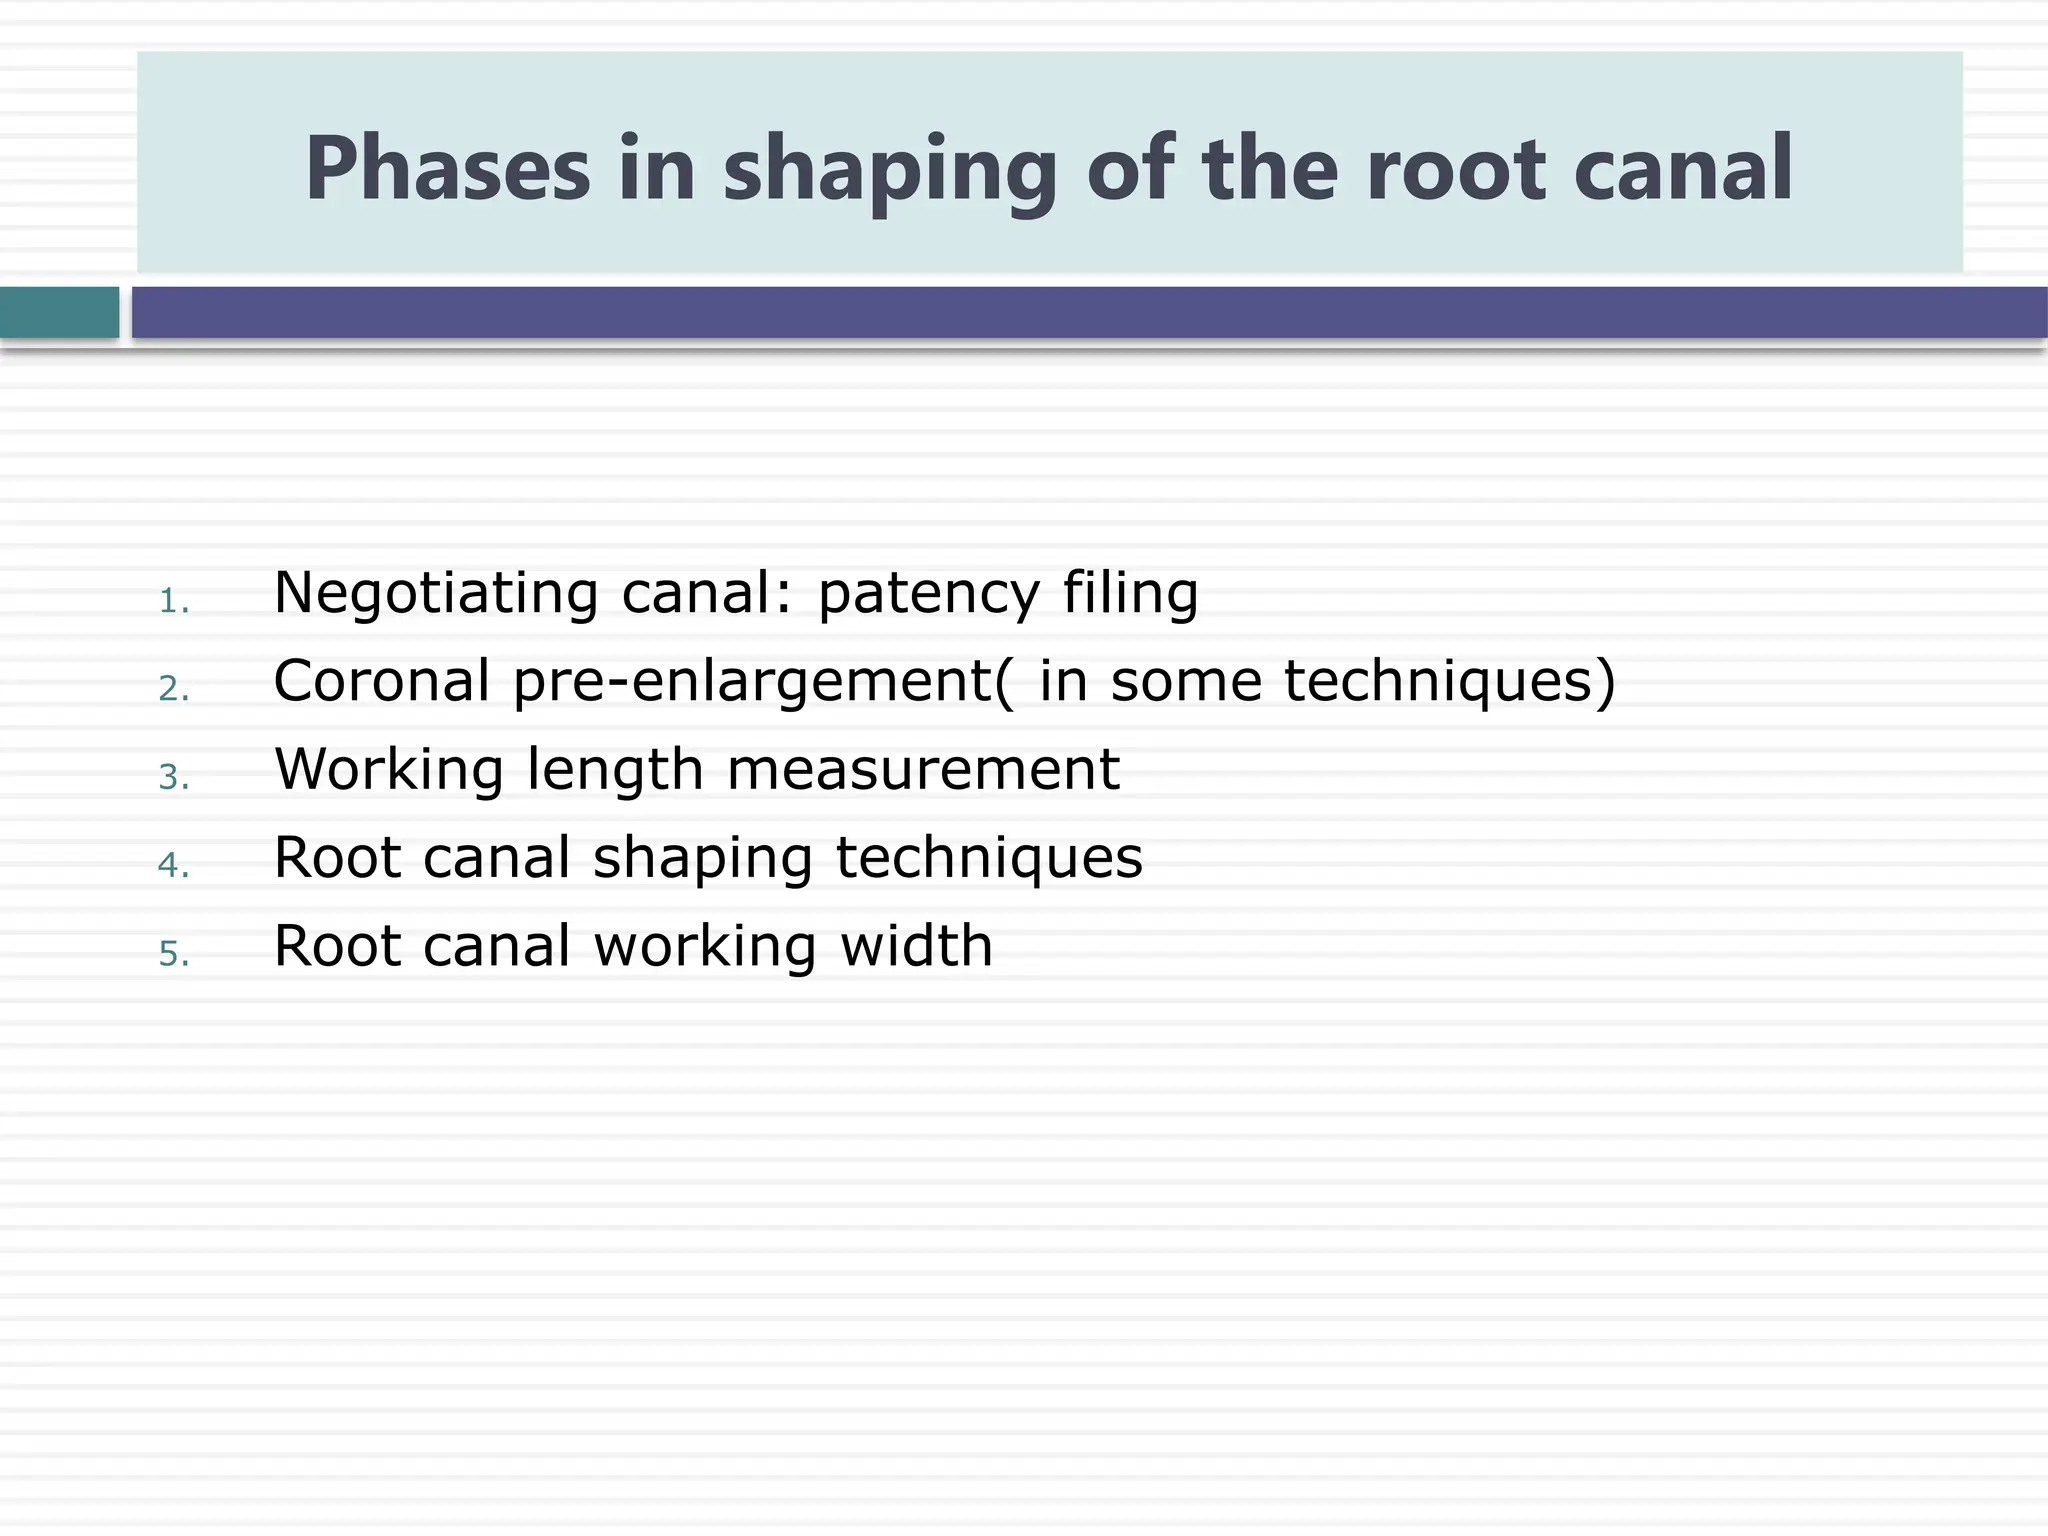
1. Negotiating canal:patency filing
2. Coronal pre-enlargement( in some techniques)
3. Working length measurement
4. Root canal shaping techniques
5. Root canal working width
Phases in shaping of the root canal
8.
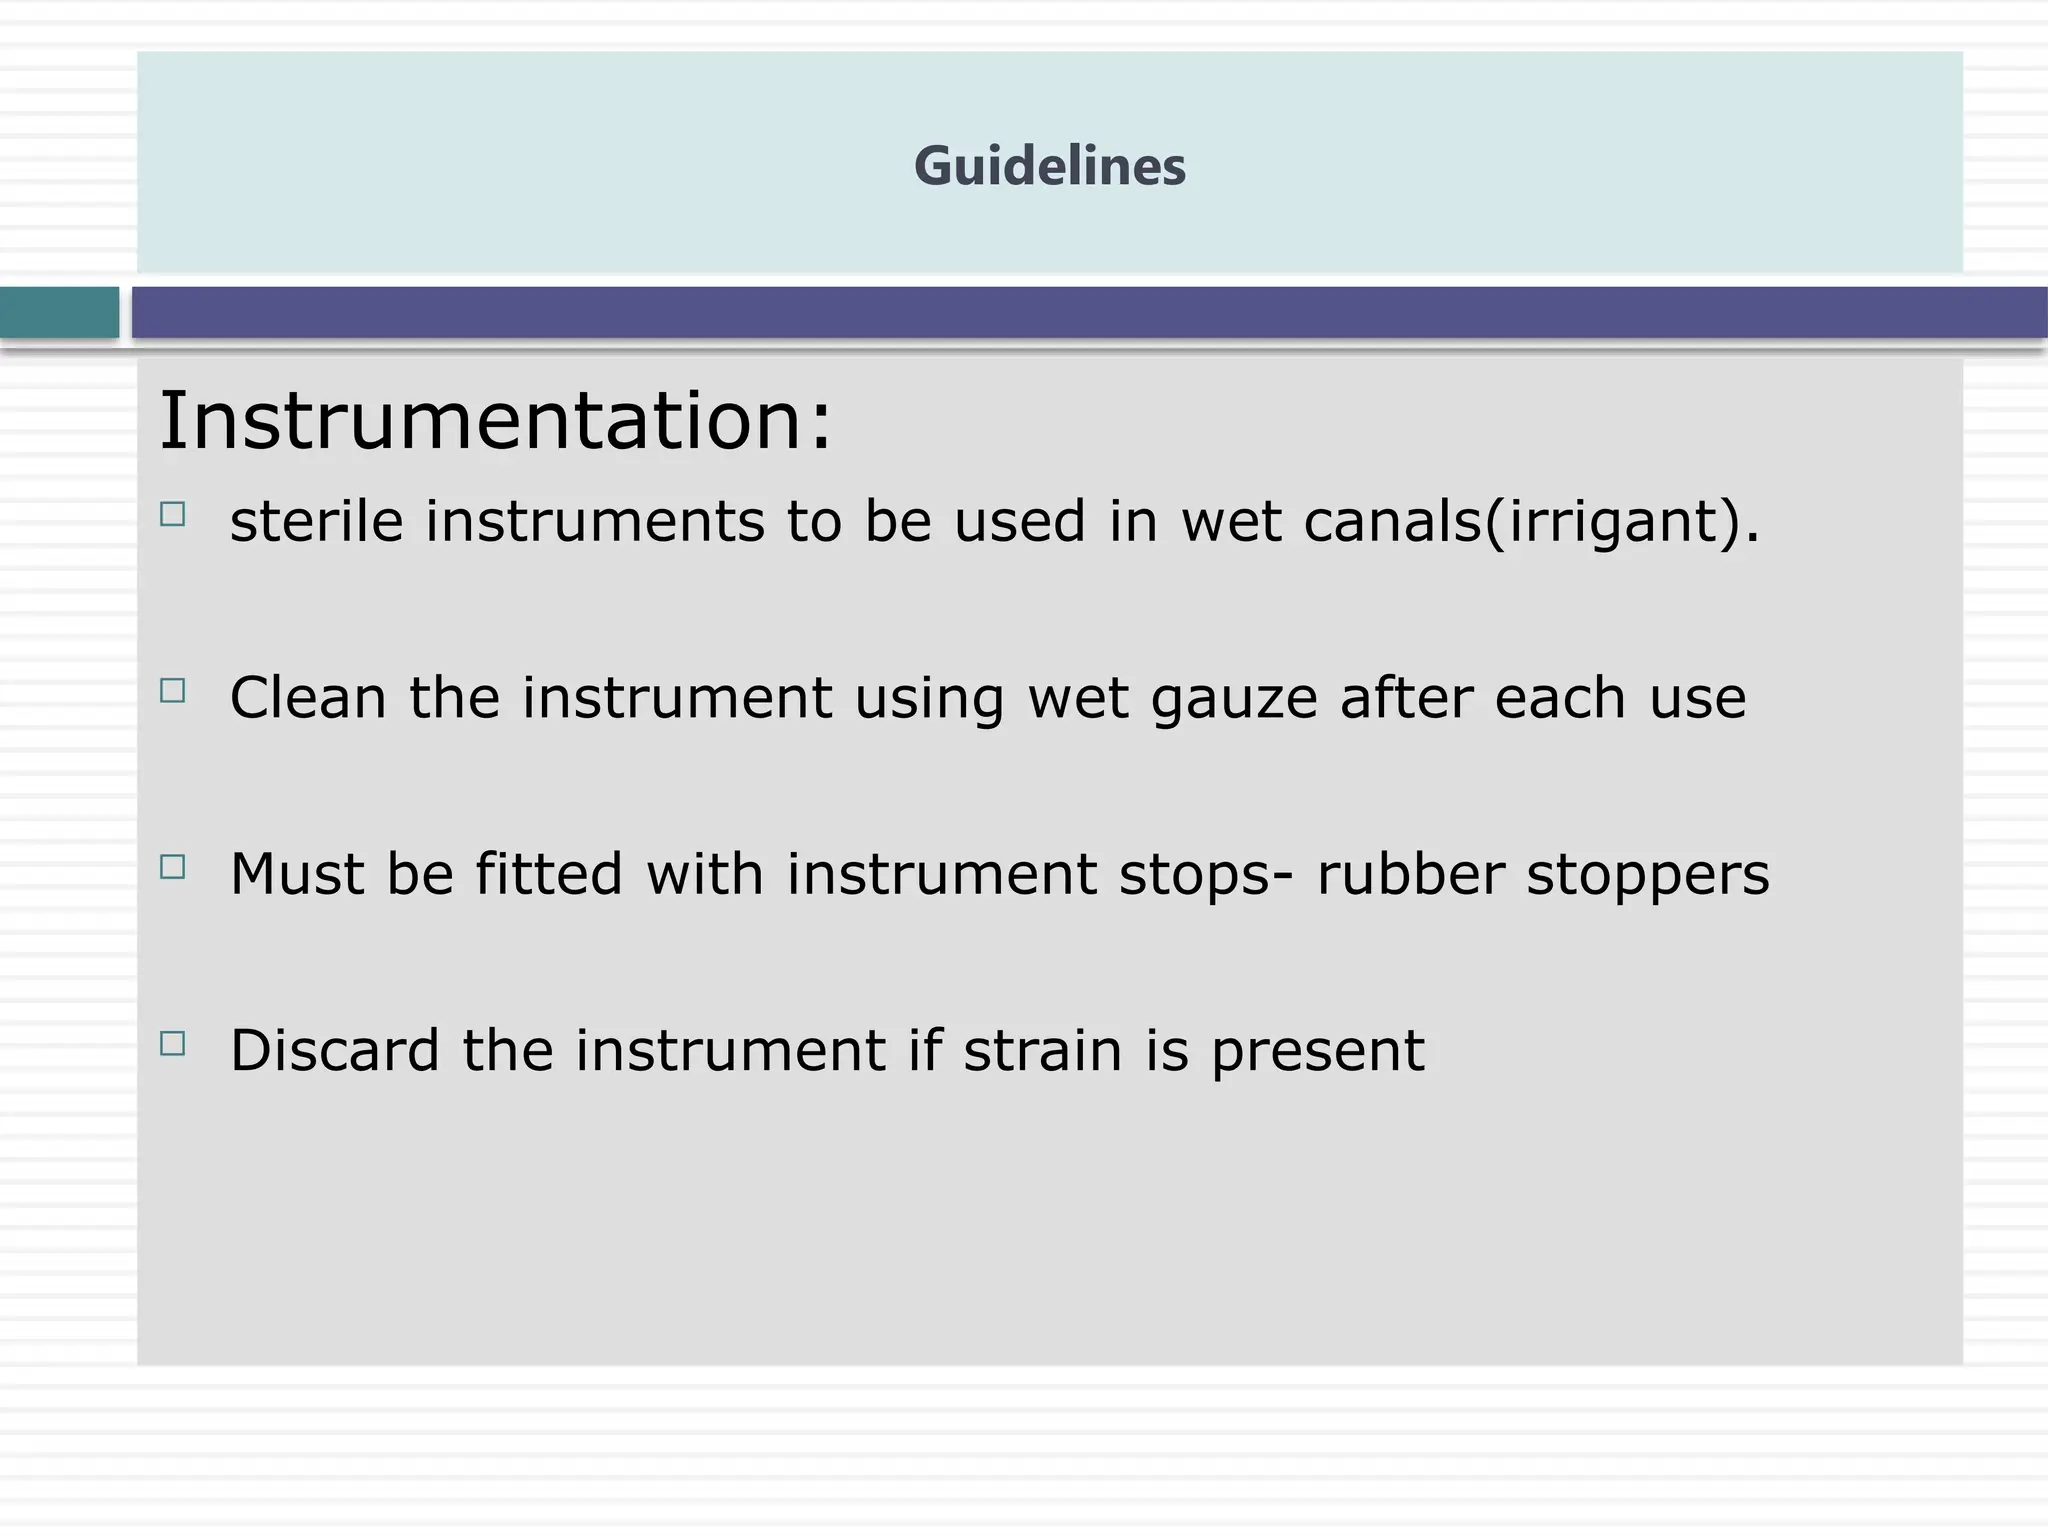
Instrumentation:
sterile instrumentsto be used in wet canals(irrigant).
Clean the instrument using wet gauze after each use
Must be fitted with instrument stops- rubber stoppers
Discard the instrument if strain is present
Guidelines
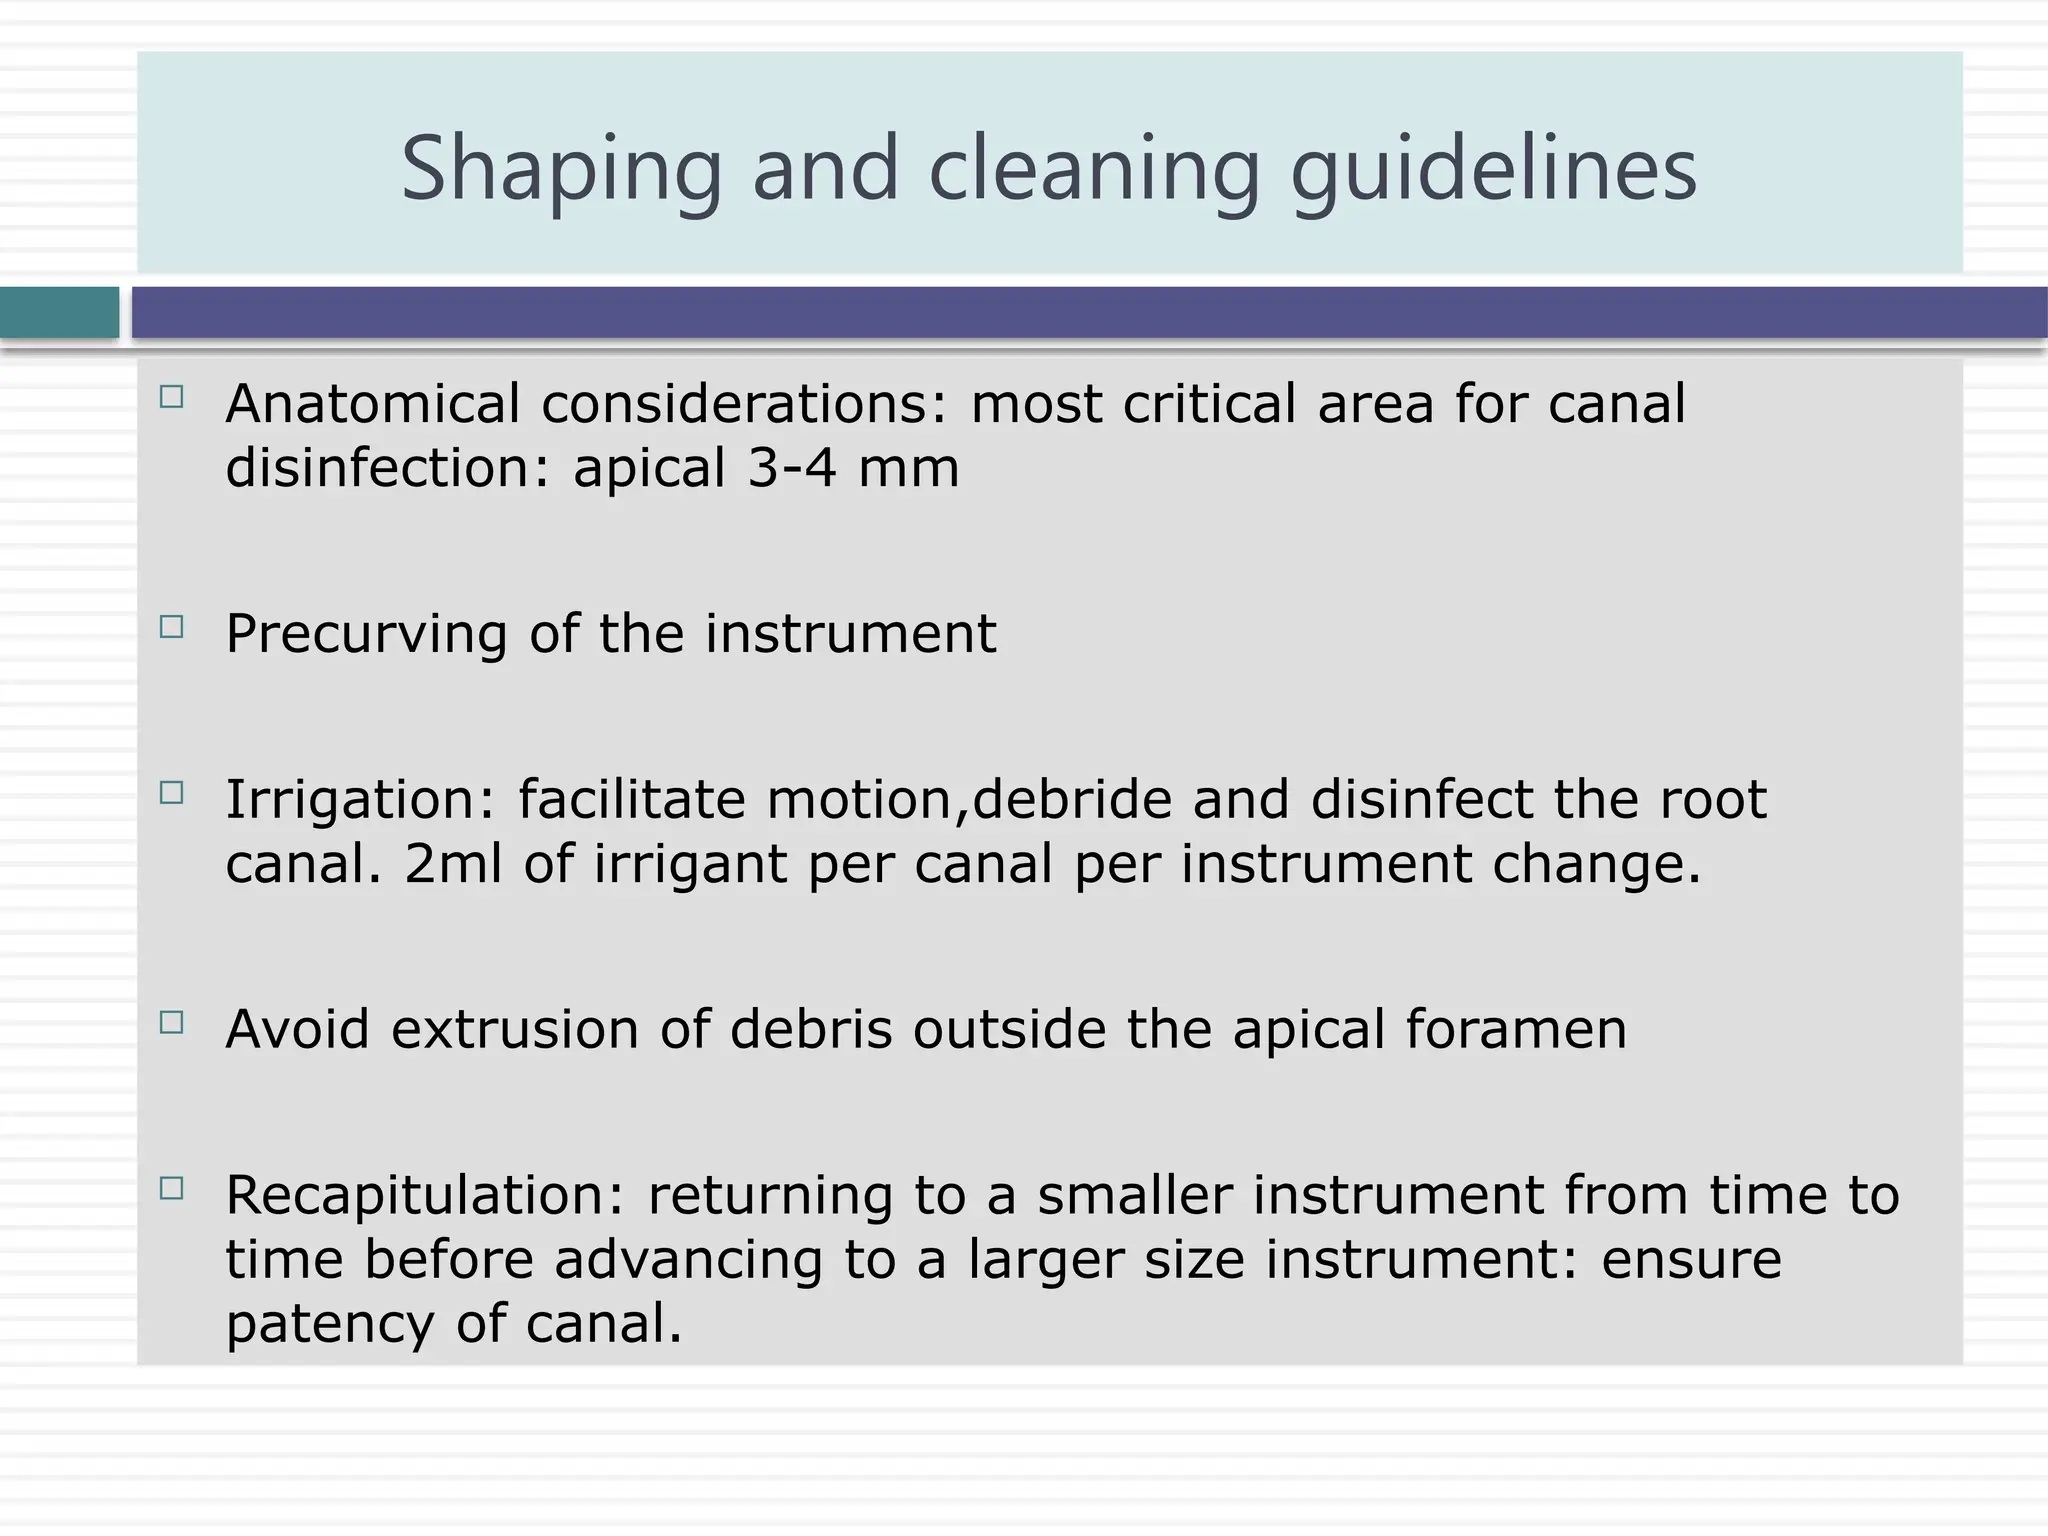
9.
Anatomical considerations:most critical area for canal
disinfection: apical 3-4 mm
Precurving of the instrument
Irrigation: facilitate motion,debride and disinfect the root
canal. 2ml of irrigant per canal per instrument change.
Avoid extrusion of debris outside the apical foramen
Recapitulation: returning to a smaller instrument from time to
time before advancing to a larger size instrument: ensure
patency of canal.
Shaping and cleaning guidelines
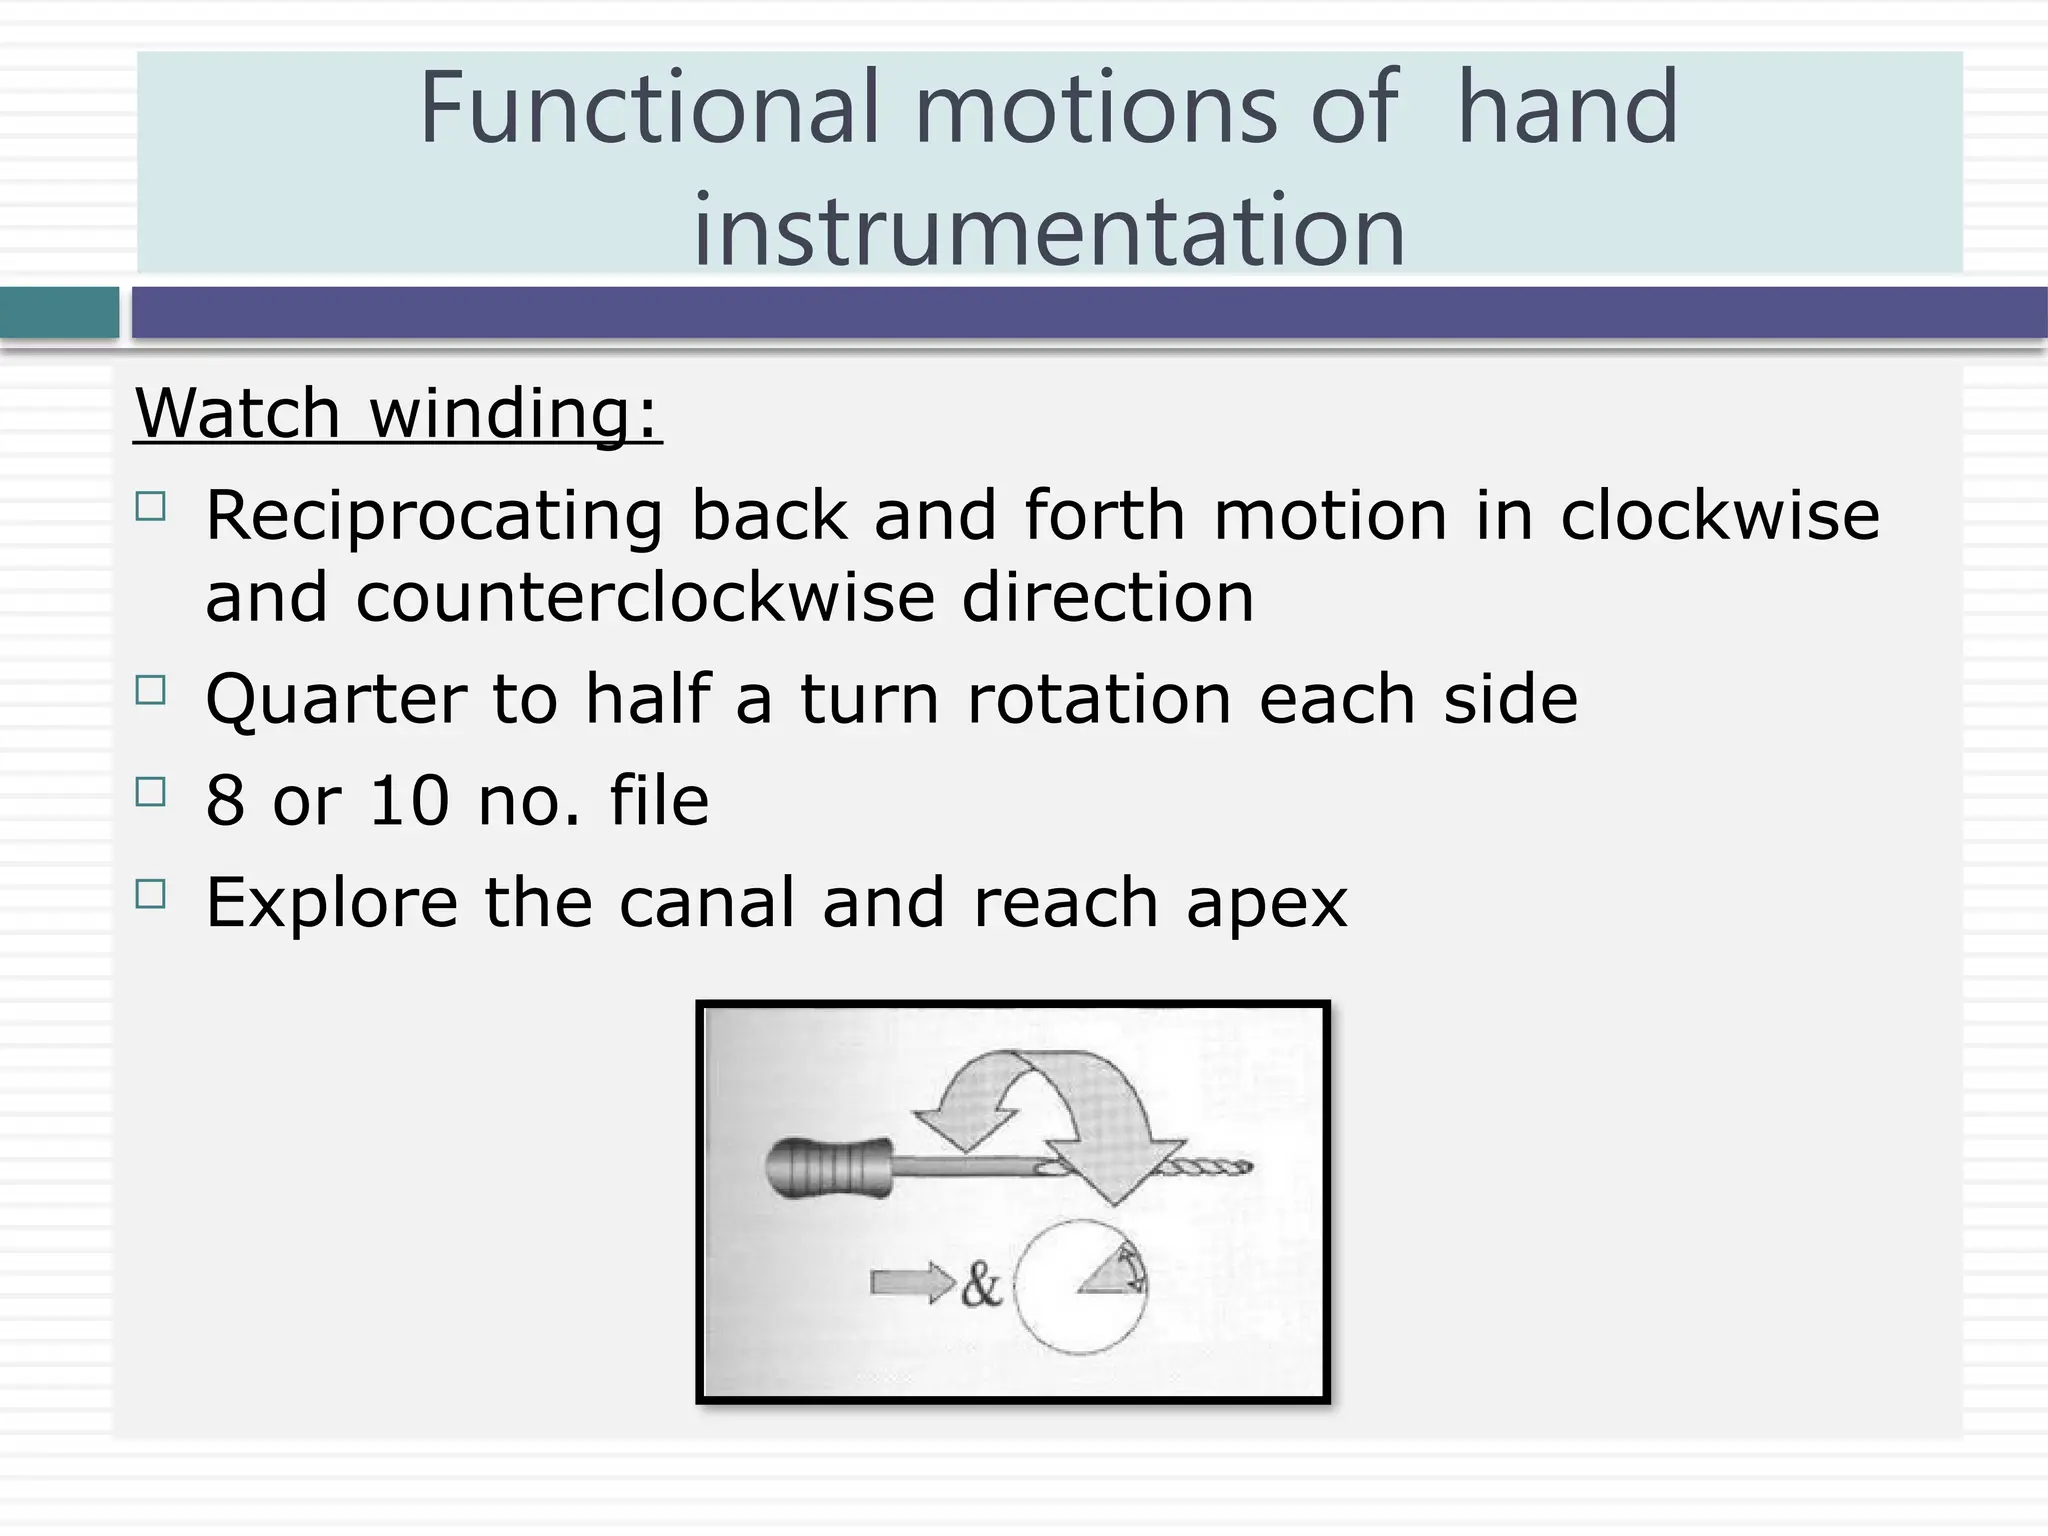
Watch winding:
Reciprocatingback and forth motion in clockwise
and counterclockwise direction
Quarter to half a turn rotation each side
8 or 10 no. file
Explore the canal and reach apex
Functional motions of hand
instrumentation
12.
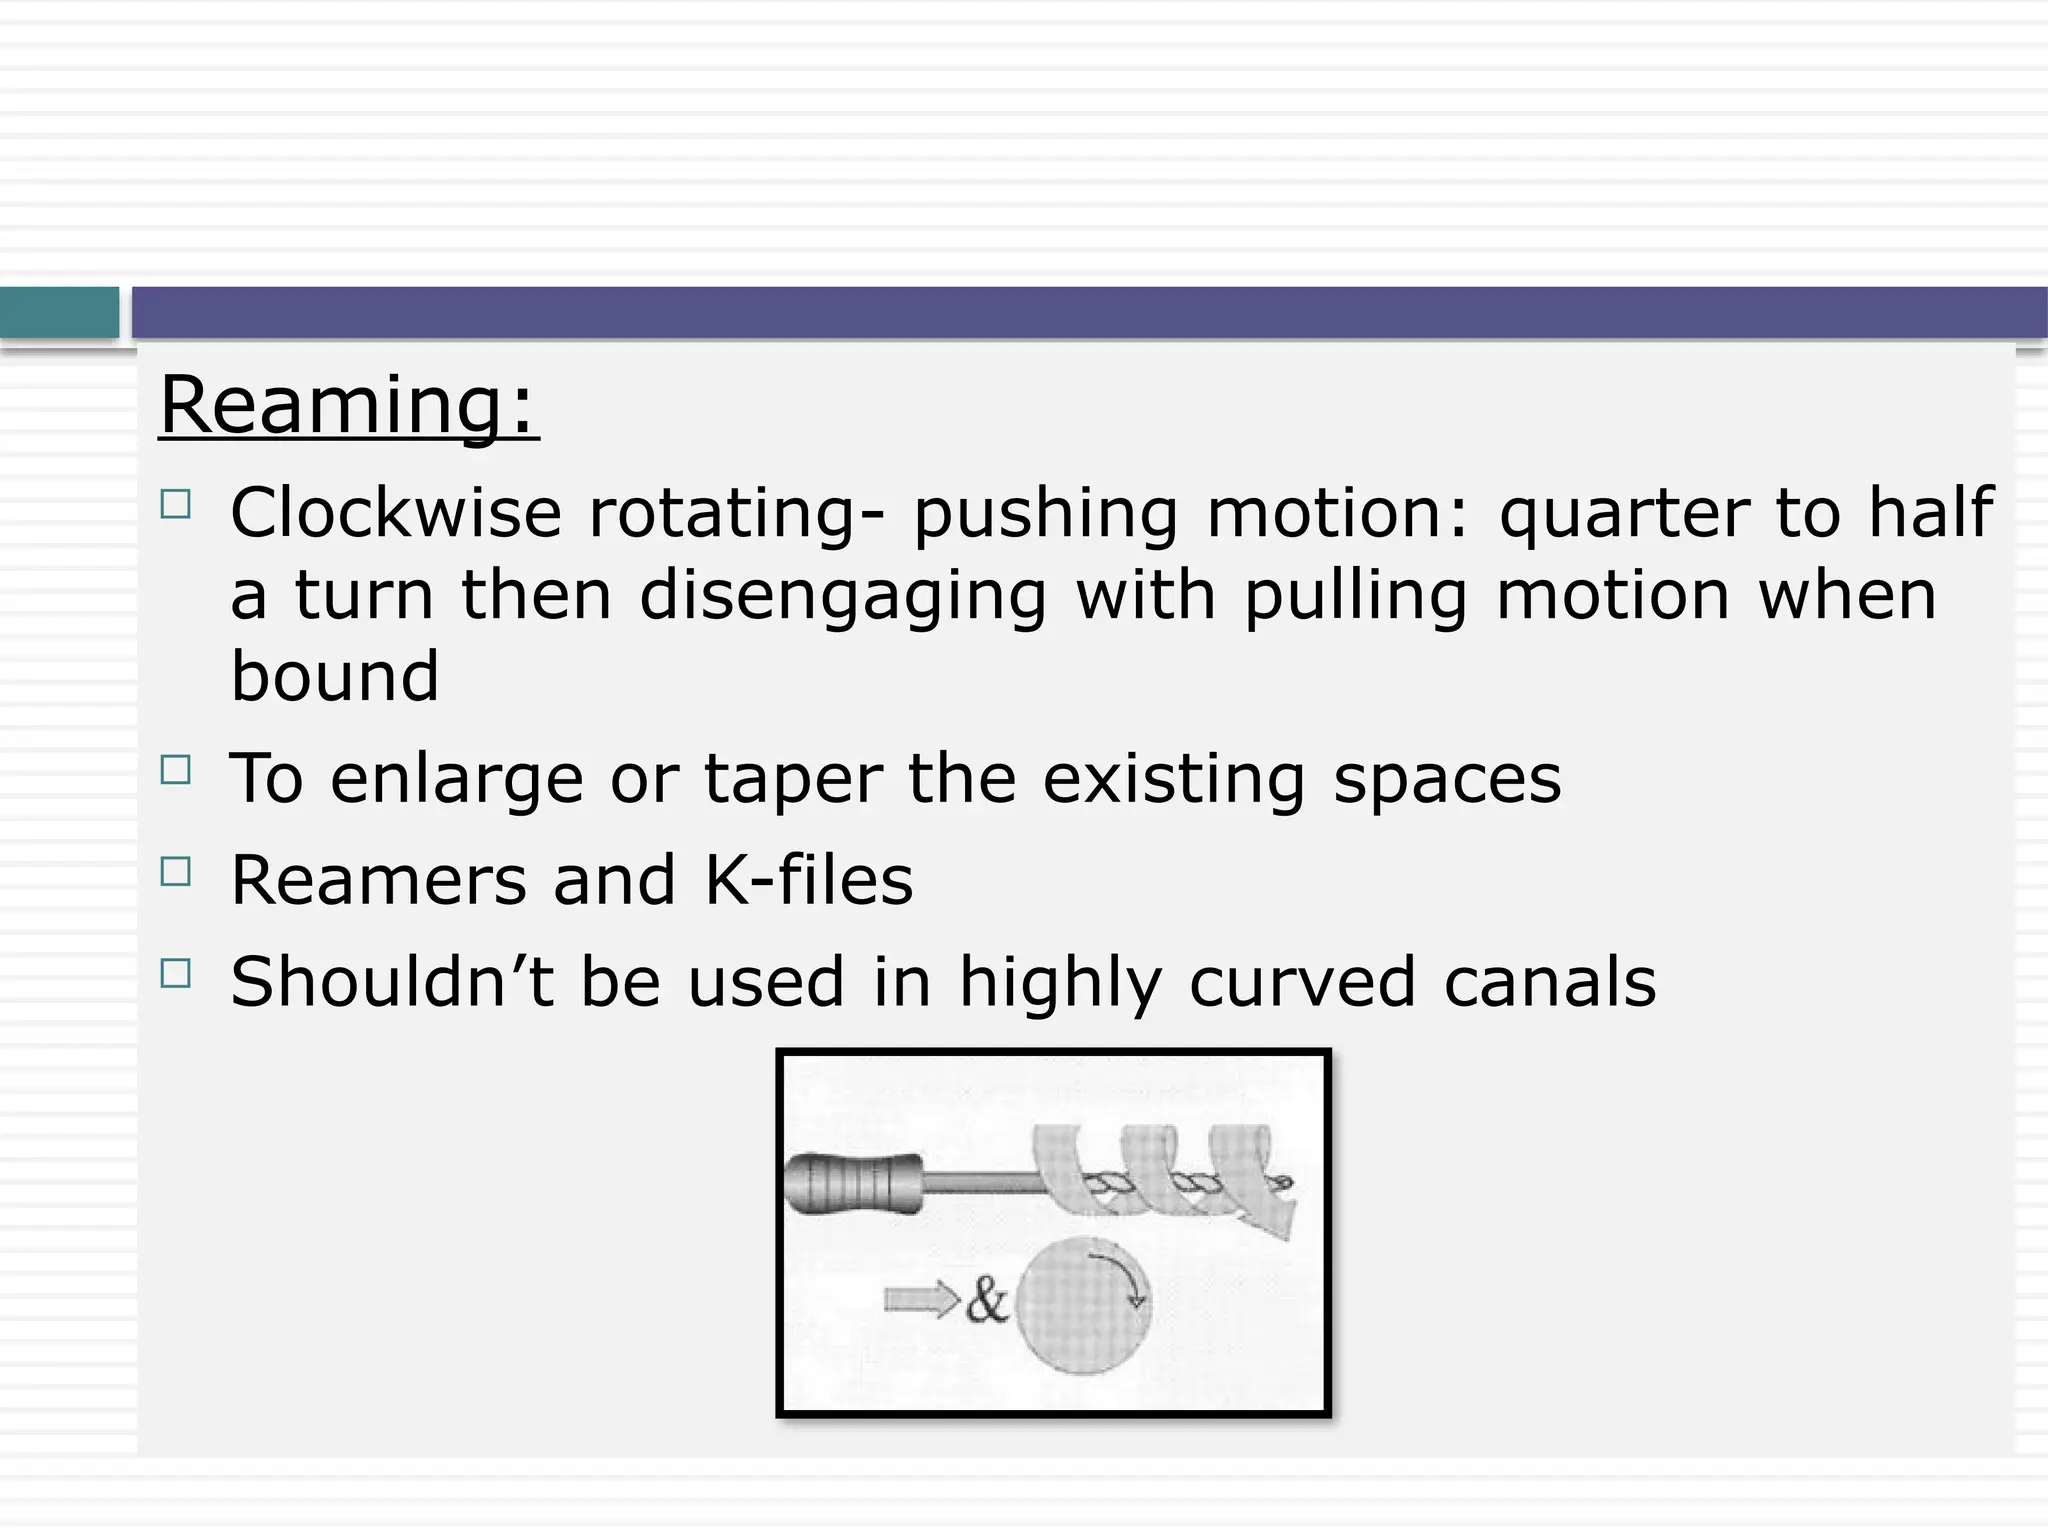
Reaming:
Clockwise rotating-pushing motion: quarter to half
a turn then disengaging with pulling motion when
bound
To enlarge or taper the existing spaces
Reamers and K-files
Shouldn’t be used in highly curved canals
13.
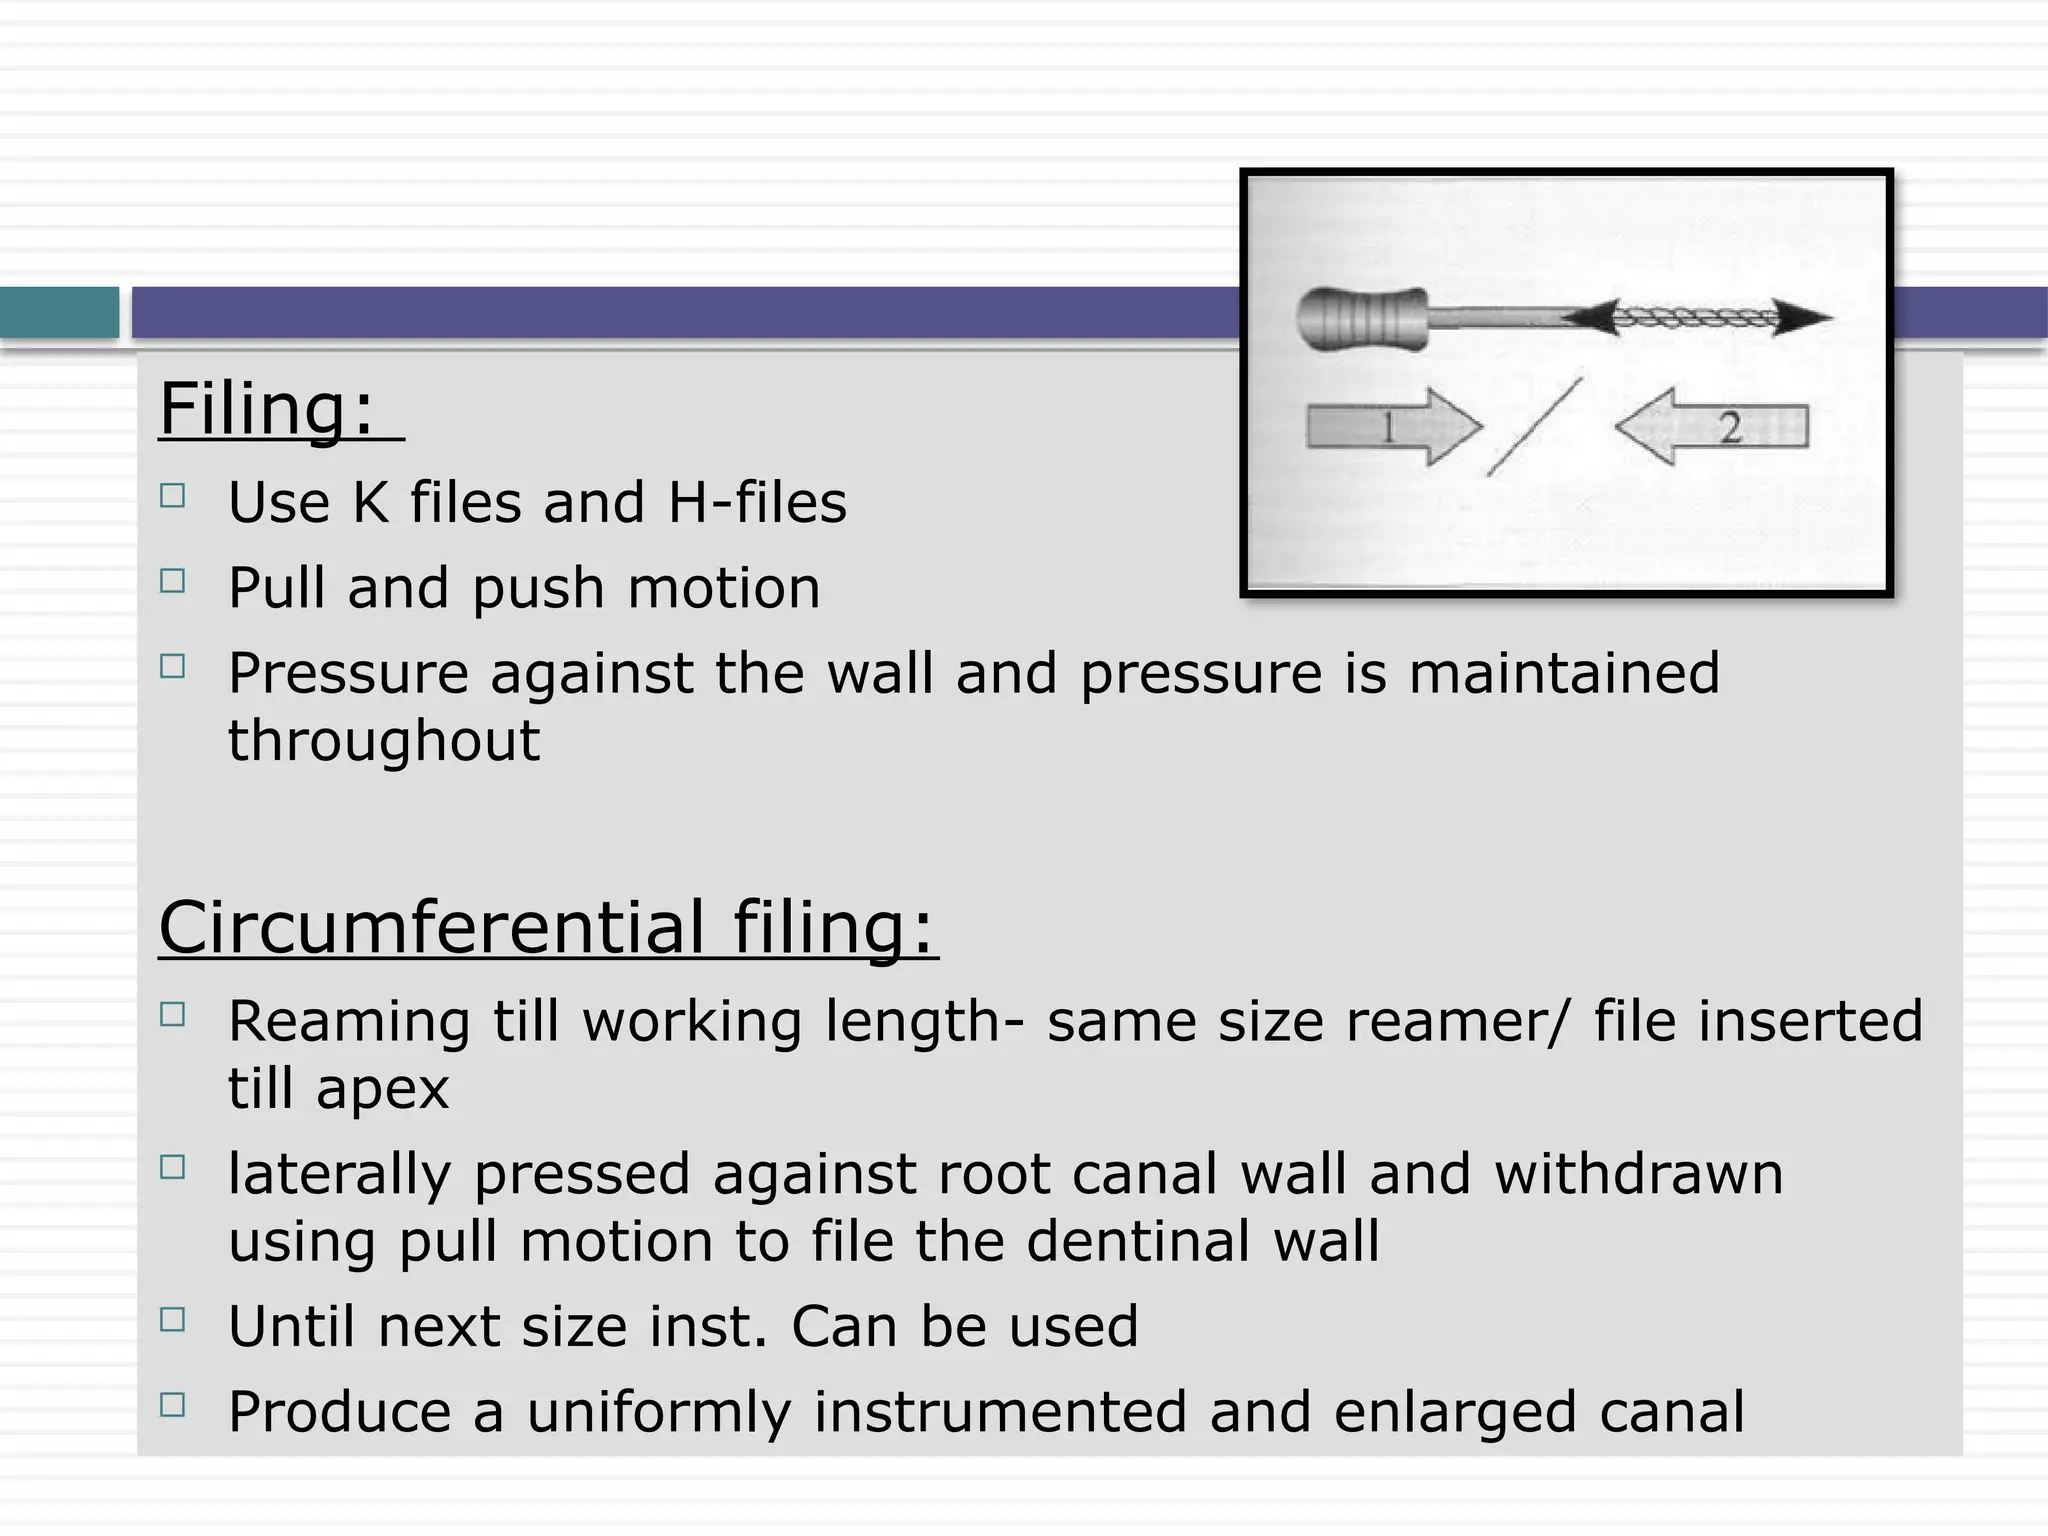
Filing:
Use Kfiles and H-files
Pull and push motion
Pressure against the wall and pressure is maintained
throughout
Circumferential filing:
Reaming till working length- same size reamer/ file inserted
till apex
laterally pressed against root canal wall and withdrawn
using pull motion to file the dentinal wall
Until next size inst. Can be used
Produce a uniformly instrumented and enlarged canal
14.
Anticurvature filing:
. AbouRass (1980)
Furcal wall of mesial root of molars prone to perforation
during coronal enlargement –curvature- thin dentin
To prevent- anticurvature filing is advocated i.e away
from curvature
Shank of the handle is pushed away from inside of
curve
Balances the cutting flutes against the safer part of
root canal.
15.
Step backtechnique-
. Conventional(Schilder and Weine)
. Modified step back
. Passive step back (Torabinejad)
Crown down/ step down technique-
. Crowndown pressureless
. Double flare
. Balanced force technique
Hybrid technique
Various instrumentation techniques
16.
Also calledas telescopic or serial root canal preparation (Schilder
and Weine)
Phase I - Apical preparation starting at the apical constriction.
Explore the canal with a fine instrument and establish the working
length
The first active instrument to be inserted should be a fine 0.02
tapered, stainless steel file coated with a lubricant
The motion of the instrument should be watch winding and
retraction and it should be taken to the working length
Step back method
Dent Clin North Am 1969: 13: 483–486.
17.
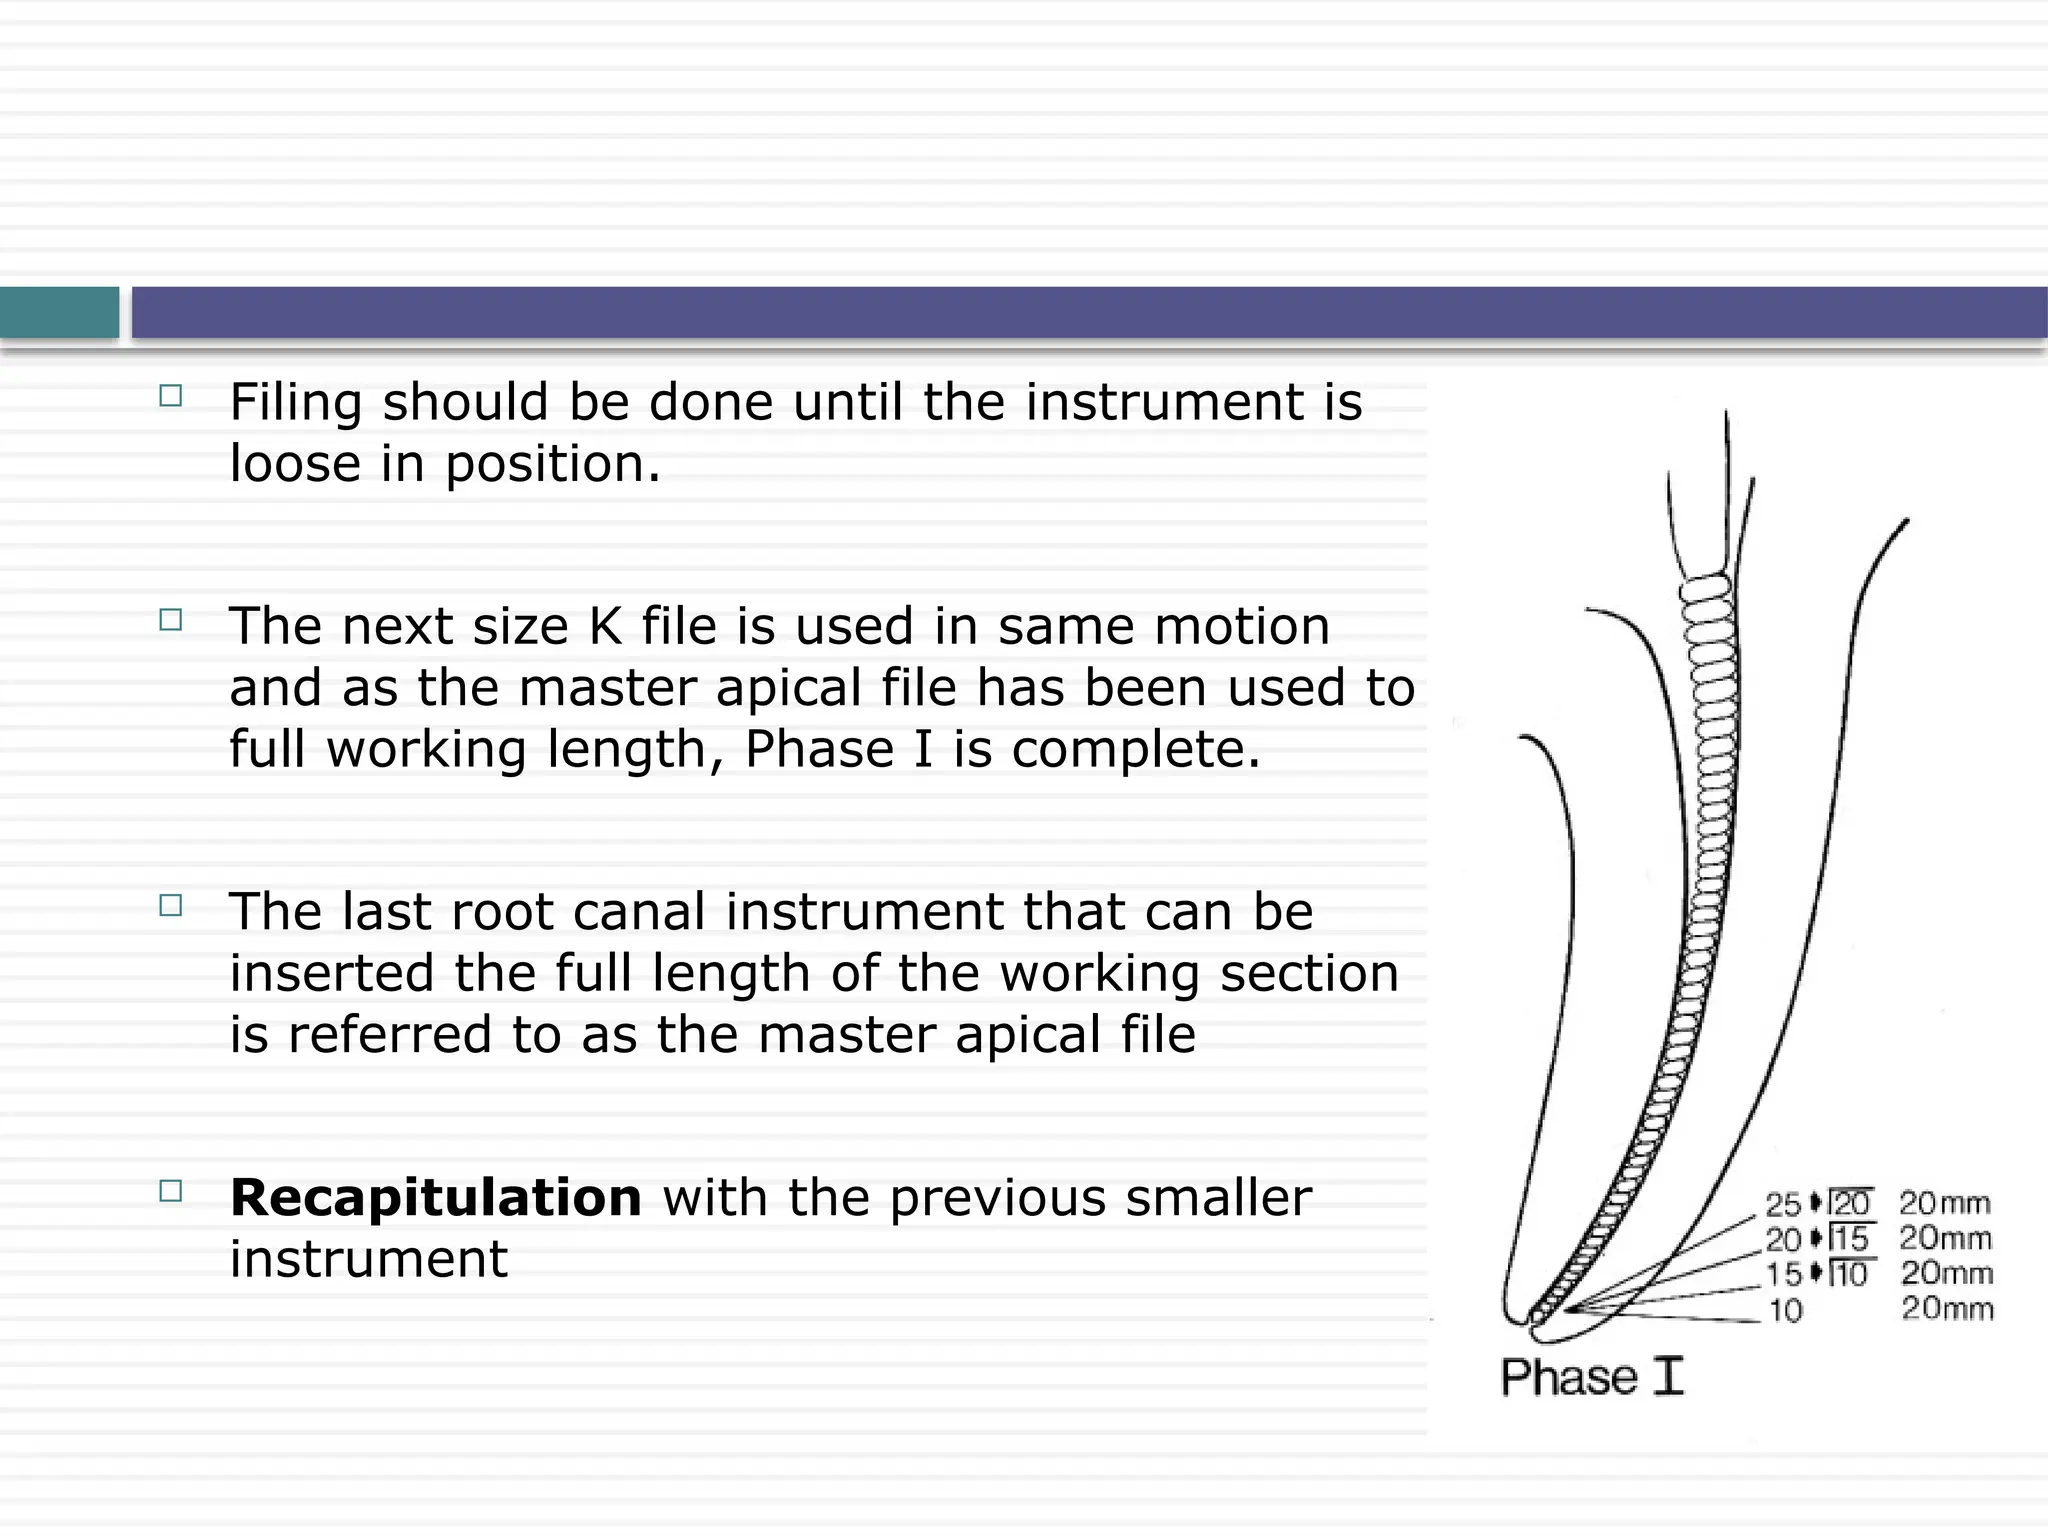
Filing shouldbe done until the instrument is
loose in position.
The next size K file is used in same motion
and as the master apical file has been used to
full working length, Phase I is complete.
The last root canal instrument that can be
inserted the full length of the working section
is referred to as the master apical file
Recapitulation with the previous smaller
instrument
18.
The preparationsteps back up the canal 1 mm
and one larger instrument at a time.
Recapitulation to full length with master apical
file follows to ensure patency to the
constriction.
Phase II is the preparation of the remainder of the canal, gradually
stepping back while increasing in size.
Refining Phase II-A Gates-Glidden drill
Nos. 2, 3, and 4 used to create coronal and
mid root preparations.
19.
Refining PhaseIIB is a return to master apical file, smoothing
all around the walls with vertical push-pull strokes, to perfect the
taper from the apical constriction to the cervical canal orifice
20.
The preparationis completed in the apical area, and then the
step-back procedure begins 2 to 3 mm up the canal.
This gives a short, almost parallel retention form to receive the
primary gutta-percha point
A slight tug-back should be felt when the gutta-percha point is
removed (retention form).
Modified Step-Back Technique
21.
Has beendescribed by Torabinejad in 1994.
Provides an unforceful and gradual enlargement of root canals in
an apical coronal direction.
Insert progressively larger hand instruments as deep as they
would passively go in order to gain insight into the canal anatomy
and do some enlargement prior to reaching the WL.
Subsequent use of GG drills or Peeso reamers will provide
additional coronal enlargement and improve tactile feedback from
the apical region as well as better access for irrigants
Passive Step back method
Oral Surg Oral Med Oral Pathol 1994: 77: 398–401.
22.
Crown down/ stepdown technique
Technique Manual. ed. Portland OR: Oregon Health Sciences University; 1980
J Endod 1984;10:491.
Given by Marshall & Pappin in 1980 and later evaluated by
Morgan & Montgomery in 1984.
This instrumentation technique was suggested to minimize the
extrusion of canal contents.
Coronal pre enlargement-by #35 hand file
Coronal preparation- by GG drills
23.
A largersize hand file is used with no apical force followed by
incrementally smaller instruments progressing deeper into the
canal.
The final step is to enlarge the apical area to three sizes larger
than the first file that bound at WL.
This is accomplished by going through the sequence of
descending instrument sizes starting with a file one size larger
than the starting size in the preceding series.
24.
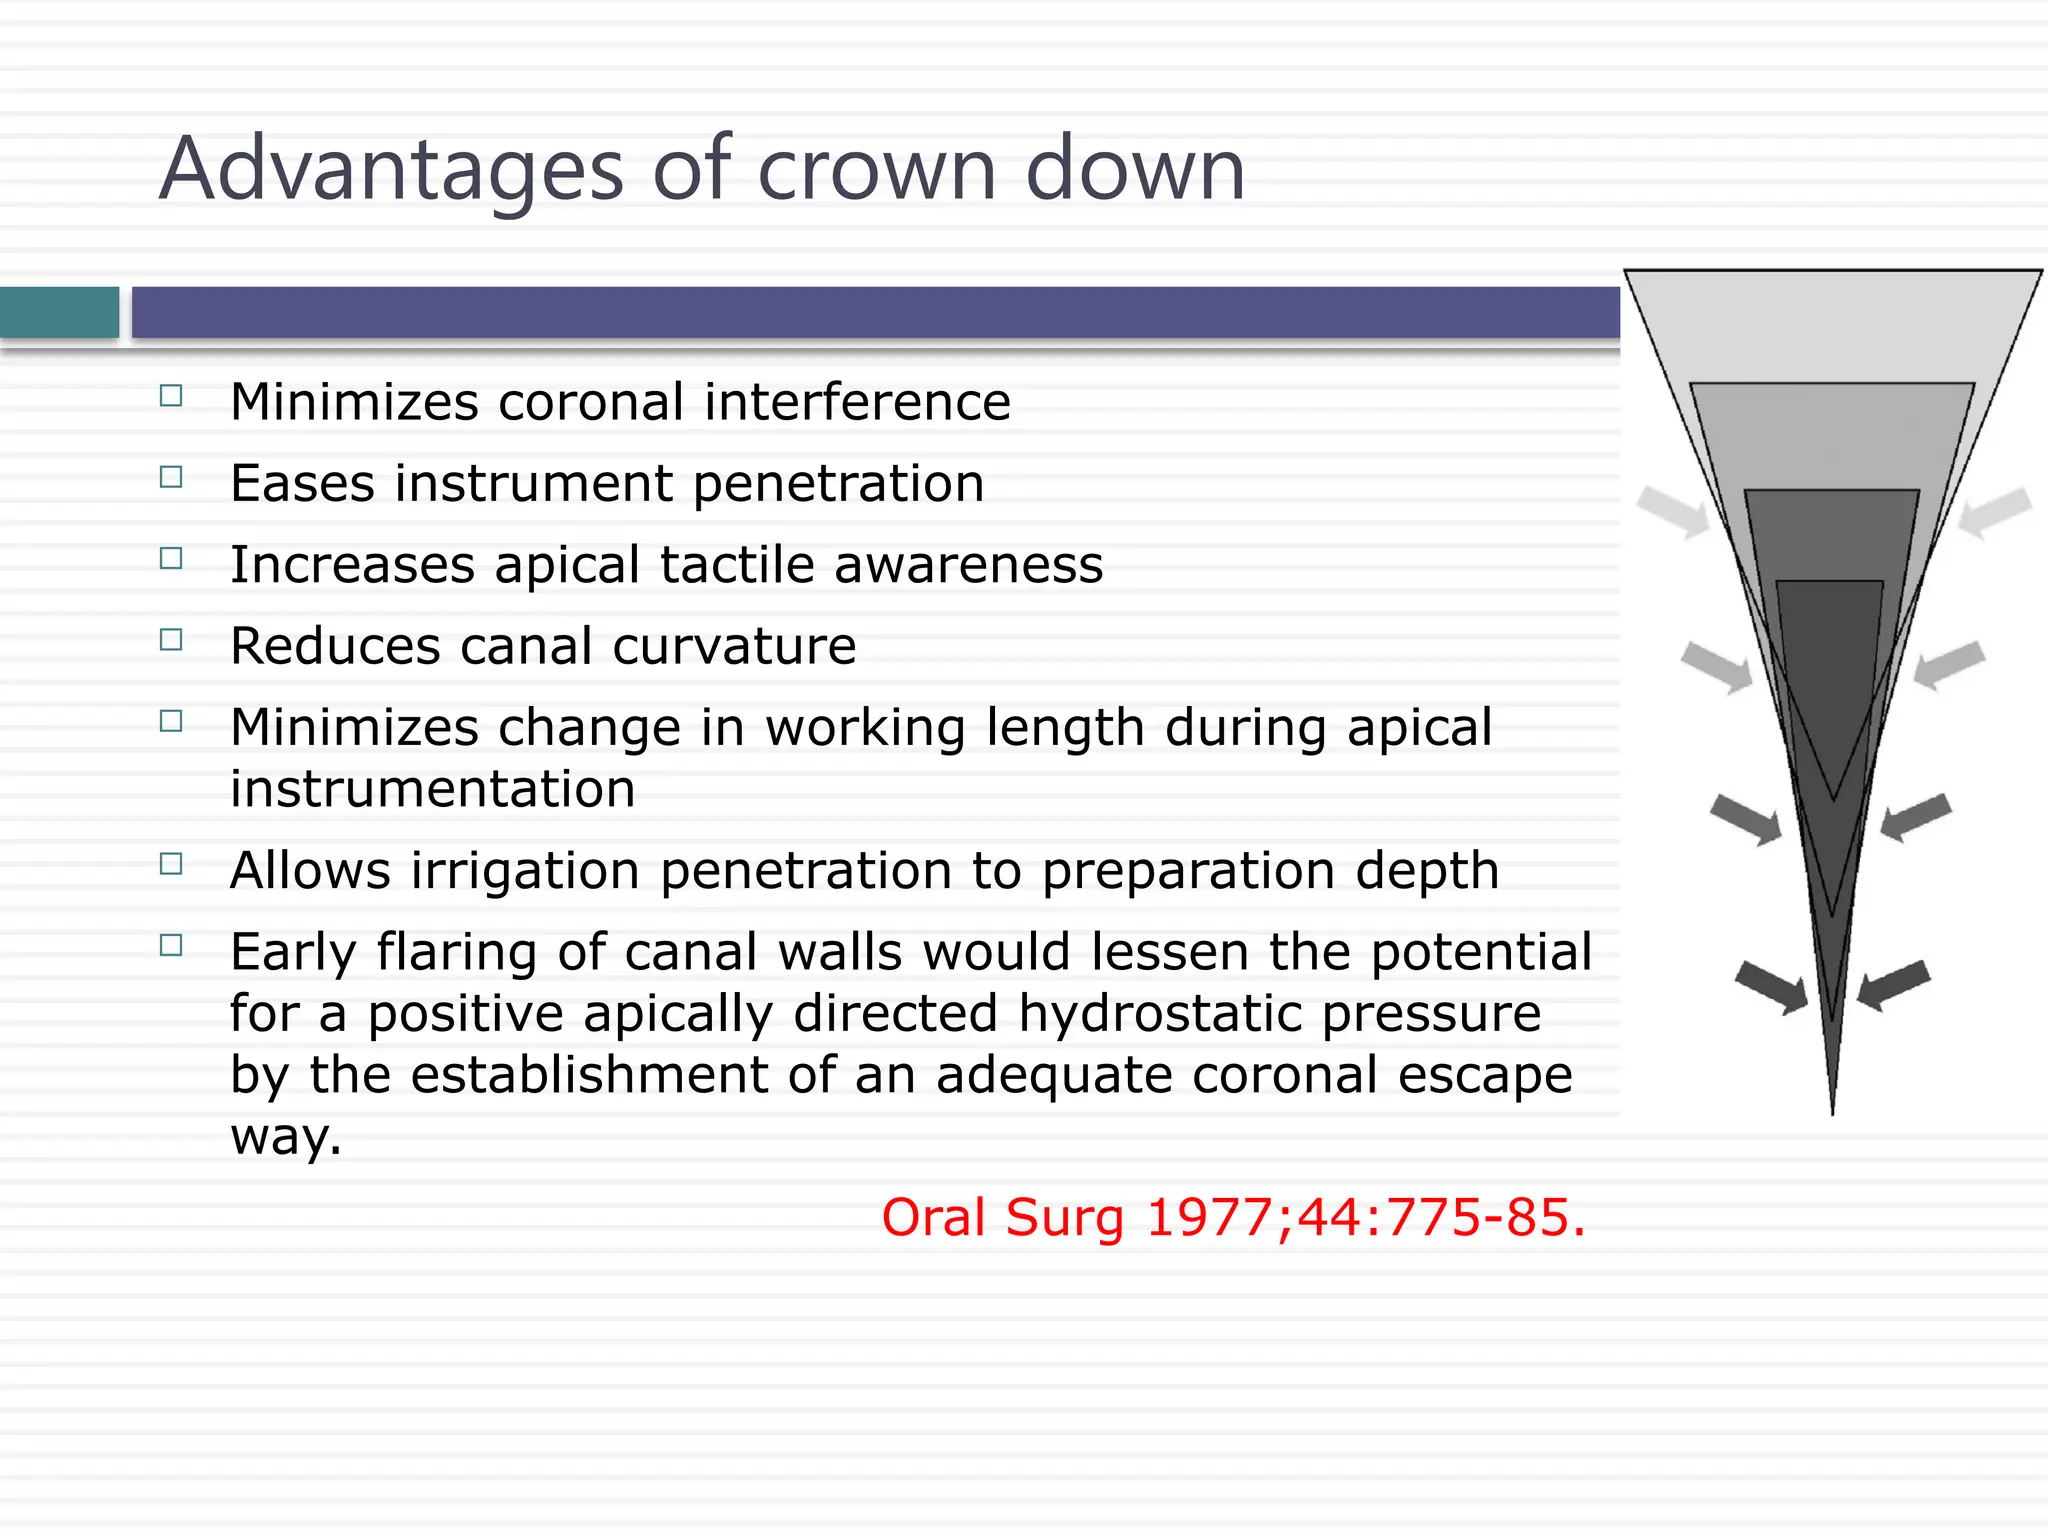
Minimizes coronalinterference
Eases instrument penetration
Increases apical tactile awareness
Reduces canal curvature
Minimizes change in working length during apical
instrumentation
Allows irrigation penetration to preparation depth
Early flaring of canal walls would lessen the potential
for a positive apically directed hydrostatic pressure
by the establishment of an adequate coronal escape
way.
Oral Surg 1977;44:775-85.
Advantages of crown down
25.
The greattaper in the cervical and middle thirds leads to more
effective removal of canal contents and the root canal is better
cleansed (therefore preventing iatrogenic apical contamination)
J Endodon 1975;1:211-4.
Reduces the contact area of each instrument (therefore reducing
torque and increasing cutting efficiency and safety)
A direct comparison between crown down and step back has shown
that using crown down will result in less tip contact, less force, and
less torque compared with step back.
Crown down is safer than step back
Int Endod J 1999;32:108–14.
26.
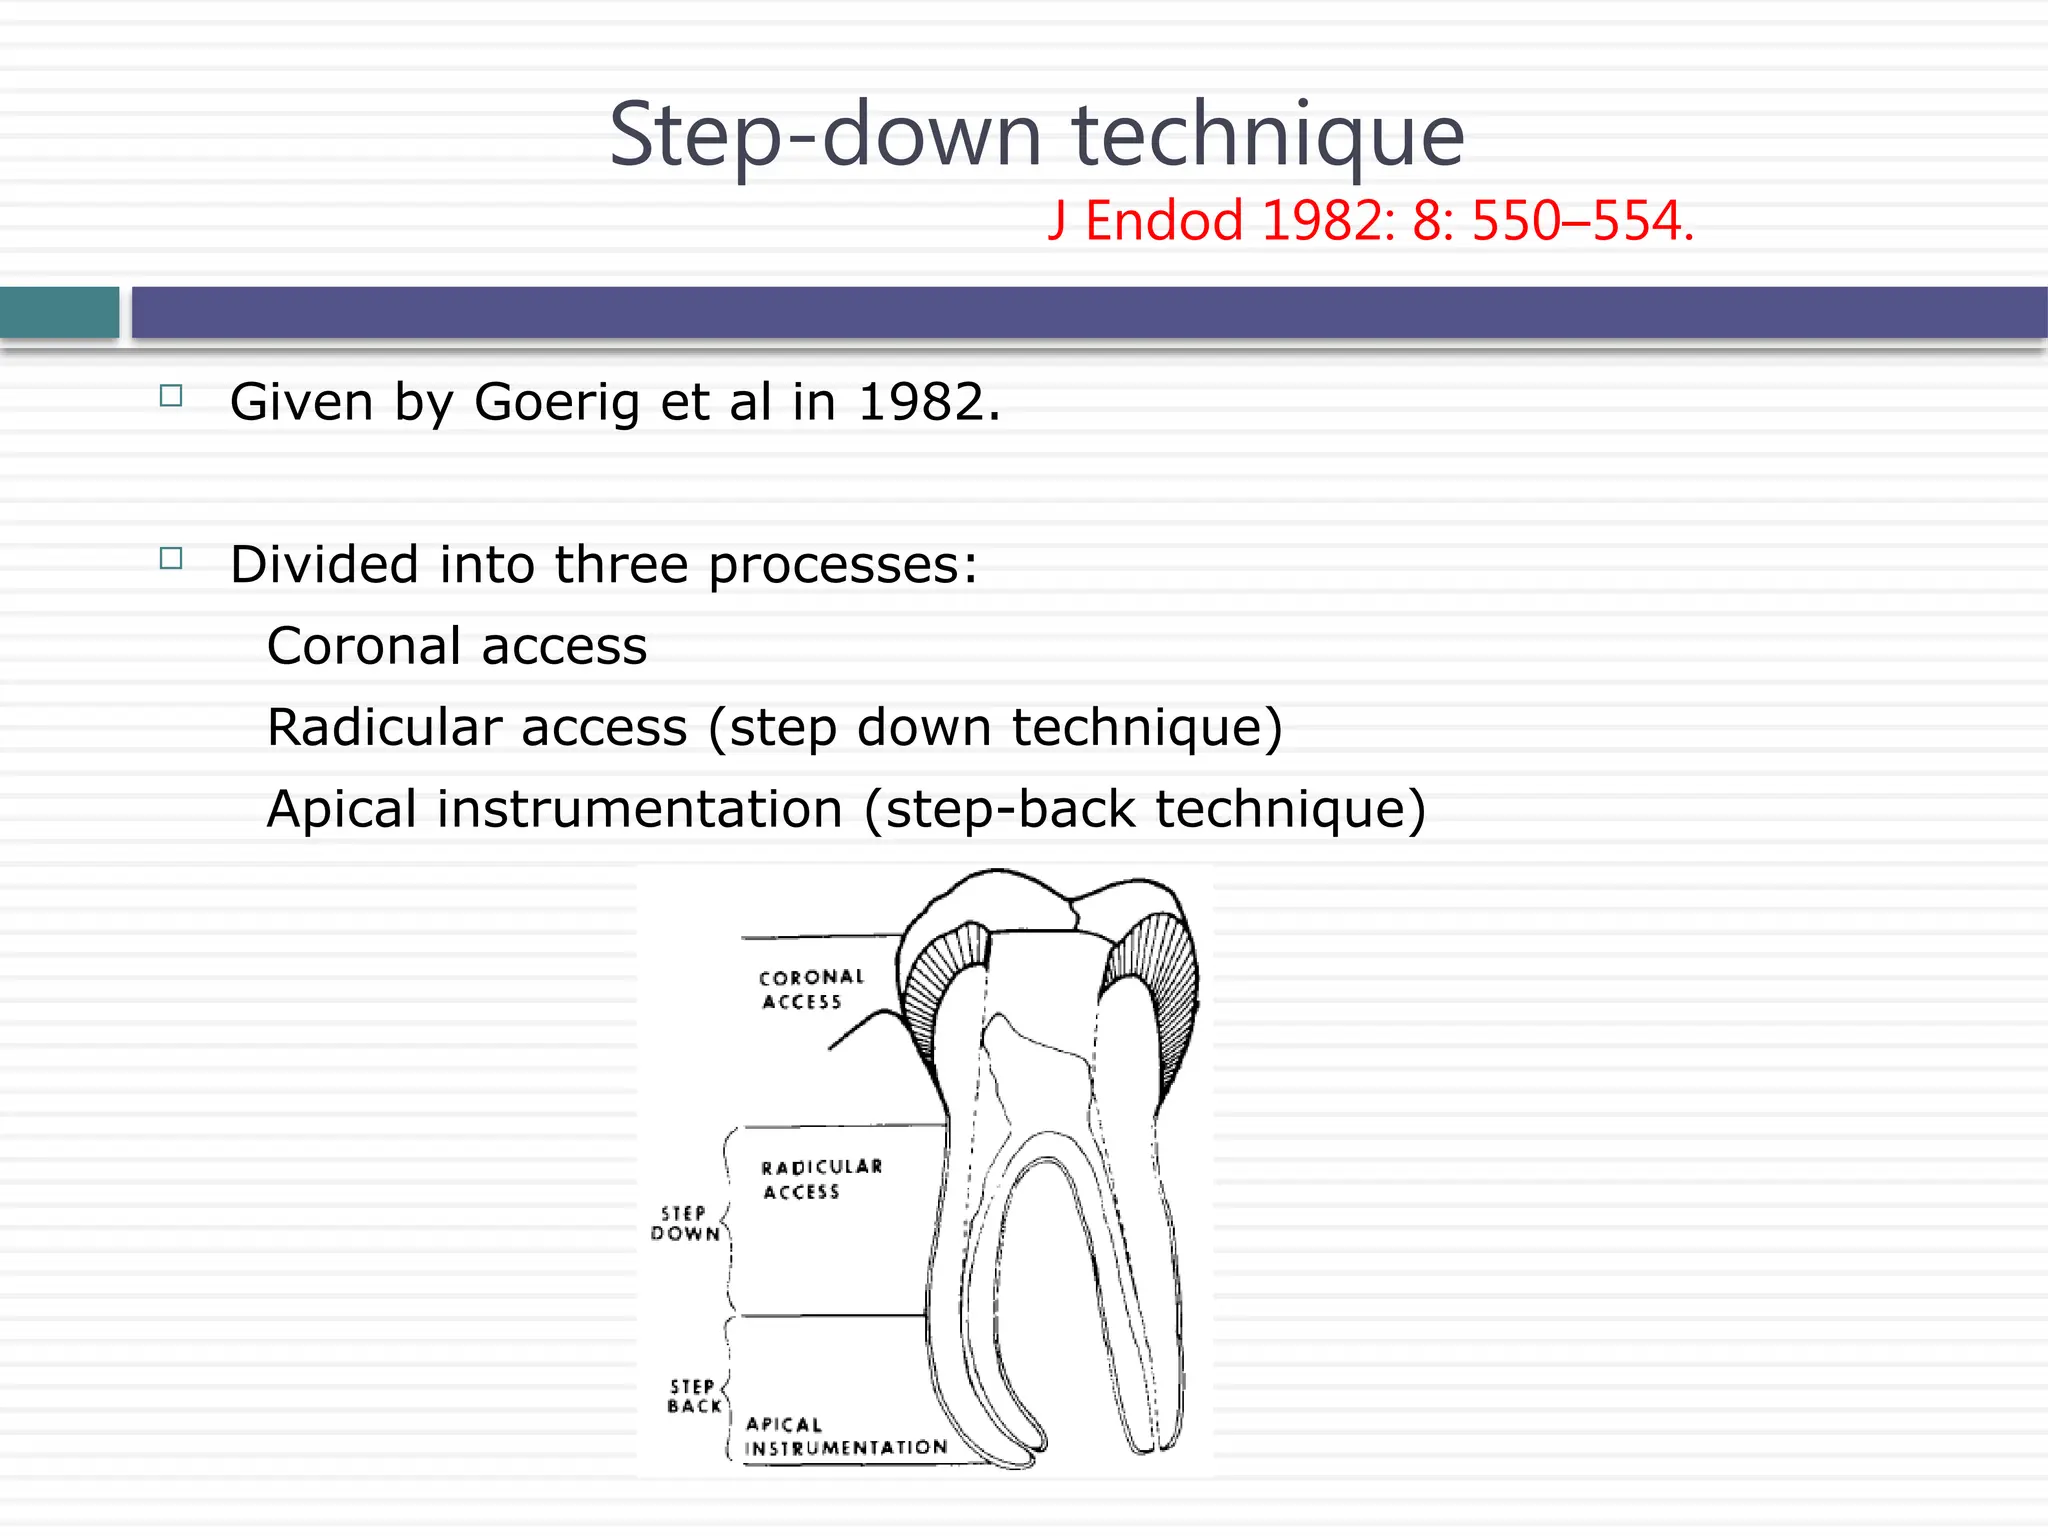
Given byGoerig et al in 1982.
Divided into three processes:
Coronal access
Radicular access (step down technique)
Apical instrumentation (step-back technique)
Step-down technique
J Endod 1982: 8: 550–554.
27.
Double flare technique
JEndod 1983: 9: 76–80.
Described by Fava in 1983.
Prepare the canal with instrument of large diameter with a stop
fitted equivalent to the measurement to the cervical third
It must not bind in the walls of the root canal to prevent the
creation of hydrostatic pressure
Decreasing the diameter of the instrument at the same time that
its length is increased by 1 mm, until reaching end of the middle
third
After maintaining the patency with # 15 or #20 k file, reach up to
the working length by preparing in same manner.
At working length, prepare it 3 times larger and follow step back
method as described by Weine.
28.
Is indicatedin cases of straight root canals or in the straight
portions of curved canals of mature teeth.
Contraindications
Calcified canals
Young permanent teeth
Teeth with an open apex
J Endod 1983: 9: 76–80.
29.
Roane etal. introduced Balanced Force concept of canal preparaton in
1985
For every action there is an equal and opposite reaction.
coronal and mid-thirds of a canal are flared with GG drills, beginning with
small sizes
Balanced Force hand instrumentation begins with the typical triad of
movements: placing, cutting, and removing instruments using only rotary
motions
Insertion is done by a quarter-turn clockwise rotation while slight or no
apical pressure is applied.
Balanced force technique
J Endod 1984: 10: 349–353.
30.
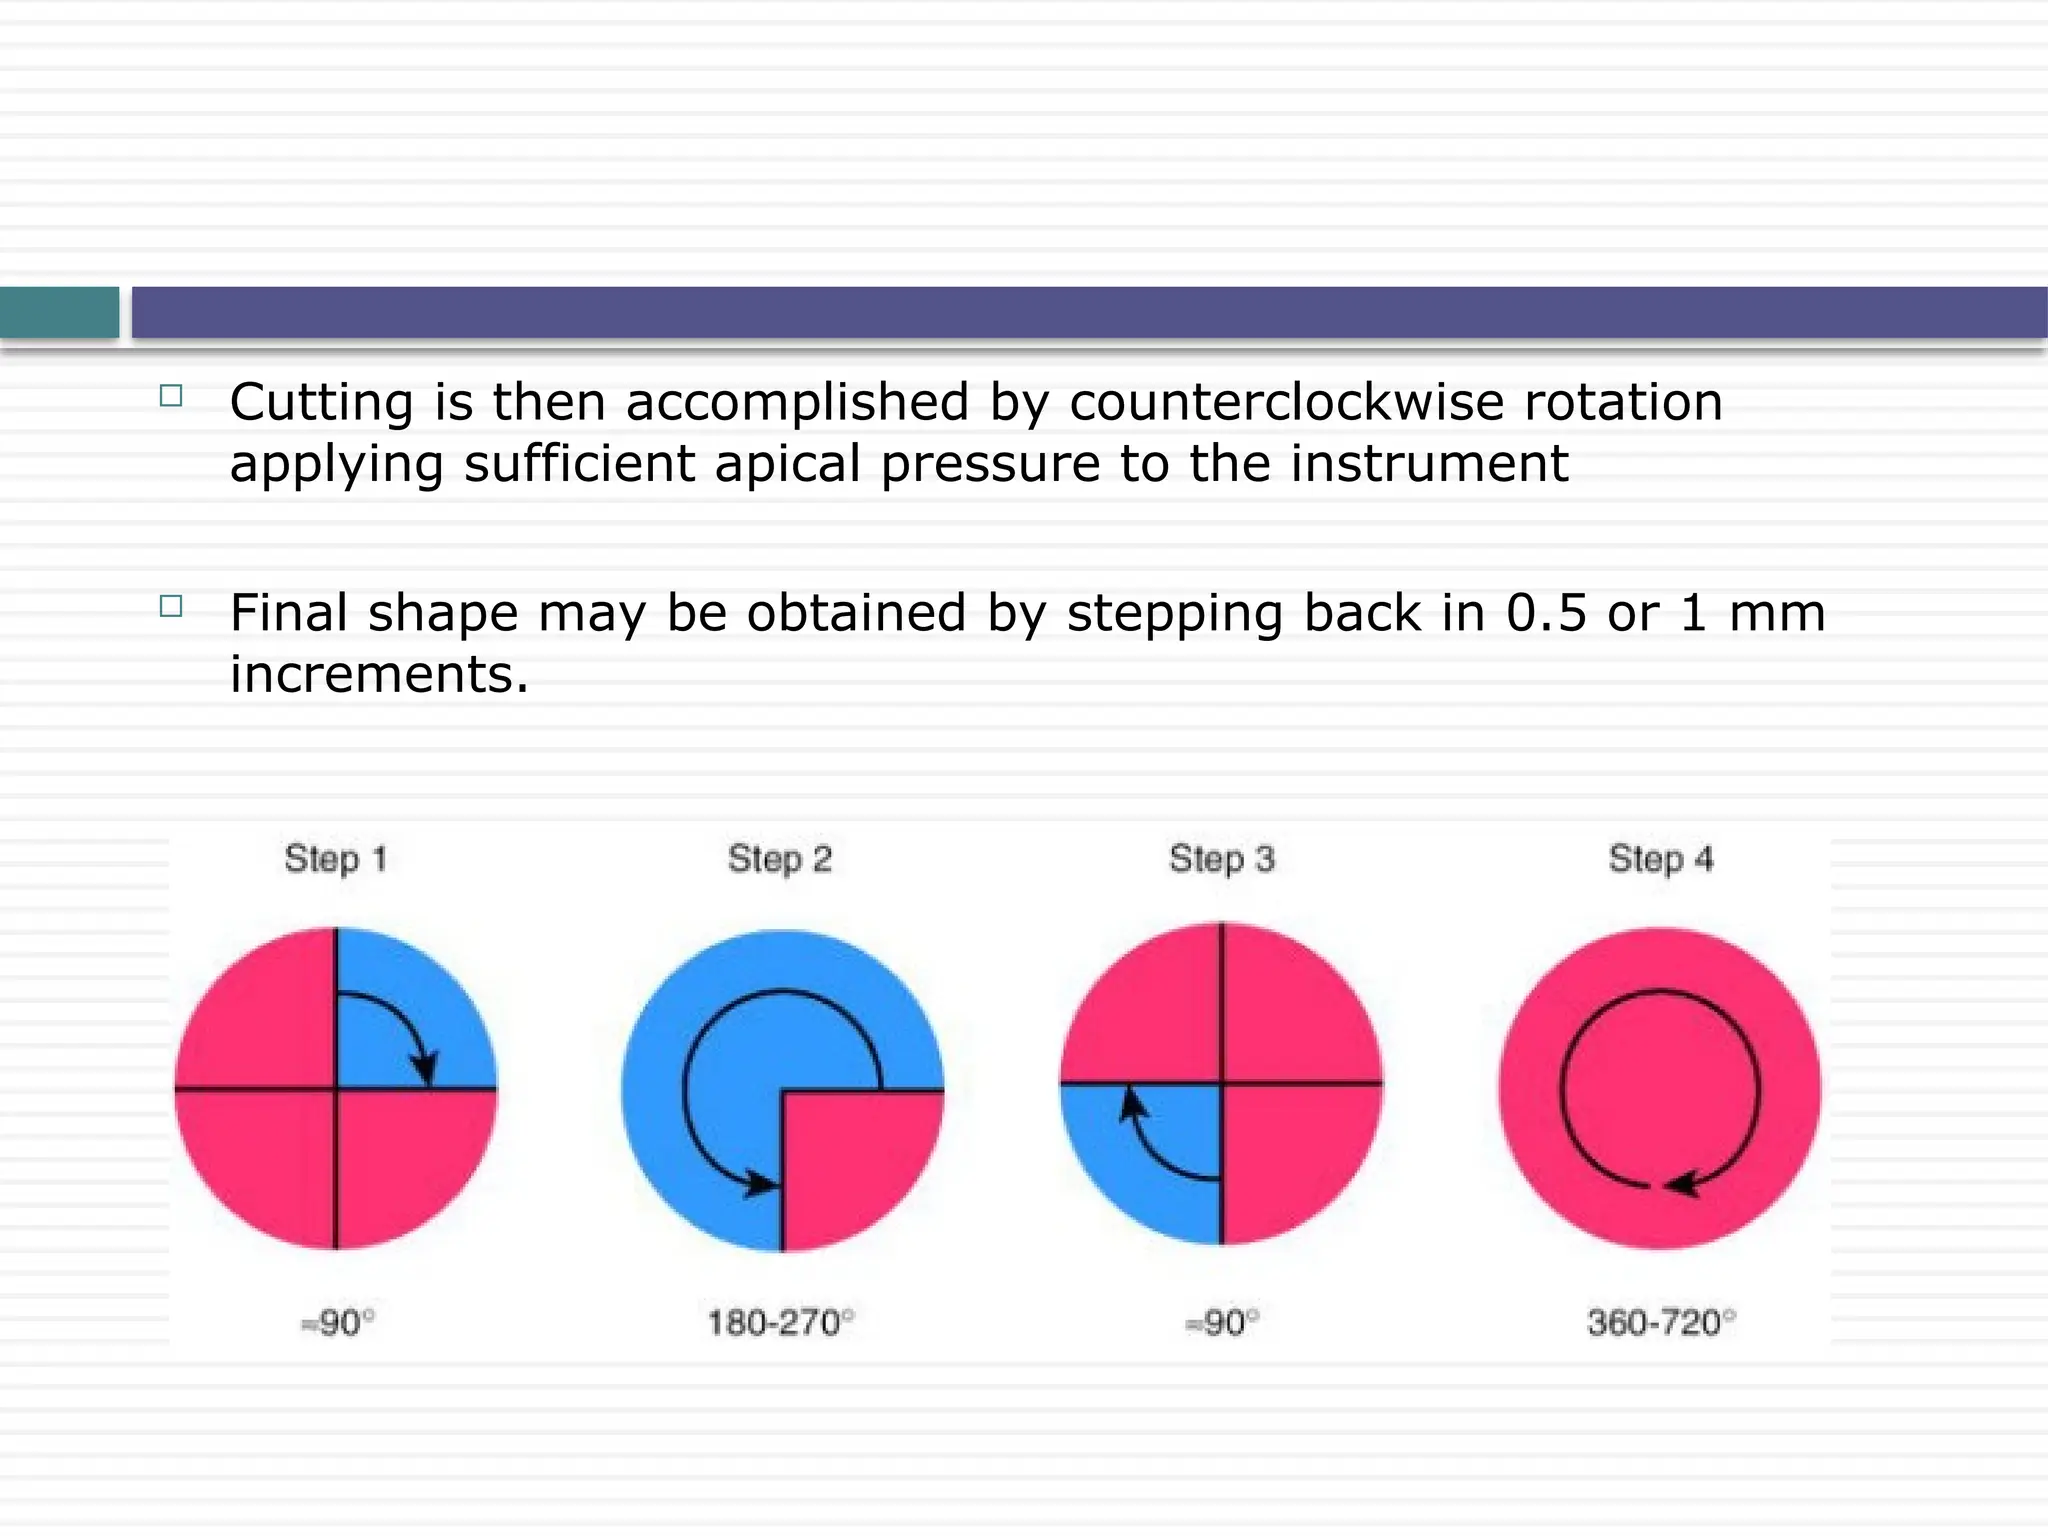
Cutting isthen accomplished by counterclockwise rotation
applying sufficient apical pressure to the instrument
Final shape may be obtained by stepping back in 0.5 or 1 mm
increments.
31.
Balanced Forcetechnique may be used with any file with
symmetrical cross section.
J Endod 1987;13:479.
Shaping and transportation control are considered optimal when a
Flex-R file is used.
J Endod 1992;18:19.
The Flex-R file design removes the transition angles inherent to
the tip of standard K-files
The specific tip design prevents Flex-R files from transporting the
canal into the external wall of a curve
32.
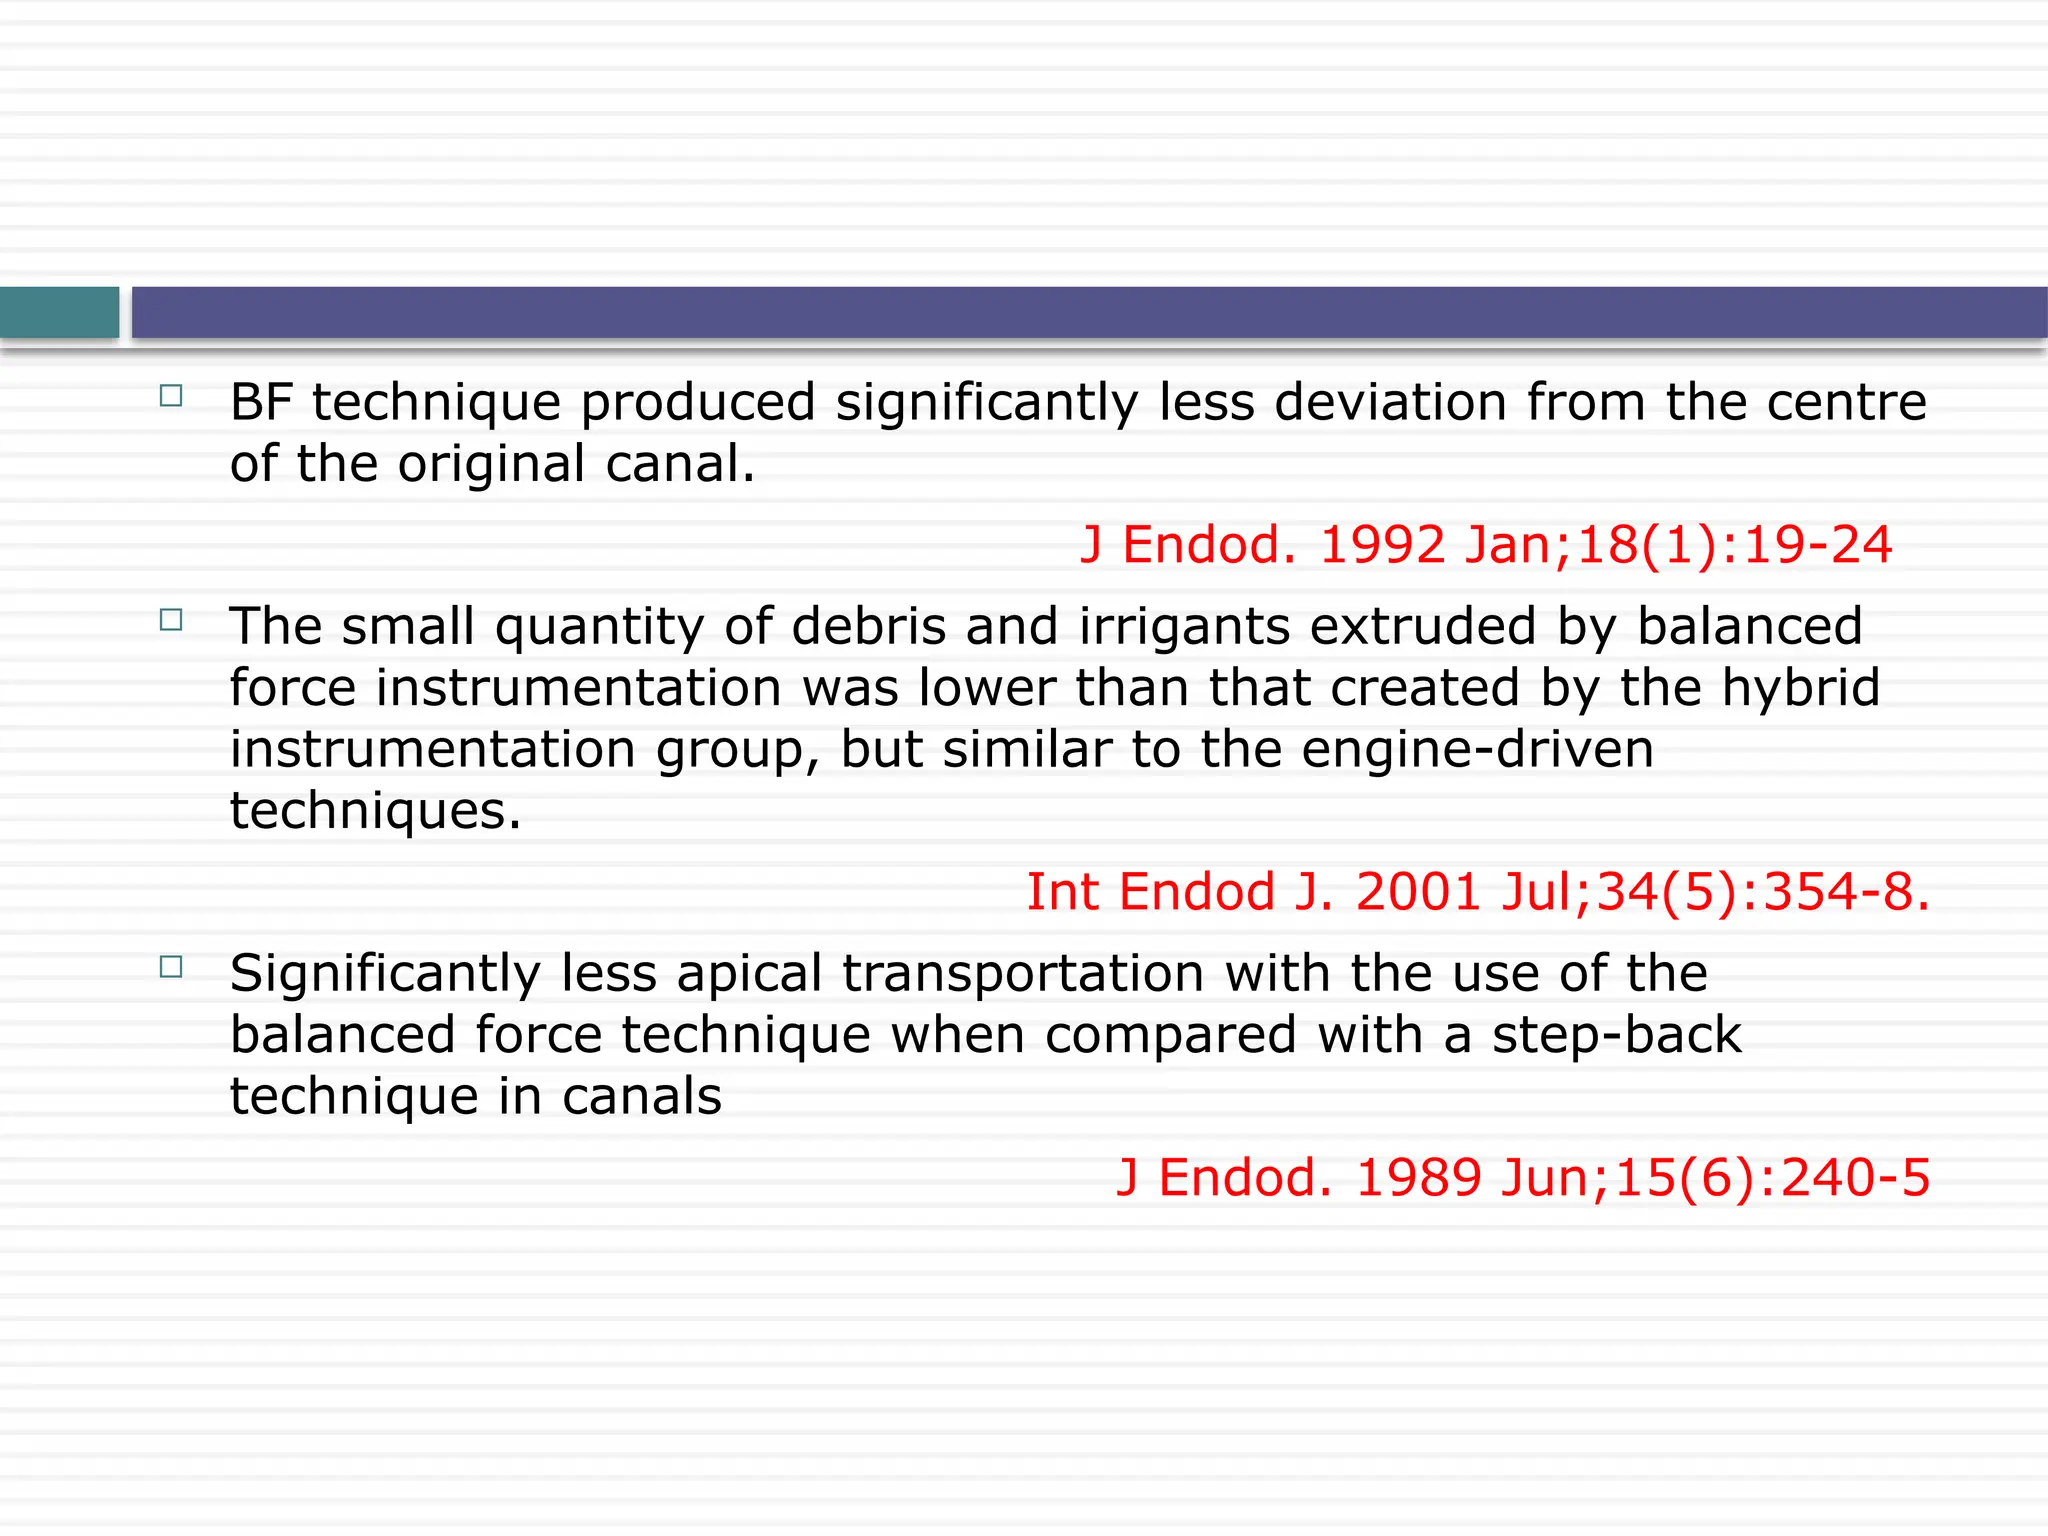
BF techniqueproduced significantly less deviation from the centre
of the original canal.
J Endod. 1992 Jan;18(1):19-24
The small quantity of debris and irrigants extruded by balanced
force instrumentation was lower than that created by the hybrid
instrumentation group, but similar to the engine-driven
techniques.
Int Endod J. 2001 Jul;34(5):354-8.
Significantly less apical transportation with the use of the
balanced force technique when compared with a step-back
technique in canals
J Endod. 1989 Jun;15(6):240-5
33.
The hybridconcept combines the best features of different
systems for safe, quick, and predictable results.
Straight line access
Working length
Master apical file size determination
Glide path
Body shaping
Apical preparation
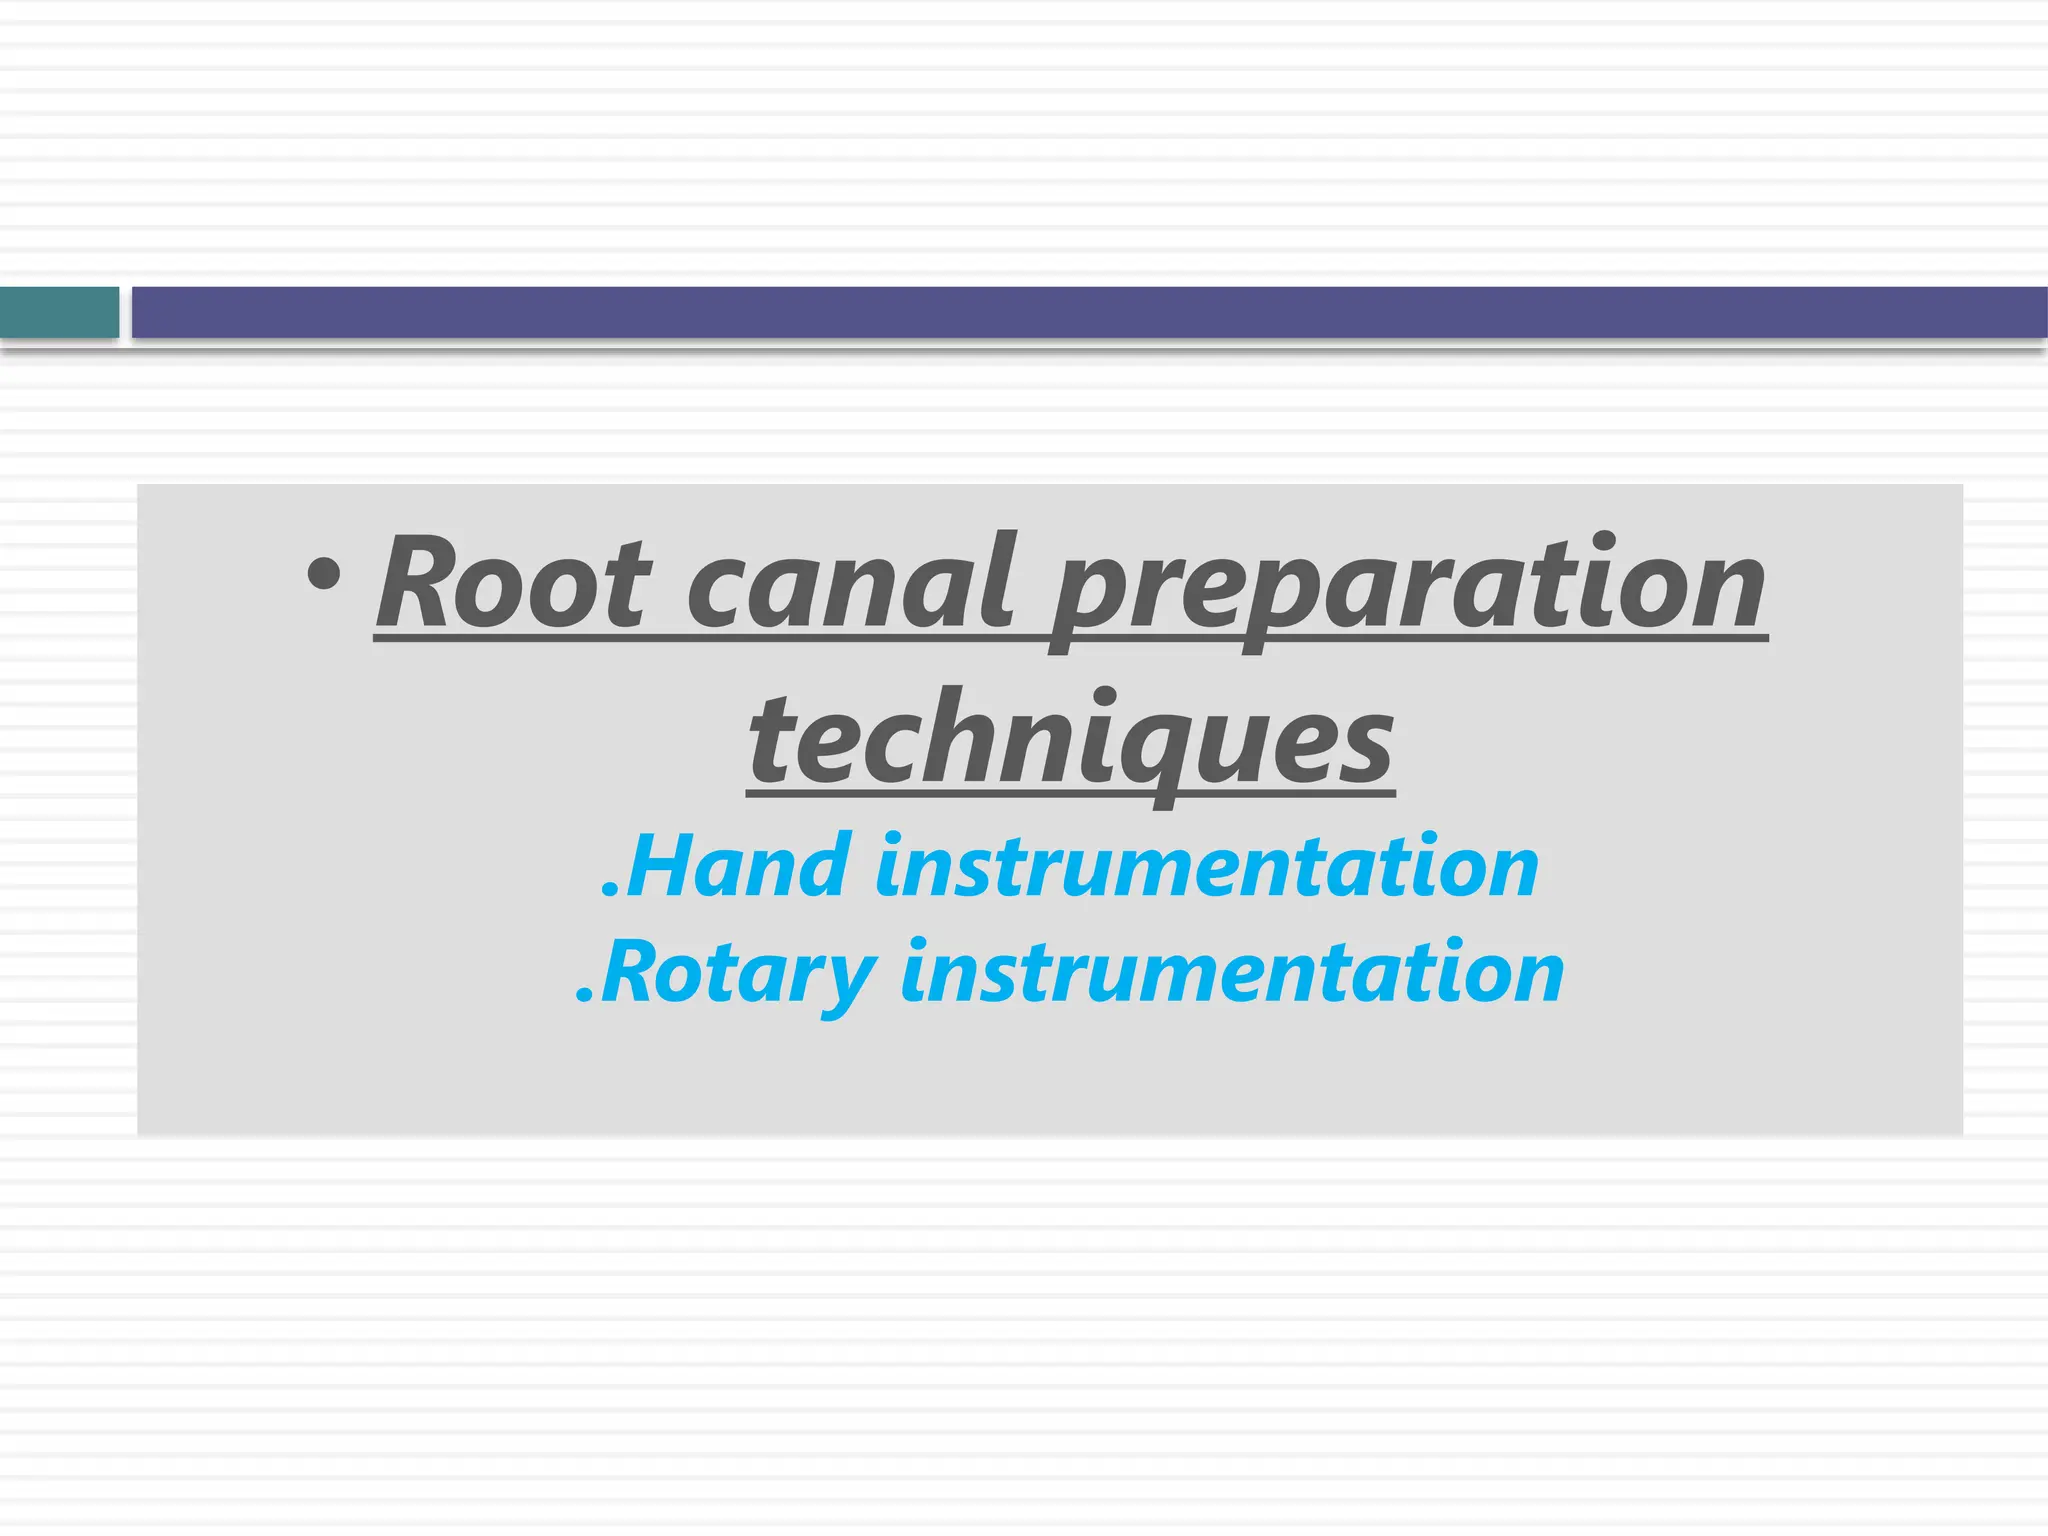
The technique involves the use of a variety of instruments:
Hybrid technique
• GG drills and K-files for establishing straight-line access;
• ProTaper instruments for body shaping and apical preenlargement;
• NiTi K-files or LightSpeed instruments for apical widening
Dent Clin N Am 48 (2004) 183–202
34.
Described bySaunders & Saunders (1992).
A #40 Flex R file was instrumented in the straight part of the canal,
using the balanced force technique
Sequentially larger sizes of files were used to instrument this
straight part of the canal
At this stage the coronal 4 to 5 mm of the root canal was
instrumented with Gates Glidden drills
A #20 Flex R file was then taken to the working length and the
canal prepared using the balanced force technique by sequential use
Preparation at the working length was continued until clean dentin
was removed, the master apical file varying between #40 and 45.
A step-back technique using balanced forces was then used to
prepare the remaining curved portion of the canal.
Modified double flare technique
J Endod 1992: 18: 32–36.
35.
When apulling (filing) motion is initiated, the greatest amount of
cutting occurs at the inner curve and apex because of the action
of a lever arm and fulcrum.
By pulling, the operator loses control and cannot direct the
cutting forces evenly along the entire canal.
When using Ni Ti rotary instruments, a reaming motion replaces
the filing movement.
Less straightening will be accomplished
Results in less canal transportation and better centering of canal.
Vessey found that more rounded preparations are produced when
using a reaming action instead of a filing movement.
Oral Surg Oral Med oral Pathol 1969; 27: 543-547.
Continuous reaming motion
36.
Described byWildey & Senia (1989)
A new SW instrument was introduced.
Canal Master technique
OOO 1989: 67: 198–207.
37.
Described byTronstad in 1991
Apical 2-5 mm of root canal is prepared in
cylindrical shape rather than tapered
This is obtained by rotating the k file at exact
working length to create a shelf.
Apical box technique
Clinical Endodontics. Stuttgart: G.Thieme-Verlag, 1991
38.
Step 1: Accessand coronal preflaring
Step 2: Determine working length and Initial apical rotary
Nonbinding instruments advance in steps of 1 mm to 2 mm to the
working length with slow, controlled movements.
Step 3: Determine Master apical rotary
Binding instruments
Used with controlled forward (1 mm to 2 mm) and backward (2
mm to 4 mm) ‘‘pecking’’ movements.
The forward motion reams the canal, whereas the backward
motion tends to clean the cutting head
The MAR may be 6 to 12 LightSpeed instruments larger than the
IAR.
Step 4: Step-back and recapitulation
Zurich LightSpeed technique
39.
Step 1:Determine the LightSpeed size that is used to begin
rotary instrumentation (sizing or gauging the apical canal
diameter)
Step 2: Determine the apical preparation size
12 ‘‘pecks’’ rule
‘‘pecking’’ movement translates into downward cut of the dentin
followed by a slight withdrawal of about 1 to 3 mm.
Step 3: Complete apical instrumentation
Step 4: Instrument mid-root
Step 5: Recapitulate
Manufacturers recommended LightSpeed
technique
40.
This systemconsists of a pump, a hose, a special valve, and a
connector that needs to be cemented into the access cavity
Cleaning action is then provided by oscillations of the irrigation
solution (1% to 3% NaOCl) at a reduced pressure.
Non instrument technique(NIT)
Lussi et al J Endod 1993;19:549.
41.
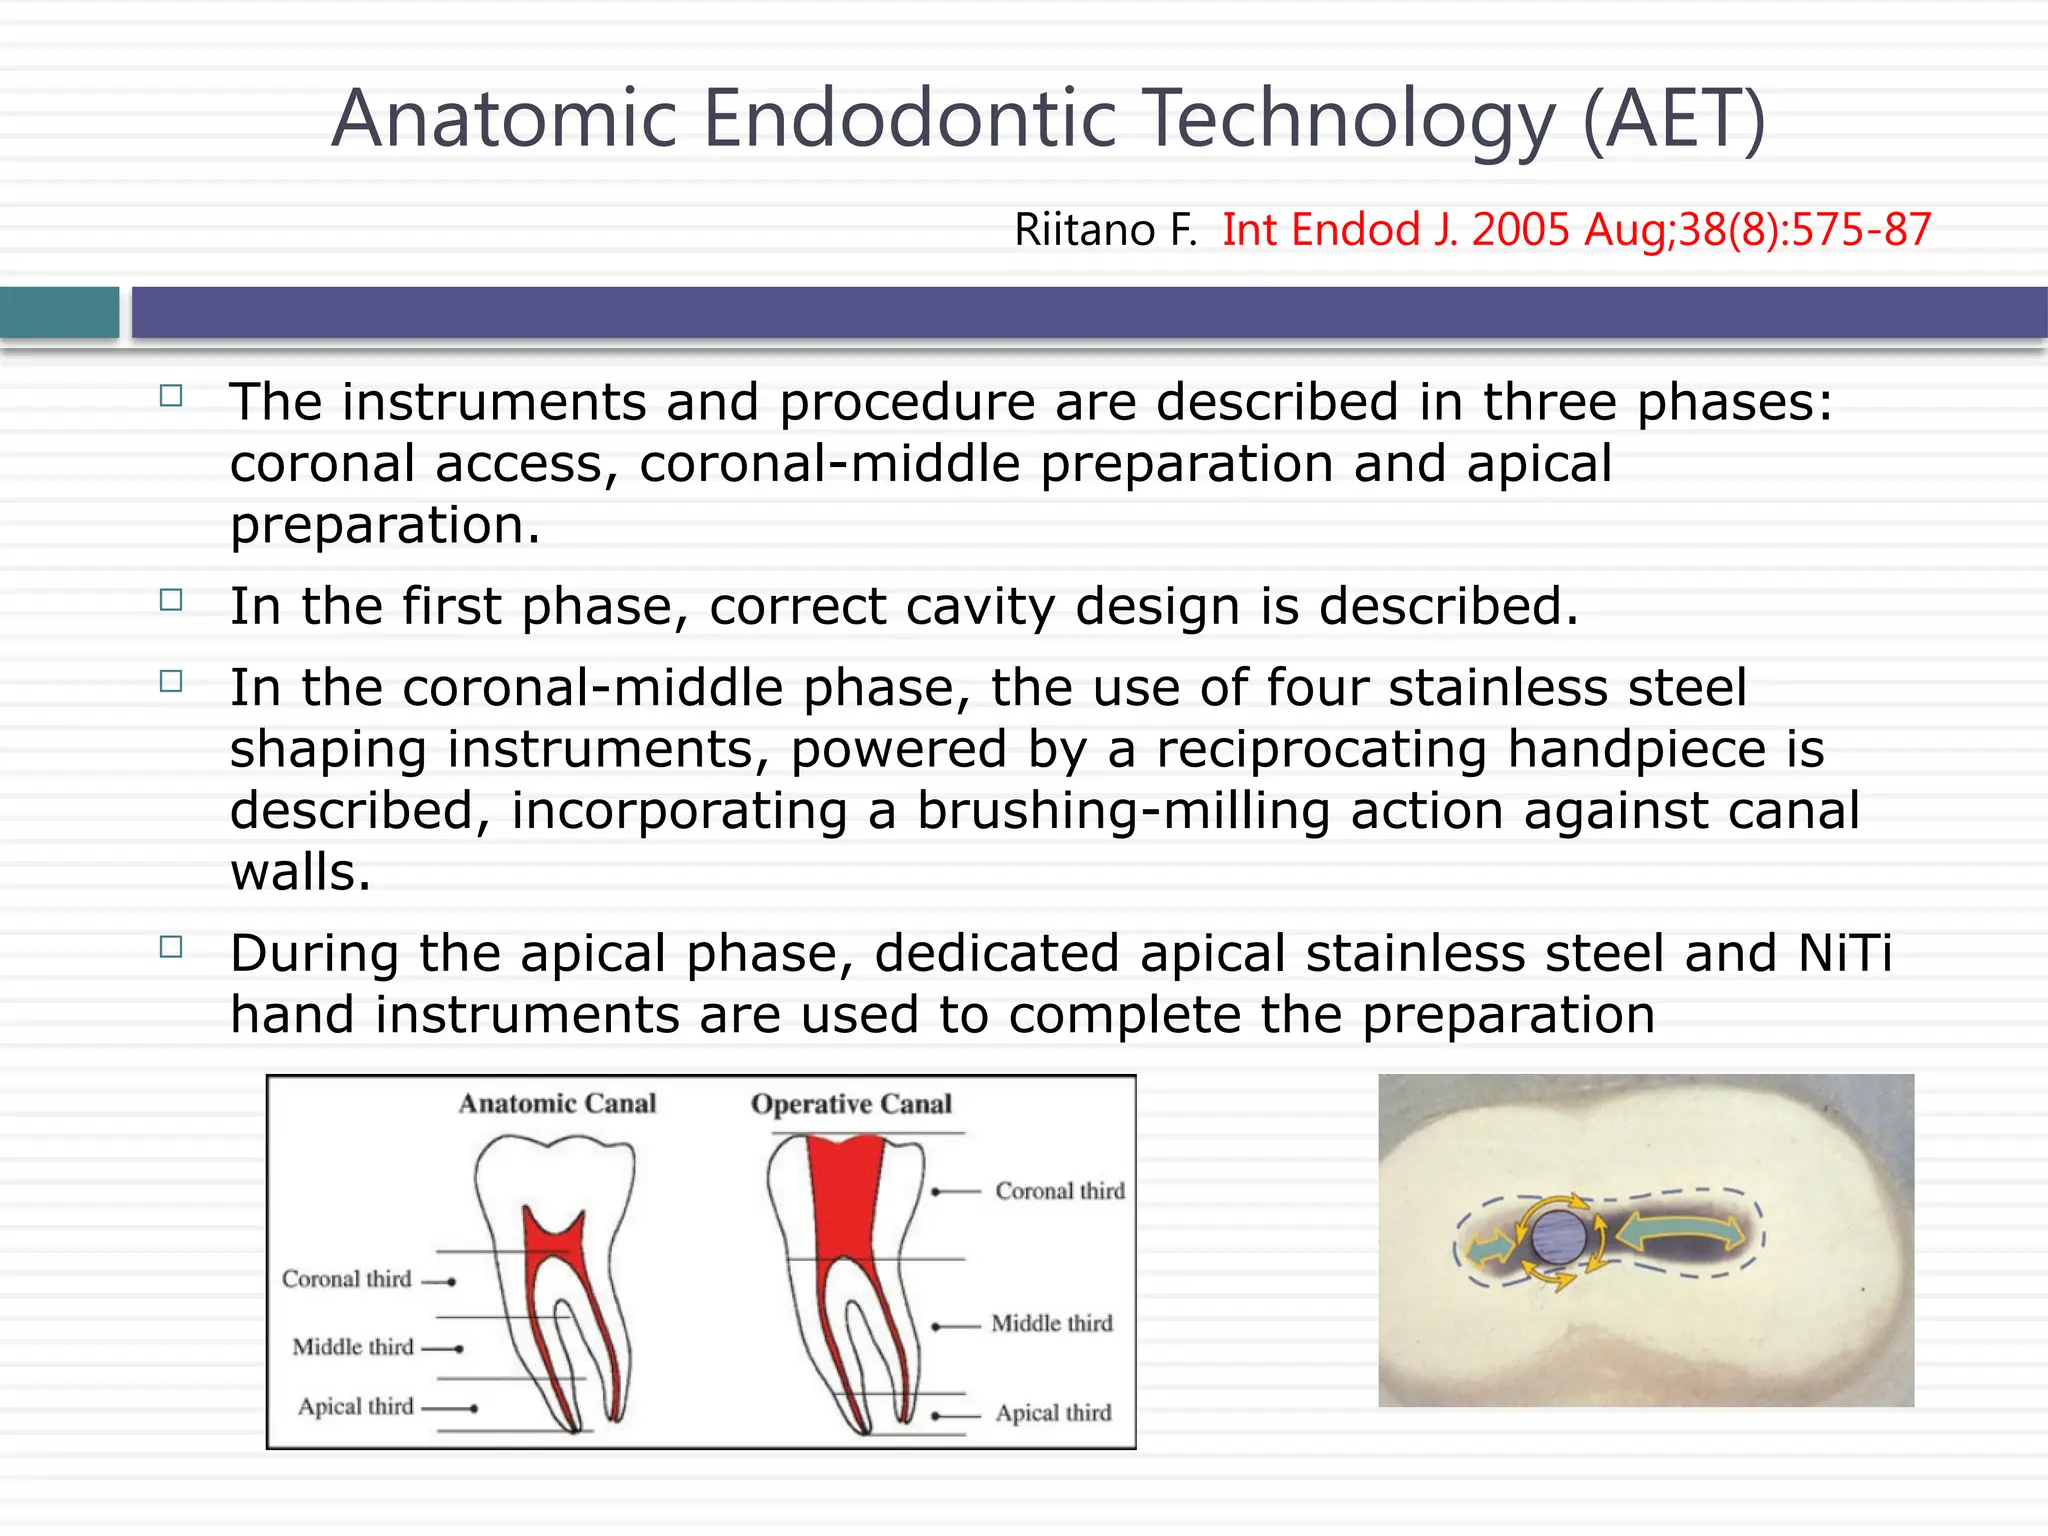
The instrumentsand procedure are described in three phases:
coronal access, coronal-middle preparation and apical
preparation.
In the first phase, correct cavity design is described.
In the coronal-middle phase, the use of four stainless steel
shaping instruments, powered by a reciprocating handpiece is
described, incorporating a brushing-milling action against canal
walls.
During the apical phase, dedicated apical stainless steel and NiTi
hand instruments are used to complete the preparation
Anatomic Endodontic Technology (AET)
Riitano F. Int Endod J. 2005 Aug;38(8):575-87
43.
Challenges
Root canal preparationis adversely influenced by
Highly variable root-canal anatomy
Relative inability of the operator to visualize this anatomy from
radiographs
Most difficult curves to deal with are to
the buccal and/or the lingual because they
are directly in line with the x-ray beam.
44.
Three main issuesare presently considered most challenging and
controversial in root canal shaping:
Identification, accessing, and enlargement of the main canals
without procedural errors
Establishing and maintaining adequate working lengths
throughout the shaping procedure
Selection of preparation sizes and overall geometries that allow
adequate disinfection and subsequent obturation.
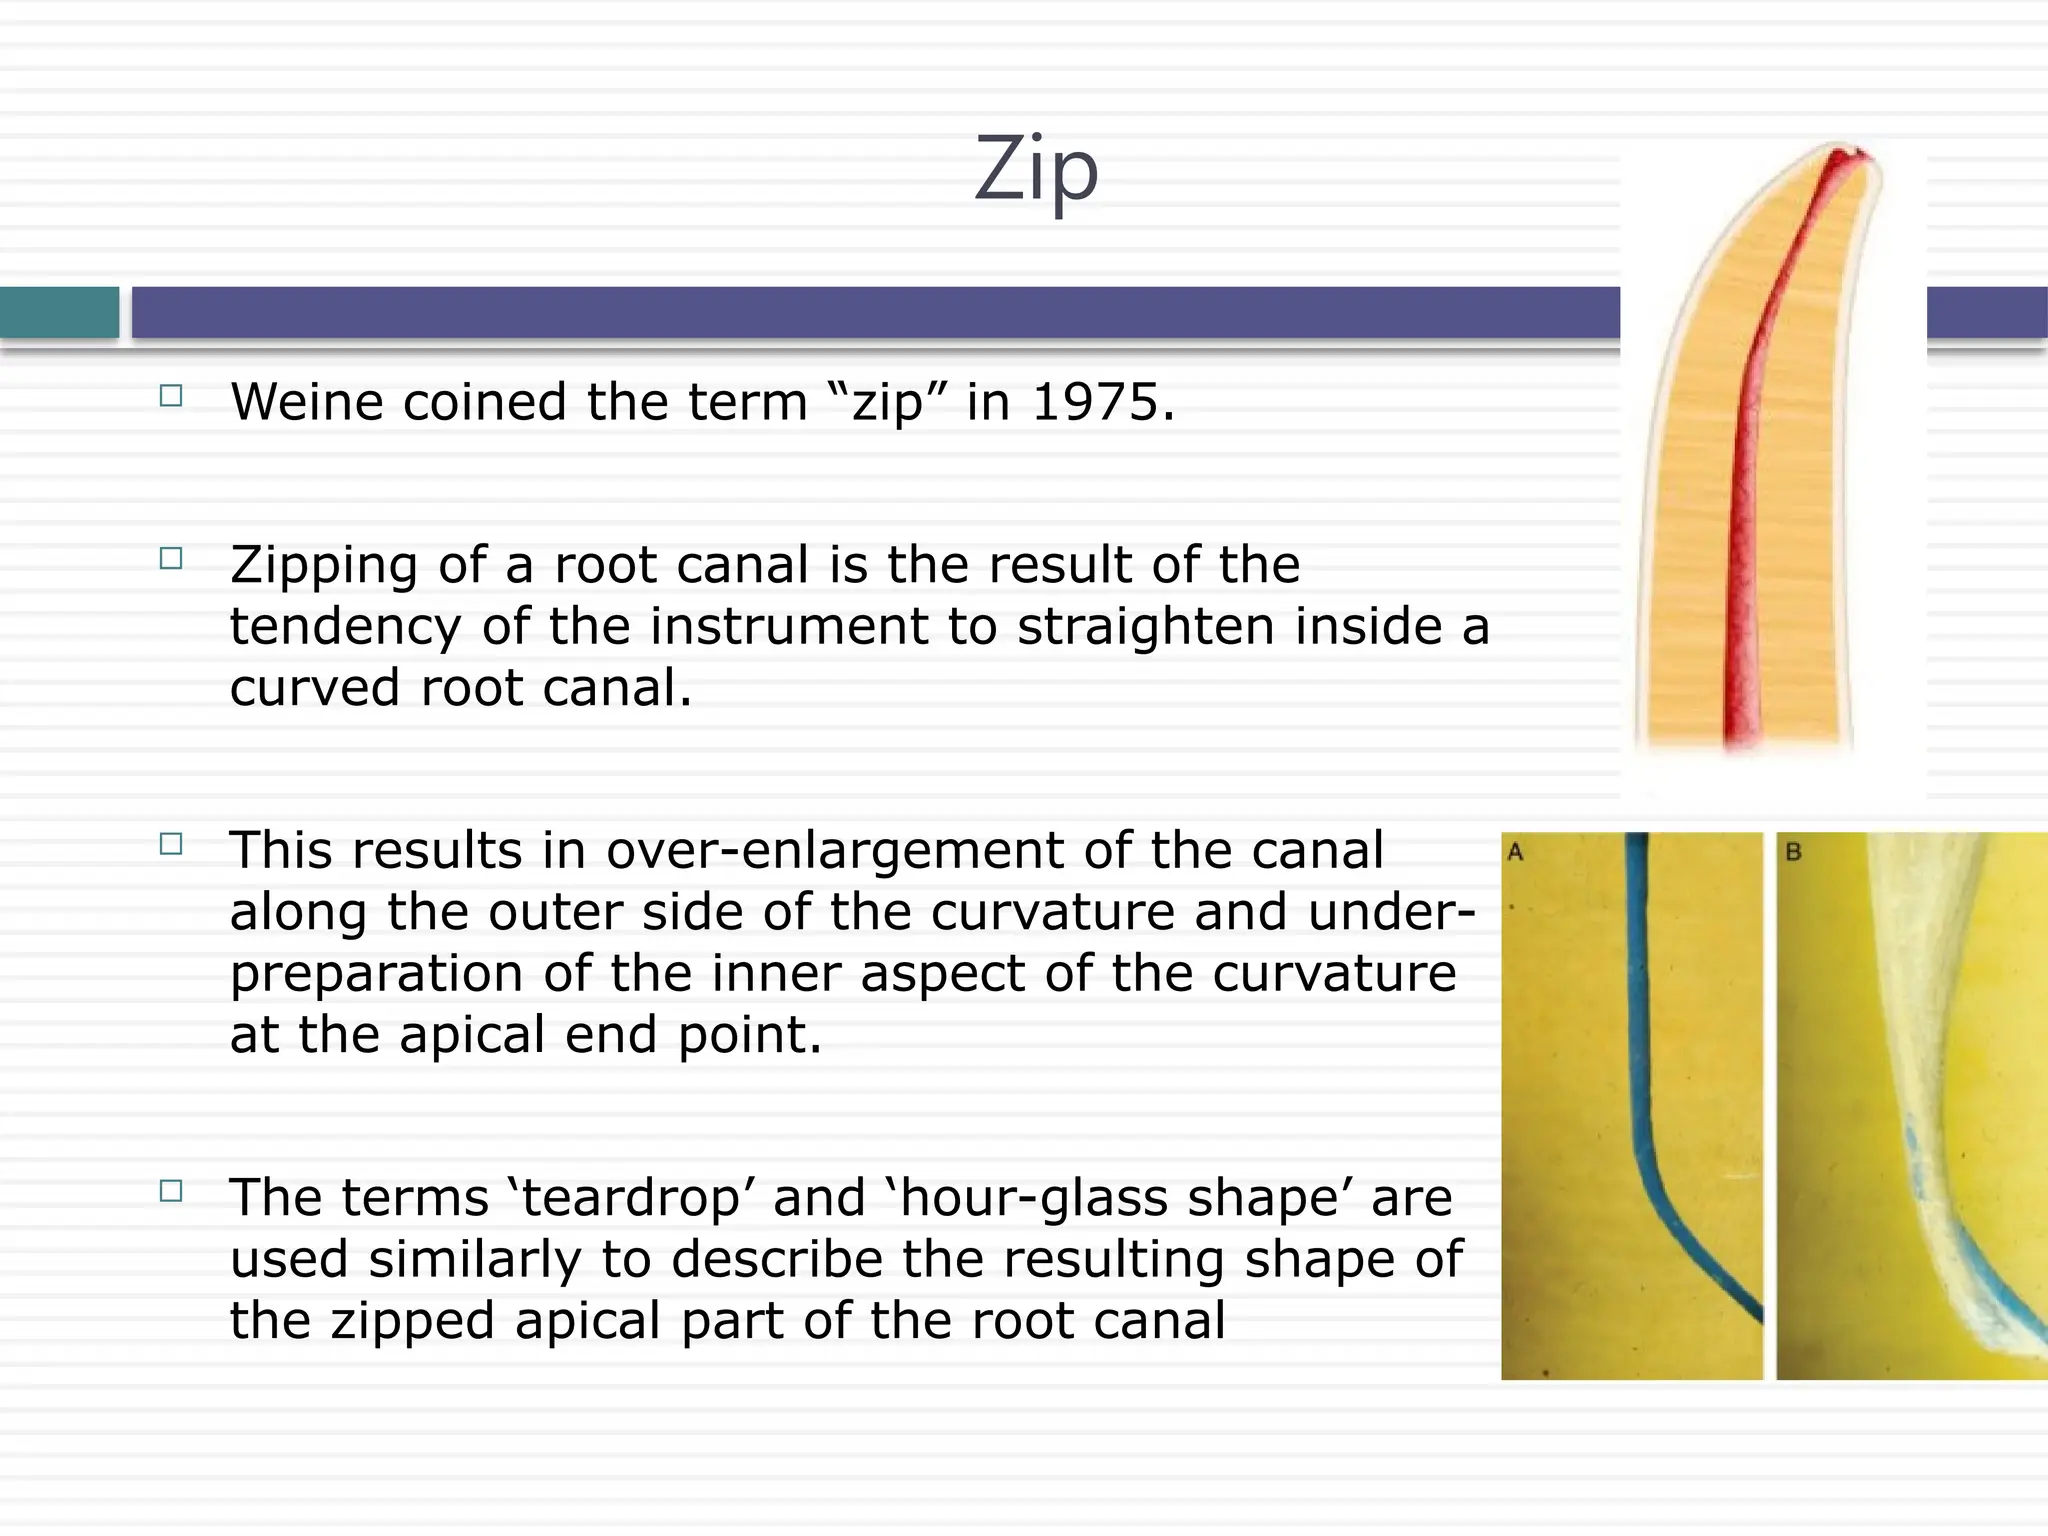
Weine coinedthe term “zip” in 1975.
Zipping of a root canal is the result of the
tendency of the instrument to straighten inside a
curved root canal.
This results in over-enlargement of the canal
along the outer side of the curvature and under-
preparation of the inner aspect of the curvature
at the apical end point.
The terms ‘teardrop’ and ‘hour-glass shape’ are
used similarly to describe the resulting shape of
the zipped apical part of the root canal
Zip
47.
Creation ofan ‘elbow’ is associated with
zipping
A narrow region of the root canal at the
point of maximum curvature as a result of
the irregular widening that occurs coronally
along the inner aspect and apically along
the outer aspect of the curve.
The irregular conicity and insufficient taper
and flow associated with elbow may
jeopardize cleaning and filling the apical
part of the root canal
Elbow
48.
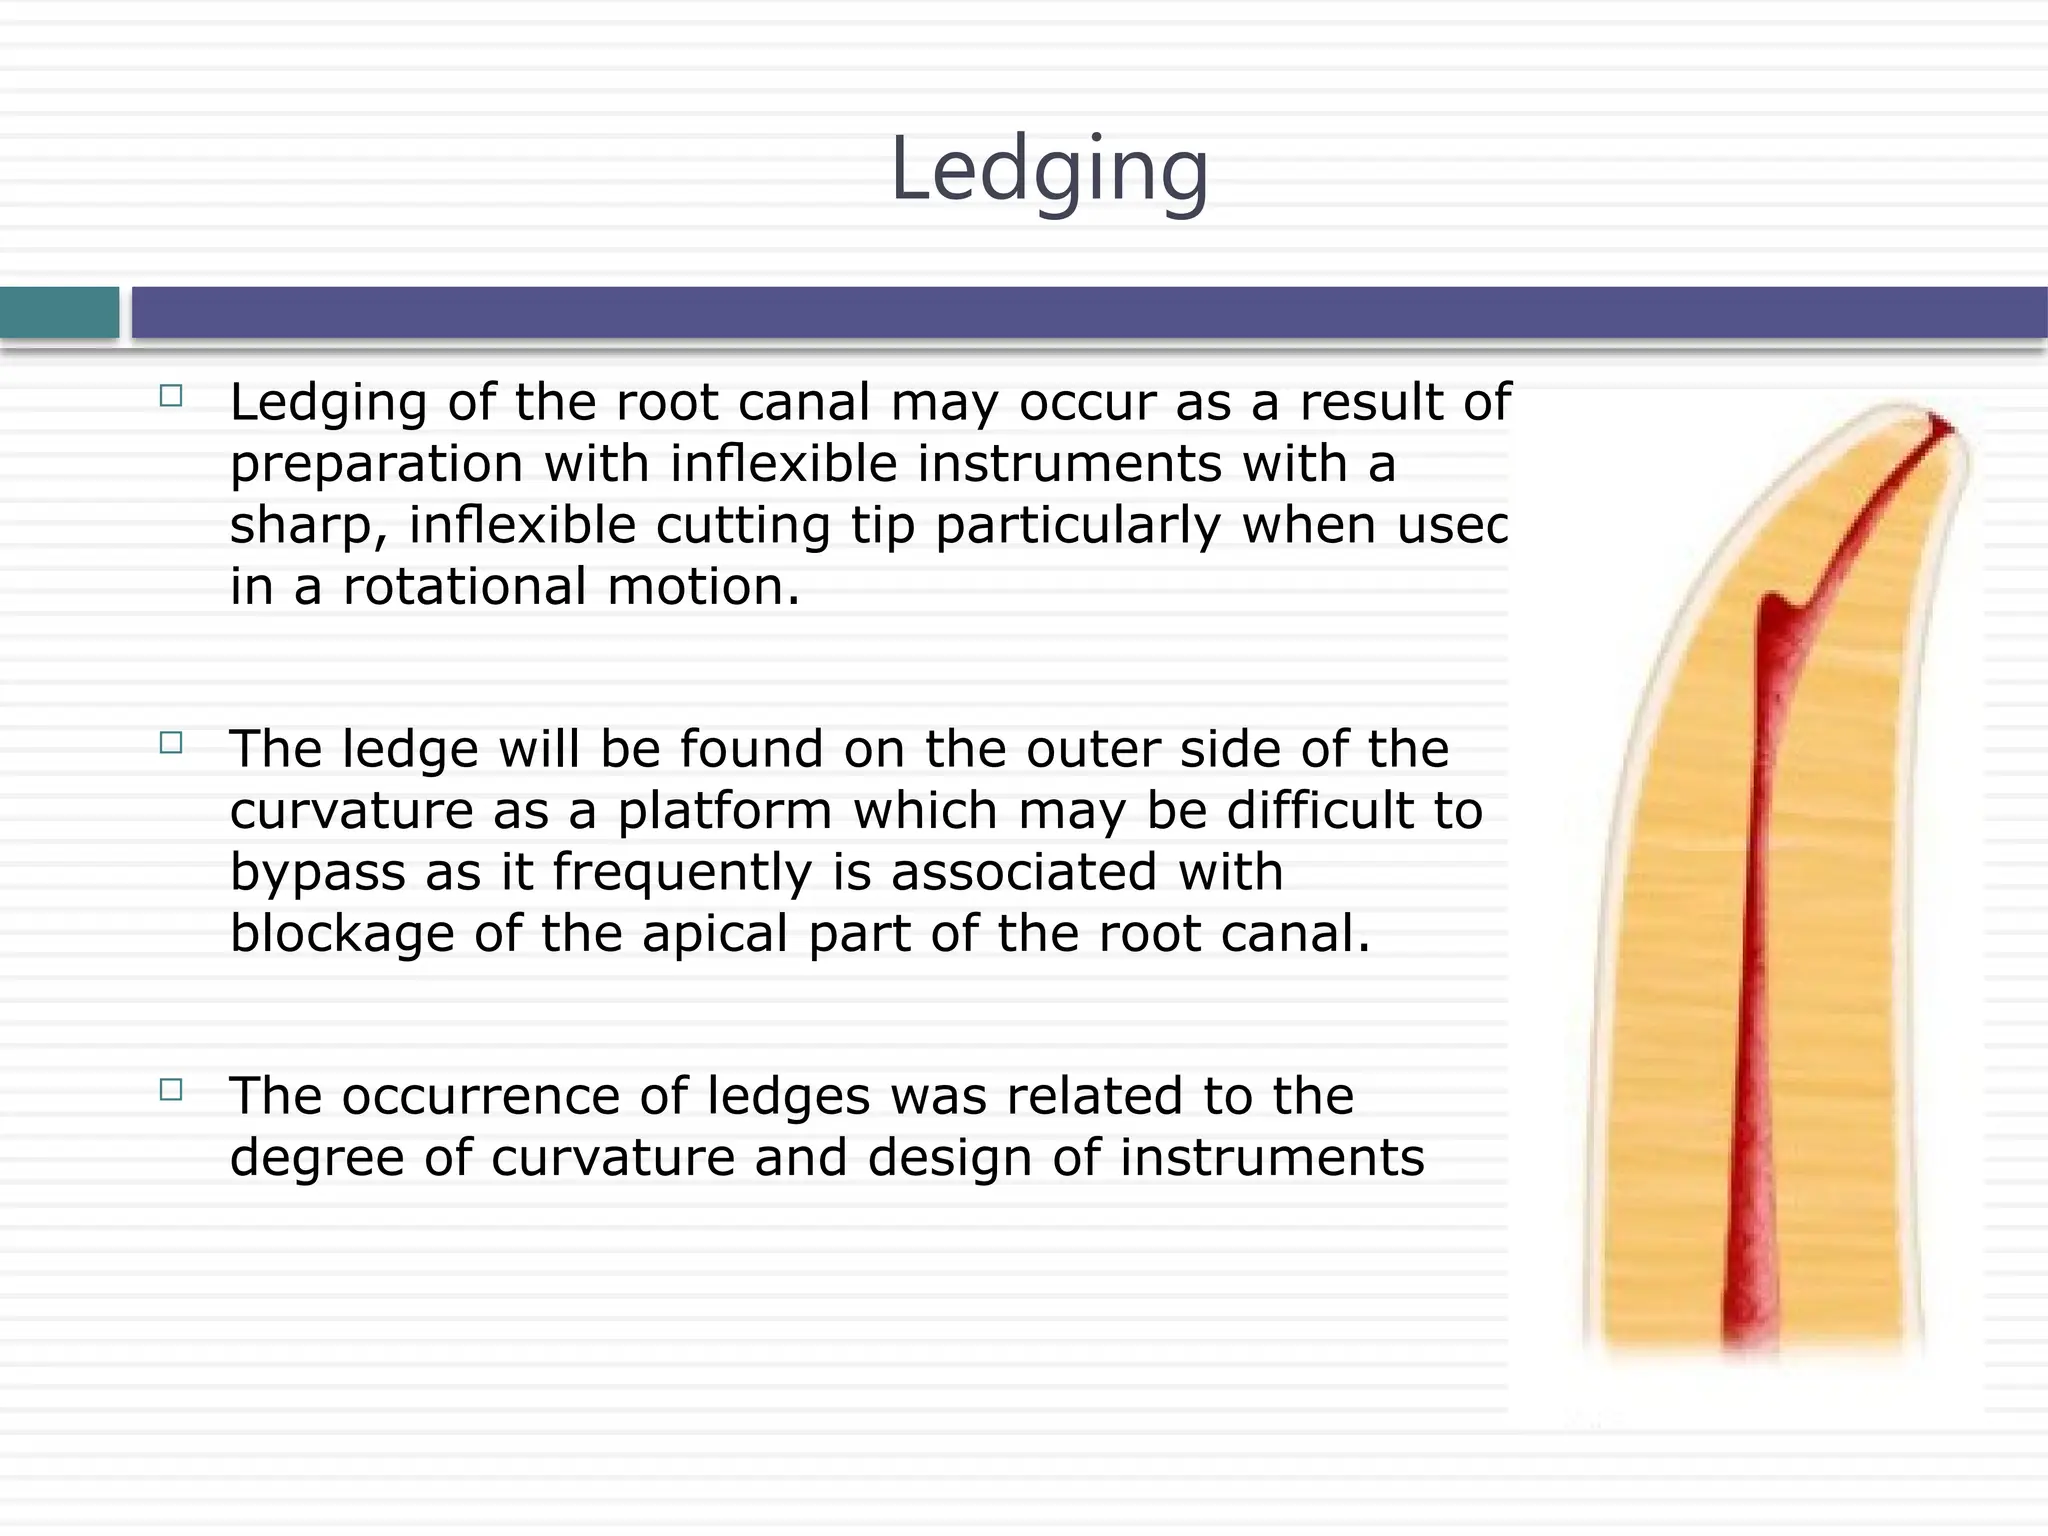
Ledging ofthe root canal may occur as a result of
preparation with inflexible instruments with a
sharp, inflexible cutting tip particularly when used
in a rotational motion.
The ledge will be found on the outer side of the
curvature as a platform which may be difficult to
bypass as it frequently is associated with
blockage of the apical part of the root canal.
The occurrence of ledges was related to the
degree of curvature and design of instruments
Ledging
49.
Perforations areassociated with destruction of
the root cementum and irritation and/or infection
of the periodontal ligament and are difficult to
seal.
The incidence of perforations in clinical treatment
as well as in experimental studies has been
reported as ranging from 2.5 to 10%
A consecutive clinical problem of perforations is
that a part of the original root canal will remain
un- or underprepared if it is not possible to
regain access to the original root canal apically
of the perforation.
Perforation
50.
Actively cuttingtips such as with Quantec SC produced more
apical zips and perforations than instruments with noncutting tips
such as ProFile and Lightspeed.
J Endodon 1997; 23:698–702.
An impact of canal geometry on outcome: the more severe the
angle and radius of the curve, the more severe canal
transportation.
The manual technique produced lesser canal transportation
(0.10 mm) than the oscillatory and rotary techniques (0.37 and
0.22 mm, respectively)
J Endod. 2007 Aug;33(8):962-5
51.
Instrument fracture
Rotaryinstrumentation is potentially associated with an increased
risk of instrument breakage
Spili et al. found overall a 3.3% prevalence of instrument
fractures but a prevalence of 5.1% after the introduction of NiTi
rotaries (4.4% NiTi versus 0.7% stainless steel).
J Endod. 2005 Dec;31(12):845-50.
Instruments used in rotary motion separate in two distinct
modes: torsional and flexural
J Endodon 2000;26:161–5.
Torsional fracture occurs when an instrument tip is locked in a
canal while the shank continues to rotate, thereby exerting
sufficient torque to fracture the tip.
52.
Flexural fracturesoccur after repeated subthreshold loads have
led to metal fatigue.
Increased severity of angle and radius of the curve, around which
the instrument rotates, decreases instrument life spans
Crown-down approach is superior to stepping back in decreasing
fracture risks by preventing a large portion of an instrument from
engaging root dentin (“taper lock”)
Int Endod J 1999;32:108–14.
A light touch for all techniques using rotary NiTi instruments is
recommended to avoid forcing rotary instruments into taper lock.
53.
Angle ofcurvature is determined by the angle formed by the
lines that intersect at the circle’s centre.
The circle’s radius is the radius of the curved portion of the root
canal space and defines how abruptly the canal curves.
As the radius of curvature decreases, instrument stress and strain
increases, and the fatigue life decreases
54.
Torque
Is theterm used about forces that act in a rotational manner.
Torque is the ability of the handpiece to withstand lateral pressure on
the revolving tool without decreasing its speed or reducing its cutting
efficiency.
High torque is very active and the incidence of instrument locking
and consequently deformation and
separation would tend to increase
Low torque would reduce the cutting
efficiency of the instrument, and
instrument progression in the canal
would be difficult
55.
During rootcanal preparation all the instruments are subjected to
different levels of torque.
If the level of the torque is equal or greater than the torque at
deformation or at separation, the instrument will either deform or
separate.
A possible solution of this problem is to use a low-torque
endodontic motor, which operates below the maximum
permissible torque limit of each and every rotary instrument.
Endodontology, Vol. 13, 2001
56.
With lowtorque control motors, the motor will stop rotating and
can even reverse the direction of rotation when the instrument is
subjected to torque levels equal to the torque values set on the
motor.
A torque-controlled motor is loaded right up to the instrument-
specific torque, the motor stops momentarily and/or starts
rotating counter-clockwise (auto-reverse function) to disengage
the locked instrument.
Endod Dent Traumatol 2000; 16 : 95-100
Incorporation of gear systems within the handpiece
57.
Role of Handpiece
Both speed and torque in a handpiece can be modified by
the incorporation of gear systems.
A common method of gearing a handpiece is the use of an
epicyclic ball-race gear system.
Located in the shank of the handpiece.
If the outer ring of an ordinary bearing is held stationary whilst
the inner ring is turned, the cage separating the balls turn at a
much reduced speed.
The speed reduction is proportional to the relative diameters of
the inner and outer rings.
58.
The greaterthe file’s lateral resistance, the greater the torque
required to instrument the canal which makes the file less
efficient.
Rotary speed is dependent on the torque requirements of the file
system. As the torque requirement is decreased, file speed can be
increased.
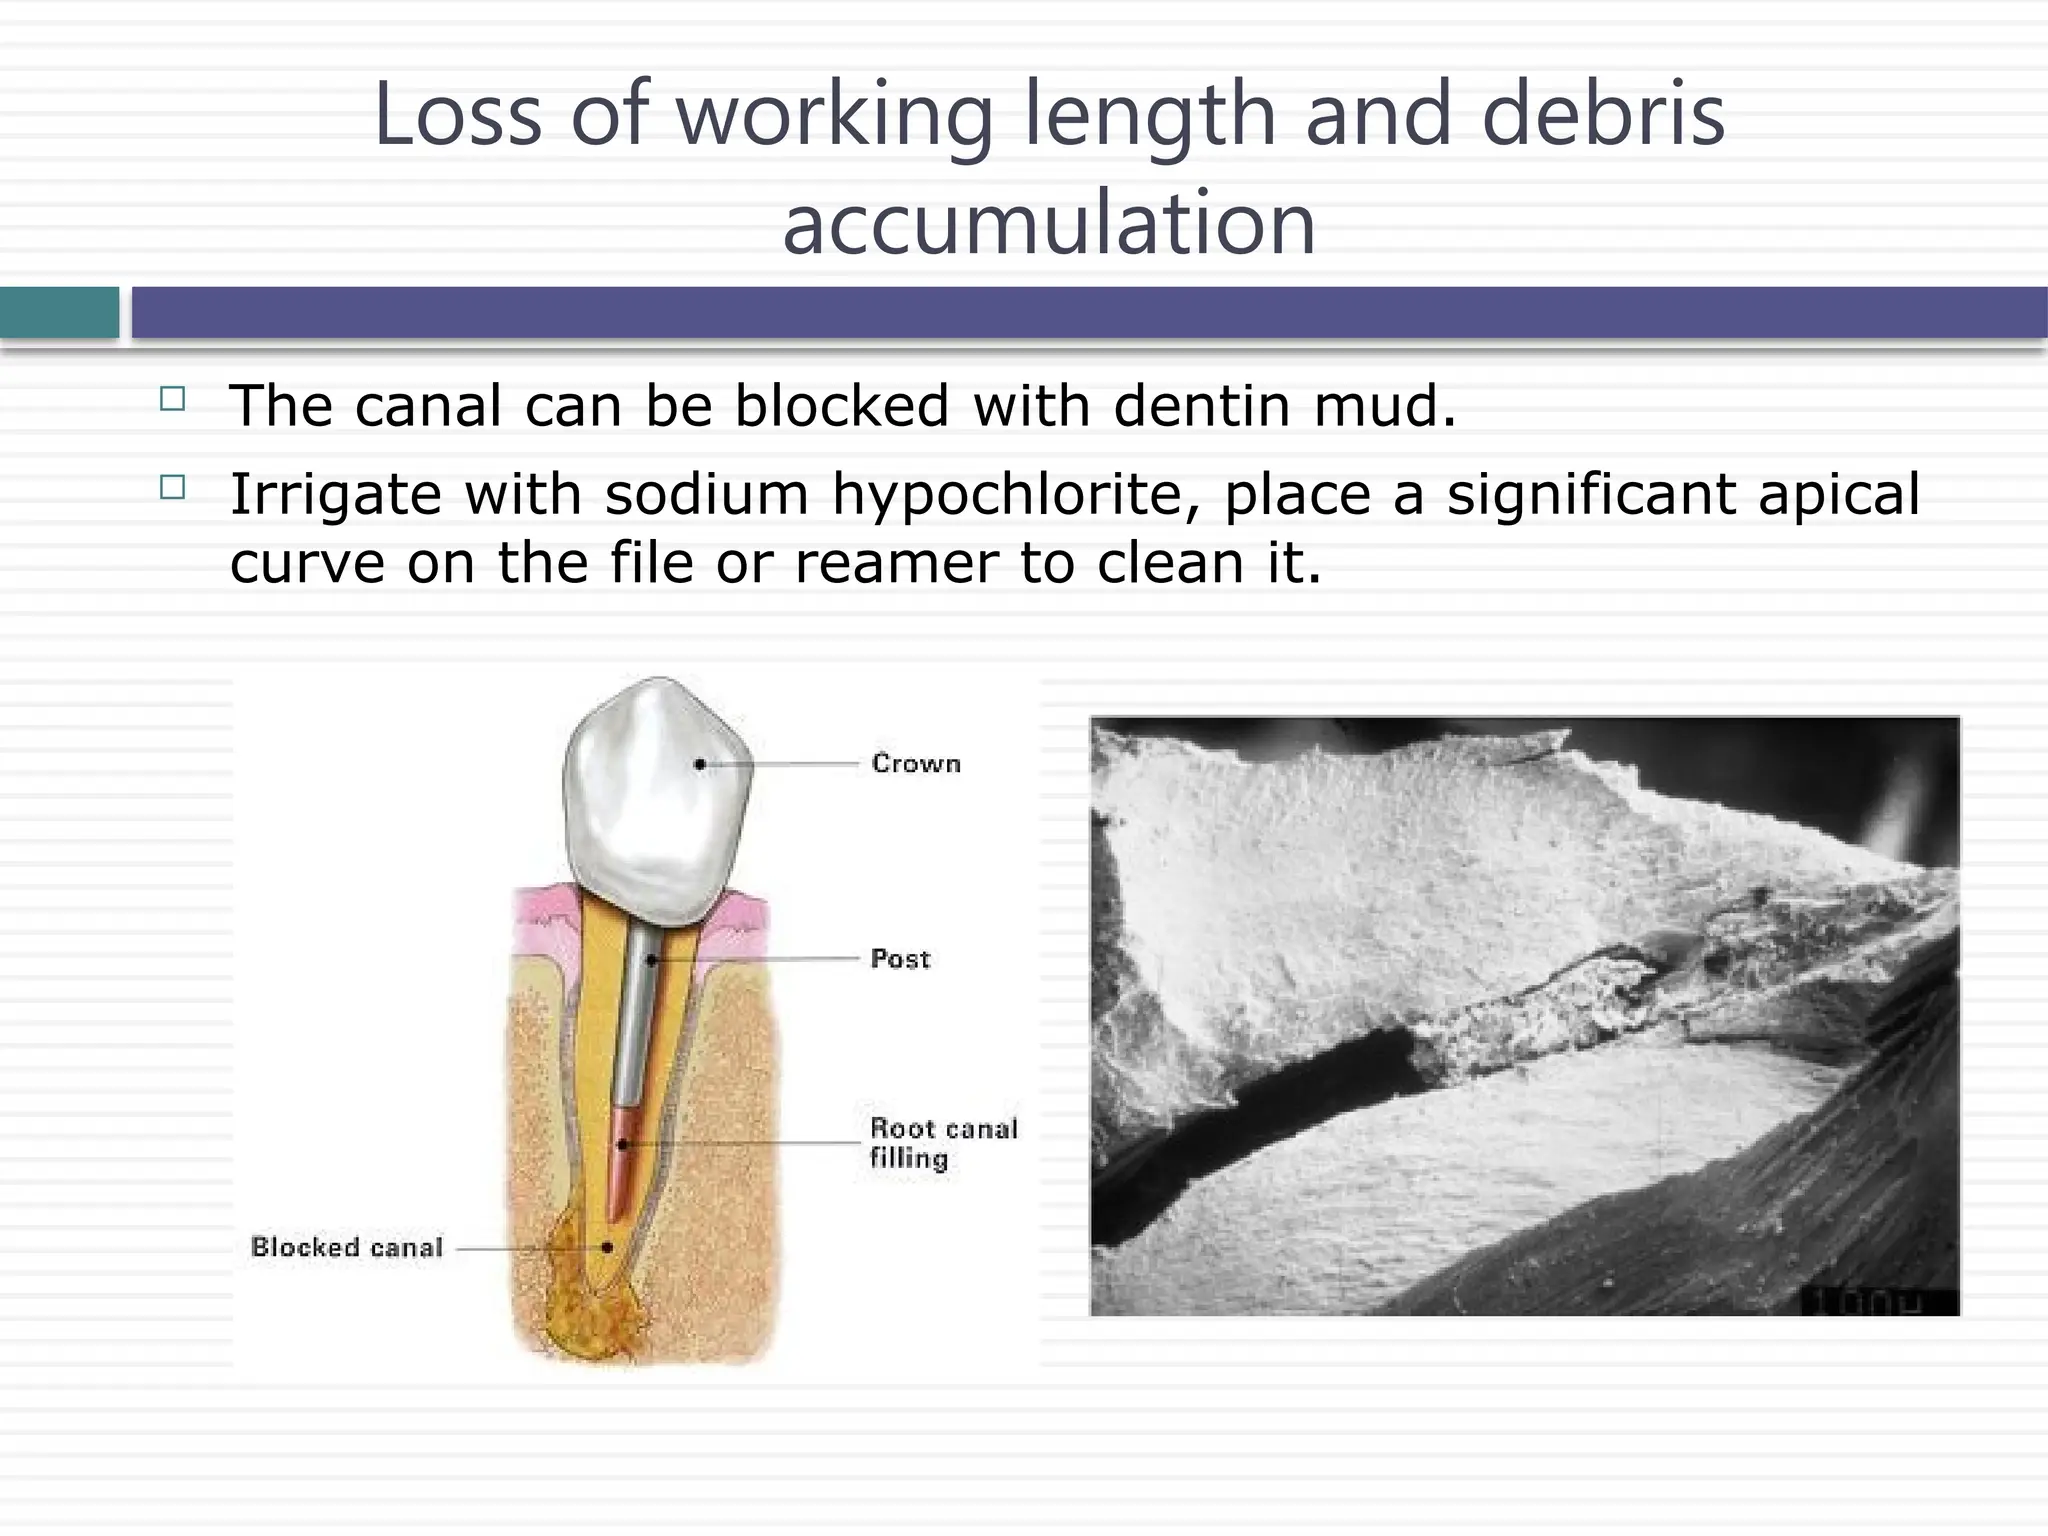
Loss of workinglength and debris
accumulation
The canal can be blocked with dentin mud.
Irrigate with sodium hypochlorite, place a significant apical
curve on the file or reamer to clean it.
61.
Effective time forthe irrigant
NiTi rotary systems speed up the treatment very much so that
the effective time for the irrigant is strongly reduced.
This fact may undermine the extent of chemical cleaning.
62.
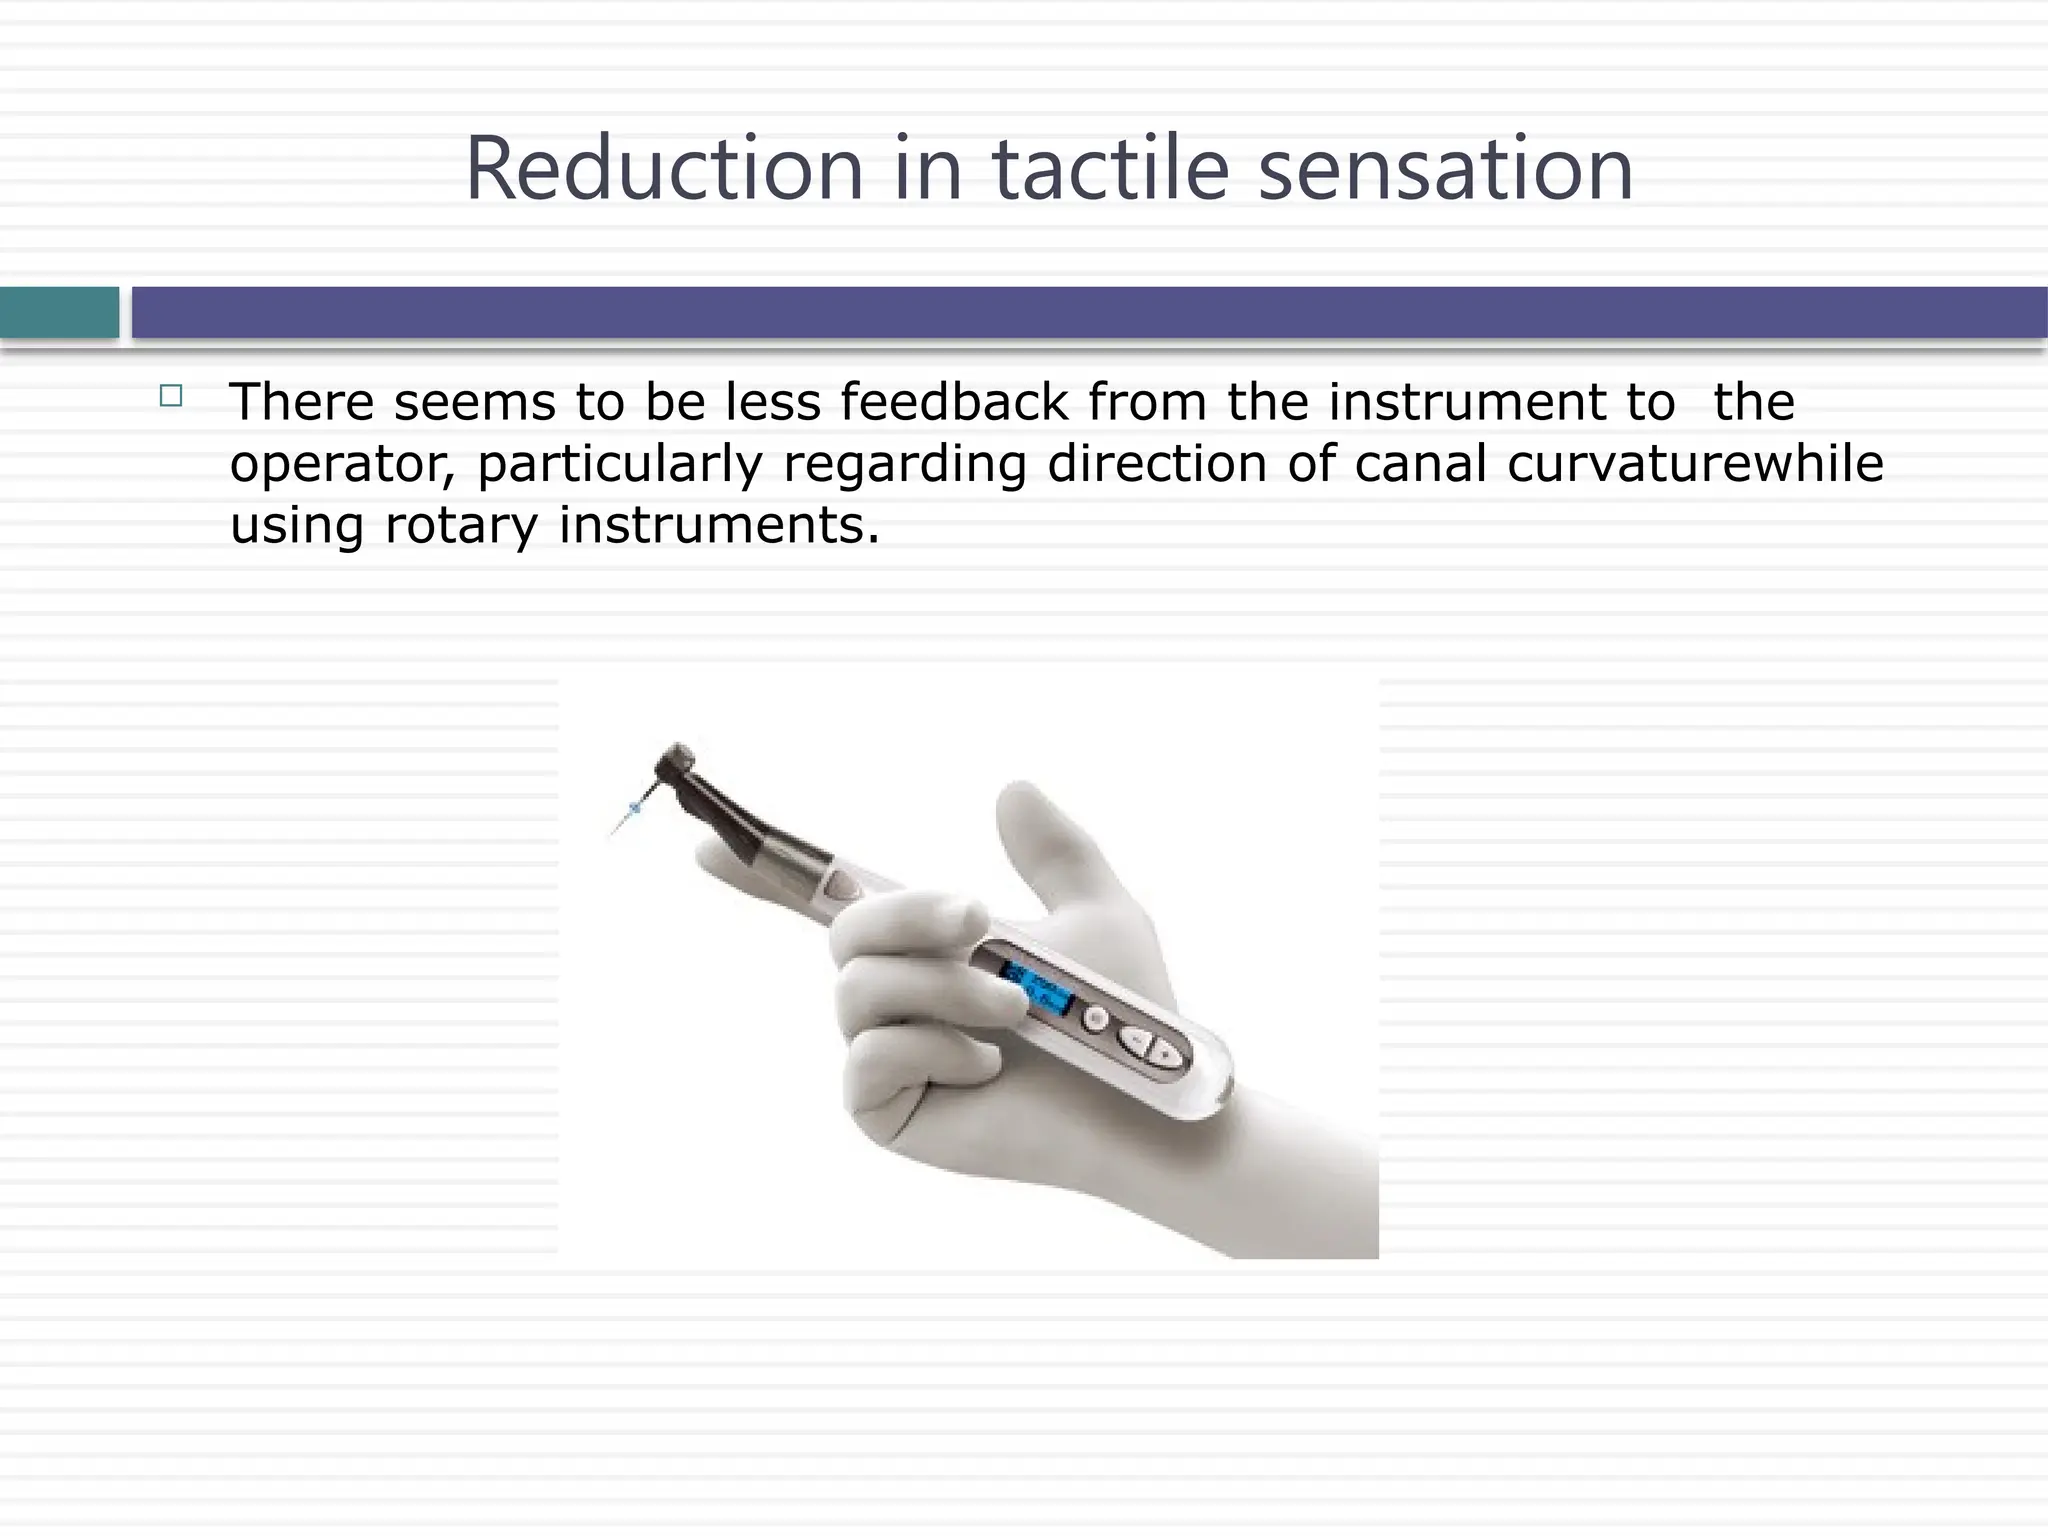
Reduction in tactilesensation
There seems to be less feedback from the instrument to the
operator, particularly regarding direction of canal curvaturewhile
using rotary instruments.
Three majorelements determine the predictability of successful
endodontics.
knowledge
Skill
Desire
Discipline and skills need to be developed, but the critical factor is
desire.
It can be done if we want to do it.
Successful endodontics is a decision.
Conclusion