1. www.prosoft-technology.comTech Support
5 Connect to the Module’s Web Page
Right-click the module icon and select “View
module’s webpage.” The web page contains
the product documentation, sample programs
and configuration information.
Select ‘Setup Guide’ and follow directions.
4 Start ProSoft Discovery Service
Click the Start button, and then navigate
to Programs / ProSoft Technology /
ProSoft Discovery Service.
Select the module to configure,
and right-click.
Select “Assign Temporary IP”.
Choose an unused IP within your
subnet, and then click OK.
Asia Pacific
Malaysia Office
Phone: +603.7724.2080
asiapc@prosoft-technology.com
Languages spoken: Chinese, English, Japanese
China Office
Phone: +86.21.5109.7557
asiapc@prosoft-technology.com
Languages spoken: Chinese, English
Europe
France Office
Phone: +33 (0)5.34.36.87.20
support.emea@prosoft-technology.com
Languages spoken: French, English
Middle East and Africa
Phone: +971.(0)4.214.6911
mea@prosoft-technology.com
Languages spoken: English, Hindi
North America
California and Wisconsin Offices
Phone: +1 661.716.5100
support@prosoft-technology.com
Languages spoken: English, Spanish
Latin America
Brasil Office
Support: +55.11.5083.3776
brasil@prosoft-technology.com
Languages spoken: Portuguese, English
Mexico and Central America Office
Phone: +52.222.264.18.14
latinam@prosoft-technology.com
support@prosoft-technology.com
Languages spoken: Spanish, English
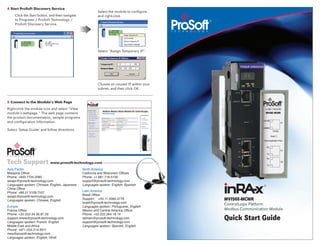
MVI56E-MCMR
ControlLogix Platform
Modbus Communication Module
Quick Start Guide
2. MVI56E-MCMR products are backward compatible with existing MVI56 products
in the field, including ladder logic and module configuration files. Easily swap and
replace products while benefiting from an array of new features designed to improve
interoperability and enhance the user experience.
Web Page: The web page allows access to manuals and other tools previously provided on
a product CD.
Personality Card: A compact flash memory card storing all of the module’s set-up and
configuration data for quick and easy replacement of modules in the field.
ProSoft Discovery Service (PDS): Utility software to list all of the MVI56E modules on the
network and temporarily change the IP address to connect to the web page.
CIPconnect™ Enabled: Allows PCB-to-module configuration and diagnostics via 1756-ENxT
local and remote chassis from anywhere on the Ethernet network.
LED Scrolling Diagnostic Display: 4-character display providing English messages for
status and alarm data, and for processor and network communication and conditions.
Ethernet Configuration Port: Replaces the serial communication port. Module is more
accessible using Ethernet communication. The Ethernet port provides access to the
module’s web server interface.
Start Here
1 Install the Module in the Rack
Insert the MVI56E-MCMR into the ControlLogix chassis. Use
the same technique recommended by Rockwell Automation
to remove and install ControlLogix modules.
POWER
MVI56E Module
Logix5500
Note: If you cannot connect through an Ethernet hub or switch, connect
from the Ethernet port on the your PC, using the same grey cable, to the
module’s Ethernet port (E1). The module will automatically correct for
cable type used (with or without crossover).
Continued on back.
What’s New
What’s Different
Quick Start
The MVI56E-MCMR module is configured with ProSoft Configuration Builder software
and in RSLogix 5000 software using the sample ladder logic or Add-On Instruction.The
module internally provides all the documentation. The Product CD within the box contains
two program executables, ProSoft Discovery Service (PDS) and the ProSoft Configuration
Builder (PCB).
• The PDS software is a utility allowing your PC to connect to the module’s web server and
set a temporary Ethernet IP address to connect to the module’s web page for user manual
retrieval and changing the module’s firmware.
• PCB is the main software product allowing end-users to configure all of ProSoft
Technology’s communication module’s. This software for the MVI56E-MCMR provides
access to the module’s configuration, diagnostics, and data analyzer features.
3 Install ProSoft Discovery Service
You must install the ProSoft Discovery Service (PDS)
software in order to retrieve the Setup Guide and
other documentation to learn how to setup the MVI56E
module.
a. Insert the MVI56E Product Support Software CD-
ROM into the CD drive of your PC. Wait for the
Startup screen to appear.
b. Click the “Install ProSoft Discovery Service” icon
to begin installing the software.
Replacing an MVI56: If you are replacing an MVI56-MCMR module, simply remove
the Personality Module (CF card) from the MVI56 module, insert the Personality Module
into the MVI56E, and install the module in the same slot location. The module will then
be working just like the old one. Follow the procedures below to learn how to use the
new Ethernet port. The MVI56E-MCMR no longer utilizes a serial port for configuration,
diagnostics, or data analysis.
First Time User: Access the module’s web page and copy the Setup Guide to your PC.
2 Connect your PC to the Module
With the module securely mounted, connect one end of the
grey Ethernet cable to the module’s Ethernet (E1) port, and
the other end to an Ethernet hub or switch accessible from the
same network as your PC.
POWER
Logix5500