Computer Graphics Concepts
•
0 likes•471 views

Explains some basic concepts and functions of graphics via C.

Recommended
More Related Content
What's hot
What's hot (20)
Similar to Computer Graphics Concepts
Similar to Computer Graphics Concepts (20)
Recently uploaded
Recently uploaded (20)
Computer Graphics Concepts
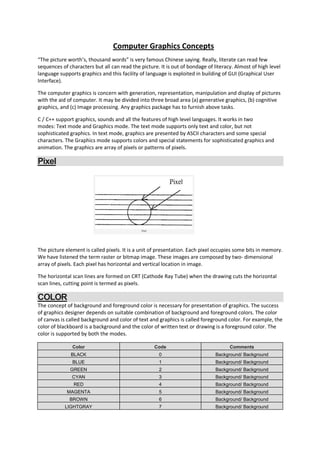
- 1. Computer Graphics Concepts “The picture worth’s, thousand words” is very famous Chinese saying. Really, literate can read few sequences of characters but all can read the picture. It is out of bondage of literacy. Almost of high level language supports graphics and this facility of language is exploited in building of GUI (Graphical User Interface). The computer graphics is concern with generation, representation, manipulation and display of pictures with the aid of computer. It may be divided into three broad area (a) generative graphics, (b) cognitive graphics, and (c) Image processing. Any graphics package has to furnish above tasks. C / C++ support graphics, sounds and all the features of high level languages. It works in two modes: Text mode and Graphics mode. The text mode supports only text and color, but not sophisticated graphics. In text mode, graphics are presented by ASCII characters and some special characters. The Graphics mode supports colors and special statements for sophisticated graphics and animation. The graphics are array of pixels or patterns of pixels. Pixel The picture element is called pixels. It is a unit of presentation. Each pixel occupies some bits in memory. We have listened the term raster or bitmap image. These images are composed by two- dimensional array of pixels. Each pixel has horizontal and vertical location in image. The horizontal scan lines are formed on CRT (Cathode Ray Tube) when the drawing cuts the horizontal scan lines, cutting point is termed as pixels. COLOR The concept of background and foreground color is necessary for presentation of graphics. The success of graphics designer depends on suitable combination of background and foreground colors. The color of canvas is called background and color of text and graphics is called foreground color. For example, the color of blackboard is a background and the color of written text or drawing is a foreground color. The color is supported by both the modes. Color Code Comments BLACK 0 Background/ Background BLUE 1 Background/ Background GREEN 2 Background/ Background CYAN 3 Background/ Background RED 4 Background/ Background MAGENTA 5 Background/ Background BROWN 6 Background/ Background LIGHTGRAY 7 Background/ Background
- 2. DRARKGRAY 8 Foreground LIGHTBLUE 9 Foreground LIGHTGREEN 10 Foreground LIGHTCYAN 11 Foreground LIGHTRED 12 Foreground LIGHTMAGENTA 13 Foreground YELLOW 14 Foreground WHITE 15 Foreground (a) void textcolor(int color); From 0 to 15 colors, numbers or constants are used to set text colors. Example: textcolor (RED); textcolor(4); The blinking effect is added by adding 128 in color code or adding BLINK with color constant. Example: textcolor(RED+BLINK); textcolor(132); The code 4 is for RED color and 128 for BLINK. (b) void textbackground(int color); From 0 to 7, numbers or constants are used for colors. It is used to set background color of text. Example: textbackground(BLUE); textbackground(1); (c) gotoxy(col, row): It is used to place cursor at specified column and row. It contains integer as column and row data type. In graphics, y-axis goes from top to bottom, not from left to right like as mathematics. Example: int col=50; int row=45; gotoxy(col, row); // it places cursor at column number 50 of rows 45. Cputs(“BUDDHA”); gotoxy(col, row);
- 3. (d) delay(int time): The function is supported by header file dos.h. it is used to delay next display. Example: Gotoxy(29, 10); Cputs(“Department of computer Science”); Delay(1000); Gotoxy(29, 11); Cputs(“Kashmir University”); Program: #include<conio.h> void main() { crscr(); textcolor(RED); gotoxy(27, 10); cputs(“Welcome ”); gotoxy(25, 11); cputs(“ Iqbal Institute Of Technology And Management”); gotoxy(25, 12); getch(); } Text in Graphics Mode (a) Specify Text Font, Orientation and size: Settextstyle(int font, int direction, int size) Font //name of font Direction //Horizontal or Vertical Size // Size of Character Font in standard library: Value Constants File Comment 0 DEFAULT_FONT Compiler automatic Bit-mapped, 8×8 1 TRIPLEX_FONT Trip.chr Times-roman styles 2 SMALL_FONT Litt.chr For small letters 3 SANS_SERIF_FONT Sans.chr Heavy sans-serif 4 GOTHIC_FONT Gothic.chr Gothic 5 SCRIPT_FONT Scri.chr Script 6 SIMPLEX_FONT Simp.chr Light sans-serif 7 TRIPLEX_SRC_FONT Tscp.chr Italic 8 COMPLEX_FONT Lcom.chr Heavy times Roman 9 EUROPEAN_FONT Euro.chr Square letter 10 BOLD_FONT Bold.chr Thick letters
- 4. Example: Fontsize=6; Settextstyle(GOTHIC_FONT, HORIZ_DIR, fontsize); Outtext(“Computer Graphics”); Settextstyle(TRIPLEX_FONT, VERT_DIR, fontsize); Outtext(“University”); (b) Set Text Justification (Position Relative to Cursor Pointer, CP) Settextjustify(int horizontal, int vertical) Horizontal //horizontal justification constants Vertical //vertical justification constants Example: Settextjustify(RIGHT_TEXT, TOP_TEXT); Outtext(“IQBAL INSTITUTE OF TECHNOLOGY AND MANAGEMENT”); Horizontal Justification: Value Constants Comment 0 LEFT_TEXT CP at left of text (default justification) 1 CENTER_TEXT CP in horizontal center of text 2 RIGHT_TEXT CP at right of text Vertical Justification: Value Constants Comment 0 BOTTOM_TEXT CP at bottom of text 1 CENTER_TEXT CP in vertical center of text (c) Change Character Size and Properties: Setusercharsize(int multx, divx, multy, int divvy); Multx //multiples with character Divx //divides with character Multy //multiplies height of character Divvy //divides with character Example: Multx=1; divx=2; Multy=1; divvy=2; Setusercharsize(int multx, divx, multy, int divvy); Outtext(“Happy New Year”); (d) moveto(): The library function moveto() sets the location of CP, using two int arguments to indicate the X and Y co-ordinates. Syntax: moveto(int column, int row); (e) outtext(): Graphics text is displayed with the outtext() library. Example: Outtext(“University express”);
- 5. (f) Specifies Color: Syntax: setcolor(int color); Shape The concept of geometric shapes are described below. The library function line(0, rectangle(), circle() etc are equipped with compiler for drawing purpose. (a) Concept of Geometrical Shape: Sn. Shape Comments 1. Line Line(x1, y1, x2, y2); The first two arguments to the function specify the X and Y co-ordinates of the line’s starting points and the last two arguments specify the end points. Lineto(x, y); This function draw a line from the CP to (xCo-ordinate, yCo-ordinate) 2. Rectangle Rectangle(int left, int top, int right, int bottom); 3. Bar3d Bar3d(int left, int top, int right, int bottom, int depth, int topflag); 4. Circle Circle(int x, int y, int radius); 5. Eclipse Eclipse(int x, int y, startA, endA, int xR1, inty R2); 6. Pieslice Pieslice(int x, int y, startA, endA, int Radius); 7. Arc Arc(int x, int y, startA, endA, int Radius); 8. Polygon Drawpoly(int side, int array); (b) Specify Line Width and Style: Setlinestyle9int style, unsigned pattern, int thickness); Style //solid, dotted, dashed, etc Pattern //user defined pattern when style is 4 Thickness //normal or thick Style Value Comment 0 SOLID_LINE 1 DOTTED_LINE 2 CENTER_LINE 3 DASHED_LINE 4 USERBIT_LINE Thickness Value Comment 0 NORM_WIDTH 1 THICK_WIDTH
- 6. (c) Specify Filling pattern and color: Setfillstyle(int pattern, int color); Pattern //pattern constants Color //color constants Fill patterns: Following fill patterns are available to fill in closed space. The concept of patterns is essential for graphics designers. Pattern Code Result EMPTY_FILL 0 Solid Background SOLID_FILL 1 Solid Color LINE_FILL 2 Horizontal lines LTSLASH_FILL 3 //// thin lines SLASH_FILL 4 ////thick line BKSLASH_FILL 5 thick lines LTBSLASH_FILL 6 thin lines HATCH_FILL 7 Light hatch XHATCH_FILL 8 Heavy cross-hatch INTERLEAVE_FILL 9 Interleaved lines WIDE_DOT_FILL 10 Wide-spaced dot CLOSE_DOT_FILL 11 Closed-spaced dots USER_FILL 12 User-defined patterns (d) Fill any Boundary Area: Floodfill(int x, int y, int border); X //x co-ordinate for fill start Y //y co-ordinate for fill start Border //color of border (fill stops here) Example: Flood(x, y, RED); What is the seed point? Seed point: A point for fill began is called seed point. The fill spreads outward from the seed point until it encounters a boundary that has the color specified in the border parameter. Program: #include<graphics.h> #include<conio.h> Void main() { Int driver, mode; driver=DETECT; initgraph(&driver, &mode, tcbgi); setcolor(GREEN);
- 7. rectangle(50, 10, 300, 200); floodfill(250, 150, green); getch(); closegraph(); } Program: #include<graphics.h> #include<conio.h> void main() { int driver, mode; driver=DETECT; initgraph(&driver, &mode, tcbgi); setcolor(RED); setfillstyle(1, RED); bar3d(250, 10, 400, 50, 10, 1); floodfill(255, 10, RED); moveto(290, 24); setcolor(BLUE); outtext(“UNIVERSITY”); getch(); closegraph(); } Program: /* Circle Programming */ #include<graphics.h> #include<conio.h> void main() { int driver, mode; driver=DETECT; initgraph(&driver, &mode, tcbgi); setcolor(RED); setfillstyle(2, 4); circle(250, 150, 100); floodfill(250, 150, 4); getch(); closegraph(); } Program: / * Circle */ #include<graphics.h> #include<conio.h> #include<math.h> #define R 50 void main() { int x; int driver, mode; driver=DETECT;
- 8. initgraph(&driver, &mode, tcbgi); setcolor(RED); for(x=50; x<=20; x=x+30) circle(x, x+10, R); getch(); closegraph(); } Program: /* Pieslice Programming */ #include<graphics.h> #include<conio.h> void main() { int driver, mode; driver=DETECT; initgraph(&driver, &mode, tcbgi); setcolor(RED); setfillstyle(5, RED); pieslice(250, 100, 0, 270, 100); floodfill(255, 10, RED); getch(); closegraph(); } Program: / * The following program generates ellipse */ #include<graphics.h> #include<conio.h> void main() { int driver, mode; driver=DETECT; initgraph(&driver, &mode, tcbgi); setcolor(BLUE); setfillstyle(7, BLUE); ellipse(250, 100, 0, 360, 100, 50); floodfill(250, 110, BLUE); getch(); closegraph(); }