Download as PDF, PPTX
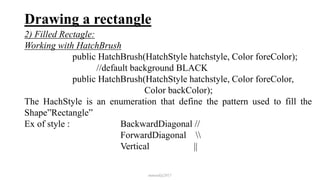
![Generics
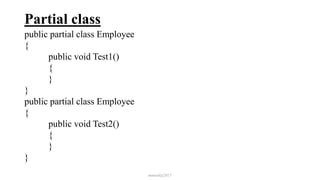
class Program
{
static void Main(string[] args)
{ int x = 3, y = 4;
Calculate<int>.Swap(ref x, ref y);
Console.WriteLine("X = {0}", x);
Console.WriteLine("Y = {0}", y);
Point<float> pt1 = new Point<float>(5.6f, 7.9f);
Point<float> pt2 = new Point<float>(20.5f, 50.7f);
Calculate<Point<float>>.Swap(ref pt1, ref pt2);
Console.WriteLine("PT1 = {0}", pt1.ToString());
Console.WriteLine("PT2 = {0}", pt2.ToString());
}
}
mmouf@2017](https://image.slidesharecdn.com/intake376-170115104609/85/Intake-37-6-5-320.jpg)
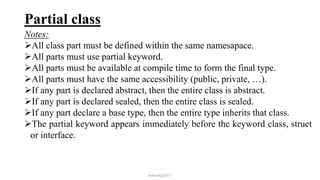
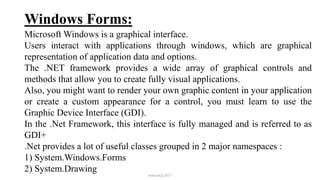


The document discusses generics and partial classes in C# and .NET framework 4.5. It provides code examples of using generics to define classes and methods that operate on type parameters. It also explains how to define partial classes that split a class definition across multiple files. The document then covers basics of Windows forms programming, including the Graphics object, drawing strings, lines, rectangles, and using coordinates and shapes.