SlideShare a Scribd company logo
1 of 74
Download to read offline
QI05024
of beef
cattle
A PRACTICAL GUIDE
Artificial Breeding
A PRACTICAL GUIDE
Queensland Primary Industries and Fisheries
QI05024
of beef
cattle
Artificial Breeding
ISSN 0727-6073
ISBN 0 7345 0309 3
Agdex 420/47
Contributions by:	 Other contributors:
Brian Dunn	 Heather Lees, Desktop publishing
Greg Fawcett
Geoff Fahey
Dennis Boothby
Geoffry Fordyce
On 26 March 2009, the Department of Primary Industries and Fisheries was amalgamated with
other government departments to form the Department of Employment, Economic Development and
Innovation.
© The State of Queensland, Department of Employment, Economic Development and Innovation,
2009.
Except as permitted by the Copyright Act 1968, no part of the work may in any form or by any
electronic, mechanical, photocopying, recording, or any other means be reproduced, stored in
a retrieval system or be broadcast or transmitted without the prior written permission of the
Department of Employment, Economic Development and Innovation. The information contained
herein is subject to change without notice. The copyright owner shall not be liable for technical
or other errors or omissions contained herein. The reader/user accepts all risks and responsibility
for losses, damages, costs and other consequences resulting directly or indirectly from using this
information.
Enquiries about reproduction, including downloading or printing the web version, should be directed
to ipcu@dpi.qld.gov.au or telephone +61 7 3225 1398.
ii
Contents
Introduction 1
The reproductive tract of the cow 2
Physiology of reproduction of the cow 4
Anatomy and physiology of the bull 14
Semen – collection, processing and storage 17
Insemination technique 26
Preparing for an AB program 37
Conducting an AB program 47
Uses of artificial breeding 60
Glossary 63
iii
Artificial Breeding of beef cattle is a companion publication to
Bull Selection, Breeding for Profit, Beef cattle recording and selection
and Female Selection .
iv
Introduction
AI (artificial insemination), also known as AB (artificial breeding), is the physical placement
of semen into the reproductive tract of females with the aim of achieving pregnancies by
means other than that of natural mating.
AI is not new. It was recorded as early as the 14th century when it was reputedly used by an
Arabian horse breeder, who transferred the contents of an ejaculate from the vagina of a
freshly served mare into the vagina of another mare by means of a sponge.
Detailed knowledge of the physiology of reproduction commenced in 1677 when the Dutch
scientist, Van Loenhoek, observed sperm cells in an ejaculate. The first scientific artificial
breeding was done with dogs in 1780, by an Italian physiologist, Spallanzani, who proved
that the sperm fraction of the ejaculate is the component which causes fertilisation.
Serious efforts to promote artificial insemination of cattle were made in Russia in 1914 by
Ivanov and his co-workers, who developed the artificial vagina (AV) to facilitate semen
collection from bulls. This was followed by experimentation with insemination procedures and
methods of diluting semen. By using AI they hoped to restrict the spread of vibriosis – a
venereal disease of cattle.
In 1937 AI in cattle became a practical commercial proposition when Sorensen, a Danish
veterinarian, and his co-workers, developed the recto-vaginal technique of insemination: the
method used worldwide today, and described in this book.
AI spread around the world after a British scientist, Polge, developed techniques for deep
freezing of sperm for long term storage in 1949. In France during the 1960s, Cassou brought
semen processing technology to its present level by designing the straw system of packaging
deep frozen semen, culminating in the development of the mini-straw in 1969. Advances in
storage containers using liquid nitrogen as a refrigerant were concurrent with the
development and spread of the Cassou straw. The Cassou straw system has been almost
universally adopted with more than 200 countries using it as a method of semen packaging.
Many millions of cows throughout the world are bred by AI each year and the number is
increasing. In Australia approximately 1.5 million cows are inseminated annually. Most cows
inseminated worldwide are dairy cows, but increasingly AI is being used in the beef industry.
AI is the cheapest, safest and most effective means of spreading superior genetic material
and both the beef and dairy cattle industries depend on it for their genetic advancement
schemes.
The most recent advances are in the area of oestrous synchronisation. Semen processing
advances hoped for in the near future include the sexing of sperm, and slow release sperm
capsules.
More information
Some states and countries have local regulations governing the use of artificial insemination.
It is necessary to contact your local department of agriculture, private veterinarian or herd
improvement organisation concerning the particular requirements of local legislation. These
organisations will also be able to direct you to the local suppliers of AI equipment, semen
and training courses that you may require.
1
The reproductive tract of the cow
A sound knowledge of the location, structure and function of the reproductive organs is
essential for efficient insemination and for avoiding damage to cows.
External organs
The anus is a ring of muscle which retains the contents of the rectum. Below the anus are
the lips of the vulva, the external opening of the vagina.
Per rectum examination
The various parts of the reproductive tract can be located by hand, palpating through the
elastic wall of the rectum. An arm length glove should be worn for protection and hygiene.
For ease of entry, lubricate the gloved hand with obstetric lubricant and form the fingers and
thumb into a cone.
Internal organs
The vagina is 24 to 30 cm long with muscular walls. About 10 cm inside the vagina along its
floor is the passage from the bladder, the urethra. It enters the vagina near a blind pouch,
the urethral diverticulum.
The cervix is 3 to 10 cm long and from 1.5 to 6 cm in diameter. It is larger in Bos indicus
animals (Brahman, Zebu and related breeds) than other breeds and increases in size with
age. It connects the vagina to the uterus. It is quite firm in comparison with other parts of
the tract and can usually be located by feeling gently around the pelvic floor.
Figure 1. Reproductive tract of the cow
Figure 2. Structure of the cervix
The position of the cervix will vary with the age of
the cow and the stage of pregnancy. In non-
pregnant cows, most operators should not have to
go in beyond elbow length to locate the cervix and
the rest of the reproductive tract. In heifers, the
cervix should be picked up at wrist depth. It may be
pulled out of reach by the weight of the developing
foetus in a pregnant animal.
2
Anus
Rectum
Fornix Cervix
Vagina Os
Ovary
Vulva
Bladder
Fallopian
tube
Body of uterus
Urethra
Urethral
diverticulum
Horns of
uterus
Fornix Annular
rings
Os
Body of
uterus
Cervix
A narrow canal passes through the centre of the cervix. It is spiral in form and tightly closed.
It opens slightly when the cow is on heat and enlarges greatly during calving. The start of this
canal is the os which extends into the vagina forming a blind pocket – the fornix.
The uterus consists of a body and two horns. The body is 2 to 3 cm long and separates into
the horns. The body feels longer on palpation than 2 to 3 cm, because the horns are joined
together by a ligament for about 12 cm beyond the point of division.
The two horns are 35 to 40 cm long and 2 cm or more in diameter. They have a thick elastic
wall and a rich blood supply to nourish the developing calf.
To imagine the uterus, partly fill a rubber glove with water and run your hand over the start
of the join of two fingers. This is approximately the size, shape and consistency of the uterus
in the non-pregnant heifer. The ligament may be felt with practice by hooking a finger under
it. This may be used to help to retract the uterus into the pelvic cavity. In heifers, muscular
contractions of the uterus may cause it to curl up in the operator’s hand if gentle palpation is
attempted. This makes definition of the structures easier.
The corpus luteum visible on an ovary. This is
palpable during rectal examination.
3
The oviduct is also known as the fallopian tube. It is 20 to
25 cm long and 1 to 2 mm in diameter. It runs from the tip
of the horn to the infundibulum (or funnel) which
surrounds the ovary. The oviduct is difficult to detect on
palpation. Fertilisation takes place in the oviduct.
Ovaries can normally be felt alongside the uterine horns.
They are oval in shape with size depending on age and
breed (usually the size of an almond nut or slightly larger).
Eggs develop in follicles (fluid filled blisters) below the
surface of the ovary. Near the time of ovulation, the follicle
will be about one centimetre in diameter.
When the follicle ruptures to release the egg, it leaves a
depression which soon fills with tissue. After three to five
days this tissue develops into the corpus luteum (yellow
body) which an experienced operator can detect by
palpation.
Here the corpus luteum is visable on an ovary.
Note the pregnancy in one horn.
Figure 3. Ovary in section
Corpus luteum
Mature
follicle
(1 cm
diameter)
Stroma
4
Physiology of reproduction of the cow
The oestrous cycle and hormones
When a heifer becomes sexually mature the ovaries begin to function in a cycle of activity.
This cycle involves a sequence of events in preparation for mating, conception and
pregnancy. The cycle repeats in preparation for a new mating cycle if pregnancy does not occur.
The cycle has an average length of 21 days. Any period between 18 and 24 days is
considered normal.
Stages of oestrous cycle
1. OESTRUS (standing heat, sexual desire)
This is the period of sexual activity at the end of the cycle when the female will stand to
permit mating. The duration of oestrus varies within a normal range of 6 to 30 hours. The
average duration traditionally has been set at 12 hours for heifers and 18 hours for cows.
However, according to recent research the average duration of standing heat in dairy
cows is approximately 8 hours under Australian conditions. It is not expected that beef
cows would have heat periods longer than this.
2. MET-OESTRUS (after heat)
Days 1 to 5 of the cycle. The female will not permit mounting. About 50% of cows and
90% of heifers show met-oestral bleeding. Ovulation occurs during this time and the
corpus luteum begins to develop.
Met-oestral bleeding does not indicate that the cow has conceived, or not
conceived, nor the sex of the calf, nor anything else in particular.
3. DI-OESTRUS (between heats)
Days 5 to 19. Characterised by a complete lack of sexual desire. If the cow conceives she
passes from di-oestrus into a state of anoestrus (absence of cycling).
4. PRO-OESTRUS (before heat)
Days 19 to 21. This is the period of preparation for sexual activity.
ANOESTRUS
Anoestrus is a complete lack of cycling activity. It can occur due to pregnancy, the stress of
lactation or poor nutritional status.
Control of the oestrous cycle
All stages in the reproductive cycle are controlled by hormones. The term hormone is derived
from a word meaning to set in motion or to arouse. Hormones are chemical messengers
released from endocrine (ductless) glands. They travel via the blood stream to have an effect
on distant target organs. An example of a hormone is adrenalin. It is produced by the
adrenal gland situated near the kidney. Release of adrenalin into the bloodstream causes
increased heart rate and breathing capacity. When you get a fright it is adrenalin which
makes your heart jump.
Hormones involved in the reproductive cycle
Reproduction, like most bodily functions, is controlled from the brain. It exercises this control
through a small gland - the pituitary gland - situated immediately beneath the brain. The
pituitary gland has two parts, the anterior (towards the front) and the posterior, each
producing distinct hormones.
The brain receives messages and stimuli from all parts of the body and from the
environment. It acts like a computer and collates these signals. Providing enough signals are
5
favourable, it releases GnRH (gonadotrophin
releasing hormone) which causes the pituitary gland
to commence the reproductive cycle. Adverse
signals such as poor body condition, diseases and
stress will cause lowering or cessation of cycling.
STAGE 1 – PRO-OESTRUS
Follicle stimulating hormone (FSH) is released from
the anterior pituitary gland upon release of GnRH
from the brain. FSH acts upon the germinal
epithelium of the ovary to cause the formation of
the follicle (the ‘Graafian follicle’) containing the
ovum.
STAGE 2 – 0ESTRUS
The fluid in the follicle contains much oestrogen.
Oestrogen is the female hormone, which is
produced continuously in small quantities in the
cortex of the ovary, and causes the typical female
growth characteristics. Much larger amounts of
oestrogen, produced by the follicle, act on the cow’s
brain, firstly to inhibit more FSH production and
secondly to modify the cow’s behaviour and cause
her to display oestrus (i.e. to come into season, or
displays ‘heat’). Oestrogen acts on the reproductive
tract at the same time. Blood supply increases and
causes the tract to ‘tone up’. The vulva swells and
becomes distended while the cervix and uterus
produce copious quantities of clear stringy mucus.
STAGE 3 – MET-OESTRUS
Luteinising hormone (LH) is released from the
anterior pituitary after oestrus. Peak LH production
is reached approximately ten to twelve hours after
the end of standing heat. LH causes ovulation
(release of the ovum from the follicle) and growth of
the corpus luteum at the ovulation site.
STAGE 4 – DI-OESTRUS
The corpus luteum develops and after three to five
days produces progesterone, the pregnancy
hormone.
Progesterone acts on the brain, inhibiting LH release
and sexual activity.
Progesterone also prepares the reproductive tract
for pregnancy and in prolonged concentrations
causes udder development. Pregnancy is maintained
by progesterone.
STAGE 5 – ALTERNATIVE (A)
PRO-OESTRUS (or stage one again). If by day 19 of
the cycle the cow is not pregnant, her uterus
releases hormone like compounds called
prostaglandins.
(Prostaglandins are present in semen as well, and
play a part in sperm transport in the uterus and
oviduct. Prostaglandins are also involved in the
initial stages of calving.)
Figure 4. Pro-oestrus
Pituitary
gland
BrainOvary
FSH
Figure 5. Oestrus
Figure 6. Met-oestrus
Figure 7. Di-oestrus
Corpus luteum on ovary
Progesterone
Follicular
fluid
Follicle on ovary
Follicle
Tone in reproductive tract
Oestrousbehaviourfrom
brain
Oestrogen
LH
Ovulation Luteinisation
6
Prostaglandins F2
alpha and E2
alpha occur naturally in the uterine tissue and their action is
to cause luteolysis – dissolving of the corpus luteum. This causes cessation of progesterone
production and removes the inhibition to sexual activity, allowing the cycle to start again.
N.B. Administration of synthetic prostaglandins in the first five months of pregnancy (for
oestrus synchronisation) may cause abortion due to luteolysis and uterine contraction.
(For the oestrus synchronising action of prostaglandins see the section on oestrus
synchronisation in the chapter ‘Conducting an artificial breeding program’.)
STAGE 5-ALTERNATIVE (B)
ANOESTRUS DUE TO PREGNANCY. The presence of a foetus at day 19 inhibits the release of
prostaglandins from the uterine wall. Because of this the corpus luteum remains and
produces progesterone which maintains the pregnancy. At approximately six months into the
pregnancy the corpus luteum starts to decline in activity as the cotyledons become the major
source of progesterone (see ‘Pregnancy and parturition’ page 9). This transition may lead
some cows to show sexual activity (e.g. mounting other cows).
Other hormones
PROLACTIN. Prolactin, or luteotrophic hormone, is produced in the anterior pituitary gland.
Its action is to maintain the corpus luteum and initiate and maintain lactation. It is also
involved in maternal behaviour patterns.
OXYTOCIN. Oxytocin, the milk let down hormone, is produced in the posterior pituitary
gland. Apart from triggering milk let down, oxytocin also causes contraction of the uterus.
This action is involved in sperm transport for fertilisation and also aids in expelling the calf at
parturition (birth) and expelling the afterbirth (placenta) immediately after parturition. Gentle
massage of the cervix after insemination releases oxytocin and boosts conception chances.
The action of oxytocin is counteracted by the effect of adrenalin which is released when
animals get frightened or upset. This reduces chances of conception. Gentle handling and
good facilities are essential to prevent upset.
RELAXIN. This is produced by the corpus luteum in very late pregnancy. It causes relaxation
of the ligaments around the pelvis, enlarging the birth canal. It is responsible for the
characteristics of ‘springing’ in late pregnancy.
Oestrogen causes the cow to display signs of oestrus or heat.
7
Fertilisation
Ovulation is the release of the egg from the ovary.
Luteinising hormone gradually softens and breaks down
the wall of the follicle so the ovum can mature and
float free. When released, the ovum is caught by the
infundibulum and passes into the fallopian tube which
moves it towards the uterus. Ovulation usually occurs
about twelve hours after the end of heat, although its
timing varies within a normal range 2 to 26 hours.
Structure of the ovum
The mature ovum of the cow is similar to other mammalian egg cells.
• The cumulus (or granuloma) cells provide nutrients and protect the ovum.
• The zona pellucida (clear layer) contains two gel layers which protect the ovum. The zona
is impervious to most compounds.
• The vitelline membrane covers the yolk.
• The yolk provides nutrients to the rapidly dividing cells of the embryo until they are
implanted in the uterus.
• The nucleus contains half of the genetic information which will determine the
characteristics of the resultant animal. The other half comes from the sperm nucleus.
Ovum transport
The beating action of the cilia propels the ovum by
setting up currents in the fluid secreted by the oviduct.
As the egg moves down the tube, excess cumulus cells
may be removed by the cilia.
Muscular contractions of the oviduct also contribute to
transport of the ovum.
Sperm transport
In natural mating, semen is deposited in the anterior part of the vagina near to the cervix.
Sperm are carried into the uterus by the cervical mucus and some reach the oviduct within
two to four minutes. The rapid movement of sperm to the site of fertilisation is believed to
be due to contractions of the uterus and oviducts. Oxytocin released at mating stimulates
muscular contractions. Prostaglandins in sperm also assist sperm transport in the uterus and
oviduct.
Capacitation
Sperm must be in the female tract for one to six hours before they are capable of fertilising
the egg. During this time they undergo a series of chemical changes which prepare them for
penetration and fertilisation of the ovum. This process of change is known as capacitation. It
is thought to include the removal of a membrane to expose the enzymes which facilitate
penetration of the egg.
Figure 10. Capacitation
Nucleus
Enzyme release
Acrosome
Sperm without
acrosome
Figure 8. Ovum at ovulation
Figure 9. Ovum transport
Fallopian
tube
Ovum Wave action of cilia
Direction of travel
Nucleus
Cumulus oophorus
Yolk
Zona pellucida
Vitelline
membrane
8
Penetration
The enzymes released during capacitation allow sperm to move through the layers of the egg
to reach the nucleus. (Enzymes are substances which stimulate chemical reactions). The
reactions in this case result in the layers of the egg dissolving to allow the sperm to pass
through. Hyaluronidase and trypsin act on cumulus cells and zonalysin acts on the zona
pellucida.
Fertilisation
Fertilisation, by which male and female gametes unite to form the zygote, takes place at a
site one-third of the way down the fallopian tube. Sperm are not strongly attracted to the
ovum, and fertilisation occurs by a chance collision of the sperm and ovum. The wall of the
egg becomes impervious once a spermatozoon has entered, so as to prevent polyspermy, i.e.
fertilisation by more than one sperm.
Figure 11. Fertilisation
Zygote: the fertilised egg before it begins to divide.
Gamete: male or female reproductive cell, i.e. sperm or ovum.
Ovum or embryo transfer
In nature a cow is limited to ten to fifteen progeny in a lifetime. This limits the direct genetic
impact a cow can have on herd improvement. Embryo transfer was developed to enable
superior cows to have many more progeny than could be obtained under natural conditions
and thus have a far greater direct impact on herd improvement.
Embryo transfers are now offered commercially by veterinarians in many countries.
This process can be divided into five stages.
STAGE I – INITIAL PREPARATION
The first step is to identify the genetically superior cows by a production recording scheme.
The bull to be used should also have his genetic worth assessed by a progeny test or a
performance test (refer to the DPI&F publication ‘Bull selection’ for further information). The
suitability of certain matings may need to be assessed by a geneticist.
The genetically superior cow (donor cow) must not be pregnant and should be cycling
normally before the program commences. The cows which are to be used as surrogate
mothers (recipient cows) must also be empty (not pregnant) and cycling normally.
STAGE 2 – TREATMENT OF DONOR COWS
In nature, a cow normally releases only one egg (ovum) at a time for fertilisation. But for an
embryo transfer program to be worthwhile the donor cow will need to be treated to ensure
the release of numerous ova for fertilisation and transfer to recipient cows. This is done with
an injection of FSH, at the correct time in the donor cow’s cycle under veterinary supervision.
To ensure correct timing, oestrus synchronising drugs such as prostaglandins and
progesterones may be used to control the oestrous cycle of the donor cow (refer to section
on oestrous synchronisation).
Sperm attachment to zona
Zona pellucida
Vitelline
membrane
Sperm without
acrosome
Zona penetration
Zona reaction
Sperm nucleus absorption
Zona reaction
increases and
spreads
Impervious wall
9
STAGE 3 – TREATMENT OF RECIPIENT COWS
An embryo is most likely to ‘take’, if the recipient cow is at exactly the same stage of the
oestrous cycle as the donor cow. To achieve this, the oestrous cycle of the recipients must be
controlled by use of oestrus synchronising drugs such as prostaglandins (see the section on
oestrus synchronisation in the chapter ‘Conducting an artificial breeding program’).
STAGE 4 – COLLECTION OF EMBRYOS
FROM DONOR COWS
The donor cow is inseminated, sometimes
two or three times, during her heat period.
Accurate heat detection is critical for good
results. Between seven and twelve days later
the embryos are removed from the donor
cow. These embryos are examined
microscopically to assess their viability. Up to
30 embryos may be obtained from one
collection, but on average only five viable
embryos are collected.
STAGE 5 – TRANSFER OF EMBRYOS TO
RECIPIENTS
As soon as possible the viable embryos are
transferred to the recipient cows.
On average up to 60% of these embryos take
successfully. The transferred embryo then
grows inside the recipient cow just as if it
were her own calf.Figure 12. Non-surgical collection of
embryos
Y-connector
Bulb of foley
catheter seals
behind cervix
Uterus
Foley
catheter
Flushing fluid
Out
In
Air
Collection
flask
Pregnancy and parturition
The duration of pregnancy (the gestation period) in cows is about 283 days, with a normal
range of 273 to 291 days. Bos indicus and larger European breeds tend to have longer
gestations; small breeds such as Jerseys have shorter gestations. Gestation may be divided
into two stages:
• The embryonic stage – from fertilisation to days 45 to 48
• The foetal stage – from days 45 to 48 to calving.
Within 15 to 30 hours of fertilisation, the zygote divides. At four to five days the embryo has
reached the uterus, has 16 to 32 cells, and is termed a morula. At day 8 the zona pellucida
disintegrates and a blastocyst is formed.
On the 14th day the blastocyst attaches loosely to the uterine wall and part of it elongates to
form a membrane called the chorion. Uterine ‘milk’ nourishes the embryo at this stage.
Implantation begins by the 35th day with the chorion and the uterus forming cotyledons or
‘buttons’. The embryonic and maternal tissues are closely associated, allowing nutrients to
pass from the maternal to the foetal blood supply and waste products to pass in the opposite
direction.
Cells divide rapidly and the head, heart and limb
buds are all present by the 40th day. The embryo is
very sensitive during this phase of rapid growth and
adverse influences can produce deformities (as
Thalidomide affected human embryos).
Organs continue to differentiate during the foetal
stage, and there is a rapid increase in weight,
particularly in the last 60 days, when the foetus
trebles in size.Figure 13. Cow blastocyst
Inner cell mass
Trophoblast
Fluid filled sac
10
Pregnancy diagnosis
HORMONAL ASSAY
Changes in hormone levels in samples of blood or urine are used to diagnose pregnancy in
humans and horses. Hormone levels in milk may be used to detect pregnancy in cows if the
milk sample is taken at an accurate, specified time after mating. Hormone assays are
expensive and not yet practical for commercial use.
BEHAVIOUR
Changes in behaviour due to hormone balance will allow some observers to detect animals
which are in calf. Absence of oestrus activity is the most reliable behavioural guide, but the
accuracy of pregnancy diagnosis by this method is low.
SONAR
Sonar machines are being used to detect pregnancy in a number of species including cattle.
Changes to the wavelength of a reflected soundwave (the doppler effect) can be interpreted
to indicate whether or not the animal is pregnant. This method is not entirely satisfactory in
cattle as diagnosis of empty (non-pregnant) cows is difficult.
REAL TIME ULTRASOUND
This method employs the doppler effect as do sonar pregnancy testing machines. Here the
reflected soundwaves are converted into visual images on a screen instead of audible sound.
Considerable skill is needed to interpret these images for an accurate diagnosis. This method
is useful for very early pregnancy diagnosis i.e. under 7 weeks.
HISTOLOGY
Pregnancy can be detected by examining the cells and mucus of the cervix and vagina under
a microscope. This method is reliable but not practical for commercial use.
PALPATION
Diagnosis of pregnancy by palpation of the tract per rectum (PR) – i.e. by feeling through the
cow’s rectal passage – is the most effective method. The technique is classed as an act of
veterinary surgery in many places and only veterinarians are permitted to offer the service,
however owners of stock are permitted to use this procedure to diagnose pregnancy in their
own cattle.
Pregnancy diagnosis by palpation
As with all examinations by palpation, it is advisable to get the cow as relaxed as possible.
The excessive moving and straining of nervous cattle lead to inaccurate diagnosis. Straining
due to molasses and rye grass feeding also reduces accuracy.
1. DAYS 28 TO 35
Detection of very early pregnancy requires skill and is not advisable because of the risk of
causing abortion. Great care must be exercised if the procedure is attempted. Gentle
palpation reveals:
• the corpus luteum on the ovary of the pregnant uterine horn
• an abrupt end to the pregnant uterine horn
• membrane slip, detectable after the 30th day. By grasping the uterus gently with the
thumb and finger, the chorion can be felt slipping between the folded uterine walls. The
best site to feel this is where the horns curl around.
This technique should be attempted
only by veterinarians or very
experienced operators as it is
possible to damage the membranes
and developing embryo and cause
abortion.
Figure 14. Feeling for membrane slip
Uterine wall
Chorion
Grip of finger and thumb
Inner membrane (chorion) slips
between uterine folds
11
2. DAYS 35 TO 62
At this stage, examination should still only be attempted by a veterinarian or very
experienced operator because of the risk of damage to the membranes and the embryo, and
of abortion.
• The pregnant horn tends to straighten out, i.e. to lose its curl. It has a fluid tone and an
increased diameter when compared to the non-pregnant horn.
• The extra weight of the pregnant horn often twists the tract slightly, leaving the lighter,
more tightly curled, non-pregnant horn ‘floating’ on top.
3. DAYS 62 TO 90
Experienced operators should be able to detect pregnancy by 63 days.
• The uterus feels like a water filled rubber balloon with a diameter of 10-16 cm.
• The horns are no longer symmetrical and the difference in size becomes gradually more
apparent towards the 90th day.
• Very gentle palpation of the uterus will reveal a foetus the size of a mouse at 60 days and
the size of a rat at 90 days.
• The uterus should still be in the pelvic cavity or in the upper part of the abdominal cavity.
4. DAYS 90 TO 150
Pregnancy testing after 90 days should be a relatively risk free proposition to most trained
operators.
• The uterus descends into the abdominal cavity and becomes progressively more difficult
to palpate.
• Its size increases mainly due to the volume of fluid in the membranes.
• The foetus weighs about 2 to 3 kg and is about the size of a cat at 150 days.
• Cotyledons can be detected. At 90 days they have a diameter of about 1 to 2 cm (like a 5
cent coin); at 150 days, 3 cm (like a 20 cent coin). The size of the cotyledons is best
gauged at the body of the uterus.
• The uterine artery of the pregnant horn enlarges and develops a characteristic ‘buzzing
pulse’ (fremitus). The artery is as thick as the little finger by the end of gestation.
• The weight of the uterus pulls the cervix over the pelvic brim. Instead of being hard and
muscular, the cervix enlarges and feels doughy.
These signs must be identified in combination to indicate the state of pregnancy.
5. DAYS 150 TO 210
• The uterus lies on the floor of the
abdomen.
• The foetus may only be palpated by
bouncing, i.e. gentle pressure on
the uterine fluid so as to bounce the
foetus against the hand.
• Cotyledons and fremitus are readily
detectable.
• The foetus is the size of a small dog
(9 to 13 kg).
Figure 15. 150 day pregnancy
Right ovary
Broad ligament
Bladder pushed
to one side
Cotyledons
Non-pregnant horn
Figure 16. Full term pregnancy
Head and
forelimbs in
pelvic
cavity
6. DAY 210 TO CALVING
• The foetus enlarges and is easy to
feel.
• Palpation of the foetus may elicit
movement.
• Close to calving the foetus should
lie with its forelimbs extended
towards the pelvic outlet and its
head between the legs. The head
and its features, jaws and ears etc.,
are easily delineated. The foetus
may have one or two teeth at 270
days and may ‘bite’ at a hand
palpating around its jaw.
External signs of pregnancy
In heifers the udder increases in size at four to five months and this is a sign of pregnancy. It
is not normally evident in mature cows until one to four weeks before calving.
From six months onward (later in fat cows), foetal movements may be seen through the
abdominal wall. In some cows the foetal heart sounds may be heard from the seventh month
with the aid of a stethoscope.
Abdominal swelling is not usually noticeable until the later stages of pregnancy.
Signs of approaching parturition
Some signs are observable in cows and heifers, others in one or other.
• In cows, the udder enlarges one to four weeks before calving. This is not a reliable sign in
heifers as the udder begins to develop halfway through pregnancy.
• Production of colostrum – a creamy or pink secretion – begins from the udder.
• The white stringy vaginal mucus becomes more profuse.
• The mucus plug in the cervix liquefies.
• The animal usually moves to a quiet spot away from the rest of the herd.
• Heifers may become restless and lose their appetite.
• Pelvic ligaments relax under the influence of relaxin, 24 to 48 hours before calving,
making the tail appear to be set higher and causing a looser walking action,
i.e. ‘springing’.
• The vulva swells to six times its normal size.
Induction of parturition
Birth is brought on by the foetus producing a hormone which acts on the cotyledons and
uterus to release prostaglandins. It is the foetus which determines when birth commences,
not the mother. Prostaglandins (mainly F2 alpha) dissolve the corpus luteum, consequently
lowering the levels of progesterone and causing contraction of the uterine muscles.
Oxytocin is released in the later stages to increase the strength of contractions.
Stages of parturition
The calf is normally presented with the forelimbs extended and its head resting on, or
between them. In some instances the hind limbs may be presented first.
12
STAGE 1
The uterine muscles contract to force the foetal membranes through the dilating cervix.
Contractions gradually increase in frequency as the second stage approaches.
STAGE 2
The foetal membranes (water bag) and feet approach the vulva. Abdominal contractions,
which are under voluntary control, take over the main effort of expelling the foetus. The cow
may rest for a short time after the head is presented before resuming contractions to push
the foetus out of the birth canal. This stage takes between 30 minutes and four hours to
complete.
STAGE 3
The foetal membranes are normally expelled within eight hours. If they are still in place after
24 hours, veterinary attention should be sought.
Difficult calving (dystocia)
Any calving in which the second stage takes longer than four hours should be viewed with
concern. If dystocia occurs veterinary attention should be sought. Intervention by an
untrained person will usually aggravate the situation. Dystocia can be reduced by careful
management. It is advisable to keep calving cows (particularly heifers) under observation.
Lactation (period of suckling)
Oestrogen promotes growth of the duct system of the udder while progesterone stimulates
development of the milk secreting glands (alveoli).
Prolactin has a dual role. Before calving it stimulates udder development; after calving it
encourages milk production. It is thought that high levels of progesterone during pregnancy
suppress the milk forming action. This suppression stops when progesterone levels fall at
calving.
Colostrum (first milk) is a rich source of antibodies which prevent infection until the calf
builds up its own resistance (immunity).
Suckling stimulates the release of oxytocin (milk let down hormone) to cause contraction of
the milk secreting tissues. Milk is forced into the ducts and teats to facilitate easy removal.
Suckling causes release of oxytocin
13
Anatomy and physiology of the bull
Testicles (Testes)
The testicles are paired organs found in a sac
like structure (the scrotum). The surface of the
testes is covered by the tunica albuginea, a
closely adhering thin white fibrous sheath. When
it is cut, the soft testicular tissue bulges
through.
The testicles of a mature bull perform two
functions:
• spermatogenesis: production of spermatozoa
• production of the male sex hormone,
testosterone.
Spermatozoa are single living cells which
constitute the basic unit of reproduction in the
male. They are formed in the seminiferous
tubules of the testes under the control of FSH
and LH. Each testicle contains about 2000 m of
seminiferous tubule producing 20 000 sperm per
second. Spermatogenesis takes 60 days to
complete.
Leydig cells, located between the loops of
seminiferous tubule, produce testosterone,
which has two major functions:
• it induces libido (sex drive)
• it causes development of male characteristics
such as body shape. This includes muscular
development in the bull’s neck region,
heavier forequarters and the crest.
Figure 17. Genital organs of the bull
Tail of epididymis
Rectum
Retractor penis muscle
Body of epididymis
Scrotal sac
Head of epididymis
Sigmoid flexure
Penis
Preputial membrane
and cavity
Ampulla
Seminal vesicles
Glans penis
Vas deferens
Inguinal canal
Bladder
Rumen
Testis
14
Figure 18. Midline section of testis
Tail of epididymis
Rete or central duct
Septa with blood vessels
and semen ducts
Head of epididymis
collects sperm from rete
Pampiniform plexus
Lobules with
seminiferous tubules
and leydig cells
Figure 19. Lobule section
Leydig cell
Sperm
Tubule
Primary spermatocyte
Scrotum
The scrotum is a two lobed sac, the lobes being
divided by a vertical septum. It is composed of a
number of layers:
• the skin, which should be almost hairless or
have only very fine hairs
• the tunica dartos muscle
• the tunica vaginalis, a thick white fibrous
sheath surrounding the testes. The dorsal part
is attached to the cremaster muscle which
enables the bull to draw the testes towards
the abdomen.
The scrotum has three main functions:
• to support the testes
• to protect the testes
• to regulate temperature within the testes.
Figure 20. Vertical section of scrotum and
testes
Inguinal canal
Spermatic vein
Vas deferensSpermatic artery
Testis
Skin of scrotum
Cremaster
muscle
Tail of epididymis
Vas deferens
TEMPERATURE REGULATION IN THE TESTES
The optimum temperature for spermatogenesis is 33° to 36°C (3° to 6° below body
temperature). Variation above or below this range impairs sperm production. Heat stress
increases the numbers of abnormal sperm in an ejaculate. In the epididymis such
abnormalities show up as returned tails, retained droplets and increased mortality. Sperm
in the seminiferous tubules show the damage as abnormal heads, midpieces and tails.
Temperature of the testes is controlled by:
• Evaporation of sweat
The skin of the scrotum is well supplied with sweat glands. Heat from the body of the
testes is conducted by the blood to the skin, which is cooled by evaporating sweat. The
efficiency of this cooling depends on the temperature, humidity and movement of air in
immediate contact with the scrotum.
• Muscle contraction
The muscular tunica dartos and the cremaster muscle contract in cold weather and relax
in hot weather. In this way the testes and scrotum are drawn towards the warm body wall
to conserve heat in cold weather and are lowered away from the body in warm weather.
Lowering also increases the surface area of the scrotum to expose more skin for sweat
evaporation. Bos indicus animals display this quite markedly.
Figure 21. Testicular cooling by pampiniform
plexus
• Blood supply
Blood coming to the testes via the spermatic
artery is at body temperature (38.5°C). If it
went straight into the testes it would raise the
temperature and disrupt spermatogenesis.
Venous blood leaving the testes is cooler
(33°C) because of its close association with
the scrotum which is cooled by the
evaporation of sweat. Veins in the spermatic
cord form a complex network of vessels (the
pampiniform plexus) which surrounds the
arteries acting like a radiator to maintain
constant temperature. With the transfer of
heat, there is an equalisation of temperature
between blood in arterial and venous vessels.
Arterial blood is cooled before it reaches the
testes.
Spermatic
artery 34°C
Pampininform
plexus
Spermatic
vein
Blood from the body 39°C
Veins 33°C
Veins in
skin 33°C
Spermatic
artery
15
Epididymis
The epididymis is divided into three parts:
• the head is on the top part of the testicle and is very closely attached to it
• the body extends down the outside of the testicle
• the tail is the enlarged distal part which may be palpated at the base of the testicle.
The epididymis has a number of functions including:
• sperm storage
• provision of nutrients for sperm
• maturation of sperm as they move down the epididymis. Immature sperm are incapable
of fertilisation.
Vas deferens
The vas deferens connects the epididymis to the urethra. It is a thin whitish tube which
enters the body through the inguinal canal and terminates at the ampulla. The vas deferens
contracts during ejaculation to force sperm down the urethra.
Ampulla
The ampulla is a thickened glandular extension of the vas deferens. It acts as a valve to prevent
urination while the bull is sexually excited. It also stops urine from entering the vas deferens.
Urethra
The urethra runs the length of the penis and is the common duct for both urine and sperm.
Accessory glands
The seminal vesicles, prostate, and bulbo-urethral glands make up the accessory sex glands.
Their function is to produce seminal plasma (accessory fluid) which may form 60% to 95% of
the volume of an ejaculate. Seminal plasma has a number of functions:
• It cleanses the urethra of urine, bacteria and contaminants just before ejaculation. This is
seen when the bull ‘dribbles’ a bit just before mounting.
• It activates sperm.
• It provides nutrients for the sperm.
• It adds volume to the ejaculate.
• It may aid sperm survival in the vagina. The vagina is a hostile environment for sperm
and unless they can quickly gain entry to the uterus, they will die. Seminal plasma may
prolong sperm survival in the vagina until more sperm can gain entry to the uterus.
The penis
The bull’s penis is fibro-elastic material covered by a dense white fibrous sheet – the tunica
albuginea. There is some erectile tissue present but this is minimal when compared to that
Figure 22. Cross section of horse and bull penis
Tunica
albuginea
Bull
Erectile or
cavernosus tissue
Urethra
Horse
Vaginalis
16
found in horses and humans. In a bull the
erectile tissue is only for hardening the penis
during erection and not for lengthening it or
increasing the diameter. Erection is caused by
contraction of muscles at the root of the penis.
The end of the penis (the glans penis) is about
8 cm long. It is flattened and slightly twisted. At
ejaculation, the glans twists about half to one turn
to increase the effective diameter of the penis.
Prepuce
The prepuce, or sheath, is the protective covering of the penis.
Semen– collection, processing & storage
AB centre operations
Most AB centres use an artificial vagina to collect semen. With this device, temperature,
pressure and friction are used to stimulate ejaculation when the donor bull mounts a teaser
animal. Cows may be used as teasers but have disadvantages. Other bulls or steers are
satisfactory. In some instances mechanical decoys are used.
Demand for a bull’s semen determines the frequency of collection. Two ejaculates twice a
week (e.g. two on Monday and two on Thursday), will allow an average bull to produce
30 000 doses or more in a year.
When bulls are unable to mount because of injury or some other factor, electro-ejaculation
can be used. This method employs passage of a fluctuating current between electrodes on a
probe which is placed in the bull’s rectum. This current stimulates accessory sex glands and
the muscles of ejaculation. Electro-ejaculation is usually regarded as a last resort for semen
collection. It is time consuming, requires expensive equipment and risks injury to the donor
animal. Semen quality is not as good as that collected by the artificial vagina.
Estimation of density by spectrophotometer.
Low magnification initial assessment of
semen quality.
Processing
About ten million normal, actively moving sperm
are required to produce conception using artificial
insemination. They must be placed at the correct
site in the reproductive tract of a cow which is at
the correct stage of the breeding cycle.
When processing a dose of frozen semen, the aim
is to ensure that sufficient live sperm are present
for conception when the dose is thawed to body
temperature. Processing includes: evaluation,
dilution, cooling, packing, freezing, quality control
(evaluation after freezing) and storage.
1. EVALUATION
After examining a drop of raw semen under low
power on a microscope to obtain an estimate of
sperm concentration and activity, samples are
taken for detailed assessment. One drop is placed
in a test tube with a special stain to determine the
percentage of the spermatozoa which were alive
and of normal conformation at the time of staining.
Another drop is used to ascertain the density of the
raw semen – the number of sperm per millilitre. A
spectrophotometer measures the amount of light
passing through the sample of semen diluted at a
particular rate. Put simply, the more sperm in the
sample, the less light that is transmitted. By
multiplying the volume of the ejaculate by the
density and the percentage of live sperm, the total
number of live sperm in the ejaculate can be
worked out.
17
2. DILUTION (OR EXTENSION)
An average ejaculate may contain 5000 million sperm
in 5 ml of raw semen. Super-fertile mature bulls
may yield up to 12 000 million sperm per ejaculate.
With natural service this could only produce one
calf. By diluting the ejaculate, the raw semen can be
extended to give 200 or more individual 0.25 ml
doses each containing 25 million live sperm. While
only 10 million sperm are required for conception,
more than double this number are placed in the
straw to allow for losses during freezing. Glycerol is
the chemical added to protect the sperm during the
freezing process. Diluents may be based on skim
milk, egg yolk citrate or specially prepared chemical
diluents such as TRIS with egg yolk. Antibiotics are
added as a precautionary measure and most
diluents have added fructose (fruit sugar) to supply
energy to the sperm.
3. PACKING
More than 200 AB centres around the world use the
Cassou or French straw system for packing semen.
Glass ampoules were used originally but in most
countries, these have been replaced by straws.
The medium straw (0.5 ml volume) was introduced
in 1969 and the ‘mini-straw’ (0.25 ml volume) in 1972.
Cassou straws are 133 mm long poly-vinyl chloride
tubes. Medium straws have a 3 mm diameter and
mini-straws 2 mm. They are plugged at one end
(the double plug end) with a sealing powder which
is retained between two cotton plugs. By applying a
vacuum to this end of the straw, semen can be
drawn up the tube and into contact with the sealing
powder. As soon as the powder becomes wet it
turns into a gel to provide a very effective seal.
Automatic straw filling and sealing machines use an
ultrasonic pulse to seal the other end (the
laboratory end).
4. COOLING AND FREEZING
At body temperature sperm swim about very rapidly, exhaust their energy reserves in a
relatively short time, and die.
Dilution of raw semen
Diluted semen in water bath for controlled
cooling.
Straws are loaded on a rack. The loaded rack is lowered in liquid nitrogen
vapour.
18
The rate of a chemical reaction depends on the temperature at which the process is taking
place. If the temperature is reduced, the rate of reaction is also reduced. Cooling semen to
near freezing point slows the sperm down, by slowing their internal reactions, and extends
their life for several days if they are protected by suitable chemicals. By further cooling,
activity can be effectively stopped to give the sperm an almost indefinite life. Some of the
sperm are killed in the freezing process but with correct processing, many survive and will
revive on thawing.
The temperature at which semen must be held if it is to retain the ability to fertilise is below
minus 70°C. (i.e. 70°C below the freezing point of water. This is called the critical
temperature.) This is much colder than the temperatures maintained in domestic deep freeze
refrigerators. Liquid nitrogen boils at a temperature of minus 196°C. (196°C below the
freezing point of water), so it is the most suitable refrigerant available. Straws of semen are
frozen by suspending them in the vapour above the surface of the liquid nitrogen, to give a
controlled rate of cooling and freezing. They are then stored in the liquid nitrogen until use.
5. QUALITY CONTROL
Twenty four hours after freezing, a portion of each batch of semen is thawed and examined
under a microscope. If the batch meets prescribed minimum standards for survival and
motility, it is packed into goblets and transferred to storage units. Periodically, straws from
each batch are checked for signs of deterioration in storage.
6. STORAGE
For ease of handling and to minimise the risk of damage to the sperm through exposure,
straws are always packed in plastic goblets. Semen should only be transferred to and from
liquid nitrogen containers in goblets, because there is no safe exposure time for individual
straws.
Goblets are usually marked with the bull’s common name and the batch number.
Straws are placed in vapour for freezing. Freezing is completed in liquid nitrogen.
Figure 23. Goblets — sizes and capacities (mini-straws)
Micro (5) (220)Hexi (80)Midi (25)Mini (10) Maxi (560)
7.1 mm 12 mm 22 mm 35 mm 65 mm9.2 mm
19
Identification of straws
Identification of individual straws in storage is not easy but following the guidelines below
will assist.
SEMEN LOCATION
All suitable on-farm liquid nitrogen containers have numbered slots for seating each of the
buckets. (Refer to the section on liquid nitrogen containers, below.) A ‘semen map’ on the lid
of the liquid nitrogen container or in the kit box is a useful guide for locating semen stocks.
GOBLET MARKING
Any goblet purchased from a reputable AB centre will contain semen from one bull only. Two
or more bull’s straws should never be put in the same goblet.
Goblets may be of different colours and this may assist in identifying straws of a particular bull.
Some AB centres also mark each goblet with a bull’s code and batch number.
Remember, there is no safe exposure time for an individual straw. However, a goblet may be
safely lifted from the bucket of a liquid nitrogen container for a short time – sufficient to read
the goblet markings.
STRAW MARKING (BATCH NUMBER)
All straws are marked with the bull’s name, centre of origin and the batch number.
Batch numbers specify the year and day of collection for each straw of semen (e.g. 04135
means a collection on the 135th day of 2004). Records of each day’s collections and the
number of straws processed are kept by the centre of origin.
Unlicensed semen
Unlicensed semen is intended for use only by the owner or part owners of a particular bull. It
is an excellent form of insurance for valuable bulls.
Generally bulls collected for unlicensed semen production have only undergone minimal
health testing. The semen is also often processed on non-licensed premises and may not
meet the standards of quality control expected by purchasers of semen.
Unlicensed semen is generally processed into wine red straws which should be identified by
the letters UL. Other information, usually in code, includes:
• the owner’s name
• the collector/processor/AB centre
• the bull’s name
• the breed
• the date of collection.
Licensed semen
Licensed semen must comply with minimum standards for identification, disease testing and
packaging and can only be collected from bulls housed at a licensed semen production centre.
A bull must proceed through quarantine, where tests are performed to determine if any
transmittable diseases or genetic defects are present, before proceeding to the licensed area
for semen collection.
Straws of licensed semen must be clearly labelled with:
• The bulls name
• collection centre
• date of collection
• batch number
The semen straws are often colour coded according to breed, however the majority of the
licensed semen processed from tropically adapted breeds is packaged in clear straws.
20
Liquid nitrogen containers
All frozen semen used in Australia is transported and stored under liquid nitrogen, which is by
far the most satisfactory refrigerant in terms of operator safety, ease of handling and
availability. It also has a wide margin of safety in the temperature range for storage.
Eighty per cent of the air we breathe is nitrogen gas. It can be converted to a liquid by
cooling and compressing. The liquid has a boiling point of minus 196°C. Both the liquid and
gaseous forms are relatively inert chemically and will not burn, support combustion or react
in any way with other materials. These properties make it a very suitable refrigerant.
SAFETY PRECAUTIONS
Liquid nitrogen can be dangerous if not handled correctly because of its extremely low
temperature. The following points must be given strict attention.
Avoid contact with the liquid. Prolonged contact with the skin or contact with wet skin may
result in severe burns. Contact with eyes (which are continually moistened by tears) may
severely affect eyesight.
Use metal forceps when removing straws from liquid nitrogen containers. Skin, if in contact
with the cold metal of the buckets, will often stick and tear when removed.
Insert objects into the liquid very slowly. This avoids the splashing which occurs when the
liquid boils on insertion of ‘warm’ objects.
When refilling containers pour the liquid slowly. This avoids ‘blowout’. If the nitrogen boils
vigorously it may shoot out the neck of the container. Don’t use plastic funnels as these will
crack and disintergrate.
You should provide adequate ventilation when storing or transporting liquid nitrogen.
Nitrogen gas is colourless, odourless and tasteless and, although inert, may cause dizziness
and suffocation at very high concentrations because of the exclusion of normal air. Liquid
nitrogen units are not designed to be transported in the passenger cabin of any motor vehicle.
Use only the stopper supplied with the container. The stopper is designed to allow controlled
evaporation of the liquid nitrogen. Attempted use of other stoppers will lead to dangerous
pressure build up or to excessive loss of nitrogen.
FIRST AID
Flood the affected area with large quantities of unheated water and later apply cold
compresses. If the skin is blistered, or if eyes or other delicate tissues are affected, seek
medical attention immediately.
21
Figure 24. Cross section of a typical semen
storage unit.
LIQUID NITROGEN CONTAINER
CONSTRUCTION
Liquid nitrogen containers (or units) are like well
engineered thermos flasks. They come in different
sizes, shapes and prices according to the role for
which they are designed. There are basically two
types of unit available:
Units designed for use at AB centres. These are
characterised by very large storage capacity and
large or ‘open’ necks designed for easy access.
They require large quantities of liquid nitrogen and
are generally unsuitable for farm use.
‘Long life’ units designed for farm use. These have
‘narrow’ necks and hence use small amounts of
liquid nitrogen which makes them very suitable for
field use. The narrow neck restricts the storage
capacity of the unit. However, all of the units
Inner wall
Outer case
Insulation
Vacuum
Plastic neck
Nitrogen
vapour
Liquid
nitrogen
Cap holding buckets,
slotted and numbered
–130 to
–140°C
–196°C
available have more than adequate storage capacity for most artificial breeding programs.
MAINTENANCE AND USE OF CONTAINERS
Semen must be stored at a temperature below minus 70°C to avoid deterioration in quality
(fertilising capacity). Most units will maintain the temperature at well below minus 80°C with
only a few millimetres of liquid nitrogen remaining. However, it is strongly advised that the
level of liquid nitrogen never be allowed to fall below 15 cm. This ensures that straws may be
removed for insemination while the other straws remain safely stored. The goblets will be full
of liquid nitrogen allowing safer removal of straws whilst still keeping stored straws
immersed. Goblets will not float out of buckets and empty their straws to the bottom of the
unit when the liquid nitrogen is being refilled, and there will be sufficient reserves should
unavoidable delays in liquid nitrogen supply occur.
Measurement of liquid nitrogen levels is quite simple. A thin plastic rod or piece of dowel can
be used as a dipstick. A frost line will indicate the level of liquid nitrogen if the rod is held in
the unit for a short time and then exposed to the atmosphere.
Figure 25. Cross section of a field container Figure 26. Dipstick
Bucket
Index ring
Minimum
safe level
for single
layer of
straws
Handle
Liquid nitrogen
Lifter
Mini-
goblet
15 cm
Frost line
Dipstick
22
Forceps
Operator 1
Goblet
Operator 2
Lifter
Field container Hire container
Figure 27. Goblet transfer
Plastic funnels will crack or explode and may spill liquid nitrogen.
Figure 28. Metal funnel
23
Knowing when to top up liquid nitrogen
A dipstick can be marked to indicate the level at which a refill of liquid nitrogen should be
ordered. It is wise to leave a safety margin when ordering nitrogen. There have been
instances when units have run dry because the nitrogen supply was delayed.
One disadvantage of using a dipstick is that its use increases the rate of nitrogen loss and
there is some risk to the operator as the liquid nitrogen may boil out of the unit when the
warm rod is inserted.
Under no circumstances use a metal rod or a hollow rod as a dipstick. A hollow rod is
dangerous because boiling will force nitrogen through it and out over a considerable
distance.
An alternative method is to set a critical weight for the unit and weigh it at regular intervals.
When the weight of the unit falls to the critical weight, more liquid nitrogen should be
ordered.
Perhaps the most satisfactory procedure is to work out the unit’s rate of nitrogen
consumption and then, after assessing the safe storage period, place reminders to re-order
at regular intervals on a calendar.
Units should still be checked periodically to guard against breakdowns or slow leaks. In most
cases the weakest point of the unit is in the non-metal neck section. The first and most
visible sign is the appearance of a frost (from condensation) on the outside neck of the unit.
If semen is to be saved it must be transferred as soon as possible to another unit.
REFILLING PROCEDURES AND FIELD
TRANSFER OF SEMEN
Any semen which is ordered will be supplied
in ‘hire units’ which will also contain nitrogen.
1. Place the hire unit close to the farm unit.
2. Determine from the packing slip in which
bucket any ordered semen is stored.
3. Determine in which bucket you wish to
place the ordered semen.
4. With the aid of another person, raise both
buckets, using forceps, and transfer the
goblets containing the semen from the
hire unit to the farm unit. This must be
done carefully.
5. Remove all empty goblets from the farm
unit.
6. As soon as possible lower the buckets
back into place.
7. After transfer of semen is complete,
remove all buckets from the hire unit and
with the aid of a metal funnel carefully
pour all liquid nitrogen from the hire unit
into the farm unit.
8. Replace all buckets in the hire unit and
return them as soon as possible to the AB
centre.
VAPOUR SHIPPERS
Small quantities of semen or embryos and
biological samples may be transported safely
in ‘vapour’ shippers. These contain a porous
filler which absorbs and stores liquid
nitrogen so that there is no actual free liquid
to spill. They have only a single bucket so
only limited numbers of straws can be
transported. They are useful in situations
where conventional tanks with free nitrogen
are unsuitable.
Points to consider when purchasing liquid nitrogen units
There are a number of manufacturers of long life units suitable for farm use – Taylor-
Wharton and M.V.E. are the most common brands in Australia.
The advertisements, brochures and technical literature from all companies have common
terminology although different standards may be applied to the terms used. Check these
standards carefully before comparing the units. The terminology includes:
• static holding time
• working time
• safe storage time
• liquid nitrogen consumption
• storage capacity.
STATIC HOLDING TIME
Static holding time is the time taken for all the liquid nitrogen to evaporate from a stationary
unit from which the buckets have been removed and which is not opened. It is of limited
value for selecting units, and not to be confused with the period of time for which semen
may be safely stored.
WORKING TIME
Working time is the time taken for all the liquid nitrogen to evaporate from a unit in which
the buckets are in place and filled with straws of semen. This term also is not to be confused
with the period of time for which semen may be safely stored.
The working time will be shorter than the static holding time because the semen and buckets
displace some liquid nitrogen. The bucket handles also increase liquid nitrogen evaporation
from the unit due to heat transfer from the atmosphere. Frequent use, i.e. opening the unit
to withdraw semen, will also markedly increase liquid nitrogen consumption.
Figure 30. Field bucket and lifter
Long bucket for straws or ampoules
Straw goblet lifter
24
Figure 29. Vapour shippers
Vacuum
maintenance
system
Insulation
Necktube
Outer casing
Inner
container
Filler
Canister
SAFE STORAGE TIME
‘Safe’ storage time is the time taken for the liquid nitrogen level in the unit to fall to 15 cm.
This term usually does not appear in promotional material supplied by the manufacturers.
Field experience has shown that with normal farm use, the safe storage period is
approximately one-half of the quoted static holding time for most units.
LIQUID NITROGEN CONSUMPTION
This figure will be quoted as liquid nitrogen consumption per day. The lower this figure the
better. Any unit which uses more than 0.2 L per day is not suitable for field use.
STORAGE CAPACITY
Storage capacity of units is affected by the type of bucket and the method of semen
packaging. There are two types of buckets available. The short bucket is suitable only for
straws. The long bucket is suitable for ampoules in canes or two layers of straws.
Although long buckets may double the storage capacity for straws in the unit, they shorten
the safe storage time available if two layers of storage are attempted. Also the bottom layer
of straws will remain inaccessible until the top layer has been removed. When selecting
semen from the bottom layer a ‘lifter’ must be used to allow access.
A typical long life unit has approximately the following storage capacities:
• 294 ampoules if using seven ampoule canes
• 480-720 medium straws if using two layers of straws packed into mini-goblets
• 960-1440 mini-straws if using two layers of straws packed into mini-goblets.
In using a single layer bucket, storage capacity is halved. If the straws are packed ‘bulk’,
almost double the quoted number of straws may be stored. Due to handling difficulties,
however, this method of storage is not recommended for farm use.
As storage capacity for all long life units is more than adequate for farm use it is not a vital
factor in the selection of a unit.
Figure 31. Short and long buckets
Double layer
storage
Straw
Goblet
Single layer
storage
Short bucket Long buckets
(recommended
for field use)
Lifter
Safe
LN2
level
30 cm
15 cm
25
Insemination
technique
Semen handling
Correct semen handling technique is vital in
the insemination routine. If maximum
conception rates are to be realised, the
following procedures should be adhered to.
1. Prepare insemination equipment as near as
possible to the inseminating area to avoid
undue delays.
2. Always prepare insemination equipment in
a clear, dry and shaded area. Direct
sunlight will injure sperm.
Complete farm kit (for
insemination with straws)
Long life liquid nitrogen unit
Dipstick for measuring nitrogen level
Metal tool box 50 cm (or more) long (to hold pistolettes and sheaths)
1 (or more) mini-pistolettes with sheaths (pistolettes are sometimes called straw or
insemination guns)
1 medium pistolette with sheaths
Straw tweezers
Clean, sharp scissors
Arm length gloves of disposable plastic
Glove lubricant
Thawing flask and thermometer
Paper towel
Record book and semen inventory
The same operation principles and loading procedures apply to both medium and mini-straws.
Mini-guns (or mini-pistolettes) are suitable only for mini-straws i.e. 0.25 cc straws while
medium guns and sheaths are suitable only for medium straws i.e. 0.5 cc. Universal sheaths
– those with the green adapters – can be used for both mini and medium straws using the
appropriate mini-gun or medium gun.
Figure 32. Gun or pistolette
PVA powder
Cotton plugs Air space
Tapered end
slit
Crimp
mini-straw
adaptor
Plunger
Taper Lock ring
Barrel
26
A covered bail area with adequate restraint
is essential
Loading straw guns
1. Identify the bucket containing the required straw or
straws by consulting the semen inventory (see
previous chapter). Thaw straws only one at a time.
Semen should be placed in the cow as soon as
practical after removal from liquid nitrogen.
2. Place and prepare the kit box. Check the
temperature of the thawing solution (see below
under the heading ‘Thawing’ for information about the
thawing solution). The temperature should be 35°C.
3. Lift the handle of the bucket from its notch, place it
directly across the neck of the unit so that it now
lies opposite its former position, then lift it to the
desired height. Always keep the bucket as low as
possible while keeping comfortable access to straws.
4. Remove the straw from the goblet using forceps.
Grasp the laboratory end firmly, shake vigorously
two or three times and place it immediately in the
thawing solution. Shaking removes liquid nitrogen
from the cotton wad on the manufacturer’s plug and
minimises the risk of explosion and/or straw
splitting. The laboratory end is always up in the
goblets, the thawing flask and the pistolette.
Avoid undue exposure of semen. Remember straws
have no safe exposure time and once removed from
liquid nitrogen should be used. When selecting and
removing semen, work as far down the neck of the unit
as is comfortable, preferably below the frost line. On
cold mornings the lifter may be held up by use of a
bulldog clip to avoid burning of fingers.
When selecting and removing semen from the liquid
nitrogen container always use forceps. If fingers are
used there is a risk of burns from cold objects, and also
a risk of damaging the semen due to heat transfer from
the hands.
5. Return the buckets to their correct positions and
replace the stopper.
6. Handle the straw only by the ends to avoid
temperature fluctuation shock to the sperm.
Remove the straw from the thawing solution and
dry with towel or paper. Grasp the manufacturer’s
end (the double wad end) and roll it between thumb
and index finger to loosen the wad and facilitate
easy ejection of semen. Recheck the name and
number of the bull on the straw.
7. Remove the gun from its protective case and pull
out the plunger to approximately the length of the
straw. Place the straw into the insemination gun,
manufacturer’s end first (laboratory end up). A stop
in the barrel prevents the straw going further than
the correct distance. Hold the gun and the straw
vertically and tap the laboratory end gently with the
scissors. This will make the air bubble go as far up
towards the laboratory plug as possible.
27
Remove the straw using forceps
Place straw in a thawing flask
Straws should be thawed individually
Wipe water from straw with paper towel
Roll the manufacturers end and place in
the gun
8. Wipe the scissors. This avoids contamination of the
straw about to be cut. Hold the loaded gun
vertically at eye level and with scissors make a
horizontal cut at 90° to the long axis of the straw
through the air bubble, immediately below the
laboratory plug or crimp. At least 1 cm of the straw
should protrude from the end of the insemination
gun. This, together with an accurate cut, is
necessary to ensure a perfect seal between the
straw and the sheath which is placed over the
‘barrel’. Wipe scissor blades after cutting the straw
to avoid contaminating the next straw to be cut.
9. Remove the sheath from its protective container
and place it over the barrel. (Handle only the split
end to keep the sheath clean.) Holding the lock ring
above the tapered section, push the sheath on over
the tapered section and through the lock ring until
the end of the straw and the inside edge of the
sheath are flush. Twist the lock ring and push it onto
the tapered section to lock the sheath into position.
10. Push the plunger in until semen is just visible at the
end of the sheath. This shortens the span of the
fingers and thumb required when depressing the
plunger during insemination. It also removes the
chance of carrying contamination from the vagina
into the uterus by eliminating the hollow space at
the end of the sheath. Do not load more than two
guns at any one time.
11. Insemination of the cow, as described in a later
section, can then begin.
After insemination
1. Loosen the locking ring. Do not allow it to slide onto
the soiled part of the sheath.
2. Slide the sheath off the barrel. The straw will be
removed with the sheath.
3. Re-check the name and batch number of the bull and
record them in the breeding management records.
4. Discard the sheath and straw and dispose of them
hygienically.
Preparing equipment for insemination
with ampoules or pellets
The same equipment can be used for both ampoules
and pellets. Pellets are drops of diluted frozen semen
which are stored in bulk. They are no longer used
commercially as individual doses cannot be identified.
While they are not comonly used, the procedure for
ampoules is described below.
Caution, ampoules can explode if handled incorrectly –
use protective eyeware.
1. Place and prepare the kit box. Select semen as for
straws. It may be necessary to remove ampoules
from canes with fingers.
2. Place the ampoule in thawing solution (iced water).
Ensure straw is correctly loaded to the
stop
28
Cut the manufacturers end at 90°
Place the sheath over the gun
Fasten the locking ring
Take disposable glove, lube and paper
towel to insemination crush
3. Remove and dry the ampoule thoroughly with a paper towel.
4. Attach the plastic insemination rod to the syringe and adaptor or to a plastic squeeze
bulb. When using a syringe make sure that the plunger is not fully depressed, i.e.
withdraw it slightly so that 0.25 to 0.5 cc of air is in the syringe.
5. Break the neck of the ampoule. Most ampoules are scored with a break point to make this
step easier. If the ampoule is not scored then score or rasp it lightly with a scoring file. (A
nail file may suffice if nothing else is available.)
6. Slowly insert the plastic insemination rod into the ampoule. At the same time carefully
withdraw the plunger of the syringe so that semen is drawn up into the insemination rod.
Avoid bubbles in the rod. If a plastic squeeze bulb is used, squeeze the bulb prior to
insertion of the plastic rod. Slowly release the bulb when inserting the plastic rod so that
the semen is drawn up into the rod.
7. Inseminate the cow following the procedure described later in this book.
8. Make sure all semen is expelled in the cow using the air reserve left in step 4.
The procedure for pelleted semen is the same as that for ampoules, except that the semen is
withdrawn from a container holding the thawed pellet in reconstituting diluent, and not from
an ampoule.
UNIVERSAL GUN
The Universal gun can be used for all known methods of semen packaging when used with
its blue or ‘stiff’ sheath (i.e. for ampoules, fresh semen or pellets and similarly packaged
semen). The plunger of the gun with the plastic pumping adaptor of the blue sheath forms a
piston. This has a syringe like action in the sheath. Semen can be sucked into and expelled
from the sheath by withdrawing and depressing the plunger.
The green plugged or universal sheath can be used for all straw systems. The loading procedure
is exactly the same as for the standard mini or medium straw guns. However, the tapered section of
the barrel is removable allowing the barrel to be reversed to adapt to either mini or medium straws.
When using the universal gun it is essential that the sheath and tapered section be securely locked
into place with the locking ring to avoid ‘disintegration’ of the gun during semen deposition.
Thawing
Research has shown that maximum sperm survival rate is achieved when the thawing
procedure is the reverse of the processing and freezing procedure. The processing and
freezing steps are a gradual lowering of temperature to minus 196°C.
To achieve the reverse, i.e. a raising of temperature from minus 196°C to 35°C, a thawing
solution must be used. Fluid achieves a much more rapid thaw than the hottest of air. For
this reason, thawing in the air, in gum boots, your mouth or in the cow is not recommended.
29
Conception rates will be lowered if semen is not correctly
thawed. This applies particularly to bulls whose conception
rates are naturally low.
Recommended thawing procedures
MINI -STRAWS AND MEDIUM STRAWS
1. Place straws in water of 34°C to 36°C, for a minimum of
30 seconds.
2. Never submerge the straw completely. Leave 1 cm at the
laboratory end exposed to avoid the entry of water in case
of imperfections during processing.
Baby bottle warmers make ideal thawing flasks.
The temperature must be measured using a thermometer.
AMPOULES
Ampoules should be thawed in iced water (5°C).Figure 33. Dial thermometer
Water
level
Straw
35° C
20 mm
Insemination of the cow
The first attempts at artificial insemination involved
deposition of the semen in the vagina, but fertility
with this technique was low. Some improvement
was achieved with the introduction of the speculum
method for insemination, as semen could then be
deposited in the cervix. Conception rates were
greatly improved following the introduction of the
recto-vaginal technique.
In the recto-vaginal technique, an insemination
instrument is inserted into the vagina and guided
through the cervix by a gloved hand in the rectum
controlling and fixing the cervix. This method of
insemination is the most efficient in terms of
results, labour and hygiene. It should be carried out
as follows:
1. Load insemination equipment as indicated in an earlier section.
2. Put on a glove and lubricate it with glove lubricant. Try to keep the hand holding the
insemination instrument as dry as possible. Never load guns with a glove on.
3. Carry the loaded gun in your mouth, to leave both arms free. Avoid contact between the
gun and any object near the insemination area. Contamination may cause infection and
reduce conception chances.
4. Let the cow know you are there by talking while approaching slowly. Lift the tail, form the
fingers into a cone and, with a twisting motion, gently insert your gloved hand into the
rectum. Locate the cervix. Do not force your hand into the cow’s rectum as it is possible to
rupture it. This could result in the cow’s death.
Figure 35. Opening vulva lips
5. Check that the cow is not pregnant (follow the
procedure on pages 10-12).
6. Release the cervix and uterus. Remove all traces of
faeces and water from the vulva with a piece of
paper towel. Spread the fingers of your gloved
hand and pull your arm backwards. At the same
time push your wrist down and to the left to open
the lips of the vulva. The insemination gun can
now be inserted with minimal contamination.
7. The point of the gun must be introduced at an
angle 30° below the horizontal to pass along the
top of the vulva and vagina. This avoids the
entrance to the urethra and urethral diverticulum
which lie on the floor of the vagina.
Down and left with
heel of hand
Lips
open
Insert
gun
Figure 36. Gun insertion angle
Rectum
Broad ligament
Ovary
Horn
Bladder
Pelvis
CervixGun
Vagina
30
>
>
30°
Figure 34. Insemination method
Rectum Broad
ligament
Ovary
Horn
Bladder
Pelvis
Cervix
8. Gently move the gun forward until a distinct
grittiness is felt, indicating that the cervix has
been reached. If the gun is caught in a
vaginal fold it may be necessary to push the
cervix forward to straighten out the fold.
9. By manipulation of the cervix and gentle
pressure on the gun, it should be possible to
guide the tip of the gun through the cervix
and into the uterus. The tip can usually be felt
through the thinner wall of the uterus. The
gun must not be carried further forward than
just through the cervix (1 cm at the most).
The maximum pressure which should be
placed on the gun is that which can be
obtained when holding the gun with the
thumb and one finger.
With repeat cows (i.e. cows returning on
heat), many sources recommend placing the
gun only up to the middle of the cervix
because up to 3% of pregnant cows may
cycle at 3 and 6 weeks. Intra-uterine
insemination may be harmful in these cases.
Midcervical insemination is much safer.
10.Slowly deposit half to two-thirds of the semen
in the body of the uterus and the remainder in
the middle of the cervix.
11.Remove the gun from the tract and massage
the cervix and uterus for a few seconds to
stimulate the release of oxytocin. Rough
handling upsets the cow and causes the
release of adrenalin which counteracts the
effect of oxytocin.
12.Loosen the locking ring of the gun but do not
allow it to slide onto the soiled part of the
sheath. Slide the sheath off the barrel. The
straw will come away with the sheath. Do not
discard the sheath and straw until records
have been completed. Burn the sheath and
straw and disposable glove to avoid possible
disease transmission.
13.Release the cow from the bail or crush.
14.Observe personal hygiene measures by
washing in disinfectant and cleaning boots.
Maintain equipment properly. Dismantle guns for
cleaning and wash them in methylated spirits.
Figure 37. Obstruction by vaginal fold
Vaginal
fold
Diverticulum
Figure 38. Pushing to straighten vaginal folds
Figure 39. First deposition site
Annular
rings
Body of
uterus
OS
Fornix
Cervix
1 cm
Figure 40. Second deposition site
Mid-cervical deposition
31
Figure 41. Timing
Timing of insemination
Correct timing of insemination is as important as correct placement of semen. Field
experience has shown that the best results are obtained when the insemination is performed
at or near the end of oestrus.
The beginning and end of oestrus are very difficult to determine. The simplest practical
method of timing inseminations is to use the a.m. – p.m. rule.
Cows first seen on heat Insemination time
Morning (a.m.) Same afternoon (p.m.)
Afternoon (p.m.) Next morning (a.m.)
• Two-thirds of cows commence oestrus at night and so will first be seen on heat in the
morning.
• With heifers and some Bos indicus breeds, many authorities do not recommend the a.m.
– p.m. rule. They recommend that these animals should be inseminated soon after the
first observed oestrus.
Dual placement of semen
The reason that placement of semen both in the uterus and the cervix is recommended (see
step 10 in the insemination procedure above) is that it helps to overcome the unpredictability
of ovulation times. In cattle, ovulation can occur from 2 to 26 hours after the end of heat.
Semen deposited in the body of the uterus reaches the fertilisation site quickly to fertilise an
ovum that is released earlier than normal. Semen deposited in the cervix survives longer.
Due to its slow release from the cervix it is more likely to fertilise an ovum released later
than normal.
Figure 42. Sperm reach ovum quickly Figure 43. Sperm reach ovum slowly
Mid-cervical deposition
Fertilisation site
Uterine body deposition
Semen
Semen
Ovary
32
Commencement
of standing heat
Oestrus
Time in hours
Chanceofconception
Optimum
insemination time
Average
time of
ovulation
Poor
Good
Hygiene
Hygiene precautions are observed to minimise, if not eliminate, the physical transfer of
infective disease agents:
• between farms
• between animals
• from animals to humans
• into the cervix and uterus
• from miscellaneous sources.
PREVENTING TRANSMISSION BETWEEN FARMS
Protective clothing. If possible wear rubber footwear and either overalls or a cape on the
farm. If this clothing becomes soiled it can be cleaned more readily than ordinary clothes.
Use disposable plastic overshoes on farms which are known to have a disease problem.
Washing. Scrub buckets and boots, paying particular attention to the tread on the sole.
Chemical agents. Use soap and/or antiseptics to improve the efficiency of all cleansing
procedures.
Towels. Use disposable paper towels.
Minimise equipment. Take the minimum of equipment into the dairy or shed. The more
items carried, the greater is the likelihood of transmitting infective agents. Apart from the
bucket and scrubbing brush, all items should be carried in an equipment box.
PREVENTING TRANSMISSION BETWEEN ANIMALS
Use disposable equipment once only. Do not split straws or re-use sheaths or insemination
rods. When more than one cow is to be inseminated, the technician should use a fresh
disposable glove for each insemination.
PREVENTING TRANSMISSION FROM ANIMALS TO HUMANS
Gloves. The use of long ‘obstetric gloves’ is recommended. If gloves are not worn there is a
strong possibility of serious infection occurring even though soap and/or antiseptics may be
used for thorough washing immediately after insemination. Cuts and abrasions on the hands
may permit the entry of infection.
Don’t smoke. Smoking while handling contaminated insemination equipment is a sure way
of transmitting infection to humans.
PREVENTING TRANSMISSION INTO CERVIX AND UTERUS
Clean the vulva. Cleaning of the vulva prior to introduction of the insemination gun should
receive careful attention. When gross contamination is present, a clean paper towel should
be used for a final cleaning. Ensure the lips of the vulva are closed during cleaning to prevent
faecal material entering the vagina.
Open the vulva. No matter how thoroughly the vulva is cleaned, the area will never be
sterile. For this reason it is essential that the lips of the vulva be parted to permit free entry
of the tip of the insemination gun. Opening of the vulva is part of step 6 of the insemination
procedure above.
Opening the vulva can generally be achieved by wrist pressure directed downwards and to
the left. With some cows it may be necessary to draw the cervix back and/or stroke the wall
of the rectum before applying wrist pressure.
These methods prevent introduction of the insemination gun into the suburethral
diverticulum. If they don’t work and no assistance is available, place a piece of paper or
cotton wool into the vulva so that it remains open enough to allow clean entry of the gun.
MISCELLANEOUS SOURCE OF INFECTIONS
Interference by pets or children. Take precautions to ensure dogs, cats and children will
not interfere with insemination equipment that is left unattended.
Accidental contact. Avoid contact between the insemination gun and shed walls, posts,
rails, switching tails, etc.
33
Dirty insemination guns. Clean insemination guns regularly. Dismantle them and wash
them in methylated spirits or boil for 10 minutes. Reassemble only when dry. Do not simply
wash in water or disinfectant as this will lead to gumming up or corrosion of the gun.
Dust. Avoid unnecessarily dusty conditions. Make sure the hammermill or other dusty
equipment are not going to be used during insemination times.
Faults in AI technique
Serious faults in insemination technique have been encountered among technicians with
many years experience as well as among those recently trained. The insemination of a cow is
a complex operation and should be treated as such. By far the biggest cause of faults is
complacency.
Overexposure of semen
Frozen semen has a critical temperature of minus 70°C. If the temperature of the dose is
raised above this level and re-frozen, sperm will be damaged. Ampoules allow a considerable
safety margin, and exposure for 30 seconds is acceptable as long as sufficient time is allowed
for re-freezing.
The only time a straw should be removed from liquid nitrogen is when it is transferred from
the container to the thawing solution. There is NO safe exposure time for straws. There are
some basic rules to observe to avoid overexposure.
• Avoid raising the bucket above the frost line in the neck of the unit.
• Use forceps to handle straws, working as far down in the unit as possible.
• Never identify a straw by exposing it to read the bull’s name. Identify semen by markings
on mini-goblets and by an index for the container. If an individual straw has to be
examined, handle it with forceps under liquid nitrogen. Place the mini-goblet in a bath of
nitrogen and ensure that all the straws are covered by the liquid. Remove the straw from
the goblet but keep it under the liquid. Bring the dose close to the surface to identify it.
Do not raise it above the level of the liquid.
• Always lower the canister back into position as soon as the dose has been removed and
placed in the thawing solution. Replace the lid immediately.
• Make all movements swift and precise when handling frozen semen.
• Never allow the level of liquid to fall below the tops of the mini-goblets. This level
provides a margin of safety and avoids the inconvenience of goblets floating out of the
canisters when the unit is refilled.
• Never remove semen from the liquid nitrogen unit prior to restraining cows.
Incorrect site of semen deposition
Inability to pass an insemination gun through the cervix,
or difficulty in doing so, is primarily due to inexperience. A
greater and far more common mistake is to pass the gun
too far into the uterus. This fault is prevalent, irrespective
of experience, and is caused solely by inattention to detail.
The best fertility is obtained by depositing half to two-
thirds of the semen in the uterine body and the remaining
semen in the middle of the cervix.
Since the uterine body is only 2 to 5 cm in length, uterine
depositions must be made just through the cervix (see
‘Insemination of the cow’, above). Rapid sperm migration
to both oviducts is facilitated by deposition in the body of
the uterus.
Figure 44. Depositing semen all in
one horn reduces chances of
fertilisation.
Inactive
ovary
Fertilisation
site
Active
ovary
Right horn
34
Figure 47. Wrong way
Sperm deposited in the cervix survive longer than sperm
deposited in the uterus, therefore partial cervical deposition is
advantageous for cows in early oestrus, and for cows having
delayed ovulation.
Passing an insemination gun too far through the cervix
reduces fertility because:
• All the semen is likely to be in one horn, which lessens the
chance of sperm migrating to both oviducts.
• Laceration of the extremely delicate endometrium is likely,
even when organs are handled gently. Blood is
spermicidal.
The use of force to overcome difficulty in passing the
insemination gun through the cervix is a frequent cause of
laceration. This may lead to sterility because of adhesions.
Finger and thumb pressure on the insemination gun is the
maximum that should be used. If the gun cannot be
manipulated through the cervix, then all semen should be
deposited in the middle of the cervix.
The placement of the gun is best checked through the side
walls of the body of the uterus with the index finger and
thumb from opposing sides, or with the index finger from
underneath.
After insemination always check the tip of the sheath and
straw for the presence of blood. This can be done whilst
massaging the cervix after insemination.
When feeling for the gun the index finger should not be
placed on top of the soft wall of the uterus as the finger may
push the sharp tip of the gun into the uterus wall and cause it
to bleed.
Rough handling and poor technique may cause the rectum to
balloon, making it impossible to manipulate the cervix
successfully. Removal of the ballooning may be attempted by
placing one or two fingers through the constricting ring at the
end of the ballooned area and gently massaging. This may
induce the rectum to contract and blow the offending air,
together with some faeces, out past the arm of the operator,
resulting in relaxation of the rectal wall and giving the
operator a good opportunity to grasp the cervix. This
technique may also be used to clear faeces from the rectum.
Figure 45. Damage to
endometrium
Laceration
Dead
sperm
Blood
Figure 46. Check gun placement
Vagina
Index finger
under uterus
For clarity the
rectal wall is
not shown
Blood
Index finger on
top of uterus
Figure 48. Removal of rectal balloon
35
Poor seal between straw and sheath
If the gun is loaded incorrectly some semen will escape into the sheath and perhaps into the
barrel. This reduces the number of sperm available for fertilisation. Inspect the equipment
after insemination to ensure that your loading procedure is correct.
After loading, the tip of the sheath should be carefully examined for cracks. There have been
cases where straws have been pushed through the sheath and into the tract when deposition
was attempted.
Sheaths which have been exposed to sunlight will become brittle, crack and shrink. All faulty
sheaths should be discarded.
There may be back flushing of semen into the vagina and an uneven distribution of the
semen if the plunger is not pushed in slowly and smoothly. Failure to loosen the manufacturer’s
plug by rolling before loading the gun may make depression of the plunger difficult.
Figure 49. Poor seal
Oblique cut Flaw in sealPlunger
Semen leakageManufacturer’s plugSheath
Gun tip
0.5 ml straw
Neglecting to open the vulva
Opening the vulva before the introduction of the
gun is a hygiene precaution of major importance.
Irrespective of the cleaning precautions
practised, there will be heavy bacterial
contamination of the vulva. Transfer of bacteria
directly into the uterus is therefore inevitable
unless the vulva is opened adequately.
In most cases pressure backwards, downwards
and to the left with the wrist (for operators with
their left arm in the rectum), will adequately part
the lips of the vulva. Alternative approaches for
difficult cows are:
Figure 50. Bladder insemination
Wrong angle
• to draw the cervix backwards as wrist pressure is applied
• to move the hand slowly back and forth in the rectum several times before applying wrist
pressure
• to massage the cervix and uterus before attempting to open the vulva.
Drawing the cervix backwards as wrist pressure is applied increases the likelihood of
passing the gun into the urethra. Particular care must therefore be taken to ensure that
the insemination gun is introduced at an angle 30° below the horizontal. Drawing the
cervix backwards will also form folds in the vagina. Consequently, the cervix has to be
pushed forward once the gun has been introduced to the vestibule of the vagina.
Thawing
Thawing of semen straws in water at 35°C is recommended because sperm revival is
increased due to the faster thawing rate. During cold weather when straws are thawed in
warm water, the insemination gun should also be warmed up. This can be achieved easily by
holding or rubbing in the hands.
The semen should be placed in the cow as soon as possible after thawing.
Straws must be carefully dried after thawing and before loading the gun.
36
Preparing for an AB program
Summary of planning steps
1. Check the feasibility of the planned program. There must be definite reasons and benefits
for attempting a program. Consider whether these can be achieved more easily and
cheaply by other methods.
2. Determine the best time to attempt the program. Consider the availability of feed and
labour; the farm work load; and existing animal husbandry practices such as calving
patterns, weaning times, etc. to see if these will be compatible with the program’s
implementation. Also avoid times of environmental stress such as periods of extreme heat
or cold.
3. Determine the type of program to be undertaken i.e. observed natural heats or
synchronised program.
4. Make provision for suitable paddocks to house the breeding herd for observation.
Consider paddock location and size, shade, feed and water. If supplementary feeding is
needed, order it or provide it ahead of time. Cows should be fed sufficiently so that they
are gaining weight for six weeks before and six weeks after the program, to ensure
maximum calf drop.
5. Select and identify cows to be included in the program. Work them through the yards to
get them into a routine. Tag cows before commencing the program. Only those with
maximum conception chances should be included. Select the cows and plan the feed
up to one year ahead and maiden heifers are most suitable for many beef programs.
6. Check the restraint facilities before the program starts.
7. Order equipment, semen and nitrogen before it is required. Leave precise delivery
instructions with the AB centre. Delays can be costly. Ensure that sufficient equipment,
semen and nitrogen are on hand and make provision for rapid re-supply if necessary.
8. Have clean up bulls on hand (one bull per 100 cows) at the completion of the program if
required. An AI program will require significant input before, during and after the actual
insemination procedure. Such programs should not be undertaken unless there are well-
defined benefits and foreseeable outcomes. While there are many factors that can limit
the success of any program, there is no compromise for good planning, preparation and
adherence the guidelines for good heat detection and insemination technique.
An AI program will require significant input before, during and after the actual insemination
procedure. Such programs should not be undertaken unless there are well-defined benefits
and foreseeable outcomes. While there are many factors that can limit the success of any
program, there is no compromise for good planning, preparation and adherence the
guidelines for good hear detection and insemination technique.
Reasons for conducting and AB program
Traditionally AI was promoted as a way of controlling reproductive disease and improving the
genetic composition of any herd. In areas where venereal disease can be a problem, AI can
reduce the spread and incidence of these diseases. With many breeds using Breedplan and
Group Breedplan, the use of AI has allowed for the improved evaluation of animals across a
range of environments. The interwoven network of progeny as a result of AI has provided a
strong base for accuracy in the Breedplan and Group Breedplan values.
AI has provided stud managers with the ability to produce a greater number of progeny from a
fashionable bloodline or performance trait. The international sale and transfer of genetic material
is a much cheaper when compared to the alternative of importing or exporting the animals.
37
The environment also plays an important part. For beef producers planning a cross breeding
program, non adapted breeds can be used in an AI program without the problems of
managing a non-adapted bull in a difficult environment.
On a small holding AI can remove the need for a bull and the associated management
problems as well as allowing the use of a range of genetic materials throughout the small
herd.
On large holdings AI is commonly used in bull breeding programs to breed replacement herd
bulls. The results of any AI program are government by many factors. When budgeting and
planning any program, be realistic about the results. Consideration should be given to the
possibility that the results may be poor (e.g. low conception and calving rates). Many factors
will contribute to the overall results of a program. The oestrus detection method, nutritional
status of the herd, the temperament of the individual animals, the skill of the inseminator,
the environment (e.g. mean daily temperature), and facilities for the AI program can all
affect the results that a producer can expect from an AI program. Good preparation and
management of a program is essential but this does not always guarantee high conception
rates.
Costing an AI program
The cost of landing an AI calf on the ground will vary tremendously. Before a program is
attempted it is advisable that a budget is prepared. It is possible, but not common, for a well
conducted AI program to produce calves at a cost comparable with those produced by
natural service.
Budgeting
The cost of AI calves will differ depending on the price of the semen used, the type of
program to be used, (depending on whether synchronisation drugs are used) and on the
results obtained from the program. Realistically all costs should be included and should at a
minimum take account of the following :-
Labour. Labour must be costed at a realistic level, even for self administered programs. It
takes highly skilled labour to successfully conduct an AI program. Labour will be needed for
mustering, heat detection, synchronising drug administration procedures (if applicable), cow
identification and drafting, restraint, insemination procedures, record keeping and equipment
maintenance.
Equipment & infrastructure. Provision and maintenance of suitable facilities for restraint
and cattle handling procedures should be maintained.
The yard structure should be designed to handle and hold the required number of animals
and minimise the stress on both the animal and operators during the detection and drafting
processes.
A strong crush with an easily operated kicking gate is best to inseminate the cows.
Provide a roof area, at least over the crush, as this will minimise any damage to the semen
by sunlight and offer some weather protection for the operator.
Prior to the commencement of the program check that:
• The yard fences and gates are in good repair
• All the hinges and catches are working correctly
• All moving parts well are lubricated.
Animal husbandry procedures. Labour and other costs are incurred during the selection
of suitable cows for inclusion in the program before it even starts. These costs need to be
recognised. Costs are involved with the pregnancy testing and also with the methods used
for monitoring the success after the completion of the program.
Welfare and nutrition. The provision of suitable feed and water, over and above the
38
A practical guide to artificial breeding of beef cattle

More Related Content

What's hot

Vet obst lecture 10 Cesarean in domestic farm and pet animals
Vet obst lecture 10 Cesarean in domestic farm and pet animalsVet obst lecture 10 Cesarean in domestic farm and pet animals
Vet obst lecture 10 Cesarean in domestic farm and pet animalsDrGovindNarayanPuroh
 
Vaginal exfoliative cytology
Vaginal exfoliative cytologyVaginal exfoliative cytology
Vaginal exfoliative cytologyprajaktatumbare
 
Collection and preservation of bull semen
Collection and preservation of bull semenCollection and preservation of bull semen
Collection and preservation of bull semenAlok Sharan
 
Ai manual chapter 09
Ai manual chapter 09Ai manual chapter 09
Ai manual chapter 09Abs Pecplan
 
Vet obst lecture 12 Postpartum complications in large domestic animals
Vet obst lecture 12 Postpartum complications in large domestic animalsVet obst lecture 12 Postpartum complications in large domestic animals
Vet obst lecture 12 Postpartum complications in large domestic animalsDrGovindNarayanPuroh
 
Andrology lecture 16 Semen collection from male animals and its evaluation
Andrology lecture 16 Semen collection from male animals and its evaluationAndrology lecture 16 Semen collection from male animals and its evaluation
Andrology lecture 16 Semen collection from male animals and its evaluationDrGovindNarayanPuroh
 
Adv in frozen semen technologies
Adv in frozen semen technologiesAdv in frozen semen technologies
Adv in frozen semen technologiesSharadindu Shil
 
Artificial insemination equipment
Artificial insemination equipmentArtificial insemination equipment
Artificial insemination equipmentmohammad azizi
 
Female Reproductive Tract Anatomy of Domestic Animals
Female Reproductive Tract Anatomy of Domestic AnimalsFemale Reproductive Tract Anatomy of Domestic Animals
Female Reproductive Tract Anatomy of Domestic AnimalsGarry D. Lasaga
 
Methods of semen collection in animals
Methods of semen  collection in animalsMethods of semen  collection in animals
Methods of semen collection in animalsSulake Fadhil
 
Stages of parturition in farm animals.
Stages of parturition in farm animals.Stages of parturition in farm animals.
Stages of parturition in farm animals.Dr ARSHAQ ASFAR
 
Diseases transmitted through semen in domestic animals
Diseases transmitted through semen in domestic animalsDiseases transmitted through semen in domestic animals
Diseases transmitted through semen in domestic animalspranay konda
 
Artificial Insemination
Artificial InseminationArtificial Insemination
Artificial InseminationSujan Adhikari
 
Control means for estrous cycle control in sheep
Control means for estrous cycle control in sheepControl means for estrous cycle control in sheep
Control means for estrous cycle control in sheepILRI
 
Lecture 9 Ovarian cysts in domestic animals
Lecture 9 Ovarian cysts in domestic animalsLecture 9 Ovarian cysts in domestic animals
Lecture 9 Ovarian cysts in domestic animalsDrGovindNarayanPuroh
 
ARTIFICIAL INSEMINATION.pptx
ARTIFICIAL INSEMINATION.pptxARTIFICIAL INSEMINATION.pptx
ARTIFICIAL INSEMINATION.pptxSupun Madushanka
 
Lecture 3 estrous cycle and estrus signs in domestic animals
Lecture 3 estrous cycle and estrus signs in domestic animalsLecture 3 estrous cycle and estrus signs in domestic animals
Lecture 3 estrous cycle and estrus signs in domestic animalsDrGovindNarayanPuroh
 
Techniques of Artificial Insemination in Cow, Doe, Ewe and Chicken
Techniques of Artificial Insemination in Cow, Doe, Ewe and ChickenTechniques of Artificial Insemination in Cow, Doe, Ewe and Chicken
Techniques of Artificial Insemination in Cow, Doe, Ewe and ChickenAbdullah Al Mubin
 

What's hot (20)

Vet obst lecture 10 Cesarean in domestic farm and pet animals
Vet obst lecture 10 Cesarean in domestic farm and pet animalsVet obst lecture 10 Cesarean in domestic farm and pet animals
Vet obst lecture 10 Cesarean in domestic farm and pet animals
 
Vaginal exfoliative cytology
Vaginal exfoliative cytologyVaginal exfoliative cytology
Vaginal exfoliative cytology
 
Collection and preservation of bull semen
Collection and preservation of bull semenCollection and preservation of bull semen
Collection and preservation of bull semen
 
Ai manual chapter 09
Ai manual chapter 09Ai manual chapter 09
Ai manual chapter 09
 
Coital Injuries and Vices of Male Animals
Coital Injuries and Vices of Male AnimalsCoital Injuries and Vices of Male Animals
Coital Injuries and Vices of Male Animals
 
Vet obst lecture 12 Postpartum complications in large domestic animals
Vet obst lecture 12 Postpartum complications in large domestic animalsVet obst lecture 12 Postpartum complications in large domestic animals
Vet obst lecture 12 Postpartum complications in large domestic animals
 
Andrology lecture 16 Semen collection from male animals and its evaluation
Andrology lecture 16 Semen collection from male animals and its evaluationAndrology lecture 16 Semen collection from male animals and its evaluation
Andrology lecture 16 Semen collection from male animals and its evaluation
 
Adv in frozen semen technologies
Adv in frozen semen technologiesAdv in frozen semen technologies
Adv in frozen semen technologies
 
Artificial insemination equipment
Artificial insemination equipmentArtificial insemination equipment
Artificial insemination equipment
 
Female Reproductive Tract Anatomy of Domestic Animals
Female Reproductive Tract Anatomy of Domestic AnimalsFemale Reproductive Tract Anatomy of Domestic Animals
Female Reproductive Tract Anatomy of Domestic Animals
 
Methods of semen collection in animals
Methods of semen  collection in animalsMethods of semen  collection in animals
Methods of semen collection in animals
 
Stages of parturition in farm animals.
Stages of parturition in farm animals.Stages of parturition in farm animals.
Stages of parturition in farm animals.
 
Diseases transmitted through semen in domestic animals
Diseases transmitted through semen in domestic animalsDiseases transmitted through semen in domestic animals
Diseases transmitted through semen in domestic animals
 
Artificial Insemination
Artificial InseminationArtificial Insemination
Artificial Insemination
 
Control means for estrous cycle control in sheep
Control means for estrous cycle control in sheepControl means for estrous cycle control in sheep
Control means for estrous cycle control in sheep
 
Lecture 9 Ovarian cysts in domestic animals
Lecture 9 Ovarian cysts in domestic animalsLecture 9 Ovarian cysts in domestic animals
Lecture 9 Ovarian cysts in domestic animals
 
ARTIFICIAL INSEMINATION.pptx
ARTIFICIAL INSEMINATION.pptxARTIFICIAL INSEMINATION.pptx
ARTIFICIAL INSEMINATION.pptx
 
Reproductive disorders
Reproductive disordersReproductive disorders
Reproductive disorders
 
Lecture 3 estrous cycle and estrus signs in domestic animals
Lecture 3 estrous cycle and estrus signs in domestic animalsLecture 3 estrous cycle and estrus signs in domestic animals
Lecture 3 estrous cycle and estrus signs in domestic animals
 
Techniques of Artificial Insemination in Cow, Doe, Ewe and Chicken
Techniques of Artificial Insemination in Cow, Doe, Ewe and ChickenTechniques of Artificial Insemination in Cow, Doe, Ewe and Chicken
Techniques of Artificial Insemination in Cow, Doe, Ewe and Chicken
 

Viewers also liked

ประวัติ ภาษาซี
ประวัติ ภาษาซีประวัติ ภาษาซี
ประวัติ ภาษาซีdel1997
 
Bi kip tan gai (quarker)
Bi kip tan gai (quarker)Bi kip tan gai (quarker)
Bi kip tan gai (quarker)Alex Tí
 
Situación de aprendizaje
Situación de aprendizajeSituación de aprendizaje
Situación de aprendizajeServando Chavez
 
21st Century/Group Project
21st Century/Group Project21st Century/Group Project
21st Century/Group Projectdingess60
 
Beef cattle recording and selection (australia)
Beef cattle recording and selection (australia)Beef cattle recording and selection (australia)
Beef cattle recording and selection (australia)razasbovinasdecolombia
 
SCREENPLAY - THROUGH HER EYES
SCREENPLAY - THROUGH HER EYESSCREENPLAY - THROUGH HER EYES
SCREENPLAY - THROUGH HER EYESSyed Shan Tariq
 
Meritorious Selection & Service at Thapar University
Meritorious Selection & Service at Thapar UniversityMeritorious Selection & Service at Thapar University
Meritorious Selection & Service at Thapar UniversitySamuel Ernest
 
Meritorious Selection and Service - NIT Tiruchirappalli
Meritorious Selection and Service - NIT TiruchirappalliMeritorious Selection and Service - NIT Tiruchirappalli
Meritorious Selection and Service - NIT TiruchirappalliSamuel Ernest
 
Vxl Thin Client presentation
Vxl Thin Client presentation Vxl Thin Client presentation
Vxl Thin Client presentation Vibhu Kodapully
 
Basics of guitar ci 350 1
Basics of guitar ci 350 1Basics of guitar ci 350 1
Basics of guitar ci 350 1dingess60
 

Viewers also liked (20)

Director research
Director researchDirector research
Director research
 
ประวัติ ภาษาซี
ประวัติ ภาษาซีประวัติ ภาษาซี
ประวัติ ภาษาซี
 
iCloud
iCloudiCloud
iCloud
 
Bi kip tan gai (quarker)
Bi kip tan gai (quarker)Bi kip tan gai (quarker)
Bi kip tan gai (quarker)
 
Situación de aprendizaje
Situación de aprendizajeSituación de aprendizaje
Situación de aprendizaje
 
IT Case Competition Case 2014
IT Case Competition Case 2014IT Case Competition Case 2014
IT Case Competition Case 2014
 
21st Century/Group Project
21st Century/Group Project21st Century/Group Project
21st Century/Group Project
 
Camera shots and angles
Camera shots and anglesCamera shots and angles
Camera shots and angles
 
Presentation - Tim Marrs
Presentation - Tim MarrsPresentation - Tim Marrs
Presentation - Tim Marrs
 
Breeding for profit (australia)
Breeding for profit (australia)Breeding for profit (australia)
Breeding for profit (australia)
 
Beef cattle recording and selection (australia)
Beef cattle recording and selection (australia)Beef cattle recording and selection (australia)
Beef cattle recording and selection (australia)
 
SCREENPLAY - THROUGH HER EYES
SCREENPLAY - THROUGH HER EYESSCREENPLAY - THROUGH HER EYES
SCREENPLAY - THROUGH HER EYES
 
Cri corte taurino 2015
Cri corte taurino 2015Cri corte taurino 2015
Cri corte taurino 2015
 
Meritorious Selection & Service at Thapar University
Meritorious Selection & Service at Thapar UniversityMeritorious Selection & Service at Thapar University
Meritorious Selection & Service at Thapar University
 
Meritorious Selection and Service - NIT Tiruchirappalli
Meritorious Selection and Service - NIT TiruchirappalliMeritorious Selection and Service - NIT Tiruchirappalli
Meritorious Selection and Service - NIT Tiruchirappalli
 
Vxl Thin Client presentation
Vxl Thin Client presentation Vxl Thin Client presentation
Vxl Thin Client presentation
 
Character sketch shan
Character sketch shanCharacter sketch shan
Character sketch shan
 
Trabajo practico
Trabajo practicoTrabajo practico
Trabajo practico
 
Basics of guitar ci 350 1
Basics of guitar ci 350 1Basics of guitar ci 350 1
Basics of guitar ci 350 1
 
Daily routine
Daily routineDaily routine
Daily routine
 

Similar to A practical guide to artificial breeding of beef cattle

Internship report
Internship reportInternship report
Internship reportFakhar Alam
 
Anatomy of female reproductive organs in domestic animals
Anatomy of female reproductive organs in domestic animalsAnatomy of female reproductive organs in domestic animals
Anatomy of female reproductive organs in domestic animalsDrGovindNarayanPuroh
 
Anatomy of female reproductive organs in domestic animals
Anatomy of female reproductive organs in domestic animalsAnatomy of female reproductive organs in domestic animals
Anatomy of female reproductive organs in domestic animalsDrGovindNarayanPuroh
 
Anatomy of female reproductive organs in domestic animals
Anatomy of female reproductive organs in domestic animalsAnatomy of female reproductive organs in domestic animals
Anatomy of female reproductive organs in domestic animalsDrGovindNarayanPuroh
 
Our bodies,
Our bodies,Our bodies,
Our bodies,Hawa1234
 
Our bodies,
Our bodies,Our bodies,
Our bodies,Hawa1234
 
Female reproductive system.pdf
Female reproductive system.pdfFemale reproductive system.pdf
Female reproductive system.pdfdipinbhandari
 
ANATOMY-OF-FEMALE-REPRODUCTIVE-ORGANS-IN-DOMESTIC-ANIMALS-1.pdf
ANATOMY-OF-FEMALE-REPRODUCTIVE-ORGANS-IN-DOMESTIC-ANIMALS-1.pdfANATOMY-OF-FEMALE-REPRODUCTIVE-ORGANS-IN-DOMESTIC-ANIMALS-1.pdf
ANATOMY-OF-FEMALE-REPRODUCTIVE-ORGANS-IN-DOMESTIC-ANIMALS-1.pdfKashiAli7
 
Palpation and pregnancy ppt [autosaved]
Palpation and pregnancy ppt [autosaved]Palpation and pregnancy ppt [autosaved]
Palpation and pregnancy ppt [autosaved]EMMANUELBURAHIMA
 
Anatomy & Physiology of Female Reproductive System 1
Anatomy & Physiology of Female Reproductive System 1Anatomy & Physiology of Female Reproductive System 1
Anatomy & Physiology of Female Reproductive System 1Dr. Sarita Sharma
 
Contraception& family planning nm.final
Contraception& family planning nm.finalContraception& family planning nm.final
Contraception& family planning nm.finalmuruganandan natesan
 
3.1 Poultry Production in Agriculture.ppt
3.1 Poultry Production in Agriculture.ppt3.1 Poultry Production in Agriculture.ppt
3.1 Poultry Production in Agriculture.pptMonairMorgan
 
JBOY PPT SCIENCE.pptx
JBOY PPT SCIENCE.pptxJBOY PPT SCIENCE.pptx
JBOY PPT SCIENCE.pptxJuvil2
 
Sheep, goat, pig poultry.pptx
Sheep, goat, pig poultry.pptxSheep, goat, pig poultry.pptx
Sheep, goat, pig poultry.pptxNarayanNeupane3
 
female-reproductive-organs
female-reproductive-organsfemale-reproductive-organs
female-reproductive-organsshafhandustur
 
Reproductive system 2
Reproductive system 2Reproductive system 2
Reproductive system 2Ankitaroy92
 
23 Female Reproductive System
23 Female Reproductive System23 Female Reproductive System
23 Female Reproductive Systemguest334add
 
23 female-reproductive-system-1213116557688874-8-1
23 female-reproductive-system-1213116557688874-8-123 female-reproductive-system-1213116557688874-8-1
23 female-reproductive-system-1213116557688874-8-1Claire Veronica Aquino
 

Similar to A practical guide to artificial breeding of beef cattle (20)

Internship report
Internship reportInternship report
Internship report
 
Anatomy of female reproductive organs in domestic animals
Anatomy of female reproductive organs in domestic animalsAnatomy of female reproductive organs in domestic animals
Anatomy of female reproductive organs in domestic animals
 
Anatomy of female reproductive organs in domestic animals
Anatomy of female reproductive organs in domestic animalsAnatomy of female reproductive organs in domestic animals
Anatomy of female reproductive organs in domestic animals
 
Anatomy of female reproductive organs in domestic animals
Anatomy of female reproductive organs in domestic animalsAnatomy of female reproductive organs in domestic animals
Anatomy of female reproductive organs in domestic animals
 
Our bodies,
Our bodies,Our bodies,
Our bodies,
 
Our bodies,
Our bodies,Our bodies,
Our bodies,
 
Female reproductive system.pdf
Female reproductive system.pdfFemale reproductive system.pdf
Female reproductive system.pdf
 
ANATOMY-OF-FEMALE-REPRODUCTIVE-ORGANS-IN-DOMESTIC-ANIMALS-1.pdf
ANATOMY-OF-FEMALE-REPRODUCTIVE-ORGANS-IN-DOMESTIC-ANIMALS-1.pdfANATOMY-OF-FEMALE-REPRODUCTIVE-ORGANS-IN-DOMESTIC-ANIMALS-1.pdf
ANATOMY-OF-FEMALE-REPRODUCTIVE-ORGANS-IN-DOMESTIC-ANIMALS-1.pdf
 
Lecture 1 a.i lecture 1
Lecture 1 a.i lecture 1Lecture 1 a.i lecture 1
Lecture 1 a.i lecture 1
 
Palpation and pregnancy ppt [autosaved]
Palpation and pregnancy ppt [autosaved]Palpation and pregnancy ppt [autosaved]
Palpation and pregnancy ppt [autosaved]
 
Anatomy & Physiology of Female Reproductive System 1
Anatomy & Physiology of Female Reproductive System 1Anatomy & Physiology of Female Reproductive System 1
Anatomy & Physiology of Female Reproductive System 1
 
Contraception& family planning nm.final
Contraception& family planning nm.finalContraception& family planning nm.final
Contraception& family planning nm.final
 
3.1 Poultry Production in Agriculture.ppt
3.1 Poultry Production in Agriculture.ppt3.1 Poultry Production in Agriculture.ppt
3.1 Poultry Production in Agriculture.ppt
 
JBOY PPT SCIENCE.pptx
JBOY PPT SCIENCE.pptxJBOY PPT SCIENCE.pptx
JBOY PPT SCIENCE.pptx
 
Anatomy and physiology2007
Anatomy and physiology2007Anatomy and physiology2007
Anatomy and physiology2007
 
Sheep, goat, pig poultry.pptx
Sheep, goat, pig poultry.pptxSheep, goat, pig poultry.pptx
Sheep, goat, pig poultry.pptx
 
female-reproductive-organs
female-reproductive-organsfemale-reproductive-organs
female-reproductive-organs
 
Reproductive system 2
Reproductive system 2Reproductive system 2
Reproductive system 2
 
23 Female Reproductive System
23 Female Reproductive System23 Female Reproductive System
23 Female Reproductive System
 
23 female-reproductive-system-1213116557688874-8-1
23 female-reproductive-system-1213116557688874-8-123 female-reproductive-system-1213116557688874-8-1
23 female-reproductive-system-1213116557688874-8-1
 

More from razasbovinasdecolombia

Tuberculosis y paratuberculosis bovina
Tuberculosis y paratuberculosis bovinaTuberculosis y paratuberculosis bovina
Tuberculosis y paratuberculosis bovinarazasbovinasdecolombia
 
Tecnología para la elaboración de queso y yogurt
Tecnología para la elaboración de queso y yogurtTecnología para la elaboración de queso y yogurt
Tecnología para la elaboración de queso y yogurtrazasbovinasdecolombia
 
Relacion nutricion fertilidad en bovinos
Relacion  nutricion fertilidad en bovinosRelacion  nutricion fertilidad en bovinos
Relacion nutricion fertilidad en bovinosrazasbovinasdecolombia
 
Razas y mejoramiento genetico de bovinos de doble proposito
Razas y mejoramiento genetico de bovinos de doble propositoRazas y mejoramiento genetico de bovinos de doble proposito
Razas y mejoramiento genetico de bovinos de doble propositorazasbovinasdecolombia
 
Razas de ganado del catalogo oficial de españa
Razas de ganado del catalogo oficial de españaRazas de ganado del catalogo oficial de españa
Razas de ganado del catalogo oficial de españarazasbovinasdecolombia
 
Planta piloto para la elaboración de queso y yogur
Planta piloto para la elaboración de queso y yogurPlanta piloto para la elaboración de queso y yogur
Planta piloto para la elaboración de queso y yogurrazasbovinasdecolombia
 
Minitube catálogo bovino reproducción animal 2015
Minitube catálogo bovino reproducción animal 2015Minitube catálogo bovino reproducción animal 2015
Minitube catálogo bovino reproducción animal 2015razasbovinasdecolombia
 
Mejoramiento genético y factores asociados en bovinos criollos colombianos
Mejoramiento genético y factores asociados en bovinos criollos colombianosMejoramiento genético y factores asociados en bovinos criollos colombianos
Mejoramiento genético y factores asociados en bovinos criollos colombianosrazasbovinasdecolombia
 
Manual elaboración de quesos y subproductos lácteos
Manual elaboración de quesos y subproductos lácteosManual elaboración de quesos y subproductos lácteos
Manual elaboración de quesos y subproductos lácteosrazasbovinasdecolombia
 
Manual de inseminacion artificial en bovinos
Manual de inseminacion artificial en bovinosManual de inseminacion artificial en bovinos
Manual de inseminacion artificial en bovinosrazasbovinasdecolombia
 
Manejo y utilizacion de forrajes tropicales multiproposito
Manejo y utilizacion de forrajes tropicales multipropositoManejo y utilizacion de forrajes tropicales multiproposito
Manejo y utilizacion de forrajes tropicales multipropositorazasbovinasdecolombia
 
Manejo sanitario bovinos doble proposito
Manejo sanitario bovinos doble propositoManejo sanitario bovinos doble proposito
Manejo sanitario bovinos doble propositorazasbovinasdecolombia
 
Guía práctica para la estandarización y evaluación de las canales bovinas mex...
Guía práctica para la estandarización y evaluación de las canales bovinas mex...Guía práctica para la estandarización y evaluación de las canales bovinas mex...
Guía práctica para la estandarización y evaluación de las canales bovinas mex...razasbovinasdecolombia
 

More from razasbovinasdecolombia (20)

Tuberculosis y paratuberculosis bovina
Tuberculosis y paratuberculosis bovinaTuberculosis y paratuberculosis bovina
Tuberculosis y paratuberculosis bovina
 
Tecnología para la elaboración de queso y yogurt
Tecnología para la elaboración de queso y yogurtTecnología para la elaboración de queso y yogurt
Tecnología para la elaboración de queso y yogurt
 
Relacion nutricion fertilidad en bovinos
Relacion  nutricion fertilidad en bovinosRelacion  nutricion fertilidad en bovinos
Relacion nutricion fertilidad en bovinos
 
Razas y mejoramiento genetico de bovinos de doble proposito
Razas y mejoramiento genetico de bovinos de doble propositoRazas y mejoramiento genetico de bovinos de doble proposito
Razas y mejoramiento genetico de bovinos de doble proposito
 
Razas de ganado del catalogo oficial de españa
Razas de ganado del catalogo oficial de españaRazas de ganado del catalogo oficial de españa
Razas de ganado del catalogo oficial de españa
 
Queso ovino
Queso ovinoQueso ovino
Queso ovino
 
Plegable tuberculosis ICA
Plegable tuberculosis ICAPlegable tuberculosis ICA
Plegable tuberculosis ICA
 
Plegable brucelosis ICA
Plegable brucelosis ICAPlegable brucelosis ICA
Plegable brucelosis ICA
 
Planta piloto para la elaboración de queso y yogur
Planta piloto para la elaboración de queso y yogurPlanta piloto para la elaboración de queso y yogur
Planta piloto para la elaboración de queso y yogur
 
Minitube catálogo bovino reproducción animal 2015
Minitube catálogo bovino reproducción animal 2015Minitube catálogo bovino reproducción animal 2015
Minitube catálogo bovino reproducción animal 2015
 
Mejoramiento genético y factores asociados en bovinos criollos colombianos
Mejoramiento genético y factores asociados en bovinos criollos colombianosMejoramiento genético y factores asociados en bovinos criollos colombianos
Mejoramiento genético y factores asociados en bovinos criollos colombianos
 
Manual elaboración de quesos y subproductos lácteos
Manual elaboración de quesos y subproductos lácteosManual elaboración de quesos y subproductos lácteos
Manual elaboración de quesos y subproductos lácteos
 
Manual de inseminacion artificial en bovinos
Manual de inseminacion artificial en bovinosManual de inseminacion artificial en bovinos
Manual de inseminacion artificial en bovinos
 
Manual de establecimiento de pasturas
Manual de establecimiento de pasturasManual de establecimiento de pasturas
Manual de establecimiento de pasturas
 
Manejo y utilizacion de forrajes tropicales multiproposito
Manejo y utilizacion de forrajes tropicales multipropositoManejo y utilizacion de forrajes tropicales multiproposito
Manejo y utilizacion de forrajes tropicales multiproposito
 
Manejo sanitario bovinos doble proposito
Manejo sanitario bovinos doble propositoManejo sanitario bovinos doble proposito
Manejo sanitario bovinos doble proposito
 
Manejo de cercas vivas
Manejo de cercas vivasManejo de cercas vivas
Manejo de cercas vivas
 
Libro genetica francesa
Libro genetica francesaLibro genetica francesa
Libro genetica francesa
 
Guía práctica para la estandarización y evaluación de las canales bovinas mex...
Guía práctica para la estandarización y evaluación de las canales bovinas mex...Guía práctica para la estandarización y evaluación de las canales bovinas mex...
Guía práctica para la estandarización y evaluación de las canales bovinas mex...
 
Farmquip catalogo productos 2014 2015
Farmquip catalogo productos 2014 2015Farmquip catalogo productos 2014 2015
Farmquip catalogo productos 2014 2015
 

Recently uploaded

Orientation, design and principles of polyhouse
Orientation, design and principles of polyhouseOrientation, design and principles of polyhouse
Orientation, design and principles of polyhousejana861314
 
zoogeography of pakistan.pptx fauna of Pakistan
zoogeography of pakistan.pptx fauna of Pakistanzoogeography of pakistan.pptx fauna of Pakistan
zoogeography of pakistan.pptx fauna of Pakistanzohaibmir069
 
Call Us ≽ 9953322196 ≼ Call Girls In Mukherjee Nagar(Delhi) |
Call Us ≽ 9953322196 ≼ Call Girls In Mukherjee Nagar(Delhi) |Call Us ≽ 9953322196 ≼ Call Girls In Mukherjee Nagar(Delhi) |
Call Us ≽ 9953322196 ≼ Call Girls In Mukherjee Nagar(Delhi) |aasikanpl
 
Artificial Intelligence In Microbiology by Dr. Prince C P
Artificial Intelligence In Microbiology by Dr. Prince C PArtificial Intelligence In Microbiology by Dr. Prince C P
Artificial Intelligence In Microbiology by Dr. Prince C PPRINCE C P
 
Call Girls in Mayapuri Delhi 💯Call Us 🔝9953322196🔝 💯Escort.
Call Girls in Mayapuri Delhi 💯Call Us 🔝9953322196🔝 💯Escort.Call Girls in Mayapuri Delhi 💯Call Us 🔝9953322196🔝 💯Escort.
Call Girls in Mayapuri Delhi 💯Call Us 🔝9953322196🔝 💯Escort.aasikanpl
 
Hubble Asteroid Hunter III. Physical properties of newly found asteroids
Hubble Asteroid Hunter III. Physical properties of newly found asteroidsHubble Asteroid Hunter III. Physical properties of newly found asteroids
Hubble Asteroid Hunter III. Physical properties of newly found asteroidsSérgio Sacani
 
A relative description on Sonoporation.pdf
A relative description on Sonoporation.pdfA relative description on Sonoporation.pdf
A relative description on Sonoporation.pdfnehabiju2046
 
Lucknow 💋 Russian Call Girls Lucknow Finest Escorts Service 8923113531 Availa...
Lucknow 💋 Russian Call Girls Lucknow Finest Escorts Service 8923113531 Availa...Lucknow 💋 Russian Call Girls Lucknow Finest Escorts Service 8923113531 Availa...
Lucknow 💋 Russian Call Girls Lucknow Finest Escorts Service 8923113531 Availa...anilsa9823
 
Stunning ➥8448380779▻ Call Girls In Panchshil Enclave Delhi NCR
Stunning ➥8448380779▻ Call Girls In Panchshil Enclave Delhi NCRStunning ➥8448380779▻ Call Girls In Panchshil Enclave Delhi NCR
Stunning ➥8448380779▻ Call Girls In Panchshil Enclave Delhi NCRDelhi Call girls
 
Animal Communication- Auditory and Visual.pptx
Animal Communication- Auditory and Visual.pptxAnimal Communication- Auditory and Visual.pptx
Animal Communication- Auditory and Visual.pptxUmerFayaz5
 
Behavioral Disorder: Schizophrenia & it's Case Study.pdf
Behavioral Disorder: Schizophrenia & it's Case Study.pdfBehavioral Disorder: Schizophrenia & it's Case Study.pdf
Behavioral Disorder: Schizophrenia & it's Case Study.pdfSELF-EXPLANATORY
 
Physiochemical properties of nanomaterials and its nanotoxicity.pptx
Physiochemical properties of nanomaterials and its nanotoxicity.pptxPhysiochemical properties of nanomaterials and its nanotoxicity.pptx
Physiochemical properties of nanomaterials and its nanotoxicity.pptxAArockiyaNisha
 
NAVSEA PEO USC - Unmanned & Small Combatants 26Oct23.pdf
NAVSEA PEO USC - Unmanned & Small Combatants 26Oct23.pdfNAVSEA PEO USC - Unmanned & Small Combatants 26Oct23.pdf
NAVSEA PEO USC - Unmanned & Small Combatants 26Oct23.pdfWadeK3
 
Is RISC-V ready for HPC workload? Maybe?
Is RISC-V ready for HPC workload? Maybe?Is RISC-V ready for HPC workload? Maybe?
Is RISC-V ready for HPC workload? Maybe?Patrick Diehl
 
Bentham & Hooker's Classification. along with the merits and demerits of the ...
Bentham & Hooker's Classification. along with the merits and demerits of the ...Bentham & Hooker's Classification. along with the merits and demerits of the ...
Bentham & Hooker's Classification. along with the merits and demerits of the ...Nistarini College, Purulia (W.B) India
 
Cultivation of KODO MILLET . made by Ghanshyam pptx
Cultivation of KODO MILLET . made by Ghanshyam pptxCultivation of KODO MILLET . made by Ghanshyam pptx
Cultivation of KODO MILLET . made by Ghanshyam pptxpradhanghanshyam7136
 
Luciferase in rDNA technology (biotechnology).pptx
Luciferase in rDNA technology (biotechnology).pptxLuciferase in rDNA technology (biotechnology).pptx
Luciferase in rDNA technology (biotechnology).pptxAleenaTreesaSaji
 
Isotopic evidence of long-lived volcanism on Io
Isotopic evidence of long-lived volcanism on IoIsotopic evidence of long-lived volcanism on Io
Isotopic evidence of long-lived volcanism on IoSérgio Sacani
 

Recently uploaded (20)

Orientation, design and principles of polyhouse
Orientation, design and principles of polyhouseOrientation, design and principles of polyhouse
Orientation, design and principles of polyhouse
 
zoogeography of pakistan.pptx fauna of Pakistan
zoogeography of pakistan.pptx fauna of Pakistanzoogeography of pakistan.pptx fauna of Pakistan
zoogeography of pakistan.pptx fauna of Pakistan
 
9953056974 Young Call Girls In Mahavir enclave Indian Quality Escort service
9953056974 Young Call Girls In Mahavir enclave Indian Quality Escort service9953056974 Young Call Girls In Mahavir enclave Indian Quality Escort service
9953056974 Young Call Girls In Mahavir enclave Indian Quality Escort service
 
Call Us ≽ 9953322196 ≼ Call Girls In Mukherjee Nagar(Delhi) |
Call Us ≽ 9953322196 ≼ Call Girls In Mukherjee Nagar(Delhi) |Call Us ≽ 9953322196 ≼ Call Girls In Mukherjee Nagar(Delhi) |
Call Us ≽ 9953322196 ≼ Call Girls In Mukherjee Nagar(Delhi) |
 
The Philosophy of Science
The Philosophy of ScienceThe Philosophy of Science
The Philosophy of Science
 
Artificial Intelligence In Microbiology by Dr. Prince C P
Artificial Intelligence In Microbiology by Dr. Prince C PArtificial Intelligence In Microbiology by Dr. Prince C P
Artificial Intelligence In Microbiology by Dr. Prince C P
 
Call Girls in Mayapuri Delhi 💯Call Us 🔝9953322196🔝 💯Escort.
Call Girls in Mayapuri Delhi 💯Call Us 🔝9953322196🔝 💯Escort.Call Girls in Mayapuri Delhi 💯Call Us 🔝9953322196🔝 💯Escort.
Call Girls in Mayapuri Delhi 💯Call Us 🔝9953322196🔝 💯Escort.
 
Hubble Asteroid Hunter III. Physical properties of newly found asteroids
Hubble Asteroid Hunter III. Physical properties of newly found asteroidsHubble Asteroid Hunter III. Physical properties of newly found asteroids
Hubble Asteroid Hunter III. Physical properties of newly found asteroids
 
A relative description on Sonoporation.pdf
A relative description on Sonoporation.pdfA relative description on Sonoporation.pdf
A relative description on Sonoporation.pdf
 
Lucknow 💋 Russian Call Girls Lucknow Finest Escorts Service 8923113531 Availa...
Lucknow 💋 Russian Call Girls Lucknow Finest Escorts Service 8923113531 Availa...Lucknow 💋 Russian Call Girls Lucknow Finest Escorts Service 8923113531 Availa...
Lucknow 💋 Russian Call Girls Lucknow Finest Escorts Service 8923113531 Availa...
 
Stunning ➥8448380779▻ Call Girls In Panchshil Enclave Delhi NCR
Stunning ➥8448380779▻ Call Girls In Panchshil Enclave Delhi NCRStunning ➥8448380779▻ Call Girls In Panchshil Enclave Delhi NCR
Stunning ➥8448380779▻ Call Girls In Panchshil Enclave Delhi NCR
 
Animal Communication- Auditory and Visual.pptx
Animal Communication- Auditory and Visual.pptxAnimal Communication- Auditory and Visual.pptx
Animal Communication- Auditory and Visual.pptx
 
Behavioral Disorder: Schizophrenia & it's Case Study.pdf
Behavioral Disorder: Schizophrenia & it's Case Study.pdfBehavioral Disorder: Schizophrenia & it's Case Study.pdf
Behavioral Disorder: Schizophrenia & it's Case Study.pdf
 
Physiochemical properties of nanomaterials and its nanotoxicity.pptx
Physiochemical properties of nanomaterials and its nanotoxicity.pptxPhysiochemical properties of nanomaterials and its nanotoxicity.pptx
Physiochemical properties of nanomaterials and its nanotoxicity.pptx
 
NAVSEA PEO USC - Unmanned & Small Combatants 26Oct23.pdf
NAVSEA PEO USC - Unmanned & Small Combatants 26Oct23.pdfNAVSEA PEO USC - Unmanned & Small Combatants 26Oct23.pdf
NAVSEA PEO USC - Unmanned & Small Combatants 26Oct23.pdf
 
Is RISC-V ready for HPC workload? Maybe?
Is RISC-V ready for HPC workload? Maybe?Is RISC-V ready for HPC workload? Maybe?
Is RISC-V ready for HPC workload? Maybe?
 
Bentham & Hooker's Classification. along with the merits and demerits of the ...
Bentham & Hooker's Classification. along with the merits and demerits of the ...Bentham & Hooker's Classification. along with the merits and demerits of the ...
Bentham & Hooker's Classification. along with the merits and demerits of the ...
 
Cultivation of KODO MILLET . made by Ghanshyam pptx
Cultivation of KODO MILLET . made by Ghanshyam pptxCultivation of KODO MILLET . made by Ghanshyam pptx
Cultivation of KODO MILLET . made by Ghanshyam pptx
 
Luciferase in rDNA technology (biotechnology).pptx
Luciferase in rDNA technology (biotechnology).pptxLuciferase in rDNA technology (biotechnology).pptx
Luciferase in rDNA technology (biotechnology).pptx
 
Isotopic evidence of long-lived volcanism on Io
Isotopic evidence of long-lived volcanism on IoIsotopic evidence of long-lived volcanism on Io
Isotopic evidence of long-lived volcanism on Io
 

A practical guide to artificial breeding of beef cattle

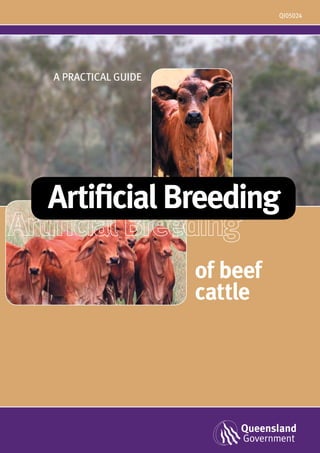
  • 1. QI05024 of beef cattle A PRACTICAL GUIDE Artificial Breeding
  • 2.
  • 3. A PRACTICAL GUIDE Queensland Primary Industries and Fisheries QI05024 of beef cattle Artificial Breeding
  • 4. ISSN 0727-6073 ISBN 0 7345 0309 3 Agdex 420/47 Contributions by: Other contributors: Brian Dunn Heather Lees, Desktop publishing Greg Fawcett Geoff Fahey Dennis Boothby Geoffry Fordyce On 26 March 2009, the Department of Primary Industries and Fisheries was amalgamated with other government departments to form the Department of Employment, Economic Development and Innovation. © The State of Queensland, Department of Employment, Economic Development and Innovation, 2009. Except as permitted by the Copyright Act 1968, no part of the work may in any form or by any electronic, mechanical, photocopying, recording, or any other means be reproduced, stored in a retrieval system or be broadcast or transmitted without the prior written permission of the Department of Employment, Economic Development and Innovation. The information contained herein is subject to change without notice. The copyright owner shall not be liable for technical or other errors or omissions contained herein. The reader/user accepts all risks and responsibility for losses, damages, costs and other consequences resulting directly or indirectly from using this information. Enquiries about reproduction, including downloading or printing the web version, should be directed to ipcu@dpi.qld.gov.au or telephone +61 7 3225 1398. ii
  • 5. Contents Introduction 1 The reproductive tract of the cow 2 Physiology of reproduction of the cow 4 Anatomy and physiology of the bull 14 Semen – collection, processing and storage 17 Insemination technique 26 Preparing for an AB program 37 Conducting an AB program 47 Uses of artificial breeding 60 Glossary 63 iii Artificial Breeding of beef cattle is a companion publication to Bull Selection, Breeding for Profit, Beef cattle recording and selection and Female Selection .
  • 6. iv
  • 7. Introduction AI (artificial insemination), also known as AB (artificial breeding), is the physical placement of semen into the reproductive tract of females with the aim of achieving pregnancies by means other than that of natural mating. AI is not new. It was recorded as early as the 14th century when it was reputedly used by an Arabian horse breeder, who transferred the contents of an ejaculate from the vagina of a freshly served mare into the vagina of another mare by means of a sponge. Detailed knowledge of the physiology of reproduction commenced in 1677 when the Dutch scientist, Van Loenhoek, observed sperm cells in an ejaculate. The first scientific artificial breeding was done with dogs in 1780, by an Italian physiologist, Spallanzani, who proved that the sperm fraction of the ejaculate is the component which causes fertilisation. Serious efforts to promote artificial insemination of cattle were made in Russia in 1914 by Ivanov and his co-workers, who developed the artificial vagina (AV) to facilitate semen collection from bulls. This was followed by experimentation with insemination procedures and methods of diluting semen. By using AI they hoped to restrict the spread of vibriosis – a venereal disease of cattle. In 1937 AI in cattle became a practical commercial proposition when Sorensen, a Danish veterinarian, and his co-workers, developed the recto-vaginal technique of insemination: the method used worldwide today, and described in this book. AI spread around the world after a British scientist, Polge, developed techniques for deep freezing of sperm for long term storage in 1949. In France during the 1960s, Cassou brought semen processing technology to its present level by designing the straw system of packaging deep frozen semen, culminating in the development of the mini-straw in 1969. Advances in storage containers using liquid nitrogen as a refrigerant were concurrent with the development and spread of the Cassou straw. The Cassou straw system has been almost universally adopted with more than 200 countries using it as a method of semen packaging. Many millions of cows throughout the world are bred by AI each year and the number is increasing. In Australia approximately 1.5 million cows are inseminated annually. Most cows inseminated worldwide are dairy cows, but increasingly AI is being used in the beef industry. AI is the cheapest, safest and most effective means of spreading superior genetic material and both the beef and dairy cattle industries depend on it for their genetic advancement schemes. The most recent advances are in the area of oestrous synchronisation. Semen processing advances hoped for in the near future include the sexing of sperm, and slow release sperm capsules. More information Some states and countries have local regulations governing the use of artificial insemination. It is necessary to contact your local department of agriculture, private veterinarian or herd improvement organisation concerning the particular requirements of local legislation. These organisations will also be able to direct you to the local suppliers of AI equipment, semen and training courses that you may require. 1
  • 8. The reproductive tract of the cow A sound knowledge of the location, structure and function of the reproductive organs is essential for efficient insemination and for avoiding damage to cows. External organs The anus is a ring of muscle which retains the contents of the rectum. Below the anus are the lips of the vulva, the external opening of the vagina. Per rectum examination The various parts of the reproductive tract can be located by hand, palpating through the elastic wall of the rectum. An arm length glove should be worn for protection and hygiene. For ease of entry, lubricate the gloved hand with obstetric lubricant and form the fingers and thumb into a cone. Internal organs The vagina is 24 to 30 cm long with muscular walls. About 10 cm inside the vagina along its floor is the passage from the bladder, the urethra. It enters the vagina near a blind pouch, the urethral diverticulum. The cervix is 3 to 10 cm long and from 1.5 to 6 cm in diameter. It is larger in Bos indicus animals (Brahman, Zebu and related breeds) than other breeds and increases in size with age. It connects the vagina to the uterus. It is quite firm in comparison with other parts of the tract and can usually be located by feeling gently around the pelvic floor. Figure 1. Reproductive tract of the cow Figure 2. Structure of the cervix The position of the cervix will vary with the age of the cow and the stage of pregnancy. In non- pregnant cows, most operators should not have to go in beyond elbow length to locate the cervix and the rest of the reproductive tract. In heifers, the cervix should be picked up at wrist depth. It may be pulled out of reach by the weight of the developing foetus in a pregnant animal. 2 Anus Rectum Fornix Cervix Vagina Os Ovary Vulva Bladder Fallopian tube Body of uterus Urethra Urethral diverticulum Horns of uterus Fornix Annular rings Os Body of uterus Cervix
  • 9. A narrow canal passes through the centre of the cervix. It is spiral in form and tightly closed. It opens slightly when the cow is on heat and enlarges greatly during calving. The start of this canal is the os which extends into the vagina forming a blind pocket – the fornix. The uterus consists of a body and two horns. The body is 2 to 3 cm long and separates into the horns. The body feels longer on palpation than 2 to 3 cm, because the horns are joined together by a ligament for about 12 cm beyond the point of division. The two horns are 35 to 40 cm long and 2 cm or more in diameter. They have a thick elastic wall and a rich blood supply to nourish the developing calf. To imagine the uterus, partly fill a rubber glove with water and run your hand over the start of the join of two fingers. This is approximately the size, shape and consistency of the uterus in the non-pregnant heifer. The ligament may be felt with practice by hooking a finger under it. This may be used to help to retract the uterus into the pelvic cavity. In heifers, muscular contractions of the uterus may cause it to curl up in the operator’s hand if gentle palpation is attempted. This makes definition of the structures easier. The corpus luteum visible on an ovary. This is palpable during rectal examination. 3 The oviduct is also known as the fallopian tube. It is 20 to 25 cm long and 1 to 2 mm in diameter. It runs from the tip of the horn to the infundibulum (or funnel) which surrounds the ovary. The oviduct is difficult to detect on palpation. Fertilisation takes place in the oviduct. Ovaries can normally be felt alongside the uterine horns. They are oval in shape with size depending on age and breed (usually the size of an almond nut or slightly larger). Eggs develop in follicles (fluid filled blisters) below the surface of the ovary. Near the time of ovulation, the follicle will be about one centimetre in diameter. When the follicle ruptures to release the egg, it leaves a depression which soon fills with tissue. After three to five days this tissue develops into the corpus luteum (yellow body) which an experienced operator can detect by palpation. Here the corpus luteum is visable on an ovary. Note the pregnancy in one horn. Figure 3. Ovary in section Corpus luteum Mature follicle (1 cm diameter) Stroma
  • 10. 4 Physiology of reproduction of the cow The oestrous cycle and hormones When a heifer becomes sexually mature the ovaries begin to function in a cycle of activity. This cycle involves a sequence of events in preparation for mating, conception and pregnancy. The cycle repeats in preparation for a new mating cycle if pregnancy does not occur. The cycle has an average length of 21 days. Any period between 18 and 24 days is considered normal. Stages of oestrous cycle 1. OESTRUS (standing heat, sexual desire) This is the period of sexual activity at the end of the cycle when the female will stand to permit mating. The duration of oestrus varies within a normal range of 6 to 30 hours. The average duration traditionally has been set at 12 hours for heifers and 18 hours for cows. However, according to recent research the average duration of standing heat in dairy cows is approximately 8 hours under Australian conditions. It is not expected that beef cows would have heat periods longer than this. 2. MET-OESTRUS (after heat) Days 1 to 5 of the cycle. The female will not permit mounting. About 50% of cows and 90% of heifers show met-oestral bleeding. Ovulation occurs during this time and the corpus luteum begins to develop. Met-oestral bleeding does not indicate that the cow has conceived, or not conceived, nor the sex of the calf, nor anything else in particular. 3. DI-OESTRUS (between heats) Days 5 to 19. Characterised by a complete lack of sexual desire. If the cow conceives she passes from di-oestrus into a state of anoestrus (absence of cycling). 4. PRO-OESTRUS (before heat) Days 19 to 21. This is the period of preparation for sexual activity. ANOESTRUS Anoestrus is a complete lack of cycling activity. It can occur due to pregnancy, the stress of lactation or poor nutritional status. Control of the oestrous cycle All stages in the reproductive cycle are controlled by hormones. The term hormone is derived from a word meaning to set in motion or to arouse. Hormones are chemical messengers released from endocrine (ductless) glands. They travel via the blood stream to have an effect on distant target organs. An example of a hormone is adrenalin. It is produced by the adrenal gland situated near the kidney. Release of adrenalin into the bloodstream causes increased heart rate and breathing capacity. When you get a fright it is adrenalin which makes your heart jump. Hormones involved in the reproductive cycle Reproduction, like most bodily functions, is controlled from the brain. It exercises this control through a small gland - the pituitary gland - situated immediately beneath the brain. The pituitary gland has two parts, the anterior (towards the front) and the posterior, each producing distinct hormones. The brain receives messages and stimuli from all parts of the body and from the environment. It acts like a computer and collates these signals. Providing enough signals are
  • 11. 5 favourable, it releases GnRH (gonadotrophin releasing hormone) which causes the pituitary gland to commence the reproductive cycle. Adverse signals such as poor body condition, diseases and stress will cause lowering or cessation of cycling. STAGE 1 – PRO-OESTRUS Follicle stimulating hormone (FSH) is released from the anterior pituitary gland upon release of GnRH from the brain. FSH acts upon the germinal epithelium of the ovary to cause the formation of the follicle (the ‘Graafian follicle’) containing the ovum. STAGE 2 – 0ESTRUS The fluid in the follicle contains much oestrogen. Oestrogen is the female hormone, which is produced continuously in small quantities in the cortex of the ovary, and causes the typical female growth characteristics. Much larger amounts of oestrogen, produced by the follicle, act on the cow’s brain, firstly to inhibit more FSH production and secondly to modify the cow’s behaviour and cause her to display oestrus (i.e. to come into season, or displays ‘heat’). Oestrogen acts on the reproductive tract at the same time. Blood supply increases and causes the tract to ‘tone up’. The vulva swells and becomes distended while the cervix and uterus produce copious quantities of clear stringy mucus. STAGE 3 – MET-OESTRUS Luteinising hormone (LH) is released from the anterior pituitary after oestrus. Peak LH production is reached approximately ten to twelve hours after the end of standing heat. LH causes ovulation (release of the ovum from the follicle) and growth of the corpus luteum at the ovulation site. STAGE 4 – DI-OESTRUS The corpus luteum develops and after three to five days produces progesterone, the pregnancy hormone. Progesterone acts on the brain, inhibiting LH release and sexual activity. Progesterone also prepares the reproductive tract for pregnancy and in prolonged concentrations causes udder development. Pregnancy is maintained by progesterone. STAGE 5 – ALTERNATIVE (A) PRO-OESTRUS (or stage one again). If by day 19 of the cycle the cow is not pregnant, her uterus releases hormone like compounds called prostaglandins. (Prostaglandins are present in semen as well, and play a part in sperm transport in the uterus and oviduct. Prostaglandins are also involved in the initial stages of calving.) Figure 4. Pro-oestrus Pituitary gland BrainOvary FSH Figure 5. Oestrus Figure 6. Met-oestrus Figure 7. Di-oestrus Corpus luteum on ovary Progesterone Follicular fluid Follicle on ovary Follicle Tone in reproductive tract Oestrousbehaviourfrom brain Oestrogen LH Ovulation Luteinisation
  • 12. 6 Prostaglandins F2 alpha and E2 alpha occur naturally in the uterine tissue and their action is to cause luteolysis – dissolving of the corpus luteum. This causes cessation of progesterone production and removes the inhibition to sexual activity, allowing the cycle to start again. N.B. Administration of synthetic prostaglandins in the first five months of pregnancy (for oestrus synchronisation) may cause abortion due to luteolysis and uterine contraction. (For the oestrus synchronising action of prostaglandins see the section on oestrus synchronisation in the chapter ‘Conducting an artificial breeding program’.) STAGE 5-ALTERNATIVE (B) ANOESTRUS DUE TO PREGNANCY. The presence of a foetus at day 19 inhibits the release of prostaglandins from the uterine wall. Because of this the corpus luteum remains and produces progesterone which maintains the pregnancy. At approximately six months into the pregnancy the corpus luteum starts to decline in activity as the cotyledons become the major source of progesterone (see ‘Pregnancy and parturition’ page 9). This transition may lead some cows to show sexual activity (e.g. mounting other cows). Other hormones PROLACTIN. Prolactin, or luteotrophic hormone, is produced in the anterior pituitary gland. Its action is to maintain the corpus luteum and initiate and maintain lactation. It is also involved in maternal behaviour patterns. OXYTOCIN. Oxytocin, the milk let down hormone, is produced in the posterior pituitary gland. Apart from triggering milk let down, oxytocin also causes contraction of the uterus. This action is involved in sperm transport for fertilisation and also aids in expelling the calf at parturition (birth) and expelling the afterbirth (placenta) immediately after parturition. Gentle massage of the cervix after insemination releases oxytocin and boosts conception chances. The action of oxytocin is counteracted by the effect of adrenalin which is released when animals get frightened or upset. This reduces chances of conception. Gentle handling and good facilities are essential to prevent upset. RELAXIN. This is produced by the corpus luteum in very late pregnancy. It causes relaxation of the ligaments around the pelvis, enlarging the birth canal. It is responsible for the characteristics of ‘springing’ in late pregnancy. Oestrogen causes the cow to display signs of oestrus or heat.
  • 13. 7 Fertilisation Ovulation is the release of the egg from the ovary. Luteinising hormone gradually softens and breaks down the wall of the follicle so the ovum can mature and float free. When released, the ovum is caught by the infundibulum and passes into the fallopian tube which moves it towards the uterus. Ovulation usually occurs about twelve hours after the end of heat, although its timing varies within a normal range 2 to 26 hours. Structure of the ovum The mature ovum of the cow is similar to other mammalian egg cells. • The cumulus (or granuloma) cells provide nutrients and protect the ovum. • The zona pellucida (clear layer) contains two gel layers which protect the ovum. The zona is impervious to most compounds. • The vitelline membrane covers the yolk. • The yolk provides nutrients to the rapidly dividing cells of the embryo until they are implanted in the uterus. • The nucleus contains half of the genetic information which will determine the characteristics of the resultant animal. The other half comes from the sperm nucleus. Ovum transport The beating action of the cilia propels the ovum by setting up currents in the fluid secreted by the oviduct. As the egg moves down the tube, excess cumulus cells may be removed by the cilia. Muscular contractions of the oviduct also contribute to transport of the ovum. Sperm transport In natural mating, semen is deposited in the anterior part of the vagina near to the cervix. Sperm are carried into the uterus by the cervical mucus and some reach the oviduct within two to four minutes. The rapid movement of sperm to the site of fertilisation is believed to be due to contractions of the uterus and oviducts. Oxytocin released at mating stimulates muscular contractions. Prostaglandins in sperm also assist sperm transport in the uterus and oviduct. Capacitation Sperm must be in the female tract for one to six hours before they are capable of fertilising the egg. During this time they undergo a series of chemical changes which prepare them for penetration and fertilisation of the ovum. This process of change is known as capacitation. It is thought to include the removal of a membrane to expose the enzymes which facilitate penetration of the egg. Figure 10. Capacitation Nucleus Enzyme release Acrosome Sperm without acrosome Figure 8. Ovum at ovulation Figure 9. Ovum transport Fallopian tube Ovum Wave action of cilia Direction of travel Nucleus Cumulus oophorus Yolk Zona pellucida Vitelline membrane
  • 14. 8 Penetration The enzymes released during capacitation allow sperm to move through the layers of the egg to reach the nucleus. (Enzymes are substances which stimulate chemical reactions). The reactions in this case result in the layers of the egg dissolving to allow the sperm to pass through. Hyaluronidase and trypsin act on cumulus cells and zonalysin acts on the zona pellucida. Fertilisation Fertilisation, by which male and female gametes unite to form the zygote, takes place at a site one-third of the way down the fallopian tube. Sperm are not strongly attracted to the ovum, and fertilisation occurs by a chance collision of the sperm and ovum. The wall of the egg becomes impervious once a spermatozoon has entered, so as to prevent polyspermy, i.e. fertilisation by more than one sperm. Figure 11. Fertilisation Zygote: the fertilised egg before it begins to divide. Gamete: male or female reproductive cell, i.e. sperm or ovum. Ovum or embryo transfer In nature a cow is limited to ten to fifteen progeny in a lifetime. This limits the direct genetic impact a cow can have on herd improvement. Embryo transfer was developed to enable superior cows to have many more progeny than could be obtained under natural conditions and thus have a far greater direct impact on herd improvement. Embryo transfers are now offered commercially by veterinarians in many countries. This process can be divided into five stages. STAGE I – INITIAL PREPARATION The first step is to identify the genetically superior cows by a production recording scheme. The bull to be used should also have his genetic worth assessed by a progeny test or a performance test (refer to the DPI&F publication ‘Bull selection’ for further information). The suitability of certain matings may need to be assessed by a geneticist. The genetically superior cow (donor cow) must not be pregnant and should be cycling normally before the program commences. The cows which are to be used as surrogate mothers (recipient cows) must also be empty (not pregnant) and cycling normally. STAGE 2 – TREATMENT OF DONOR COWS In nature, a cow normally releases only one egg (ovum) at a time for fertilisation. But for an embryo transfer program to be worthwhile the donor cow will need to be treated to ensure the release of numerous ova for fertilisation and transfer to recipient cows. This is done with an injection of FSH, at the correct time in the donor cow’s cycle under veterinary supervision. To ensure correct timing, oestrus synchronising drugs such as prostaglandins and progesterones may be used to control the oestrous cycle of the donor cow (refer to section on oestrous synchronisation). Sperm attachment to zona Zona pellucida Vitelline membrane Sperm without acrosome Zona penetration Zona reaction Sperm nucleus absorption Zona reaction increases and spreads Impervious wall
  • 15. 9 STAGE 3 – TREATMENT OF RECIPIENT COWS An embryo is most likely to ‘take’, if the recipient cow is at exactly the same stage of the oestrous cycle as the donor cow. To achieve this, the oestrous cycle of the recipients must be controlled by use of oestrus synchronising drugs such as prostaglandins (see the section on oestrus synchronisation in the chapter ‘Conducting an artificial breeding program’). STAGE 4 – COLLECTION OF EMBRYOS FROM DONOR COWS The donor cow is inseminated, sometimes two or three times, during her heat period. Accurate heat detection is critical for good results. Between seven and twelve days later the embryos are removed from the donor cow. These embryos are examined microscopically to assess their viability. Up to 30 embryos may be obtained from one collection, but on average only five viable embryos are collected. STAGE 5 – TRANSFER OF EMBRYOS TO RECIPIENTS As soon as possible the viable embryos are transferred to the recipient cows. On average up to 60% of these embryos take successfully. The transferred embryo then grows inside the recipient cow just as if it were her own calf.Figure 12. Non-surgical collection of embryos Y-connector Bulb of foley catheter seals behind cervix Uterus Foley catheter Flushing fluid Out In Air Collection flask Pregnancy and parturition The duration of pregnancy (the gestation period) in cows is about 283 days, with a normal range of 273 to 291 days. Bos indicus and larger European breeds tend to have longer gestations; small breeds such as Jerseys have shorter gestations. Gestation may be divided into two stages: • The embryonic stage – from fertilisation to days 45 to 48 • The foetal stage – from days 45 to 48 to calving. Within 15 to 30 hours of fertilisation, the zygote divides. At four to five days the embryo has reached the uterus, has 16 to 32 cells, and is termed a morula. At day 8 the zona pellucida disintegrates and a blastocyst is formed. On the 14th day the blastocyst attaches loosely to the uterine wall and part of it elongates to form a membrane called the chorion. Uterine ‘milk’ nourishes the embryo at this stage. Implantation begins by the 35th day with the chorion and the uterus forming cotyledons or ‘buttons’. The embryonic and maternal tissues are closely associated, allowing nutrients to pass from the maternal to the foetal blood supply and waste products to pass in the opposite direction. Cells divide rapidly and the head, heart and limb buds are all present by the 40th day. The embryo is very sensitive during this phase of rapid growth and adverse influences can produce deformities (as Thalidomide affected human embryos). Organs continue to differentiate during the foetal stage, and there is a rapid increase in weight, particularly in the last 60 days, when the foetus trebles in size.Figure 13. Cow blastocyst Inner cell mass Trophoblast Fluid filled sac
  • 16. 10 Pregnancy diagnosis HORMONAL ASSAY Changes in hormone levels in samples of blood or urine are used to diagnose pregnancy in humans and horses. Hormone levels in milk may be used to detect pregnancy in cows if the milk sample is taken at an accurate, specified time after mating. Hormone assays are expensive and not yet practical for commercial use. BEHAVIOUR Changes in behaviour due to hormone balance will allow some observers to detect animals which are in calf. Absence of oestrus activity is the most reliable behavioural guide, but the accuracy of pregnancy diagnosis by this method is low. SONAR Sonar machines are being used to detect pregnancy in a number of species including cattle. Changes to the wavelength of a reflected soundwave (the doppler effect) can be interpreted to indicate whether or not the animal is pregnant. This method is not entirely satisfactory in cattle as diagnosis of empty (non-pregnant) cows is difficult. REAL TIME ULTRASOUND This method employs the doppler effect as do sonar pregnancy testing machines. Here the reflected soundwaves are converted into visual images on a screen instead of audible sound. Considerable skill is needed to interpret these images for an accurate diagnosis. This method is useful for very early pregnancy diagnosis i.e. under 7 weeks. HISTOLOGY Pregnancy can be detected by examining the cells and mucus of the cervix and vagina under a microscope. This method is reliable but not practical for commercial use. PALPATION Diagnosis of pregnancy by palpation of the tract per rectum (PR) – i.e. by feeling through the cow’s rectal passage – is the most effective method. The technique is classed as an act of veterinary surgery in many places and only veterinarians are permitted to offer the service, however owners of stock are permitted to use this procedure to diagnose pregnancy in their own cattle. Pregnancy diagnosis by palpation As with all examinations by palpation, it is advisable to get the cow as relaxed as possible. The excessive moving and straining of nervous cattle lead to inaccurate diagnosis. Straining due to molasses and rye grass feeding also reduces accuracy. 1. DAYS 28 TO 35 Detection of very early pregnancy requires skill and is not advisable because of the risk of causing abortion. Great care must be exercised if the procedure is attempted. Gentle palpation reveals: • the corpus luteum on the ovary of the pregnant uterine horn • an abrupt end to the pregnant uterine horn • membrane slip, detectable after the 30th day. By grasping the uterus gently with the thumb and finger, the chorion can be felt slipping between the folded uterine walls. The best site to feel this is where the horns curl around. This technique should be attempted only by veterinarians or very experienced operators as it is possible to damage the membranes and developing embryo and cause abortion. Figure 14. Feeling for membrane slip Uterine wall Chorion Grip of finger and thumb Inner membrane (chorion) slips between uterine folds
  • 17. 11 2. DAYS 35 TO 62 At this stage, examination should still only be attempted by a veterinarian or very experienced operator because of the risk of damage to the membranes and the embryo, and of abortion. • The pregnant horn tends to straighten out, i.e. to lose its curl. It has a fluid tone and an increased diameter when compared to the non-pregnant horn. • The extra weight of the pregnant horn often twists the tract slightly, leaving the lighter, more tightly curled, non-pregnant horn ‘floating’ on top. 3. DAYS 62 TO 90 Experienced operators should be able to detect pregnancy by 63 days. • The uterus feels like a water filled rubber balloon with a diameter of 10-16 cm. • The horns are no longer symmetrical and the difference in size becomes gradually more apparent towards the 90th day. • Very gentle palpation of the uterus will reveal a foetus the size of a mouse at 60 days and the size of a rat at 90 days. • The uterus should still be in the pelvic cavity or in the upper part of the abdominal cavity. 4. DAYS 90 TO 150 Pregnancy testing after 90 days should be a relatively risk free proposition to most trained operators. • The uterus descends into the abdominal cavity and becomes progressively more difficult to palpate. • Its size increases mainly due to the volume of fluid in the membranes. • The foetus weighs about 2 to 3 kg and is about the size of a cat at 150 days. • Cotyledons can be detected. At 90 days they have a diameter of about 1 to 2 cm (like a 5 cent coin); at 150 days, 3 cm (like a 20 cent coin). The size of the cotyledons is best gauged at the body of the uterus. • The uterine artery of the pregnant horn enlarges and develops a characteristic ‘buzzing pulse’ (fremitus). The artery is as thick as the little finger by the end of gestation. • The weight of the uterus pulls the cervix over the pelvic brim. Instead of being hard and muscular, the cervix enlarges and feels doughy. These signs must be identified in combination to indicate the state of pregnancy. 5. DAYS 150 TO 210 • The uterus lies on the floor of the abdomen. • The foetus may only be palpated by bouncing, i.e. gentle pressure on the uterine fluid so as to bounce the foetus against the hand. • Cotyledons and fremitus are readily detectable. • The foetus is the size of a small dog (9 to 13 kg). Figure 15. 150 day pregnancy Right ovary Broad ligament Bladder pushed to one side Cotyledons Non-pregnant horn
  • 18. Figure 16. Full term pregnancy Head and forelimbs in pelvic cavity 6. DAY 210 TO CALVING • The foetus enlarges and is easy to feel. • Palpation of the foetus may elicit movement. • Close to calving the foetus should lie with its forelimbs extended towards the pelvic outlet and its head between the legs. The head and its features, jaws and ears etc., are easily delineated. The foetus may have one or two teeth at 270 days and may ‘bite’ at a hand palpating around its jaw. External signs of pregnancy In heifers the udder increases in size at four to five months and this is a sign of pregnancy. It is not normally evident in mature cows until one to four weeks before calving. From six months onward (later in fat cows), foetal movements may be seen through the abdominal wall. In some cows the foetal heart sounds may be heard from the seventh month with the aid of a stethoscope. Abdominal swelling is not usually noticeable until the later stages of pregnancy. Signs of approaching parturition Some signs are observable in cows and heifers, others in one or other. • In cows, the udder enlarges one to four weeks before calving. This is not a reliable sign in heifers as the udder begins to develop halfway through pregnancy. • Production of colostrum – a creamy or pink secretion – begins from the udder. • The white stringy vaginal mucus becomes more profuse. • The mucus plug in the cervix liquefies. • The animal usually moves to a quiet spot away from the rest of the herd. • Heifers may become restless and lose their appetite. • Pelvic ligaments relax under the influence of relaxin, 24 to 48 hours before calving, making the tail appear to be set higher and causing a looser walking action, i.e. ‘springing’. • The vulva swells to six times its normal size. Induction of parturition Birth is brought on by the foetus producing a hormone which acts on the cotyledons and uterus to release prostaglandins. It is the foetus which determines when birth commences, not the mother. Prostaglandins (mainly F2 alpha) dissolve the corpus luteum, consequently lowering the levels of progesterone and causing contraction of the uterine muscles. Oxytocin is released in the later stages to increase the strength of contractions. Stages of parturition The calf is normally presented with the forelimbs extended and its head resting on, or between them. In some instances the hind limbs may be presented first. 12
  • 19. STAGE 1 The uterine muscles contract to force the foetal membranes through the dilating cervix. Contractions gradually increase in frequency as the second stage approaches. STAGE 2 The foetal membranes (water bag) and feet approach the vulva. Abdominal contractions, which are under voluntary control, take over the main effort of expelling the foetus. The cow may rest for a short time after the head is presented before resuming contractions to push the foetus out of the birth canal. This stage takes between 30 minutes and four hours to complete. STAGE 3 The foetal membranes are normally expelled within eight hours. If they are still in place after 24 hours, veterinary attention should be sought. Difficult calving (dystocia) Any calving in which the second stage takes longer than four hours should be viewed with concern. If dystocia occurs veterinary attention should be sought. Intervention by an untrained person will usually aggravate the situation. Dystocia can be reduced by careful management. It is advisable to keep calving cows (particularly heifers) under observation. Lactation (period of suckling) Oestrogen promotes growth of the duct system of the udder while progesterone stimulates development of the milk secreting glands (alveoli). Prolactin has a dual role. Before calving it stimulates udder development; after calving it encourages milk production. It is thought that high levels of progesterone during pregnancy suppress the milk forming action. This suppression stops when progesterone levels fall at calving. Colostrum (first milk) is a rich source of antibodies which prevent infection until the calf builds up its own resistance (immunity). Suckling stimulates the release of oxytocin (milk let down hormone) to cause contraction of the milk secreting tissues. Milk is forced into the ducts and teats to facilitate easy removal. Suckling causes release of oxytocin 13
  • 20. Anatomy and physiology of the bull Testicles (Testes) The testicles are paired organs found in a sac like structure (the scrotum). The surface of the testes is covered by the tunica albuginea, a closely adhering thin white fibrous sheath. When it is cut, the soft testicular tissue bulges through. The testicles of a mature bull perform two functions: • spermatogenesis: production of spermatozoa • production of the male sex hormone, testosterone. Spermatozoa are single living cells which constitute the basic unit of reproduction in the male. They are formed in the seminiferous tubules of the testes under the control of FSH and LH. Each testicle contains about 2000 m of seminiferous tubule producing 20 000 sperm per second. Spermatogenesis takes 60 days to complete. Leydig cells, located between the loops of seminiferous tubule, produce testosterone, which has two major functions: • it induces libido (sex drive) • it causes development of male characteristics such as body shape. This includes muscular development in the bull’s neck region, heavier forequarters and the crest. Figure 17. Genital organs of the bull Tail of epididymis Rectum Retractor penis muscle Body of epididymis Scrotal sac Head of epididymis Sigmoid flexure Penis Preputial membrane and cavity Ampulla Seminal vesicles Glans penis Vas deferens Inguinal canal Bladder Rumen Testis 14 Figure 18. Midline section of testis Tail of epididymis Rete or central duct Septa with blood vessels and semen ducts Head of epididymis collects sperm from rete Pampiniform plexus Lobules with seminiferous tubules and leydig cells Figure 19. Lobule section Leydig cell Sperm Tubule Primary spermatocyte
  • 21. Scrotum The scrotum is a two lobed sac, the lobes being divided by a vertical septum. It is composed of a number of layers: • the skin, which should be almost hairless or have only very fine hairs • the tunica dartos muscle • the tunica vaginalis, a thick white fibrous sheath surrounding the testes. The dorsal part is attached to the cremaster muscle which enables the bull to draw the testes towards the abdomen. The scrotum has three main functions: • to support the testes • to protect the testes • to regulate temperature within the testes. Figure 20. Vertical section of scrotum and testes Inguinal canal Spermatic vein Vas deferensSpermatic artery Testis Skin of scrotum Cremaster muscle Tail of epididymis Vas deferens TEMPERATURE REGULATION IN THE TESTES The optimum temperature for spermatogenesis is 33° to 36°C (3° to 6° below body temperature). Variation above or below this range impairs sperm production. Heat stress increases the numbers of abnormal sperm in an ejaculate. In the epididymis such abnormalities show up as returned tails, retained droplets and increased mortality. Sperm in the seminiferous tubules show the damage as abnormal heads, midpieces and tails. Temperature of the testes is controlled by: • Evaporation of sweat The skin of the scrotum is well supplied with sweat glands. Heat from the body of the testes is conducted by the blood to the skin, which is cooled by evaporating sweat. The efficiency of this cooling depends on the temperature, humidity and movement of air in immediate contact with the scrotum. • Muscle contraction The muscular tunica dartos and the cremaster muscle contract in cold weather and relax in hot weather. In this way the testes and scrotum are drawn towards the warm body wall to conserve heat in cold weather and are lowered away from the body in warm weather. Lowering also increases the surface area of the scrotum to expose more skin for sweat evaporation. Bos indicus animals display this quite markedly. Figure 21. Testicular cooling by pampiniform plexus • Blood supply Blood coming to the testes via the spermatic artery is at body temperature (38.5°C). If it went straight into the testes it would raise the temperature and disrupt spermatogenesis. Venous blood leaving the testes is cooler (33°C) because of its close association with the scrotum which is cooled by the evaporation of sweat. Veins in the spermatic cord form a complex network of vessels (the pampiniform plexus) which surrounds the arteries acting like a radiator to maintain constant temperature. With the transfer of heat, there is an equalisation of temperature between blood in arterial and venous vessels. Arterial blood is cooled before it reaches the testes. Spermatic artery 34°C Pampininform plexus Spermatic vein Blood from the body 39°C Veins 33°C Veins in skin 33°C Spermatic artery 15
  • 22. Epididymis The epididymis is divided into three parts: • the head is on the top part of the testicle and is very closely attached to it • the body extends down the outside of the testicle • the tail is the enlarged distal part which may be palpated at the base of the testicle. The epididymis has a number of functions including: • sperm storage • provision of nutrients for sperm • maturation of sperm as they move down the epididymis. Immature sperm are incapable of fertilisation. Vas deferens The vas deferens connects the epididymis to the urethra. It is a thin whitish tube which enters the body through the inguinal canal and terminates at the ampulla. The vas deferens contracts during ejaculation to force sperm down the urethra. Ampulla The ampulla is a thickened glandular extension of the vas deferens. It acts as a valve to prevent urination while the bull is sexually excited. It also stops urine from entering the vas deferens. Urethra The urethra runs the length of the penis and is the common duct for both urine and sperm. Accessory glands The seminal vesicles, prostate, and bulbo-urethral glands make up the accessory sex glands. Their function is to produce seminal plasma (accessory fluid) which may form 60% to 95% of the volume of an ejaculate. Seminal plasma has a number of functions: • It cleanses the urethra of urine, bacteria and contaminants just before ejaculation. This is seen when the bull ‘dribbles’ a bit just before mounting. • It activates sperm. • It provides nutrients for the sperm. • It adds volume to the ejaculate. • It may aid sperm survival in the vagina. The vagina is a hostile environment for sperm and unless they can quickly gain entry to the uterus, they will die. Seminal plasma may prolong sperm survival in the vagina until more sperm can gain entry to the uterus. The penis The bull’s penis is fibro-elastic material covered by a dense white fibrous sheet – the tunica albuginea. There is some erectile tissue present but this is minimal when compared to that Figure 22. Cross section of horse and bull penis Tunica albuginea Bull Erectile or cavernosus tissue Urethra Horse Vaginalis 16 found in horses and humans. In a bull the erectile tissue is only for hardening the penis during erection and not for lengthening it or increasing the diameter. Erection is caused by contraction of muscles at the root of the penis. The end of the penis (the glans penis) is about 8 cm long. It is flattened and slightly twisted. At ejaculation, the glans twists about half to one turn to increase the effective diameter of the penis. Prepuce The prepuce, or sheath, is the protective covering of the penis.
  • 23. Semen– collection, processing & storage AB centre operations Most AB centres use an artificial vagina to collect semen. With this device, temperature, pressure and friction are used to stimulate ejaculation when the donor bull mounts a teaser animal. Cows may be used as teasers but have disadvantages. Other bulls or steers are satisfactory. In some instances mechanical decoys are used. Demand for a bull’s semen determines the frequency of collection. Two ejaculates twice a week (e.g. two on Monday and two on Thursday), will allow an average bull to produce 30 000 doses or more in a year. When bulls are unable to mount because of injury or some other factor, electro-ejaculation can be used. This method employs passage of a fluctuating current between electrodes on a probe which is placed in the bull’s rectum. This current stimulates accessory sex glands and the muscles of ejaculation. Electro-ejaculation is usually regarded as a last resort for semen collection. It is time consuming, requires expensive equipment and risks injury to the donor animal. Semen quality is not as good as that collected by the artificial vagina. Estimation of density by spectrophotometer. Low magnification initial assessment of semen quality. Processing About ten million normal, actively moving sperm are required to produce conception using artificial insemination. They must be placed at the correct site in the reproductive tract of a cow which is at the correct stage of the breeding cycle. When processing a dose of frozen semen, the aim is to ensure that sufficient live sperm are present for conception when the dose is thawed to body temperature. Processing includes: evaluation, dilution, cooling, packing, freezing, quality control (evaluation after freezing) and storage. 1. EVALUATION After examining a drop of raw semen under low power on a microscope to obtain an estimate of sperm concentration and activity, samples are taken for detailed assessment. One drop is placed in a test tube with a special stain to determine the percentage of the spermatozoa which were alive and of normal conformation at the time of staining. Another drop is used to ascertain the density of the raw semen – the number of sperm per millilitre. A spectrophotometer measures the amount of light passing through the sample of semen diluted at a particular rate. Put simply, the more sperm in the sample, the less light that is transmitted. By multiplying the volume of the ejaculate by the density and the percentage of live sperm, the total number of live sperm in the ejaculate can be worked out. 17
  • 24. 2. DILUTION (OR EXTENSION) An average ejaculate may contain 5000 million sperm in 5 ml of raw semen. Super-fertile mature bulls may yield up to 12 000 million sperm per ejaculate. With natural service this could only produce one calf. By diluting the ejaculate, the raw semen can be extended to give 200 or more individual 0.25 ml doses each containing 25 million live sperm. While only 10 million sperm are required for conception, more than double this number are placed in the straw to allow for losses during freezing. Glycerol is the chemical added to protect the sperm during the freezing process. Diluents may be based on skim milk, egg yolk citrate or specially prepared chemical diluents such as TRIS with egg yolk. Antibiotics are added as a precautionary measure and most diluents have added fructose (fruit sugar) to supply energy to the sperm. 3. PACKING More than 200 AB centres around the world use the Cassou or French straw system for packing semen. Glass ampoules were used originally but in most countries, these have been replaced by straws. The medium straw (0.5 ml volume) was introduced in 1969 and the ‘mini-straw’ (0.25 ml volume) in 1972. Cassou straws are 133 mm long poly-vinyl chloride tubes. Medium straws have a 3 mm diameter and mini-straws 2 mm. They are plugged at one end (the double plug end) with a sealing powder which is retained between two cotton plugs. By applying a vacuum to this end of the straw, semen can be drawn up the tube and into contact with the sealing powder. As soon as the powder becomes wet it turns into a gel to provide a very effective seal. Automatic straw filling and sealing machines use an ultrasonic pulse to seal the other end (the laboratory end). 4. COOLING AND FREEZING At body temperature sperm swim about very rapidly, exhaust their energy reserves in a relatively short time, and die. Dilution of raw semen Diluted semen in water bath for controlled cooling. Straws are loaded on a rack. The loaded rack is lowered in liquid nitrogen vapour. 18
  • 25. The rate of a chemical reaction depends on the temperature at which the process is taking place. If the temperature is reduced, the rate of reaction is also reduced. Cooling semen to near freezing point slows the sperm down, by slowing their internal reactions, and extends their life for several days if they are protected by suitable chemicals. By further cooling, activity can be effectively stopped to give the sperm an almost indefinite life. Some of the sperm are killed in the freezing process but with correct processing, many survive and will revive on thawing. The temperature at which semen must be held if it is to retain the ability to fertilise is below minus 70°C. (i.e. 70°C below the freezing point of water. This is called the critical temperature.) This is much colder than the temperatures maintained in domestic deep freeze refrigerators. Liquid nitrogen boils at a temperature of minus 196°C. (196°C below the freezing point of water), so it is the most suitable refrigerant available. Straws of semen are frozen by suspending them in the vapour above the surface of the liquid nitrogen, to give a controlled rate of cooling and freezing. They are then stored in the liquid nitrogen until use. 5. QUALITY CONTROL Twenty four hours after freezing, a portion of each batch of semen is thawed and examined under a microscope. If the batch meets prescribed minimum standards for survival and motility, it is packed into goblets and transferred to storage units. Periodically, straws from each batch are checked for signs of deterioration in storage. 6. STORAGE For ease of handling and to minimise the risk of damage to the sperm through exposure, straws are always packed in plastic goblets. Semen should only be transferred to and from liquid nitrogen containers in goblets, because there is no safe exposure time for individual straws. Goblets are usually marked with the bull’s common name and the batch number. Straws are placed in vapour for freezing. Freezing is completed in liquid nitrogen. Figure 23. Goblets — sizes and capacities (mini-straws) Micro (5) (220)Hexi (80)Midi (25)Mini (10) Maxi (560) 7.1 mm 12 mm 22 mm 35 mm 65 mm9.2 mm 19
  • 26. Identification of straws Identification of individual straws in storage is not easy but following the guidelines below will assist. SEMEN LOCATION All suitable on-farm liquid nitrogen containers have numbered slots for seating each of the buckets. (Refer to the section on liquid nitrogen containers, below.) A ‘semen map’ on the lid of the liquid nitrogen container or in the kit box is a useful guide for locating semen stocks. GOBLET MARKING Any goblet purchased from a reputable AB centre will contain semen from one bull only. Two or more bull’s straws should never be put in the same goblet. Goblets may be of different colours and this may assist in identifying straws of a particular bull. Some AB centres also mark each goblet with a bull’s code and batch number. Remember, there is no safe exposure time for an individual straw. However, a goblet may be safely lifted from the bucket of a liquid nitrogen container for a short time – sufficient to read the goblet markings. STRAW MARKING (BATCH NUMBER) All straws are marked with the bull’s name, centre of origin and the batch number. Batch numbers specify the year and day of collection for each straw of semen (e.g. 04135 means a collection on the 135th day of 2004). Records of each day’s collections and the number of straws processed are kept by the centre of origin. Unlicensed semen Unlicensed semen is intended for use only by the owner or part owners of a particular bull. It is an excellent form of insurance for valuable bulls. Generally bulls collected for unlicensed semen production have only undergone minimal health testing. The semen is also often processed on non-licensed premises and may not meet the standards of quality control expected by purchasers of semen. Unlicensed semen is generally processed into wine red straws which should be identified by the letters UL. Other information, usually in code, includes: • the owner’s name • the collector/processor/AB centre • the bull’s name • the breed • the date of collection. Licensed semen Licensed semen must comply with minimum standards for identification, disease testing and packaging and can only be collected from bulls housed at a licensed semen production centre. A bull must proceed through quarantine, where tests are performed to determine if any transmittable diseases or genetic defects are present, before proceeding to the licensed area for semen collection. Straws of licensed semen must be clearly labelled with: • The bulls name • collection centre • date of collection • batch number The semen straws are often colour coded according to breed, however the majority of the licensed semen processed from tropically adapted breeds is packaged in clear straws. 20
  • 27. Liquid nitrogen containers All frozen semen used in Australia is transported and stored under liquid nitrogen, which is by far the most satisfactory refrigerant in terms of operator safety, ease of handling and availability. It also has a wide margin of safety in the temperature range for storage. Eighty per cent of the air we breathe is nitrogen gas. It can be converted to a liquid by cooling and compressing. The liquid has a boiling point of minus 196°C. Both the liquid and gaseous forms are relatively inert chemically and will not burn, support combustion or react in any way with other materials. These properties make it a very suitable refrigerant. SAFETY PRECAUTIONS Liquid nitrogen can be dangerous if not handled correctly because of its extremely low temperature. The following points must be given strict attention. Avoid contact with the liquid. Prolonged contact with the skin or contact with wet skin may result in severe burns. Contact with eyes (which are continually moistened by tears) may severely affect eyesight. Use metal forceps when removing straws from liquid nitrogen containers. Skin, if in contact with the cold metal of the buckets, will often stick and tear when removed. Insert objects into the liquid very slowly. This avoids the splashing which occurs when the liquid boils on insertion of ‘warm’ objects. When refilling containers pour the liquid slowly. This avoids ‘blowout’. If the nitrogen boils vigorously it may shoot out the neck of the container. Don’t use plastic funnels as these will crack and disintergrate. You should provide adequate ventilation when storing or transporting liquid nitrogen. Nitrogen gas is colourless, odourless and tasteless and, although inert, may cause dizziness and suffocation at very high concentrations because of the exclusion of normal air. Liquid nitrogen units are not designed to be transported in the passenger cabin of any motor vehicle. Use only the stopper supplied with the container. The stopper is designed to allow controlled evaporation of the liquid nitrogen. Attempted use of other stoppers will lead to dangerous pressure build up or to excessive loss of nitrogen. FIRST AID Flood the affected area with large quantities of unheated water and later apply cold compresses. If the skin is blistered, or if eyes or other delicate tissues are affected, seek medical attention immediately. 21 Figure 24. Cross section of a typical semen storage unit. LIQUID NITROGEN CONTAINER CONSTRUCTION Liquid nitrogen containers (or units) are like well engineered thermos flasks. They come in different sizes, shapes and prices according to the role for which they are designed. There are basically two types of unit available: Units designed for use at AB centres. These are characterised by very large storage capacity and large or ‘open’ necks designed for easy access. They require large quantities of liquid nitrogen and are generally unsuitable for farm use. ‘Long life’ units designed for farm use. These have ‘narrow’ necks and hence use small amounts of liquid nitrogen which makes them very suitable for field use. The narrow neck restricts the storage capacity of the unit. However, all of the units Inner wall Outer case Insulation Vacuum Plastic neck Nitrogen vapour Liquid nitrogen Cap holding buckets, slotted and numbered –130 to –140°C –196°C
  • 28. available have more than adequate storage capacity for most artificial breeding programs. MAINTENANCE AND USE OF CONTAINERS Semen must be stored at a temperature below minus 70°C to avoid deterioration in quality (fertilising capacity). Most units will maintain the temperature at well below minus 80°C with only a few millimetres of liquid nitrogen remaining. However, it is strongly advised that the level of liquid nitrogen never be allowed to fall below 15 cm. This ensures that straws may be removed for insemination while the other straws remain safely stored. The goblets will be full of liquid nitrogen allowing safer removal of straws whilst still keeping stored straws immersed. Goblets will not float out of buckets and empty their straws to the bottom of the unit when the liquid nitrogen is being refilled, and there will be sufficient reserves should unavoidable delays in liquid nitrogen supply occur. Measurement of liquid nitrogen levels is quite simple. A thin plastic rod or piece of dowel can be used as a dipstick. A frost line will indicate the level of liquid nitrogen if the rod is held in the unit for a short time and then exposed to the atmosphere. Figure 25. Cross section of a field container Figure 26. Dipstick Bucket Index ring Minimum safe level for single layer of straws Handle Liquid nitrogen Lifter Mini- goblet 15 cm Frost line Dipstick 22
  • 29. Forceps Operator 1 Goblet Operator 2 Lifter Field container Hire container Figure 27. Goblet transfer Plastic funnels will crack or explode and may spill liquid nitrogen. Figure 28. Metal funnel 23 Knowing when to top up liquid nitrogen A dipstick can be marked to indicate the level at which a refill of liquid nitrogen should be ordered. It is wise to leave a safety margin when ordering nitrogen. There have been instances when units have run dry because the nitrogen supply was delayed. One disadvantage of using a dipstick is that its use increases the rate of nitrogen loss and there is some risk to the operator as the liquid nitrogen may boil out of the unit when the warm rod is inserted. Under no circumstances use a metal rod or a hollow rod as a dipstick. A hollow rod is dangerous because boiling will force nitrogen through it and out over a considerable distance. An alternative method is to set a critical weight for the unit and weigh it at regular intervals. When the weight of the unit falls to the critical weight, more liquid nitrogen should be ordered. Perhaps the most satisfactory procedure is to work out the unit’s rate of nitrogen consumption and then, after assessing the safe storage period, place reminders to re-order at regular intervals on a calendar. Units should still be checked periodically to guard against breakdowns or slow leaks. In most cases the weakest point of the unit is in the non-metal neck section. The first and most visible sign is the appearance of a frost (from condensation) on the outside neck of the unit. If semen is to be saved it must be transferred as soon as possible to another unit. REFILLING PROCEDURES AND FIELD TRANSFER OF SEMEN Any semen which is ordered will be supplied in ‘hire units’ which will also contain nitrogen. 1. Place the hire unit close to the farm unit. 2. Determine from the packing slip in which bucket any ordered semen is stored. 3. Determine in which bucket you wish to place the ordered semen. 4. With the aid of another person, raise both buckets, using forceps, and transfer the goblets containing the semen from the hire unit to the farm unit. This must be done carefully. 5. Remove all empty goblets from the farm unit. 6. As soon as possible lower the buckets back into place. 7. After transfer of semen is complete, remove all buckets from the hire unit and with the aid of a metal funnel carefully pour all liquid nitrogen from the hire unit into the farm unit. 8. Replace all buckets in the hire unit and return them as soon as possible to the AB centre.
  • 30. VAPOUR SHIPPERS Small quantities of semen or embryos and biological samples may be transported safely in ‘vapour’ shippers. These contain a porous filler which absorbs and stores liquid nitrogen so that there is no actual free liquid to spill. They have only a single bucket so only limited numbers of straws can be transported. They are useful in situations where conventional tanks with free nitrogen are unsuitable. Points to consider when purchasing liquid nitrogen units There are a number of manufacturers of long life units suitable for farm use – Taylor- Wharton and M.V.E. are the most common brands in Australia. The advertisements, brochures and technical literature from all companies have common terminology although different standards may be applied to the terms used. Check these standards carefully before comparing the units. The terminology includes: • static holding time • working time • safe storage time • liquid nitrogen consumption • storage capacity. STATIC HOLDING TIME Static holding time is the time taken for all the liquid nitrogen to evaporate from a stationary unit from which the buckets have been removed and which is not opened. It is of limited value for selecting units, and not to be confused with the period of time for which semen may be safely stored. WORKING TIME Working time is the time taken for all the liquid nitrogen to evaporate from a unit in which the buckets are in place and filled with straws of semen. This term also is not to be confused with the period of time for which semen may be safely stored. The working time will be shorter than the static holding time because the semen and buckets displace some liquid nitrogen. The bucket handles also increase liquid nitrogen evaporation from the unit due to heat transfer from the atmosphere. Frequent use, i.e. opening the unit to withdraw semen, will also markedly increase liquid nitrogen consumption. Figure 30. Field bucket and lifter Long bucket for straws or ampoules Straw goblet lifter 24 Figure 29. Vapour shippers Vacuum maintenance system Insulation Necktube Outer casing Inner container Filler Canister
  • 31. SAFE STORAGE TIME ‘Safe’ storage time is the time taken for the liquid nitrogen level in the unit to fall to 15 cm. This term usually does not appear in promotional material supplied by the manufacturers. Field experience has shown that with normal farm use, the safe storage period is approximately one-half of the quoted static holding time for most units. LIQUID NITROGEN CONSUMPTION This figure will be quoted as liquid nitrogen consumption per day. The lower this figure the better. Any unit which uses more than 0.2 L per day is not suitable for field use. STORAGE CAPACITY Storage capacity of units is affected by the type of bucket and the method of semen packaging. There are two types of buckets available. The short bucket is suitable only for straws. The long bucket is suitable for ampoules in canes or two layers of straws. Although long buckets may double the storage capacity for straws in the unit, they shorten the safe storage time available if two layers of storage are attempted. Also the bottom layer of straws will remain inaccessible until the top layer has been removed. When selecting semen from the bottom layer a ‘lifter’ must be used to allow access. A typical long life unit has approximately the following storage capacities: • 294 ampoules if using seven ampoule canes • 480-720 medium straws if using two layers of straws packed into mini-goblets • 960-1440 mini-straws if using two layers of straws packed into mini-goblets. In using a single layer bucket, storage capacity is halved. If the straws are packed ‘bulk’, almost double the quoted number of straws may be stored. Due to handling difficulties, however, this method of storage is not recommended for farm use. As storage capacity for all long life units is more than adequate for farm use it is not a vital factor in the selection of a unit. Figure 31. Short and long buckets Double layer storage Straw Goblet Single layer storage Short bucket Long buckets (recommended for field use) Lifter Safe LN2 level 30 cm 15 cm 25
  • 32. Insemination technique Semen handling Correct semen handling technique is vital in the insemination routine. If maximum conception rates are to be realised, the following procedures should be adhered to. 1. Prepare insemination equipment as near as possible to the inseminating area to avoid undue delays. 2. Always prepare insemination equipment in a clear, dry and shaded area. Direct sunlight will injure sperm. Complete farm kit (for insemination with straws) Long life liquid nitrogen unit Dipstick for measuring nitrogen level Metal tool box 50 cm (or more) long (to hold pistolettes and sheaths) 1 (or more) mini-pistolettes with sheaths (pistolettes are sometimes called straw or insemination guns) 1 medium pistolette with sheaths Straw tweezers Clean, sharp scissors Arm length gloves of disposable plastic Glove lubricant Thawing flask and thermometer Paper towel Record book and semen inventory The same operation principles and loading procedures apply to both medium and mini-straws. Mini-guns (or mini-pistolettes) are suitable only for mini-straws i.e. 0.25 cc straws while medium guns and sheaths are suitable only for medium straws i.e. 0.5 cc. Universal sheaths – those with the green adapters – can be used for both mini and medium straws using the appropriate mini-gun or medium gun. Figure 32. Gun or pistolette PVA powder Cotton plugs Air space Tapered end slit Crimp mini-straw adaptor Plunger Taper Lock ring Barrel 26 A covered bail area with adequate restraint is essential
  • 33. Loading straw guns 1. Identify the bucket containing the required straw or straws by consulting the semen inventory (see previous chapter). Thaw straws only one at a time. Semen should be placed in the cow as soon as practical after removal from liquid nitrogen. 2. Place and prepare the kit box. Check the temperature of the thawing solution (see below under the heading ‘Thawing’ for information about the thawing solution). The temperature should be 35°C. 3. Lift the handle of the bucket from its notch, place it directly across the neck of the unit so that it now lies opposite its former position, then lift it to the desired height. Always keep the bucket as low as possible while keeping comfortable access to straws. 4. Remove the straw from the goblet using forceps. Grasp the laboratory end firmly, shake vigorously two or three times and place it immediately in the thawing solution. Shaking removes liquid nitrogen from the cotton wad on the manufacturer’s plug and minimises the risk of explosion and/or straw splitting. The laboratory end is always up in the goblets, the thawing flask and the pistolette. Avoid undue exposure of semen. Remember straws have no safe exposure time and once removed from liquid nitrogen should be used. When selecting and removing semen, work as far down the neck of the unit as is comfortable, preferably below the frost line. On cold mornings the lifter may be held up by use of a bulldog clip to avoid burning of fingers. When selecting and removing semen from the liquid nitrogen container always use forceps. If fingers are used there is a risk of burns from cold objects, and also a risk of damaging the semen due to heat transfer from the hands. 5. Return the buckets to their correct positions and replace the stopper. 6. Handle the straw only by the ends to avoid temperature fluctuation shock to the sperm. Remove the straw from the thawing solution and dry with towel or paper. Grasp the manufacturer’s end (the double wad end) and roll it between thumb and index finger to loosen the wad and facilitate easy ejection of semen. Recheck the name and number of the bull on the straw. 7. Remove the gun from its protective case and pull out the plunger to approximately the length of the straw. Place the straw into the insemination gun, manufacturer’s end first (laboratory end up). A stop in the barrel prevents the straw going further than the correct distance. Hold the gun and the straw vertically and tap the laboratory end gently with the scissors. This will make the air bubble go as far up towards the laboratory plug as possible. 27 Remove the straw using forceps Place straw in a thawing flask Straws should be thawed individually Wipe water from straw with paper towel Roll the manufacturers end and place in the gun
  • 34. 8. Wipe the scissors. This avoids contamination of the straw about to be cut. Hold the loaded gun vertically at eye level and with scissors make a horizontal cut at 90° to the long axis of the straw through the air bubble, immediately below the laboratory plug or crimp. At least 1 cm of the straw should protrude from the end of the insemination gun. This, together with an accurate cut, is necessary to ensure a perfect seal between the straw and the sheath which is placed over the ‘barrel’. Wipe scissor blades after cutting the straw to avoid contaminating the next straw to be cut. 9. Remove the sheath from its protective container and place it over the barrel. (Handle only the split end to keep the sheath clean.) Holding the lock ring above the tapered section, push the sheath on over the tapered section and through the lock ring until the end of the straw and the inside edge of the sheath are flush. Twist the lock ring and push it onto the tapered section to lock the sheath into position. 10. Push the plunger in until semen is just visible at the end of the sheath. This shortens the span of the fingers and thumb required when depressing the plunger during insemination. It also removes the chance of carrying contamination from the vagina into the uterus by eliminating the hollow space at the end of the sheath. Do not load more than two guns at any one time. 11. Insemination of the cow, as described in a later section, can then begin. After insemination 1. Loosen the locking ring. Do not allow it to slide onto the soiled part of the sheath. 2. Slide the sheath off the barrel. The straw will be removed with the sheath. 3. Re-check the name and batch number of the bull and record them in the breeding management records. 4. Discard the sheath and straw and dispose of them hygienically. Preparing equipment for insemination with ampoules or pellets The same equipment can be used for both ampoules and pellets. Pellets are drops of diluted frozen semen which are stored in bulk. They are no longer used commercially as individual doses cannot be identified. While they are not comonly used, the procedure for ampoules is described below. Caution, ampoules can explode if handled incorrectly – use protective eyeware. 1. Place and prepare the kit box. Select semen as for straws. It may be necessary to remove ampoules from canes with fingers. 2. Place the ampoule in thawing solution (iced water). Ensure straw is correctly loaded to the stop 28 Cut the manufacturers end at 90° Place the sheath over the gun Fasten the locking ring Take disposable glove, lube and paper towel to insemination crush
  • 35. 3. Remove and dry the ampoule thoroughly with a paper towel. 4. Attach the plastic insemination rod to the syringe and adaptor or to a plastic squeeze bulb. When using a syringe make sure that the plunger is not fully depressed, i.e. withdraw it slightly so that 0.25 to 0.5 cc of air is in the syringe. 5. Break the neck of the ampoule. Most ampoules are scored with a break point to make this step easier. If the ampoule is not scored then score or rasp it lightly with a scoring file. (A nail file may suffice if nothing else is available.) 6. Slowly insert the plastic insemination rod into the ampoule. At the same time carefully withdraw the plunger of the syringe so that semen is drawn up into the insemination rod. Avoid bubbles in the rod. If a plastic squeeze bulb is used, squeeze the bulb prior to insertion of the plastic rod. Slowly release the bulb when inserting the plastic rod so that the semen is drawn up into the rod. 7. Inseminate the cow following the procedure described later in this book. 8. Make sure all semen is expelled in the cow using the air reserve left in step 4. The procedure for pelleted semen is the same as that for ampoules, except that the semen is withdrawn from a container holding the thawed pellet in reconstituting diluent, and not from an ampoule. UNIVERSAL GUN The Universal gun can be used for all known methods of semen packaging when used with its blue or ‘stiff’ sheath (i.e. for ampoules, fresh semen or pellets and similarly packaged semen). The plunger of the gun with the plastic pumping adaptor of the blue sheath forms a piston. This has a syringe like action in the sheath. Semen can be sucked into and expelled from the sheath by withdrawing and depressing the plunger. The green plugged or universal sheath can be used for all straw systems. The loading procedure is exactly the same as for the standard mini or medium straw guns. However, the tapered section of the barrel is removable allowing the barrel to be reversed to adapt to either mini or medium straws. When using the universal gun it is essential that the sheath and tapered section be securely locked into place with the locking ring to avoid ‘disintegration’ of the gun during semen deposition. Thawing Research has shown that maximum sperm survival rate is achieved when the thawing procedure is the reverse of the processing and freezing procedure. The processing and freezing steps are a gradual lowering of temperature to minus 196°C. To achieve the reverse, i.e. a raising of temperature from minus 196°C to 35°C, a thawing solution must be used. Fluid achieves a much more rapid thaw than the hottest of air. For this reason, thawing in the air, in gum boots, your mouth or in the cow is not recommended. 29 Conception rates will be lowered if semen is not correctly thawed. This applies particularly to bulls whose conception rates are naturally low. Recommended thawing procedures MINI -STRAWS AND MEDIUM STRAWS 1. Place straws in water of 34°C to 36°C, for a minimum of 30 seconds. 2. Never submerge the straw completely. Leave 1 cm at the laboratory end exposed to avoid the entry of water in case of imperfections during processing. Baby bottle warmers make ideal thawing flasks. The temperature must be measured using a thermometer. AMPOULES Ampoules should be thawed in iced water (5°C).Figure 33. Dial thermometer Water level Straw 35° C 20 mm
  • 36. Insemination of the cow The first attempts at artificial insemination involved deposition of the semen in the vagina, but fertility with this technique was low. Some improvement was achieved with the introduction of the speculum method for insemination, as semen could then be deposited in the cervix. Conception rates were greatly improved following the introduction of the recto-vaginal technique. In the recto-vaginal technique, an insemination instrument is inserted into the vagina and guided through the cervix by a gloved hand in the rectum controlling and fixing the cervix. This method of insemination is the most efficient in terms of results, labour and hygiene. It should be carried out as follows: 1. Load insemination equipment as indicated in an earlier section. 2. Put on a glove and lubricate it with glove lubricant. Try to keep the hand holding the insemination instrument as dry as possible. Never load guns with a glove on. 3. Carry the loaded gun in your mouth, to leave both arms free. Avoid contact between the gun and any object near the insemination area. Contamination may cause infection and reduce conception chances. 4. Let the cow know you are there by talking while approaching slowly. Lift the tail, form the fingers into a cone and, with a twisting motion, gently insert your gloved hand into the rectum. Locate the cervix. Do not force your hand into the cow’s rectum as it is possible to rupture it. This could result in the cow’s death. Figure 35. Opening vulva lips 5. Check that the cow is not pregnant (follow the procedure on pages 10-12). 6. Release the cervix and uterus. Remove all traces of faeces and water from the vulva with a piece of paper towel. Spread the fingers of your gloved hand and pull your arm backwards. At the same time push your wrist down and to the left to open the lips of the vulva. The insemination gun can now be inserted with minimal contamination. 7. The point of the gun must be introduced at an angle 30° below the horizontal to pass along the top of the vulva and vagina. This avoids the entrance to the urethra and urethral diverticulum which lie on the floor of the vagina. Down and left with heel of hand Lips open Insert gun Figure 36. Gun insertion angle Rectum Broad ligament Ovary Horn Bladder Pelvis CervixGun Vagina 30 > > 30° Figure 34. Insemination method Rectum Broad ligament Ovary Horn Bladder Pelvis Cervix
  • 37. 8. Gently move the gun forward until a distinct grittiness is felt, indicating that the cervix has been reached. If the gun is caught in a vaginal fold it may be necessary to push the cervix forward to straighten out the fold. 9. By manipulation of the cervix and gentle pressure on the gun, it should be possible to guide the tip of the gun through the cervix and into the uterus. The tip can usually be felt through the thinner wall of the uterus. The gun must not be carried further forward than just through the cervix (1 cm at the most). The maximum pressure which should be placed on the gun is that which can be obtained when holding the gun with the thumb and one finger. With repeat cows (i.e. cows returning on heat), many sources recommend placing the gun only up to the middle of the cervix because up to 3% of pregnant cows may cycle at 3 and 6 weeks. Intra-uterine insemination may be harmful in these cases. Midcervical insemination is much safer. 10.Slowly deposit half to two-thirds of the semen in the body of the uterus and the remainder in the middle of the cervix. 11.Remove the gun from the tract and massage the cervix and uterus for a few seconds to stimulate the release of oxytocin. Rough handling upsets the cow and causes the release of adrenalin which counteracts the effect of oxytocin. 12.Loosen the locking ring of the gun but do not allow it to slide onto the soiled part of the sheath. Slide the sheath off the barrel. The straw will come away with the sheath. Do not discard the sheath and straw until records have been completed. Burn the sheath and straw and disposable glove to avoid possible disease transmission. 13.Release the cow from the bail or crush. 14.Observe personal hygiene measures by washing in disinfectant and cleaning boots. Maintain equipment properly. Dismantle guns for cleaning and wash them in methylated spirits. Figure 37. Obstruction by vaginal fold Vaginal fold Diverticulum Figure 38. Pushing to straighten vaginal folds Figure 39. First deposition site Annular rings Body of uterus OS Fornix Cervix 1 cm Figure 40. Second deposition site Mid-cervical deposition 31
  • 38. Figure 41. Timing Timing of insemination Correct timing of insemination is as important as correct placement of semen. Field experience has shown that the best results are obtained when the insemination is performed at or near the end of oestrus. The beginning and end of oestrus are very difficult to determine. The simplest practical method of timing inseminations is to use the a.m. – p.m. rule. Cows first seen on heat Insemination time Morning (a.m.) Same afternoon (p.m.) Afternoon (p.m.) Next morning (a.m.) • Two-thirds of cows commence oestrus at night and so will first be seen on heat in the morning. • With heifers and some Bos indicus breeds, many authorities do not recommend the a.m. – p.m. rule. They recommend that these animals should be inseminated soon after the first observed oestrus. Dual placement of semen The reason that placement of semen both in the uterus and the cervix is recommended (see step 10 in the insemination procedure above) is that it helps to overcome the unpredictability of ovulation times. In cattle, ovulation can occur from 2 to 26 hours after the end of heat. Semen deposited in the body of the uterus reaches the fertilisation site quickly to fertilise an ovum that is released earlier than normal. Semen deposited in the cervix survives longer. Due to its slow release from the cervix it is more likely to fertilise an ovum released later than normal. Figure 42. Sperm reach ovum quickly Figure 43. Sperm reach ovum slowly Mid-cervical deposition Fertilisation site Uterine body deposition Semen Semen Ovary 32 Commencement of standing heat Oestrus Time in hours Chanceofconception Optimum insemination time Average time of ovulation Poor Good
  • 39. Hygiene Hygiene precautions are observed to minimise, if not eliminate, the physical transfer of infective disease agents: • between farms • between animals • from animals to humans • into the cervix and uterus • from miscellaneous sources. PREVENTING TRANSMISSION BETWEEN FARMS Protective clothing. If possible wear rubber footwear and either overalls or a cape on the farm. If this clothing becomes soiled it can be cleaned more readily than ordinary clothes. Use disposable plastic overshoes on farms which are known to have a disease problem. Washing. Scrub buckets and boots, paying particular attention to the tread on the sole. Chemical agents. Use soap and/or antiseptics to improve the efficiency of all cleansing procedures. Towels. Use disposable paper towels. Minimise equipment. Take the minimum of equipment into the dairy or shed. The more items carried, the greater is the likelihood of transmitting infective agents. Apart from the bucket and scrubbing brush, all items should be carried in an equipment box. PREVENTING TRANSMISSION BETWEEN ANIMALS Use disposable equipment once only. Do not split straws or re-use sheaths or insemination rods. When more than one cow is to be inseminated, the technician should use a fresh disposable glove for each insemination. PREVENTING TRANSMISSION FROM ANIMALS TO HUMANS Gloves. The use of long ‘obstetric gloves’ is recommended. If gloves are not worn there is a strong possibility of serious infection occurring even though soap and/or antiseptics may be used for thorough washing immediately after insemination. Cuts and abrasions on the hands may permit the entry of infection. Don’t smoke. Smoking while handling contaminated insemination equipment is a sure way of transmitting infection to humans. PREVENTING TRANSMISSION INTO CERVIX AND UTERUS Clean the vulva. Cleaning of the vulva prior to introduction of the insemination gun should receive careful attention. When gross contamination is present, a clean paper towel should be used for a final cleaning. Ensure the lips of the vulva are closed during cleaning to prevent faecal material entering the vagina. Open the vulva. No matter how thoroughly the vulva is cleaned, the area will never be sterile. For this reason it is essential that the lips of the vulva be parted to permit free entry of the tip of the insemination gun. Opening of the vulva is part of step 6 of the insemination procedure above. Opening the vulva can generally be achieved by wrist pressure directed downwards and to the left. With some cows it may be necessary to draw the cervix back and/or stroke the wall of the rectum before applying wrist pressure. These methods prevent introduction of the insemination gun into the suburethral diverticulum. If they don’t work and no assistance is available, place a piece of paper or cotton wool into the vulva so that it remains open enough to allow clean entry of the gun. MISCELLANEOUS SOURCE OF INFECTIONS Interference by pets or children. Take precautions to ensure dogs, cats and children will not interfere with insemination equipment that is left unattended. Accidental contact. Avoid contact between the insemination gun and shed walls, posts, rails, switching tails, etc. 33
  • 40. Dirty insemination guns. Clean insemination guns regularly. Dismantle them and wash them in methylated spirits or boil for 10 minutes. Reassemble only when dry. Do not simply wash in water or disinfectant as this will lead to gumming up or corrosion of the gun. Dust. Avoid unnecessarily dusty conditions. Make sure the hammermill or other dusty equipment are not going to be used during insemination times. Faults in AI technique Serious faults in insemination technique have been encountered among technicians with many years experience as well as among those recently trained. The insemination of a cow is a complex operation and should be treated as such. By far the biggest cause of faults is complacency. Overexposure of semen Frozen semen has a critical temperature of minus 70°C. If the temperature of the dose is raised above this level and re-frozen, sperm will be damaged. Ampoules allow a considerable safety margin, and exposure for 30 seconds is acceptable as long as sufficient time is allowed for re-freezing. The only time a straw should be removed from liquid nitrogen is when it is transferred from the container to the thawing solution. There is NO safe exposure time for straws. There are some basic rules to observe to avoid overexposure. • Avoid raising the bucket above the frost line in the neck of the unit. • Use forceps to handle straws, working as far down in the unit as possible. • Never identify a straw by exposing it to read the bull’s name. Identify semen by markings on mini-goblets and by an index for the container. If an individual straw has to be examined, handle it with forceps under liquid nitrogen. Place the mini-goblet in a bath of nitrogen and ensure that all the straws are covered by the liquid. Remove the straw from the goblet but keep it under the liquid. Bring the dose close to the surface to identify it. Do not raise it above the level of the liquid. • Always lower the canister back into position as soon as the dose has been removed and placed in the thawing solution. Replace the lid immediately. • Make all movements swift and precise when handling frozen semen. • Never allow the level of liquid to fall below the tops of the mini-goblets. This level provides a margin of safety and avoids the inconvenience of goblets floating out of the canisters when the unit is refilled. • Never remove semen from the liquid nitrogen unit prior to restraining cows. Incorrect site of semen deposition Inability to pass an insemination gun through the cervix, or difficulty in doing so, is primarily due to inexperience. A greater and far more common mistake is to pass the gun too far into the uterus. This fault is prevalent, irrespective of experience, and is caused solely by inattention to detail. The best fertility is obtained by depositing half to two- thirds of the semen in the uterine body and the remaining semen in the middle of the cervix. Since the uterine body is only 2 to 5 cm in length, uterine depositions must be made just through the cervix (see ‘Insemination of the cow’, above). Rapid sperm migration to both oviducts is facilitated by deposition in the body of the uterus. Figure 44. Depositing semen all in one horn reduces chances of fertilisation. Inactive ovary Fertilisation site Active ovary Right horn 34
  • 41. Figure 47. Wrong way Sperm deposited in the cervix survive longer than sperm deposited in the uterus, therefore partial cervical deposition is advantageous for cows in early oestrus, and for cows having delayed ovulation. Passing an insemination gun too far through the cervix reduces fertility because: • All the semen is likely to be in one horn, which lessens the chance of sperm migrating to both oviducts. • Laceration of the extremely delicate endometrium is likely, even when organs are handled gently. Blood is spermicidal. The use of force to overcome difficulty in passing the insemination gun through the cervix is a frequent cause of laceration. This may lead to sterility because of adhesions. Finger and thumb pressure on the insemination gun is the maximum that should be used. If the gun cannot be manipulated through the cervix, then all semen should be deposited in the middle of the cervix. The placement of the gun is best checked through the side walls of the body of the uterus with the index finger and thumb from opposing sides, or with the index finger from underneath. After insemination always check the tip of the sheath and straw for the presence of blood. This can be done whilst massaging the cervix after insemination. When feeling for the gun the index finger should not be placed on top of the soft wall of the uterus as the finger may push the sharp tip of the gun into the uterus wall and cause it to bleed. Rough handling and poor technique may cause the rectum to balloon, making it impossible to manipulate the cervix successfully. Removal of the ballooning may be attempted by placing one or two fingers through the constricting ring at the end of the ballooned area and gently massaging. This may induce the rectum to contract and blow the offending air, together with some faeces, out past the arm of the operator, resulting in relaxation of the rectal wall and giving the operator a good opportunity to grasp the cervix. This technique may also be used to clear faeces from the rectum. Figure 45. Damage to endometrium Laceration Dead sperm Blood Figure 46. Check gun placement Vagina Index finger under uterus For clarity the rectal wall is not shown Blood Index finger on top of uterus Figure 48. Removal of rectal balloon 35
  • 42. Poor seal between straw and sheath If the gun is loaded incorrectly some semen will escape into the sheath and perhaps into the barrel. This reduces the number of sperm available for fertilisation. Inspect the equipment after insemination to ensure that your loading procedure is correct. After loading, the tip of the sheath should be carefully examined for cracks. There have been cases where straws have been pushed through the sheath and into the tract when deposition was attempted. Sheaths which have been exposed to sunlight will become brittle, crack and shrink. All faulty sheaths should be discarded. There may be back flushing of semen into the vagina and an uneven distribution of the semen if the plunger is not pushed in slowly and smoothly. Failure to loosen the manufacturer’s plug by rolling before loading the gun may make depression of the plunger difficult. Figure 49. Poor seal Oblique cut Flaw in sealPlunger Semen leakageManufacturer’s plugSheath Gun tip 0.5 ml straw Neglecting to open the vulva Opening the vulva before the introduction of the gun is a hygiene precaution of major importance. Irrespective of the cleaning precautions practised, there will be heavy bacterial contamination of the vulva. Transfer of bacteria directly into the uterus is therefore inevitable unless the vulva is opened adequately. In most cases pressure backwards, downwards and to the left with the wrist (for operators with their left arm in the rectum), will adequately part the lips of the vulva. Alternative approaches for difficult cows are: Figure 50. Bladder insemination Wrong angle • to draw the cervix backwards as wrist pressure is applied • to move the hand slowly back and forth in the rectum several times before applying wrist pressure • to massage the cervix and uterus before attempting to open the vulva. Drawing the cervix backwards as wrist pressure is applied increases the likelihood of passing the gun into the urethra. Particular care must therefore be taken to ensure that the insemination gun is introduced at an angle 30° below the horizontal. Drawing the cervix backwards will also form folds in the vagina. Consequently, the cervix has to be pushed forward once the gun has been introduced to the vestibule of the vagina. Thawing Thawing of semen straws in water at 35°C is recommended because sperm revival is increased due to the faster thawing rate. During cold weather when straws are thawed in warm water, the insemination gun should also be warmed up. This can be achieved easily by holding or rubbing in the hands. The semen should be placed in the cow as soon as possible after thawing. Straws must be carefully dried after thawing and before loading the gun. 36
  • 43. Preparing for an AB program Summary of planning steps 1. Check the feasibility of the planned program. There must be definite reasons and benefits for attempting a program. Consider whether these can be achieved more easily and cheaply by other methods. 2. Determine the best time to attempt the program. Consider the availability of feed and labour; the farm work load; and existing animal husbandry practices such as calving patterns, weaning times, etc. to see if these will be compatible with the program’s implementation. Also avoid times of environmental stress such as periods of extreme heat or cold. 3. Determine the type of program to be undertaken i.e. observed natural heats or synchronised program. 4. Make provision for suitable paddocks to house the breeding herd for observation. Consider paddock location and size, shade, feed and water. If supplementary feeding is needed, order it or provide it ahead of time. Cows should be fed sufficiently so that they are gaining weight for six weeks before and six weeks after the program, to ensure maximum calf drop. 5. Select and identify cows to be included in the program. Work them through the yards to get them into a routine. Tag cows before commencing the program. Only those with maximum conception chances should be included. Select the cows and plan the feed up to one year ahead and maiden heifers are most suitable for many beef programs. 6. Check the restraint facilities before the program starts. 7. Order equipment, semen and nitrogen before it is required. Leave precise delivery instructions with the AB centre. Delays can be costly. Ensure that sufficient equipment, semen and nitrogen are on hand and make provision for rapid re-supply if necessary. 8. Have clean up bulls on hand (one bull per 100 cows) at the completion of the program if required. An AI program will require significant input before, during and after the actual insemination procedure. Such programs should not be undertaken unless there are well- defined benefits and foreseeable outcomes. While there are many factors that can limit the success of any program, there is no compromise for good planning, preparation and adherence the guidelines for good heat detection and insemination technique. An AI program will require significant input before, during and after the actual insemination procedure. Such programs should not be undertaken unless there are well-defined benefits and foreseeable outcomes. While there are many factors that can limit the success of any program, there is no compromise for good planning, preparation and adherence the guidelines for good hear detection and insemination technique. Reasons for conducting and AB program Traditionally AI was promoted as a way of controlling reproductive disease and improving the genetic composition of any herd. In areas where venereal disease can be a problem, AI can reduce the spread and incidence of these diseases. With many breeds using Breedplan and Group Breedplan, the use of AI has allowed for the improved evaluation of animals across a range of environments. The interwoven network of progeny as a result of AI has provided a strong base for accuracy in the Breedplan and Group Breedplan values. AI has provided stud managers with the ability to produce a greater number of progeny from a fashionable bloodline or performance trait. The international sale and transfer of genetic material is a much cheaper when compared to the alternative of importing or exporting the animals. 37
  • 44. The environment also plays an important part. For beef producers planning a cross breeding program, non adapted breeds can be used in an AI program without the problems of managing a non-adapted bull in a difficult environment. On a small holding AI can remove the need for a bull and the associated management problems as well as allowing the use of a range of genetic materials throughout the small herd. On large holdings AI is commonly used in bull breeding programs to breed replacement herd bulls. The results of any AI program are government by many factors. When budgeting and planning any program, be realistic about the results. Consideration should be given to the possibility that the results may be poor (e.g. low conception and calving rates). Many factors will contribute to the overall results of a program. The oestrus detection method, nutritional status of the herd, the temperament of the individual animals, the skill of the inseminator, the environment (e.g. mean daily temperature), and facilities for the AI program can all affect the results that a producer can expect from an AI program. Good preparation and management of a program is essential but this does not always guarantee high conception rates. Costing an AI program The cost of landing an AI calf on the ground will vary tremendously. Before a program is attempted it is advisable that a budget is prepared. It is possible, but not common, for a well conducted AI program to produce calves at a cost comparable with those produced by natural service. Budgeting The cost of AI calves will differ depending on the price of the semen used, the type of program to be used, (depending on whether synchronisation drugs are used) and on the results obtained from the program. Realistically all costs should be included and should at a minimum take account of the following :- Labour. Labour must be costed at a realistic level, even for self administered programs. It takes highly skilled labour to successfully conduct an AI program. Labour will be needed for mustering, heat detection, synchronising drug administration procedures (if applicable), cow identification and drafting, restraint, insemination procedures, record keeping and equipment maintenance. Equipment & infrastructure. Provision and maintenance of suitable facilities for restraint and cattle handling procedures should be maintained. The yard structure should be designed to handle and hold the required number of animals and minimise the stress on both the animal and operators during the detection and drafting processes. A strong crush with an easily operated kicking gate is best to inseminate the cows. Provide a roof area, at least over the crush, as this will minimise any damage to the semen by sunlight and offer some weather protection for the operator. Prior to the commencement of the program check that: • The yard fences and gates are in good repair • All the hinges and catches are working correctly • All moving parts well are lubricated. Animal husbandry procedures. Labour and other costs are incurred during the selection of suitable cows for inclusion in the program before it even starts. These costs need to be recognised. Costs are involved with the pregnancy testing and also with the methods used for monitoring the success after the completion of the program. Welfare and nutrition. The provision of suitable feed and water, over and above the 38