SlideShare a Scribd company logo
1 of 291
DSLRs
Dr Maulik Suthar
• 1. An Overview of digital camera technology
• 2. Basic photographic techniques.
Content
• Common photography terms with explanations
• Basic gear and explanations of common lenses
– Understanding shutter speed
– Understanding aperture and F-stops
– Understanding ISO
• When to use auto mode
• Achieving great focus
• Rules of composition (and when to break them!)
• Metering light and using histograms
• How to use white balance
• How to use reflectors like a pro
Oh the Technology!
• D-SLR (single-lens reflex),
• Megapixels,
• Image Stabilization (IS & VR),
• Dust Reduction,
• Live View,
• Sensors,
• facial recognition..........
What does it all mean?
• (and why does it matter to me?)
Introduction to Digital Cameras
Knowing Your Camera
4
Digital Cameras can be seem like a
complex piece of equipment. Knowing
some of the basics of your camera will
help you choose the right camera and
produce quality photos.
What is a Digital Camera
A camera that takes video or still photographs
(or both) digitally by recording images on a
light-sensitive sensor.
DSLR Camera
• Top of the line camera; primarily used by
professionals.
• Include high quality lenses, and often
interchangeable.
• Often accepts other accessories such as filters.
• Produce very high resolution photos.
5
Digital Photos Overview
• Digital Photos are made up of pixels (picture
elements).
• DPI vs PPI
– DPI - Dots Per Inch (How a printer prints the image)
– PPI – Pixels Per Inch (How a monitor displays an image)
• The resolution of a digital photo is its pixel
dimensions.
• Digital Cameras use megapixels to specify the
pixel dimensions of its photos.
6
Types of Digital Cameras
• Ultra Compact
Digital Cameras
• Compact Digital
Cameras
• Advanced Digital
Cameras
• Digital Single Lens
Reflex (DSLR)
Cameras
7
Ultra Compact Digital Camera
• Typically a small and
inexpensive camera.
• Can easily be carried in a
pocket or purse.
• Usually have fewer
features than the higher
end cameras.
8
2006-06-01
Point and Shoot digital Cameras (P&S)
o - Commonly referred to as “consumer”
digital cameras.
o - Represent probably 90% of all digital
cameras on the market
o - Typically small, compact and
lightweight
o - Targeted at broad majority
o - Typically very User-Friendly
o - Image Quality has improved drastically
Compact Digital Cameras
• The typical digital camera used for taking most pictures by
consumers.
• Includes most of the features the average person would need.
10
2006-06-01
Prosumer Digital Cameras
• -Not technically its own specification
• - Common term used to describe
advanced models of P&S
• (now also used to describe many
entry level DSLR's)
• - Similar in shape and appearance to
Digital SLR's
• - Typically have extended zoom range
(8-12X Optical Equiv)
• - Typically combine user friendly
• P&S features with more advanced
• manual features.
Advanced Digital Camera
• Designed for the
more skilled or
hobbyist
photographer.
• Usually has
higher quality
lens and zoom.
12
2006-06-01
Digital SLR (DSLR)
• SLR Stands for Single Lens Reflex
• - Have larger sensors, resulting in greater image quality
• - Tend to favor manual control, lacking many automatic settings found on P&S
• - Much larger and heavier
• - Ability to interchange system lenses
2006-06-01
• So What is the REAL difference between a digital SLR
and a point and shoot camera?
2006-06-01
The short answer is.....Image Quality
• But Why?
• How can a 6 megapixel DSLR take a better
picture than a 24 megapixel point and shoot?
•Because Size Matters!
2006-06-01
How the digital sensor works
• - Each digital image is made from millions of tiny squares, known
as pixels.
• - Essentially, an image is recorded by tiny microlenses (pixels)
which make up the cameras sensor
2006-06-01
• All Pixels are not created equal!
• -A digital sensor is essentially
made up of millions of tiny
micro-lenses (pixels)
• - Pixels are analog devices
which record light and color
data
• - Larger Sensors contain larger
pixels, which are much better
and collecting this data
Digital Sensors Compared
Full-Frame versus APS-C Sized Sensors
2006-06-01
Digital Camera Features and Technologies
• Megapixels – Determine the total size (Dimensions) of the
image recorded by camera
• - More MP does not always mean a better picture
• - Digital Image dimensions do not equal print dimensions
• - For example a full quality image from an 8 megapixel camera
• will produce a digital image measuring approximately 9X14
inches but printing standards say that you should not print to
“Photo Quality” any larger than 8X10
Megapixels Vs. Print Size
Megapixels
Megapixels Pixel Dimension Max Quality Print Size
2.0 1600 x 1200 4” x 6”
3.0 2100 x 1500 5” x 7”
4.0 2400 x 1800 8” x 10”
5.0 2500 x 1900 9” x 12”
6.0 3000 x 2000 11” x 14”
8.0 4000 x 2000 12” x 16”
22
The following guide will help you know what size of high-quality print you
can expect from each megapixel rating.
Multiplying the pixel dimension will give you the exact megapixel rating.
The rating stated by the manufacturer is usually rounded.
Megapixels
• A higher megapixel rating does not always
mean higher quality photos.
• A camera’s megapixel rating will help you
determine the largest size of prints you can
expect to make without sacrificing the quality
of the image.
23
Megapixels
24
4 megapixel
8 megapixel
2400 x 1800
4000 x 2000
8” x 10” print
The 8 megapixel will not produce a better quality
8” x 10” print than the 4 megapixel.
MegaPixel and Image Size
1,000 megapixels or 1 GigaPixel
Canon 1200d
Rs. 24,560
Nikon D3300
Rs 27,999
Sony alpha 58
Rs. 30,990
Make it cinematic
Anatomy of a Camera
Anatomy of a Camera
Anatomy of a Camera
Anatomy of a Camera
Accessories
Electronic Viewfinder
• An electronic viewfinder, or EVF, is a viewfinder in which the
image captured by the lens is projected electronically onto a
miniature display. The viewfinder shows exactly what the lens
sees.
46
Optical Viewfinder
• A window on the back of the camera you look through to
position the shot.
• The primary drawback to the optical viewfinder is the
parallax, displacement or difference in the apparent position
of an object viewed along two different lines of sight.
47
Viewfinder
• Unlike with compact cameras, where you compose
your shots by looking at the back of the camera
(LCD screen), on the DSLR, you’ll usually look
through the eyepiece of the viewfinder for
composing, focusing, and viewing certain
information provided by the camera.
• Some DSLRs will allow you to use their LCD monitors
the same way you would with a compact camera,
but you won’t usually take photos this way.
LCD Monitor
• One of the biggest advantages of your DSLR is its
ability to preview an image immediately after
you take a picture. The LCD monitor is located on
the back of the camera and may have a swivel
capability so that you can orient the screen for
easier view from different camera positions.
• As you take each shot, a preview of the image
will appear for a short time on the LCD. This
monitor also gives you access to image data and
the camera’s menu system.
LCD/OSD
An on-screen display (OSD) is information
about the camera’s settings displayed on the
LCD screen.
Live View
• Refers to the ability to use the lcd screen on the camera the same
way you would use the viewfinder
• Shots can be composed even while holding the camera away
from your face
• Originally only a feature in P&S, DSLR’s now use Live View also
Facial Recognition
• Camera detects faces in your frame based on color,
contrast change, etc.
• Focus is automatically adjusted so detail in faces is high
• Color and contrast are automatically adjusted to create
pleasing skin tones
Camera Bag
• Purchasing a cool, sophisticated, cutting-edge camera is one thing. Getting
a camera bag to support, hold and protect your camera is another.
Welcome to Flipkart's mind-boggling array of camera bags that will not
only satiate your requirements, but will also effectively give you the
benefit of heading out with confidence on your outdoor ventures with the
camera of your choice, securely by your side.
Camera bags are the perfect accessories for photography enthusiasts and
professionals who require one bag that carries all of their camera-based
essentials. Before investing in a camera bag, ensure that the bag is able to
accommodate your camera model and make sure that the bag is
waterproof with plenty of internal pockets to store extra additions safely
and securely. Additions such as batteries, backup lenses, charger units, SD
cards, pocket tripods and many such accessories should be
accommodated without a fuss.
Camera bags are divided into multiple types such as holster, the belt pack,
shoulder bag with one strap, backpacks, slings and so on. Choose a type or
a model that is most convenient to you
Why Batteries?
Batteries are the soul of
photographic equipment
Types of Light
• Sunlight
• Moonlight
• Good Light
• Bad Light
• Soft Light
• Harsh Light
• Storm Light
• Flash Light
• Incandescent
• U.V. Light
• Black Light
• Fluorescent
• Indirect/Bounce
• Highlights
Movement Compensation
• Refers to the cameras ability to correct small
movements by the user while taking a
picture, in order to reduce the blur caused
by camera shake.
• Very Useful in low-light or telephoto
situations
Movement Compensation
• Represented differently by different
companies:
• Nikon – VR – Vibration Reduction
• Canon – IS – Image Stabilization
• Sony – SSS – Super Steady-Shot
Dust Reduction
• Dust is more of a problem in DSLR's due to changing lenses
• Once dust gets on your sensor, it can be difficult to remove
• Dust reduction is essentially a mechanism which shakes
the cameras sensor to free any clinging dust particles
• Special anti-static coatings or filters may also be used
File Format
• Refers to the way the computer stores
the data
• More common formats include:
– JPEG
– EXIF
– TIFF
– RAW
JPEG
• Stands for Joint Photography Experts
Group
• Most widely used format
• Biggest advantage - can compress image
data
• Do not edit JPEG images in photo-editing
programs to minimize data loss
EXIF
• Stands for Exchange Image File Format
• Used by many digicams
• Is a variation of the JPEG format
• Stores extra data as metadata with the
image file
• Metadata stores shutter speed, aperture,
and other capture settings
TIFF
• Stands for Tagged Image File Format
• Is the choice for bringing images into
publishing programs
• Does not compress as much as JPEG
• Choose when picture quality is more
important than file size
RAW
• Simply means raw
• Used by high-resolution digicams
• Does not include any in-camera
processing features
• Provides a truer version of the scene in
front of the camera
• Large file size
Back
DSLR Camera Image File Formats
JPEG (.jpg, .jpeg)
• require little, if any, color and exposure correction.
• undergo less scrutiny.
• need to be delivered, printed, or distributed quickly
(often straight from the camera or memory card).
• take up less media storage.
Raw (e.g. RAW, CR2, NEF)
• Provide you with plenty of image detail and data to make
reasonable adjustments without compromising image quality.
• Offer the maximum available image data, thus provide the
potential for generating the highest quality images your sensor
can record.
• Take up to several times the media storage than do JPEG files.
• Must go through a Raw file conversion process which adds an
extra step before distributing, displaying, or printing images using
the normal JPEG format.
• Do not have camera color balance, exposure, or other settings
“baked-in,” so you are free to apply these adjustments (within the
boundaries of the available data) after image capture.
Getting a “Good” shot
• While there are hundreds of factors which
can make a photo “good”, it is still a relative
term, and good to one person may not be
good to someone else.
• For our purposes we will refer to good in the
sense of a correct exposure.
Exposure
• A “correct” or “good” exposure occurs when you maintain as
much detail as possible in both the very bright parts (highlights)
as well as the very dark parts (shadows) of an image. How much
of a range in which you can capture detail from light to dark is
referred to as the Dynamic Range. As you are about to see, there
can be many “correct” or “good” exposures
• There are three factors which influence the exposure of your
image:
1. Shutter Speed
2. Aperture
3. ISO
Exposure
Exposure
87
CAMERA BASICS
These basics
are common
to ALL
cameras:
• F-Stop
• Shutter Speed
• Film Speed
88
CAMERA BASICS
•F-Stop (how much light is seen, how much
the aperture is open)
•Shutter Speed (how long the light is seen
in the aperture)
•FILM SPEED (how fast the film itself
responds to this light)
89
F-STOP
HOW MUCH LIGHT IS SEEN
• Sometimes known as ‘aperture’
• Ranges from about 1.8 to 32
• A higher number (i.e. 32) means less light is
‘seen’.
• A lower number (i.e. 1.8) means more light is
‘seen’.
90
F-STOP
HIGHER F-stop (i.e. 32)
ADVANTAGES
• Increased depth of field, i.e. image
background is not blurry
DISADVANTAGES
• Needs more light, i.e. slower shutter speed.
91
F-STOP
LOWER F-STOP (i.e. F1.8)
ADVANTAGES
• Lets plenty of light in! Better to use in darker
settings.
• Less blurry since faster shutter speed may be
needed to compensate for more light.
DISADVANTAGES
• No depth of field, i.e. background of image likely
out of focus.
92
F-STOP IMPACT
Low F-stop High F-stop
93
SHUTTER SPEED
MEASURES HOW LONG LIGHT IS LET INTO THE
FILM/CAMERA
• Common values include ½ sec, 1/8 second, 1/1000
second etc
• Shorter time means less time for light to get into the
camera
• Shorter time reduces blurriness
94
SHUTTER SPEED
FASTER SPEED
ADVANTAGES
• Reduces blurriness as image is ‘seen’ only briefly
– great for sports events.
DISADVANTAGES
• Less time for light to enter camera
• Requires bright conditions
95
SHUTTER SPEED
SLOWER SPEED
ADVANTAGES
• Great for darker conditions (more time for light to
enter the camera)
DISADVANTAGES
• Increased chance of blurriness
• Often requires a tripod be used for steadiness.
96
Shutter Speed=1/15 of a Second
97
Shutter Speed=1/150 of a second
98
FILM SPEED
• Traditional cameras use film of different sensitivities.
It is measured by its ISO number, i.e. 64, 100 400
• Slower speed (i.e. 64) is good for enlarging but
requires bright light and/or slow shutter speed
and/or lower F-stop.
• Faster Film (i.e. 400) is poor for enlarging but needs
less light and thus good for indoor photography.
• Digital Cameras do not use film per se. They use a
technology called CCD (Charge Coupled Device)
which senses images.
The only difference between these two pictures is that one was shot with automatic
exposure, and the other was shot using creative exposure.
Which photo do you prefer? Probably the picture on the right! By choosing a
creatively dark exposure, the rich colors in the sunset were allowed to shine
through.
However, technically, the photo on the left is “correct,” and the photo on the right
is “incorrect.” The camera saw through the lens and tried to expose the bird so
that it wouldn’t become a shadow. To me, the photo was not about exposing the
bird properly, but exposing the sunset properly. The bird was just a nice shape to
include in the foreground. This is exactly why you must learn exposure–because
sometimes the “scientifically correct” exposure is not the best exposure to make
the photo look how you want it to.
Too much light creates an over-
bright image with white spots: parts
of the image are Over-Exposed
Too little light creates an under-bright
image with black spots: parts of the
image are Under-Exposed
Getting the ‘best’ exposure can be difficult in scenes with contrasting light
Exposure is the total amount
of light allowed to fall on the
film/image sensor
Exposure can be controlled
mainly through two camera
settings:
Aperture…
… and
Shutter
Speed
Aperture, Shutter Speed & ISO
Triangle
Shutter Speed and Blur
Your camera’s image sensor records any light projected onto it when you take a photo and the result is
saved as a single still image. If there is no movement during exposure, the sensor only records
stillness. However, if there is movement during exposure (either in the scene or from camera
movement) it will may be recorded as overlapping areas of light in the frame. This produces blur,
ghosting, light streaks, and other effects. Sometimes these effects are used creatively.
To help prevent blur due to camera movement, a tripod or monopod can be used. Image Stabilization
(IS), Vibration Reduction (VR) and similar technologies are lens and camera features that can also
assist in minimizing this type of blurring. While these will help minimize the effects of camera
movement, they will not reduce blurring caused by movement in your scene -- but faster shutter
speeds will.
The faster the shutter speed, the shorter the duration of exposure; the sensor will have less
opportunity to “see” anything move or change in the scene. Many compact and DSLR cameras are
capable of shutter speeds as fast as 1/8000 of a second. At high speeds, you can capture images with
virtually no motion blur regardless of subject or camera movement.
Slower shutter speeds are useful, too. In low light conditions slower shutter speeds offer the ability to
capture a scene when higher ISO and wider apertures are not practical. In other words, in low light a
slower shutter speed can allow enough time for the image sensor to collect enough light for proper
exposure. Again, the tradeoff is that a slower shutter speed increases the potential for blur due to
movement of the camera and/or the subject.
Aperture
Aperture is the size of the
opening in the lens that allows
light through the lens – similar to
an eye’s pupil
High f-stop =
Low aperture =
Small opening =
Less light =
Lower Exposure
Low f-stop =
High aperture =
Large opening =
More light =
Higher Exposure
• In our everyday lives, our eyes are constantly being drawn to areas of interest; the
people and objects we look at receive our visual (and mental) focus. Our eyes dart
around -- scanning, stopping, and focusing on the world around us. But our eyes
aren’t really capable of focusing on more than one thing at a time, so while some
areas of a given scene are in focus, other areas are not. The same can be said of
our camera lenses. When we focus our camera’s lens on a nearby subject, objects
at a good distance from the subject are usually out of focus. The area that is in
focus can be thought of as a plane parallel to the camera sensor plane. The depth
of this plane of focus (how much of the area around the subject is in focus) is
called the Depth of Field (DOF) and it is controlled by adjusting your lens’
aperture.
Aperture
• An aperture is defined as a hole or opening through
which light is admitted.
• Inside the camera lens is a system of blades which open
and close to increase or decrease the opening through
which light passes into the camera
Aperture
• Often referred to as an f-stop, aperture is usually
represented by: f/1.8, or f/5.6
• A Smaller # means a wider opening and is referred to as a
larger value (eg. A large aperture of 2.0, a small aperture
of 22)
• The wider the lens is open(larger aperture value), the
more light gets in (you can use faster shutter speeds)
Aperture
Narrow Aperture
Wide Aperture
Apertures
Aperture, measured in f stops, determines the size of the opening in
your lens, which controls how much light strikes your filming during an exposure. The smaller
the number, the larger the opening.
The larger the number, the smaller the opening. Aperture also determines depth of field
smaller the aperture, the greater the depth of field.
O o o o o o o
f2.8 f4 f5.6 f8 f11 f16 f22
Each f stop change lets in either 2 times or ½ the amount of light,
depending on whether you are opening up or stopping down.
Open up means to make the opening larger (but a smaller
number). Stop down means selecting an aperture that is smaller in size (but bigger in number)
Shutter Speed
• Refers to how long the shutter is open, exposing the
image sensor to light (how long the camera “sees” the
picture)
• Shutter speeds are read in fractions of a second.
• Measured in Seconds, from 30 down to 1/8000
• As you’ve already seen, your camera’s image sensor must be exposed to light
in a controlled way in order to properly record a picture. The mechanism that
controls the duration of the exposure is called the shutter. The shutter’s job is to
block the light coming in through your lens until you press the shutter release
button to take a photo. When you press that button, the shutter slides open,
exposing the image sensor to the light coming in through the lens (the projected
image of the scene), then closes to block the sensor again, ending the
exposure. Your DSLR is capable of a wide range of shutter speeds
• Usually, the shutter remains open for only a fraction of a second, but the
duration can be longer. We refer to the length of time the shutter remains open
as the shutter speed. Shutter speed is either controlled by the photographer
directly, or by the camera in some automatic modes.
Shutter Speed Priority
Freeze the Moments vs. Show Movement
Shutter Speed
• Fast Shutter Speeds (600 and up) are used to
stop motion and will freeze the subject.
Shutter Speed
• Slow Shutter Speeds (1/60 or slower) can be used to
portray movement or speed
Fast Shutter Speed
http://tiny.cc/GAQLd
Slow Shutter Speed
Slow Shutter Speed: Panning
Shutter Speed
• Very Slow Shutter Speeds (5 sec. or slower) can be used
in very low light situations to obtain correct exposure, or
achieve dramatic effects.
The longer a picture is being taken, the more chance there is that
movement/unsteady camera will cause it to blur – so a fast
shutter speed is desirable for sharp photos (remember you will
have to compensate the aperture to keep it in good exposure)
Using flash creates enough
light to allow a fast shutter
speed – very good for
capturing movement, but short
range and can lose background
ISO affects the camera’s
sensitivity to light:
Low ISO = less sensitive to light,
slower shutter speed (likely to
blur in low light, but little grain)
High ISO = more sensitive to
light, faster shutter speed (less
likely to blur, but more grain)
No flash Flash
Low ISO
High ISO
Shutter Speed
• Beware!
• As your shutter speed decreases, your
chances of getting a blurry image increase
because you must hold the camera steady
for a longer period.
Shutter Speed •
Shutter speeds appear as whole numbers, but are really fractions:
• 1/60 sec., 1/125 sec., 1/250 sec., 1/500 sec.
• Therefore 1/60 is a slower shutter speed than 1/125, etc.
• When you change 1 stop in Shutter speed, you are letting in either 2 times or
½ the amount of light-
- Long shutter speeds spend more time letting light in, which can help in dark
environments and create artistic blur effects with movement
So Shutter Speed is the length of time the camera’s lens shutter is
open – in other words, how long the camera spends taking the picture
- Short shutter speeds spends less time letting light in, which allows for quicker
pictures and the ability to ‘freeze time’ in great detail
- To get a good exposure on manual mode, you have to
make sure the aperture and shutter speed balance
each-other out correctly for the sort of photo you want
- Most SLRs on automatic mode will judge the aperture and
shutter speed for you when taking a picture – but you can
still change an exposure compensation setting to alter
what it thinks is ‘correct’ if it gets it wrong
On most SLRs you can switch
on: Aperture Priority (you
pick the aperture, the camera
picks the shutter speed), or -
Shutter Priority (you pick the
shutter speed, the camera picks
the aperture – compacts usually
have this too) -
depending on which is most
convenient for what you want
Remember: Practice
makes perfect!
Fast and Slow Shutter Speeds
What is a Reciprocal relationship between
Aperture and Shutter Speed?
• If a correct exposure for a given
lighting condition is 1/60 @ 11, then
1/125 @ f8 will let in the same amount
of light.
If 1/125 @f8 is correct, then
1/250 @f5.6 will let in the same amount
of light.
Reciprocal relationship between
Aperture and Shutter Speed?
3. ISO
• Refers to the light sensitivity of the sensor
• HIGH ISO value means the sensor will be
MORE sensitive to light, meaning it will take
LESS LIGHT to get the right exposure
• Similar to Film Speeds in 35mm format
• Typically ranges from 100-1600
• Newer Digital cameras have a higher range
• (up to 64000)
• Using High ISO values causes the sensor to
produce much more heat, which creates digital
“noise” in images.
• Noise is similar to film grain and causes loss
of fine detail in images
• It is more visible in dark parts of an image
and is generally more noticeable when
displayed on screen than in print
• Some cameras claim to have “Digital Image
Stabilization”
• This just means that the camera will
automatically increase the ISO in order to
allow a faster shutter speed
• Faster Shutter Speed will reduce the
likelihood of camera shake, but high ISO will
most likely result in a grainy image.
ISO and Image Quality
Exposure Compensation
• Despite what your camera meter might determine as being the best
aperture and shutter speed settings, you might find that you’d
prefer the subject and/or background to appear a little brighter.
Without changing the actual lighting in the scene (with reflectors,
additional light sources, moving your subject, or adding flash), you’ll
have to adjust the exposure overall. You can leave your camera on
its current shooting and metering mode and simply override the
camera’s exposure settings via the Exposure Compensation (EC)
control. Doing this is as easy as dialing the appropriate control wheel
to move the exposure level indicator up or down the meter scale.
For example, if you’d like the subject to appear a bit lighter in the
picture, you might dial-in +1 stop in the exposure indicator.
3 Elements
The fourth Element - White Balance
• White balance doesn't really affect your exposure, just
the appearance of colors in the image
• Different light sources cast their own colors, which
cannot usually be noticed with the naked eye.
• White Balance is essentially the camera compensating
for the color cast of the light in order to reproduce the
“correct” colors
White Balance
• The color cast of light is referred to as its
Color Temperature and is rated in degrees
Kelvin
• Ranges from “Cool” to “Warm”
• Most Digital cameras have Automatic White
Balance, but also specific options for
different sources of light.
• Auto. With Auto WB, your camera estimates the best WB adjustment for the scene. Auto will not always
give you the most accurate results, but it is a good choice if you don’t want to deal with WB settings while
shooting.
• Daylight, Shade, Cloudy, Flash. These settings help compensate for the bluish (cooler) colors associated
with outdoor/daylight and flash lighting.
• Tungsten. This setting helps compensate for the orange (warmer) colors associated with incandescent
lighting.
• Fluorescent. This setting helps compensate for the greenish colors associated with traditional fluorescent
lighting.
• Kelvin. If you’d like to dial-in a specific color temperature as your WB setting, use this. It can be great for
fine-tuning the WB.
• Custom or “White Card” setting. After photographing a known white surface under the lighting conditions
you’ll be shooting in, you can use that image to calibrate your WB setting. This is usually accomplished by
having the camera prompt you for the image of the white surface. The camera then uses the color cast in
the image to determine a good WB adjustment for subsequent photos. A neutral gray card can also be
used. See more about this in Gray Cards and Color Reference Charts later in this section.
The Histogram
The Histogram
Underexposed
Correctly exposed
Overexposed
http://tiny.cc/GAQLd
Introduction to
Digital Photography
White Balance
http://tiny.cc/GAQLd
White Balance: Cold vs Warm
http://tiny.cc/GAQLd
• It’s easy to get frustrated because you can’t see the preview image
clearly under bright light. Times might also arise where you’re
second-guessing what the preview is showing you because you’re
not sure if the brightness setting on the LCD is too high or low. The
histogram is a quick way to view what your camera is recording
about an image’s tonal values when other methods are not as
precise. With the knowledge you’ll get from that data, you can
make quick, informed adjustments to your exposure settings.
• Your camera’s histogram displays a bar graph detailing the
distribution of tones in an image from darkest to brightest with the
darker tones to the left and brighter tones to the right. Each tiny
bar represents one shade or tone in the image with the height of
that bar representing the number of pixels the image contains of
that tone. The histogram is somewhat reminiscent of mountain
peaks and valleys. The valleys are tones that appear infrequently (or
not at all) in the image and the peaks are the tones that appear
most often. Note that although the bars in the histogram are
clustered, this does not indicate that those tones are clustered in
the actual image. Each bar simply indicates how often a particular
tone appears throughout the image.
• With that in mind, it’s easy to understand what the histogram says
about a particular photo. If most of the image contains very bright
areas, the histogram will show most of the higher bars to the right
of the graph. If most of the image contains very dark areas, the
histogram will show most of the higher bars to the left of the graph.
A photo with plenty of middle tones will display a cluster of bars
around the middle areas of the graph. Histograms with displayed
zones, delimited by visible vertical lines on the graph, give you an
idea of how the values fit into the dynamic range of the sensor. The
middle zone is where the medium tones are, while the zones just to
the left and right of the middle zone are -1 stop, or +1 stop,
respectively. The two zones farthest to the left and right of the
graph are -2 and +2 stops, respectively.
• How is the histogram useful for evaluating exposure? Having a
graphical view of the distribution of all the tonal values can help
you know what’s going on with an image in ways that might not be
obvious in the regular image preview. One thing to keep in mind is
that the histogram is most useful when you have an idea of what it
should look like based on the type of image you’re capturing. There
is no single “correct” histogram, because there is no single “correct”
type of image.
The fifth element = Depth of Field
• Aperture also controls depth of field (DOF),
which refers to how much of your image is
in focus.
• A wide aperture (small #) will give a shallow
DOF and can be used to isolate a subject.
Depth of Field
Depth of Field
Basic In-Camera Settings
• Exposure Modes
• There are several modes available which offer a combination of
automatic and manual control over the three elements of
exposure.
• Auto, sometimes represented by an A, or simply a green square,
is fully automatic functioning. True “point and shoot” where the
camera decides all the settings for you
Basic In-Camera Settings
• Av or Aperture Priority allows you to choose the aperture
value while the camera chooses the shutter speed required
to obtain a correct exposure
• Tv or Shutter Priority allows you to choose the shutter
speed while the camera chooses the aperture which would
produce the correct exposure
• M or Manual gives you complete manual control. You
choose both shutter speed and aperture
Basic In-Camera Settings
• Scene Modes
• Scene Modes are basically fully automatic
modes designed specifically for a certain
situation. They typically place emphasis on
one or more settings based on the typical
circumstances of the situation chosen.
• Most digital cameras have very similar scene
modes available
Scene Modes
• Backlight - eliminates dark shadows when light is coming
from behind a subject, or when the subject is in the
shade. The built-in flash automatically fires to "fill in" the
shadows.
• Beach/Snow - photograph beach, snow and sunlit water
scenes. Exposure and white balance are set to help
prevent the scene from becoming washed out looking.ds.
Use of tripod recommended.
Scene Modes
• Fireworks - shutter speed and exposure are set for shooting
fireworks; pre-focusing & use of tripod recommended.
• Landscape - take photos of wide scenes. Camera automatically
focuses on a distant object.
• Macro - take close-up shots of small objects, flowers and insects.
Lens can be moved closer to the subject than in other modes.
Hold the camera steady or use a tripod.
Scene Modes
• Night Portrait - take photos of a subject against a
night scene. The built-in flash and red-eye
reduction are enabled; shutter-speeds are low.
Use of tripod recommended.
• Night Scene - photograph nightscapes.
Preprogrammed to use slow shutter speeds. Use
of tripod recommended.
Scene Modes
• Party - take photos in a dim lit room;
exposure and shutter speed are
automatically adjusted for room brightness.
Captures indoor background lighting or
candlelight. Hold the camera very steady
when using this mode.
Scene Modes
• Portrait - main subject is clearly
focused and the background is
out of focus (has less depth of
field). Best when taking shots
outside during the day. Shoot
using a mid to long telephoto
lens, stand close to your subject
within the recommended
camera range and, when
possible, select an
uncomplicated background that
is far from the subject.
Scene Modes
• Sports (also called Kids & Pets)- take photos of a fast moving subject;
fast shutter speeds "freeze" the action. Best when shots are taken in
bright light; pre-focusing recommended.
• Sunset - take photos of sunsets and sunrises; helps keep the deep hues
in the scene.
DSLR Shooting Modes
Fully Automatic Mode
• More than likely, your camera has an all-encompassing automatic mode. On Canon
and Nikon cameras this full-auto mode is denoted by a green icon on the mode
dial. On your camera it might be under a different icon, or simply under the word
AUTO. You can think of full-auto as sort of a point-and-shoot mode. Few camera
settings are set by you, and the actual decisions about exposure are made entirely
by the camera. ISO, aperture, and shutter speed are determined based on what the
camera’s programming thinks is best for the scene. While this might seem like a
great way to shoot, it provides you with very few creative choices and not always
the intended results.
• To use this mode, just set your camera to AUTO or the green icon, and you can start
shooting just as if you were using a point-and-shoot. The camera will make all of
the important exposure decisions for you including whether or not to trigger the
internal or pop-up flash if your camera has one.
• Again, just as with all of the automatic and easy shooting modes, you’ll have limited
creative control over your exposure settings and the camera will not always make
the best decisions on your behalf. That’s definitely a point you should be aware of.
If you want more control, you’ll have to abandon these modes and move on to the
ones that put more control in YOUR hands. We’ll discuss other modes as we
progress.
Basic/Scene Modes
• Now, besides full-auto, some cameras also have modes
designed for very specific shooting scenarios like “Portrait” or
“Landscape” shots, night shooting, action and other
situations. Depending on the camera manufacturer, these
might be called BASIC or SCENE shooting modes on your
camera. These are more than likely found on consumer and
some pro-sumer models than on high-end DSLRs. As you
might expect, if you want the camera to attempt to make
good exposure decisions for you, you’d select the BASIC or
SCENE mode that matches up to your shooting scenario. I’ll
stress this one last time: the camera’s not always going to
make the best choices, and your creative options might be
very limited, but these modes could make shooting a little
easier for beginners.
Program or Program Shift (P) Mode
• Program mode is another easy-to-use mode that gives the camera initial
control over the aperture and shutter speed settings. The camera controls
the balance between the aperture and shutter speed, but it allows you to
shift the exposure mix in case you’d like to see one of the other settings in
a different place.
• For example, let’s say your camera is showing an aperture at f/5.6 and
shutter speed at 1/60 sec. If you’d like to open up your aperture to f/4, you
can turn a dial until you see that adjustment as your camera automatically
makes the reciprocal adjustment to the shutter speed (in this case, to
1/125 sec.). This is usually done via one of the adjustment “wheels” on the
camera. This type of exposure control shifting is a handy way to exert a
little more control over the exposure settings than you’d have with the full-
auto mode.
• Besides allowing you to shift the exposure settings up or down, P mode
also allows you to set the ISO and dial-in Exposure Compensation, which
we'll cover later.
Shutter Priority (Tv or S) Mode
• Controlling things like the aperture setting and shutter speed will
become very important to you as seek to gain more control over the
look of your images. When you want to deliberately control shutter
speed, or the duration of your exposure, Shutter Priority mode, often
denoted with the symbols “Tv” (time value) or “S”, allows you to select
and adjust the shutter speed as you shoot, while the camera
automatically adjusts the aperture to compensate for any change in
exposure. If you’re taking pictures at a sporting event for example, you
might want to capture the images at shutter speeds no slower than
1/500 sec in order to freeze the action. As background and other lighting
conditions change, your aperture will be adjusted automatically.
• Of course, the camera’s ability to maintain good exposures through
automatic aperture adjustments is limited by the aperture range of the
lens used. In other words, if the camera would otherwise adjust the
aperture to f/2.8 to compensate for a change you’ve made to the
shutter speed, it can’t if the lens’ maximum built-in aperture is f/4. In
those cases, a simple manual adjustment to your ISO will put you back
into a good exposure range.
Aperture Priority (Av or A) Mode
• This can be thought of as the flip side to Shutter Priority
mode and can be found on your shooting mode dial under
“Av” or “A.” You’ll use Aperture Priority when you want to
have direct control of your aperture setting while allowing
your camera to automatically adjust the shutter speed for
you to maintain proper exposure. Although using this
setting means you’re less concerned about the exact
shutter speeds being used, you’ll want to keep an eye on
the shutter speeds your camera is selecting for you.
Stopping your aperture down too far can lead to slower
shutter speeds and blurry pictures.
Manual (M) Mode
• Manual mode (“M” on the shooting dial) gives you total control over all
exposure settings: ISO, aperture, and shutter speed. This means you, and not the
camera, are responsible for getting a proper exposure. The camera’s metering
system will still provide you with feedback to help you judge the potential for
over/under exposure, but it won’t take over to correct your exposure settings.
Where lighting conditions are inconsistent, you’ll have to make frequent
adjustments. Since you can freely adjust aperture and shutter speed
independently of each other, you’ll find that you have a great amount of creative
freedom with manual mode. But since you’re doing all the thinking for the
camera (as far as exposure goes), you might be spending more time dealing with
the settings than you’d like.
• Manual mode is very useful in situations where you can take your time
composing and making creative adjustments to exposure. It’s also great for
studio lighting and portrait setups because in those situations the lighting
conditions tend to remain constant throughout a series of shots; few if any
exposure adjustments have to be made unless there are changes made to the
lighting setup and/or the ambient lighting conditions.
Metering Modes
• The metering system within a camera measures
the amount of light in a frame and determines
the best exposure. Many cameras have more
than one metering mode and each evaluates a
scene in a different way.
• Essentially, by changing the metering mode you
are telling the camera to evaluate the scene in a
different way.
Metering Modes
• Center-weighted metering
• Currently the most common digital camera metering
system. Center-weighted is the metering system of
choice on digicams that do not offer other metering
modes.
• Exposure metering is averaged over the entire frame
with emphasis placed on the central area. Used for
general and portrait photography.
Metering Modes
• Matrix (evaluative) metering
• A complex metering system whereby a scene is
split up into a series of zones. Overall exposure is
based on evaluating each zone individually and
taking an average of the total light readings.
Metering Modes
• Spot metering
• Spot metering covers just under 4 percent of the
viewfinder area. It takes a precise exposure reading only
at the very center of the frame and disregards the rest. A
spot meter is used when a subject is backlit or has bright
light upon it and the background is dark -- for example,
when there are extremes in brightness in a scene.
Metering Modes
• Partial metering
• Partial metering is similar to spot metering but covers a
larger area of the viewfinder, about 13.5 percent. It is
useful for taking portrait photos when the subject is back
lit Underexposure is minimized by metering on the face.
• Both spot and partial metering are considered advanced
settings. They give the skilled photographer more control
over exposure than do matrix and center-weighted
metering.
How to change metering mode
Taking Digital Photos
1. The quality of the recording device (camera's optics &
sensor).
2. The size (in pixels) of the digital image.
3. The digital format it is stored.
4. The technical proficiency and the "eye" of the photographer.
228
There are 4 primary points to consider that impact the quality of
a digital photo:
- Vary between landscape and portrait
- Try to keep the horizon/background objects lined
up straight (unless you are throwing them off for
artistic effect)
- Try zooming/not zooming where it might not be
expected
- Rather than capturing the
whole of something, try taking a
strange angle and shooting just
part of it (perhaps close up in
macro mode)
Composition
• Learn to see
• Rules of thirds
• Viewfinder awareness
• Simplicity
Back
Composition = The Rule of Thirds
• Imagine the frame divided into three equal sections both
horizontally and vertically
• Divided into “thirds”
• The Concept is: Placing your subject or elements along any
of these lines, and especially on or near the intersecting
points, makes a photo more naturally attractive to the
viewer.
Framing the Scene
- Digital screens/viewfinders tend to be more accurate in framing the
pictures you take
- Don’t always (or never) shoot your
subject in the centre of the shot – laying
the scene out according to thirds can be
more interesting/satisfying
- You can use Photoshop or other digital imagery software to crop
unwanted bits out of your photos
Rule of Thirds
• The rule of thirds is a compositional rule of thumb in photography
and other visual arts such as painting and design.
• The rule states that an image can be divided into nine equal parts by
two equally-spaced horizontal lines and two equally-spaced vertical
lines. The four points formed by the intersections of these lines can
be used to align features in the photograph. Proponents of this
technique claim that aligning a photograph with these points creates
more tension, energy and interest in the photo than simply
centering the feature would.
240
Rule of Thirds
• Again, the concept is simple: Place subjects along the
lines, or near intersecting points
• For portraits, the eyes are often positioned along one
of the horizontal lines preferably near one of the
power points to make the photograph more pleasing
to look at, and naturally draw attention to the eyes.
• For landscapes the horizon is aligned to any of the
horizontal lines depending on how much
land/water/sky you want to show.
The Rule of Thirds
Rule of Thirds
Rule of Thirds Illustrated
Focusing on the Subject
• Fixed Focus
– found on lower end cameras and phones
– The focus is fixed and can’t be adjusted.
• Auto Focus
– Most consumer cameras are equipped with auto focus
cameras.
– The auto focus kicks in as you start to press the shutter
button.
• Manual Focus
– Found on most professional level cameras
– The photographer focuses the camera on the lens.
254
How to use Focus Points
• Don’t just rely on autofocus (AF), specify exactly where you want to focus. There are two main
choices here: let the camera take control by searching the scene, or you can select an area
manually.
• Single point AF
This mode is best used when shooting a portrait or any subject that stays relatively still. It enables
you to select a focus point manually, which doesn’t have to be in the centre of the frame.
• Dynamic area AF
This mode is perfect for shooting fast-moving or erratically moving subjects. Some D-SLRs now have
up to 50 AF points, so you choose one, but if the subject briefly leaves that point, the camera will
re-focus on a point near to the one you’ve chosen.
• Focus point:
The focus point used for
autofocus is shown in the
information display.
F-area mode:
AF-area mode is displayed as
shown below.
Single-point AF
Dynamic-area AF
Auto-area AF
camera information display
Shutter Release Button
• This is the button you press to take a photo. The shutter must
be released in order to expose the image sensor to light from
the scene. It is usually located on the top of the camera in a
position accessible to the right-hand index finger. The default
behavior of the shutter button on many DSLRs causes it to
activate exposure metering and auto-focus as it’s partially
depressed; releasing the shutter as it’s fully depressed.
Creating a quality image
• Technology is only part of the equation
• a visual language and the eye needs to be educated to
communicate
Rule of Thirds
Surprise
Juxtaposition
Mood
Moment
Layering
Graphic
Point of EntryPerspective
Emotion
Quality of light
Impact
Sense of place
Negative Space
http://tiny.cc/GAQLd
Preparation
• Select camera and
accessories
• Check batteries
• Clean the camera
• Adjust controls
• Extra memory cards
• Field storage
Back
Shooting
• Autofocus
• White balance
• Set other controls
• Review images
• Remove unwanted
images
Back
Back
Lens
Lens
• The lens is attached to the camera body via the lens mount on the front of the
DSLR. The camera and lens must have compatible interfaces or some form of
adapter in order to make a proper connection. The lens release button must be
pressed in order to detach the lens from the camera.
• The lens may have a switch which allows you to choose manual or autofocus
functionality. Lenses are available in a wide selection of focal lengths (e.g. wide
angle, normal, telephoto) that are suitable for different types of photography.
Zoom lenses offer the flexibility of changing focal lengths without changing the
lens.
• Fixed focal length lenses (often called, “prime” lenses) don’t allow you to
zoom, but often have advantages over zoom lenses, including better optical
quality.
• Photographers often regard their camera lenses as more crucial to the quality
of their images than their camera bodies. Well-made and cared-for lenses tend
to retain their value over the years.
Zoom
• Optical Zoom
– The subject is magnified through the camera's optics, or lens.
– Produces a higher quality image.
– Image quality is maintained in optical zoom.
• Digital Zoom
– Is an artificial zoom.
– Digital zoom crops your image and magnifies the result of the
cropping.
– Image quality is lost in digital zoom.
271
Most digital cameras are capable of some type of zoom. Many
will have one or both types of zoom.
Types of Camera Lenses
• Wide Angle: A lens with a range of 14-16mm or 14-24mm is good. There are also specialty
lenses known as "fish eye" lenses that will give some very wide angle creative effects. Here is an
awesome wide angle zoom: Canon EF-S 10-22mm f/3.5-4.5 USM SLR Lens
• MidrangeTelephoto: This would generally be a lens with a focal range of 70-200mm. Canon has
this one covered with four five lenses, all L-glass. You can see them here.
• Long Telephoto Lens: A 300mm lens is the minimum here. More appropriate is a 400mm or
500mm lens. Depending upon the aperture, these lenses can cost as much as a used car, but
they are really valuable in terms of taking wildlife and sports events.
• Macro: No photographer's bag would be complete without a macro lens. These allow you to
take those close ups of bugs, flowers, and the like. They are also useful for portraits. Generally a
macro lens will be a prime, or single focal length, lens. Canon has its own head of the class in the
Canon EF 100mm f/2.8 Macro. But there are some very good off brand macro lenses made by
Tamron and Sigma. Be sure to check them out.
• Extension Tubes: This is an excellent way to get macro...cheap. These little tubes move the lens
away from the sensor without any glass. The effect is to allow you to move your lens much
closer to the object. You will definitely need a tripod when you use them. They are sold as a set
of three different extentions. I use them all the time with my Canon 70-200mm lens because
that is my sharpest lens. I can get really good results with the birds right outside my window.
They come within a couple of feet of my position because of how I set up my feeder. The Canon
70-200mm lens does a really good job with the smallest extension. Here is a photo I took with
the 70-200mm lens and a 12mm extension.
• Before you go to camera store don’t forget to consider is the image sensor in your camera. There
are basically two different sensor sizes; “Full frame” sensors, which are the same size as one
frame of 35mm film, like those in traditional film SLRs; these are generally in higher-end cameras.
Another one is the smaller image sensors, like those found in most digital SLR cameras such as
Nikon D5300 or Canon EOS D700. The full frame cameras such as: Nikon D800E and Canon EOS
5D Mark III or Sony Alpha 99 (SLT-A99V).
• If you are serious about choosing lenses, you may need to have a telephoto lens for portrait
photos to make the results more like an amazing 85 millimeters, to take portraits or to get closer
shots of distant objects without moving the camera. This lens is also good to use when you want
to photograph beautiful birds in the trees, or steal a photo when you see a beautiful girl in the
distance, then you can make close to the face of the girl with a telephoto lens without being
noticed by the girl.
• If you are interested in photographing small flowers or insects that was perched on a flower, then
you need a macro lens, but the lens of your camera kit is also quite good for this sort of picture-
making. Would you like to vacation and see landscapes like forests or mountains in the distance
and the beach? If you have enough money, then you need to have a wide angle lens. And you
should apprehend that for a very wide, please go with an 18 millimeter lens. However For just a
little wider than the 50 millimeter lens, use a 35 millimeter prime lens.
• You may have very amazed with the photos of stars in the sky or other photos that
you see on the Internet or at a photo exhibition. The world of photography is an art
that is not limited and highly dependent on your imagination and creativity, and of
course also depends on the equipment, the type of camera, lens types, and also
related to camera accessories.
• You can also take advantage of the atmosphere of the era of horse to buy lenses
because until towards the end of February 2014 you can get a discount at the nearest
camera shop or at a trusted online store.
• With the passage of time, then you will know more about the lenses you need, then
start saving money so you can buy your dream lens or camera. Perhaps you need to
think to sell your stock photos online. Look for information by using a search engine
today, so you can have an income from photography, you can even sell photography
services to family or friends who will make the wedding party. If you are successful
you will get a lot of references. You must also know a professional photographer can
be a very good living from photography.
Final things to remember…
These are only guidelines – every rule has an exception!
Always remember your framing and exposure!
There’s a lot more to learn and discover!
PRACTICE MAKES
PERFECT!
Practice,…Practice,…Practice,…
Learn from your mistakes
Stop making comparisons with great
photographers
• Often, people compare themselves with great
photographers. Works of people like Ansel Adams, Gary
Winogrand, Henri Cartier-Bresson are published in
hundreds of magazines the world over. They are a constant
source of inspiration for many. On the flip side, however,
they can become a benchmark for all the wrong reasons.
People start to compare their own work with the work of
these greats, thereby creating an unnecessary feeling of
depression.
• When you compare your work with that of established
photographers (not just the greats named above), someone
who has years of experience practicing his skills, you
compare yourself with the essence of that professional’s
hard work and dedication of many years.
• Behind every great photo there are hours of
preparation, hard work, failures and heartburns.
• Master photographers will almost never show you
how they failed before making that great shot. You
don’t get to see the incorrect exposures, poor
compositions, incorrect development (film
photography) and crappy treatment of themes.
• Understand what they have done and why they have
done that. When you have mastered the process, add
your own touch to it. You will probably fail as many
times, may be even more, but you will end up also
creating stunning compositions as well.
Thank You!
Now go out and take some pictures!!!

More Related Content

What's hot

Introduction to camera & its major parts
Introduction to camera & its major partsIntroduction to camera & its major parts
Introduction to camera & its major partsanshula garg
 
Basic photography lighting
Basic photography  lightingBasic photography  lighting
Basic photography lightingRam Chandran
 
Digital camera basics
Digital camera basicsDigital camera basics
Digital camera basicsjillian b
 
Intro to Film: Cinematography
Intro to Film: CinematographyIntro to Film: Cinematography
Intro to Film: CinematographyRob Nyland
 
An introduction to exposure
An introduction to exposureAn introduction to exposure
An introduction to exposureJimi Kayode
 
Lesson 3 • Types of Cameras
Lesson 3 • Types of CamerasLesson 3 • Types of Cameras
Lesson 3 • Types of CamerasMarcio Sargento
 
Photography Basics
Photography BasicsPhotography Basics
Photography Basicsdillarja
 
Understanding Camera Exposure, Aperture, ISO & Shutter Speed
Understanding Camera Exposure, Aperture, ISO & Shutter SpeedUnderstanding Camera Exposure, Aperture, ISO & Shutter Speed
Understanding Camera Exposure, Aperture, ISO & Shutter SpeedRahat Kazmi
 
Photography 101
Photography 101Photography 101
Photography 101Rica Camus
 
History Of Photography
History Of PhotographyHistory Of Photography
History Of PhotographyMarc García
 
Camera shots & angles
Camera shots & anglesCamera shots & angles
Camera shots & anglesMarisa Barr
 
Introduction to Photography
Introduction to Photography Introduction to Photography
Introduction to Photography wdpsorg
 
Basic Photography Workshop Presentation
Basic Photography Workshop PresentationBasic Photography Workshop Presentation
Basic Photography Workshop PresentationShiraz Shrestha
 

What's hot (20)

Introduction to camera & its major parts
Introduction to camera & its major partsIntroduction to camera & its major parts
Introduction to camera & its major parts
 
Basic photography lighting
Basic photography  lightingBasic photography  lighting
Basic photography lighting
 
Digital camera basics
Digital camera basicsDigital camera basics
Digital camera basics
 
Digital Photography Basics
Digital Photography BasicsDigital Photography Basics
Digital Photography Basics
 
Intro to Film: Cinematography
Intro to Film: CinematographyIntro to Film: Cinematography
Intro to Film: Cinematography
 
Photography Basics
Photography BasicsPhotography Basics
Photography Basics
 
Street Photography
Street PhotographyStreet Photography
Street Photography
 
An introduction to exposure
An introduction to exposureAn introduction to exposure
An introduction to exposure
 
Portrait Photography
Portrait PhotographyPortrait Photography
Portrait Photography
 
Lesson 3 • Types of Cameras
Lesson 3 • Types of CamerasLesson 3 • Types of Cameras
Lesson 3 • Types of Cameras
 
Photography Basics
Photography BasicsPhotography Basics
Photography Basics
 
Understanding Camera Exposure, Aperture, ISO & Shutter Speed
Understanding Camera Exposure, Aperture, ISO & Shutter SpeedUnderstanding Camera Exposure, Aperture, ISO & Shutter Speed
Understanding Camera Exposure, Aperture, ISO & Shutter Speed
 
Fundamentals of photography
Fundamentals of photographyFundamentals of photography
Fundamentals of photography
 
Photography 101
Photography 101Photography 101
Photography 101
 
Photojournalism - Introduction
Photojournalism - IntroductionPhotojournalism - Introduction
Photojournalism - Introduction
 
History Of Photography
History Of PhotographyHistory Of Photography
History Of Photography
 
Photojournalism
PhotojournalismPhotojournalism
Photojournalism
 
Camera shots & angles
Camera shots & anglesCamera shots & angles
Camera shots & angles
 
Introduction to Photography
Introduction to Photography Introduction to Photography
Introduction to Photography
 
Basic Photography Workshop Presentation
Basic Photography Workshop PresentationBasic Photography Workshop Presentation
Basic Photography Workshop Presentation
 

Viewers also liked

Systems thinking in action conference seattle2 11 2011
Systems thinking in action conference seattle2 11 2011Systems thinking in action conference seattle2 11 2011
Systems thinking in action conference seattle2 11 2011Map_Makr
 
Political Communication In CMC
Political Communication In CMCPolitical Communication In CMC
Political Communication In CMCDaywalk3r
 
Ppp For Fundraiser Gc
Ppp For Fundraiser GcPpp For Fundraiser Gc
Ppp For Fundraiser Gcsgeorge86
 
Lifespan Communication In Cmc
Lifespan Communication In CmcLifespan Communication In Cmc
Lifespan Communication In CmcDaywalk3r
 
Bosnia Herzegovina Ppp
Bosnia Herzegovina PppBosnia Herzegovina Ppp
Bosnia Herzegovina Pppsgeorge86
 
Bosnia Herzegovina Ppp
Bosnia Herzegovina PppBosnia Herzegovina Ppp
Bosnia Herzegovina Pppsgeorge86
 
RecuperacióN De Lengua. Power Point
RecuperacióN De Lengua. Power PointRecuperacióN De Lengua. Power Point
RecuperacióN De Lengua. Power Pointencarna tomas
 
Ppp For Fundraiser
Ppp For FundraiserPpp For Fundraiser
Ppp For Fundraisersgeorge86
 
Ten rules for teens safe Internet usage
Ten rules for teens safe Internet usageTen rules for teens safe Internet usage
Ten rules for teens safe Internet usageDaywalk3r
 
Creative Portfolio for Print Ads
Creative Portfolio for Print AdsCreative Portfolio for Print Ads
Creative Portfolio for Print AdsTajdar O. Chaudry
 
Os media nos últimos 25 anos (Forum Estudante)
Os media nos últimos 25 anos (Forum Estudante)Os media nos últimos 25 anos (Forum Estudante)
Os media nos últimos 25 anos (Forum Estudante)Rogério Santos
 
Bosnia Herzegovina Ppp
Bosnia Herzegovina PppBosnia Herzegovina Ppp
Bosnia Herzegovina Pppsgeorge86
 
Bosnia Herzegovina Pp #2
Bosnia Herzegovina Pp #2Bosnia Herzegovina Pp #2
Bosnia Herzegovina Pp #2sgeorge86
 
Misi dan Teknologi
Misi dan TeknologiMisi dan Teknologi
Misi dan TeknologiSABDA
 
Internet Safety
Internet SafetyInternet Safety
Internet Safetydpl
 
SABDA Android
SABDA AndroidSABDA Android
SABDA AndroidSABDA
 
Quote graphics
Quote graphicsQuote graphics
Quote graphicsSABDA
 

Viewers also liked (18)

Systems thinking in action conference seattle2 11 2011
Systems thinking in action conference seattle2 11 2011Systems thinking in action conference seattle2 11 2011
Systems thinking in action conference seattle2 11 2011
 
Political Communication In CMC
Political Communication In CMCPolitical Communication In CMC
Political Communication In CMC
 
Ppp For Fundraiser Gc
Ppp For Fundraiser GcPpp For Fundraiser Gc
Ppp For Fundraiser Gc
 
Lifespan Communication In Cmc
Lifespan Communication In CmcLifespan Communication In Cmc
Lifespan Communication In Cmc
 
Bosnia Herzegovina Ppp
Bosnia Herzegovina PppBosnia Herzegovina Ppp
Bosnia Herzegovina Ppp
 
CARICATURAS
CARICATURASCARICATURAS
CARICATURAS
 
Bosnia Herzegovina Ppp
Bosnia Herzegovina PppBosnia Herzegovina Ppp
Bosnia Herzegovina Ppp
 
RecuperacióN De Lengua. Power Point
RecuperacióN De Lengua. Power PointRecuperacióN De Lengua. Power Point
RecuperacióN De Lengua. Power Point
 
Ppp For Fundraiser
Ppp For FundraiserPpp For Fundraiser
Ppp For Fundraiser
 
Ten rules for teens safe Internet usage
Ten rules for teens safe Internet usageTen rules for teens safe Internet usage
Ten rules for teens safe Internet usage
 
Creative Portfolio for Print Ads
Creative Portfolio for Print AdsCreative Portfolio for Print Ads
Creative Portfolio for Print Ads
 
Os media nos últimos 25 anos (Forum Estudante)
Os media nos últimos 25 anos (Forum Estudante)Os media nos últimos 25 anos (Forum Estudante)
Os media nos últimos 25 anos (Forum Estudante)
 
Bosnia Herzegovina Ppp
Bosnia Herzegovina PppBosnia Herzegovina Ppp
Bosnia Herzegovina Ppp
 
Bosnia Herzegovina Pp #2
Bosnia Herzegovina Pp #2Bosnia Herzegovina Pp #2
Bosnia Herzegovina Pp #2
 
Misi dan Teknologi
Misi dan TeknologiMisi dan Teknologi
Misi dan Teknologi
 
Internet Safety
Internet SafetyInternet Safety
Internet Safety
 
SABDA Android
SABDA AndroidSABDA Android
SABDA Android
 
Quote graphics
Quote graphicsQuote graphics
Quote graphics
 

Similar to DSLR Cameras

Similar to DSLR Cameras (20)

Photography 101
Photography 101 Photography 101
Photography 101
 
Digital Camera by Abhinav Kumar
Digital Camera by Abhinav KumarDigital Camera by Abhinav Kumar
Digital Camera by Abhinav Kumar
 
Digital image and file formats
Digital image and file formatsDigital image and file formats
Digital image and file formats
 
Photography1
Photography1Photography1
Photography1
 
Digital photographer
Digital photographerDigital photographer
Digital photographer
 
Pentax K100d
Pentax K100dPentax K100d
Pentax K100d
 
Digital slr copy
Digital slr copyDigital slr copy
Digital slr copy
 
Photography and its applications
Photography and its applicationsPhotography and its applications
Photography and its applications
 
Learn Basic Photography
Learn Basic PhotographyLearn Basic Photography
Learn Basic Photography
 
Cameras task1b
Cameras task1bCameras task1b
Cameras task1b
 
Camera Types
Camera TypesCamera Types
Camera Types
 
Digital still camera
Digital still cameraDigital still camera
Digital still camera
 
Photography in Orthodontics
Photography in OrthodonticsPhotography in Orthodontics
Photography in Orthodontics
 
Skill sets of today's photojournalists
Skill sets of today's photojournalistsSkill sets of today's photojournalists
Skill sets of today's photojournalists
 
Digital Photography
Digital PhotographyDigital Photography
Digital Photography
 
Basic photography & intro to dslrs
Basic photography  & intro to dslrsBasic photography  & intro to dslrs
Basic photography & intro to dslrs
 
Cayentano arellano-high-school
Cayentano arellano-high-schoolCayentano arellano-high-school
Cayentano arellano-high-school
 
Digital cameras
Digital camerasDigital cameras
Digital cameras
 
Camera
CameraCamera
Camera
 
Ultimate Photography Guide
Ultimate Photography GuideUltimate Photography Guide
Ultimate Photography Guide
 

Recently uploaded

Burari Call Girls : ☎ 8527673949, Low rate Call Girls
Burari Call Girls : ☎ 8527673949, Low rate Call GirlsBurari Call Girls : ☎ 8527673949, Low rate Call Girls
Burari Call Girls : ☎ 8527673949, Low rate Call Girlsashishs7044
 
Bobbie goods colorinsssssssssssg book.pdf
Bobbie goods colorinsssssssssssg book.pdfBobbie goods colorinsssssssssssg book.pdf
Bobbie goods colorinsssssssssssg book.pdflunavro0105
 
Bur Dubai Call Girls O58993O4O2 Call Girls in Bur Dubai
Bur Dubai Call Girls O58993O4O2 Call Girls in Bur DubaiBur Dubai Call Girls O58993O4O2 Call Girls in Bur Dubai
Bur Dubai Call Girls O58993O4O2 Call Girls in Bur Dubaidajasot375
 
FULL ENJOY - 9953040155 Call Girls in New Ashok Nagar | Delhi
FULL ENJOY - 9953040155 Call Girls in New Ashok Nagar | DelhiFULL ENJOY - 9953040155 Call Girls in New Ashok Nagar | Delhi
FULL ENJOY - 9953040155 Call Girls in New Ashok Nagar | DelhiMalviyaNagarCallGirl
 
Olivia Cox. intertextual references.pptx
Olivia Cox. intertextual references.pptxOlivia Cox. intertextual references.pptx
Olivia Cox. intertextual references.pptxLauraFagan6
 
Akola Call Girls #9907093804 Contact Number Escorts Service Akola
Akola Call Girls #9907093804 Contact Number Escorts Service AkolaAkola Call Girls #9907093804 Contact Number Escorts Service Akola
Akola Call Girls #9907093804 Contact Number Escorts Service Akolasrsj9000
 
Bare And Wild Creation, Curio Shop, Tucumcari NM
Bare And Wild Creation, Curio Shop, Tucumcari NMBare And Wild Creation, Curio Shop, Tucumcari NM
Bare And Wild Creation, Curio Shop, Tucumcari NMroute66connected
 
Govindpuri Call Girls : ☎ 8527673949, Low rate Call Girls
Govindpuri Call Girls : ☎ 8527673949, Low rate Call GirlsGovindpuri Call Girls : ☎ 8527673949, Low rate Call Girls
Govindpuri Call Girls : ☎ 8527673949, Low rate Call Girlsashishs7044
 
Downtown Call Girls O5O91O128O Pakistani Call Girls in Downtown
Downtown Call Girls O5O91O128O Pakistani Call Girls in DowntownDowntown Call Girls O5O91O128O Pakistani Call Girls in Downtown
Downtown Call Girls O5O91O128O Pakistani Call Girls in Downtowndajasot375
 
Russian Call Girls Delhi NCR 9999965857 Call or WhatsApp Anytime
Russian Call Girls Delhi NCR 9999965857 Call or WhatsApp AnytimeRussian Call Girls Delhi NCR 9999965857 Call or WhatsApp Anytime
Russian Call Girls Delhi NCR 9999965857 Call or WhatsApp AnytimeKomal Khan
 
Jagat Puri Call Girls : ☎ 8527673949, Low rate Call Girls
Jagat Puri Call Girls : ☎ 8527673949, Low rate Call GirlsJagat Puri Call Girls : ☎ 8527673949, Low rate Call Girls
Jagat Puri Call Girls : ☎ 8527673949, Low rate Call Girlsashishs7044
 
How Can You Get Dubai Call Girls +971564860409 Call Girls Dubai?
How Can You Get Dubai Call Girls +971564860409 Call Girls Dubai?How Can You Get Dubai Call Girls +971564860409 Call Girls Dubai?
How Can You Get Dubai Call Girls +971564860409 Call Girls Dubai?kexey39068
 
Zagor VČ OP 055 - Oluja nad Haitijem.pdf
Zagor VČ OP 055 - Oluja nad Haitijem.pdfZagor VČ OP 055 - Oluja nad Haitijem.pdf
Zagor VČ OP 055 - Oluja nad Haitijem.pdfStripovizijacom
 
FULL ENJOY - 9953040155 Call Girls in Mahipalpur | Delhi
FULL ENJOY - 9953040155 Call Girls in Mahipalpur | DelhiFULL ENJOY - 9953040155 Call Girls in Mahipalpur | Delhi
FULL ENJOY - 9953040155 Call Girls in Mahipalpur | DelhiMalviyaNagarCallGirl
 
Russian⚡ Call Girls In Sector 39 Noida✨8375860717⚡Escorts Service
Russian⚡ Call Girls In Sector 39 Noida✨8375860717⚡Escorts ServiceRussian⚡ Call Girls In Sector 39 Noida✨8375860717⚡Escorts Service
Russian⚡ Call Girls In Sector 39 Noida✨8375860717⚡Escorts Servicedoor45step
 
Kishangarh Call Girls : ☎ 8527673949, Low rate Call Girls
Kishangarh Call Girls : ☎ 8527673949, Low rate Call GirlsKishangarh Call Girls : ☎ 8527673949, Low rate Call Girls
Kishangarh Call Girls : ☎ 8527673949, Low rate Call Girlsashishs7044
 
Khanpur Call Girls : ☎ 8527673949, Low rate Call Girls
Khanpur Call Girls : ☎ 8527673949, Low rate Call GirlsKhanpur Call Girls : ☎ 8527673949, Low rate Call Girls
Khanpur Call Girls : ☎ 8527673949, Low rate Call Girlsashishs7044
 
9654467111 Full Enjoy @24/7 Call Girls In Saket Delhi Ncr
9654467111 Full Enjoy @24/7 Call Girls In Saket Delhi Ncr9654467111 Full Enjoy @24/7 Call Girls In Saket Delhi Ncr
9654467111 Full Enjoy @24/7 Call Girls In Saket Delhi NcrSapana Sha
 
Karol Bagh Call Girls : ☎ 8527673949, Low rate Call Girls
Karol Bagh Call Girls : ☎ 8527673949, Low rate Call GirlsKarol Bagh Call Girls : ☎ 8527673949, Low rate Call Girls
Karol Bagh Call Girls : ☎ 8527673949, Low rate Call Girlsashishs7044
 
Aiims Call Girls : ☎ 8527673949, Low rate Call Girls
Aiims Call Girls : ☎ 8527673949, Low rate Call GirlsAiims Call Girls : ☎ 8527673949, Low rate Call Girls
Aiims Call Girls : ☎ 8527673949, Low rate Call Girlsashishs7044
 

Recently uploaded (20)

Burari Call Girls : ☎ 8527673949, Low rate Call Girls
Burari Call Girls : ☎ 8527673949, Low rate Call GirlsBurari Call Girls : ☎ 8527673949, Low rate Call Girls
Burari Call Girls : ☎ 8527673949, Low rate Call Girls
 
Bobbie goods colorinsssssssssssg book.pdf
Bobbie goods colorinsssssssssssg book.pdfBobbie goods colorinsssssssssssg book.pdf
Bobbie goods colorinsssssssssssg book.pdf
 
Bur Dubai Call Girls O58993O4O2 Call Girls in Bur Dubai
Bur Dubai Call Girls O58993O4O2 Call Girls in Bur DubaiBur Dubai Call Girls O58993O4O2 Call Girls in Bur Dubai
Bur Dubai Call Girls O58993O4O2 Call Girls in Bur Dubai
 
FULL ENJOY - 9953040155 Call Girls in New Ashok Nagar | Delhi
FULL ENJOY - 9953040155 Call Girls in New Ashok Nagar | DelhiFULL ENJOY - 9953040155 Call Girls in New Ashok Nagar | Delhi
FULL ENJOY - 9953040155 Call Girls in New Ashok Nagar | Delhi
 
Olivia Cox. intertextual references.pptx
Olivia Cox. intertextual references.pptxOlivia Cox. intertextual references.pptx
Olivia Cox. intertextual references.pptx
 
Akola Call Girls #9907093804 Contact Number Escorts Service Akola
Akola Call Girls #9907093804 Contact Number Escorts Service AkolaAkola Call Girls #9907093804 Contact Number Escorts Service Akola
Akola Call Girls #9907093804 Contact Number Escorts Service Akola
 
Bare And Wild Creation, Curio Shop, Tucumcari NM
Bare And Wild Creation, Curio Shop, Tucumcari NMBare And Wild Creation, Curio Shop, Tucumcari NM
Bare And Wild Creation, Curio Shop, Tucumcari NM
 
Govindpuri Call Girls : ☎ 8527673949, Low rate Call Girls
Govindpuri Call Girls : ☎ 8527673949, Low rate Call GirlsGovindpuri Call Girls : ☎ 8527673949, Low rate Call Girls
Govindpuri Call Girls : ☎ 8527673949, Low rate Call Girls
 
Downtown Call Girls O5O91O128O Pakistani Call Girls in Downtown
Downtown Call Girls O5O91O128O Pakistani Call Girls in DowntownDowntown Call Girls O5O91O128O Pakistani Call Girls in Downtown
Downtown Call Girls O5O91O128O Pakistani Call Girls in Downtown
 
Russian Call Girls Delhi NCR 9999965857 Call or WhatsApp Anytime
Russian Call Girls Delhi NCR 9999965857 Call or WhatsApp AnytimeRussian Call Girls Delhi NCR 9999965857 Call or WhatsApp Anytime
Russian Call Girls Delhi NCR 9999965857 Call or WhatsApp Anytime
 
Jagat Puri Call Girls : ☎ 8527673949, Low rate Call Girls
Jagat Puri Call Girls : ☎ 8527673949, Low rate Call GirlsJagat Puri Call Girls : ☎ 8527673949, Low rate Call Girls
Jagat Puri Call Girls : ☎ 8527673949, Low rate Call Girls
 
How Can You Get Dubai Call Girls +971564860409 Call Girls Dubai?
How Can You Get Dubai Call Girls +971564860409 Call Girls Dubai?How Can You Get Dubai Call Girls +971564860409 Call Girls Dubai?
How Can You Get Dubai Call Girls +971564860409 Call Girls Dubai?
 
Zagor VČ OP 055 - Oluja nad Haitijem.pdf
Zagor VČ OP 055 - Oluja nad Haitijem.pdfZagor VČ OP 055 - Oluja nad Haitijem.pdf
Zagor VČ OP 055 - Oluja nad Haitijem.pdf
 
FULL ENJOY - 9953040155 Call Girls in Mahipalpur | Delhi
FULL ENJOY - 9953040155 Call Girls in Mahipalpur | DelhiFULL ENJOY - 9953040155 Call Girls in Mahipalpur | Delhi
FULL ENJOY - 9953040155 Call Girls in Mahipalpur | Delhi
 
Russian⚡ Call Girls In Sector 39 Noida✨8375860717⚡Escorts Service
Russian⚡ Call Girls In Sector 39 Noida✨8375860717⚡Escorts ServiceRussian⚡ Call Girls In Sector 39 Noida✨8375860717⚡Escorts Service
Russian⚡ Call Girls In Sector 39 Noida✨8375860717⚡Escorts Service
 
Kishangarh Call Girls : ☎ 8527673949, Low rate Call Girls
Kishangarh Call Girls : ☎ 8527673949, Low rate Call GirlsKishangarh Call Girls : ☎ 8527673949, Low rate Call Girls
Kishangarh Call Girls : ☎ 8527673949, Low rate Call Girls
 
Khanpur Call Girls : ☎ 8527673949, Low rate Call Girls
Khanpur Call Girls : ☎ 8527673949, Low rate Call GirlsKhanpur Call Girls : ☎ 8527673949, Low rate Call Girls
Khanpur Call Girls : ☎ 8527673949, Low rate Call Girls
 
9654467111 Full Enjoy @24/7 Call Girls In Saket Delhi Ncr
9654467111 Full Enjoy @24/7 Call Girls In Saket Delhi Ncr9654467111 Full Enjoy @24/7 Call Girls In Saket Delhi Ncr
9654467111 Full Enjoy @24/7 Call Girls In Saket Delhi Ncr
 
Karol Bagh Call Girls : ☎ 8527673949, Low rate Call Girls
Karol Bagh Call Girls : ☎ 8527673949, Low rate Call GirlsKarol Bagh Call Girls : ☎ 8527673949, Low rate Call Girls
Karol Bagh Call Girls : ☎ 8527673949, Low rate Call Girls
 
Aiims Call Girls : ☎ 8527673949, Low rate Call Girls
Aiims Call Girls : ☎ 8527673949, Low rate Call GirlsAiims Call Girls : ☎ 8527673949, Low rate Call Girls
Aiims Call Girls : ☎ 8527673949, Low rate Call Girls
 

DSLR Cameras

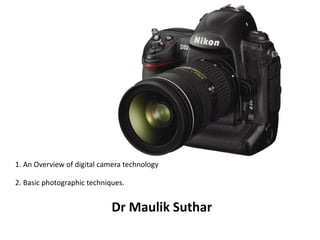
  • 1. DSLRs Dr Maulik Suthar • 1. An Overview of digital camera technology • 2. Basic photographic techniques.
  • 2. Content • Common photography terms with explanations • Basic gear and explanations of common lenses – Understanding shutter speed – Understanding aperture and F-stops – Understanding ISO • When to use auto mode • Achieving great focus • Rules of composition (and when to break them!) • Metering light and using histograms • How to use white balance • How to use reflectors like a pro
  • 3. Oh the Technology! • D-SLR (single-lens reflex), • Megapixels, • Image Stabilization (IS & VR), • Dust Reduction, • Live View, • Sensors, • facial recognition.......... What does it all mean? • (and why does it matter to me?) Introduction to Digital Cameras
  • 4. Knowing Your Camera 4 Digital Cameras can be seem like a complex piece of equipment. Knowing some of the basics of your camera will help you choose the right camera and produce quality photos. What is a Digital Camera A camera that takes video or still photographs (or both) digitally by recording images on a light-sensitive sensor.
  • 5. DSLR Camera • Top of the line camera; primarily used by professionals. • Include high quality lenses, and often interchangeable. • Often accepts other accessories such as filters. • Produce very high resolution photos. 5
  • 6. Digital Photos Overview • Digital Photos are made up of pixels (picture elements). • DPI vs PPI – DPI - Dots Per Inch (How a printer prints the image) – PPI – Pixels Per Inch (How a monitor displays an image) • The resolution of a digital photo is its pixel dimensions. • Digital Cameras use megapixels to specify the pixel dimensions of its photos. 6
  • 7. Types of Digital Cameras • Ultra Compact Digital Cameras • Compact Digital Cameras • Advanced Digital Cameras • Digital Single Lens Reflex (DSLR) Cameras 7
  • 8. Ultra Compact Digital Camera • Typically a small and inexpensive camera. • Can easily be carried in a pocket or purse. • Usually have fewer features than the higher end cameras. 8
  • 9. 2006-06-01 Point and Shoot digital Cameras (P&S) o - Commonly referred to as “consumer” digital cameras. o - Represent probably 90% of all digital cameras on the market o - Typically small, compact and lightweight o - Targeted at broad majority o - Typically very User-Friendly o - Image Quality has improved drastically
  • 10. Compact Digital Cameras • The typical digital camera used for taking most pictures by consumers. • Includes most of the features the average person would need. 10
  • 11. 2006-06-01 Prosumer Digital Cameras • -Not technically its own specification • - Common term used to describe advanced models of P&S • (now also used to describe many entry level DSLR's) • - Similar in shape and appearance to Digital SLR's • - Typically have extended zoom range (8-12X Optical Equiv) • - Typically combine user friendly • P&S features with more advanced • manual features.
  • 12. Advanced Digital Camera • Designed for the more skilled or hobbyist photographer. • Usually has higher quality lens and zoom. 12
  • 13. 2006-06-01 Digital SLR (DSLR) • SLR Stands for Single Lens Reflex • - Have larger sensors, resulting in greater image quality • - Tend to favor manual control, lacking many automatic settings found on P&S • - Much larger and heavier • - Ability to interchange system lenses
  • 14. 2006-06-01 • So What is the REAL difference between a digital SLR and a point and shoot camera?
  • 15. 2006-06-01 The short answer is.....Image Quality • But Why? • How can a 6 megapixel DSLR take a better picture than a 24 megapixel point and shoot? •Because Size Matters!
  • 16. 2006-06-01 How the digital sensor works • - Each digital image is made from millions of tiny squares, known as pixels. • - Essentially, an image is recorded by tiny microlenses (pixels) which make up the cameras sensor
  • 17. 2006-06-01 • All Pixels are not created equal! • -A digital sensor is essentially made up of millions of tiny micro-lenses (pixels) • - Pixels are analog devices which record light and color data • - Larger Sensors contain larger pixels, which are much better and collecting this data
  • 19. Full-Frame versus APS-C Sized Sensors
  • 20. 2006-06-01 Digital Camera Features and Technologies • Megapixels – Determine the total size (Dimensions) of the image recorded by camera • - More MP does not always mean a better picture • - Digital Image dimensions do not equal print dimensions • - For example a full quality image from an 8 megapixel camera • will produce a digital image measuring approximately 9X14 inches but printing standards say that you should not print to “Photo Quality” any larger than 8X10
  • 22. Megapixels Megapixels Pixel Dimension Max Quality Print Size 2.0 1600 x 1200 4” x 6” 3.0 2100 x 1500 5” x 7” 4.0 2400 x 1800 8” x 10” 5.0 2500 x 1900 9” x 12” 6.0 3000 x 2000 11” x 14” 8.0 4000 x 2000 12” x 16” 22 The following guide will help you know what size of high-quality print you can expect from each megapixel rating. Multiplying the pixel dimension will give you the exact megapixel rating. The rating stated by the manufacturer is usually rounded.
  • 23. Megapixels • A higher megapixel rating does not always mean higher quality photos. • A camera’s megapixel rating will help you determine the largest size of prints you can expect to make without sacrificing the quality of the image. 23
  • 24. Megapixels 24 4 megapixel 8 megapixel 2400 x 1800 4000 x 2000 8” x 10” print The 8 megapixel will not produce a better quality 8” x 10” print than the 4 megapixel.
  • 25.
  • 27. 1,000 megapixels or 1 GigaPixel
  • 31.
  • 33. Anatomy of a Camera
  • 34. Anatomy of a Camera
  • 35. Anatomy of a Camera
  • 36.
  • 37. Anatomy of a Camera
  • 38.
  • 39.
  • 40.
  • 41.
  • 43.
  • 44.
  • 45.
  • 46. Electronic Viewfinder • An electronic viewfinder, or EVF, is a viewfinder in which the image captured by the lens is projected electronically onto a miniature display. The viewfinder shows exactly what the lens sees. 46
  • 47. Optical Viewfinder • A window on the back of the camera you look through to position the shot. • The primary drawback to the optical viewfinder is the parallax, displacement or difference in the apparent position of an object viewed along two different lines of sight. 47
  • 48.
  • 49. Viewfinder • Unlike with compact cameras, where you compose your shots by looking at the back of the camera (LCD screen), on the DSLR, you’ll usually look through the eyepiece of the viewfinder for composing, focusing, and viewing certain information provided by the camera. • Some DSLRs will allow you to use their LCD monitors the same way you would with a compact camera, but you won’t usually take photos this way.
  • 50. LCD Monitor • One of the biggest advantages of your DSLR is its ability to preview an image immediately after you take a picture. The LCD monitor is located on the back of the camera and may have a swivel capability so that you can orient the screen for easier view from different camera positions. • As you take each shot, a preview of the image will appear for a short time on the LCD. This monitor also gives you access to image data and the camera’s menu system.
  • 51. LCD/OSD An on-screen display (OSD) is information about the camera’s settings displayed on the LCD screen.
  • 52.
  • 53. Live View • Refers to the ability to use the lcd screen on the camera the same way you would use the viewfinder • Shots can be composed even while holding the camera away from your face • Originally only a feature in P&S, DSLR’s now use Live View also
  • 54.
  • 55.
  • 56. Facial Recognition • Camera detects faces in your frame based on color, contrast change, etc. • Focus is automatically adjusted so detail in faces is high • Color and contrast are automatically adjusted to create pleasing skin tones
  • 57. Camera Bag • Purchasing a cool, sophisticated, cutting-edge camera is one thing. Getting a camera bag to support, hold and protect your camera is another. Welcome to Flipkart's mind-boggling array of camera bags that will not only satiate your requirements, but will also effectively give you the benefit of heading out with confidence on your outdoor ventures with the camera of your choice, securely by your side. Camera bags are the perfect accessories for photography enthusiasts and professionals who require one bag that carries all of their camera-based essentials. Before investing in a camera bag, ensure that the bag is able to accommodate your camera model and make sure that the bag is waterproof with plenty of internal pockets to store extra additions safely and securely. Additions such as batteries, backup lenses, charger units, SD cards, pocket tripods and many such accessories should be accommodated without a fuss. Camera bags are divided into multiple types such as holster, the belt pack, shoulder bag with one strap, backpacks, slings and so on. Choose a type or a model that is most convenient to you
  • 58.
  • 59. Why Batteries? Batteries are the soul of photographic equipment
  • 60.
  • 61.
  • 62. Types of Light • Sunlight • Moonlight • Good Light • Bad Light • Soft Light • Harsh Light • Storm Light • Flash Light • Incandescent • U.V. Light • Black Light • Fluorescent • Indirect/Bounce • Highlights
  • 63.
  • 64. Movement Compensation • Refers to the cameras ability to correct small movements by the user while taking a picture, in order to reduce the blur caused by camera shake. • Very Useful in low-light or telephoto situations
  • 65. Movement Compensation • Represented differently by different companies: • Nikon – VR – Vibration Reduction • Canon – IS – Image Stabilization • Sony – SSS – Super Steady-Shot
  • 66.
  • 67. Dust Reduction • Dust is more of a problem in DSLR's due to changing lenses • Once dust gets on your sensor, it can be difficult to remove • Dust reduction is essentially a mechanism which shakes the cameras sensor to free any clinging dust particles • Special anti-static coatings or filters may also be used
  • 68.
  • 69.
  • 70. File Format • Refers to the way the computer stores the data • More common formats include: – JPEG – EXIF – TIFF – RAW
  • 71. JPEG • Stands for Joint Photography Experts Group • Most widely used format • Biggest advantage - can compress image data • Do not edit JPEG images in photo-editing programs to minimize data loss
  • 72. EXIF • Stands for Exchange Image File Format • Used by many digicams • Is a variation of the JPEG format • Stores extra data as metadata with the image file • Metadata stores shutter speed, aperture, and other capture settings
  • 73. TIFF • Stands for Tagged Image File Format • Is the choice for bringing images into publishing programs • Does not compress as much as JPEG • Choose when picture quality is more important than file size
  • 74. RAW • Simply means raw • Used by high-resolution digicams • Does not include any in-camera processing features • Provides a truer version of the scene in front of the camera • Large file size Back
  • 75. DSLR Camera Image File Formats JPEG (.jpg, .jpeg) • require little, if any, color and exposure correction. • undergo less scrutiny. • need to be delivered, printed, or distributed quickly (often straight from the camera or memory card). • take up less media storage.
  • 76. Raw (e.g. RAW, CR2, NEF) • Provide you with plenty of image detail and data to make reasonable adjustments without compromising image quality. • Offer the maximum available image data, thus provide the potential for generating the highest quality images your sensor can record. • Take up to several times the media storage than do JPEG files. • Must go through a Raw file conversion process which adds an extra step before distributing, displaying, or printing images using the normal JPEG format. • Do not have camera color balance, exposure, or other settings “baked-in,” so you are free to apply these adjustments (within the boundaries of the available data) after image capture.
  • 77.
  • 78.
  • 79. Getting a “Good” shot • While there are hundreds of factors which can make a photo “good”, it is still a relative term, and good to one person may not be good to someone else. • For our purposes we will refer to good in the sense of a correct exposure.
  • 80.
  • 81. Exposure • A “correct” or “good” exposure occurs when you maintain as much detail as possible in both the very bright parts (highlights) as well as the very dark parts (shadows) of an image. How much of a range in which you can capture detail from light to dark is referred to as the Dynamic Range. As you are about to see, there can be many “correct” or “good” exposures • There are three factors which influence the exposure of your image: 1. Shutter Speed 2. Aperture 3. ISO
  • 84.
  • 85.
  • 86.
  • 87. 87 CAMERA BASICS These basics are common to ALL cameras: • F-Stop • Shutter Speed • Film Speed
  • 88. 88 CAMERA BASICS •F-Stop (how much light is seen, how much the aperture is open) •Shutter Speed (how long the light is seen in the aperture) •FILM SPEED (how fast the film itself responds to this light)
  • 89. 89 F-STOP HOW MUCH LIGHT IS SEEN • Sometimes known as ‘aperture’ • Ranges from about 1.8 to 32 • A higher number (i.e. 32) means less light is ‘seen’. • A lower number (i.e. 1.8) means more light is ‘seen’.
  • 90. 90 F-STOP HIGHER F-stop (i.e. 32) ADVANTAGES • Increased depth of field, i.e. image background is not blurry DISADVANTAGES • Needs more light, i.e. slower shutter speed.
  • 91. 91 F-STOP LOWER F-STOP (i.e. F1.8) ADVANTAGES • Lets plenty of light in! Better to use in darker settings. • Less blurry since faster shutter speed may be needed to compensate for more light. DISADVANTAGES • No depth of field, i.e. background of image likely out of focus.
  • 93. 93 SHUTTER SPEED MEASURES HOW LONG LIGHT IS LET INTO THE FILM/CAMERA • Common values include ½ sec, 1/8 second, 1/1000 second etc • Shorter time means less time for light to get into the camera • Shorter time reduces blurriness
  • 94. 94 SHUTTER SPEED FASTER SPEED ADVANTAGES • Reduces blurriness as image is ‘seen’ only briefly – great for sports events. DISADVANTAGES • Less time for light to enter camera • Requires bright conditions
  • 95. 95 SHUTTER SPEED SLOWER SPEED ADVANTAGES • Great for darker conditions (more time for light to enter the camera) DISADVANTAGES • Increased chance of blurriness • Often requires a tripod be used for steadiness.
  • 98. 98 FILM SPEED • Traditional cameras use film of different sensitivities. It is measured by its ISO number, i.e. 64, 100 400 • Slower speed (i.e. 64) is good for enlarging but requires bright light and/or slow shutter speed and/or lower F-stop. • Faster Film (i.e. 400) is poor for enlarging but needs less light and thus good for indoor photography. • Digital Cameras do not use film per se. They use a technology called CCD (Charge Coupled Device) which senses images.
  • 99. The only difference between these two pictures is that one was shot with automatic exposure, and the other was shot using creative exposure. Which photo do you prefer? Probably the picture on the right! By choosing a creatively dark exposure, the rich colors in the sunset were allowed to shine through. However, technically, the photo on the left is “correct,” and the photo on the right is “incorrect.” The camera saw through the lens and tried to expose the bird so that it wouldn’t become a shadow. To me, the photo was not about exposing the bird properly, but exposing the sunset properly. The bird was just a nice shape to include in the foreground. This is exactly why you must learn exposure–because sometimes the “scientifically correct” exposure is not the best exposure to make the photo look how you want it to.
  • 100. Too much light creates an over- bright image with white spots: parts of the image are Over-Exposed Too little light creates an under-bright image with black spots: parts of the image are Under-Exposed Getting the ‘best’ exposure can be difficult in scenes with contrasting light Exposure is the total amount of light allowed to fall on the film/image sensor
  • 101. Exposure can be controlled mainly through two camera settings: Aperture… … and Shutter Speed
  • 102. Aperture, Shutter Speed & ISO Triangle
  • 103.
  • 104.
  • 105.
  • 106.
  • 107.
  • 108.
  • 109.
  • 110.
  • 111. Shutter Speed and Blur Your camera’s image sensor records any light projected onto it when you take a photo and the result is saved as a single still image. If there is no movement during exposure, the sensor only records stillness. However, if there is movement during exposure (either in the scene or from camera movement) it will may be recorded as overlapping areas of light in the frame. This produces blur, ghosting, light streaks, and other effects. Sometimes these effects are used creatively. To help prevent blur due to camera movement, a tripod or monopod can be used. Image Stabilization (IS), Vibration Reduction (VR) and similar technologies are lens and camera features that can also assist in minimizing this type of blurring. While these will help minimize the effects of camera movement, they will not reduce blurring caused by movement in your scene -- but faster shutter speeds will. The faster the shutter speed, the shorter the duration of exposure; the sensor will have less opportunity to “see” anything move or change in the scene. Many compact and DSLR cameras are capable of shutter speeds as fast as 1/8000 of a second. At high speeds, you can capture images with virtually no motion blur regardless of subject or camera movement. Slower shutter speeds are useful, too. In low light conditions slower shutter speeds offer the ability to capture a scene when higher ISO and wider apertures are not practical. In other words, in low light a slower shutter speed can allow enough time for the image sensor to collect enough light for proper exposure. Again, the tradeoff is that a slower shutter speed increases the potential for blur due to movement of the camera and/or the subject.
  • 113. Aperture is the size of the opening in the lens that allows light through the lens – similar to an eye’s pupil High f-stop = Low aperture = Small opening = Less light = Lower Exposure Low f-stop = High aperture = Large opening = More light = Higher Exposure
  • 114. • In our everyday lives, our eyes are constantly being drawn to areas of interest; the people and objects we look at receive our visual (and mental) focus. Our eyes dart around -- scanning, stopping, and focusing on the world around us. But our eyes aren’t really capable of focusing on more than one thing at a time, so while some areas of a given scene are in focus, other areas are not. The same can be said of our camera lenses. When we focus our camera’s lens on a nearby subject, objects at a good distance from the subject are usually out of focus. The area that is in focus can be thought of as a plane parallel to the camera sensor plane. The depth of this plane of focus (how much of the area around the subject is in focus) is called the Depth of Field (DOF) and it is controlled by adjusting your lens’ aperture.
  • 115. Aperture • An aperture is defined as a hole or opening through which light is admitted. • Inside the camera lens is a system of blades which open and close to increase or decrease the opening through which light passes into the camera
  • 116. Aperture • Often referred to as an f-stop, aperture is usually represented by: f/1.8, or f/5.6 • A Smaller # means a wider opening and is referred to as a larger value (eg. A large aperture of 2.0, a small aperture of 22) • The wider the lens is open(larger aperture value), the more light gets in (you can use faster shutter speeds)
  • 118.
  • 119.
  • 122.
  • 123. Apertures Aperture, measured in f stops, determines the size of the opening in your lens, which controls how much light strikes your filming during an exposure. The smaller the number, the larger the opening. The larger the number, the smaller the opening. Aperture also determines depth of field smaller the aperture, the greater the depth of field. O o o o o o o f2.8 f4 f5.6 f8 f11 f16 f22 Each f stop change lets in either 2 times or ½ the amount of light, depending on whether you are opening up or stopping down. Open up means to make the opening larger (but a smaller number). Stop down means selecting an aperture that is smaller in size (but bigger in number)
  • 124. Shutter Speed • Refers to how long the shutter is open, exposing the image sensor to light (how long the camera “sees” the picture) • Shutter speeds are read in fractions of a second. • Measured in Seconds, from 30 down to 1/8000
  • 125. • As you’ve already seen, your camera’s image sensor must be exposed to light in a controlled way in order to properly record a picture. The mechanism that controls the duration of the exposure is called the shutter. The shutter’s job is to block the light coming in through your lens until you press the shutter release button to take a photo. When you press that button, the shutter slides open, exposing the image sensor to the light coming in through the lens (the projected image of the scene), then closes to block the sensor again, ending the exposure. Your DSLR is capable of a wide range of shutter speeds • Usually, the shutter remains open for only a fraction of a second, but the duration can be longer. We refer to the length of time the shutter remains open as the shutter speed. Shutter speed is either controlled by the photographer directly, or by the camera in some automatic modes. Shutter Speed Priority Freeze the Moments vs. Show Movement
  • 126.
  • 127.
  • 128. Shutter Speed • Fast Shutter Speeds (600 and up) are used to stop motion and will freeze the subject.
  • 129. Shutter Speed • Slow Shutter Speeds (1/60 or slower) can be used to portray movement or speed
  • 130.
  • 131.
  • 132.
  • 133.
  • 134.
  • 136.
  • 137.
  • 138.
  • 139.
  • 142. Shutter Speed • Very Slow Shutter Speeds (5 sec. or slower) can be used in very low light situations to obtain correct exposure, or achieve dramatic effects.
  • 143.
  • 144.
  • 145. The longer a picture is being taken, the more chance there is that movement/unsteady camera will cause it to blur – so a fast shutter speed is desirable for sharp photos (remember you will have to compensate the aperture to keep it in good exposure) Using flash creates enough light to allow a fast shutter speed – very good for capturing movement, but short range and can lose background ISO affects the camera’s sensitivity to light: Low ISO = less sensitive to light, slower shutter speed (likely to blur in low light, but little grain) High ISO = more sensitive to light, faster shutter speed (less likely to blur, but more grain) No flash Flash Low ISO High ISO
  • 146. Shutter Speed • Beware! • As your shutter speed decreases, your chances of getting a blurry image increase because you must hold the camera steady for a longer period.
  • 147. Shutter Speed • Shutter speeds appear as whole numbers, but are really fractions: • 1/60 sec., 1/125 sec., 1/250 sec., 1/500 sec. • Therefore 1/60 is a slower shutter speed than 1/125, etc. • When you change 1 stop in Shutter speed, you are letting in either 2 times or ½ the amount of light- - Long shutter speeds spend more time letting light in, which can help in dark environments and create artistic blur effects with movement
  • 148. So Shutter Speed is the length of time the camera’s lens shutter is open – in other words, how long the camera spends taking the picture - Short shutter speeds spends less time letting light in, which allows for quicker pictures and the ability to ‘freeze time’ in great detail
  • 149.
  • 150. - To get a good exposure on manual mode, you have to make sure the aperture and shutter speed balance each-other out correctly for the sort of photo you want - Most SLRs on automatic mode will judge the aperture and shutter speed for you when taking a picture – but you can still change an exposure compensation setting to alter what it thinks is ‘correct’ if it gets it wrong On most SLRs you can switch on: Aperture Priority (you pick the aperture, the camera picks the shutter speed), or - Shutter Priority (you pick the shutter speed, the camera picks the aperture – compacts usually have this too) - depending on which is most convenient for what you want Remember: Practice makes perfect!
  • 151. Fast and Slow Shutter Speeds
  • 152.
  • 153.
  • 154.
  • 155.
  • 156. What is a Reciprocal relationship between Aperture and Shutter Speed? • If a correct exposure for a given lighting condition is 1/60 @ 11, then 1/125 @ f8 will let in the same amount of light. If 1/125 @f8 is correct, then 1/250 @f5.6 will let in the same amount of light.
  • 158.
  • 159.
  • 160. 3. ISO • Refers to the light sensitivity of the sensor • HIGH ISO value means the sensor will be MORE sensitive to light, meaning it will take LESS LIGHT to get the right exposure • Similar to Film Speeds in 35mm format
  • 161. • Typically ranges from 100-1600 • Newer Digital cameras have a higher range • (up to 64000) • Using High ISO values causes the sensor to produce much more heat, which creates digital “noise” in images.
  • 162.
  • 163.
  • 164. • Noise is similar to film grain and causes loss of fine detail in images • It is more visible in dark parts of an image and is generally more noticeable when displayed on screen than in print
  • 165. • Some cameras claim to have “Digital Image Stabilization” • This just means that the camera will automatically increase the ISO in order to allow a faster shutter speed • Faster Shutter Speed will reduce the likelihood of camera shake, but high ISO will most likely result in a grainy image.
  • 166.
  • 167.
  • 168. ISO and Image Quality
  • 169.
  • 170.
  • 171.
  • 172.
  • 173.
  • 174.
  • 175. Exposure Compensation • Despite what your camera meter might determine as being the best aperture and shutter speed settings, you might find that you’d prefer the subject and/or background to appear a little brighter. Without changing the actual lighting in the scene (with reflectors, additional light sources, moving your subject, or adding flash), you’ll have to adjust the exposure overall. You can leave your camera on its current shooting and metering mode and simply override the camera’s exposure settings via the Exposure Compensation (EC) control. Doing this is as easy as dialing the appropriate control wheel to move the exposure level indicator up or down the meter scale. For example, if you’d like the subject to appear a bit lighter in the picture, you might dial-in +1 stop in the exposure indicator.
  • 177.
  • 178.
  • 179.
  • 180.
  • 181. The fourth Element - White Balance • White balance doesn't really affect your exposure, just the appearance of colors in the image • Different light sources cast their own colors, which cannot usually be noticed with the naked eye. • White Balance is essentially the camera compensating for the color cast of the light in order to reproduce the “correct” colors
  • 182. White Balance • The color cast of light is referred to as its Color Temperature and is rated in degrees Kelvin • Ranges from “Cool” to “Warm” • Most Digital cameras have Automatic White Balance, but also specific options for different sources of light.
  • 183.
  • 184. • Auto. With Auto WB, your camera estimates the best WB adjustment for the scene. Auto will not always give you the most accurate results, but it is a good choice if you don’t want to deal with WB settings while shooting. • Daylight, Shade, Cloudy, Flash. These settings help compensate for the bluish (cooler) colors associated with outdoor/daylight and flash lighting. • Tungsten. This setting helps compensate for the orange (warmer) colors associated with incandescent lighting. • Fluorescent. This setting helps compensate for the greenish colors associated with traditional fluorescent lighting. • Kelvin. If you’d like to dial-in a specific color temperature as your WB setting, use this. It can be great for fine-tuning the WB. • Custom or “White Card” setting. After photographing a known white surface under the lighting conditions you’ll be shooting in, you can use that image to calibrate your WB setting. This is usually accomplished by having the camera prompt you for the image of the white surface. The camera then uses the color cast in the image to determine a good WB adjustment for subsequent photos. A neutral gray card can also be used. See more about this in Gray Cards and Color Reference Charts later in this section.
  • 187. Introduction to Digital Photography White Balance http://tiny.cc/GAQLd
  • 188. White Balance: Cold vs Warm http://tiny.cc/GAQLd
  • 189. • It’s easy to get frustrated because you can’t see the preview image clearly under bright light. Times might also arise where you’re second-guessing what the preview is showing you because you’re not sure if the brightness setting on the LCD is too high or low. The histogram is a quick way to view what your camera is recording about an image’s tonal values when other methods are not as precise. With the knowledge you’ll get from that data, you can make quick, informed adjustments to your exposure settings. • Your camera’s histogram displays a bar graph detailing the distribution of tones in an image from darkest to brightest with the darker tones to the left and brighter tones to the right. Each tiny bar represents one shade or tone in the image with the height of that bar representing the number of pixels the image contains of that tone. The histogram is somewhat reminiscent of mountain peaks and valleys. The valleys are tones that appear infrequently (or not at all) in the image and the peaks are the tones that appear most often. Note that although the bars in the histogram are clustered, this does not indicate that those tones are clustered in the actual image. Each bar simply indicates how often a particular tone appears throughout the image.
  • 190. • With that in mind, it’s easy to understand what the histogram says about a particular photo. If most of the image contains very bright areas, the histogram will show most of the higher bars to the right of the graph. If most of the image contains very dark areas, the histogram will show most of the higher bars to the left of the graph. A photo with plenty of middle tones will display a cluster of bars around the middle areas of the graph. Histograms with displayed zones, delimited by visible vertical lines on the graph, give you an idea of how the values fit into the dynamic range of the sensor. The middle zone is where the medium tones are, while the zones just to the left and right of the middle zone are -1 stop, or +1 stop, respectively. The two zones farthest to the left and right of the graph are -2 and +2 stops, respectively. • How is the histogram useful for evaluating exposure? Having a graphical view of the distribution of all the tonal values can help you know what’s going on with an image in ways that might not be obvious in the regular image preview. One thing to keep in mind is that the histogram is most useful when you have an idea of what it should look like based on the type of image you’re capturing. There is no single “correct” histogram, because there is no single “correct” type of image.
  • 191.
  • 192. The fifth element = Depth of Field • Aperture also controls depth of field (DOF), which refers to how much of your image is in focus. • A wide aperture (small #) will give a shallow DOF and can be used to isolate a subject.
  • 195.
  • 196.
  • 197. Basic In-Camera Settings • Exposure Modes • There are several modes available which offer a combination of automatic and manual control over the three elements of exposure. • Auto, sometimes represented by an A, or simply a green square, is fully automatic functioning. True “point and shoot” where the camera decides all the settings for you
  • 198. Basic In-Camera Settings • Av or Aperture Priority allows you to choose the aperture value while the camera chooses the shutter speed required to obtain a correct exposure • Tv or Shutter Priority allows you to choose the shutter speed while the camera chooses the aperture which would produce the correct exposure • M or Manual gives you complete manual control. You choose both shutter speed and aperture
  • 199.
  • 200.
  • 201.
  • 202.
  • 203. Basic In-Camera Settings • Scene Modes • Scene Modes are basically fully automatic modes designed specifically for a certain situation. They typically place emphasis on one or more settings based on the typical circumstances of the situation chosen. • Most digital cameras have very similar scene modes available
  • 204. Scene Modes • Backlight - eliminates dark shadows when light is coming from behind a subject, or when the subject is in the shade. The built-in flash automatically fires to "fill in" the shadows. • Beach/Snow - photograph beach, snow and sunlit water scenes. Exposure and white balance are set to help prevent the scene from becoming washed out looking.ds. Use of tripod recommended.
  • 205. Scene Modes • Fireworks - shutter speed and exposure are set for shooting fireworks; pre-focusing & use of tripod recommended. • Landscape - take photos of wide scenes. Camera automatically focuses on a distant object. • Macro - take close-up shots of small objects, flowers and insects. Lens can be moved closer to the subject than in other modes. Hold the camera steady or use a tripod.
  • 206. Scene Modes • Night Portrait - take photos of a subject against a night scene. The built-in flash and red-eye reduction are enabled; shutter-speeds are low. Use of tripod recommended. • Night Scene - photograph nightscapes. Preprogrammed to use slow shutter speeds. Use of tripod recommended.
  • 207. Scene Modes • Party - take photos in a dim lit room; exposure and shutter speed are automatically adjusted for room brightness. Captures indoor background lighting or candlelight. Hold the camera very steady when using this mode.
  • 208. Scene Modes • Portrait - main subject is clearly focused and the background is out of focus (has less depth of field). Best when taking shots outside during the day. Shoot using a mid to long telephoto lens, stand close to your subject within the recommended camera range and, when possible, select an uncomplicated background that is far from the subject.
  • 209. Scene Modes • Sports (also called Kids & Pets)- take photos of a fast moving subject; fast shutter speeds "freeze" the action. Best when shots are taken in bright light; pre-focusing recommended. • Sunset - take photos of sunsets and sunrises; helps keep the deep hues in the scene.
  • 211. Fully Automatic Mode • More than likely, your camera has an all-encompassing automatic mode. On Canon and Nikon cameras this full-auto mode is denoted by a green icon on the mode dial. On your camera it might be under a different icon, or simply under the word AUTO. You can think of full-auto as sort of a point-and-shoot mode. Few camera settings are set by you, and the actual decisions about exposure are made entirely by the camera. ISO, aperture, and shutter speed are determined based on what the camera’s programming thinks is best for the scene. While this might seem like a great way to shoot, it provides you with very few creative choices and not always the intended results. • To use this mode, just set your camera to AUTO or the green icon, and you can start shooting just as if you were using a point-and-shoot. The camera will make all of the important exposure decisions for you including whether or not to trigger the internal or pop-up flash if your camera has one. • Again, just as with all of the automatic and easy shooting modes, you’ll have limited creative control over your exposure settings and the camera will not always make the best decisions on your behalf. That’s definitely a point you should be aware of. If you want more control, you’ll have to abandon these modes and move on to the ones that put more control in YOUR hands. We’ll discuss other modes as we progress.
  • 212. Basic/Scene Modes • Now, besides full-auto, some cameras also have modes designed for very specific shooting scenarios like “Portrait” or “Landscape” shots, night shooting, action and other situations. Depending on the camera manufacturer, these might be called BASIC or SCENE shooting modes on your camera. These are more than likely found on consumer and some pro-sumer models than on high-end DSLRs. As you might expect, if you want the camera to attempt to make good exposure decisions for you, you’d select the BASIC or SCENE mode that matches up to your shooting scenario. I’ll stress this one last time: the camera’s not always going to make the best choices, and your creative options might be very limited, but these modes could make shooting a little easier for beginners.
  • 213. Program or Program Shift (P) Mode • Program mode is another easy-to-use mode that gives the camera initial control over the aperture and shutter speed settings. The camera controls the balance between the aperture and shutter speed, but it allows you to shift the exposure mix in case you’d like to see one of the other settings in a different place. • For example, let’s say your camera is showing an aperture at f/5.6 and shutter speed at 1/60 sec. If you’d like to open up your aperture to f/4, you can turn a dial until you see that adjustment as your camera automatically makes the reciprocal adjustment to the shutter speed (in this case, to 1/125 sec.). This is usually done via one of the adjustment “wheels” on the camera. This type of exposure control shifting is a handy way to exert a little more control over the exposure settings than you’d have with the full- auto mode. • Besides allowing you to shift the exposure settings up or down, P mode also allows you to set the ISO and dial-in Exposure Compensation, which we'll cover later.
  • 214. Shutter Priority (Tv or S) Mode • Controlling things like the aperture setting and shutter speed will become very important to you as seek to gain more control over the look of your images. When you want to deliberately control shutter speed, or the duration of your exposure, Shutter Priority mode, often denoted with the symbols “Tv” (time value) or “S”, allows you to select and adjust the shutter speed as you shoot, while the camera automatically adjusts the aperture to compensate for any change in exposure. If you’re taking pictures at a sporting event for example, you might want to capture the images at shutter speeds no slower than 1/500 sec in order to freeze the action. As background and other lighting conditions change, your aperture will be adjusted automatically. • Of course, the camera’s ability to maintain good exposures through automatic aperture adjustments is limited by the aperture range of the lens used. In other words, if the camera would otherwise adjust the aperture to f/2.8 to compensate for a change you’ve made to the shutter speed, it can’t if the lens’ maximum built-in aperture is f/4. In those cases, a simple manual adjustment to your ISO will put you back into a good exposure range.
  • 215. Aperture Priority (Av or A) Mode • This can be thought of as the flip side to Shutter Priority mode and can be found on your shooting mode dial under “Av” or “A.” You’ll use Aperture Priority when you want to have direct control of your aperture setting while allowing your camera to automatically adjust the shutter speed for you to maintain proper exposure. Although using this setting means you’re less concerned about the exact shutter speeds being used, you’ll want to keep an eye on the shutter speeds your camera is selecting for you. Stopping your aperture down too far can lead to slower shutter speeds and blurry pictures.
  • 216. Manual (M) Mode • Manual mode (“M” on the shooting dial) gives you total control over all exposure settings: ISO, aperture, and shutter speed. This means you, and not the camera, are responsible for getting a proper exposure. The camera’s metering system will still provide you with feedback to help you judge the potential for over/under exposure, but it won’t take over to correct your exposure settings. Where lighting conditions are inconsistent, you’ll have to make frequent adjustments. Since you can freely adjust aperture and shutter speed independently of each other, you’ll find that you have a great amount of creative freedom with manual mode. But since you’re doing all the thinking for the camera (as far as exposure goes), you might be spending more time dealing with the settings than you’d like. • Manual mode is very useful in situations where you can take your time composing and making creative adjustments to exposure. It’s also great for studio lighting and portrait setups because in those situations the lighting conditions tend to remain constant throughout a series of shots; few if any exposure adjustments have to be made unless there are changes made to the lighting setup and/or the ambient lighting conditions.
  • 217. Metering Modes • The metering system within a camera measures the amount of light in a frame and determines the best exposure. Many cameras have more than one metering mode and each evaluates a scene in a different way. • Essentially, by changing the metering mode you are telling the camera to evaluate the scene in a different way.
  • 218.
  • 219.
  • 220. Metering Modes • Center-weighted metering • Currently the most common digital camera metering system. Center-weighted is the metering system of choice on digicams that do not offer other metering modes. • Exposure metering is averaged over the entire frame with emphasis placed on the central area. Used for general and portrait photography.
  • 221.
  • 222. Metering Modes • Matrix (evaluative) metering • A complex metering system whereby a scene is split up into a series of zones. Overall exposure is based on evaluating each zone individually and taking an average of the total light readings.
  • 223. Metering Modes • Spot metering • Spot metering covers just under 4 percent of the viewfinder area. It takes a precise exposure reading only at the very center of the frame and disregards the rest. A spot meter is used when a subject is backlit or has bright light upon it and the background is dark -- for example, when there are extremes in brightness in a scene.
  • 224. Metering Modes • Partial metering • Partial metering is similar to spot metering but covers a larger area of the viewfinder, about 13.5 percent. It is useful for taking portrait photos when the subject is back lit Underexposure is minimized by metering on the face. • Both spot and partial metering are considered advanced settings. They give the skilled photographer more control over exposure than do matrix and center-weighted metering.
  • 225.
  • 226. How to change metering mode
  • 227.
  • 228. Taking Digital Photos 1. The quality of the recording device (camera's optics & sensor). 2. The size (in pixels) of the digital image. 3. The digital format it is stored. 4. The technical proficiency and the "eye" of the photographer. 228 There are 4 primary points to consider that impact the quality of a digital photo:
  • 229.
  • 230.
  • 231.
  • 232. - Vary between landscape and portrait - Try to keep the horizon/background objects lined up straight (unless you are throwing them off for artistic effect) - Try zooming/not zooming where it might not be expected - Rather than capturing the whole of something, try taking a strange angle and shooting just part of it (perhaps close up in macro mode)
  • 233.
  • 234.
  • 235.
  • 236.
  • 237. Composition • Learn to see • Rules of thirds • Viewfinder awareness • Simplicity Back
  • 238. Composition = The Rule of Thirds • Imagine the frame divided into three equal sections both horizontally and vertically • Divided into “thirds” • The Concept is: Placing your subject or elements along any of these lines, and especially on or near the intersecting points, makes a photo more naturally attractive to the viewer.
  • 239. Framing the Scene - Digital screens/viewfinders tend to be more accurate in framing the pictures you take - Don’t always (or never) shoot your subject in the centre of the shot – laying the scene out according to thirds can be more interesting/satisfying - You can use Photoshop or other digital imagery software to crop unwanted bits out of your photos
  • 240. Rule of Thirds • The rule of thirds is a compositional rule of thumb in photography and other visual arts such as painting and design. • The rule states that an image can be divided into nine equal parts by two equally-spaced horizontal lines and two equally-spaced vertical lines. The four points formed by the intersections of these lines can be used to align features in the photograph. Proponents of this technique claim that aligning a photograph with these points creates more tension, energy and interest in the photo than simply centering the feature would. 240
  • 241. Rule of Thirds • Again, the concept is simple: Place subjects along the lines, or near intersecting points • For portraits, the eyes are often positioned along one of the horizontal lines preferably near one of the power points to make the photograph more pleasing to look at, and naturally draw attention to the eyes. • For landscapes the horizon is aligned to any of the horizontal lines depending on how much land/water/sky you want to show.
  • 242. The Rule of Thirds
  • 244.
  • 245.
  • 246.
  • 247.
  • 248.
  • 249.
  • 250. Rule of Thirds Illustrated
  • 251. Rule of Thirds Illustrated
  • 252.
  • 253.
  • 254. Focusing on the Subject • Fixed Focus – found on lower end cameras and phones – The focus is fixed and can’t be adjusted. • Auto Focus – Most consumer cameras are equipped with auto focus cameras. – The auto focus kicks in as you start to press the shutter button. • Manual Focus – Found on most professional level cameras – The photographer focuses the camera on the lens. 254
  • 255.
  • 256.
  • 257.
  • 258.
  • 259. How to use Focus Points • Don’t just rely on autofocus (AF), specify exactly where you want to focus. There are two main choices here: let the camera take control by searching the scene, or you can select an area manually. • Single point AF This mode is best used when shooting a portrait or any subject that stays relatively still. It enables you to select a focus point manually, which doesn’t have to be in the centre of the frame. • Dynamic area AF This mode is perfect for shooting fast-moving or erratically moving subjects. Some D-SLRs now have up to 50 AF points, so you choose one, but if the subject briefly leaves that point, the camera will re-focus on a point near to the one you’ve chosen.
  • 260.
  • 261. • Focus point: The focus point used for autofocus is shown in the information display. F-area mode: AF-area mode is displayed as shown below. Single-point AF Dynamic-area AF Auto-area AF camera information display
  • 262.
  • 263.
  • 264.
  • 265. Shutter Release Button • This is the button you press to take a photo. The shutter must be released in order to expose the image sensor to light from the scene. It is usually located on the top of the camera in a position accessible to the right-hand index finger. The default behavior of the shutter button on many DSLRs causes it to activate exposure metering and auto-focus as it’s partially depressed; releasing the shutter as it’s fully depressed.
  • 266. Creating a quality image • Technology is only part of the equation • a visual language and the eye needs to be educated to communicate Rule of Thirds Surprise Juxtaposition Mood Moment Layering Graphic Point of EntryPerspective Emotion Quality of light Impact Sense of place Negative Space http://tiny.cc/GAQLd
  • 267. Preparation • Select camera and accessories • Check batteries • Clean the camera • Adjust controls • Extra memory cards • Field storage Back
  • 268. Shooting • Autofocus • White balance • Set other controls • Review images • Remove unwanted images Back Back
  • 269. Lens
  • 270. Lens • The lens is attached to the camera body via the lens mount on the front of the DSLR. The camera and lens must have compatible interfaces or some form of adapter in order to make a proper connection. The lens release button must be pressed in order to detach the lens from the camera. • The lens may have a switch which allows you to choose manual or autofocus functionality. Lenses are available in a wide selection of focal lengths (e.g. wide angle, normal, telephoto) that are suitable for different types of photography. Zoom lenses offer the flexibility of changing focal lengths without changing the lens. • Fixed focal length lenses (often called, “prime” lenses) don’t allow you to zoom, but often have advantages over zoom lenses, including better optical quality. • Photographers often regard their camera lenses as more crucial to the quality of their images than their camera bodies. Well-made and cared-for lenses tend to retain their value over the years.
  • 271. Zoom • Optical Zoom – The subject is magnified through the camera's optics, or lens. – Produces a higher quality image. – Image quality is maintained in optical zoom. • Digital Zoom – Is an artificial zoom. – Digital zoom crops your image and magnifies the result of the cropping. – Image quality is lost in digital zoom. 271 Most digital cameras are capable of some type of zoom. Many will have one or both types of zoom.
  • 272.
  • 273. Types of Camera Lenses
  • 274.
  • 275.
  • 276.
  • 277.
  • 278.
  • 279.
  • 280.
  • 281. • Wide Angle: A lens with a range of 14-16mm or 14-24mm is good. There are also specialty lenses known as "fish eye" lenses that will give some very wide angle creative effects. Here is an awesome wide angle zoom: Canon EF-S 10-22mm f/3.5-4.5 USM SLR Lens • MidrangeTelephoto: This would generally be a lens with a focal range of 70-200mm. Canon has this one covered with four five lenses, all L-glass. You can see them here. • Long Telephoto Lens: A 300mm lens is the minimum here. More appropriate is a 400mm or 500mm lens. Depending upon the aperture, these lenses can cost as much as a used car, but they are really valuable in terms of taking wildlife and sports events. • Macro: No photographer's bag would be complete without a macro lens. These allow you to take those close ups of bugs, flowers, and the like. They are also useful for portraits. Generally a macro lens will be a prime, or single focal length, lens. Canon has its own head of the class in the Canon EF 100mm f/2.8 Macro. But there are some very good off brand macro lenses made by Tamron and Sigma. Be sure to check them out. • Extension Tubes: This is an excellent way to get macro...cheap. These little tubes move the lens away from the sensor without any glass. The effect is to allow you to move your lens much closer to the object. You will definitely need a tripod when you use them. They are sold as a set of three different extentions. I use them all the time with my Canon 70-200mm lens because that is my sharpest lens. I can get really good results with the birds right outside my window. They come within a couple of feet of my position because of how I set up my feeder. The Canon 70-200mm lens does a really good job with the smallest extension. Here is a photo I took with the 70-200mm lens and a 12mm extension.
  • 282.
  • 283. • Before you go to camera store don’t forget to consider is the image sensor in your camera. There are basically two different sensor sizes; “Full frame” sensors, which are the same size as one frame of 35mm film, like those in traditional film SLRs; these are generally in higher-end cameras. Another one is the smaller image sensors, like those found in most digital SLR cameras such as Nikon D5300 or Canon EOS D700. The full frame cameras such as: Nikon D800E and Canon EOS 5D Mark III or Sony Alpha 99 (SLT-A99V). • If you are serious about choosing lenses, you may need to have a telephoto lens for portrait photos to make the results more like an amazing 85 millimeters, to take portraits or to get closer shots of distant objects without moving the camera. This lens is also good to use when you want to photograph beautiful birds in the trees, or steal a photo when you see a beautiful girl in the distance, then you can make close to the face of the girl with a telephoto lens without being noticed by the girl. • If you are interested in photographing small flowers or insects that was perched on a flower, then you need a macro lens, but the lens of your camera kit is also quite good for this sort of picture- making. Would you like to vacation and see landscapes like forests or mountains in the distance and the beach? If you have enough money, then you need to have a wide angle lens. And you should apprehend that for a very wide, please go with an 18 millimeter lens. However For just a little wider than the 50 millimeter lens, use a 35 millimeter prime lens.
  • 284. • You may have very amazed with the photos of stars in the sky or other photos that you see on the Internet or at a photo exhibition. The world of photography is an art that is not limited and highly dependent on your imagination and creativity, and of course also depends on the equipment, the type of camera, lens types, and also related to camera accessories. • You can also take advantage of the atmosphere of the era of horse to buy lenses because until towards the end of February 2014 you can get a discount at the nearest camera shop or at a trusted online store. • With the passage of time, then you will know more about the lenses you need, then start saving money so you can buy your dream lens or camera. Perhaps you need to think to sell your stock photos online. Look for information by using a search engine today, so you can have an income from photography, you can even sell photography services to family or friends who will make the wedding party. If you are successful you will get a lot of references. You must also know a professional photographer can be a very good living from photography.
  • 285.
  • 286. Final things to remember… These are only guidelines – every rule has an exception! Always remember your framing and exposure! There’s a lot more to learn and discover! PRACTICE MAKES PERFECT!
  • 288. Learn from your mistakes
  • 289. Stop making comparisons with great photographers • Often, people compare themselves with great photographers. Works of people like Ansel Adams, Gary Winogrand, Henri Cartier-Bresson are published in hundreds of magazines the world over. They are a constant source of inspiration for many. On the flip side, however, they can become a benchmark for all the wrong reasons. People start to compare their own work with the work of these greats, thereby creating an unnecessary feeling of depression. • When you compare your work with that of established photographers (not just the greats named above), someone who has years of experience practicing his skills, you compare yourself with the essence of that professional’s hard work and dedication of many years.
  • 290. • Behind every great photo there are hours of preparation, hard work, failures and heartburns. • Master photographers will almost never show you how they failed before making that great shot. You don’t get to see the incorrect exposures, poor compositions, incorrect development (film photography) and crappy treatment of themes. • Understand what they have done and why they have done that. When you have mastered the process, add your own touch to it. You will probably fail as many times, may be even more, but you will end up also creating stunning compositions as well.
  • 291. Thank You! Now go out and take some pictures!!!