
Recommended
More Related Content
What's hot
What's hot (20)
Similar to Slide design sharing
Similar to Slide design sharing (20)
Recently uploaded
Recently uploaded (20)
Slide design sharing
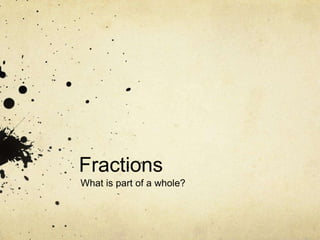
- 1. Fractions What is part of a whole?
- 2. Goal: To present a mathematical concept that is challenging in a way that supports students’ understanding. Topic: Fractions Message: Fraction is a mathematical terms that expresses part of a whole and sometimes fractions that are the same are expressed in two different ways (equivalent fractions). Audience: 4th/5th grade students
- 3. This is my original design. I found some great pictures online that I thought would really grab my audience’s attention. I also created a question to keep the audience interested.
- 5. First set of changes I thought about how I could tell a story with the pictures, so I took pictures of a whole orange, in ways that looked like the fractions. So, I changed from using pictures that were from the internet (beautiful, but not as relevant) to pictures that really showed what I was doing. I also added some captions that explain and two captions with questions to keep the readers searching for answers. I also tried to add some different words to support understanding of the jargon.
- 7. Next set of changes I made quite a few changes in the weeks between the last slide and this one. I started by taking out the boarder that offered no value to the slide message (embellishment). I also took the time/date stamp off of the photographs. I added a bold title and a line to give contrast between the slide and the title. I also added a subheading in bold to draw the eyes to the question. I do think that this improved the design because it does draw the eyes to the title and subheading. I changed the alignment from horizontal to vertical; however, I failed to keep it aligned between top and bottom and throughout the graphics.
- 9. Next set of changes This is the split complement triad design. I really liked the way the colors worked together. I did use the thicker font and I changed the font for the question and I think it looks better. There is a good use of white space. I think that this design is an improvement. The colors are bright and have nice contrast. The alignment is better (not perfect) in this design. I did a right alignment and made sure all of the pictures were aligned. However, I didn’t align the text with the pictures so there is still some continuity issues.
- 11. Final set of changes On this slide I used size to create contrast. Not only the size of the title and the last caption, but also the size of the word question in the text. I also used text with different forms, the letter “g” shows the contrast the best between the two fonts. I made sure to choose two very different fonts, a modern and a decorative font. I tried to work out all the alignment issues (I had alignment issues for many of my pieces). I also added the drop shadow to my pictures and put the lighter color at the top of the slide. I like the changes to this slide, it feel bold and makes a statement. It works well with the theme.