![International Journal of Trend in Scientific Research and Development (IJTSRD) @ www.ijtsrd.com eISSN: 2456-6470
@ IJTSRD | Unique Paper ID – IJTSRD27872 | Volume – 3 | Issue – 5 | July - August 2019 Page 2067
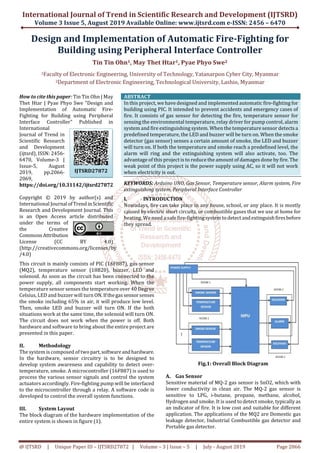
Fig2: MQ-2 gas sensor
B. Temperature Sensor
The core functionality of the DS18B20 is its direct-to-digital
temperature sensor. The DS18B20 has an operating
temperature range of -55°C to +125°C. The resolution of the
temperature sensor is user-configurable to 9, 10, 11, or 12
bits, corresponding to increments of 0.5°C, 0.25°C, 0.125°C,
and 0.0625°C, respectively. The default resolutionatpower-
up is 12-bit. The DS18B20 powers up in a low-power idle
state. To initiate a temperature measurement and A-to-D
conversion, the master must issue a Convert T [44h]
command. If the DS18B20 is powered by an external supply,
the master can issue “read time slots” after the Convert T
command and the DS18B20 will respond by transmitting 0
while the temperature conversion is in progress and1when
the conversion is done.
Fig.3: Temperature sensor (18B20)
C. Peripheral Interface Controller (PIC)
PIC 16F887 is one of the latest products from microchip and
it has 40 pins. It has 35 pins I/O, 2 pins Ground, 2 pins
Supply, 1 pin Input. Operation frequency is 0-20M Hz. The
software selectable frequency ranges from 8M Hz to 31k Hz.
This microcontroller has three types of memory ROM, RAM
and EEPROM. All of them will be separately discussed that
each has specific functions, features and organization. ROM
(read only memory) memory is used to permanently save
the program being executed. PIC16F887 has 8kb ROM (in
total of 8192 location). Since this ROM is made with FLASH
Technology, its contents can be changed by providing a
special programming voltage (13V). Similar to program
memory, the contents of the EEPROM canbechangedduring
operation of the microcontroller. That is why this memory
(256 locations) is a perfect one for permanently saving
results created and used during the operation.RAMmemory
is that third and most complex part of microcontroller
memory. In this case, it consists of two parts: general
purpose registers and special function registers (SFR).
Master synchronous serial port (MSSP)supports SPI and I2C
mode.
Fig.4: PIC (16F887)
D. Alarm System
Alarm system is designed by buzzer and LED in fig:5. A
buzzer is an audio signalling device. The device is an alarm
that to know accidents and emergencycaseoffireforpeople.
In output, RB7 of PIC is connected resistor (1k) and
transistor (C945) in front of the buzzer. Transistor (C945)is
used as a switch for buzzer on-off. The output current of PIC
is 1A although the receive current of buzzer is 20mA.
Resistor (1k) is used between transistor of base and PIC
because of reduced the current gain. When C945 is turned
on, collector voltage of C945 is 0.7V. Emitter of C945 is
ground. If C945 will turn on, buzzer will ring.
LEDs are very small light bulbs that fit into an electrical
circuit. This is a very basic 5mm LED with a red lens. It has a
typical forward voltage of 2V and a rated forward current of
10mA. Working voltage of PICis 5V.ReceivingvoltageofLED
is 2V. So, resistor (330) is used in front of the LED.
V = IR
R = V/I
= (5-2) V /10mA
= 300Ω
Fig5: Overall circuit diagram of Alarm System
E. Fire Extinguishing System
Solenoid is used for the fire extinguishing system in fig:6. It
offers fast and safe switching, high reliability, long service
light, low control power and compact design. One pin of
solenoid is connected AC and next pin is connected NO of
relay. The solenoid follows by the relay and transistor
(C945). If transistor will saturate, relay will start to work.
When the current is flowing in the relay, themagnetic fieldis
occurred. So, the bar in the relay is ON. When the relay is
working, the common is attached to normally open (NO).So,
the solenoid receives AC signal and work. Wire is wrapped
around the nail in solenoid in which AC flows. This leads to
electromagnetic field which in turn causes it to stick
upwards. Consequently, bar is turned ON and water in
solenoid starts flowing. This solenoid sprays water. The
higher the value of the resistance, the lower the values of the
current.
Fig.6: Circuit Diagram of Fire Extinguishing System](data:image/gif;base64,R0lGODlhAQABAIAAAAAAAP///yH5BAEAAAAALAAAAAABAAEAAAIBRAA7)
Recommended
Recommended
More Related Content
What's hot
What's hot (20)
Similar to Design and Implementation of Automatic Fire Fighting for Building using Peripheral Interface Controller
Similar to Design and Implementation of Automatic Fire Fighting for Building using Peripheral Interface Controller (20)
More from ijtsrd
More from ijtsrd (20)
Recently uploaded
Recently uploaded (20)
Design and Implementation of Automatic Fire Fighting for Building using Peripheral Interface Controller
- 1. International Journal of Trend in Scientific Research and Development (IJTSRD) Volume 3 Issue 5, August 2019 Available Online: www.ijtsrd.com e-ISSN: 2456 – 6470 @ IJTSRD | Unique Paper ID – IJTSRD27872 | Volume – 3 | Issue – 5 | July - August 2019 Page 2066 Design and Implementation of Automatic Fire-Fighting for Building using Peripheral Interface Controller Tin Tin Ohn1, May Thet Htar1, Pyae Phyo Swe2 1Faculty of Electronic Engineering, University of Technology, Yatanarpon Cyber City, Myanmar 2Department of Electronic Engineering, Technological University, Lashio, Myanmar How to cite this paper: Tin Tin Ohn | May Thet Htar | Pyae Phyo Swe "Design and Implementation of Automatic Fire- Fighting for Building using Peripheral Interface Controller" Published in International Journal of Trend in Scientific Research and Development (ijtsrd), ISSN: 2456- 6470, Volume-3 | Issue-5, August 2019, pp.2066- 2069, https://doi.org/10.31142/ijtsrd27872 Copyright © 2019 by author(s) and International Journal ofTrend inScientific Research and Development Journal. This is an Open Access article distributed under the terms of the Creative Commons Attribution License (CC BY 4.0) (http://creativecommons.org/licenses/by /4.0) ABSTRACT In this project, we have designed and implemented automatic fire-fighting for building using PIC. It intended to prevent accidents and emergency cases of fire. It consists of gas sensor for detecting the fire, temperature sensor for sensing the environmental temperature, relay driver for pump control, alarm system and fire extinguishing system. When the temperature sensor detects a predefined temperature, the LED and buzzer will be turn on. When the smoke detector (gas sensor) senses a certain amount of smoke, the LED and buzzer will turn on. If both the temperature and smoke reach a predefined level, the alarm will ring and the extinguishing system will also activate, too. The advantage of this project is to reduce the amount of damages done by fire.The weak point of this project is the power supply using AC, so it will not work when electricity is out. KEYWORDS: Arduino UNO, Gas Sensor, Temperature sensor, Alarm system, Fire extinguishing system, Peripheral Interface Controller I. INTRODUCTION Nowadays, fire can take place in any house, school, or any place. It is mostly caused by electric short circuits, or combustible gases that we use at home for heating. We need a safe fire-fightingsystemtodetectand extinguishfiresbefore they spread. This circuit is mainly consists of PIC (16F887), gas sensor (MQ2), temperature sensor (18B20), buzzer, LED and solenoid. As soon as the circuit has been connected to the power supply, all components start working. When the temperature sensor senses the temperature over 40 Degree Celsius, LED and buzzer will turn ON.Ifthegas sensorsenses the smoke including 65% in air, it will produce low level. Then, smoke LED and buzzer will turn ON. If the both situations work at the same time, the solenoid will turn ON. The circuit does not work when the power is off. Both hardware and software to bring about the entire project are presented in this paper. II. Methodology The system is composed of two part,softwareandhardware. In the hardware, sensor circuitry is to be designed to develop system awareness and capability to detect over- temperature, smoke. A microcontroller (16F887) is used to process the various sensor signals and control the system actuators accordingly. Fire-fighting pump will be interfaced to the microcontroller through a relay. A software code is developed to control the overall system functions. III. System Layout The block diagram of the hardware implementation of the entire system is shown in figure (1). Fig.1: Overall Block Diagram A. Gas Sensor Sensitive material of MQ-2 gas sensor is SnO2, which with lower conductivity in clean air. The MQ-2 gas sensor is sensitive to LPG, i-butane, propane, methane, alcohol, Hydrogen and smoke. It is used to detect smoke, typically as an indicator of fire. It is low cost and suitable for different application. The applications of the MQ2 are Domestic gas leakage detector, Industrial Combustible gas detector and Portable gas detector. IJTSRD27872
- 2. International Journal of Trend in Scientific Research and Development (IJTSRD) @ www.ijtsrd.com eISSN: 2456-6470 @ IJTSRD | Unique Paper ID – IJTSRD27872 | Volume – 3 | Issue – 5 | July - August 2019 Page 2067 Fig2: MQ-2 gas sensor B. Temperature Sensor The core functionality of the DS18B20 is its direct-to-digital temperature sensor. The DS18B20 has an operating temperature range of -55°C to +125°C. The resolution of the temperature sensor is user-configurable to 9, 10, 11, or 12 bits, corresponding to increments of 0.5°C, 0.25°C, 0.125°C, and 0.0625°C, respectively. The default resolutionatpower- up is 12-bit. The DS18B20 powers up in a low-power idle state. To initiate a temperature measurement and A-to-D conversion, the master must issue a Convert T [44h] command. If the DS18B20 is powered by an external supply, the master can issue “read time slots” after the Convert T command and the DS18B20 will respond by transmitting 0 while the temperature conversion is in progress and1when the conversion is done. Fig.3: Temperature sensor (18B20) C. Peripheral Interface Controller (PIC) PIC 16F887 is one of the latest products from microchip and it has 40 pins. It has 35 pins I/O, 2 pins Ground, 2 pins Supply, 1 pin Input. Operation frequency is 0-20M Hz. The software selectable frequency ranges from 8M Hz to 31k Hz. This microcontroller has three types of memory ROM, RAM and EEPROM. All of them will be separately discussed that each has specific functions, features and organization. ROM (read only memory) memory is used to permanently save the program being executed. PIC16F887 has 8kb ROM (in total of 8192 location). Since this ROM is made with FLASH Technology, its contents can be changed by providing a special programming voltage (13V). Similar to program memory, the contents of the EEPROM canbechangedduring operation of the microcontroller. That is why this memory (256 locations) is a perfect one for permanently saving results created and used during the operation.RAMmemory is that third and most complex part of microcontroller memory. In this case, it consists of two parts: general purpose registers and special function registers (SFR). Master synchronous serial port (MSSP)supports SPI and I2C mode. Fig.4: PIC (16F887) D. Alarm System Alarm system is designed by buzzer and LED in fig:5. A buzzer is an audio signalling device. The device is an alarm that to know accidents and emergencycaseoffireforpeople. In output, RB7 of PIC is connected resistor (1k) and transistor (C945) in front of the buzzer. Transistor (C945)is used as a switch for buzzer on-off. The output current of PIC is 1A although the receive current of buzzer is 20mA. Resistor (1k) is used between transistor of base and PIC because of reduced the current gain. When C945 is turned on, collector voltage of C945 is 0.7V. Emitter of C945 is ground. If C945 will turn on, buzzer will ring. LEDs are very small light bulbs that fit into an electrical circuit. This is a very basic 5mm LED with a red lens. It has a typical forward voltage of 2V and a rated forward current of 10mA. Working voltage of PICis 5V.ReceivingvoltageofLED is 2V. So, resistor (330) is used in front of the LED. V = IR R = V/I = (5-2) V /10mA = 300Ω Fig5: Overall circuit diagram of Alarm System E. Fire Extinguishing System Solenoid is used for the fire extinguishing system in fig:6. It offers fast and safe switching, high reliability, long service light, low control power and compact design. One pin of solenoid is connected AC and next pin is connected NO of relay. The solenoid follows by the relay and transistor (C945). If transistor will saturate, relay will start to work. When the current is flowing in the relay, themagnetic fieldis occurred. So, the bar in the relay is ON. When the relay is working, the common is attached to normally open (NO).So, the solenoid receives AC signal and work. Wire is wrapped around the nail in solenoid in which AC flows. This leads to electromagnetic field which in turn causes it to stick upwards. Consequently, bar is turned ON and water in solenoid starts flowing. This solenoid sprays water. The higher the value of the resistance, the lower the values of the current. Fig.6: Circuit Diagram of Fire Extinguishing System
- 3. International Journal of Trend in Scientific Research and Development (IJTSRD) @ www.ijtsrd.com eISSN: 2456-6470 @ IJTSRD | Unique Paper ID – IJTSRD27872 | Volume – 3 | Issue – 5 | July - August 2019 Page 2068 Fig.7: Solenoid and its working IV. Operation of the system When giving AC 220V to the step down transformer, it induced in the secondary coil. It can produce 12V. This circuit is used AC 12V and since itpassedthroughthecentre- tapped full-wave rectifier diode to get DC 12V. Filter capacitor is used to get pure DC. Regulator LM 7805 is used to get DC 5V (stable). The power supply DC 5V is connected to the power supply pin of the PIC and the ground pin of the power supply is connected to the GND pin of the PIC. When the circuit is connected to the power supply, all components start working. Smoke sensor is connected to theRE3pin(for Room 1) RD7 pin (for Room 2) of the PIC, LED of the smoke sensor is connected to the RB5 pin (for Room 1) RC5pin(for Room 2) of the PIC. Temperature sensor is connected to the RD1 pin (for Room 1) and RD2 pin (for Room 2), LED of the temperature sensor is connectedtotheRB6pin(forRoom1) and RC4 pin (for Room 2) of the PIC. RB7 pin of the PIC is connected to the buzzer. Solenoid is connected to the RD0 pin (for Room 1) and RD3 pin (for Room 2) of the PIC. When 18B20 receives command from the PIC, it starts sensing. To initiate a temperature measurement and A-to-D conversion, the master must issue a Convert T [44h] command. Convertingtemperatureenters thePIC.According to the program in the PIC, PORTB.B6 and PORTB.B7 are equal to ‘0’ when the temperature is less than 40 Degree Celsius. LED and buzzer will turn off. If enter temperature is greater than 40 Degree Celsius, PORTB.B6 and PORTB.B7 will equal ‘1’. LED and buzzer will turn on shown in figure (9). If smoke sensor receives the supply voltage, LED will turn on in the smoke sensor circuit. When the smoke detector senses a critical amount of smoke, next LED willalsoturn on. Then, PIC receives the signal. According to the program in the PIC, PORTB.B5 is equal to ‘1’ and PORTB.B7is equal to‘0’ when the smoke sensor has not smoked.LEDandbuzzer will turn off. If the smoke sensorsenses thesmokeincluding65% in air, PORTB.B5 will equal ‘0’. PORTB.B7 is equal to ‘1’. LED and buzzer will turn on shown in figure (10). Preset is adjusted so that smoke sensor senses in critical amount of smoke. When both the temperature and smoke amount reach to a critical level, the alarm will ring and the extinguishersystem will also be activated too shown in figure (11 and 12). Either smoke LED or temperature LED turns on that buzzer turn ON and solenoid turn OFF.BothtemperatureLEDandsmoke LED will not be activated, buzzer and solenoid turn OFF. Fig.8: Program Flow Chart V. SIMULATION RESULTS Fig.9: Testing of Temperature sensor Fig.10: Testing of Smoke Sensor Fig.11: Testing for Room1
- 4. International Journal of Trend in Scientific Research and Development (IJTSRD) @ www.ijtsrd.com eISSN: 2456-6470 @ IJTSRD | Unique Paper ID – IJTSRD27872 | Volume – 3 | Issue – 5 | July - August 2019 Page 2069 Fig.12: Testing for Room2 VI. Experimental Results Fig.13: Testing of Overall Circuit Fig.15: Testing of Room1 Fig.16: Testing of Room 2 Fig.17: Fire Extinguishing VII. Conclusions The fire-fighting using Peripheral Interface Controller (PIC) are available at reasonable price in the market. In this system, there is no complexity on design features.Firstofall, requiring components in the circuit are collected. As soonas the fire starts, people can know immediately. As the system is installed inside the home or the building, we willfeelsafer. If the number of houses which set up this system increased, the incidence of fire outbreaks will be reduced. So, we can prevent the residents and their properties of these homes from fire damage. And, the weak point is the powersupply is designed to use AC, it will not work when electricity is out. Acknowledgement The authors would like to thank everyone who provide the support to implement this system. REFERENCES [1] http//: www.naffco.com [2] http//:www.instructable.com [3] http//:www.learn.mikroe.com [4] http//:www.techtarget.com [5] Chen Guoqin, Lu Souxiang. Research status of the vessel fire security engineering [J] Fire-fighting technology and productioninformation,2004(8)21-23 [6] Liu Jianghong Research progress of fine water mist fire- fighting technology [J] Science aviso,2003(8)762- 767 [7] Zhang Junli, Qi Jianlin, Huang Jin Introduction of electric fire and prevention [J] Coal mine organization, 2007 (5) 31-32