Fixed prosthodontics problems and solutions in dentistry
•Download as PPTX, PDF•
118 likes•38,732 views

Fixed prosthodontics and implant problems and solutions in dentistry

Recommended
More Related Content
What's hot
What's hot (20)
Viewers also liked
Viewers also liked (10)
Similar to Fixed prosthodontics problems and solutions in dentistry
Similar to Fixed prosthodontics problems and solutions in dentistry (20)
More from Private Office
More from Private Office (7)
Recently uploaded
Recently uploaded (20)
Fixed prosthodontics problems and solutions in dentistry
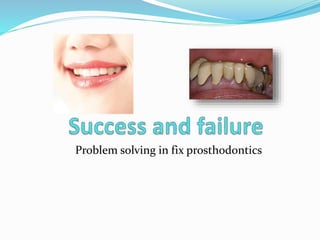
- 1. Problem solving in fix prosthodontics
- 2. INTRO……. Failure Repairment About 90% of bridges last at least 10 yrs.(Smith, 2000)
- 3. WHY C&B WORKS FAIL? MECANICAL FAILURE CHANGES IN ABUTMENT TOOTH DESIGN FAILURES INADEQUATE CLINICAL OR LAB TECHNIQUE
- 4. Mechanical Failures…. Porcelain/PJC Failure of solder joints Distortion Occlusal/Incisal wear & perforation Lost facings
- 5. Porcelain fused to metal Distortion of metal-ceramic framework Inadequate metal support Excessive porcelain thickness Technical flaws Normal function (occlusal forces) Trauma
- 6. Failure of solder joints Inclusion Failure to bond Small solder joint
- 7. CHANGES IN ABUTMENT TOOTH…. Perio disease Pulpal problems Recurrent caries
- 8. Mutiple aboutment better to index and solder
- 9. Mutiple aboutment better to index and solder
- 10. Distortion Pontics are too thin Bridge is removed with too much force. Trauma.
- 11. Occlusal/incisal wear & perforation Composite crowns Belle glass Targis vectris Wear down substantially over a lifetime Rate Occlusion Diet Para functional (bruxing) habits
- 12. 3) DESIGN FAILURES….. Abutment prep. design Inadequate bridge design Under-prescribed bridges
- 13. Inadequate clinical/lab technique Problems to 1 of 3 groups: 1. Minor problems 2. Can be corrected in situ. 3. Those that cannot.
- 14. Marginal deficiencies Positive ledge (overhang) Negative ledge
- 15. Casting difficulties External angles of crown should be rounded Sharp edges Stone die wax-up stage. investment material flow difficult to remove the investment material Cement thickness
- 16. REPAIRMENT TIME… Some things are really beautiful! But nothing lasts forever! HOW CAN WE REPAIR THESE C&B FAILURES?
- 17. Seriousness of the problem 1. Leave it alone if not causing any serious harm 2. Adjusting or repairing the fault 3. Replace the crown or bridge
- 18. fit checker
- 19. Grinding and polishing in situ Metal margins of crowns with positive ledges Porcelain margin Heatless stone Diamond point Followed by various composite finishing burs and discs.
- 20. Metal margins 1. Diamond stone 1. Green stones 2. Tungsten carbide stones 3. Metal and linen strips 2. Interdentally, 1. Triangular shaped diamond 2. Abrasive rubber instrument with special handpiece 3. Margins should be polished
- 21. Repairs by restoring in situ……. Occlusal Repairs 1. Amalgam 2. gold inlay 3. composite material
- 22. Repairs at the Margins margins of a poorly fitting bridge Secondary caries/early erosion and abrasion composite or GIC Cavity prep at margins poor access >>> remove part of the crown margin raising a full gingival flap good visibility
- 23. Repairs to porcelain Ceramic restorations Composite Separate silane coupling agent Limited to sites with minimal occlusal forces.
- 29. Ceramic facings Porcelain is lost and composite repair is not possible Often better to replace whole crown Pontic. Drilled through New pin retained metal- ceramic facing Removing all the porcelain Metal ceramic sleeve crown
- 30. Removing c&b’s 1. Vibration of ultrasonic scaler. 2. Good leverage at margins 3. A slide hammer Bridge remover 4. Crown can be cut off
- 31. Removing post & cores Using extraction forceps and using sharp twists – carefully… Files Ultrasonic
- 32. Removing PJC’s Cannot be removed intact and should be cut off. A vertical groove is made with a diamond bur in the buccal surface just through to cement. Then Removed with suitable heavy duty instrument.
- 33. Removing Metal – Ceramic Crowns Possible to remove with normal devices usually better to cut off. cast metal solid tungsten carbide bur with very fine cross cuts Eye protection!!! Vertical groove cut on buccal metal is usually thinner here with better vision. Diamond bur can cut porcelain favourably !
- 34. Cutting How to cut a pfm
- 35. Removing Bridges (3 situations) 1. Abutment teeth need to be extracted Bridge is removed Intact Dividing the bridge 2. abutment needed to be retained Retainers are cut and bridge removed carefully 3. temporary measures removing whole bridges and making adjustments.
- 39. Inhibited or Slow Setting Visual Appearance: Shiny, no detail Result: Inadequate surface detail on cast, poor fitting restorations. S ulfur inhibition For Vinyl Polysiloxane Materials latex gloves . Residues custom temporary provisional cements
- 41. Inhibited or Slow Setting CAUSE SOLUTION For Vinyl Polysiloxane Materials Sulfur inhibition due to contact of latex gloves with tissue/tooth/retraction material or impression material. Wear gloves proven not to contain traces of sulfur. If contamination is suspected, scrub affected area with diluted hydrogen peroxide.
- 42. Inhibited or Slow Setting CAUSE SOLUTION Residues from custom temporary or provisional cements (acrylics) present. Do not use impressions already used to fabricate the temporary restoration. Fabricate the temporary crown or bridge after final impression has been made. Remove air-inhibited layer on the exposed surface with an alcohol wipe before making final impression.
- 43. Expired impression material Inadequate mix.
- 44. Lack of Impression Detail Visual Appearance: Muted detail reproduction. Result: Crowns may be too tight, or loose, and not fit correctly.
- 45. Lack of Impression Detail CAUSE SOLUTION Impression material stored at elevated temperature. Store impression material at room temperature.
- 46. Lack of Impression Detail CAUSE SOLUTION Impression material stored at too low a temperature (prolongs the setting reactions, changes viscosity and requires exceptionally high extrusion forces for automix materials). Keep impression material at a temperature of 18°C/64°F at least one day prior use.
- 47. Lack of Impression Detail CAUSE SOLUTION Thick blood/saliva pooled around prep. Remove blood and saliva prior to making impression. Use 2-step impression technique.
- 48. Lack of Impression Detail CAUSE SOLUTION Inadequate retraction of sulcus around prep. Use good retraction technique, with proper moisture control.
- 49. Lack of Impression Detail CAUSE SOLUTION Exceeding the working time. Follow manufacturer’s working time specifications. Choose material with longer working time.
- 50. Lack of Impression Detail CAUSE SOLUTION Inadequate disinfection effects surface quality (detail reproduction) and dimensional stability. Use water based disinfectants according to FDA guidelines. Follow manufacturer’s instructions for use.
- 51. Voids on the Margin Visual Appearance: Voids/holes on margin of the prepared teeth. Incomplete margin. Result: The fit and function of the final restoration may be compromised. Short crown margins and/or open margins.
- 52. Voids on the Margin CAUSE SOLUTION Improper syringe technique. Keep syringe tip immersed in wash material to avoid entrapping air. Wiggle and stir while syringing. Push material forward.
- 53. Voids on the Margin CAUSE SOLUTION Inadequate coverage of marginal area with light body impression material. Use wash material liberally on preparation and abutments.
- 54. Blood and saliva contamination around prep. Use good moisture control technique. Rinse and dry prep area before taking the impression. Stop bleeding by using appropriate retraction technique and hemostatic agent. Leave cord in sulcus until no blood or saliva are present before syringing the light body impression material. Consider two-cord retraction to displace tissue and control fluids. Voids on the Margin CAUSE SOLUTION
- 55. Tray not seated straight. Insert impression tray straight.
- 56. Tearing at the Margin Visual Appearance: Rip, or visible tearing on the margin of the preparation. Result: Short crown margins and/or open margins.
- 57. Tearing at the Margin CAUSE SOLUTION Check expiration date of impression material. Ensure mixing instructions are followed and materials have a streak-free appearance. Expired impression material. Inadequate mix.
- 58. Tearing at the Margin CAUSE SOLUTION Displace tissue to allow the impression material to access prepared area. Consider two-cord retraction. Leave pilot cord in the sulcus when taking the impression. Use impression material with sufficient tear resistance. Insufficient retraction.
- 59. Tearing at the Margin CAUSE SOLUTION Do not use impressions already used to fabricate the temporary restoration. Fabricate the temporary crown or bridge after final impression has been made. Remove air-inhibited layer on the exposed surface with an alcohol wipe before making final impression. Residues from custom temporary or provisional cements (acrylics) present.
- 60. Facial-Lingual Pulls Visual Appearance: V- shaped void, trough- like. Result: Failure to capture complete and accurate dentition.
- 61. Facial-Lingual Pulls CAUSE SOLUTION Follow manufacturer’s working time specifications. Choose material with longer working time. Exceeding the working time.
- 62. Facial-Lingual Pulls CAUSE SOLUTION Do not move tray after seating. Tray movement or repositioning after seating.
- 63. Facial-Lingual Pulls CAUSE SOLUTION Use more material to create back flow effect. Insufficient amount of impression material used.
- 64. Facial-Lingual Pulls CAUSE SOLUTION Use lingual stops. Use an impression tray that supports the flow of the material. Impression tray does not support flow of impression material.
- 65. Tray-Tooth Contact Result: Restoration may have slight distortion at marginal area, or rocks. Visual Appearance: Show-through of tray. Impression tray exposed.
- 66. Tray-Tooth Contact CAUSE SOLUTION Use proper size tray. Test various tray sizes to ensure proper size. Prepared teeth contact the sides or bottom of impression tray.
- 67. Tray-Tooth Contact CAUSE SOLUTION Carve out tray material properly before applying wash. Tooth contact with the pre- set tray material when using the two-step technique.
- 68. Tray-Tooth Contact CAUSE SOLUTION Fill tray adequately. Insufficient impression material used.
- 69. Delamination Visual Appearance: Heavy body and light body materials not blended, or mixed together. Result: Restoration will not seat or fit properly.
- 70. Delamination CAUSE SOLUTION Follow manufacturer’s working time specifications. Choose material with longer working time. Store impression material at room temperature. Exceeding the working time. Impression material stored at elevated temperature.
- 71. Delamination CAUSE SOLUTION Avoid contact with sulfur contaminants: Wear gloves proven not to contain traces of sulfur. Avoid contact with acrylic and methacrylic contaminants: Ensure impression materialdoes not come into contact with methacrylate residue from acrylate temporary materials. Sulfur or acrylic contamination of pre-set heavy body material in two- step technique.
- 72. Poor Bond of Impression Material to the Tray Visual Appearance: Impression pulling away from the sides/bottom of tray. Result: Crown(s) may be tight and not seat fully, or require excessive internal adjustment.
- 73. No tray adhesive used. Use tray adhesive. Poor Bond of Impression Material to the Tray CAUSE SOLUTION
- 74. Incompatible tray adhesive used. Use appropriate tray adhesive. VPS adhesive for VPS. Polyether adhesive for polyether materials. Poor Bond of Impression Material to the Tray CAUSE SOLUTION
- 75. Inadequate drying time for tray adhesive.. Follow manufacturer’s instructions for application, and drying time Poor Bond of Impression Material to the Tray CAUSE SOLUTION
- 76. Thin plastic trays allow deflection, which can cause rebound upon removal. Use a tray that fits better, and is stiffer and more rigid. Poor Bond of Impression Material to the Tray CAUSE SOLUTION
- 77. Stone Model Discrepancies Visual Appearance: Voids on margin, powdery cusp tips on incisal edges on prepared tooth. “Golf- ball” appearance of stone model. Result: Incomplete seating of indirect restorations
- 79. Tooth contact with impression tray, or gauze of double bite tray causes water to leach out of the tray, dehydrating the stone. Instruct patient to bite passively in centric occlusion when using dual arch trays. Fill tray with sufficient amount of material. CAUSE SOLUTION Stone Model Discrepancies
- 80. Cast not made according to model preparation guidelines and lacks detail. Provide as much information as possible to the lab. Indicate type of impression material (polyether or VPS) and whether or not the impression has been disinfected. CAUSE SOLUTION Stone Model Discrepancies
- 81. VPS Hydrogen gas emission. Follow manufacturer’s instruction for casting time. CAUSE SOLUTION Stone Model Discrepancies
Editor's Notes
- Failure means, to be unsatisfactory, and in C&B, it’s the inevitable. Repairment is the work that is done to get rid of the failure.
- Distortion of metal-ceramic framework invariably results in the loss of porcelain
- A flaw or inclusion in the solder itself Failure to bond to the surface of the metal The solder joint not being sufficiently large for the conditions in which it is placed.
- Progression of perio disease Abutment tooth may become non-vital (pulpal problems) Recurrent caries occuring at margins of retainers: - change in diet. - lapsed oral hygiene. - inadequate restoration design
- May occur to all-metal bridges if pontics are too thin or if a bridge is removed with too much force. Framework distortion may occur during function or as a result of trauma.
- Crowns tend to wear down substantially over a lifetime All restorative materials wear in use , and the rate is determined by the occlusion, the diet and parafunctional (bruxing) habits
- No cut back Inadequate space for porcelain
- Minor problems to be noted & monitored but where no other action is needed. The type of inadequacies that can be corrected in situ. Those that cannot.
- Positive ledge (overhang) excess of crown material protruding beyond the margin of the preparation. Negative ledge deficiency of crown material that leaves the margin exposed but with no major gaps between the crown and the tooth. Often arises because the impression did not correct at the try-in stage.
- “External angles of crown preps for metal castings should be rounded to prevent one of the faults that may occur in the following chain of events:” Stone die may not flow into the impression adequately, trapping air bubbles in the sharp angles of the imp. Sharp edges may be damaged at the wax-up stage. Investment material may not flow adequately into the wax pattern to produce rounded internal angles on the casting, preventing the casting from seating fully. It may be difficult to remove the investment material entirely from sharp internal angles without damaging the casting. Cement will flow less rapidly around sharp angles, increasing the likelihood of an unnecessary thick cement layer at the margins.
- Flower picture
- In some situations, margins of crowns with good ledges can easily be adjusted. If margin is porcelain (or specially designed), finishing instruments should be used, example, heatless stone or diamond point followed by various composite finishing burs and discs. Can also be modified in situ using the same instruments.
- diamond stone followed by green stones, tungsten carbide stones or metal and linen strips may be used. Interdentally, a triangular shaped diamond and an abrasive rubber instrument with special handpiece (esp overhangs). Margins should be polished with prophylactic paste with brush/rubber cup, and interdentally with finishing strips.
- Occlusal Repairs Occlusal effects in metal retainers can be fixed by amalgam which usually gives good results. A small gold inlay may also be preferred. In metal-ceramic or porcelain restorations, composite material can be used but repair may need to be done periodically.
- Should never try to repair margins of a poorly fitting bridge during insertion. Secondary caries/early erosion and abrasion can be treated with composite or GIC. Cavity prep at margins should not endanger strength although all caries should be removed. If poor access, then it is better to remove part of the crown margin rather than excessive amount of tooth structure. In some cases, raising a full gingival flap may be justified. Retainer margins can be adjusted and restored with good visibility. Any necessary periodontal therapy or endodontic surgery can also be carried out.
- Materials such as basic composite with a separate silane coupling agent for optimum bonding can be used to modify or shape ceramic restorations. It is not an acid etch bond to enamel and is not strong. Therefore, the use of the material is limited to sites with minimal occlusal forces.
- When porcelain is lost from a metal-ceramic unit and composite repair is not possible – often better to replace whole crown. Sometimes possible with a pontic. A hole is drilled through the backing and an impression is taken with suitable pins for a new pin retained metal-ceramic facing. - It could be a little bulkier than the original! Sometimes possible to fix retainers or pontics by removing all the porcelain and reprepare the metal part using a “metal ceramic sleeve crown” which covers the skeleton of the old retainer or pontic. Sometimes made with heat cured acrylic or laboratory light cured composite.
- In removing any crown or bridge, in particular posts and caries, often helpful to break up the cement by vibration of ultrasconic scaler. It works best with zinc phosphate cement. Metal crowns Good leverage at margins for either complete or partial metal crowns. Some instruments used are; - cumine or mitchels trimmer - even a slide hammer type crown - bridge remover may be used Crown can be cut off if all else fails.
- Possible to remove with normal devices but are more rigid than gold and porcelain may break – usually better to cut off. cast metal is best cut with a solid tungsten carbide bur with very fine cross cuts (beaver bur). Eye protection is important for everyone . Vertical groove cut on buccal as metal is usually thinner here with better vision. Diamond bur can cut porcelain favourably !
- 1 Abutment teeth need to be extracted Bridge is removed with crown and bridge remover Easy for cantilever Others - Dividing the bridge through pontic or connector and remove teeth individually with retainers in place 2. When abutment teeth are needed to be retained either for support of partial denture or overdenture or for making a new crown. Retainers are cut and bridge removed carefully as preparations are protected. 3. Some temporary measures require removing whole bridges and making adjustments. Neither bridge nor preparation should be damaged.