
Recommended
More Related Content
What's hot
What's hot (20)
Similar to Laboratory procedures in rpd- Kelly
Similar to Laboratory procedures in rpd- Kelly (20)
More from Kelly Norton
More from Kelly Norton (13)
Recently uploaded
Recently uploaded (20)
Laboratory procedures in rpd- Kelly
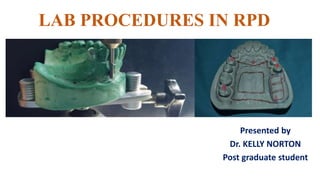
- 1. LAB PROCEDURES IN RPD Presented by Dr. KELLY NORTON Post graduate student
- 2. Contents • Preparation of master cast • Duplication of master cast • Wax pattern & Spruing • Investing & burn-out • Casting of framework • Finishing & Polishing • Fitting the framework to the master cast • Sectioning and resoldering the framework • Review of literature • Conclusion • References and cross references 275
- 3. Introduction • Metal partial denture framework fabrication, as an important constituent part of a future partial denture, holds a very important place in the fabrication process. • It is necessary to point out that metals being considerably more resistant to fractures than acrylic resins enable fabrication of partial denture bases, which contributes to a better and faster adjustment of the patient to new conditions in the oral cavity. 375
- 4. Laboratory steps • Preparation of master cast • Duplication • Wax pattern & Spruing • Investing & burn-out • Casting • Finishing & Polishing • Fitting the framework to the master cast 475
- 5. Preparation of master cast • Design transfer from diagnostic cast. • Beading of maxillary major connector. • Spraying. • Block out. • Relief. 575
- 6. Impressions with work authorization forms 675 Bomberg TJ, Hatch RA, Hoffman W. impression material thickness in stock and custom tray. J Prosthet Dent. 1985;54(August). (1) The signature and license number of the dentist (2) The date the authorization was signed (3) The name and address of the patient (4) A description of the service or material ordered.
- 7. 75 7 Retripoding the master casts Dental laboratory procedures vol 3;Rudd KD 2nd edition.
- 8. 75 8 Dental laboratory procedures vol 3;Rudd KD 2nd edition. MARKING THE HEIGHT OF CONTOUR
- 9. Design transfer from diagnostic cast 975 Design should mimic the design on diagnostic cast
- 10. Beading of the maxillary major connector • Scraping the outline of the major connector into the master cast. • A depth of half the diameter of a no.2 round bur. • Positive contact against palatal tissues. • Reduce the packing of food particles underneath major connector. • 3 - 4mm away from marginal gingiva. 1075 RAISED EDGE Beading on thin mandibular gingival tissues.
- 11. Spraying • Treating the master cast with a surface sealer using a brush or an aerosol spray to seal the cast and protect the design during the other steps of cast preparation and duplication. • Sealer application should be done in front of a suction vent because inhaling aerosol is potentially dangerous. 1175
- 12. Block out • Elimination of undesirable undercuts on the master cast with wax is commonly referred to as blocking out. • Both hard and soft tissue areas will require block out. • Types of block out: • Parallel block out • Shaped block out • Arbitrary block out 1275
- 13. Parallel block out • Proximal tooth surfaces used as guiding planes. • Beneath all minor connectors. • Tissue undercuts to be crossed by rigid connectors. • Tissue undercuts to be crossed by origin of bar clasps. • Deep interproximal spaces to be covered by minor connectors or linguoplates. • Beneath bar clasp arms to gingival crevice. 1375
- 14. Shaped block out • On buccal and lingual surfaces to locate plastic or wax patterns for clasp arms. 1475
- 15. Arbitrary block out • All gingival crevices. • Gross tissue undercuts situated below areas involved in design of denture framework. • Tissue undercuts distal to cast framework. • Labial and buccal tooth and tissue undercuts not involved in denture design. 1575
- 16. Relief • Beneath lingual bar connectors or the bar portion of the linguoplates when indicated • Areas in which major connectors will contact thin tissue, such as hard areas so frequently found on lingual or mandibular ridges and elevated palatal Raphes • Beneath framework extensions onto ridge areas for attachment of resin bases • The retentive meshwork must be raised above the edentulous area to allow resin to completely surround it. • At least 1mm of resin should surround the tissue surface of mesh. • Margin of the relief wax forms the internal finish line of the framework. • The finish line should be sharply defined. • Space of at least 1mm and no closer than 1.5-2mm from abutment. 1675
- 17. Tissue stop • A small square of 2x2 mm of relief wax is removed at the distal end of the saddle. • It provides stability of the framework during acrylic resin processing. 1775
- 18. Duplication of the master cast Duplication with reversible hydrocolloid Ticonium flask 1875
- 19. 1975 Dental laboratory procedures vol 3;Rudd KD 2nd edition. Duplicating procedure
- 20. 75 20 Stewart’s clinical removable partial prosthodontics. Rodney D. phoenix.4th edition. Reversible Hydrocolloid/Agar : complex polysacharide extracted from sea weed Primarily consists of 13-17% colloidal suspension of agar in water Borates- 0.2-0.5% Potassium sulphate- 1-2% Wax- 0.5 - 1% Thixotrophic material – 0.3- 0.5% Water- around 84%
- 21. 2175
- 22. 2275
- 23. Investment Materials 2375 Gypsum bonded Phosphate bonded Silica bonded Robert G. Craig & John M. Powers : Restorative dental materials (Tenth edition)
- 24. Gypsum bonded • mixed with water • composed of a mixture of silica (SiO2) and calcium sulphate hemihydrates (gypsum product) • Three types of gypsum bonded investments can be identified as follows: -Type 1 thermal expansion type; for casting inlays and crowns. -Type 2 hygroscopic expansion type; for casting inlays and crowns. -Type 3 casting complete and partial dentures. 2475 Robert G. Craig & John M. Powers : Restorative dental materials (Tenth edition)
- 25. Phosphate bonded • powder contains silica, magnesium oxide and ammonium phosphate • Can be mixed with water or colloidal silica • Two types of phosphate-bonded investment can be identified as follows: -Type 1- for inlays, crowns and other fixed restorations. -Type 2- for partial dentures and other cast removable restorations 2575 Robert G. Craig & John M. Powers : Restorative dental materials (Tenth edition)
- 26. Silica bonded • consist of powdered quartz or cristobalite which is bonded together with silica gel or ethyl silicate. • On heating, the silica gel turns into silica resulting in a completed mould is a tightly packed mass of silica particles. • Use for high fusing alloys. 2675 Robert G. Craig & John M. Powers : Restorative dental materials (Tenth edition)
- 27. • Refractory materials (also termed investments) must be measured and mixed according to the manufacturer's instructions if mold expansion is to match the shrinkage of the associated alloy. • Gypsum-bonded refractory materials, commonly called low-heat investments, are used for casting Type IV partial denture gold and Ticonium (CMP Industries, Albany, NY). These refractory materials can be heated to 704°C (1,300°F) without causing breakdown of the investment. • Refractory materials used for chrome cobalt alloys, titanium, and titanium alloys are termed high-heat investments and may be heated to temperatures approximating 1,037°C (1,900°F). These high heat investments are phosphate bonded and usually require a special, silica-containing liquid to mix with the refractory powder. 2775
- 29. 75 29
- 30. 75 30
- 31. Draw the outline approx. 6mm for trimming 3175 placed in a drying oven at 93°C (200°F) for 30 to 60 minutes
- 32. 3275 the cast is positioned on its end to allow excess wax to run off Refractory cast is dipped into beeswax at 138°C to 149°C (280°F to 300°F) for 15 seconds
- 33. 75 33
- 34. • Before the waxing begins, design must once again transferred. • Master cast is evaluated and the outline of framework design is transferred precisely to refractory cast. 3475 Design transfer
- 35. Waxing technique • Pre-made wax patterns are used for waxing the framework. • Plastic patterns are glued to the cast with a mixture of acetone and plastic pattern scraps mixed to a watery consistency. • Tacky liquid is painted on the design outline with a fine brush and allowed to dry for a few seconds. • Patterns are carefully adapted to the cast with the help of a soft rubber pencil eraser shaped into a wedge. • Exercise extreme care not to stretch the pattern. 3575
- 36. • Once the patterns are in place on the refractory cast, they must be joined together with wax. • The areas where the retentive mesh work joins the major connector must be reinforced. • For final contouring ,carvers with miniature rounded blades are most apt to be used. 3675
- 37. Spruing • Spruing is attaching wax or plastic form to the wax pattern, to provide an entrance to the mold space and to serve as a reservoir of metal during casting procedure. • Rules: • The sprues should be large enough. • The sprues should lead into the molten cavity as directly as possible. • Sprues should be attached to the wax pattern at its bulkier sections. 3775
- 38. Types of spruing • There are two basic types of sprues, multiple & single. • A single sprue is preferred for complete denture metal bases. • The majority of partial denture castings require multiple spruing. 3875
- 39. Types of multiple sprues • Top spruing: A cone-shaped plastic sprue is attached to the central sprue from which auxiliary sprues run to each corner of the wax pattern. • 10 guage half round sprues are used. 3975
- 40. Inverted spruing • In which the base of the refractory cast should have a 7 mm diameter hole in its center. • A cone-shaped plastic sprue is placed into the hole which extends about 10mm on the pattern side. • 6 guage half round leads are used for spruing • Main and auxiliary sprues should be attached 7 mm below the central sprue. • All the sprues have to be attached at the same level to the central sprue to have equal distribution. • All sprues should be short and direct. • All junctions should be reinforced and rounded. • Auxiliary sprues are attached between the main sprue and the thick sections of the wax pattern. 4075
- 41. ERRORS IN SPRUING 75 41
- 42. 42 The effect of four sprue shapes on the quality of cobalt-chromium cast removable partial denture frame-works Kennedy Class III Mod I Round with reservoir-sprue design Square-sprue designRound-sprue design Ribbon-sprue design Evaluation of the fit on master die Viswambaran M, Agarwal S.. Contemporary Clinical Dentistry. 2013;4(2):132. 21-03-2016 120 Occlusal Radiograph showing internal defect
- 43. • PURPOSE: • Provides the strength necessary to resist the forces created by the stream of molten metal. • To make a smooth surface of the mold cavity so that the casting obtained will require as little as finishing required. • To establish an avenue of release for the gases created by burnout and casting procedures. • To compensate for the dimensional changes that occur when the metal goes from the molten to the solid state. 75 43 INVESTING THE REFRACTORY CAST
- 44. • Two part mold: • The investment for a removable partial denture casting consists of two parts: the investment cast on which the pattern is formed, and the outer investment surrounding the cast and pattern • Refractory cast is soaked in a slurry water. • Investment material is measured and mixed. • A paint on layer about 3-4mm is painted on waxed refractory cast and ensure that no voids are present. • As the layer reaches its initial set, the second part of investing procedure begins. • The cast is placed in an investing ring , having a moistened ring liner 3 mm short of the crucible end of the ring. • This ring liner permits the escape of gases and mold expansion. 4475
- 45. Burn out • The time and temperature required to eliminate wax from the mold cavity is specific to the refractory-alloy system that is being used. • Each system is developed to provide mold expansion that closely matches the anticipated shrinkage of the alloy as it solidifies.. • Purposes: • It drives off moisture in the mold. • It vaporizes & eliminates the wax pattern & sprues by heating them to evaporation leaving a cavity in the mold. • It expands the mold to compensate for contraction of the metal on cooling. 4575
- 46. Burn out furnaces • Can be either electric or gas and must be vented to allow the escape of noxious fumes. • Industrial gas type furnaces can hold 25 casting molds and small electric furnaces with a capacity of only 1 or two molds. • Modern furnaces are controlled electronically to permit time/temperature relationship to be set exactly to the alloy manufacturer’s specifications. 4675 manual semiautomatic fully programmable controls manual
- 47. Steps of burn out • For the investment to heat uniformly, it should be moist at the start of the burnout cycle. Steam will then carry the heat into the investment during the early stages of the burnout. • Also because of the water trapped in the pores of the investment it reduces the absorption of wax . • The mold should be placed in the oven with the sprue hole down. • Burnout should be started with a cold oven, or nearly so. • The temperature of the oven should be increased slowly and should be maintained for the period to a temperature recommended by the manufacturer. • When the cycle is complete all the wax of the pattern is eliminated. 4775
- 48. Casting • Molten metal is forced into the pre-heated mold. • Centrifugal force or air pressure is used. • If little force is used, the mold is not completely filled before the metal begins to freeze. • If excess force is used,turbulence may result in the entrapment of gases in the casting. • Metal is melted with a gas-oxygen blow torch or by an electric muffle surrounding the metal. • Induction casting is the method of choice for base metal alloys. • Titanium is melted using an argon arc melting and casted in a vacuum pressure chamber • Modern induction casting machines are normally programmed to cast when the alloy has reached the desired temperature. 4875
- 49. Recovery of the casting • The mold is removed from the machine and allowed to cool according to manufacturer’s directions. • At the appropriate time the mold is broken by tapping it with a wooden mallet to break off the outer layer of investment. • The remaining investment is then removed by sand blasting using aluminium oxide particles. • If gold casting alloys are used then pickling is done to remove the base metal deposits, oxidation and other contaminants • If not removed can cause tarnish and corrosion 4975
- 50. Errors during burnout and casting 75 50
- 51. Rubber wheels,rubber points,knife edge wheels Magnification and bright light for defects Point is formed on truing stone or heatless stone 51 Finishing the framework 75
- 52. Sprue stumps removed with heatless stone or separating disk Inaccessible areas-carbide bur or small mounted stone Major connector finished with abrasive stones 5275 Separating disk to cut sprues
- 53. Inverted cone stone used with sharp edge in undercut Flat surface against finish line Remove nodules from latticework 5375Felt cylinder used with Tripoli on surfaces that contact teeth Felt wheel to polish tissue side and tongue side of major connector
- 54. Knife edge wheels for finish lines 5475 Rag wheel with Tripoli to polish rest of framework Scrub casting to remove tripoli. Chloroform on cotton can be used to remove last traces of tripoli
- 55. ELECTROPOLISHING • Electropolishing, a form of electrolytic stripping, is usually the first step in polishing the framework. • In this process, atoms of metal from rough projections on the framework go into solution before those in smooth areas do. • This results in a very consistent, satin-like surface. • The polishing occurs in a bath of 85% orthophosphoric acid, which is heated to 49°C (120°F) to 60°C (140°F). • The anode is attached to the cast metal frameworl and is immersed in the solution. • Each square inch of metal surface area requires 2 amperes of current for 6 minutes. 75 55
- 56. Fitting the framework • The technician begins to fit the framework by carefully seating the casting on the master cast and attempts to identify the first spots that bind. • Special powdered sprays and liquid disclosing media are commercially available to aid in this process • The seating and spot grinding continues until the rests completely contact the cast. • As the retentive clasp tip engages an undercut area, they will most likely be the first area that binds. • Technician must carefully relieve the cast in the area of the clasp tip undercuts to allow the clasps to pass the height of contour. 5675
- 57. • Some technicians bend the retentive clasp arms away from the cast and then attempt to recontour the clasp back into contact. • This attempt requires good deal of skill and seldom results in a truly passive clasp. 5775
- 58. Rubber wheeling and final polish • Once the casting seats completely on the master cast without rocking, proceed with rubber wheeling and polishing. • Each alloy manufacturer sells a specific variety of polishing compound that best suits alloy. • Ultrasonic cleaning is commonly used to remove all traces of polishing materials. 5875
- 60. Sectioning and resoldering the framework • Framework must be fitted to oral cavity before denture bases and prosthetic teeth are added. • If the framework cannot be seated, the clinician must: • 1)decide to have new framework made or • 2)attempt to correct fit of the existing framework by sectioning and soldering. • Sectioned segments must be satisfactorily related in the mouth and then transferred with either a plaster index or a resin matrix to the laboratory. • Technician carefully pours a soldering cast against the properly related segments. • Foil is placed between the cast and the components to be soldered. • Electrosoldering tips are placed on each side of the joint to heat the solder 6075
- 61. Adjusting occlusion • Preliminary adjustments to the occlusion of a removable partial denture framework should be accomplished in the laboratory. • The clinician should provide an opposing cast and suitable interocclusal records. • Occlusal and incisal rests are sometimes made excessively thick to ensure complete casting. • Once cast, these areas are adjusted to return to the proper occlusal vertical dimension. • Once the framework has been adjusted to the minimum required dimensions, the interfering part of the opposing cast should be relieved and clearly marked with a red pencil. • In this way, a potential problem area is called to the attention of the clinician. • This approach allows the clinician the option of performing the final framework adjustment personally, reducing the opposing tooth, or both. 75 61
- 63. The effects of different types of investments on the alpha- case layer of titanium castings • The aim of this study was to evaluate the effect of 3 types of investments on the microstructure, composition, and microhardness of the a-case layer on titanium castings. • Patterns were invested using 3 types of investment materials: SiO2-, Al2O3-, and MgO-based investments and were cast in pure titanium. • Results: The use of an MgO-based investment material reduces the thickness of the reaction layer and decreases the surface microhardness of titanium castings compared to SiO2- and Al2O3-based investment materials 75 63 Guilin Y, Nan L, Yousheng L, Yining W. The Journal of Prosthetic Dentistry. 2007;97(3):157-164.
- 64. Comparative study of circumferential clasp retention force for titanium and cobalt-chromium removable partial dentures • The objective of this study was to compare circumferential RPD clasps made of commercially pure titanium and identical clasps made of 2 different cobalt (Co)-chromium (Cr) alloys by testing insertion/removal and radiographically inspecting the casts for defects, • 36 frameworks were cast from commercially pure titanium and 2 Co-Cr alloys with identical prefabricated patterns and the manufacturer-designated investment and casting technique. Each group was divided into 2 subgroups, corresponding to .25-mm and .50-mm undercuts, respectively 75 64 Main testing device comprised metallic matrix (A), load cell (B), and test specimen (C). Rodrigues R, Ribeiro R, de Mattos M, Bezzon O. The Journal of Prosthetic Dentistry. 2002;88(3):290-296.
- 65. • RESULTS: • A total of 20% of the titanium specimens demonstrated porosity, showing casting difficulties, and any defect detected on the clasps determined the sample replacement. For Co-Cr alloys, casting difficulties were not found. • The results suggest that commercially pure titanium clasps maintained retention over a simulated 5-year period, with lower retention force than identical Co-Cr clasps. 75 65 Porosities in titanium clasps.
- 66. Use of CAD/CAM technology to fabricate a removable partial denture framework 66 Unrestored condition of patient. Use of tool in FreeForm. Completed virtual build. 75 Williams R, Bibb R, Eggbeer D, Collis J. The Journal of Prosthetic Dentistry. 2006;96(2):96-99.
- 67. 67 Screen capture of virtual RPD and supports prepared for building. Framework emerging from selective laser melting(SLM). 75SLM Co/Cr RPD fitted to cast. Finished framework fitted to patient
- 68. Conclusion 6875 • Although the clinician’s direct involvement with construction phases of the removable partial denture framework is impractical, each dentist should be aware of the techniques and processes used in prosthesis fabrication. • A good working relationship between the dentist and the dental laboratory technician permits the construction of quality prostheses and the delivery of quality care.
- 69. References • McCracken’s Removable partial prosthodontics.11th edition • Stewart’s clinical removable prosthodontics.3rd edition • Dental laboratory procedures-Removable partial dentures.Morrow,Rhudd.Vol-3. • Robert G. Craig & John M. Powers : Restorative dental materials (Tenth edition • Viswambaran M, Agarwal S. The effect of four sprue shapes on the quality of cobalt-chromium cast removable partial denture frame-works. Contemporary Clinical Dentistry. 2013;4(2):132. • Guilin Y, Nan L, Yousheng L, Yining W. The effects of different types of investments on the alpha-case layer of titanium castings. The Journal of Prosthetic Dentistry. 2007;97(3):157-164. • Rodrigues R, Ribeiro R, de Mattos M, Bezzon O. Comparative study of circumferential clasp retention force for titanium and cobalt-chromium removable partial dentures. The Journal of Prosthetic Dentistry. 2002;88(3):290-296. • Williams R, Bibb R, Eggbeer D, Collis J. Use of CAD/CAM technology to fabricate a removable partial denture framework. The Journal of Prosthetic Dentistry. 2006;96(2):96-99. 6975
Editor's Notes
- Dental clinic and laboratory will not be in one place Sometimes in different cities Thus work authorization form acts as a medium of communication
- the clinician determines a specific path of insertion and removal for the partial denture. This path is recorded by placing tripod marks on the diagnostic cast. In turn, the clinician prepares both hard and soft tissues of the mouth in harmony with this path. The technician must ensure that all framework fabrication steps are based upon this path of insertion and removal.
- Using carbon marker mark survey lines on master cast that will be contacted by metal
- Metallic outline drawn in brown Rest, tripod, undercut cross lines, terminal end of the clasp in red Finish lines in blue
- .5mm deep and becomes less distinct at gingival margins Prevents food particles from entering and creating discomfort Snugg fit against the palate
- treated with a surface sealer. The sealer is a mixture of acetone, diethyl phthalate, and cellulose acetate. Impermeable seal that protects the drawn design multiple layer should not be applied Dry for 5 mins and block out
- Buccal or lingual surface to faciliate accurate placement of plastic or wax pattern It must be trimmed flush with the survey line If stone is trimmed off the final frame will not fit in the mouth
- Relief is given in edentulous areas for adaptation of denture base and to form internal finish line Generally not needed except for unhealed ridges. The dentist should specify if relief is needed Advantages if relief is not used- eliminates one step and chances of error, no need for conventional internal finish line A properly formed internal finish line permits formation of a butt joint between the framework and the acrylic resin denture base. This allows a smooth transition from metal to resin and minimizes the likelihood of trauma to the adjacent soft tissues. One thickness of baseplate wax makes an ideal relief pad
- Cast is placed on the base of the duplicating flask. ¼ inch clearence in all direction Use modelling clay to fix the cast and close the body of the flask. Secure the junction between the base and body of the flask
- Agar –basic constituent Borates- improves strength, also retards the setting of stone poured into the finished impression-disadvantage Potassium sulphate-counters retarding effect of borates Wax- filler Thixotropic-plasticizer Water-dispersion medium Coloring and flavour agent
- Double boiler or storage unit A breakdown temperature of 100 °C and a working temperature of 63 ° C are suitable Pour the agar in a stream not more that one pencil size diameter
- Run cool water at the base of the flask. Colloid cooling at the base alone will cause shrinkage in only that direction making it to adapt more closely to the cast 45 mins to 1 hr
- Blockout philosophies and techniques are similar regardless of the chosen alloy. In contrast, duplication materials and techniques are alloy specific. refractory cast expansion determines the ultimate fit of the framework
- Casts may be heated to 704 degrees celcius
- The use of colloidal solution of silica instead of water for mixing with the powder has the dual effect of increasing the setting expansion and strengthening the set material. On heating the investment prior to casting, mould enlargement occurs by both thermal expansion and inversion of the silica. Thermal expansion is greater for the colloidal silica-mixed materials than for the water-mixed materials.
- GYPSUM-BONDED INVESTMENTS DECOMPOSE ABOVE 1200ºC BY INTERACTION OF SILICA WITH CALCIUM SULPHATE TO LIBERATE SULFUR TRIOXIDE GAS. CALCIUM SULPHATE AND CARBON: CASO4 + 4C → CAS + 4CO • THE CARBON MAY BE DERIVED FROM THE RESIDUE LEFT AFTER BURNING OUT OF THE WAX PATTERN OR MAY BE PRESENT AS GRAPHITE IN THE INVESTMENT. LIBERATING SULPHUR DIOXIDE
- Add powder to water. Mechanical mixing 60 sec and vaccum mixing 30 sec
- Add in increments. Use small portions for teeth that are to be clasped.
- This mold is over filled and the investment touching the casts may be distorted because of restricted expansion
- Place the cast in dry oven for at 200 farenheit for 2-3 hrs. Treating the cast with spray or bees wax. Make it less abrasive
- Then patterns from the cards are removed with a quick snap to prevent distortion and placed on the refractory cast. Cards are to be kept cold
- The molten metal touched the tip of the central sprue firsthence any impurities tend to collect there first
- Also known as divesting
- Barrel shaped mouted stone, fine tappered mounting stone or carbide bur to remove flash from clasp arms, minor connectors, rest and indirect retainers
- thickness of this surface layer of titanium castings using phosphate-bonded SiO2 investment is 50 to 500 mm, consisting of Si, P, O, and Ti.