Diploma project update prototyping phase 1
•
0 likes•231 views

Developing the fully functional prototype along with the experiential labs in Delhi

Recommended
Recommended
More Related Content
Similar to Diploma project update prototyping phase 1
Similar to Diploma project update prototyping phase 1 (20)
More from Devyani Jain
More from Devyani Jain (12)
Recently uploaded
Recently uploaded (20)
Diploma project update prototyping phase 1
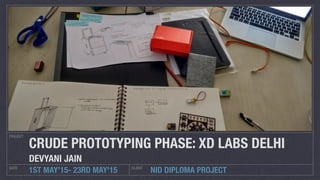
- 1. NID DIPLOMA PROJECT PROJECT DATE CLIENT 1ST MAY’15- 23RD MAY'15 CRUDE PROTOTYPING PHASE: XD LABS DELHI DEVYANI JAIN
- 2. SMART CABIN LUGGAGE PRODUCT IDEA #1 DIGITAL WEIGHT SCALE DON’T FORGET YOUR LUGGAGE • Notifies you when you go out of threshold area. • Report Lost if the luggage is lost • Find your luggage, if in range. • Weigh your luggage as you lift it up PROTOTYPING PROCESS: The prototyping is divided into following four parts: 1. Weighing Mechanism 2. Bluetooth Feature 3. Embedding the electronics into the suitcase 4. Designing the mobile application.
- 3. STEP 1# THEORETICAL DESIGN VIA SKETCHING Figuring out the design and prototyping process Designing on paper: how the first level prototype with look Designing on paper: how the first level prototype can be made
- 4. STEP 2# A QUICK EXPERIMENT FOR FEASIBILITY CHECK OF WEIGHING MECHANISM Since making a weighing mechanism is time consuming and challenging, I decided to use an off the shelf component, and do the feasibility testing. Fixing of the weighing mechanism on the suitcase Experiment Successful. The idea is Feasible. Tested by lifting the luggage and seeing if this gives and accuthe weighing mechanism still works! Top-View
- 5. STEP#2 A QUICK EXPERIMENT TO UNDERSTAND THE ATTACHMENT OF WEIGHING MECHANISM I ripped off the off-the-shelf weighing machine to understand how can I fit the existing piece of technology into the desired form Then attached the weighing mechanism, to a card box so as to understand attachment to design the casing Inside View Outside View
- 6. STEP#3 TAKING AND MARKING THE MEASUREMENTS FOR THE CASING INTERFACE ON THE SUITCASE Figuring out the measurements the casing according to the existing suitcas; by pasting a paper and marking accurate measurements for all the components Taking the measurements fFnal measurementsMarking the measurements
- 7. STEP#4 DESIGNING THE CASING BASED ON ACCURATE MEASUREMENTS In order to design the casing, I made a few 3d models of paper. Measurements were not to scale, since it was an exercise to understand the complex 3d structures. Casing Design Explorations: Interior Casing Design: Exterior View Final Sketches of the Casing
- 8. STEP#5 MAKING THE CASING ON SKETCHUP FOR ACRYLIC BOX 3D model on sketchup of the case Spillitting the design to 2d faces Acrylic Sheets Cut according to measurements
- 9. STEP#6 MAKING THE ACRYLIC BOX Attaching the various faces into a box via superglue. Spillitting the design to 2d faces The completed acrylic box, currently Interior of the acrylic case Exterior of the acrylic case
- 10. STEP#7 FIGURING OUT THE ELECTRONICS Taking the measurements Final Circuit on Lilypad and BLE moduleMarking the measurementsTransferring the Uno Circuit on the Lilypad Making the circuit on Arduino Uno Exploring with the team about Arduino Exploring with the team Arduino Software
- 11. STEP 8# FIGURING OUT THE MOBILE APPLICATION Working out the flow of the application Mobile Application Homescreen: Checking the Feasibility Mobile Application Key Screens and App Icon
- 12. STEP#8 EMBEDDING THE TECH ONTO THE SUITCASE Outer view of the final crude prototype Interior view of the final crude prototypeClose view
- 13. STEP#8 EMBEDDING THE TECH ONTO THE SUITCASE : MORE VIEWS
- 14. THE FINAL CRUDE PROTOTYPE: VIDEOS Exterior view Interior view Mobile App