
Recommended
More Related Content
Viewers also liked
Viewers also liked (8)
Similar to Web 2.0 Tools for 21st Century Learning
Similar to Web 2.0 Tools for 21st Century Learning (20)
Recently uploaded
Recently uploaded (20)
Web 2.0 Tools for 21st Century Learning
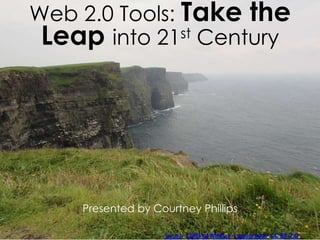
- 1. Web 2.0 Tools: Take the Leap into 21st Century Presented by Courtney Phillips .Sergio. Cliffs of Moher – panorama. CC BY 2.0.
- 2. A collection of tools perfect for grades K-5K.W. Barrett. 2nd graders using Build A Bird app on the iPad. CC BY 2.0.
- 4. Benefits of Digital Learning 1. Personalization 2. Accessibility 3. Cultural Relevance 4. Efficiency 5. Performance Bfishadow. iPad vs. iPhone. CC BY 2.0. Steinberg, S. (n.d.). Technology for schools and teachers: 5 reasons digital learning matters. Retrieved July 26, 2015.
- 6. Identifying Character Traits SOL 1.9 :The student will read and demonstrate comprehension of a variety of fictional texts. (f) Identify characters, setting, and important events
- 7. Culminating Activity Describing Contributions of Famous Americans SOL 2.4: The student will describe how the contributions of selected individuals changed the lives of Americans, with emphasis on (c) Abraham Lincoln
- 8. A “hook” for a new lesson VS.7: The student will demonstrate knowledge of the issues that divided our nation and led to the Civil War
- 9. Big Huge Labs www.bighugelabs.comAndy Rennie. Lens (160/356). CC BY-SA 2.0.
- 10. Trading Cards SOL 2.4: The student will describe how the contributions of selected individuals changed the lives of Americans, with emphasis on (e) Helen Keller. David. Helen Keller. CC BY 2.0.
- 11. Motivational Poster Highlighting Vocabulary Words SOL 3.4: The student will expand vocabulary when reading. Shadowgate. Gorges du verdon. CC BY 2.0.
- 12. Magazine Covers VS. 7: The student will demonstrate knowledge of the issues that divided our nation and led to the Civil War. VS. 8: The student will demonstrate knowledge of the reconstruction of Virginia following the Civil War Raymond, Nicolas. Gettysburg sunset cannon – hdr. CC BY 2.0.
- 14. Analyzing: Blabberize matter - solid. (n.d.). Retrieved July 29, 2015, from https://www.youtube.com/watch?v=0rSuU-oX0fQ MatterSOL 1.3: The student will investigate and understand how different common materials interact with water. May, Kyle. DIY fake ice cubes. CC BY 2.0.
- 15. Creating: 3d shapes. (n.d.). Retrieved July 29, 2015, from https://www.youtube.com/watch?v=YwSDfiy2Q_0 3D Shapes SOL 2.16: The student will identify, describe, compare, and contrast plane and solid geometric figures (circle/sphere, square/cube, and rectangle/rectangular prism). Depolo, Steven. Colorful wooden blocks children's museum macro April 17, 20114. CC BY 2.0.
- 16. Understanding: Blabberize - arctic animals. (n.d.). Retrieved July 29, 2015, from https://www.youtube.com/watch?v=PB_bFwFw_2k AnimalsSOL 4.5 The student will investigate and understand how plants and animals, including humans, in an ecosystem interact with one another and with the nonliving components in the ecosystem. Key concepts include a) plant and animal adaptations; d) habitat and niches Werner22brigette.Polar-bear-559499_1. CC 0.
- 18. Book Trailer or Book Review SOL 2.8: The student will read and demonstrate comprehension of fictional texts. (H) Summarize stories and events with beginning, middle, and end in the correct sequence. Olivia Bean, Trivia Queen book trailer. (n.d.). Retrieved August 6, 2015, from https://www.youtube.com/watch?v=pxuWvxOIbYA Cockburn Libraries. New curved shelves in children's library @ Coolbellup Library. CC BY-NC-2.0ND.
- 19. Illustrate Procedure for How-To Writing SOL 4.7: The student will write cohesively for a variety of purposes. Nador, Kristin. Pencils on notepad. CC BY 2.0.
- 20. Season Scavenger Hunt SOL 1.7: The student will investigate and understand weather and seasonal changes Kramer, Rachel. 4 seasons- tree-lined drive. CC BY 2.0.
- 21. Are you prepared to take the leap? .Sergio. Cliffs of Moher – panorama. CC BY 2.0.
Editor's Notes
- Good morning and welcome! My name is Courtney Phillips and today I will be discussing Web 2.0 Tools: Take the Leap into 21st Century Learning. Web 2.0, as defined by Discovery Education, is a name given to cutting edge web-based tools that make “creating, collaborating, editing, and sharing user-generated content online” as simple as a few keystrokes and mouse clicks. In other words, it is a way for teachers, students, and literally anyone, to develop and share their creations with one another through incredibly simple to learn programs. With the tools that we’ll be looking at today, anyone can bring 21st Century Learning into their classrooms! (35 seconds)
- Today I want to take a look at four digital tools that can be used to bring technology into the lives of students. The tools that we will be discussing in this session are perfect for grades K through 5, although the earlier grades may need some extra support. However, don’t walk away from here believing that these tools can only be used for those grades, they can truly be used in grades K through 12, but developing these skills at an early age can help them stay ahead for years to come. (25 seconds)
- So before we get into the individual tools let me tell you a little about myself. My name, as I mentioned earlier, is Courtney Phillips. I have been teaching for eleven years in the Virginia Beach Public School system. Five of those years were spent as a second grade teacher, three of them as a Reading Recovery teacher, and I just began my fourth year as a first grade teacher. At a recent administration conference I attended, State Superintendent Dr. Steve Staples stated that, “Today’s students won’t get tomorrow’s jobs with yesterday’s schools.” This statement strengthens my reasons for wanting to continue in the Library Science Program at Old Dominion University. (33 seconds)
- To bring yesterday’s schools up to date, and even better, to push them into tomorrow, we need to add technology. There are definite benefits to digital learning. The first benefit is that of personalization. Each of the tools that we are going to discuss can be tailored for each student, class, or subject. So, not only can the students use the tools, but so can the teacher to present the curriculum. The ease of using these tools allows the presentations to be created quickly, so that materials can be updated to stay relevant and connect with the students. It has been shown that “students thrive most in situations where educational experience has been customized to their unique needs, and digital learning provides teachers with the tools and opportunity to offer individualized learning programs” (Steinberg, 2013). The next benefit of digital learning is accessibility. With basic digital resources, any school, regardless of economic standing, can have access to all of the same opportunities. The ability to create with web 2.0 tools allows every classroom teacher to have materials for non-traditional and unique lesson plans, without any added cost. That brings us to cultural relevance. As I mentioned before, technology is all around us and should be brought into the classroom. Colleges are increasingly expecting students to come with a background in technology, so exposing students to technology early is essential. Efficiency. Digital learning is efficient. I think we have all felt the pain of budget cuts recently. These digital tools will help reduce the resources used in the classroom and the amount of time spent at the copy machine. Not only will it save you time, it can help save the environment. One device can connect to almost endless tools to be used in the classroom with little or no added cost. In this way, digital learning will help cut costs and make better use of the limited dollars available for education. Lastly, there is the benefit of performance. By now I think we all know that students that are engaged in education learn more effectively. The great thing about using technology, and digital learning, is that sometimes the students don’t even realize that they are learning. Digital tools are able to present material in a way that is much more interesting and relatable to modern students. The ability to be interactive has proven results in test scores and retention rates. Put simply, it allows you to communicate in their language. (120 seconds)
- Now we get to look at the digital learning tools themselves! The first tool I would like to talk about is Tagxedo. According to www.tagxedo.com, Tagxedo is a digital text tool that ”turns words -- famous speeches, news articles, slogans and themes, even your love letters -- into a visually stunning word cloud.” Now, what is a word cloud? As you can see from the picture, it is a collection of words grouped together to make a cloud, or other shape, with words sized based on how often they occur in the selected text or list. This tool allows the user to either enter a website or provide their own text that they would like to turn into a word cloud. Currently, Tagxedo is free but soon the site will be available in a premium subscription if you would like to use the more advanced features. The free site will continue to provide many customization options, though. The creator may choose from 30 fonts, 30 themes, and 30 shapes. Although there are only a handful of selected shapes to choose from, if the shape you are looking for is not already available, a custom shape can be created with the premium subscription. When using Tagxedo, please be aware that the program needs Microsoft Silverlight to be installed in order for it to work. Unfortunately, some internet browsers, such as Chrome, do not support the use of Silverlight. (75 seconds)
- There are many ways this simple but engaging digital text tool could be used by either a classroom teacher or librarian. Here you will see a word cloud that has been created to showcase character traits for the popular story character, Chrysanthemum. So, for a practical classroom application, when learning about character traits students can make a list of different traits that describe a character’s personality. Those traits can then be typed into the correct field to create the word cloud. To highlight the character name, like in the Chrysanthemum example shown, add it several times so that it stands out against the other traits listed. Press create and Tagxedo does the rest! (40 seconds)
- Another option for incorporating Tagxedo into daily lessons would be to create a word cloud after completing a unit of study about famous Americans. Here is an example of a word cloud created in the shape of President Lincoln’s face. Just like the one created for character traits, the students could write down words that came to mind when thinking about the famous American president, type the list into the correct field, choose the shape, in this case Abe Lincoln’s face, and press create. An exercise like this one would encourage participation and help associate those words listed with Lincoln in a concrete example; increasing retention. (38 seconds)
- Here, the classroom teacher or librarian could create a word cloud to use as a hook to a brand new lesson or topic. The word cloud could be displayed on a Smart Board in order to grab the students’ attention. Questions and observations could be made while the teacher leads the students into how the words are all related to one another. Now that we have discussed what Tagxedo is and how it can be used let’s talk to the people at our table about other ways you have used this tool before or how it can be used in ways that we have not mentioned. Who would like to share one or two ways this tool could be used? (34 seconds) Are there any questions I can answer about this tool? (3 minutes)
- The next tool we will be discussing is Big Huge Labs, which is an image creation tool. Big Huge Labs is a fun and engaging way to transform your everyday digital photos or pictures. Digital cameras are always at the tip of our fingertips with the accessibility of smart phones and tablets. Most children even own one or have access to one. Why not take advantage of this wonderful tool and incorporate digital photos into our daily lessons. Big Huge Labs allows for students or teachers to add special effects or filters, create magazine covers, billboards, movie posters, jigsaw puzzles, badges, trading cards, or even motivational or funny posters to name only a few. This site is free to use and has very little limitations. The only drawback may be that each activity has a template to use so you are limited in the design of the magazine cover, trading card, or other selection (44 seconds).
- This is an example of the trading card created with Big Huge Labs. This activity can be used in so many ways. At the end of a content unit, students may create a trading card for any famous American they have been learning about by providing important facts about their life. If a class of students all created a trading card for a different person, the classroom teacher could make a collection of each one and provide the students with a class set to use as review. (23 seconds)
- Here is an example of a motivational poster. You probably have one hanging in your school somewhere right now. In every grade level, students are always challenged to expand their vocabulary. By using the motivational poster, students can choose a vocabulary word, find or take a digital picture, upload it, and provide the definition for it. This is simple enough to create that it would be great to use for the early grade levels. (15 seconds)
- Creating a magazine cover is another option when using Big Huge Labs. Why not let students work together to create one focusing on a major historical event. Here you see a magazine cover that focuses on the Civil War. Since there are many different important events that happened during that time, students could choose one and write a factual paper on it. When each group member has completed theirs, they can be put together with the magazine cover. This would be a great way to tie in a historical period that was made up of many other smaller events. The students could even present their papers to the class like articles from the magazine to share what they found with their classmates. (34 seconds) So, we have just discussed three different ways to incorporate Big Huge Labs into daily lessons. Let’s take some time to discuss your own experience with this tool. Talk to the people sitting near you. I can also take some time to address any questions that anyone may have. (3 minutes)
- The next tool we will be looking closer at is Blabberize. This tool is incredibly fun and so easy to use. Blabberize is an audio recording tool that allows you to upload a picture and give the object in the picture a voice. You can use any image and even have the option of saving the recording on the site by creating a user account with Blabberize. It is addictive and can be used for so much! It allows you to record directly from the computer microphone, creating one on your phone, or uploading a previously recorded audio file. So, while all it really does is add a mouth to pretty much anything, it directly associates what is being said with the person or object saying it. It’s a great way to connect content with the subject, and as I mentioned previously, can be used by teachers and students for any grade level and for any subject. Blabberize is, in the end, a very simple tool in what it actually accomplishes. Really it is just a mouth moving to an audio file, but really, its limitation is the imagination of the person creating with it. The following are some examples of how this tool was used to create videos on several different subjects. (45 seconds)
- Let’s watch and listen to this video. Here is one example of how a student used Blabberize to show the knowledge he gained after learning about solids, liquids, and gases. The student drew a picture of an ice cube and made it come alive by adding an audio file. The ice cube itself is explaining what kind of matter it is and what makes the ice cube a solid. This is a simple but effective way of incorporating technology into an everyday lesson which will ultimately help the student internalize the information she learned and as you can see by the picture and the voice, the creator was young, which shows just about anyone can create with it. (67 seconds)
- Another way students have used this tool in the past is by identifying and describing 3-demensional shapes. (Click the play button to watch video. Stop video at 2:28) Here the students drew a picture of a 3-d shape, uploaded it to Blabberize, gave the shape a mouth, and recorded themselves talking about the name of the shape, how many faces, vertices, and edges it has. Seeing what their classmates have created helps keep the students more attentive and engaged. (179 seconds)
- Have the students in your school ever had to do animal research? As a classroom teacher I know mine have. After the students complete their research and write an informational piece on their animal, why not have the students take the activity one step further by creating a Blabberize? Here is an example of how some students have done just that. (Click play on video) (72 seconds) Let’s take some time to discuss your own experience with this tool. Talk to the people sitting near you. Let’s share out. I can also take some time to address any questions that anyone may have. (3 minutes)
- The last Web 2.0 tool I’d like to focus on is Animoto. This is an online video maker that allows the creator to upload photographs, video, audio, and text in order to tell a story. There are several templates or styles to choose from that will fit perfectly with any occasion. Animoto is available as an iOS or Android app so it can easily be uploaded to a smartphone or tablet for ease of use. This tool is available as a free trial but if you would like to create a video without the Animoto watermark, there are three different price plans available to meet your needs. The price plans increase in price from $9.99 to $29.99 and the features included in each plan increase with the cost. One of the great features of Animoto is that it offers an Animoto Plus account for educators which comes at no cost. (43 seconds)
- Here is an example of how elementary students could use Animoto in a classroom setting. Students are always looking for new books to read so why not encourage other students to create book trailers for some of their favorite books. Let’s watch this book trailer created for the book called Olivia Bean: Trivia Queen. (Click to watch video) School librarians could even embed the book trailer link in a QR code and post it next to the book in order to increase interest and encourage students to check it out. I think that this would be a great idea so that students could preview books and see how much their peers enjoyed them. (150 seconds)
- Although I don’t have a video to share showing an example of how this has been done in the past, as a current first grade teacher, my students are given plenty of opportunities to write how-to pieces. In many cases, before they begin to write their story, the students actually go through the steps in the process so they can have background knowledge of what they are going to talk about. Now, with this Animoto tool, students can use a tablet, take pictures of the process they are completing, write their how-to paper, and illustrate the procedure by uploading pictures, text, and music in order to create a video. (29 seconds)
- Finally, many students in Kindergarten, first, and second grade spend time learning about the four seasons. When the weather is nice, it’s fun to take the students outside on a nature walk to investigate or observe the changes they see around them. Instead of simply checking off the signs of each season they observe, why not take pictures using an iPad. The students can upload the pictures to Animoto, add a label to each one, and create a video showing the many signs they observed. Over the school year, students could revisit these videos as review. (33 seconds) It’s time to discuss your own experience with this tool. Talk to the people sitting near you. Is anyone willing to share an idea or two. I can also take some time to address any questions that anyone may have. (3 minutes)
- Thank you for joining me today. I hope you have learned something new about these Web 2.0 tools and are willing to share this information with the staff at your school. If there are any more questions, please feel free to stick around and talk with me. (10 seconds)