1. Danielle Thomas
Glades Middle School
16700 Bass Creek Road
Miramar, FL 33027
754-323-4600
Danielle.j.thomas@browardschools.com
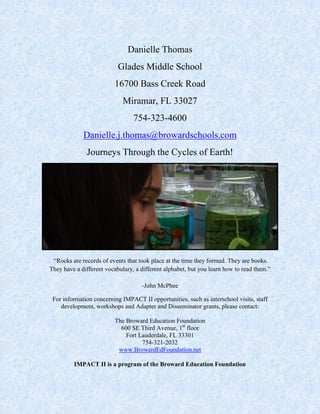
Journeys Through the Cycles of Earth!
“Rocks are records of events that took place at the time they formed. They are books.
They have a different vocabulary, a different alphabet, but you learn how to read them.”
-John McPhee
For information concerning IMPACT II opportunities, such as interschool visits, staff
development, workshops and Adapter and Disseminator grants, please contact:
The Broward Education Foundation
600 SE Third Avenue, 1st
floor
Fort Lauderdale, FL 33301
754-321-2032
www.BrowardEdFoundation.net
IMPACT II is a program of the Broward Education Foundation
2. 2
TABLE OF CONTENTS
1. Unit Goals……………………………………………….…………….....pg. 3
2. Objectives………………………………………….………………….....pg. 4
3. Standards and Benchmarks……………………………………………....pg. 5
4. Unit Outline and Overview…………………………………………..…..pgs. 6 -7
5. The Water Cycle…………………………………………………………pgs. 8 - 13
6. The Rock Cycle………………………………………………………......pgs. 14 - 24
7. The Crystal Cycle…………………………………………………………pgs. 25 - 31
8. Final Assessment………………………………………………………….pg. 32
9. Budget and Supply List..……………………………………………….….pg. 33
10. Partial Picture Supply List…………………………………………………pg. 34
11. Unit Adaptations…………………………………..……………………….pg. 35
3. 3
Unit Goals
Journeys Through the Cycles of Earth is a unit based on the cycles of Earth. Each
cycle is broken down into a journey and there are activities for each journey. The journeys are
the rock cycle, the water cycle and the crystal cycle. Each journey can be used independently and
can be differentiated for different grade or learning levels. Each journey has either a hands-on lab
or technology project that can be adapted to any subject. The culminating activity is to create a
project that demonstrates what each student learned. Students are able to work independently or
with a partner.
Journey One ~ The Water Cycle
Our water cycle journey began with learning the essential vocabulary for the water cycle.
Students utilized the textbook to create a vocabulary illustration for each word that showed the
word, definition, sentence and an illustration. Next, the students watched videos about the water
cycle from Promethean Planet. Lastly, the students did a lab that illustrated the water cycle in
action. They took a plastic cup with a paper towel and food coloring in it. They filled the cup
with water and sealed it in a plastic bag. They attached the bag to the window of the classroom
and anxiously observed the changes over the next month. The final step of the lab was to freeze
the bags with the remaining water vapor. The students were awed to see that the water vapor
turned to snow.
Journey Two ~ The Rock Cycle
Our rock cycle journey began with learning the essential vocabulary for the rock cycle. Students
utilized the textbook to create a VIS chart for each word that showed the word, definition,
sentence, and an illustration. They watched videos on the rock cycle from Promethean Planet.
After learning about the various types of rock students completed the rock cycle lab. They used
what they learned about the various types of rocks to correctly identify unknown rocks. The
students had to write a story about the rock cycle. Their job was to create at least a two-page
short story that utilized at least ten vocabulary words and/or definitions in their story. The
resulting stories were then shared with the class.
Journey Three ~ The Crystal Cycle
As part of Journey One and Two, the students learned about crystals and crystal formation. The
students completed the crystal-growing lab where students created their own crystals in class
using borax, epsom salt or both. The students recorded their observations and took their crystals
outside to perform their final observations. The students were then able to take their creations
home.
4. 4
Objectives
1. Students will identify key vocabulary and create a vocabulary illustration for each word.
2. Students will complete a lab that demonstrates the movement of water above, on and
below the Earth’s surface.
3. Students will explain how water moves through the water cycle.
4. Students will classify rocks according to key identifying characteristics.
5. Students will describe the process that changes rock from one type into another type.
6. Students will explain the process that shapes the surface of the Earth.
7. Students will create a flow chart of the steps in the rock cycle and/or the water cycle.
8. Students will demonstrate the process of evaporation and depositation.
9. Students will create a short story that utilizes ten vocabulary words.
10. Students will explain how the cycling of water between the atmosphere and hydrosphere
has an effect on weather patterns and climate.
11. Students will identify patterns in the rock cycle and relate them to surface events and
subsurface events.
12. Students will create a borax or epsom salt crystal.
13. Students will complete lab reports for the rock cycle, water cycle and crystal lab.
14. Students will compare and contrast the water and rock cycles.
15. Students will generate, explain, test and defend hypotheses using both inductive and
deductive strategies through experimental inquiry.
16. Students will compare and create graphic representations of various concepts.
5. 5
Science Standards and Benchmarks
Big Idea 7 Earth’s Systems and Patterns
SC.6.6: Over geologic time, internal and external sources of energy have continuously altered the
features of Earth by means of both constructive and destructive forces. All life, including human
civilization, is dependent on Earth's internal and external energy, and material resources.
SC.6.6.1: Describe and give examples of ways in which Earth's surface is built up and torn down
by physical and chemical weathering, erosion, and deposition.
SC.6.7: The scientific theory of the evolution of Earth states that changes in our planet are driven
by the flow of energy and the cycling of matter through dynamic interactions among the
atmosphere, hydrosphere, cryosphere, geosphere, and biosphere, and the resources used to
sustain human civilization on Earth.
SC.6.7.2: Investigate and apply how the cycling of water between the atmosphere and
hydrosphere has an effect on weather patterns and climate.
SC.A.1.3.3.3: Determines the effect of a change in temperature on common materials (for
example, butter, food coloring in water, isopropyl alcohol).
SC.A.1.3.4.1: Understands that matter may exist as solids, liquids, and gases.
Reading Standards and Benchmarks
LA.6.3.5.1: Prepare writing using technology in a format appropriate to audience and purpose.
LA.6.3.5.2: Use elements of spacing and design for graphics, when applicable to enhance the
appearance of the document.
LA.6.3.5.3: Share the writing with the intended audience.
LA.6.1.6.1: Use new vocabulary that is introduced and taught directly.
LA.6.1.6.2: Listen to, read, and discuss familiar and conceptually challenging text.
LA.6.1.6.3: Use context clues to determine meanings of unfamiliar words.
Technology Standards and Benchmarks
LA.6.6.4.1: Use appropriate available technologies to enhance communication and achieve a
purpose.
LA.6.6.4.2: Determine and apply digital tools to publications and presentations.
6. 6
Unit Overview
Journey One ~ The Water Cycle pgs. 8 - 13
Our water cycle journey began with learning the essential vocabulary for the water cycle.
Students utilized the textbook to create a vocabulary illustration for each word that showed the
word, definition, sentence and an illustration. Next, the students watched videos about the water
cycle from Promethean planet. Lastly, the students did a lab that illustrated the water cycle in
action. They took a plastic cup with a paper towel and food coloring in it. They filled the cup
with water and sealed it in a plastic bag. They attached the bag to the window of the classroom
and anxiously observed the changes over the next month. The final step to the lab was to freeze
the bags with the remaining water vapor. The students were awed to see that the water vapor
turned to snow.
Journey One: The Water Cycle
a. Vocabulary Introduction
b. Water Cycle Flow Chart
c. Video Link
d. Water Cycle Lab and Observation
______________________________________________________________________________
Journey Two ~ The Rock Cycle pgs. 14 - 24
Our rock cycle journey began with learning the essential vocabulary for the rock cycle. Students
utilized the textbook to create a VIS chart for each word that showed the word, definition,
sentence and an illustration. They watched videos on the rock cycle from Promethean planet.
After learning about the various types of rock students completed the rock cycle lab where they
had to use what they learned about the various types of rocks to correctly identify unknown rocks
using their notes and their observations. The students had to write a story about the rock cycle.
Their job was to create at least a two-page short story that utilized at least ten vocabulary words
and/or definitions in their story. The resulting stories were then shared with the class.
Journey Two: The Rock Cycle
a. Vocabulary Introduction
b. VIS Chart
c. Video Link
d. The Rock Cycle Lab
e. The Rock Cycle Story
______________________________________________________________________________
7. 7
Journey Three ~ The Crystal Cycle pgs. 25 - 31
As part of journey one and two the students learned about crystals and crystal formation. The
students completed the crystal-growing lab where students created their own crystals in class
using borax, epsom salt or both. The students recorded their observations and took their crystals
outside to perform their final observations. The students were then able to take their creations
home.
Journey Three: The Crystal Cycle
a. Crystal Cycle Teacher Notes for Lab
b. Lab safety contract
c. Crystal Growing Lab Part One
d. Crystal Growing Lab Part Two
e. Crystal Growing Lab Part Three
f. Crystal Growing Lab Part Four
______________________________________________________________________________
8. 8
Journey One: The Water Cycle
a. Vocabulary Introduction
b. Water Cycle Research and Flow Chart Activity
c. Video Link
d. Water Cycle Lab and Observation
The Water Cycle Introduction
The water cycle is the continuous movement of water from the ocean to the atmosphere to the
land and back to the ocean.
______________________________________________________________________________
9. 9
The water cycle research and flow chart activity
Directions: Research the following vocabulary words using the Internet. Use your research to
create a flow chart that demonstrates the different parts of the water cycle. You may add pictures
or additional information if you feel it adds to your presentation.
Key vocabulary: The Water Cycle, Condensation, Precipitation, Evaporation
______________________________________________________________________________
10. 10
Water Cycle Graphic
http://earthguide.ucsd.edu/earthguide/diagrams/watercycle/
The Water Cycle - Water Science for Schools
http://ga.water.usgs.gov/edu/watercyclehi.html
______________________________________________________________________________
Water Cycle Video
You may view one or all. Have students take notes while watching the videos. There are also a
few Spanish versions of the videos.
Go to BEEP
Click on United Streaming (Discovery Education)
In the search type the following titles:
View Bill Nye: The water cycle
View Weather Smart: The Water Cycle and Clouds
http://player.discoveryeducation.com/index.cfm?guidAssetId=A67F6299-8E81-4136-97A5-
582DBCE98CD8&blnFromSearch=1&productcode=US
Teacher Water Lab Set Up Pictures
11. 11
Water Cycle Lab Teacher Set Up
1. Put students up in groups of four.
2. Have each student copy the lab form off the board prior to completing the lab. If you
have younger students, ESE or ESL students they may receive copies of the form.
3. Have one student come up and get the materials.
4. The students must follow the procedures to complete the lab.
5. Hang the bags on a window with tape. Hang some in the sun and some with indirect sun.
6. Observe the changes over time. I left mine up for three months. The students were
excited to see the changes over time. This also helped reinforce the concept of the water
cycle.
7. After a few months, I took a few of the bags and put them in the freezer. I asked them to
record their observations. Snow formed on the bag. They were excited to see this
transformation. It also allowed each student to feel real snow.
Materials Needed
1 Zip close sandwich bag per group
1 Small piece of paper towel per group
Food coloring – be sure to use a variety of colors as this creates interesting observations for the
students.
4 oz. Clear plastic cups
Tape
Water
Window
12. 12
Water Cycle Lab
Warm Up: Answer in complete sentences.
1. Write three real life examples of the water cycle.
2. Why is the water cycle important to the environment?
3. Why is the water cycle important for people?
Materials
1 Plastic bag
1 4 oz. Clear Plastic Cup
Water
1 small piece of paper towel
4 drops of food coloring
Procedures
1. Place paper towel in cup.
2. Fill the cup halfway with water.
3. Put all materials in bag and close.
4. Affix bag to a sunny window. Observe changes over the next 3 days.
Observations
1. Make three predictions about what you are going to observe.
2. For the next three days write what changes you observe. Draw and label a picture for
each day.
Follow Up Questions
All answers must be at least 3 sentences long.
1. What changes did you observe?
2. What surprised you the most about the experiment?
3. Did the changes happen faster or slower than you thought?
4. Did all the all the experiments change at the same rate? Why do you think this is?
5. Describe one change that surprised you the most?
6. What would happen if…? Describe three changes you would make to this experiment.
7. What do you think would happen if we froze the bag?
13. 13
Water Cycle Lab Observations
Day
Draw and Labeled Illustration
Write at least 3 observations
daily in complete sentences.
Write one prediction about
your experiment.
14. 14
Journey Two: The Rock Cycle
a. Vocabulary Introduction
b. VIS Chart
c. Rock Identification Booklet
d. Video Link
e. The Rock Cycle Lab
f. The Rock Cycle Story
______________________________________________________________________________
The rock cycle – is the continuous process by which new rock forms from old rock material. It
changes from one rock to another, is destroyed, and forms again by geologic processes.
From Google Images
15. 15
Essential Rock Vocabulary Introduction
The teacher introduces the vocabulary words. I broke them down by section. I introduce no more
than 10 vocabulary words at a time. I included all the different types of vocabulary words that I
used while teaching about rocks. You may use what you like. The vocabulary is essential for
understanding the rock cycle and for completing the rock cycle story. Here are a few options for
introduction.
1. Provide the vocabulary words. The students define them using the Internet or their
Science book.
2. Create a slideshow with the words and have them copy them.
3. Provide the words and definitions. Complete a VIS chart of the essential vocabulary. See
next section.
4. Create a vocabulary comic strip.
5. Create a rock identification booklet for each rock type.
______________________________________________________________________________
17. 17
Essential Rock Vocabulary
Rock – a naturally occurring solid mixture of one or more minerals and organic matter.
Mineral – a naturally formed, inorganic solid that has a definite crystalline structure.
Composition – the chemical makeup of a rock; describes either the minerals or other materials
in the rock.
Texture – the quality of a rock that is based on the sizes, shapes, and positions of the rock’s
grains.
Deposited – laid down.
________________________________________________________________________
Igneous rock forms when hot igneous rock called magma cools and hardens. Igneous rock forms
within Earth and on Earth’s surface.
a. Intrusive igneous rock – form deep inside Earth.
b. Extrusive igneous rock – form from lava that has erupted at Earth’s surface.
________________________________________________________________________
Metamorphic rock forms when rock is heated and squeezed. The rocks structure, composition,
and texture have changed, or metamorphosed, from those of the original rock.
Metamorphic rock textures:
a. Foliated – banded
b. Nonfoliated – non-banded because it has only one mineral.
________________________________________________________________________
Sedimentary rocks form when rock breaks into smaller pieces and those pieces cement together.
Grains – fragments of rocks
Sediment – grains of rock or minerals.
Sedimentary rock types:
a. Fine-grained texture rocks – are made of very small crystals or grains
b. Coarse-grained texture rocks – made of crystals or grains that can be seen with the
eye.
18. 18
c. Medium grained texture rocks – texture that is between fine-grained and coarse-
grained rocks.
d. Sediment – grains of rock or minerals.
e. Clastic sedimentary rock – form when sediments are buried, squeezed together, and
cemented by minerals.
f. Chemical sedimentary rock – form when minerals crystallize out of a solution.
e. Organic sedimentary rock – form when the shells and skeletons of dead marine
organisms are buried and cemented together.
________________________________________________________________________
The rock cycle – is the continuous process by which new rock forms from old rock material. It
changes from one rock to another, is destroyed, and forms again by geologic processes.
________________________________________________________________________
Weathering – the natural process by which atmospheric and environmental agents, such as
wind, rain and temperature changes, disintegrate and decompose rocks.
Types of weathering:
a. Mechanical weathering – the breakdown of rock into smaller pieces by physical
means. Agents of mechanical weathering include ice, wind, water, gravity, plants and
animals.
b. Abrasion - the grinding and wearing away of rock surfaces.
c. Chemical weathering – the process by which rocks break down as a result of chemical
reactions. Common agents are water, weak acids and air.
d. Acid precipitation – Rain, sleet and snow that have a high concentration of acids.
e. Differential weathering – the process by which softer, less weather resistant rocks
wear away at a faster rate than harder, more weather resistant rocks do.
________________________________________________________________________
Erosion – the process by which wind, water, ice or gravity transports soil and sediment from one
location to another.
Deposition – the process by which material is laid down.
Uplift – the process by which regions of the Earth rise up to higher elevations.
19. 19
Soil – a loose mixture of rock fragments, organic material, water, and air that can support the
growth of vegetation.
Parent rock – a rock formation that is the source of soil.
Bedrock – the layer of rock beneath soil.
Soil texture – the soil quality that is based on the proportions of soil particles.
Soil structure – the arrangement of soil particles.
Soil fertility – A soils ability to hold nutrients and to supply nutrients to a plant.
Humus – the dark, organic material formed in soil from the decayed remains of plants and
animals.
Deforestation – clearing of trees from an area without replacing them.
Desertification – the process by which land becomes more desert-like.
21. 21
Rock Identification Booklet
Procedures:
1. Take six pieces of paper, stack them up and fold them in half.
2. Staple the sides of the booklet
3. Label the front cover Rock Identification Booklet
4. Create three sections in your book:
a. Metamorphic Rock
b. Igneous Rock
c. Sedimentary Rock
d. Minerals and additional information
5. For each type of rock list the following information:
a. Definition
b. Picture
c. Identifying characteristics
d. Names of rocks that are that type.
6. You may do additional research at home. Add any notes that you feel are necessary to
increase your understanding of the material.
7. Keep this booklet with you at all times. You may add information from the video.
Rock Video
Access videos through B.E.E.P. on United Streaming (Discovery Education).
I have students take notes during the videos. They can include the information they learned
into their Rock Identification Booklet.
Basics of Geology: All About Rocks and Minerals
http://player.discoveryeducation.com/index.cfm?guidAssetId=20658F49-12F3-4C35-
AFAA-C791276E64AC&blnFromSearch=1&productcode=US
22. 22
Rock Identification Lab Teacher Information
We have premade rock sets. I give one set to each group of students. The list with the correct
names and description is removed prior to the lab. The names of the rocks on the board and
allow them to guess which rock is which. The students are allowed to use their notes from the
videos and the vocabulary words.
It took students two days to complete the lab. We reviewed the correct answers and I explained
the identifying characteristics for each rock.
If you can’t afford the sets, you can have the students bring in various rocks that they collect.
They can bring in rocks that they find from outside. If you buy only one set you can pass the
rocks around one rock at a time.
Rock Identification Lab
1. Put students up in groups of four.
2. Have each student copy the lab form off the board prior to completing the lab. If you
have younger students, ESE or ESL students they may receive copies of the form.
3. Have one student come up and get the materials.
4. The students must follow the procedures to complete the lab.
Materials
Hand lens at least one per pair
Various rock types or a rock set
Nasco Rock Collection
Product Number: SB10942M
Price: $22.00
23. 23
Rock Identification Lab
Materials
Hand lens
Various rocks
Rock identification booklet
Procedures
1. Examine each rock. Feel it, look at it closely. Use the hand lens to examine it even closer.
2. Identify the key characteristics for each rock.
3. Try to classify each rock using an educated guess as sedimentary, igneous or
metamorphic.
4. Make an educated guess about the type of rock that it is.
5. Draw a picture of each rock.
Name
Date
Period
Rock Identification Lab
Types of Rocks
Igneous
Sedimentary
Metamorphic
a. Guess Name
b. Guess Type
c. Write at least 5 key characteristics of
each rock.
d. Draw a picture of each rock
1.
a.
b.
c.
d.
2.
a.
b.
c.
d.
3.
a.
b.
c.
d.
4.
a.
b.
c.
d.
5.
a.
b.
c.
d.
6.
a.
b.
c.
d.
24. 24
Rock Cycle Story
Objective: Create a two-page (minimum) rock cycle story that incorporates at least 10
vocabulary words from our lessons on the rock cycle.
Answer the following questions prior to starting your essay.
1. Choose which type of rock you would like to be.
2. Think about what might happen to him/ or her while they transform.
3. Describe your rocks adventures in detail.
4. Be sure to include scientific information to explain what is happening to your rock.
5. Be sure to include all phases of the rock cycle.
6. You may include illustrations.
7. Be creative, you can go through time, create a comedy skit, write about its daily life at
certain points, or friends they meet along the way.
________________________________________________________________________
Additional Ideas
A day in the life of
How I went from a mountain to a piece of sand
Places I have traveled
Friends I have met along the way
Things I have seen or experienced just lying around.
________________________________________________________________________
Grading:
Your story will be graded on the following components:
- Proper use of terminology (magma vs. lava, intrusive/extrusive, etc.)
- Accurate and thorough description of the processes and conditions that cause you to change.
- Good physical description of what you would look like at each stage of your rock cycle and the
proper name that would be given at each phase.
- Creativity
- Minimum 2 pages
- Grammar and spelling are counted as part of the grade.
- The final story must be neatly completed.
- Correct use of at least 10 science vocabulary words.
Bonus Points will be awarded for the following:
- Use technology to compose your final story.
- Use additional vocabulary words
- Add illustrations
- Be funny
Be sure that use the following items while completing your story:
VIS chart, Rock Identification Booklet, Notes from class
25. 25
Journey Three: The Crystal Cycle
a. Crystal Cycle Teacher Notes for Lab
b. Lab safety contract
c. Crystal Growing Lab Part One
d. Crystal Growing Lab Part Two
e. Crystal Growing Lab Part Three
f. Crystal Growing Lab Part Four
______________________________________________________________________________
Crystal Growing Lab Teacher Notes
1. SAFETY: Student and teacher safety is key with this assignment. Please review the
safety rules on the attached lab safety contract with your students prior to starting this lab.
If the students are going to be stirring the mixture they MUST HAVE A SIGNED LAB
SAFETY CONTRACT.
2. I have varied this assignment from class to class. Depending on the size of the jar you
may need to add more water or borax. HINT: The more borax or epsom salt you add the
bigger the crystals.
3. The water must be BOILING or the crystals will not form properly and sometimes not at
all.
4. Be sure the students mix it until there is no sediment at the bottom of the jar. The crystals
may still form. Sometimes they tend to stick to the bottom of the jar.
5. The borax crystals form within 24 hours. The epsom salt takes a few days. If you mix
both it takes more than a week.
6. I set a table up by my cabinet where I boiled the water. I worked in groups of four at a
time. It takes time to boil the water.
7. While the water is boiling, the students put on goggles and apron. They construct their
shape with the pipe cleaner. Attach to the string and hang it to the appropriate level in the
jar. Remove shape from the jar and lay on the table.
8. Students add the borax or epsom salt and food coloring to the jar.
9. TEACHER adds the boiling water while wearing heat resistant gloves.
10. Student stirs the mixture until there is no sediment at the bottom of the jar.
11. Student add the shape hanging from the pencil being sure NOT TO TOUCH THE JAR
OR THE LIQUID AS IT IS BOILING HOT.
26. 26
12. TEACHER WEARS THE HEAT RESISTANT GLOVES AND MOVES THE
EXPERIMENT TO THE FINAL LOCATION.
**AT NO TIME SHOULD THE STUDENTS HANDLE THE BOILING WATER OR
THE HOT JARS. **
**ALSO, THE STUDENTS NOT COMPLETING THE LAB NEED TO REMAIN
SEATED IN THEIR DESK. THEY SHOULD BE GIVEN A DIFFERENT ASSIGNMENT
TO COMPLETE DURING THIS TIME.
Materials
About a month before the lab collect a glass jar from each student. Have them label their
name and period. The small salsa jars work best. It must be glass. The crystals will not form
in plastic.
Teacher Set Up Materials
5 aprons 5 goggles 4 scissors
One for each student:
Jar
Pencil
Pipe cleaner
Piece of string
Tape
3 hot plates 3 volumetric flasks
water
paper towels for clean up
3 boxes of borax or epsom
salt for 100 students
Heat resistant gloves Food coloring
Teacher Station Set Up Materials
3 hot plates
3 volumetric flasks
Water
Heat resistant gloves
Student Station Set Up Materials
Apron
Goggles
Scissors
Tape
Pencil
Spoon
Pipe cleaner
Food coloring
28. 28
Crystal Growing Lab
Part One
Materials
Apron
Scissors
Goggles
Tape
Volumetric Flask
Borax or Epsom Salt
Boiling water
Jar
Food coloring
String
Pipe cleaner
Pencil
Spoon
Vocabulary ~ Please define
Dependent variable
Independent variable
Procedures
Indicate which procedures are for teacher (T), student (S) or both (B).
1. Review all safety procedures.
2. Create a shape with the pipe cleaner. Attach to string then hang around the pencil.
3. Hang shape so it almost hits the bottom of the jar. Use tape if necessary.
4. Measure 6 teaspoons of borax into the jar. Add 4 drops of food coloring.
5. Teacher will pour in one cup boiling water.
6. Stir until all the borax or epsom salt is dissolved.
7. Hang shape in mixture.
8. The teacher will carry the jar to the designated location.
9. Leave undisturbed for four days and record your observations.
29. 29
Crystal Growing Lab
Part Two
Directions: Complete the observation form. You must have the following.
a. Labeled diagram
b. At least two sentences that describe your observations of your experiment. Be sure to
include the changes that have occurred to your experiment.
c. At least one sentence which describes a prediction about your experiment.
Day 0 Labeled Diagram Observation Prediction
Day 1
Day 2
Day 3
30. 30
Crystal Growing Lab
Part 3
Questions
Write at least 2 sentences for each.
1. Where do you think the crystals are going to form and why? You may draw a
diagram.
2. How long do you think it will take the crystals to form?
3. Do you think all the crystals on the all the projects will look the same and why?
4. What would you change on the experiment? What do you think the result will be?
5. What are the independent variables in our experiment? How do you know?
6. What are the dependent variables in our experiment? How do you know?
______________________________________________________________________________
Crystal Growing Lab
Part 4 Complete after 3 days.
Questions
Write at least 2 sentences for each.
1. What did you observe on your final crystal creation?
2. Did your crystal take a long time to form?
3. Was it faster than you expected?
4. Why do you think that some of the crystals did not form?
5. What was your favorite part of this lab?
6. What would happen if..? Describe 3 changes you would make to this lab?
31. 31
Final Assessment Activity
Create a class compare and contrast chart for the water, rock and crystal cycles.
Directions:
a. Fold your paper in half. On the front write the water cycle and the rock cycle.
On the back write the crystal cycle and how the three cycles are similar.
b. Under each heading write what is different about each cycle.
Please be specific and use your notes.
c. In the last box, write how the cycles are the same.
d. You will be called on to include your information in the class chart.
The Water Cycle
The Rock Cycle
The Crystal Cycle
How are the three cycles similar?
33. 33
Partial Picture Supply List
Dual Lens Magnifiers
Product Number: SB26621J
Vendor Nasco
Borax Laundry Booster in the laundry detergent
section.
Heat Resistant Gloves 18-1/2”
Scienceware Clavies Biohazard Autoclave
Gloves
Product Number: SB39276M
Vendor: NASCO
Hot Plate
Vendor: NASCO
Scholar 170 Hot Plate
Product Number: SB45547
Product Number: SB26518M
Vendor: NASCO
1000 ml Erlenmeyer flask
Nasco Rock Collection
Product Number: SB10942M
Price: $22.00
34. 34
Unit Adaptation Ideas
a. What would happen if…?
I use this strategy for each lab I do. The students have the opportunity to change one
thing (the independent variable) in the experiment. This allows the students to take
ownership of the experiment. It also creates excitement about learning Science. My
students talk about the experiments at home and tend to repeat them when possible.
b. 1st
Grade Rock Day
My son was so excited about making crystals and learning about rocks at home with me
that he got his whole class excited. His class did a whole “Rock Day”.
1. Students brought in their favorite rocks. The students talked about their rocks and
passed them around.
2. Creating crystals – Students brought in jars and created their shapes. The teacher
poured the borax and water solution into the jars. He inserted the pipe cleaner
creations. The next day the students studied their crystal creations.
3. Rock music – The students listened to rock music. The teacher also played his own
guitar for the class.
c. The Rock Cycle Story in the school Literary Fair
As the students began writing their rock stories, their excitement increased. They wanted
to be sure that they turned in quality work. They asked their language arts teachers to edit
their stories. The teachers were impressed with their quality of writing and their correct
infusion of vocabulary. The stories were added to our school’s literary fair in a special
category titled: Short stories that incorporate scientific vocabulary. The students were
excited to showcase their work in such a special way.