Card 8 flooring story telling
•Download as PPTX, PDF•
1 like•313 views

Classroom design recipe is a learning and teaching tool that aims to propose opportunities to rethink classroom space design in order to facilitate and support learning and influence innovative teaching practices. Additionally, Classroom Design Recipe inspire teachers to change, use and prepare the classroom space to support and facilitate learning activities.

Recommended
More Related Content
Similar to Card 8 flooring story telling
Similar to Card 8 flooring story telling (20)
Recently uploaded
Recently uploaded (20)
Card 8 flooring story telling
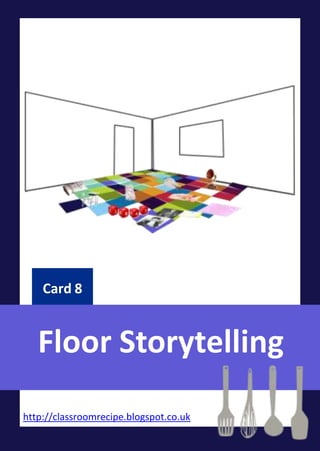
- 2. Why Why use this card? Benefits classroom users’ will get when they use this card: • Creating an interactive floor. • Using classroom flooring to support teachers’ teaching strategy. • Designing a colourful patterned floor. • Visualising teacher’s storytelling teaching strategy in order to stimulate students and respond to their divers learning styles. • Changing the classroom space according to the curriculum. • Turning classroom flooring into a 3D curriculum. • Involving students in telling curriculum stories. • Creating a different learning experience. 2Card 8
- 3. How What do you need to apply this card? How to apply this card. 3 Applying this card depends on: 1. Turning the curriculum into a visual story and telling students the story using images, short sentences and 3D objects such as: mini- furniture, Lego, cubes and other 3D objects which are related to the curriculum and the topics teachers are teaching. 2. Involving students in telling the story by asking them to draw some of the images or to bring some of the objects. 3. Arranging the classroom tables and chairs in a U-shape. 4. Arranging the images, words, 3D objects on the floor and telling students the story by linking it to what is on the floor. Card 8
- 4. How What do you need to apply this card? How to apply this card. 4Card 8
- 5. How What do you need to apply this card? How to apply this card. 5Card 8
- 6. How What do you need to apply this card? How to apply this card. 6 This card could be applied in diverse ways but here is one suggestion of how to apply this card. For example, if the lesson is about a character such as Thomas Edison you could apply the card in this way: 1. The lesson could be divided into sections: the year he was born, difficulties he faced in life, where he lived, what he invented, what he said, and his photo. Card 8
- 7. How What do you need to apply this card? How to apply this card. 7 2. Then turn each section into visuals: for example, use cube numbers to show the year he was born; use images and objects to make students think about difficulties he faced in his life; use a map to show where he lived, bring in objects he invented; write on his quotes post notes; bring in his photo. Card 8
- 8. How What do you need to apply this card? How to apply this card. 8 3. After that, cut out rainbow coloured squares using colourful cardboard and spread them on the floor. 4. Finally, the teacher can spread her/his visuals on the rainbow squares. For example, the teacher can hide some visuals under the squares and put others on the squares. Card 8
- 9. 9 How What do you need to apply this card? How to apply this card. Card 8
- 10. What What do teachers expect when using this card? How might the learning space look? 10Card 8
- 11. Apply and Share #Classroom_Design_Recipes #Floor_Storytelling #your_name 11Card 8 http://classroomrecipe.blogspot.co.uk To share your work, please send it to this email Classroom.Recipe@gmail.com