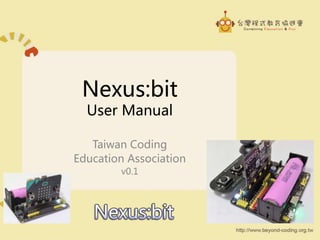
Nexus:bit User Manual v0.1 (English)
•
0 likes•934 views

Taiwan Coding Education Association http://www.beyond-coding.org.tw/ Neus:bit/NexusBot https://www.beyond-coding.org.tw/component/sppagebuilder/?view=page&id=91

Recommended
Recommended
More Related Content
What's hot
What's hot (16)
Similar to Nexus:bit User Manual v0.1 (English)
Similar to Nexus:bit User Manual v0.1 (English) (20)
More from 台灣程式教育協進會(TCEA)
More from 台灣程式教育協進會(TCEA) (20)
Recently uploaded
Recently uploaded (20)
Nexus:bit User Manual v0.1 (English)
- 1. Nexus:bit User Manual Taiwan Coding Education Association v0.1
- 2. Taiwan Coding Education Association • Taipei headquarter – Business hours: • Mon/Tue/Thu/Fri 9:00-21:00 • Wed/Sat/Sun 9:00-18:00 – Address: 4F., No. 143, Sec. 1, Chongqing S. Rd., Zhongzheng Dist., Taipei City 100, Taiwan (R.O.C.) – Tel: 00-886-2-2316-7734 – Email: service@beyond-coding.org.tw – Official website: http://www.beyond-coding.org.tw – Facebook: Taiwan Coding Education Association
- 4. Contents 1. Meet Nexus:bit (page 5) 2. Download MakeCode extension (page 20) 3. Nexus:bit basic features (page 28) 4. Nexus:bit advanced features (page 56) 5. PCA9685 servo control (page 84)
- 6. What is Nexus:bit? • Nexus:bit is a powerful expansion board designed for BBC micro:bit, a programmable single-board microcontroller. micro:bits are already full of wonderful features; with the Nexus:bit it can be even better. • You can use Nexus:bit for: – Building robot/car or other motor devices – Building Maker projects – Make it as a mini game console
- 7. • Nexus:bit has the following built-in features: – 18650 rechargeable lithium battery (2600 mAh, included) – Mini joystick board – Buzzer (monotone speaker) – RGB LED – Vibration motor – Microphone (sound level detection) – Servo/DC motor pins – And others
- 8. Nexus:bit features Joystick/ultrasonic module slot (P1, P2, P5, P11) RGB LED (PCA9685 13-15) Mic (P12) Buzzer (P0) Buzzer switch Vibrator (P8) Mic sensitivity knob I2C pins micro:bit full breakout pins PCA9685 Servo pins (1-12) 18650 lithium battery USB charging port Power/charging Indicator LED Power switch 5V/3.3V power 5V input DC motor pins (P13~16) Single servo pin (P12) SPI pins
- 9. Nexus:bit vs. Thunder:bit • What’s the difference between Nexus:bit and TCEA’s earlier board Thunder:bit? – Nexus:bit is the upgraded version of Thunder:bit, smaller, has more servo pins and added microphone – Thunder:bit has more room for connecting wires, the DC motor ports are easier to use, with the possibility to connect external A/B buttons Left: Thunder:bit Right: Nexus:bit
- 10. Safety • Please use Nexus:bit in places far from heat/water sources and keep your hands dry. • Do not let water/metal contacts metal points under the board or battery connections for the risk of causing short circuit.
- 11. Lithium battery • Install the battery as indicated in the next page. Once installed, do not remove it without absolute necessary. • If you need to change battery, pry it out from the negative end or middle with a flathead screwdriver. • Warning: DO NOT REVERSE BATTERY AND TURN ON POWER
- 13. • Turn off the Nexus:bit after using it. • Recharge battery if you used it for quite some time (see the following few pages).
- 14. Recharge battery • Connect a micro USB cable to charging board, the board would go into charging mode and stop using battery power. • It is recommended to recharge with 5V 1-2A transformers. Using computer USB ports would be slower. • When charging the indicator LED would be red (powered off) or yellow (powered on). The red light would turn off once it’s fully recharged. • After fully recharged, remove the USB cable.
- 15. Battery life • How long can Nexus:bit’s 18650 lithium battery (capacity 2600mAh) last? – As in our test, when the board connected 8 SG90 servos and turn them simultaneously every half second, it lasted almost 3.5 hours.
- 16. Power/charging indicator LED Red light on means charging; after charging it would turn off.
- 17. Power/charging indicator LED If you turn on power while charging, it would be yellow light (red + green)
- 18. Power/charging indicator LED Green light on when you simply turn on power
- 19. Install micro:bit • It’s recommended to turn Nexus:bit off before you install the micro:bit. • Power on Nexus:bit before you flash code onto micro:bit. front
- 21. What is MakeCode editor? • MakeCode is a graphic JavaScript block editor developed by Microsoft, which is the most common coding tool for micro:bit • MakeCode editor: https://makecode.microbit.org/ • MakeCode also allows users to define custom blocks. We will introduce TCEA’s Nexus:bit extension, which integrate various control functions for Nexus:bit.
- 22. Download extension • Open MakeCode editor, go to Advanced -> Extension…and enter nexusbit, nexusbot or TCEA in the search box. Click the extension to import it.
- 23. Open new project in MakeCode
- 24. Change the language if you need to
- 25. Select Advanced -> Extension
- 26. Enter nexusbit and import It might take a while depending on Internet status. You can also copy/paste the this link to search: https://github.com/alankrantas/pxt-Nexusbit
- 29. What are micro:bit’s pins?
- 30. • Pins are signal input/output channels of microcontrollers, like a electronic switch. • Most of Nexus:bit’s features are connected to specific pins of micro:bit, so they can actually be controlled by original MakeCode blocks. However our extension significantly simplified the process.
- 31. Buzzer (pin 0)
- 32. Buzzer (pin 0) • This block plays specific sound via buzzer (frequency = 0 is no sound). Set duration as 0 means forever.
- 33. Buzzer (pin 0) • You can also use original music blocks in MakeCode:
- 34. Buzzer (pin 0) • If you wish to read analog signal of pin 0 without triggering buzzer, you can remove the jumper hat behind buzzer. • Put away the jumper hat properly! jumper hats
- 35. Buzzer switch Remove the jumper hat will “cut off” buzzer
- 36. Joystick (pin 1, 2, A/B button) • The slot in front of Nexus:bit can be used to install the mini joystick board:
- 37. Install joystick board Make sure it’s properly installed
- 38. Joystick direction X axis (left/right) = pin 1 Y axis (forward/backward) = pin 2 A/B button function is the same as micro:bit’s own A/B button (pin 5, pin 11) 前 後 左 右 rightleft for- ward back- ward
- 39. Joystick safety notice • It is recommended to put your index fingers under the side of joystick board as support. Try not to press the joystick board down too hard. • Do not touch the metal dots under the joystick board – this may cause signal anomy from the joystick. • If your code uses the joystick board, install it properly before powering up Nexus:bit.
- 40. Joystick (pin 1, 2, A/B button) • Determine if the joystick is pushed to a certain direction (forward/backward/left/right/center, which return true/false):
- 41. Joystick sensitivity • You can adjust the sensitivity of joystick: (with high sensitivity, the joystick only needs to be pushed a bit to determined directions.)
- 42. Read joystick analog signals • The two 2 axis of the joystick in fact would return analog signals to indicate their position. We can read the analog values as well:
- 43. Vibration motor (pin 8) • The vibration level can be set between 0-1023 (1023 = full power). Duration set as 0 means forever. – Note: since the vibrator is rather powerful, it is not recommended to use it at full power.
- 44. • This pin can be used to connect 1 servo and allow user control it with this block: Single servo pin (pin 12)
- 45. Single servo pin (pin 12) S signal + power - ground
- 46. Single servo pin (pin 12) • You can still use the original servo block in MakeCode editor. If you want a quick servo test without importing the Nexus:bit extension, this would be very useful.
- 47. Microphone (pin 12) • The mic on Nexus:bit detects sound volume differences, not the quality of sound itself. • The block would return True if the sound is loud enough; otherwise return False.
- 49. Adjust mic sensitivity Rotate the knob by flathead screwdriver to change the sensitivity of mic. (Clockwise = more sensitive)
- 50. Pin 12 signal indicator LED The LED would light up whenever the mic heard sound (you can use it to judge the sensitivity) or pin 12 servo has received signal.
- 51. Note on mic/servo usage mix • Since mic and single servo pin share pin 12, using both would cause dysfunction for the mic and servo. (For example, the servo may jittering when the mic heard sound.) • Please not mix the both in the same program, or using PCA9685 servo blocks in this manual’s section 5.
- 52. RGB LED • The RGB LED on Nexus:bit is in fact connected to onboard PCA9685 chip; the blocks in the extension will take care of necessary settings so it’s pretty easy to control. • When powering up Nexus:bit, RGN LED would light up as white (default) unless you set it to other colors.
- 53. RGB LED
- 54. RGB LED • We can select 8 pre-set colors for RGB LED with brightness control (0-100, 100 = brightest):
- 55. • We can also set a specific color or randomized color:
- 57. Select board type • This extension is applicable to Thunder:bit V2/V1 expansion boards. (Default is set to Nexus:bit if you don’t select boards.)
- 58. Select board type • Since Thunder:bit has less PCA9685 servo pins and different RGB LED pins, it is necessary to use the “Select board type” block on them. • The mic block would not work when you selected Thunder:bits (always return False).
- 59. Plug-in ultrasonic module • The joystick slot on Nexus:bit can be used to plug in a HC-SR04/HC-SR04P ultrasonic module. The module is useful for robots and cars to detect objects and avoid obstacles. • HC-SR04 is one of the most common ultrasonic modules on the market with reliable detection distance within 1-2 meters.
- 60. HC-SR04 ultrasonic modules HC-SR04 (original) -> Power: 5V <- HC-SR04P (newer version) Power: 3.3-5V
- 61. HC-SR04 vs HC-SR04P? • The two models has the same functionality and pins. The differences are appearance, pin installation direction and input voltage. Both works with Nexus:bit and Thunder:bit. • The NexusBot robot has to use HC-SC04P (see the NexusBot assembly manual).
- 62. HC-SR04P module Vcc (power, 3.3-5V) Trig (trigger) Echo (echo) Gnd (ground)
- 63. Install HC-SR04P Vcc->5V Trig->P5 Echo->P11 Gnd->G The 4 slots in the middle front
- 64. Install HC-SR04P
- 65. Detect distance of objects • Read the detected distance (cm) from the ultrasonic module: * The reading may be slight different than the actual distance; however It still reflects the relative distance of objects. Also, if the object is moving, the reading may varies or occasionally return 0.
- 66. Detect distance of objects • We can also directly determined if objects are closer or farther than certain distance: ※This block would ignore value 0 readings
- 67. Note on using ultrasonic modules • When you use the joystick slot to use an HC- SR04/HC-SR04P module, it will use pin 5 and pin 11, which are pins originally reserved for micro:bit’s button A and B. Hence, the A and B button blocks would not function normally when you are using the ultrasonic module.
- 68. DC motors (pin 13/14, 15/16) • Pin 13-16 are connected to two sets of DC motor pins, which allows motors to rotate in either direction at full or slower speed. • The DC motor pins on Nexus:bit are designed for the NexusBot car, which uses special DC motors, so the A1/A2 and B1/B2 marks are in opposite direction.
- 69. DC motors (pin 13/14, 15/16) (pin 15) B2 A1 (pin 13) (pin 16) B1 A2 (pin 14)
- 70. DC motor in servo body This is the type used by the NexusBot car. For details, see TCEA’s NexusBot assembly manual.
- 71. Normal DC motors • To use normal DC motors, you’ll need to add jumper wire connectors.
- 72. Control DC motors • The rotate direction and speed (-100 to 100) in controllable: The absolute value represent speed, + and - means direction.
- 73. 2WD DC motor car • The extension has implemented a block to directly control 2WD DC motor cars – go forward/backward, turn left/right or stop. – NexusBot car is controlled a bit differently; check out the NexusBot manual for details.
- 74. DC motor car example • The regular DC motor version See TCEA’s remote car assembly manual for details (no translation yet). Basically, the motor connections nearer ground will be connect to P13 and P15.
- 75. Stepper motors • This block can be used to drive a 5V stepper motor: Every time you use this block the stepper motor would go 1 “step”. For example, a 28BYJ-48-5V motor needs to go 512 steps to turn a full circle. Since the “forever” loop has a tiny delay, you can use while loop to speed up the turning speed.
- 76. Stepper motors This manual does not include tutorial about 28BYJ-48-5V stepper motors and ULN2003 driver boards.
- 77. 2WD stepper car • The extension also allows user to control a 2WD stepper motor car. – If you are using pins shared by micro:bit’s LEDs, it is recommended to disable LED screen.
- 78. I2C/SPI pins • I2C (Inter-Integrated Circuit) and SPI (Serial Peripheral Interface) pins allow us to connect various electronic modules, for example, devices originally designed for Arduino and Raspberry Pi. • This enables us to create more advanced Maker projects.
- 79. I2C pins SCL = P19, SDA = P20
- 80. I2C device connect example Example of using a “0.96 OLED screen module. Look up I2C devices’ wiring and usage before connecting them.
- 81. SPI pins SPI預設腳位: P13 = SCK, P14 = MISO, P15 = MOSI, P16 = CE
- 82. SPI device connect example Example of using 4 linked MAX7219 matrix LED modules. Look up SPI devices’ wiring and usage before connecting them.
- 83. Reassign SPI pins • Since DC motor pins are also connected to P13-16, if you wish to use SPI devices at the same time, please reassign the SPI pins:
- 85. What is PCA9685? • PCA9685 is a chip which allows multiple servos’ control. Nexus:bit (and Thunder:bit) has this built-in. • Thanks to PCA9685, micro:bit now can control motor devices such as MeArm (4 servos) or biped robots with hands (8 servos or more). • Nexus:bit can control as many as 12 servos via PCA9685.
- 86. PCA9685 servo pins S signal + power - ground S1 = servo 1, S2 = servo 2, all the way to S12 = servo 12。
- 87. Nexus:bit’s servo package • The Nexus:bit extension has implemented a powerful servo control package: – It would record servo positions and prevent them turning to degrees outside 0-180 (so servos won’t be jammed and overheat) – Servos can be controlled by direct or relative mode – Multiple servos can be assign degrees at the same time – Servos can turn gratually
- 88. Direct degree setting • It’s similar to the MakeCode servo block; you can turn servos to 0-180 or min/max degrees. • Servo no 1-12 (Nexus:bit) or 1-4 (Thunder:bit) * If the board is selected as Thunder:bit, setting degrees for servo 5-12 won’t take any effects.
- 89. Relative degree setting • We can also assign relative turning degrees (from default position) to servos. – All servos’ default position are 90 degrees, so turn -90 means 90 – 90 = 0 degree, +90 means 90 + 90 = 180 degrees.
- 90. The advantage of relative mode • Users don’t need to assign actual degrees, just relative movements. • You just need to calibrate the default position and leave rest of the parameters untouched. • It is recommended to use “All PCA9685 servos turn to default” in “on start” to make sure servos reset properly and synchronize with the code.
- 91. Configure default/min/max degrees • The default/min/max degrees of every servo can be configured: The default position has to be set between min and max degrees. If max is smaller than min, it would be set as the same value as min. If default position is outside min and max, it would be set to either min or max.
- 92. Configure example • Set servo 1’s default as 80, min as 30 and max as 150. Now we turn it to relative -60 and 60 degrees repeatedly. – 80 – 60 = 20, however 20 degrees is lower than min (30), so the servo is only allowed to be turned to 30. – 80 + 60 = 140, within max (150), so it would be turned to 140. • All PCA9685 servos in the extension will obey the configured parameters in all conditions.
- 93. Gradually turning • “Gradually turning” is to turn servos a bit at a time, creating smooth turning effects and allow motor devices to have finer performance. • The gradually turning blocks would only turn servos a bit every time, so you’ll have to use loops to for continuous turning.
- 94. Gradually turning example 1 • Turn the servo gradually toward either end by pressing button A or B. The extension would stop the servo turning once it reached min or max degrees.
- 95. Gradually turning example 2 • Add position check with while loops (which can be interrupted when needed:)
- 96. • The occasions to use position check blocks: – If you wish the code stop setting degrees once the servo has reached target; – If you wish to do something else once the servo has reached target; – If you wish to add other logic blocks to stop servo turning early when needed.
- 97. Gradually turning degree • In the servo configure block, gradually turning degree means the turning speed (degrees changed every time).
- 98. • If servo 1 turned to default 90 degrees, with gradually turning degrees = 5 and gradually turn to 120, the degrees would be 95, 100, 105, 100, 115 then 120 respectively (turning 6 times). • The gradually turning degrees and delay time between turning would determine the speed and smoothness of turning. • Servos will always turn to exact target degrees and stop.
- 99. Turn multiple servos at the same time • The extension also has blocks for multiple servo control, including direct and relative mode. • We will only talk about the relative mode, which is the most convenient way to control motor devices like robots.
- 100. Turn multiple servos at the same time • We can input a number array to turn multiple servos at the same time. The example is to gradually turn 4 servos until all 4 of them reached targets. 1 2 3 4 Servo no. You can drag a array setting block and borrow the array. Servos that not set (in this example servo no. 5-12) would be ignored.
- 101. Set multiple servos at the same time Set gradually turning Degrees for 8 servos. If the array is longer than max servos ( Nexus:bit = 12, Thunder:bit = 4) the block would not function.
- 102. Design continuous movement This is a continuous movement for 4 servos (no. 1-4), move 2 at a time. This is actually how biped robots walk.
- 103. • If you wish to let certain servos maintain position while setting multiple servos’ degrees, put “null” block in the corresponding array slot. Servos with new degrees set as “null” will be ignored.
- 104. Design continuous movement 2 This example is the same as before, other than allowing user to break loops when needed,
- 105. Note on gradually turning servos • Since the extension need to calculate each servos’ positions, if you gradually turn more than 4-5 servos at the same time, overall turning speed would drop, even causing servos jittering.
- 106. THE END Thank you so much for purchasing and using our product!