
Recommended
Recommended
More Related Content
Similar to P.S. Nair Tutorial Robotics with Boe-Bot and PBASIC .docx
Similar to P.S. Nair Tutorial Robotics with Boe-Bot and PBASIC .docx (20)
More from alfred4lewis58146
More from alfred4lewis58146 (20)
Recently uploaded
Recently uploaded (20)
P.S. Nair Tutorial Robotics with Boe-Bot and PBASIC .docx
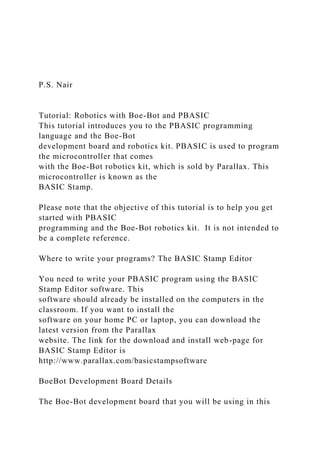
- 1. P.S. Nair Tutorial: Robotics with Boe-Bot and PBASIC This tutorial introduces you to the PBASIC programming language and the Boe-Bot development board and robotics kit. PBASIC is used to program the microcontroller that comes with the Boe-Bot robotics kit, which is sold by Parallax. This microcontroller is known as the BASIC Stamp. Please note that the objective of this tutorial is to help you get started with PBASIC programming and the Boe-Bot robotics kit. It is not intended to be a complete reference. Where to write your programs? The BASIC Stamp Editor You need to write your PBASIC program using the BASIC Stamp Editor software. This software should already be installed on the computers in the classroom. If you want to install the software on your home PC or laptop, you can download the latest version from the Parallax website. The link for the download and install web-page for BASIC Stamp Editor is http://www.parallax.com/basicstampsoftware BoeBot Development Board Details The Boe-Bot development board that you will be using in this
- 2. class is the “Parallax Board of Education - Rev D (USB)” and looks as shown below: Fig. 1. Parallax Boe-Bot Development Board and its parts http://www.parallax.com/basicstampsoftware P.S. Nair ‘Board of Education – USB’ and click on the arrow that is labeled as ‘NEXT’. You will be taken to a page where you will be able to see the description of the various parts of the development board shown in Fig. 1. At the top of this page, you should be able to locate several icons. Move the cursor over the icons and when you find the icon that says ‘Expand all’, click on that icon. Read the information provided and bookmark the page for later reference. Connecting the Development Board to your Computer (PC) 1. Connect the battery holder (it holds 4 AA batteries) to the part number 2 on the board (see Fig. 1) using the cable attached to the battery holder. 2. Slide the power switch (part number 11 on the board) to the position 1(middle position).This will power up the board. When you want to run the servo motors, the switch should be in position 2
- 3. 3. After you have connected the battery pack to the board, take the USB cable and connect the broad end of the cable to a USB drive on your computer. Connect the narrow end to part number 13 on the board (see Fig. 1). Important (Please note): When you are done using the board, please disconnect the USB cable first before removing the power connection to the battery pack. 4. Next, you need to test the connection between the board and the computer. In order to do this, click on the functional key F6 on your keyboard. Alternatively, you can click on connection has been properly done, you will see the that the connection has been detected on one of the COM ports of the computer, similar to what is shown in Fig. 2 below (in this figure, it is indicated that COM5 is where the connection was detected and the device identified was BASIC Stamp 2). Fig. 2 Example result of a correct connection check P.S. Nair
- 4. Writing your first PBASIC Program 1. In the Debug Terminal (main window of Basic Stamp Editor), type the following program: ' First PBASIC program ' A comment is followed by the single quote symbol ' ' This is a comment line and so are the next three lines shown below ' Stamps in Class - FirstProgram.BS2 ' BASIC Stamp sends message to the Debug Terminal ' The next line is a Directive. ' {$STAMP BS2} ' The above directive tells the Basic Stamp Editor software that ' the part being programmed ON the board is BASIC Stamp 2 ' The following directive tells that the version 2.5 of the Basic Stamp Editor software ' is being ‘used ' {$PBASIC 2.5} DEBUG "Hello, it's me, your BASIC Stamp!" ' The DEBUG command shown above is used to send a message to the PC ' The END command is used to end the program END 2. After you have typed the above program, save the program by
- 5. Then name the file as FirstProgram.bs2. Then click on the Save button. P.S. Nair Running your first PBASIC Program 1. Now, run the pr Alternatively, you can click on the functional key F9. This will run the program on the Basic Stamp 2 that is on the development board and then display the result on the screen of your computer as shown below: Fig. 3. Output of the FirstProgram.bs2 program. More PBASIC Programs: I. Now try the following program and run it after saving:
- 6. ' {$STAMP BS2} ' {$PBASIC 2.5} DEBUG "Hello, it's me, your BASIC Stamp!", CR ' The DEBUG...CR command shown above can be used to move the program control ' to the next line and, optionally, to display a message DEBUG "What is 7 x 11? ”, DEC 7 * 11 ' The DEBUG...DEC command can be used to evaluate an expression and, optionally, ' to display a message END P.S. Nair II. Introducing delay in the program Try the following program and run it after saving: ' {$STAMP BS2} ' {$PBASIC 2.5} PAUSE 5000 ' The above command delays the execution of the next command by 5000 ms = 5s DEBUG "Hello, it's me, your BASIC Stamp!", CR ' The DEBUG...CR command shown above can be used to move
- 7. the program control ' to the next line and, optionally, to display a message END III. The DO…LOOP Try the following program and run it after saving: ' {$STAMP BS2} ' {$PBASIC 2.5} DO DEBUG "Hello”, CR PAUSE 1000 LOOP ' The commands between DO and LOOP are executed repeatedly ' In this program, the word ‘Hello’ will be displayed on a new line repeatedly ' with a delay of 1second between successive displays. END
- 8. P.S. Nair IV. Use of Variables and Variable initialization Try the following program and run it after saving: ' {$STAMP BS2} ' {$PBASIC 2.5} value VAR Word anothervalue VAR Word thirdvalue VAR Word ' value, anothervalue and thirdvalue are all variables (VAR means a variable) ' All these variables are Word-sized (Range: 0 to 65535) ' We can also specify negative numbers by using DEBUG…SDEC ‘ Range when DEBUG… SDEC is used: −32768 to + 32767 ' These variables are assigned initial values as shown below (Initialization) value = 500 anothervalue = 65535 ' The following lines display the current values of ‘value’ and ‘anothervalue’
- 9. DEBUG ? value, CR DEBUG ? anothervalue, CR ' The following line modifies the variable ‘value’ value = value * 10 ' The following line displays the new value taken by the variable ‘value’ DEBUG ? value thirdvalue = value – 9000 DEBUG “thirdvalue = ” DEBUG SDEC thirdvalue ' DEBUG SDEC causes negative value to be displayed END P.S. Nair V. The FOR…NEXT LOOP The FOR…NEXT loop is a very convenient and powerful way to control the number of times a given portion of your program is executed. It has the following syntax: FOR Counter = StartValue TO EndValue {STEP StepValue} …
- 10. … NEXT (The words written in bold letters above are key words; The contents of the curly brackets specify optional arguments. You can have other lines or program between FOR and NEXT, as in the DO…LOOP). a. Next, try the following program and run it after saving: ' {$STAMP BS2} ' {$PBASIC 2.5} Val_count VAR Word FOR Val_count = 0 TO 18 STEP 6 DEBUG ? Val_count PAUSE 500 ' Half second delay is created by the above line NEXT END b.Now try running the following program ' {$STAMP BS2} ' {$PBASIC 2.5} Val_count VAR Word FOR Val_count = 0 TO 18
- 11. ' There is no STEP DEBUG ? Val_count PAUSE 500 ' Half second delay is created by the above line NEXT END P.S. Nair An Important PBASIC Command: The PULSOUT Command • Physical movement of the robot is achieved in the Boe-Bot robotics kit through the use of servo motors. • These servo motors are controlled by sending pulses. In the case of Basic Stamp 2, a pulse means a voltage of 5V lasting for a short duration • Varying the duration or width of this 5V voltage results in the pulse width being varied • The width of the pulse controls the duration of rotation operation of the servo motors; the rotation of the servo movements could be used to cause movements • Therefore, the servo motors require high (5V) and low (0V)
- 12. voltages that last for precise durations. Such precise-duration signals can be provided to the board by using the PULSOUT command • Syntax: PULSOUT PinNumber, Argument • This command sends out a precise high pulse on the Basic Stamp pin specified by Pin in the PinNumber. The duration (width) of the pulse depends on the argument • Note: The Argument does not specify the duration directly. The actual duration and the Argument are related to each other by the following formulae: Actual Duration = Argument * 2 µs, or Argument = Actual Duration in seconds * 500,000 P.S. Nair Fig. 4. Two pulses, each having a width of 0.13 s. Fig. 4 Source: Robotics with Boe-Bot Student Guide Version 3.0 by Andy Lindsay, available at http://www.parallax.com/Portals/0/Downloads/docs/books/edu/ Roboticsv3_0.pdf
- 13. Examples of PULSOUT 1. PULSOUT 13, 80000 Here a high pulse is sent to pin number 13 of the Basic Stamp 2. The actual pulse duration is 80000 * 2 µs = (80000 * 2) / 1,000,000 s = 0.16 seconds 2. A program using PULSOUT and FOR…NEXT ' {$STAMP BS2} ' {$PBASIC 2.5} L_counter VAR Word FOR L_counter = 1 TO 100 PULSOUT 13, 850 PAUSE 20 ' PULSOUT command lasts for 850 * 2 µs = 1.7ms ' PAUSE command causes 20 ms delay ‘ Time to execute the loop commands themselves (PULSOUT and PAUSE) = 1.3 ms ' Therefore, time for one loop iteration = 1.7 + 20 + 1.3 = 23 ms ' Therefore, total servo run time (due to 100 iterations) = 23 ms * 100 = 2.3 seconds NEXT END
- 14. California State University, Fullerton College of Engineering and Computer Science EGGN 100 Introduction to Engineering Fall 2015 Computer Engineering Design Project Demonstration (in-class) deadline: Tuesday, September 22, 2015 Report due date (submit via TITANium): Thursday, October 1, 2015, 11:45 p.m. Submit only one report per team In this design project, you will use the Basic Stamp microcontroller (hardware) and PBASIC programming (software) to control the movement of the Boe- Bot through various points on a 2’ x 2’ grid on the classroom floor. The final requirement of this project is to trace the letter-combination ‘OP’ on the grid using a Boe-bot. The 2’ x 2’ grid is represented by the figure shown below: The grid has been marked with numbered points, which are also known as nodes. An adjacent node is defined as a node that lies immediately to the side, top, or bottom of a given node. For example, in the grid shown above, nodes 2 and 8 are adjacent to node 1, while node 7 is not. The distance between any
- 15. given node, and its adjacent node, is 1 foot (12 inches). The specifications for the project are as follows: 1. Starting at node 1, the Boe-Bot traces the letter ‘O’ on the grid. The sequence to be followed by the Boe-Bot for tracing this letter is as follows: ● At the beginning, the Boe-Bot is at rest with its center aligned with node 1. The front wheel of the Boe-Bot is facing towards node 2 ● The Boe-Bot starts moving towards node 3 via node 2 (at full- speed). When the center of the Boe-Bot reaches node 3, the Boe-Bot pauses briefly (for 0.5 seconds), and then turns right to proceed towards node 5 via node 4 (at full-speed) ● When the center of the Boe-Bot reaches node 5, the Boe-Bot pauses briefly (for 0.5 seconds), and then turns right to proceed towards node 9 via node 6 (at full-speed) ● When the center of the Boe-Bot reaches node 9, the Boe-Bot pauses briefly (for 0.5 seconds), and then turns right to proceed towards node 1 via node 8 (at full-speed) ● When the center of the Boe-Bot reaches node 1, it should turn right and pause for 2 seconds (with the center aligned on top of node 1). This completes the tracing of the letter ‘O’ on the grid by the Boe-bot. 2. Now the Boe-Bot traces the letter ‘P’ on the grid, starting at
- 16. node 1. The sequence to be followed by the Boe-Bot for tracing this letter is as follows: ● At the beginning of this tracing, the Boe-Bot’s center is aligned with node 1. The front wheel of the Boe-Bot is facing towards node 2 ● The Boe-Bot starts moving towards node 3 via node 2 (at full- speed). When the center of the Boe-Bot reaches node 3, the Boe-Bot pauses briefly (for 0.5 seconds), and then turns right to proceed towards node 5 via node 4 (at full-speed) ● When the center of the Boe-Bot reaches node 5, the Boe-Bot pauses briefly (for 0.5 seconds), and then turns right to proceed towards node 6 (at full-speed) ● When the center of the Boe-Bot reaches node 6, the Boe-Bot pauses briefly (for 0.5 seconds), and then turns right to proceed towards node 2 via node 7 (at full-speed) ● When the center of the Boe-Bot reaches node 2, the Boe-Bot pauses briefly (for 0.5 seconds), and then turns left to proceed towards node 1 (at full- speed) ● When the center of the Boe-Bot reaches node 1, the Boe-Bot pauses briefly (for 0.5 seconds). Then it does an about-turn (180° turn). At the end of this turn, the Boe-Bot is at rest with its center aligned with node 1 and the front wheel of the Boe-Bot faces towards node 2. This completes the tracing of the letter ‘P’ on the grid by the Boe-bot.
- 17. The completion of stages 1 and 2 described above completes the tracing of the letter-combination ‘OP’ on the grid by the Boe-bot. Deliverables 1. Give a demonstration of your project to the instructor or the student assistant before the end of class on the demonstration deadline day 2. Turn in a project report on the report due date. The project report should contain the following: i. An Objective statement ii. A Procedure: The section in which you will explain how you went about completing the project. iii. Role of Team Members: In this section, you will describe the role played by each team member in executing the project. Please describe clearly each member’s contribution to the project. Also describe how each member was able to/not able to work effectively with team partners on the project (each person should elaborate on his/her comments in the same report). iv. Program, with comments: Include the PBASIC program for your project. The program
- 18. should include comments for improved readability. v. Conclusions: Concluding remarks about the project The report should be typed, using a 12-size ‘Times New Roman’ font for the main text of the report. The left and right margins should be at least 1 inch each. The report should be typed in a single column format and should be single-spaced. The report should contain the names of all contributing team members. It should be submitted via TITANium. Each team must submit only one report (i.e. do not submit more than one report for the entire team) Dr. Pradeep Nair Introduction to Computer Engineering Engineering P.S. Nair math principles to solve problems subject to constraints such as cost and practicality product or outcome using available resources
- 19. tical principles are important aspects of engineering Computer Engineering P.S. Nair concerned with the design, analysis, performance estimation, application, verification, testing and synthesis of computer systems desktop computers, laptop computers, super-computers, embedded computers – they are present in microwave ovens, TVs, cars, air-conditioners, smart-phones and many other things – even though we may not notice them readily Computer Engineering – cont’d P.S. Nair
- 20. hardware and computer software tionally, the emphasis in basic computer engineering tends to be slightly more on the hardware aspects although a deep knowledge of both hardware and software is required to design efficient computer systems -related aspects find more emphasis in computer science computer and its design involves the application of electronics principles programming languages to create system software and applications (apps) that run on the computer hardware and perform desired tasks Common Computer Engineering Job Titles P.S. Nair
- 21. neer Computer Engineering Specialties P.S. Nair ty
- 22. Computer Engineering Program at CSUF P.S. Nair urrently offers the following degree programs: -year integrated BS/MS in Computer Engineering of hardware and software courses, in addition to science, math and GE courses oundation math and science courses: 31 units Computer Engineering Core Courses
- 23. P.S. Nair focused on achieving the right blend of knowledge in hardware systems, software and electronics – Computer Engineering, Electrical Engineering and Computer Science isciplinary Project in the senior year. This is a team project and usually involves the design and implementation of a solution using knowledge from more than one discipline Computer Engineering Program: Subject Areas P.S. Nair stems
- 24. -related technical elective areas Computer Engineering Program: Facilities P.S. Nair PGA and Digital Electronics Lab Computer Engineering Program: Opportunities
- 25. P.S. Nair -awards -assistant positions rnship opportunities such as the IEEE Computer Society Career Options after Graduation
- 26. industry/government/military P.S. Nair Examples of Computer Engineering Designs Computer Engineering Labs P.S. Nair Computer Engineering – Student Services
- 27. P.S. Nair y ECS retention specialists Computer Engineering One of the Top-Paid Majors Mean wages of Engineers and Computer Scientists ngineers – $105,450 – $93,960 – $104,340 – $85,640 – $106,930 – $80,930 – $80,740 – $93,380 – $97,870 – $85,520 – $89,930 – $85,930 – $77,910
- 28. – $106,860 Petroleum Engineers – $149,180 – $96,260 – $104,480 – $67,540 Source: Occupational Employment and Wages – May 2013, Bureau of Labor Statistics (Release date: April 1, 2014). Available at: http://www.bls.gov/news.release/pdf/ocwage.pdf Introduction to Computer EngineeringEngineering�Computer EngineeringComputer Engineering – cont’dCommon Computer Engineering Job TitlesComputer Engineering SpecialtiesComputer Engineering Program at CSUFComputer Engineering Core CoursesComputer Engineering Program: Subject AreasComputer Engineering Program: FacilitiesComputer Engineering Program: OpportunitiesCareer Options after GraduationSlide Number 13Computer Engineering LabsComputer Engineering – Student ServicesSlide Number 16Mean wages of Engineers and Computer Scientists 1 Boe-Bot Activity The Boe-Bot robot 2 Image source: Robotics with the Boe-Bot —Student Guide
- 29. Boe-Bot Circuit Board – Rev D 3 Moving the Boe-Bot P.S. Nair 4 -Bot is equipped with servo motors and a microcontroller (“brain” ), which can be programmed by the user -Bot’s wheel movement is controlled by the rotation of these servo motors The servo motors’ rotation are, in turn, controlled by electrical pulses applied to specific circuit pins of the Boe-Bot’s “brain” (you!)
- 30. Controlled movement of the Boe-Bot! Pulses P.S. Nair 5 (duration) of the HIGH pulse es are separated from each other by a PAUSE Pulses – cont’d P.S. Nair 6 servo motor clockwise counter-clockwise
- 31. stay still How to apply pulses to pins via programming? P.S. Nair 7 language lse (at pin N) that lasts for Argument * 0. 002 milliseconds i.e. Actual duration of pulse = Argument * 0. 002 milliseconds PULSOUT Argument = Actual Duration in milliseconds * 500 PULSOUT 12, 650 generates a HIGH pulse lasting 1.3 ms at pin 12, causing the
- 32. servo motor connected to pin 12 to rotate full-speed clockwise Example Code: Moving Boe-Bot for 3 seconds 8 ' {$STAMP BS2} ' {$PBASIC 2.5} DEBUG "Boe-bot is running the program“ counter VAR Byte FOR counter = 1 TO 122 'Runs the FOR loop 122 times; initially, counter = 1 PULSOUT 13, 850 'Generates 1.7 ms pulse at pin 13 (pin 13 servo rotates counterclockwise) PULSOUT 12, 650 ' Generates 1.3 ms pulse at pin 12 (pin 12 servo rotates clockwise) PAUSE 20 'Pause for 20 ms between pulses NEXT 'Increment counter by one and repeat loop (repeat till counter = 122)
- 33. 'Time overhead due to the number of instructions in the loop = 1.6 ms 'TIME TAKEN FOR ONE LOOP EXECTION = 1.7 + 1.3 + 20 + 1.6 = 24.6 ms 'TOTAL TIME OF BOE-BOT MOVEMENT= 122 * 24.6 ms = 3 seconds (approx.) END P.S. Nair Exercises 9 symbols (??) with actual numbers to achieve desired Boe-Bot movement -Bot P.S. Nair
- 34. Exercise 1: Moving Boe-Bot backwards for 5 seconds 10 ' {$STAMP BS2} ' {$PBASIC 2.5} DEBUG "Boe-bot is running the program“ counter VAR Byte FOR counter = 1 TO ?? PULSOUT 13, ?? PULSOUT 12, ?? PAUSE 20 'Pause for 20 ms between pulses NEXT 'Increment counter by one and repeat 'Time overhead due to the number of instructions in the loop = 1.6 ms 'TIME TAKEN FOR ONE LOOP EXECTION = 1.7 + 1.3 + 20 + 1.6 = 24.6 ms END
- 35. P.S. Nair Exercise 2: Keeping the Boe-Bot still for 3 seconds 11 ' {$STAMP BS2} ' {$PBASIC 2.5} DEBUG "Boe-bot is running the program“ counter VAR Byte FOR counter = 1 TO 122 PULSOUT 13, ?? PULSOUT 12, ?? PAUSE 20 'Pause for 20 ms between pulses NEXT 'Increment counter by one and repeat 'Time overhead due to the number of instructions in the loop = 1.6 ms END
- 36. P.S. Nair Exercise 3: Identify the wheel controlled by pin 12 12 ' {$STAMP BS2} ' {$PBASIC 2.5} DEBUG "Boe-bot is running the program“ counter VAR Byte FOR counter = 1 TO 122 PULSOUT 13, ?? PULSOUT 12, ?? PAUSE 20 'Pause for 20 ms between pulses NEXT 'Increment counter by one and repeat 'Time overhead due to the number of instructions in the loop = 1.6 ms END
- 37. P.S. Nair 13 Questions?? P.S. Nair 14 Thank you!! P.S. Nair