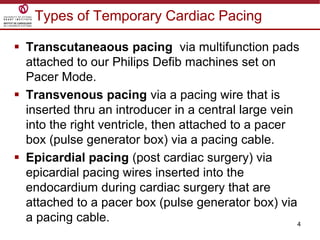
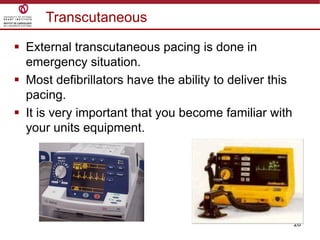
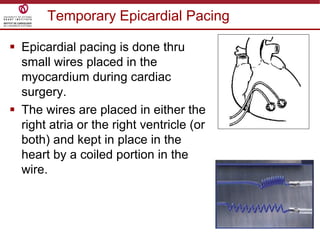
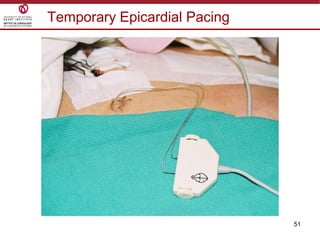
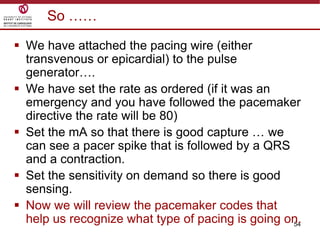
Temporary cardiac pacing is used when a patient's heart rate is too slow or irregular. There are three main types: transcutaneous pacing using pads on the chest, transvenous pacing using a wire inserted into the heart via a vein, and epicardial pacing using wires placed during cardiac surgery. The pacing method depends on urgency and availability. A pulse generator is attached to the pacing wires and is used to deliver electrical impulses and adjust settings like rate, amplitude, and sensitivity. The goal is consistent capture of the heart without unnecessary pacing.
2. 2
Objectives
Outline various types of temporary pacing
Identify how pacing method determined
Outline insertion / application procedure for each
type of pacing
Identify initial nursing care required
3. 3
Temporary Cardiac Pacing
Temporary cardiac pacing is the application of an
artificial electrical stimulus to the heart in the hope
of producing a depolarization of cardiac cells.
It is done when the patients own „intrinsic‟ or built
in ability to pace fails or to cause a more effective
depolarization.
4. 4
Types of Temporary Cardiac Pacing
Transcutaneaous pacing via multifunction pads
attached to our Philips Defib machines set on
Pacer Mode.
Transvenous pacing via a pacing wire that is
inserted thru an introducer in a central large vein
into the right ventricle, then attached to a pacer
box (pulse generator box) via a pacing cable.
Epicardial pacing (post cardiac surgery) via
epicardial pacing wires inserted into the
endocardium during cardiac surgery that are
attached to a pacer box (pulse generator box) via
a pacing cable.
5. 5
Any slow rate where the patient is symptomatic
The slow rate could be:
• Sinus Bradycardia
• 2nd or 3rd degree Heart Block
• Junctional rhythm
• Idioventricular rhythm
The etiologies of these rhythm issues could be
degeneration of conduction system,
atherosclerosis, ischemia, drug induced (OD or
antiarrythmics), conduction issues post cardiac
arrest.
Indications for Pacing
6. 6
Determination of Pacing
Urgency of need is the prime determination for
which pacing method is used.
Trancutaneous patches are quick to apply, non-
invasive, but should only be used for a short time.
Transvenous pacing should be provided when
available: easiest route is right internal jugular or
left subclavian; fluroscopy should be used but it
can be attempted without it in an emergency
Obviously, if the patient has epicardial wires post
cardiac surgery then this is the primary method of
pacing.
7. 7
Overview of Terminology
Pace to deliver an electrical impulse
Sense ability of the pacemaker to detect
intrinsic electrical activity
Pacing Spike stimulus from the pacemaker
recorded on the ECG, a short narrow
deflection
Capture depolarization of the heart by an
artificial stimulus; patients myocardial
cells capture the impulse delivered
by the pacemaker; pacer spike
followed by a QRS associated with a
pulse
8. 8
Overview of Terminology
Pacing
Threshold
Amount of energy required to initiate
a depolarization … for the cells to
„capture‟ the impulse and depolarize.
It is measured in milliamps (MA)
Influenced by:
• Ischemia
• Drugs
• Electrolyte Imbalances
• Pacer wire position
9. 9
Terminology: Modes of Pacing
Asynchronous (Fixed Rate)
• delivers electrical stimuli at a selected rate
regardless of patients intrinsic cardiac activity
Synchronous (Demand)
• delivers electrical stimulus only when needed
• pacemaker detects or “senses” the patients
intrinsic electrical activity and inhibits the
pacemaker from firing an electrical stimulus
10. 10
Pacing Device
Depending on the device being used to pace you
may be able to choose:
• Demand or asynchronous pacing.
• The rate at which you pace the patient‟s heart.
• The amount of energy in milliamps (mA)
required for to cause a depolarization in the
myocyte, referred to as „capture‟.
• How sensitive you want the pacer box to be to
the intrinsic activity of the heart.
Lets review each of these settings generally before
moving on to the specific devices….
11. 11
Rates in Demand Mode
Demand (Synchronous) Mode
• In demand mode the stimulus is provided when the
patient‟s heart rate drops below at predetermined
rate.
• So if you have the rate of the pacer at 60, it won‟t
pace until the patients heart rate falls below 60.
• The pacer box must have adequate sensing for
demand mode to work effectively.
• This is the preferred way of pacing as it should
avoid competition between the patients own heart
rate and that of the pacer box.
13. 13
Rates in Fixed Mode
Fixed (Asynchronous) Mode
• In fixed mode the stimulus is provided at a preset
rate and the pacer fires at that rate regardless of
what the patients heart is doing.
• If fixed rate is used and the patient has an
underlying rhythm, the rate must be set greater
than the patient‟s inherent rate to avoid
competition
• There is a great risk for „R on T‟ phenomena with
asynchronous pacing (see Cardiac Anatomy
Module 2 for more about „R on T‟)
15. 15
Energy to Elicit Pacing
The energy used by the pacer box to elicit a
depolarization and contraction is measured in
milliamps (mA).
Different hearts may require different amounts of
energy to elicit a depolarization and contraction;
the variables that could effect the amount of energy
required include:
• position of electrode;
• contact with viable myocardial tissue;
• level of energy delivered through wire; presence
of hypoxia, acidosis or electrolyte imbalances;
• other medications being used
16. 16
Ventricular Pacing
Pacer Spikes Wide QRS: because
the beat is initiated
away from the
superhighway so it
takes longer for the
ventricle to depolarize
What does a ventricularly paced beat look like?
17. 17
„Capture‟
When there is sufficient energy to cause a
depolarization and contraction, it is referred to as
„capture‟.
This strip shows three paced beats followed by the
patients own intrinsic rhythm.
Here is a strip with no underlying
rhythm, just pacer spikes. If you saw
this you would immediately turn up the
mA to try and elicit a depolarization.
Finally, after a couple of seconds the
myocytes depolarization … the cardiac
cells have captured the impulse and it
is moving thru the ventricle….
18. 18
Energy to Elicit Pacing
The higher the mA the more energy is being
generated by the device to try and elicit a
depolarization by the cardiac cells.
If you do not see „capture‟ on the monitor then you
would turn up the mA.
You may hear this setting referred to as just „mA‟
or „output‟ or sometimes „what are you capturing
at‟….
19. 19
Stimulation Threshold
The stimulation threshold is the minimum output pulse
needed to consistently „capture‟ the heart and cause a
depolarization and contraction.
This should be checked regularly in order to see how
much „leeway‟ you have to go up in milliamps should it be
required.
Turn the mA down until you no longer have capture …
that is your stimulation threshold .. then set the mA at
double or triple that number.
3 mA 2 mA 1 mA
The stimulation
threshold here is
1 mA so the pacers
mA would be set at 2
or 3 mA
20. 20
Sensitivity refers to the pacing devices‟ ability to
„see‟ what electrical activity is being generated by
the patients own heart to prevent any competition
between the hearts intrinsic activity.
This allows pacing only on „demand‟ when the
intrinsic heart rate is too low,
The energy coming from the heart is measured in
millivolts (mV).
We can actually measure the mV‟s being produced
by the heart on the graft paper our ECG strips are
on ….. Each little square is not only 1mm in height
but also represents 0.1mV.
Sensitivity
22. 22
Sensitivity
So … we want to set the pacemaker to „see‟ even
the smallest of electrical activity being produced
by the heart so that it doesn‟t pace in
appropriately.
We set the mV sensitivity on the pacer device to
the lowest number so that it will see the smallest
amount of electricity being produced by the heart.
This number will be different depending on which
device you are using.
23. 23
Sensitivity
In this example if the mV were set at 2.5, the pacer box
is only sensing impulses generating greater than 2.5 mV.
When we lower the mV setting to 1.5 mV on the pacing
device the pacer will sense the beats that elicit a smaller
amount of mV and stop the pacer from pacing
inappropriately.
1.25 (mV)
2.5 (mV)
5 (mV)
Sensitivity (mV)
1.5 (mV)
24. 24
The sensitivity threshold can be determined by
dialing up the sensitivity to find the minimum R
wave amplitude needed to be detected by the
pulse generator… when you dial up the sensitivity
the pacer will start firing inappropriately.
Once the sensitivity threshold is determined, the
sensitivity is set 2-3 times lower.
However, on a number of the pulse generators it is
safest to make the device „most sensitive‟; just
turn the dial to the setting at the lowest number
which will be labeled „Demand‟ mode.
Sensitivity
25. 25
Sensing
Here the pacer „sensed‟ that there was intrinsic activity so
did not pace
Here the pacer is not „sensing‟ the intrinsic activity so it is
pacing all over the place … in this case causing VF
because it paced on
28. 28
External transcutaneous pacing is done in
emergency situation.
Most defibrillators have the ability to deliver this
pacing.
It is very important that you become familiar with
your units equipment.
Transcutaneous
29. 29
Transcutaneous External Cardiac Pacing
The Philips Defib machines are capable of
delivering either demand or non-demand fixed
(asynchronous ) pacing.
You are able to control both the rate and current
level (mA), called „output‟ on this machine.
Although it is sensing when you are in Demand
Mode, you are not able to control the sensitivity.
Pacing is done thru two disposable electrodes
which are self adhering.
30. 30
Equipment required
Multifunction pads (same ones which are used to
defibrillate, cardiovert, and pace).
Connection cable for the pacing pads
ECG signal:
• 3 or 5 lead ECG cable
• synchronization ECG cable to plug into the
monitor
The ECG signal must be attached to the defib
machine for you to see what the patients ECG
rhythm is … the machine will not pace and give
you an ECG signal thru the pads at the same time.
Transcutaneous External Cardiac Pacing
31. 31
Labeling of patches varies by manufacturer
Positioning of patches can be as per manufacturers
pictures on patches or anterior posterior … if you
are doing CPR it may be easier to apply anterior.
Skin should be clean, dry, & intact
Clip hairy chest PRN
Once you have positioned the pads so that you have
good sense and capture … leave them there….
however if you have to leave the pads on for an
extended time, change pads Q12 hours
(theoretically, if a patient requires transcutaneous
pacing for more than a short time (say 60 -120 mins
or so), a transvenous wire should be inserted).
Transcutaneous External Cardiac Pacing
32. 32
The anterior patch is
placed on the left
anterior chest halfway
between the xiphoid
process and the left
nipple
Posterior electrode is
placed on the left
posterior chest
beneath the scapula
and lateral to the
spine
Application: If applying anterior/ posterior
33. 33
Application: If applying anterior/ posterior
If applying anterior/anterior follow the instruction
pictures on the pads themselves.
34. 34
Turning on the Pacing Modality
1.Turn the defib machine
to manual and plug in
appropriate cable 2. Turn Pacer modality on
3.Press start
4.Increase mA
until you have a
pacer spike,
followed by a
QRS associated
with a pulse
Special multifunction pad
cable is inserted here
Remember to plug sync cable or ECG leads into Defib machine
Comes ‘on’ in Demand mode so needs sync cable to ‘see’ rhythm
If sync cable unavailable change mode to ‘fixed’ if patient asystole
35. 35
When you turn on the pacer
modality, the machine will
automatically come on with
a rate of 70 and a mA of
30.
If there is no capture after
pressing „start‟, increase
the „output‟ until the
pacemaker „spikes‟ result in
consistent „capture‟ of the
ventricle and there is an
associated pulse.
Output can go as high as
200 mA (because it has to
travel thru so much tissue)
Transcutaneous External Cardiac Pacing
36. 36
Each pacer spike on the monitor should be
followed by a QRS.
The QRS will be wider than normal because the
paced beat is traveling off the „conduction highway‟
so it takes longer as it travels thru the ventricle cell
to cell to cell.
Once you see a pacer spike, followed by a QRS
check the femoral pulse to ensure that the QRS
that you see is actually producing a cardiac cycle.
There is significant discomfort for the patient so
ensure analgesia has been ordered.
Transcutaneous External Cardiac Pacing
37. 37
We cannot stress enough the need for you to be
familiar with the equipment required for
transcutaneous pacing.
It is your responsibility to take a few minutes once
a month to run thru the set up … plug in the
required cables, practice running thru the settings.
This way when pacing is required in an
emergency, you know exactly what to do to save
your patient next time they loose their heart
rhythm!!!
Transcutaneous External Cardiac Pacing
It only takes 4 minutes of no cardiac output to start
loosing brain cells …. Knowing what to do could
make all the difference to that patients future.
39. 39
Pulse Generators
Pulse generators are small, battery-powered
medical devices designed to electrically stimulate
the heart muscle in an effort to restore a heart
rhythm or increase the rate of a heart rhythm.
At UOHI all pacemakers are the same and have
the capability of pacing either the atria or the
ventricle or both the atria and ventricle.
Pulse generators are generally referred to as
„pacer boxes‟.
They are used with either transvenous or
epicardial pacing wires are in situ.
40. 40
Pulse Generators
With these pacer boxes you can choose and
adjust:
• Asynchronous or demand pacing.
• The rate at which you pace the patient‟s heart.
• The amount of energy in milliamps (mA)
required for to cause a depolarization in the
myocyte, referred to as „capture‟.
• How sensitive you want the pacer box to be to
the intrinsic activity of the heart.
43. 43
Transvenous Wires
Tranvenous wires are inserted thru an introducer
placed in a large central vessel such as the jugular
or femoral veins (try and stay away from
subclavian because the EP guys might need it for
access for a permanent pacer).
It is imperative that the right size introducer be
used for the right size of transvenous wire ie a
size 5 fr. wire goes into a 6 fr introducer; a 6 fr wire
thru a 7 fr introducer etc.
Do not put a 5 or 6 fr wire down an introducer
which has had a PA catheter in it …. There will be
leakage around the wire into the protective sterile
sheath because the previous catheter thru the
introducer was considerably larger.
44. 44
Insertion of Transvenous Wire
This procedure can be done with a number of
different bipolar leads … some have balloons to
help them float into place, some are what are called
„hard wires‟.
The best way to ensure proper placement is to do
the procedure under fluoroscopy, but if transvenous
pacing is required stat it can inserted without
fluoroscopy.
The MD can estimate the length required from the
site of entry to the right ventricle prior to beginning
the insertion of the lead by „measuring‟ up the
patient …. this just helps the MD have an idea of
where they should be during the insertion.
45. 45
Insertion of Transvenous Wire
Gather equipment:
• pacing lead, pacer box & connecting cable
• skin prep solution
• introducer kit
• gowns, masks, gloves
• sutures, syringes, & needles
• suture tray & scalpel blade
• Defibrillator
Make sure you save the sterile sleeve for the lead
from the introducer set kit ….. And make sure the
doc remembers to put it on the pacer wire!!!!
46. 46
Insertion of Transvenous Wire
MD will insert the appropriate sized introducer.
Under sterile conditions provide the MD with the
pacing lead.
They then need to apply the sterile sleeve over the
lead (the sterile sleeve was in the introducer kit).
MD will hand you the connector end of the pacer
lead for you to connect to the pacer box.
Remember to attach the leads appropriately,
positive to positive; negative to negative.
47. 47
Insertion of Transvenous Wire
Set to pacer box to a rate of 10 and most
sensitive.
As the MD advances the lead watch both the
rhythm on the monitor and the sensing light on the
pacer box… if the patient has an underlying
rhythm, as the lead comes in contact with the
endocardium the sense light will flash when there
is intrinsic activity … so you know the lead is near
cardiac structure.
Once the lead has reached the right ventricle and
is properly positioned, check the stimulation
threshold ( you may need to increase the rate
above the intrinsic rate if the patient has one).
48. 48
Insertion of Transvenous Wire
The wire then needs to be well secured.
How much can you move the pateint with a
transvenous wire?
• Depends on the patient … sometimes you can
sit them on the side of the bed and you won‟t
loose sense or capture … sometimes you have
issues with the wire moving just turning the
patient.
• Best advice is to always move the patient with
extreme care, watching the monitor and always
be prepared for the worse case scenerio!!!
49. 49
Connection Cables for Transvenous Wires
At UOHI you may see different
cables for the transvenous wires
… other TOH sites use a
disposable cable so the patient
could arrive to our units with it
attached to a transvenous wire.
The non disposable cables we
usually use require the „peg‟ ends
attached to the pacer wire.
Remember if the wire is marked:
• Distal = negative
• Proximal = positive
When going into the cable
negative to negative and positive
to positive
Disposable
cables
Non-disposable
/ block cables
50. 50
Temporary Epicardial Pacing
Epicardial pacing is done thru
small wires placed in the
myocardium during cardiac
surgery.
The wires are placed in either the
right atria or the right ventricle (or
both) and kept in place in the
heart by a coiled portion in the
wire.
52. 52
Temporary Epicardial Pacing
How you connect the wires to the block cable
depends on how many wires you have.
If you have two wires … each wire goes into an
opening of the block lead.
If you have one wire, you need to insert a ground
wire to act as the positive end of the circuit …. then
the ground wire is inserted into the positive access
of the block cable.
If you have atrial wires and ventricular wires, each
set needs it own block cable.
Always use a ground wire, never borrow a wire ie
don‟t use a ventricular wire as a ground for atrial
pacing and visa versa.
53. 53
Temporary Epicardial Pacing
Once the pacer wires are attached to the block
lead take a clean glove … turn it inside out
enough that it forms a pocket …. Put into the
pocket the connection portion of the block lead
and the pacer wires.
Tape the glove to the patients skin using just two
pieces of tape … DO NOT PUT TOO MUCH
TAPE OVER THE GLOVE … too much tape
makes it difficult to assess the status of the wires /
block lead in an emergency.
54. 54
So ……
We have attached the pacing wire (either
transvenous or epicardial) to the pulse
generator….
We have set the rate as ordered (if it was an
emergency and you have followed the pacemaker
directive the rate will be 80)
Set the mA so that there is good capture … we
can see a pacer spike that is followed by a QRS
and a contraction.
Set the sensitivity on demand so there is good
sensing.
Now we will review the pacemaker codes that
help us recognize what type of pacing is going on.
55. 55
NASPE Codes
The North American Society of Pacing and
Electrophysiology (NASPE) has developed a code
so that when we are talking about what the pacers
are set at, everyone is talking the same language.
Each „position‟ or letter represents
For temporary pacing we use the first three letters
of the code, permanent pacers use 5 letters.
The chart on the next slide shows all 5 letters, just
so you have a resource for when you have a
patient with permanent pacer.
56. 56
NASPE Codes
I II III IV V
Chamber(s)
Paced
Chamber(s)
Sensed
Mode(s) of
Response
Programmable
Functions
Antitachycardia
Functions
V= Ventricle V=Ventricle T=Triggered
R=Rate
Modulated
O=None
A=Atrium A=Atrium I=Inhibited
C=Communicating
P=Paced
D=Dual
(A&V)
D=Dual
(A&V)
D=Dual
Triggered &
Inhibited
M=Multi-
programmable
S=Shocks
O=None O=None O=None
P=Simple
Programmable D=Dual (P&S)
O=None
57. 57
NBG Codes – 3 Letter Temporary Code
Chamber(s) Paced
A = atrium
V = ventricle
D = dual (both
atrium and
ventricle)
1st Letter
Chamber(s) Sensed
A = atrium
V = ventricle
D = dual
O = none
2nd Letter
Response to Sensing
I = inhibit
(Demand mode)
T = triggered
D = dual
O = none (Asynch)
3rd Letter
V V I
Chamber paced
Chamber sensed
Action or response to a sensed event
58. 58
Commonly Used Pacemaker Modes
You are told in report that your patient has a
transvenous wired and it is pacing VVI at a rate of
80 ….. What does that mean?
• V – Ventricular pacing: the pacing device is
located in the ventricle
• V – Ventricular sensing: sensing for ventricular
activity
• I - Inhibit mode: the pacing device will inhibit
itself from pacing when it sense intrinsic
ventricular activity
59. 59
VVI Demand/Inhibited
Here the pacing device paces the heart when the
patient‟s own rate becomes slower than the rate
set on the pacemaker.
When the pacemaker senses intrinsic
depolarization it stops pacing.
60. 60
Commonly Used Pacemaker Modes
You are asked to hook up the patients atrial wires
because their blood pressure is low … the hope is
by increasing „atrial kick‟ by pacing the cardiac
output will increase and the blood pressure will go
up …. The order is to set the pacer at AAI rate of 80.
• A - Atrial pacing: the pacing device is located in
the atria
• A - Atrial sensing: the device is sensing for atrial
activity
• I - Inhibit mode: the pacing device will inhibit itself
from pacing when it senses any intrinsic atrial
activity
61. 61
Try this one …..
VOO
• 1st letter is …..
• Where is it pacing?
• Ventricle
• 2nd letter is ….
• Is it sensing …. Is it?
• No
• 3rd letter is …..
• Is the pacer inhibiting itself from pacing when
there is an intrinsic beat?
• No
VOO is fixed
asynchronous
pacing of the
ventricle … the
pacer doesn‟t care
what the patients
heart is doing it is
just going to pace at
the set rate.
62. 62
DDD
DDD pacing is done when there are atrial and
ventricle wires … so you will see it post cardiac
surgery or with permanent pacing.
D – pacing in both the atria and ventricle
D – sensing in both the atria and ventricle
D – dual function ….there will be both inhibition of
pacing when there is intrinsic activity and there
will be triggering …. we‟ll cover that in the next
slide…
63. 63
Triggering in DDD pacing
DDD is a form of AV synchronous pacing
Hemodynamically the patient will be much better
off if the atria and ventricle depolarize in an
organized manner … the atria depolarizing prior
to the ventricle depolarizing.
So in DDD pacing, if the rate is set higher than the
intrinsic rate, you will see a small pacing spike in
front of a P wave …. If after a preset time period,
called the AV interval, there is no ventricular
activity sensed, the pacer will also pace the
ventricle.
64. 64
DDD Pacing
Here you can see an atrial pacer spike and a
ventricular spike …. DDD pacing ..
The pacemaker sensed it needed to pace atrially…
then waited the set AV interval (sort of the PR
interval) … there was no ventricular activity so it
paced the ventricle too.
65. 65
Other DDD Scenarios …
Pacer set on DDD rate of 80 ….
• Patients own atrial rate is 88
• What will the pacer do first
• It will SENSE that the atrial rate is higher than
the set rate so it will not pace the atria
• The pacer will then wait the preset AV interval
and see if the patients ventricle depolarizes at
the rate of the atria….
• If the ventricle does not depolarize, the pacer
will be TRIGGERED to pace the ventricle but…..
• IT WILL PACE THE VENTRICLE AT THE
INTRINSIC RATE OF THE ATRIA … 88 bpm
66. 66
Other DDD Scenarios …
This „atrial tracking‟ allows the heart to work in
synchrony, the ventricle depolarizing at the same rate
as the atria.
Another scenario is when the intrinsic atrial rate is
lower than the set rate … so the atria is paced but
after the AV interval an intrinsic ventricular
depolarization occurs … so the pacer SENSES that
there is ventricular activity so it does not pace.
No Pacing
Intrinsic „P‟
and
ventricular
pacing
Both atrial
and
ventricular
pacing
Atrial pacing
with intrinsic
ventricular beat
68. 68
To help prevent the need to troubleshoot …
Lets start troubleshooting by talking about what you
should be doing at the beginning of every shift to
help minimize the troubleshooting you will have to do!
1. Assess the wires involved –
a. is the temporary transvenous wire well
secured;
b. sort out which epicardial wires / ground wires
are actually attached to the pacer … you may
have to unwrap the wires / pacer cable from
a glove but it is important you know what you
are dealing with.
69. 69
To help prevent the need to troubleshoot ..
2. Check the pacer box …
a. what are the pacer settings: rate, mA, mV
b. Determine the mode …. Is it VVI, AAI, DDD?
c. CHECK THE BATTERY… look at the number of
bars remaining, if 2 or less OR if battery is
flashing, then change batteries immediately.
d. Check that the cable/s are well secured into the
pacer box.
e. If the patient is pacer
dependent always make
sure there are spare batteries
in the room.
70. 70
To help prevent the need to troubleshoot …
3. Check the ECG strip …
a. What is the rate of the rhythm on the ECG strip
… compare that to the rate set on the box …
should the rhythm be paced or intrinsic.
b. Is the pacer capturing every pacer stimuli?
c. Is the pacer sensing all intrinsic activity?
71. 71
To help prevent the need to troubleshoot …
4. Check the underlying rhythm and mA threshold
(CSICU RN ‘s).
a. Do this on day shift when there is plenty of staff
around (just in case it doesn‟t work as planned!)
b. To check underlying rate slowly turn down the
rate on the pacer ….. DO NOT JUST PULL
OUT THE PACER CABLES OR USE THE
PAUSE BUTTON … you need to „walk the rate‟
down to give the intrinsic rate a chance to
evolve. Personally if I get down to 30 bpm that
is as low as I go … run a strip to see what the
underlying is and then dial back up.
72. 72
To help prevent the need to troubleshoot …
c. To check mA threshold turn the rate of the
pacer to around 10 beats above the intrinsic
rate … then turn down the mA until you
loose capture … then double or triple that
number.
By doing your shift checks it will help having to
troubleshoot …. But just in case we will cover the
some potential issues in the next few slides.
73. 73
Failure to Pace
With failure to pace, the pacer does not produce a
stimulus when it should.
When you have „failure to pace‟ you should check for :
• Failure of pacemaker battery or pulse generator
so change both out
• Loose cable connections in the pacing system
• Fracture or dislodgement of the pacing lead wire
• With epicardial pacing, check ground is in place
74. 74
Failure to Pace
What if you can‟t get the pacer going and the
patient is asystole !!!
• Call for help … if you have no cardiac output
someone will need to start CPR.
• Call for a new cable and box and try changing
them out.
• Get the defibrillator in the room and assign
someone to set up for transcutaneous pacing.
• If you are dealing with epicardial wires strip
everything down so you can see the wires /
ground wire while you are working with them.
75. 75
Undersensing
When a pacer „undersenses‟ it fires with no regard
to the patient‟s own rhythm. It doesn‟t sense the
intrinsic activity of the patients heart.
This can be dangerous with ventricular pacing
because it may lead to ventricular tachycardia
and/or ventricular fibrillation especially in the
presence of existing electrolyte imbalance or
cardiac irritation.
Undersensing can occur because of inadequate
QRS signal, myocardial ischemia, fibrosis,
myocardial edema, electrolyte imbalances, bundle
branch block, or a poorly positioned lead.
76. 76
Undersensing
The above is an example of ventricular undersensing
…. There are some paced beats but also pacer
spikes inappropriately in intrinsic activity.
The above is an example of atrial undersensing ….
There are some paced beats but also pacer spikes
inappropriately in intrinsic activity.
77. 77
What do we do about undersensing?
First check to see what the sensitivity is set at …
remember the lower the number the more sensitive
the pacer is … if the pacer can be made more
sensitive then do so.
Check that the battery light is not on.
Check all lead connections …. If you are using
epicardial wires with a ground make sure the
ground remains implanted in the skin.
If it is a transvenous lead turn the patient on their
left side until repositioning can be done.
Switch polarity on epicardial wires
If the patient has an adequate underlying rhythm,
you may have to turn the pacer off.
78. 78
When oversensing occurs the pacemaker thinks it
detects a QRS complex so it inhibits itself from
producing a pacing stimulus.
What the pacer could be seeing is:
• Tall or peaked P waves or T waves
• Myopotentials (electrical signals produced by
skeletal muscle contraction as with shivering or
seizures)
Oversensing
79. 79
Oversensing
Should have paced here but
the pacer saw the
myopotentials as intrinsic
activity so didn’t fire.
If you see oversensing, you need to make the pacer
less sensitive … increase the mV.
Check all connections, change cables, switch pacer
Reverse polarity on epicardial wires
80. 80
Failure to Capture
Failure to capture is when the cardiac cells are
unable to depolarize in response to the stimulus
being generated by the pacemaker.
It could happens because:
• there is not enough milliamps (mA) being
generated by the pacer for the cells to
depolarize.
• The cells are unable to depolarize because of
issues such as ischema, fibrosis, electrolyte
imbalance, the lead has perforated the
myocardium
• There is an issue with the pacing system
81. 81
Failure to Capture
Here you can see two ventricular paced beats
followed by failure to capture of ventricular pacing ...
pacer spikes with no QRS associated with it.
Failure to capture
82. 82
Failure to Capture
This is an example of failure to capture in DDD
pacing where both the atria and ventricle are not
being depolarized by the pacer stimuli
This is an example of failure to capture the atria in
DDD mode. You can see an atrial pacer spike but
no „p‟ wave… ventricular pacing is fine.
83. 83
Failure to Capture
When you have to deal with failure to capture you
need to:
• Check to make sure the battery light on the
pacer is not on … change battery if required
• Increase the mA
• Check and change the lead cables,
connections and the pacer itself … if dealing
will epicardial wires ensure the ground is insitu
• If you have a transvenous wire it may need to
be repositioned.
• Try changing polarity (change which wire is in
the positive and negative port).
84. 84
Competition
There will be times, especially if the heart is
recovering when both the intrinsic rate and the
paced rate are very close.
This can lead to competition between the two.
You can also competition when there is:
• Asynchronous pacing
• Failure to sense
• Mechanical failure: wires, bridging cables,
pacemaker
• Loose connections
85. 85
Competition
If the patient has an adequate underlying rate and
rhythm it may be wisest to turn the pacer rate
down to prevent fusion beats
1 is a paced beat
2 & 3 are fusion beats
86. 86
Permanent Pacemakers (PPM)
Permanent pacers are dealt with in a separate
presentation but lets review a couple of issues that
come up in daily practice:
• If you defib a patient with a perm pacer the
paddle should be at least 10 cm away from the
„can‟ (the „can‟ is the part of the device under the
skin that hold the battery etc) of the device.
• Some PPM are set to have a lower rate at night
to mimic natural circadian rhythm.
• Always give the pacer clinic a call to obtain a
report of what the PPM is set at … best to have
this information on the chart.