those are the steps that students need to record a video about the project and the research that they did during the first term about the 21st century threats and challenges
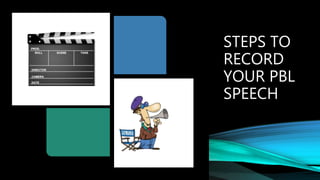
2. AS YOU ALL KNOW WE ARE
NOW WORKING ON VIRTUAL
MODE, SO YOU WILL FIND SOME
INSTRUCTIONS AND STEPS TO
RECORD A VIDEO WHERE YOU
ARE GOING TO TALK ABOUT THE
RESEARCH THAT YOU DID
BASED ON THE TOPIC THAT YOU
AS A TEAM CHOSE
3. STEP 1
• Each member is going to record a video answering one of the questions below.
1. According to your investigation what kind of problems did you find based on the
topic that you chose?
2. What promising solutions did you find on the web ?
3. What important people have influenced on the challenge or threat that you
investigated that exist today in a positive and a negative way?
4. What´s your position towards the problem that you chose that people have to
face or deal nowadays?
4. STEP 2
• After you read the questions, you are
going to talk as a team with your friends
about which member is going to answer
the question #1,2,3 or 4.
5. STEP 3
• It is time to record!!!
• each one of the questions are going to take 2
minutes minimum, it means that the video is
going to be at least about 6 min.
6. STEP 4
• it is time to edit:
• As teachers we all know that
when we talk about
technology you are so Smart
and very creative so this is not
going to be hard for you to do
it.
• When you finish recording you
or one of the members of the
team is going to edit the
video, so we have some tools
that will help you out in the
next slide
7. TOOLS
• Camtasia Studio (Windows and Mac)
• Camtasia is a software used to make
recordings and editions of videos through
your computer. It is suitable for recording
videotapes, tutorials and demonstrations
of products. The software is very complete
and allows you to create videos with high
quality. At first it may seem a little
complicated to use, but gradually you will
realize that this is only the first impression.
8. Windows Movie Maker
(Windows)
• The Windows Movie Maker is
a good choice for those who
want to start editing video
lessons. However, it is not
recommended for those who
wish to advance knowledge in
the issues. This is because it is
more of a basic tool.
9. ActivePresenter (Windows)
• The ActivePresenter is the solution for
creating video lessons, handouts, manuals,
documentations and interactive training
presentations. It’s similar to Camtasia Studio,
but Active has a free version. In this version,
the user can export their work to PNG, JPEG,
AVI, MPEG4, WMV, WebM, MKV and SCORM
1,2 and SCORM2004 files.
• In paid versions, the user can export to other
formats, but the free version already offers
the essential formats for those who want to
produce and edit videotapes.
10. Movavi (Windows and Mac)
• The Movavi tool lets you record lessons
and tutorials, combines a complete
screen capture program with a very
good and easy-to-use video editor. It
also has a huge amount of fast export
settings to optimize your recordings for
mobile devices and online sharing.
• This one is awesome and the quality of
the video is so good.
Esta foto de Autor desconocido está bajo licencia CC BY-SA-NC
11. YouTube Editor
• Another good request for those
starting out editing videos is the
YouTube Editor. Besides being fast and
very easy to use, this tool allows you to
make cuts, add subtitles and edit
videos online, with total practicality.
12. FINAL STEP
• When you finish editing you are going
to upload the video on youtube and
you will send the link of video to your
teacher and classmantes, it is going to
be awesome.