
Recommended
Recommended
More Related Content
What's hot
What's hot (20)
Similar to Setup and Use Omni-channel Routing in Salesforce
Similar to Setup and Use Omni-channel Routing in Salesforce (20)
Recently uploaded
Recently uploaded (20)
Setup and Use Omni-channel Routing in Salesforce
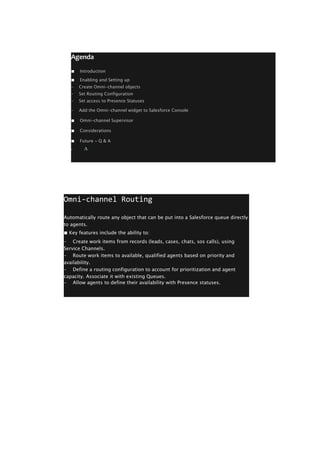
- 1. Agenda ■ Introduction ■ Enabling and Setting up - Create Omni-channel objects - Set Routing Configuration - Set access to Presence Statuses - Add the Omni-channel widget to Salesforce Console ■ Omni-channel Supervisor ■ Considerations ■ Future - Q & A 2 A Omni-channel Routing Automatically route any object that can be put into a Salesforce queue directly to agents. ■ Key features include the ability to: - Create work items from records (leads, cases, chats, sos calls), using Service Channels. - Route work items to available, qualified agents based on priority and availability. - Define a routing configuration to account for prioritization and agent capacity. Associate it with existing Queues. - Allow agents to define their availability with Presence statuses.
- 2. Setup Omni-channel Enable Omni-channel ■ BEFORE enabling omni-channel, ensure you have.. - Access to Salesforce Console - Created a console App - Some Queues created - Case/Lead Assignment Rules defined. ■ Enable Omni-channel - Its free, no need to raise case to Salesforce to enable. Setup Omni-channel Service Channel & Routing Configuration ■ Create Service Channels - turns objects to work items - One Service Channel per object • Create Routing Configuration - defines how work items are routed - Overflow Assignee - Routing Priority - Routing Model-Most Available, Least Active - Work Item Size - Units of Capacity, Percentage of Capacity - Connect the Queue to Routing Configuration
- 3. Setup Omni-channel Presence Configuration & Presence Status • Create Presence Configurations - define how much work agents can take on and what Omni-Channel behaviours they can access - Capacity - Automatically accept requests - More settings on Decline Requests ■ Create Presence Statuses - to indicate if the agent is available or not available to receive incoming work - Status Options-Online, Busy - Service Channels - Assign to users through Permission Sets or Profile. Add Omni-channel widget to Salesforce Console In the desired Console App, add the widget under 'Choose Console Components' section. Test it and rock n roll! Omni-channel Supervisor ■ Real-time information about your Omni-Channel agents, queues, and work are streamed live into the panel ■ Filter, sort, drill down to see details -all without leaving console. • Enable the tab - change the visibility to 'Default On' ■ Add the tab to Console app.
- 4. Press Esc to exit full screen Hands-on • DE ■ Service User ■ Console app • Enable Omni-channel and other settings ■ Add to the Console App (under 'Choose Console Components' section) ■ Permission Set • Test - Go to Console app - Login to Omni-Channel - make yourself Available - Create a case and assign it to a queue which you are a member of - See if the Case gets assigned to you automatically. Considerations > ■ Cannot deploy! ■ Different Presence Status will not route to different Queues within the same object ■ Works with Salesforce Console only ■ When using Omni-channel for Chat - Can't use direct-to-agent routing - Can't use chat conferencing - Can't use supervisor whisper messages and assistance flags ■ Doesn't work with CTI ■ Check Ideas (& vote). ■ Capacity-Close tab NOT close Case ■ Capacity -Calculated for Cases assigned through Omni-Channel, not manual ■ Automate more using Omni-channel SOAP API 11