SlideShare a Scribd company logo
1 of 28
Download to read offline
QUICK START GUIDE
Note: Specifications subject to change without notice.
Manual No. I80E-EN2-01
QuickStartGuide
OMRON EUROPE B.V. Wegalaan 67-69, NL-2132 JD, Hoofddorp, The Netherlands.
Tel: +31 (0) 23 568 13 00 Fax: +31 (0) 23 568 13 88 www.industrial.omron.eu
Austria
Tel: +43 (0) 2236 377 800
www.industrial.omron.at
Belgium
Tel: +32 (0) 2 466 24 80
www.industrial.omron.be
Czech Republic
Tel: +420 234 602 602
www.industrial.omron.cz
Denmark
Tel: +45 43 44 00 11
www.industrial.omron.dk
Finland
Tel: +358 (0) 207 464 200
www.industrial.omron.fi
France
Tel: +33 (0) 1 56 63 70 00
www.industrial.omron.fr
Germany
Tel: +49 (0) 2173 680 00
www.industrial.omron.de
Hungary
Tel: +36 (0) 1 399 30 50
www.industrial.omron.hu
Italy
Tel: +39 02 32 681
www.industrial.omron.it
Middle East & Africa
Tel: +31 (0) 23 568 11 00
www.industrial.omron.eu
Netherlands
Tel: +31 (0) 23 568 11 00
www.industrial.omron.nl
Norway
Tel: +47 (0) 22 65 75 00
www.industrial.omron.no
Poland
Tel: +48 (0) 22 645 78 60
www.industrial.omron.com.pl
Portugal
Tel: +351 21 942 94 00
www.industrial.omron.pt
Russia
Tel: +7 495 648 94 50
www.industrial.omron.ru
Spain
Tel: +34 913 777 900
www.industrial.omron.es
Sweden
Tel: +46 (0) 8 632 35 00
www.industrial.omron.se
Switzerland
Tel: +41 (0) 41 748 13 13
www.industrial.omron.ch
Turkey
Tel: +90 (0) 216 474 00 40
www.industrial.omron.com.tr
United Kingdom
Tel: +44 (0) 870 752 08 61
www.industrial.omron.co.uk
J1000ManualNo.I80E-EN2-01
Manual No.
I80E-EN2-01
J1000
Compact General Purpose Inverter
Model: JZA
200 V Class Three-Phase Input 0.1 to 0.4 kW
200 V Class Single-Phase Input 0.1 to 1.5 kW
400 V Class Three-Phase Input 0.2 to 4.0 kW
Quick Start Guide
Type: JZA
Compact V/f Control AC Drive
J1000
Models: 200 V Class, Three-Phase Input: 0.1 to 4.0 kW
200 V Class, Single-Phase Input: 0.1 to 1.5 kW
400 V Class, Three-Phase Input: 0.2 to 4.0 kW
Manual No. I80E-EN
YE Ref. No TOEP C710606 28A
I80E-EN J1000 Quick Start Guide 3
ENGLISH
J1000
Quick Start Guide
ENGLISH
1 Safety Instructions and General Warnings . . . . . . . . . . 4
2 Mechanical Installation . . . . . . . . . . . . . . . . . . . . . . . . . . 9
3 Electrical Installation. . . . . . . . . . . . . . . . . . . . . . . . . . . 11
4 Keypad Operation . . . . . . . . . . . . . . . . . . . . . . . . . . . . . 16
5 Start Up. . . . . . . . . . . . . . . . . . . . . . . . . . . . . . . . . . . . . . 18
6 Parameter Table. . . . . . . . . . . . . . . . . . . . . . . . . . . . . . . 21
7 Troubleshooting . . . . . . . . . . . . . . . . . . . . . . . . . . . . . . 24
4 I80E-EN J1000 Quick Start Guide
1 Safety Instructions and General Warnings
Omron Yaskawa Motion Control B.V. (OYMC) supplies component parts for use in a wide
variety of industrial applications. The selection and application of OYMC products remain
the responsibility of the equipment designer or end user. OYMC accepts no responsibility
for the way its products are incorporated into the final system design. Under no circum-
stances should any OYMC product be incorporated into any product or design as the exclu-
sive or sole safety control. Without exception, all controls should be designed to detect faults
dynamically and fail safely under all circumstances. All products designed to incorporate a
component part manufactured by OYMC must be supplied to the end user with appropriate
warnings and instructions as to the safe use and operation of that part. Any warnings pro-
vided by OYMC must be promptly provided to the end user. OYMC offers an express war-
ranty only as to the quality of its products in conforming to standards and specifications
published in the manual. NO OTHER WARRANTY, EXPRESS OR IMPLIED, IS
OFFERED. OYMC assumes no liability for any personal injury, property damage, losses, or
claims arising from misapplication of its products.
General Warnings
The following conventions are used to indicate Safety messages in this manual:
WARNING
• Read and understand this manual before installing, operating or servicing this drive.
• All warnings, cautions, and instructions must be followed.
• All work must be performed by qualified personnel.
• The drive must be installed according to this manual and local codes.
• Heed the safety messages in this manual.
The operating company is responsible for any injuries or equipment damage resulting from
failure to heed the warnings in this manual.
DANGER
Indicates a hazardous situation, which, if not avoided, will result in death or serious injury.
WARNING
Indicates a hazardous situation, which, if not avoided, could result in death or serious injury.
CAUTION
Indicates a hazardous situation, which, if not avoided, could result in minor or moderate injury.
1 Safety Instructions and General Warnings
I80E-EN J1000 Quick Start Guide 5
ENGLISH
Safety Warnings
NOTICE
Indicates a property damage message.
WARNING
Electrical Shock Hazard
• Do not attempt to modify or alter the drive in any way not explained in this manual.
Failure to comply could result in death or serious injury.
OYMC is not responsible for any modification of the product made by the user. This product
must not be modified.
• Do not touch any terminals before the capacitors have fully discharged.
Failure to comply could result in death or serious injury.
Before wiring terminals, disconnect all power to the equipment. The internal capacitor remains
charged even after the power supply is turned off. The charge indicator LED will extinguish
when the DC bus voltage is below 50 Vdc. To prevent electric shock, wait at least one minute
after all indicators are off and measure the DC bus voltage level to confirm safe level.
• Do not allow unqualified personnel to use equipment.
Failure to comply could result in death or serious injury.
Maintenance, inspection, and replacement of parts must be performed only by authorized
personnel familiar with installation, adjustment, and maintenance of AC drives.
• Do not remove covers or touch circuit boards while the power is on.
Failure to comply could result in death or serious injury.
• Always ground the motor-side grounding terminal.
Improper equipment grounding could result in death or serious injury by contacting the motor
case.
• Do not perform work on the drive while wearing loose clothing, jewelry or without eye
protection.
Failure to comply could result in death or serious injury.
Remove all metal objects such as watches and rings, secure loose clothing, and wear eye
protection before beginning work on the drive.
• Never short the output circuits of the drive.
Do not short the output circuits of the drive. Failure to comply could result in death or serious
injury.
1 Safety Instructions and General Warnings
6 I80E-EN J1000 Quick Start Guide
Sudden Movement Hazard
• System may start unexpectedly upon application of power, resulting in death or serious
injury.
Clear all personnel from the drive, motor, and machine area before applying power. Secure
covers, couplings, shaft keys, and machine loads before applying power to the drive.
Fire Hazard
• Do not use an improper voltage source.
Failure to comply could result in death or serious injury by fire.
Verify that the rated voltage of the drive matches the voltage of the incoming power supply
before applying power.
• Do not use improper combustible materials.
Failure to comply could result in death or serious injury by fire.
Attach the drive to metal or other noncombustible material.
• Do not connect AC line power to output terminals U, V, and W.
• Make sure that the power supply lines are connected to main circuit input terminals R/
L1, S/L2, T/L3 (or R/L1 and S/L2 for single-phase power).
Do not connect the AC power line to the output motor terminals of the drive. Failure to comply
could result in death or serious injury by fire as a result of drive damage from line voltage
application to output terminals.
• Tighten all terminal screws to the specified tightening torque.
Loose electrical connections could result in death or serious injury by fire due to overheating of
electrical connections.
CAUTION
Crush Hazard
• Do not carry the drive by the front cover.
Failure to comply may result in minor or moderate injury from the main body of the drive
falling.
Burn Hazard
• Do not touch the heatsink or braking resistor hardware until a powered-down cooling
period has elapsed.
WARNING
1 Safety Instructions and General Warnings
I80E-EN J1000 Quick Start Guide 7
ENGLISH
NOTICE
Equipment Hazard
• Observe proper electrostatic discharge procedures (ESD) when handling the drive and
circuit boards.
Failure to comply may result in ESD damage to the drive circuitry.
• Never connect or disconnect the motor from the drive while the drive is outputting voltage.
Improper equipment sequencing could result in damage to the drive.
• Do not perform a withstand voltage test on any part of the drive.
Failure to comply could result in damage to the sensitive devices within the drive.
• Do not operate damaged equipment.
Failure to comply could result in further damage to the equipment.
Do not connect or operate any equipment with visible damage or missing parts.
• Install adequate branch circuit short circuit protection per applicable codes.
Failure to comply could result in damage to the drive.
The drive is suitable for circuits capable of delivering not more than 100,000 RMS symmetrical
Amperes, 240 Vac maximum (200 V Class) and 480 Vac maximum (400V Class).
• Do not use unshielded cable for control wiring.
Failure to comply may cause electrical interference resulting in poor system performance. Use
shielded twisted-pair wires and ground the shield to the ground terminal of the drive.
• Do not allow unqualified personnel to use the product.
Failure to comply could result in damage to the drive or braking circuit.
• Do not modify the drive circuitry.
Failure to comply could result in damage to the drive and will void warranty.
Yaskawa is not responsible for modification of the product made by the user. This product must
not be modified.
• Check all the wiring to ensure that all connections are correct after installing the drive and
connecting other devices.
Failure to comply could result in damage to the drive.
• Do not connect unapproved LC or RC interference suppression filters, capacitors, or
overvoltage protection devices to the output of the drive.
Using unapproved filters could result in damage to the drive or motor equipment.
1 Safety Instructions and General Warnings
8 I80E-EN J1000 Quick Start Guide
Precautions for CE Low Voltage Directive Compliance
This drive has been tested according to European standard EN61800-5-1: 2007, and it fully
complies with the Low Voltage Directive. The following conditions must be met to maintain
compliance when combining this drive with other devices:
Do not use drives in areas with pollution higher than severity 2 and overvoltage category 3
in accordance with IEC664.
Ground the neutral point of the main power supply for 400 V Class drives.
Precautions for UL/cUL Standards Compliance
This drive is tested in accordance with UL standard UL508C and complies with UL require-
ments. The following conditions must be met to maintain compliance when using this drive
in combination with other equipment:
Do not install the drive to an area greater than pollution severity 2 (UL standard).
Use UL-listed copper wires (rated at 75°C) and closed-loop connectors or CSA-certified
ring connectors. For details refer to the instruction manual.
Wire low voltage wires with NEC Class 1 circuit conductors. Refer to national state or local
codes for wiring. Use a class 2 (UL regulations) power supply for the control circuit termi-
nal. For details refer to the instruction manual.
This drive has undergone the UL short-circuit test, which certifies that during a short circuit
in the power supply the current flow will not rise above 30,000 amps maximum at 240 V for
200 V class drives and 480 V for 400 V class drives.
The drive internal motor overload protection is UL listed and in accordance with the NEC
and CEC. The setup can be done using the parameters L1-01/02. For details refer to the tech-
nical manual.
ENGLISH
2 Mechanical Installation
I80E-EN J1000 Quick Start Guide 9
2 Mechanical Installation
Upon Receipt
Please perform the following tasks after receiving the drive:
• Inspect the drive for damage. If the drive appears damaged upon receipt, contact your sup-
plier.
• Verify receipt of the correct model by checking the information on the nameplate. If you
have received the wrong model contact your supplier.
Installation Environment
For optimum performance life of the drive, install the drive in an environment that meets the
conditions listed below.
Environment Conditions
Installation Area Indoors
Ambient Temperature
-10 °C to +50 °C
When using an enclosure panel, install a cooling fan or air conditioner in the
area to ensure that the air temperature inside the enclosure does not exceed the
specified levels.
Do not allow ice to develop on the drive.
Humidity 95% RH or less and free of condensation
Storage Temperature -20 °C to +60 °C
Surrounding Area
Install the drive in an area free from:
• oil mist and dust
• metal shavings, oil, water or other foreign materials
• radioactive materials
• combustible materials (e.g., wood)
• harmful gases and liquids
• excessive vibration
• chlorides
• direct sunlight
Altitude 1000 m or less
Vibration 10 - 20 Hz at 9.8 m/s2, 20 - 55 Hz at 5.9 m/s2
Orientation Install the drive vertically to maintain maximum cooling effects.
2 Mechanical Installation
10 I80E-EN J1000 Quick Start Guide
Installation Orientation and Spacing
Always install the drive in an upright position.
Leave space around the unit for proper cooling
as shown in the figure on the right.
Note: Several units can be installed closer
together than shown in the figure by
using “Side-by-Side” mounting. For
details please refer to the instruction
manual.
Dimensions
Model
JZA
Dimensions (mm) Weight
(kg)W H D W1 H1 H2 D1 D2 d
B0P1 68 128 76 56 118 5 6.5 67.5 M4 0.6
B0P2 68 128 76 56 118 5 6.5 67.5 M4 0.6
B0P4 68 128 118 56 118 5 38.5 109.5 M4 1.0
B0P7 108 128 137.5 96 118 5 58 129 M4 1.7
B1P5 108 128 154 96 118 5 58 145.5 M4 1.8
20P1 68 128 76 56 118 5 6.5 67.5 M4 0.6
20P2 68 128 76 56 118 5 6.5 67.5 M4 0.6
20P4 68 128 108 56 118 5 38.5 99.5 M4 0.9
20P7 68 128 128 56 118 5 58.5 119.5 M4 1.1
21P5 108 128 129 96 118 5 58 120.5 M4 1.7
22P2 108 128 137.5 96 118 5 58 129 M4 1.7
24P0 140 128 143 128 118 5 65 134.5 M4 2.4
40P2 108 128 81 96 118 5 10 72.5 M4 1.0
40P4 108 128 99 96 118 5 28 90.5 M4 1.2
40P7 108 128 137.5 96 118 5 58 129 M4 1.7
41P5 108 128 154 96 118 5 58 145.5 M4 1.7
42P2 108 128 154 96 118 5 58 145.5 M4 1.7
43P0 108 128 154 96 118 5 58 145.5 M4 1.7
44P0 140 128 143 128 118 5 65 134.5 M4 2.4
30mm 30mm
100mm
100mm Air
Air
W1
D
D2
D1
d
H
W1
W
H2H1
ENGLISH
3 Electrical Installation
I80E-EN J1000 Quick Start Guide 11
3 Electrical Installation
The figure below shows the main and control circuit wiring.
R/L1
S/L2
T/L3
S1
S2
S3
S4
S5
B1+1 -+2 B2
L1
L2
L3
U/T1
V/T2
W/T3
+24 V
SINK
SOURCE
MA
MB
MC
+24 V 8 mA
M
U
V
W
SC
AM
AC
+V
A1
AC
2 kΩ
DC reactor
(option)For 1-phase
power supply use
R/L1 and S/L2
Terminals marked -,+1,+2,B1,B2 are for
connecting an option. Do not wire AC
power lines to these terminals.
Filter
Fuses
Main
Switch Forward/Stop
Reverse/Stop
External Fault
Fault Reset
Multi-speed 1
Multi-function
digital inputs
(default setting)
Link
Thermal
relay
Braking
resistor
(option)
J1000
Ground
Multi-function relay output
250 Vac / 30 Vdc (10 mA to 1A)
(default setting)Fault
DIP
switch S3
Shielded ground
terminal
Analog input power supply
+10.5 Vdc, max. 20 mA
Analog input
Monitor output
(default setting)
Analog output
0 to +10 Vdc (2mA)
(Output frequency)
Shielded
Cable
Symbols:
Use twisted pair cables
Use shielded twisted pair cables
Indicates a main circuit terminal
Indicates a control circuit terminal.
Power
Supply
DIP switch S1
Option unit
connector
I V
Analog input
0 to 10 V (20 kΩ) or
0/4 to 20 mA (250 kΩ)
3 Electrical Installation
12 I80E-EN J1000 Quick Start Guide
Wiring Specification
Main Circuit
Use the fuses and line filters listed up in the table below when wiring the main circuit. Make
sure not to exceed the given tightening torque values.
Tightening Torque Values
Tighten the main circuit terminals using the torque values provided by the table below.
Control Circuit
Use wires within the specification listed below. For safe wiring use solid wires or flexible
wires with ferrules. The stripping length or ferrule length should be 6 mm.
Model
JZA
EMC Filter Type
Main Fuse
(Ferraz)
Recom.
Motor cable
[mm²]
Main Circuit Terminal Sizes
Schaffner
R/L1,S/L2,T/L3, U/T1,
V/T2,W/T3, - , +1, +2 B1, B2 GND
B0P1
A1000-FIV1010-SE
A6T15 2.5 M3.5 M3.5 M3.5
B0P2 A6T20 2.5 M3.5 M3.5 M3.5
B0P4 A6T20 2.5 M3.5 M3.5 M3.5
B0P7
A1000-FIV1020-SE
A6T40 2.5 M4 M4 M4
B1P5 A6T40 4 M4 M4 M4
20P1
A1000-FIV2010-SE
A6T10 2.5 M3.5 M3.5 M3.5
20P2 A6T10 2.5 M3.5 M3.5 M3.5
20P4 A6T15 2.5 M3.5 M3.5 M3.5
20P7 A6T20 2.5 M3.5 M3.5 M3.5
21P5
A1000-FIV2020-SE
A6T25 2.5 M4 M4 M4
22P2 A6T30 4 M4 M4 M4
24P0 A1000-FIV2030-SE A6T40 6 M4 M4 M4
40P2
A1000-FIV3005-SE
A6T10 2.5 M4 M4 M4
40P4 A6T10 2.5 M4 M4 M4
40P7 A6T20 2.5 M4 M4 M4
41P5
A1000-FIV3010-SE
A6T25 2.5 M4 M4 M4
42P2 A6T25 2.5 M4 M4 M4
43P0 A6T25 2.5 M4 M4 M4
44P0 A1000-FIV3020-SE A6T30 2.5 M4 M4 M4
Terminal Size M3.5 M4
Tightening Torque [Nm] 0.8 to 1.0 1.2 to 1.5
Terminal Screw Size
Tightening
Torque N·m
Bare Wire Terminal Ferrule-Type Terminal
Applicable wire
size mm2
Recomm.
mm2
Applicable wire
size mm2
Recomm.
mm2
MA, MB, MC M3 0.5 to 0.6 0.25 to 1.5 0.75 0.25 to 1.0 0.5
S1-S5, SC, +V, A1,
AC, AM
M2 0.22 to 0.25 0.25 to 1.0 0.75 0.25 to 0.5 0.5
3 Electrical Installation
I80E-EN J1000 Quick Start Guide 13
ENGLISH
EMC Filter Installation
This drive has been tested in accordance with European standards EN61800-3:2004. In order
to comply to the EMC standards, wire the main circuit as described below.
1. Install an appropriate EMC noise filter to the input side.See the list above or refer to the
instruction manual for details.
2. Place the drive and EMC noise filter in the same enclosure.
3. Use braided shield cable for the drive and motor wiring.
4. Remove any paint or dirt from ground connections for minimal ground impedance.
5. Install an AC reactor at drives smaller than 1 kW for compliance with the
EN61000-3-2. Refer to the instruction manual or contact your supplier for details.
EMC Standards Compliant Wiring of Single- and Three Phase Units
Main and Control Circuit Wiring
Wiring the Main Circuit Input
Consider the following precautions for the main circuit input.
N L1
E
N
L1
PE
Wiring distance as
short as possible
Cable shield
grounding clamp
Drive
Cable clamp
Braid shielded motor
cable
EMC
Filter
Grounding Surface
(remove any paint)
Metal plate
Panel or mounting wall
M
Grounding
Surface
(remove any
paint)
Ground shield at
motor side
L3L2 L1
E
L1 PE
Wiring distance as
short as possible
Cable shield
grounding clamp
Drive
Cable clamp
Braid shielded motor
cable
EMC
Filter
Grounding Surface
(remove any paint)
Metal plate
Panel or mounting wall
M
Grounding
Surface
(remove any
paint)
Ground shield at
motor side
L3
L2
3 Electrical Installation
14 I80E-EN J1000 Quick Start Guide
• Use only circuit breakers that have been designed specifically for drives.
• If using a ground fault circuit breaker, make sure that it can detect both DC and high fre-
quency current.
• If using an input switch is used, make sure that the switch does not operate not more than
once every 30 minutes.
• Use a DC reactor or AC reactor on the input side of the drive:
• To suppress harmonic current.
• To improve the power factor on the power supply side.
• When using an advancing capacitor switch.
• With a large capacity power supply transistor (over 600 kVA).
Wiring the Main Circuit Output
Consider the following precautions for the output circuit wiring.
• Do not connect any other load than a 3 phase motor to the drives output.
• Never connect a power source to the drives output.
• Never short or ground the output terminals.
• Do not use phase correction capacitors.
• If using a contactor between the drive and motor, it should never be operated when the
drive is outputting a voltage. Operating while there is voltage output can cause large peak
currents, thus tripping the over current detection or damage the drive.
Ground Connection
Take the following precautions when grounding the drive.
• Never share the ground wire with other devices such as welding machines, etc.
• Always use a ground wire, that complies with electrical equipment technical standards.
Keep ground wires as short as possible. Leakage current is caused by the drive. Therefore,
if the distance between the ground electrode and the ground terminal is too long, potential
on the ground terminal of the drive will become unstable.
• When using more than one drive, do not to loop the ground wire.
Control Circuit Wiring Precautions
Consider the following precautions for wiring the control circuits.
• Separate control circuit wiring from main circuit wiring and other high-power lines.
• Separate wiring for control circuit terminals MA, MB, MC (contact output) from wiring
to other control circuit terminals.
• For external control power supply use a UL Listed Class 2 power supply.
• Use twisted-pair or shielded twisted-pair cables for control circuits to prevent operating
faults.
• Ground the cable shields with the maximum contact area of the shield and ground.
• Cable shields should be grounded on both cable ends.
3 Electrical Installation
I80E-EN J1000 Quick Start Guide 15
ENGLISH
Main Circuit Terminals
Control Circuit Terminals
The figure below shows the control circuit terminal arrangement.
There are two DIP switches, S1 and S3, located on the control board
Control Circuit Terminal Functions
Terminal Type Function
R/L1, S/L2, T/L3
Main circuit power sup-
ply input
Connects line power to the drive.
Drives with single-phase 200 V input power use terminals R/L1
and S/L2 only (T/L3 is not used).
U/T1, V/T2, W/T3 Drive output Connects to the motor.
B1, B2 Braking resistor For connecting a braking resistor.
+1, +2 DC reactor connection Linked at shipment. Remove the link to install a DC choke.
+1, – DC power supply input For connecting a DC power supply.
(2 terminals)
Ground Terminal
For 200 V class: Ground with 100 Ω or less
For 400 V class: Ground with 10 Ω or less
SW1 Switches analog input A1 between voltage and current input
SW3
Used to select sourcing (PNP)/sinking (NPN, default) mode for the digital inputs (PNP requires
external 24 Vdc power supply)
Type No. Terminal Name (Signal) Function (Signal Level), Default Setting
Multi-
Function
Digital
Inputs
S1
to
S5
Multi-function digital input 1 to 5
Photocoupler inputs, 24 Vdc, 8 mA
Note: Drive preset to sinking mode (NPN). When using
source mode, set DIP switch S3 to “SOURCE” and use an
external 24 Vdc (±10%) power supply.
SC Multi-function input common Sequence common
Analog
Input
A1 Analog input
0 to +10 Vdc (20 kΩ) resolution 1/1000
0/4 to 20 mA (250 Ω) resolution: 1/500
+V Analog input power supply +10.5 V (max allowable current 20 mA)
AC Frequency reference common 0 V
Multi-
Function
Relay
Output
MA N.O. (fault)
Digital relay output
30 Vdc, 10 mA to 1 A
250 Vac, 10 mA to 1 A
MB N.C. output (fault)
MC Digital output common
Monitor
Output
AM Analog monitor output 0 to 10 Vdc (2 mA or less), Resolution: 1/256 (8 bit)
AC Monitor common 0 V
S1 S2 S3 S4 S5 SC A1 +V AC AM AC
MCMBMA
Use a straght-edge screwdriver
with a blade width of max 2.5 mm
and a thickness of max 0.6 mm to
release the terminals
16 I80E-EN J1000 Quick Start Guide
4 Keypad Operation
4 Keypad Operation
LED Operator and Keys
The LED operator is used to program the drive, to start/
stop it, and to display fault information. The LEDs indi-
cate the drive status.
Keys and Functions
Display Name Function
Data Display Area Displays the frequency reference, parameter number, etc.
ESC Key Returns to the previous menu.
RESET Key
Moves the cursor to the right.
Resets a fault.
RUN Key
Starts the drive in the LOCAL mode. The Run LED
• is on, when the drive is operating the motor.
• flashes during deceleration to stop or when the frequency reference is 0.
• flashes quickly the drive is disabled by a DI, the drive was stopped using a fast
stop DI or a run command was active during power up.
Up Arrow Key Scrolls up to select parameter numbers, setting values, etc.
Down Arrow Key Scrolls down to select parameter numbers, setting values, etc.
STOP Key Stops the drive.
ENTER Key Selects modes, parameters and is used to store settings.
LO/RE Selection
Key
Switches drive control between the operator (LOCAL) and the control circuit
terminals (REMOTE). The LED is on when the drive is in the LOCAL mode
(operation from keypad).
ALM LED Light
Flashing: The drive is in an alarm state.
On: The drive is in a fault state and the output is stopped.
REV LED Light
On: The motor rotation direction is reverse.
Off: The motor rotation direction is forward.
DRV LED Light
On: The drive is ready to operate the motor.
Off: The drive is in the Verify, Setup, Parameter Setting mode.
FOUT LED Light
On: The output frequency is displayed on the data screen.
Off: Anything else than the output frequency is displayed on the data screen.
STOP
RUN
STOP
ALM
REV
DRV
FOUT
4 Keypad Operation
I80E-EN J1000 Quick Start Guide 17
ENGLISH
Menu Structure and Modes
The following illustration explains the operator keypad menu structure.
XXXX
XX
XX
XX
XX
XX
XX
XX
XX
XXXX
DRVLEDisoff.
Themotorcannotbestarted.
:
:
:
:
Key operation description
Turn the power on (DRV flashes)
Forward Selection Reverse Selection<1>
Output Frequency
Output Current
Output Voltage
Monitor Display
Verify Menu
Setup Mode
Parameter Setting Mode
DRVLEDison.
ARuncommandwillstartthemotor.
The Monitor Displays are used to
read out drive data like terminal
status, output frequency, fault
information etc.
The Verify Menu lists up all
parameters which are unequal to
the default setting.
The Setup Mode can be used to
set up a minimum list of
parameters necessary to run the
application.
In the Parameter Setting Mode all
drive parameters can be set up.
The LED is lit when
LOCAL is selected
<1> Switching to reverse:
18 I80E-EN J1000 Quick Start Guide
5 Start Up
5 Start Up
Drive Setup Procedure
The illustration below shows the basic setup procedure. Each step is explained more detailed
on the following pages.
Intstall and wire the drive as explained.
Turn the power on.
Initialize the drive if necessary using parameter A1-01.
Set/check the basic parameters:
Connect the load, run the motor and check the operation
Fine tune and set application parameters if necessary.
Final check the operation and verify the settings.
Drive is ready to run the application
START
* b1-01, b1-02 for frequency reference and RUN command source
* H1- , H2- , H3- , H4- , to configure the I/Os
* Frequency reference values
* C1- , C2- for Acceleration/Deceleration times and S-curves
* E1- , E2- V/f pattern and motor data
Run the motor without load, check the operation and verify, if the
upper controller (e.g. PLC,...) commands to the drive work as
desired.
5 Start Up
I80E-EN J1000 Quick Start Guide 19
ENGLISH
Power On
Before turning on the power supply,
• Make sure all wires are connected properly.
• Make sure no screws, loose wire ends or tools are left in the drive.
• After turning the power on, the drive mode display should appear and no fault or alarm
should be displayed.
Reference and Run Source
The drive has a LOCAL and a REMOTE mode. The LED in the LO/RE key indicates the
drive status.
If the drive is operated in the REMOTE mode, make sure that the correct sources for the fre-
quency reference and Run command are set in parameters b1-01/02 and that the drive is in
the REMOTE mode.
I/O Setup
Multi-Function Digital Inputs (S1 to S5)
The function of each digital input can be assigned in the H1- parameters. The default set-
ting functions can be seen in the connection diagram on page 11.
Multi-Function Digital Output MA-MB-MC (H2-01)
The function of the digital output can be assigned in H2-01. The default setting is “Fault”
(H2-01=E). The setting value of H2-01 consist of 3 digits, where the middle and right digit
set the function and the left digit sets the output characteristics (0: Output as selected; 1:
Inverse output).
Analog Input A1 (H3- )
Analog Input A1 can be used to set the frequency reference when parameter b1-01. Use the
H3- parameters to adjust the gain and bias for the analog input. Select the input signal
level in the parameter H3-01.
NOTICE! If the input signal level of input A1 is switched between voltage and current, make
sure that DIP switch S1 is in the correct position and parameter H3-01 is set up
correctly.
Status Description LO/RE LED
LOCAL The Run/ Stop command and the frequency reference are entered at the operator keypad. ON
REMOTE
The Run command source entered in parameter b1-02 and the frequency reference
source entered in parameter b1-02 are used.
OFF
5 Start Up
20 I80E-EN J1000 Quick Start Guide
Analog Monitor Output (H4- )
Use the H4- parameters to set up the output value of the analog monitor output and to
adjust the output voltage levels. The default monitor value setting is “Output frequency”.
Frequency Reference and Acceleration/ Deceleration Times
Frequency Reference Setup(b1-01)
Set parameter b1-01 according to the frequency reference used.
Acceleration/ Deceleration Times and S-Curves
There are two sets of acceleration and deceleration times which can be set in the C1-
parameters. The default activated accel/ decel times are C1-01/02. Adjust these times to the
appropriate values required by the application. If necessary S-curves can be activated in the
C2- parameters for softer accel/ decel start and end.
Test Run
Perform the following steps to start up the machine after all parameter settings have been
done.
1. Run the motor without load and check if all input, outputs and the sequence work as
desired.
2. Connect the load to the motor.
3. Run the motor with load and make sure that there is no vibrations, hunting or motor
stalling occurs.
After taking the steps listed above, the drive should be ready to run the application and per-
form the basic functions. For details about more advanced setup refer to the technical man-
ual.
b1-01 Reference source Frequency reference input
0 Operator keypad
Set the frequency references in the d1- parameters and used digital inputs to
switch over between different reference values.
1 Analog input Apply the frequency reference signal to terminal A1.
2
Serial Communica-
tions Option
RS232C or RS422/485 Memobus communication
3 Potentiometer Option Potentiometer Option
I80E-EN J1000 Quick Start Guide 21
6 Parameter Table
ENGLISH
6 Parameter Table
This parameter table shows the most impor-
tant parameters. Default settings are bold
type. Refer to the instruction manual for a
complete list of parameters.
Par. Name Description
Initialization Parameters
A1-01
Access
Level
Selection
Selects which parameters are
accessible via the digital operator.
0:Operation only
2:Advanced Access Level
A1-03
Initialize
Parameters
Resets all parameters to default.
(returns to 0 after initialization)
No Initialize
2220: 2-Wire Initialization
3330: 3-Wire Initialization
Operation Mode Selection
b1-01
Frequency
Reference
Selection
0:Operator - d1- values
1:Analog input A1
2:Serial Comm.option
3:Potentiometer Option
b1-02
Run
Command
Selection
0:Operator - RUN and STOP keys
1:Terminals - Digital Inputs
2:Serial Comm.option
b1-03
Stopping
Method
Selection
Selects the stopping method when
the run command is removed.
0:Ramp to Stop
1:Coast to Stop
b1-04
Reverse
Operation
Selection
0:Reverse enabled
1:Reverse prohibited
b1-14
Phase Order
Selection
Switches the output phase order.
0:Standard
1:Switch phase order
DC Injection Braking
b2-02
DC
Injection
Braking
Current
Sets the DC Injection Braking cur-
rent as a percentage of the drive
rated current.
b2-03
DC Inj.
Braking
Time/DC
Excitation
Time at
Start
Sets the time of DC Injection Brak-
ing at start in units of 0.01 seconds.
Disabled when set to 0.00 seconds.
b2-04
DC Inj.
Braking
Time at
Stop
Sets the DC Injection Braking time
at stop. Disabled when set to 0.00
seconds.
Acceleration/ Deceleration
C1-01
Accel
Time 1
Sets the acceleration time 1 from 0
to the max. output frequency.
C1-02
Decel
Time 1
Sets the deceleration time 2 from
the max. output frequency to 0.
C2-01 S-Curve 1 S-curve at acceleration start.
C2-02 S-Curve 2 S-curve at acceleration end.
C2-03 S-Curve 3 S-curve at deceleration start.
C2-04 S-Curve 4 S-curve at deceleration end.
Slip Compensation
C3-01
Slip Com-
pensation
Gain
• Increase if the speed is lower than
the frequency reference
• Decrease if the speed is higher
than the frequency reference.
C3-02
Slip Com-
pensation
Delay Time
• Decrease the setting when the slip
compensation is too slow.
• Increase the setting when the
speed is not stable.
Torque Compensation
C4-01
Torque
Compensa-
tion Gain
• Increase this setting when the
torque response is slow
• Decrease this setting when speed/
torque oscillations occur.
Duty Mode and Carrier Frequency
C6-01
Normal/
Heavy Duty
Selection
0: Heavy Duty (HD)
Constant torque applications
1:Normal Duty (ND)
Variable torque application
Par. Name Description
6 Parameter Table
22 I80E-EN J1000 Quick Start Guide
C6-02
Carrier Fre-
quency
Selection
1:2.0 kHz
2:5.0 kHz
3:8.0 kHz
4:10.0 kHz
5:12.5 kHz
6:15.0 kHz
7:Swing PWM
F: User defined
Frequency References
d1-01
to
d1-08
Frequency
Reference
1 to 8
Set the multi-speed references 1 to
8
d1-17 Jog Speed Jog speed
V/f Pattern
E1-01
Input
Voltage Set-
ting
Input Voltage
E1-04
Max. Out-
put Freq.
For a linear V/f characteristics, set
the same values for E1-07 and E1-
09. In this case, the setting for E1-
08 will be disregarded.
Ensure that the four frequencies are
set according to these rules or
OPE10 fault will occur:
E1-04 ≥ E1-06 ≥ E1-07 ≥ E1-09
E1-05
Max. Out-
put Voltage
E1-06
Base Fre-
quency
E1-07
Middle Out-
put Freq.
E1-08
Mid. Out-
put Voltage
E1-09
Min. Out-
put Freq.
E1-10
Min. Out-
put Voltage
Motor Data
E2-01
Motor
Rated
Current
Motor rated current in Ampere.
E2-02
Motor
Rated Slip
Motor rated slip in hertz (Hz).
Par. Name Description
(E1-04)(E1-06)(E1-07)(E1-09)
(E1-10)
(E1-08)
(E1-05)
Output voltage
Output frequency
E2-03
Motor
No-Load
Current
Magnetizing current in Ampere.
E2-05
Motor Line-
to-Line
Resistance
Sets the phase-to-phase motor
resistance in ohms.
Digital Input Settings
H1-01
to
H1-05
DI S1 to
S5
Function
Selection
Selects the function of terminals S1
to S5.
A list of the major functions can be found at the table end.
Digital Output Settings
H2-01
DO
MA/MB
Function
Set the function for the relay output
MA-MB-MC.
Major functions are listed at the end of the table.
Analog Input Setting
H3-01
A1 Signal
Level Sel.
0:0 to +10 V (neg. input is zeroed)
1:0 to +10 V (bipolar input)
2:4~20mA (9 bit input)
3:0~20mA
H3-03 A1 Gain
Sets the input value in % at 10 V/
20 mA analog input.
H3-04 A1 Bias
Sets the input value in % at 0 V/0
mA/4 mA analog input.
Analog Input Setting
H4-01
AM
Monitor
Selection
Enter value equal to U1-
monitor values. Example: Enter
“103” for U1-03.
H4-02 AM Gain
Sets terminal AM output voltage
equal to 100% monitor value.
H4-03 AM Bias
Sets terminal AM output voltage
equal to 0% monitor value.
Motor Overheat Protection
L1-01
Motor
Overload
Prot. Sel.
Sets the motor overload protection.
0:Disabled
1:Standard fan cooled motor
2:Standard blower cooled motor
L1-02
Motor
Overload
Prot. Time
Sets the motor overload protection
time in min. Normally no change is
necessary.
Par. Name Description
6 Parameter Table
I80E-EN J1000 Quick Start Guide 23
ENGLISH
Stall Prevention
L3-01
Stall
Prevention
Selection
during
Accelera-
tion
0:Disabled - Motor accelerates at
active acceleration rate and may
stall with too heavy load or too
short accel time.
1:General Purpose - Hold
acceleration when current is
above L3-02.
L3-02
Stall Prev.
Level dur-
ing Accel.
Sets the current level for stall pre-
vention during acceleration.
L3-04
Stall Prev.
Selection
during
Decel.
0:Disabled - Deceleration as set.
OV might occur.
1:General Purpose - Deceleration
is hold if DC bus voltage rises
high.
4:Overexciation Deceferation
L3-05
Stall Prev.
Selection
during Run
0:Disabled - Motor stall or
overload might occur.
1:Decel Time 1 - Reduce speed
using C1-02.
2:Decel Time 2
L3-06
Stall Prev.
Level dur-
ing Run
Sets the current level at which stall
prevention during run starts to
operate.
Monitor Description
U1-01 Frequency Reference (Hz)
U1-02 Output Frequency (Hz)
U1-03 Output Current (A)
U1-06 Output Voltage Reference (Vac)
U1-07 DC Bus Voltage (Vdc)
U1-10
Input Terminal Status
Par. Name Description
1: Digital input 1
(terminal S1 enabled)
1: Digital input 2
(terminal S2 enabled)
1: Digital input 3
(terminal S3 enabled)
1: Digital input 4
(terminal S4 enabled)
1: Digital input 5
(terminal S5 enabled)
: ON : OFF
Reserved
U1-11
Output Terminal Status
U1-13 Terminal A1 input level
Fault Trace
U2-01 Current Fault
U2-02 Previous Fault
DI/DO
Sel.
Description
Digital Input Function Selections
3 Multi-step speed reference 1
4 Multi-step speed reference 2
5 Multi-step speed reference 3
6
Jog frequency command (higher priority than
multi-step speed reference)
7 Accel/decel time selection 1
F Not used (Set when a terminal is not used)
14 Fault reset (Reset when turned ON)
20 to 2F
External fault; Input mode: N.O. contact /
N.C. contact, Detection mode: Normal/during
operation
Digital Output Function Selections
0
During Run (ON: run command is ON or volt-
age is being output)
1 Zero Speed
2 Speed Agree
6 Drive Ready
E Fault
F Not used
10 Minor fault (Alarm) (ON: Alarm displayed)
Monitor Description
1: Relay Output
(terminal MA-MC closed
MB-MC open)
: ON
Reserved
: OFF
24 I80E-EN J1000 Quick Start Guide
7 Troubleshooting
7 Troubleshooting
General Fault and Alarms
Faults and alarms indicate problems in the drive or in the machine.
An alarm is indicated by a code on the data display and the flashing ALM LED. The drive
output is not necessarily switched off.
A fault is indicated by a code on the data display and the ALM LED is on. The drive output
is always switched off immediately and the motor coast to stop.
To remove an alarm or reset a fault, trace the cause, remove it and reset the drive by pushing
the Reset key on the operator or cycling the power supply.
This lists up the most important alarms and faults only. Please refer to the instruction manual
for a complete list.
LED Display ALM FLT Cause
Base Block The software base block function is assigned to one of the digital inputs and the input is
off. The drive does not accept Run commands.
ControlCircuit
Fault
There is a problem in the drive’s control circuit.
Cannot Reset
Fault reset was input when a run command was active.
Option
External Fault An external fault was tripped by the upper controller via an option unit.
External Fault A forward and reverse command were input simultaneously for longer than 500 ms.
This alarm stops a running motor.
External Faults • An external fault was triggered by an external device via one of the digital inputs S1
to S5.
• The digital inputs are set up incorrectly.
Output Phase
Loss
• Output cable is disconnected or the motor winding is damaged.
• Loose wires at the drive output.
• Motor is too small (less than 5% of drive current).
Overcurrent
• Short circuit or ground fault on the drive output side
• The load is too heavy.
• The accel./decel. times are too short.
• Wrong motor data or V/f pattern settings.
• A magnetic contactor was switched at the output.
to
to
7 Troubleshooting
I80E-EN J1000 Quick Start Guide 25
ENGLISH
Heatsink
Overheat
• Surrounding temperature is too high.
• The cooling fan has stopped.
• The heatsink is dirty.
• The airflow to the heatsink is restricted.
Motor
Overload
• The motor load is too heavy.
• The motor is operated at low speed with heavy load.
• Cycle times of accel./ decel. are too short.
• Incorrect motor rated current has been set.
Drive
Overload
• The load is too heavy.
• The drive capacity is too small.
• Too much torque at low speed.
DC
Overvoltage
DC bus voltage rose too high.
• The deceleration time is too short.
• Stall prevention is disabled.
• Braking chopper/ resistor broken
• Too high input voltage.
Input Phase
Loss
• Input voltage drop or phase imbalance.
• One of the input phase is lost.
• Loose wires at the drive input.
DC
Undervoltage
The voltage in the DC bus fell below the undervoltage detection level.
• The power supply failed or one input phase has been lost.
• The power supply is too weak.
DC Charge
Circuit Fault The charge circuit for the DC bus is broken.
LED Display ALM FLT Cause
or
or
7 Troubleshooting
26 I80E-EN J1000 Quick Start Guide
Operator Programing Errors
An Operator Programming Error (OPE) occurs when an inapplicable parameter is set or an
individual parameter setting is inappropriate. This monitor will display the parameter that is
causing the OPE error.
LED Operator
Display Cause Corrective Action
oPE01 Drive capacity and value set to o2-04 do not
match.
Correct the value set to o2-04.
oPE02 Parameters were set outside the allowable setting
range.
Set parameters to the proper values.
oPE03
A contradictory setting is assigned to multi-func-
tion contact inputs H1-01 through to H1-05.
• The same function is assigned to two inputs
(this excludes “External fault” and “Not used”)
• Input functions which require the setting of
other input functions were set alone.
• Input functions that are not allowed to be used
simultaneously have been set.
• Fix any incorrect settings.
• Refer to the instruction manual for more details.
oPE05
No option unit is installed and one of the follow-
ing is true:
• b1-01=2 or 3
• b1-02=2
• Install the required option unit.
• Correct the values set to b1-01 and b1-02.
oPE10
The V/f pattern setting is incorrect.
• Check the V/f pattern settings.
• Refer to the instruction manual for more details.
ENGLISH
Revision History
The revision dates and numbers of the revised manuals are given on the bottom of the back
cover.
Date of Publication Rev. No. Section Revised Contents
November 2007 - First edition
December 2007 Wiring
Specification
Rasmi (EMC filter type) deleted
MANUAL NO. TOEP C710606 28A
Published in Japan December 2007 07-11
Date of publication
Date of original publication
1
Revision number
1

More Related Content

What's hot

Hướng dẫn sử dụng đồng hồ vạn năng Testo 760
Hướng dẫn sử dụng đồng hồ vạn năng Testo 760Hướng dẫn sử dụng đồng hồ vạn năng Testo 760
Hướng dẫn sử dụng đồng hồ vạn năng Testo 760Tenmars Việt Nam
 
I g5a manual_v2.4_ 110131
I g5a manual_v2.4_ 110131I g5a manual_v2.4_ 110131
I g5a manual_v2.4_ 110131Chan Suk
 
410 opi 21742069_en_0705
410 opi 21742069_en_0705410 opi 21742069_en_0705
410 opi 21742069_en_0705Toàn Huỳnh
 
Catalog biến tần Inovance MD290 - HPC
Catalog biến tần Inovance MD290 - HPCCatalog biến tần Inovance MD290 - HPC
Catalog biến tần Inovance MD290 - HPCCTY TNHH HẠO PHƯƠNG
 
Catalog biến tần Inovance MD500 - HPC
Catalog biến tần Inovance MD500 - HPCCatalog biến tần Inovance MD500 - HPC
Catalog biến tần Inovance MD500 - HPCCTY TNHH HẠO PHƯƠNG
 
5980 dual column floor frames system support
5980 dual column floor frames system support5980 dual column floor frames system support
5980 dual column floor frames system supportMuhammed Fuad Al-Barznji
 
Hướng dẫn sử dụng Testo 770
Hướng dẫn sử dụng Testo 770Hướng dẫn sử dụng Testo 770
Hướng dẫn sử dụng Testo 770Tenmars Việt Nam
 
Mitsubishi numerical protection relay melpro d series dienhathe.vn
Mitsubishi numerical protection relay melpro d series dienhathe.vnMitsubishi numerical protection relay melpro d series dienhathe.vn
Mitsubishi numerical protection relay melpro d series dienhathe.vnDien Ha The
 
Catalog biến tần Inovance MD200 - HPC
Catalog biến tần Inovance MD200 - HPCCatalog biến tần Inovance MD200 - HPC
Catalog biến tần Inovance MD200 - HPCCTY TNHH HẠO PHƯƠNG
 
Catalog FR-A700 Instruction manual (basic)-Beeteco.com
Catalog FR-A700 Instruction manual (basic)-Beeteco.comCatalog FR-A700 Instruction manual (basic)-Beeteco.com
Catalog FR-A700 Instruction manual (basic)-Beeteco.comBeeteco
 

What's hot (16)

Catalog biến tần Inovance MD310
Catalog biến tần Inovance MD310Catalog biến tần Inovance MD310
Catalog biến tần Inovance MD310
 
I s7 eng_101201
I s7 eng_101201I s7 eng_101201
I s7 eng_101201
 
Vfd s manual-en
Vfd s manual-enVfd s manual-en
Vfd s manual-en
 
Pb1750m
Pb1750mPb1750m
Pb1750m
 
I g5a
I g5aI g5a
I g5a
 
Hướng dẫn sử dụng đồng hồ vạn năng Testo 760
Hướng dẫn sử dụng đồng hồ vạn năng Testo 760Hướng dẫn sử dụng đồng hồ vạn năng Testo 760
Hướng dẫn sử dụng đồng hồ vạn năng Testo 760
 
I g5a manual_v2.4_ 110131
I g5a manual_v2.4_ 110131I g5a manual_v2.4_ 110131
I g5a manual_v2.4_ 110131
 
410 opi 21742069_en_0705
410 opi 21742069_en_0705410 opi 21742069_en_0705
410 opi 21742069_en_0705
 
Catalog biến tần Inovance MD290 - HPC
Catalog biến tần Inovance MD290 - HPCCatalog biến tần Inovance MD290 - HPC
Catalog biến tần Inovance MD290 - HPC
 
Catalog biến tần Inovance MD500 - HPC
Catalog biến tần Inovance MD500 - HPCCatalog biến tần Inovance MD500 - HPC
Catalog biến tần Inovance MD500 - HPC
 
756 i e5_eng_081014
756 i e5_eng_081014756 i e5_eng_081014
756 i e5_eng_081014
 
5980 dual column floor frames system support
5980 dual column floor frames system support5980 dual column floor frames system support
5980 dual column floor frames system support
 
Hướng dẫn sử dụng Testo 770
Hướng dẫn sử dụng Testo 770Hướng dẫn sử dụng Testo 770
Hướng dẫn sử dụng Testo 770
 
Mitsubishi numerical protection relay melpro d series dienhathe.vn
Mitsubishi numerical protection relay melpro d series dienhathe.vnMitsubishi numerical protection relay melpro d series dienhathe.vn
Mitsubishi numerical protection relay melpro d series dienhathe.vn
 
Catalog biến tần Inovance MD200 - HPC
Catalog biến tần Inovance MD200 - HPCCatalog biến tần Inovance MD200 - HPC
Catalog biến tần Inovance MD200 - HPC
 
Catalog FR-A700 Instruction manual (basic)-Beeteco.com
Catalog FR-A700 Instruction manual (basic)-Beeteco.comCatalog FR-A700 Instruction manual (basic)-Beeteco.com
Catalog FR-A700 Instruction manual (basic)-Beeteco.com
 

Viewers also liked

Chf100 englishmanual
Chf100 englishmanualChf100 englishmanual
Chf100 englishmanualToàn Huỳnh
 
Gulf of Mexico Hydrate Mounds
Gulf of Mexico Hydrate MoundsGulf of Mexico Hydrate Mounds
Gulf of Mexico Hydrate MoundsB.Nicole Barry
 
Tài liệu biến tần ABB ACS55
Tài liệu biến tần ABB ACS55Tài liệu biến tần ABB ACS55
Tài liệu biến tần ABB ACS55Toàn Huỳnh
 
Quick guide aqua fc 200
Quick guide aqua fc 200Quick guide aqua fc 200
Quick guide aqua fc 200Toàn Huỳnh
 
F4 s instruction manual
F4 s instruction manualF4 s instruction manual
F4 s instruction manualToàn Huỳnh
 
420 opi 24523400_en_1006
420 opi 24523400_en_1006420 opi 24523400_en_1006
420 opi 24523400_en_1006Toàn Huỳnh
 
430 opi 24479264_en_1006
430 opi 24479264_en_1006430 opi 24479264_en_1006
430 opi 24479264_en_1006Toàn Huỳnh
 
Fuji frenic-multi-inverter-instructions
Fuji frenic-multi-inverter-instructionsFuji frenic-multi-inverter-instructions
Fuji frenic-multi-inverter-instructionsToàn Huỳnh
 
Computacion en la nube
Computacion en la nubeComputacion en la nube
Computacion en la nubeatorresherrera
 
PHỤ KIỆN TỦ ĐIỆN CIKACHI-TAIWAN GIẢM 30% GIÁ LIST - CÔNG TY KỸ THUẬT SONG ĐẠT
PHỤ KIỆN TỦ ĐIỆN CIKACHI-TAIWAN GIẢM 30% GIÁ LIST - CÔNG TY KỸ THUẬT SONG ĐẠTPHỤ KIỆN TỦ ĐIỆN CIKACHI-TAIWAN GIẢM 30% GIÁ LIST - CÔNG TY KỸ THUẬT SONG ĐẠT
PHỤ KIỆN TỦ ĐIỆN CIKACHI-TAIWAN GIẢM 30% GIÁ LIST - CÔNG TY KỸ THUẬT SONG ĐẠTToàn Huỳnh
 
V1000 quick start manual
V1000 quick start manualV1000 quick start manual
V1000 quick start manualToàn Huỳnh
 
Louisiana's Barrier Berms
Louisiana's Barrier BermsLouisiana's Barrier Berms
Louisiana's Barrier BermsB.Nicole Barry
 
CPU scheduling algorithms in OS
CPU scheduling algorithms in OSCPU scheduling algorithms in OS
CPU scheduling algorithms in OSharini0810
 

Viewers also liked (18)

Vlt8000 quick guide
Vlt8000 quick guideVlt8000 quick guide
Vlt8000 quick guide
 
Slide cherry
Slide cherrySlide cherry
Slide cherry
 
História do etepam
História do etepamHistória do etepam
História do etepam
 
Chf100 englishmanual
Chf100 englishmanualChf100 englishmanual
Chf100 englishmanual
 
Gulf of Mexico Hydrate Mounds
Gulf of Mexico Hydrate MoundsGulf of Mexico Hydrate Mounds
Gulf of Mexico Hydrate Mounds
 
6000 series
6000 series6000 series
6000 series
 
Idec 05 2012
Idec 05 2012Idec 05 2012
Idec 05 2012
 
Tài liệu biến tần ABB ACS55
Tài liệu biến tần ABB ACS55Tài liệu biến tần ABB ACS55
Tài liệu biến tần ABB ACS55
 
Quick guide aqua fc 200
Quick guide aqua fc 200Quick guide aqua fc 200
Quick guide aqua fc 200
 
F4 s instruction manual
F4 s instruction manualF4 s instruction manual
F4 s instruction manual
 
420 opi 24523400_en_1006
420 opi 24523400_en_1006420 opi 24523400_en_1006
420 opi 24523400_en_1006
 
430 opi 24479264_en_1006
430 opi 24479264_en_1006430 opi 24479264_en_1006
430 opi 24479264_en_1006
 
Fuji frenic-multi-inverter-instructions
Fuji frenic-multi-inverter-instructionsFuji frenic-multi-inverter-instructions
Fuji frenic-multi-inverter-instructions
 
Computacion en la nube
Computacion en la nubeComputacion en la nube
Computacion en la nube
 
PHỤ KIỆN TỦ ĐIỆN CIKACHI-TAIWAN GIẢM 30% GIÁ LIST - CÔNG TY KỸ THUẬT SONG ĐẠT
PHỤ KIỆN TỦ ĐIỆN CIKACHI-TAIWAN GIẢM 30% GIÁ LIST - CÔNG TY KỸ THUẬT SONG ĐẠTPHỤ KIỆN TỦ ĐIỆN CIKACHI-TAIWAN GIẢM 30% GIÁ LIST - CÔNG TY KỸ THUẬT SONG ĐẠT
PHỤ KIỆN TỦ ĐIỆN CIKACHI-TAIWAN GIẢM 30% GIÁ LIST - CÔNG TY KỸ THUẬT SONG ĐẠT
 
V1000 quick start manual
V1000 quick start manualV1000 quick start manual
V1000 quick start manual
 
Louisiana's Barrier Berms
Louisiana's Barrier BermsLouisiana's Barrier Berms
Louisiana's Barrier Berms
 
CPU scheduling algorithms in OS
CPU scheduling algorithms in OSCPU scheduling algorithms in OS
CPU scheduling algorithms in OS
 

Similar to J1000 quickstartguide

Bien tan ls tai lieu huong dan su dung bien tan i g5 series 1-dienhathe.vn
Bien tan ls   tai lieu huong dan su dung  bien tan  i g5 series 1-dienhathe.vnBien tan ls   tai lieu huong dan su dung  bien tan  i g5 series 1-dienhathe.vn
Bien tan ls tai lieu huong dan su dung bien tan i g5 series 1-dienhathe.vnDien Ha The
 
Bien tan ls tai lieu huong dan su dung bien tan i g5 series 1
Bien tan ls   tai lieu huong dan su dung  bien tan  i g5 series 1Bien tan ls   tai lieu huong dan su dung  bien tan  i g5 series 1
Bien tan ls tai lieu huong dan su dung bien tan i g5 series 1Dien Ha The
 
Instructinon manual eco
Instructinon manual   ecoInstructinon manual   eco
Instructinon manual ecoToàn Huỳnh
 
Sv i c5-eng_100323
Sv i c5-eng_100323Sv i c5-eng_100323
Sv i c5-eng_100323Chan Suk
 
C option control panel operator's manual Generac
C option control panel   operator's manual   GeneracC option control panel   operator's manual   Generac
C option control panel operator's manual GeneracOtorongosabroso
 
Commander se users guide
Commander se users guideCommander se users guide
Commander se users guideToàn Huỳnh
 
Sv i e5-eng_081014
Sv i e5-eng_081014Sv i e5-eng_081014
Sv i e5-eng_081014Chan Suk
 
Bien tan ls gioi thieu bien tan i e5 series (new)-2-dienhathe.vn
Bien tan ls   gioi thieu bien tan i e5 series (new)-2-dienhathe.vnBien tan ls   gioi thieu bien tan i e5 series (new)-2-dienhathe.vn
Bien tan ls gioi thieu bien tan i e5 series (new)-2-dienhathe.vnDien Ha The
 
Bien tan ls gioi thieu bien tan i e5 series (new)-2-dienhathe.vn
Bien tan ls   gioi thieu bien tan i e5 series (new)-2-dienhathe.vnBien tan ls   gioi thieu bien tan i e5 series (new)-2-dienhathe.vn
Bien tan ls gioi thieu bien tan i e5 series (new)-2-dienhathe.vnDien Ha The
 
Bien tan ls gioi thieu bien tan i e5 series (new)-2
Bien tan ls   gioi thieu bien tan i e5 series (new)-2Bien tan ls   gioi thieu bien tan i e5 series (new)-2
Bien tan ls gioi thieu bien tan i e5 series (new)-2Dien Ha The
 
I s7 eng_101201
I s7 eng_101201I s7 eng_101201
I s7 eng_101201Chan Suk
 
Instructinon manual mini
Instructinon manual   miniInstructinon manual   mini
Instructinon manual miniToàn Huỳnh
 
Vfd m operation manual
Vfd m operation manualVfd m operation manual
Vfd m operation manualspectra-tw
 
Varispeed g7+instruc manual
Varispeed g7+instruc manualVarispeed g7+instruc manual
Varispeed g7+instruc manualToàn Huỳnh
 

Similar to J1000 quickstartguide (20)

Vg7 upac manual
Vg7 upac manualVg7 upac manual
Vg7 upac manual
 
Quick start l1000 a
Quick start l1000 aQuick start l1000 a
Quick start l1000 a
 
Bien tan ls tai lieu huong dan su dung bien tan i g5 series 1-dienhathe.vn
Bien tan ls   tai lieu huong dan su dung  bien tan  i g5 series 1-dienhathe.vnBien tan ls   tai lieu huong dan su dung  bien tan  i g5 series 1-dienhathe.vn
Bien tan ls tai lieu huong dan su dung bien tan i g5 series 1-dienhathe.vn
 
Bien tan ls tai lieu huong dan su dung bien tan i g5 series 1-dienhathe.vn
Bien tan ls   tai lieu huong dan su dung  bien tan  i g5 series 1-dienhathe.vnBien tan ls   tai lieu huong dan su dung  bien tan  i g5 series 1-dienhathe.vn
Bien tan ls tai lieu huong dan su dung bien tan i g5 series 1-dienhathe.vn
 
Bien tan ls tai lieu huong dan su dung bien tan i g5 series 1
Bien tan ls   tai lieu huong dan su dung  bien tan  i g5 series 1Bien tan ls   tai lieu huong dan su dung  bien tan  i g5 series 1
Bien tan ls tai lieu huong dan su dung bien tan i g5 series 1
 
Instructinon manual eco
Instructinon manual   ecoInstructinon manual   eco
Instructinon manual eco
 
I c5 eng_100323
I c5 eng_100323I c5 eng_100323
I c5 eng_100323
 
Sv i c5-eng_100323
Sv i c5-eng_100323Sv i c5-eng_100323
Sv i c5-eng_100323
 
Sv i h
Sv i hSv i h
Sv i h
 
C option control panel operator's manual Generac
C option control panel   operator's manual   GeneracC option control panel   operator's manual   Generac
C option control panel operator's manual Generac
 
Commander se users guide
Commander se users guideCommander se users guide
Commander se users guide
 
Sv ig5a manual
Sv ig5a manualSv ig5a manual
Sv ig5a manual
 
Sv i e5-eng_081014
Sv i e5-eng_081014Sv i e5-eng_081014
Sv i e5-eng_081014
 
Bien tan ls gioi thieu bien tan i e5 series (new)-2-dienhathe.vn
Bien tan ls   gioi thieu bien tan i e5 series (new)-2-dienhathe.vnBien tan ls   gioi thieu bien tan i e5 series (new)-2-dienhathe.vn
Bien tan ls gioi thieu bien tan i e5 series (new)-2-dienhathe.vn
 
Bien tan ls gioi thieu bien tan i e5 series (new)-2-dienhathe.vn
Bien tan ls   gioi thieu bien tan i e5 series (new)-2-dienhathe.vnBien tan ls   gioi thieu bien tan i e5 series (new)-2-dienhathe.vn
Bien tan ls gioi thieu bien tan i e5 series (new)-2-dienhathe.vn
 
Bien tan ls gioi thieu bien tan i e5 series (new)-2
Bien tan ls   gioi thieu bien tan i e5 series (new)-2Bien tan ls   gioi thieu bien tan i e5 series (new)-2
Bien tan ls gioi thieu bien tan i e5 series (new)-2
 
I s7 eng_101201
I s7 eng_101201I s7 eng_101201
I s7 eng_101201
 
Instructinon manual mini
Instructinon manual   miniInstructinon manual   mini
Instructinon manual mini
 
Vfd m operation manual
Vfd m operation manualVfd m operation manual
Vfd m operation manual
 
Varispeed g7+instruc manual
Varispeed g7+instruc manualVarispeed g7+instruc manual
Varispeed g7+instruc manual
 

More from Toàn Huỳnh

Ct2000 v english_ver 1.36
Ct2000 v english_ver 1.36Ct2000 v english_ver 1.36
Ct2000 v english_ver 1.36Toàn Huỳnh
 
Ct2000 pro plus_manual_english[1]
Ct2000 pro plus_manual_english[1]Ct2000 pro plus_manual_english[1]
Ct2000 pro plus_manual_english[1]Toàn Huỳnh
 
Ct2000 f manual_english
Ct2000 f manual_englishCt2000 f manual_english
Ct2000 f manual_englishToàn Huỳnh
 
Ct2000 ev manual_english_version 1.1
Ct2000 ev manual_english_version 1.1Ct2000 ev manual_english_version 1.1
Ct2000 ev manual_english_version 1.1Toàn Huỳnh
 
Ct2000 es manual_english_version_1[1].0
Ct2000 es manual_english_version_1[1].0Ct2000 es manual_english_version_1[1].0
Ct2000 es manual_english_version_1[1].0Toàn Huỳnh
 
En acs800 standard_fw_l
En acs800 standard_fw_lEn acs800 standard_fw_l
En acs800 standard_fw_lToàn Huỳnh
 
En acs150 um rev c_a4_screen
En acs150 um rev c_a4_screenEn acs150 um rev c_a4_screen
En acs150 um rev c_a4_screenToàn Huỳnh
 
En ach550 01_um_f_a4_lo_screenres
En ach550 01_um_f_a4_lo_screenresEn ach550 01_um_f_a4_lo_screenres
En ach550 01_um_f_a4_lo_screenresToàn Huỳnh
 
En acq810 fw manual b
En  acq810 fw manual bEn  acq810 fw manual b
En acq810 fw manual bToàn Huỳnh
 
En 600stdprg fwmanual
En 600stdprg fwmanualEn 600stdprg fwmanual
En 600stdprg fwmanualToàn Huỳnh
 
Abb acs850-04-firmware-manual
Abb acs850-04-firmware-manualAbb acs850-04-firmware-manual
Abb acs850-04-firmware-manualToàn Huỳnh
 
Abb acs310-users-guide
Abb acs310-users-guideAbb acs310-users-guide
Abb acs310-users-guideToàn Huỳnh
 
Abb acs55-users-guide
Abb acs55-users-guideAbb acs55-users-guide
Abb acs55-users-guideToàn Huỳnh
 
Sv i s5 user manual-100520
Sv i s5 user manual-100520Sv i s5 user manual-100520
Sv i s5 user manual-100520Toàn Huỳnh
 

More from Toàn Huỳnh (20)

Fr f700
Fr f700Fr f700
Fr f700
 
Ct2000 v english_ver 1.36
Ct2000 v english_ver 1.36Ct2000 v english_ver 1.36
Ct2000 v english_ver 1.36
 
Ct2000 pro plus_manual_english[1]
Ct2000 pro plus_manual_english[1]Ct2000 pro plus_manual_english[1]
Ct2000 pro plus_manual_english[1]
 
Ct2000 f manual_english
Ct2000 f manual_englishCt2000 f manual_english
Ct2000 f manual_english
 
Ct2000 ev manual_english_version 1.1
Ct2000 ev manual_english_version 1.1Ct2000 ev manual_english_version 1.1
Ct2000 ev manual_english_version 1.1
 
Ct2000 es manual_english_version_1[1].0
Ct2000 es manual_english_version_1[1].0Ct2000 es manual_english_version_1[1].0
Ct2000 es manual_english_version_1[1].0
 
En acs880 fw_man_d
En acs880 fw_man_dEn acs880 fw_man_d
En acs880 fw_man_d
 
En acs800 standard_fw_l
En acs800 standard_fw_lEn acs800 standard_fw_l
En acs800 standard_fw_l
 
En acs150 um rev c_a4_screen
En acs150 um rev c_a4_screenEn acs150 um rev c_a4_screen
En acs150 um rev c_a4_screen
 
En ach550 01_um_f_a4_lo_screenres
En ach550 01_um_f_a4_lo_screenresEn ach550 01_um_f_a4_lo_screenres
En ach550 01_um_f_a4_lo_screenres
 
En acq810 fw manual b
En  acq810 fw manual bEn  acq810 fw manual b
En acq810 fw manual b
 
En 600stdprg fwmanual
En 600stdprg fwmanualEn 600stdprg fwmanual
En 600stdprg fwmanual
 
Acs550 x1-rev e
Acs550 x1-rev eAcs550 x1-rev e
Acs550 x1-rev e
 
Acs550 02-us-04
Acs550 02-us-04Acs550 02-us-04
Acs550 02-us-04
 
Acs355
Acs355Acs355
Acs355
 
Abb acs850-04-firmware-manual
Abb acs850-04-firmware-manualAbb acs850-04-firmware-manual
Abb acs850-04-firmware-manual
 
Abb acs310-users-guide
Abb acs310-users-guideAbb acs310-users-guide
Abb acs310-users-guide
 
Abb acs55-users-guide
Abb acs55-users-guideAbb acs55-users-guide
Abb acs55-users-guide
 
Sv i s5 user manual-100520
Sv i s5 user manual-100520Sv i s5 user manual-100520
Sv i s5 user manual-100520
 
I v5 eng_110526
I v5 eng_110526I v5 eng_110526
I v5 eng_110526
 

Recently uploaded

/:Call Girls In Indirapuram Ghaziabad ➥9990211544 Independent Best Escorts In...
/:Call Girls In Indirapuram Ghaziabad ➥9990211544 Independent Best Escorts In.../:Call Girls In Indirapuram Ghaziabad ➥9990211544 Independent Best Escorts In...
/:Call Girls In Indirapuram Ghaziabad ➥9990211544 Independent Best Escorts In...lizamodels9
 
MAHA Global and IPR: Do Actions Speak Louder Than Words?
MAHA Global and IPR: Do Actions Speak Louder Than Words?MAHA Global and IPR: Do Actions Speak Louder Than Words?
MAHA Global and IPR: Do Actions Speak Louder Than Words?Olivia Kresic
 
Contemporary Economic Issues Facing the Filipino Entrepreneur (1).pptx
Contemporary Economic Issues Facing the Filipino Entrepreneur (1).pptxContemporary Economic Issues Facing the Filipino Entrepreneur (1).pptx
Contemporary Economic Issues Facing the Filipino Entrepreneur (1).pptxMarkAnthonyAurellano
 
FULL ENJOY Call girls in Paharganj Delhi | 8377087607
FULL ENJOY Call girls in Paharganj Delhi | 8377087607FULL ENJOY Call girls in Paharganj Delhi | 8377087607
FULL ENJOY Call girls in Paharganj Delhi | 8377087607dollysharma2066
 
Call Girls In Connaught Place Delhi ❤️88604**77959_Russian 100% Genuine Escor...
Call Girls In Connaught Place Delhi ❤️88604**77959_Russian 100% Genuine Escor...Call Girls In Connaught Place Delhi ❤️88604**77959_Russian 100% Genuine Escor...
Call Girls In Connaught Place Delhi ❤️88604**77959_Russian 100% Genuine Escor...lizamodels9
 
Islamabad Escorts | Call 03274100048 | Escort Service in Islamabad
Islamabad Escorts | Call 03274100048 | Escort Service in IslamabadIslamabad Escorts | Call 03274100048 | Escort Service in Islamabad
Islamabad Escorts | Call 03274100048 | Escort Service in IslamabadAyesha Khan
 
Call Girls Miyapur 7001305949 all area service COD available Any Time
Call Girls Miyapur 7001305949 all area service COD available Any TimeCall Girls Miyapur 7001305949 all area service COD available Any Time
Call Girls Miyapur 7001305949 all area service COD available Any Timedelhimodelshub1
 
Digital Transformation in the PLM domain - distrib.pdf
Digital Transformation in the PLM domain - distrib.pdfDigital Transformation in the PLM domain - distrib.pdf
Digital Transformation in the PLM domain - distrib.pdfJos Voskuil
 
Call Girls In Radisson Blu Hotel New Delhi Paschim Vihar ❤️8860477959 Escorts...
Call Girls In Radisson Blu Hotel New Delhi Paschim Vihar ❤️8860477959 Escorts...Call Girls In Radisson Blu Hotel New Delhi Paschim Vihar ❤️8860477959 Escorts...
Call Girls In Radisson Blu Hotel New Delhi Paschim Vihar ❤️8860477959 Escorts...lizamodels9
 
Lowrate Call Girls In Sector 18 Noida ❤️8860477959 Escorts 100% Genuine Servi...
Lowrate Call Girls In Sector 18 Noida ❤️8860477959 Escorts 100% Genuine Servi...Lowrate Call Girls In Sector 18 Noida ❤️8860477959 Escorts 100% Genuine Servi...
Lowrate Call Girls In Sector 18 Noida ❤️8860477959 Escorts 100% Genuine Servi...lizamodels9
 
Buy gmail accounts.pdf Buy Old Gmail Accounts
Buy gmail accounts.pdf Buy Old Gmail AccountsBuy gmail accounts.pdf Buy Old Gmail Accounts
Buy gmail accounts.pdf Buy Old Gmail AccountsBuy Verified Accounts
 
Annual General Meeting Presentation Slides
Annual General Meeting Presentation SlidesAnnual General Meeting Presentation Slides
Annual General Meeting Presentation SlidesKeppelCorporation
 
Marketplace and Quality Assurance Presentation - Vincent Chirchir
Marketplace and Quality Assurance Presentation - Vincent ChirchirMarketplace and Quality Assurance Presentation - Vincent Chirchir
Marketplace and Quality Assurance Presentation - Vincent Chirchirictsugar
 
Marketing Management Business Plan_My Sweet Creations
Marketing Management Business Plan_My Sweet CreationsMarketing Management Business Plan_My Sweet Creations
Marketing Management Business Plan_My Sweet Creationsnakalysalcedo61
 
Flow Your Strategy at Flight Levels Day 2024
Flow Your Strategy at Flight Levels Day 2024Flow Your Strategy at Flight Levels Day 2024
Flow Your Strategy at Flight Levels Day 2024Kirill Klimov
 
BEST Call Girls In Greater Noida ✨ 9773824855 ✨ Escorts Service In Delhi Ncr,
BEST Call Girls In Greater Noida ✨ 9773824855 ✨ Escorts Service In Delhi Ncr,BEST Call Girls In Greater Noida ✨ 9773824855 ✨ Escorts Service In Delhi Ncr,
BEST Call Girls In Greater Noida ✨ 9773824855 ✨ Escorts Service In Delhi Ncr,noida100girls
 
8447779800, Low rate Call girls in Shivaji Enclave Delhi NCR
8447779800, Low rate Call girls in Shivaji Enclave Delhi NCR8447779800, Low rate Call girls in Shivaji Enclave Delhi NCR
8447779800, Low rate Call girls in Shivaji Enclave Delhi NCRashishs7044
 
Kenya Coconut Production Presentation by Dr. Lalith Perera
Kenya Coconut Production Presentation by Dr. Lalith PereraKenya Coconut Production Presentation by Dr. Lalith Perera
Kenya Coconut Production Presentation by Dr. Lalith Pereraictsugar
 
BEST Call Girls In Old Faridabad ✨ 9773824855 ✨ Escorts Service In Delhi Ncr,
BEST Call Girls In Old Faridabad ✨ 9773824855 ✨ Escorts Service In Delhi Ncr,BEST Call Girls In Old Faridabad ✨ 9773824855 ✨ Escorts Service In Delhi Ncr,
BEST Call Girls In Old Faridabad ✨ 9773824855 ✨ Escorts Service In Delhi Ncr,noida100girls
 

Recently uploaded (20)

/:Call Girls In Indirapuram Ghaziabad ➥9990211544 Independent Best Escorts In...
/:Call Girls In Indirapuram Ghaziabad ➥9990211544 Independent Best Escorts In.../:Call Girls In Indirapuram Ghaziabad ➥9990211544 Independent Best Escorts In...
/:Call Girls In Indirapuram Ghaziabad ➥9990211544 Independent Best Escorts In...
 
MAHA Global and IPR: Do Actions Speak Louder Than Words?
MAHA Global and IPR: Do Actions Speak Louder Than Words?MAHA Global and IPR: Do Actions Speak Louder Than Words?
MAHA Global and IPR: Do Actions Speak Louder Than Words?
 
Contemporary Economic Issues Facing the Filipino Entrepreneur (1).pptx
Contemporary Economic Issues Facing the Filipino Entrepreneur (1).pptxContemporary Economic Issues Facing the Filipino Entrepreneur (1).pptx
Contemporary Economic Issues Facing the Filipino Entrepreneur (1).pptx
 
FULL ENJOY Call girls in Paharganj Delhi | 8377087607
FULL ENJOY Call girls in Paharganj Delhi | 8377087607FULL ENJOY Call girls in Paharganj Delhi | 8377087607
FULL ENJOY Call girls in Paharganj Delhi | 8377087607
 
Corporate Profile 47Billion Information Technology
Corporate Profile 47Billion Information TechnologyCorporate Profile 47Billion Information Technology
Corporate Profile 47Billion Information Technology
 
Call Girls In Connaught Place Delhi ❤️88604**77959_Russian 100% Genuine Escor...
Call Girls In Connaught Place Delhi ❤️88604**77959_Russian 100% Genuine Escor...Call Girls In Connaught Place Delhi ❤️88604**77959_Russian 100% Genuine Escor...
Call Girls In Connaught Place Delhi ❤️88604**77959_Russian 100% Genuine Escor...
 
Islamabad Escorts | Call 03274100048 | Escort Service in Islamabad
Islamabad Escorts | Call 03274100048 | Escort Service in IslamabadIslamabad Escorts | Call 03274100048 | Escort Service in Islamabad
Islamabad Escorts | Call 03274100048 | Escort Service in Islamabad
 
Call Girls Miyapur 7001305949 all area service COD available Any Time
Call Girls Miyapur 7001305949 all area service COD available Any TimeCall Girls Miyapur 7001305949 all area service COD available Any Time
Call Girls Miyapur 7001305949 all area service COD available Any Time
 
Digital Transformation in the PLM domain - distrib.pdf
Digital Transformation in the PLM domain - distrib.pdfDigital Transformation in the PLM domain - distrib.pdf
Digital Transformation in the PLM domain - distrib.pdf
 
Call Girls In Radisson Blu Hotel New Delhi Paschim Vihar ❤️8860477959 Escorts...
Call Girls In Radisson Blu Hotel New Delhi Paschim Vihar ❤️8860477959 Escorts...Call Girls In Radisson Blu Hotel New Delhi Paschim Vihar ❤️8860477959 Escorts...
Call Girls In Radisson Blu Hotel New Delhi Paschim Vihar ❤️8860477959 Escorts...
 
Lowrate Call Girls In Sector 18 Noida ❤️8860477959 Escorts 100% Genuine Servi...
Lowrate Call Girls In Sector 18 Noida ❤️8860477959 Escorts 100% Genuine Servi...Lowrate Call Girls In Sector 18 Noida ❤️8860477959 Escorts 100% Genuine Servi...
Lowrate Call Girls In Sector 18 Noida ❤️8860477959 Escorts 100% Genuine Servi...
 
Buy gmail accounts.pdf Buy Old Gmail Accounts
Buy gmail accounts.pdf Buy Old Gmail AccountsBuy gmail accounts.pdf Buy Old Gmail Accounts
Buy gmail accounts.pdf Buy Old Gmail Accounts
 
Annual General Meeting Presentation Slides
Annual General Meeting Presentation SlidesAnnual General Meeting Presentation Slides
Annual General Meeting Presentation Slides
 
Marketplace and Quality Assurance Presentation - Vincent Chirchir
Marketplace and Quality Assurance Presentation - Vincent ChirchirMarketplace and Quality Assurance Presentation - Vincent Chirchir
Marketplace and Quality Assurance Presentation - Vincent Chirchir
 
Marketing Management Business Plan_My Sweet Creations
Marketing Management Business Plan_My Sweet CreationsMarketing Management Business Plan_My Sweet Creations
Marketing Management Business Plan_My Sweet Creations
 
Flow Your Strategy at Flight Levels Day 2024
Flow Your Strategy at Flight Levels Day 2024Flow Your Strategy at Flight Levels Day 2024
Flow Your Strategy at Flight Levels Day 2024
 
BEST Call Girls In Greater Noida ✨ 9773824855 ✨ Escorts Service In Delhi Ncr,
BEST Call Girls In Greater Noida ✨ 9773824855 ✨ Escorts Service In Delhi Ncr,BEST Call Girls In Greater Noida ✨ 9773824855 ✨ Escorts Service In Delhi Ncr,
BEST Call Girls In Greater Noida ✨ 9773824855 ✨ Escorts Service In Delhi Ncr,
 
8447779800, Low rate Call girls in Shivaji Enclave Delhi NCR
8447779800, Low rate Call girls in Shivaji Enclave Delhi NCR8447779800, Low rate Call girls in Shivaji Enclave Delhi NCR
8447779800, Low rate Call girls in Shivaji Enclave Delhi NCR
 
Kenya Coconut Production Presentation by Dr. Lalith Perera
Kenya Coconut Production Presentation by Dr. Lalith PereraKenya Coconut Production Presentation by Dr. Lalith Perera
Kenya Coconut Production Presentation by Dr. Lalith Perera
 
BEST Call Girls In Old Faridabad ✨ 9773824855 ✨ Escorts Service In Delhi Ncr,
BEST Call Girls In Old Faridabad ✨ 9773824855 ✨ Escorts Service In Delhi Ncr,BEST Call Girls In Old Faridabad ✨ 9773824855 ✨ Escorts Service In Delhi Ncr,
BEST Call Girls In Old Faridabad ✨ 9773824855 ✨ Escorts Service In Delhi Ncr,
 

J1000 quickstartguide

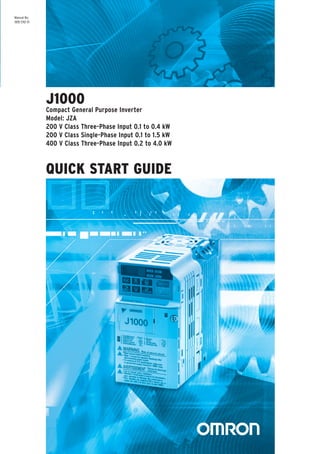
  • 1. QUICK START GUIDE Note: Specifications subject to change without notice. Manual No. I80E-EN2-01 QuickStartGuide OMRON EUROPE B.V. Wegalaan 67-69, NL-2132 JD, Hoofddorp, The Netherlands. Tel: +31 (0) 23 568 13 00 Fax: +31 (0) 23 568 13 88 www.industrial.omron.eu Austria Tel: +43 (0) 2236 377 800 www.industrial.omron.at Belgium Tel: +32 (0) 2 466 24 80 www.industrial.omron.be Czech Republic Tel: +420 234 602 602 www.industrial.omron.cz Denmark Tel: +45 43 44 00 11 www.industrial.omron.dk Finland Tel: +358 (0) 207 464 200 www.industrial.omron.fi France Tel: +33 (0) 1 56 63 70 00 www.industrial.omron.fr Germany Tel: +49 (0) 2173 680 00 www.industrial.omron.de Hungary Tel: +36 (0) 1 399 30 50 www.industrial.omron.hu Italy Tel: +39 02 32 681 www.industrial.omron.it Middle East & Africa Tel: +31 (0) 23 568 11 00 www.industrial.omron.eu Netherlands Tel: +31 (0) 23 568 11 00 www.industrial.omron.nl Norway Tel: +47 (0) 22 65 75 00 www.industrial.omron.no Poland Tel: +48 (0) 22 645 78 60 www.industrial.omron.com.pl Portugal Tel: +351 21 942 94 00 www.industrial.omron.pt Russia Tel: +7 495 648 94 50 www.industrial.omron.ru Spain Tel: +34 913 777 900 www.industrial.omron.es Sweden Tel: +46 (0) 8 632 35 00 www.industrial.omron.se Switzerland Tel: +41 (0) 41 748 13 13 www.industrial.omron.ch Turkey Tel: +90 (0) 216 474 00 40 www.industrial.omron.com.tr United Kingdom Tel: +44 (0) 870 752 08 61 www.industrial.omron.co.uk J1000ManualNo.I80E-EN2-01 Manual No. I80E-EN2-01 J1000 Compact General Purpose Inverter Model: JZA 200 V Class Three-Phase Input 0.1 to 0.4 kW 200 V Class Single-Phase Input 0.1 to 1.5 kW 400 V Class Three-Phase Input 0.2 to 4.0 kW
  • 2.
  • 3. Quick Start Guide Type: JZA Compact V/f Control AC Drive J1000 Models: 200 V Class, Three-Phase Input: 0.1 to 4.0 kW 200 V Class, Single-Phase Input: 0.1 to 1.5 kW 400 V Class, Three-Phase Input: 0.2 to 4.0 kW Manual No. I80E-EN YE Ref. No TOEP C710606 28A
  • 4. I80E-EN J1000 Quick Start Guide 3 ENGLISH J1000 Quick Start Guide ENGLISH 1 Safety Instructions and General Warnings . . . . . . . . . . 4 2 Mechanical Installation . . . . . . . . . . . . . . . . . . . . . . . . . . 9 3 Electrical Installation. . . . . . . . . . . . . . . . . . . . . . . . . . . 11 4 Keypad Operation . . . . . . . . . . . . . . . . . . . . . . . . . . . . . 16 5 Start Up. . . . . . . . . . . . . . . . . . . . . . . . . . . . . . . . . . . . . . 18 6 Parameter Table. . . . . . . . . . . . . . . . . . . . . . . . . . . . . . . 21 7 Troubleshooting . . . . . . . . . . . . . . . . . . . . . . . . . . . . . . 24
  • 5. 4 I80E-EN J1000 Quick Start Guide 1 Safety Instructions and General Warnings 1 Safety Instructions and General Warnings Omron Yaskawa Motion Control B.V. (OYMC) supplies component parts for use in a wide variety of industrial applications. The selection and application of OYMC products remain the responsibility of the equipment designer or end user. OYMC accepts no responsibility for the way its products are incorporated into the final system design. Under no circum- stances should any OYMC product be incorporated into any product or design as the exclu- sive or sole safety control. Without exception, all controls should be designed to detect faults dynamically and fail safely under all circumstances. All products designed to incorporate a component part manufactured by OYMC must be supplied to the end user with appropriate warnings and instructions as to the safe use and operation of that part. Any warnings pro- vided by OYMC must be promptly provided to the end user. OYMC offers an express war- ranty only as to the quality of its products in conforming to standards and specifications published in the manual. NO OTHER WARRANTY, EXPRESS OR IMPLIED, IS OFFERED. OYMC assumes no liability for any personal injury, property damage, losses, or claims arising from misapplication of its products. General Warnings The following conventions are used to indicate Safety messages in this manual: WARNING • Read and understand this manual before installing, operating or servicing this drive. • All warnings, cautions, and instructions must be followed. • All work must be performed by qualified personnel. • The drive must be installed according to this manual and local codes. • Heed the safety messages in this manual. The operating company is responsible for any injuries or equipment damage resulting from failure to heed the warnings in this manual. DANGER Indicates a hazardous situation, which, if not avoided, will result in death or serious injury. WARNING Indicates a hazardous situation, which, if not avoided, could result in death or serious injury. CAUTION Indicates a hazardous situation, which, if not avoided, could result in minor or moderate injury.
  • 6. 1 Safety Instructions and General Warnings I80E-EN J1000 Quick Start Guide 5 ENGLISH Safety Warnings NOTICE Indicates a property damage message. WARNING Electrical Shock Hazard • Do not attempt to modify or alter the drive in any way not explained in this manual. Failure to comply could result in death or serious injury. OYMC is not responsible for any modification of the product made by the user. This product must not be modified. • Do not touch any terminals before the capacitors have fully discharged. Failure to comply could result in death or serious injury. Before wiring terminals, disconnect all power to the equipment. The internal capacitor remains charged even after the power supply is turned off. The charge indicator LED will extinguish when the DC bus voltage is below 50 Vdc. To prevent electric shock, wait at least one minute after all indicators are off and measure the DC bus voltage level to confirm safe level. • Do not allow unqualified personnel to use equipment. Failure to comply could result in death or serious injury. Maintenance, inspection, and replacement of parts must be performed only by authorized personnel familiar with installation, adjustment, and maintenance of AC drives. • Do not remove covers or touch circuit boards while the power is on. Failure to comply could result in death or serious injury. • Always ground the motor-side grounding terminal. Improper equipment grounding could result in death or serious injury by contacting the motor case. • Do not perform work on the drive while wearing loose clothing, jewelry or without eye protection. Failure to comply could result in death or serious injury. Remove all metal objects such as watches and rings, secure loose clothing, and wear eye protection before beginning work on the drive. • Never short the output circuits of the drive. Do not short the output circuits of the drive. Failure to comply could result in death or serious injury.
  • 7. 1 Safety Instructions and General Warnings 6 I80E-EN J1000 Quick Start Guide Sudden Movement Hazard • System may start unexpectedly upon application of power, resulting in death or serious injury. Clear all personnel from the drive, motor, and machine area before applying power. Secure covers, couplings, shaft keys, and machine loads before applying power to the drive. Fire Hazard • Do not use an improper voltage source. Failure to comply could result in death or serious injury by fire. Verify that the rated voltage of the drive matches the voltage of the incoming power supply before applying power. • Do not use improper combustible materials. Failure to comply could result in death or serious injury by fire. Attach the drive to metal or other noncombustible material. • Do not connect AC line power to output terminals U, V, and W. • Make sure that the power supply lines are connected to main circuit input terminals R/ L1, S/L2, T/L3 (or R/L1 and S/L2 for single-phase power). Do not connect the AC power line to the output motor terminals of the drive. Failure to comply could result in death or serious injury by fire as a result of drive damage from line voltage application to output terminals. • Tighten all terminal screws to the specified tightening torque. Loose electrical connections could result in death or serious injury by fire due to overheating of electrical connections. CAUTION Crush Hazard • Do not carry the drive by the front cover. Failure to comply may result in minor or moderate injury from the main body of the drive falling. Burn Hazard • Do not touch the heatsink or braking resistor hardware until a powered-down cooling period has elapsed. WARNING
  • 8. 1 Safety Instructions and General Warnings I80E-EN J1000 Quick Start Guide 7 ENGLISH NOTICE Equipment Hazard • Observe proper electrostatic discharge procedures (ESD) when handling the drive and circuit boards. Failure to comply may result in ESD damage to the drive circuitry. • Never connect or disconnect the motor from the drive while the drive is outputting voltage. Improper equipment sequencing could result in damage to the drive. • Do not perform a withstand voltage test on any part of the drive. Failure to comply could result in damage to the sensitive devices within the drive. • Do not operate damaged equipment. Failure to comply could result in further damage to the equipment. Do not connect or operate any equipment with visible damage or missing parts. • Install adequate branch circuit short circuit protection per applicable codes. Failure to comply could result in damage to the drive. The drive is suitable for circuits capable of delivering not more than 100,000 RMS symmetrical Amperes, 240 Vac maximum (200 V Class) and 480 Vac maximum (400V Class). • Do not use unshielded cable for control wiring. Failure to comply may cause electrical interference resulting in poor system performance. Use shielded twisted-pair wires and ground the shield to the ground terminal of the drive. • Do not allow unqualified personnel to use the product. Failure to comply could result in damage to the drive or braking circuit. • Do not modify the drive circuitry. Failure to comply could result in damage to the drive and will void warranty. Yaskawa is not responsible for modification of the product made by the user. This product must not be modified. • Check all the wiring to ensure that all connections are correct after installing the drive and connecting other devices. Failure to comply could result in damage to the drive. • Do not connect unapproved LC or RC interference suppression filters, capacitors, or overvoltage protection devices to the output of the drive. Using unapproved filters could result in damage to the drive or motor equipment.
  • 9. 1 Safety Instructions and General Warnings 8 I80E-EN J1000 Quick Start Guide Precautions for CE Low Voltage Directive Compliance This drive has been tested according to European standard EN61800-5-1: 2007, and it fully complies with the Low Voltage Directive. The following conditions must be met to maintain compliance when combining this drive with other devices: Do not use drives in areas with pollution higher than severity 2 and overvoltage category 3 in accordance with IEC664. Ground the neutral point of the main power supply for 400 V Class drives. Precautions for UL/cUL Standards Compliance This drive is tested in accordance with UL standard UL508C and complies with UL require- ments. The following conditions must be met to maintain compliance when using this drive in combination with other equipment: Do not install the drive to an area greater than pollution severity 2 (UL standard). Use UL-listed copper wires (rated at 75°C) and closed-loop connectors or CSA-certified ring connectors. For details refer to the instruction manual. Wire low voltage wires with NEC Class 1 circuit conductors. Refer to national state or local codes for wiring. Use a class 2 (UL regulations) power supply for the control circuit termi- nal. For details refer to the instruction manual. This drive has undergone the UL short-circuit test, which certifies that during a short circuit in the power supply the current flow will not rise above 30,000 amps maximum at 240 V for 200 V class drives and 480 V for 400 V class drives. The drive internal motor overload protection is UL listed and in accordance with the NEC and CEC. The setup can be done using the parameters L1-01/02. For details refer to the tech- nical manual.
  • 10. ENGLISH 2 Mechanical Installation I80E-EN J1000 Quick Start Guide 9 2 Mechanical Installation Upon Receipt Please perform the following tasks after receiving the drive: • Inspect the drive for damage. If the drive appears damaged upon receipt, contact your sup- plier. • Verify receipt of the correct model by checking the information on the nameplate. If you have received the wrong model contact your supplier. Installation Environment For optimum performance life of the drive, install the drive in an environment that meets the conditions listed below. Environment Conditions Installation Area Indoors Ambient Temperature -10 °C to +50 °C When using an enclosure panel, install a cooling fan or air conditioner in the area to ensure that the air temperature inside the enclosure does not exceed the specified levels. Do not allow ice to develop on the drive. Humidity 95% RH or less and free of condensation Storage Temperature -20 °C to +60 °C Surrounding Area Install the drive in an area free from: • oil mist and dust • metal shavings, oil, water or other foreign materials • radioactive materials • combustible materials (e.g., wood) • harmful gases and liquids • excessive vibration • chlorides • direct sunlight Altitude 1000 m or less Vibration 10 - 20 Hz at 9.8 m/s2, 20 - 55 Hz at 5.9 m/s2 Orientation Install the drive vertically to maintain maximum cooling effects.
  • 11. 2 Mechanical Installation 10 I80E-EN J1000 Quick Start Guide Installation Orientation and Spacing Always install the drive in an upright position. Leave space around the unit for proper cooling as shown in the figure on the right. Note: Several units can be installed closer together than shown in the figure by using “Side-by-Side” mounting. For details please refer to the instruction manual. Dimensions Model JZA Dimensions (mm) Weight (kg)W H D W1 H1 H2 D1 D2 d B0P1 68 128 76 56 118 5 6.5 67.5 M4 0.6 B0P2 68 128 76 56 118 5 6.5 67.5 M4 0.6 B0P4 68 128 118 56 118 5 38.5 109.5 M4 1.0 B0P7 108 128 137.5 96 118 5 58 129 M4 1.7 B1P5 108 128 154 96 118 5 58 145.5 M4 1.8 20P1 68 128 76 56 118 5 6.5 67.5 M4 0.6 20P2 68 128 76 56 118 5 6.5 67.5 M4 0.6 20P4 68 128 108 56 118 5 38.5 99.5 M4 0.9 20P7 68 128 128 56 118 5 58.5 119.5 M4 1.1 21P5 108 128 129 96 118 5 58 120.5 M4 1.7 22P2 108 128 137.5 96 118 5 58 129 M4 1.7 24P0 140 128 143 128 118 5 65 134.5 M4 2.4 40P2 108 128 81 96 118 5 10 72.5 M4 1.0 40P4 108 128 99 96 118 5 28 90.5 M4 1.2 40P7 108 128 137.5 96 118 5 58 129 M4 1.7 41P5 108 128 154 96 118 5 58 145.5 M4 1.7 42P2 108 128 154 96 118 5 58 145.5 M4 1.7 43P0 108 128 154 96 118 5 58 145.5 M4 1.7 44P0 140 128 143 128 118 5 65 134.5 M4 2.4 30mm 30mm 100mm 100mm Air Air W1 D D2 D1 d H W1 W H2H1
  • 12. ENGLISH 3 Electrical Installation I80E-EN J1000 Quick Start Guide 11 3 Electrical Installation The figure below shows the main and control circuit wiring. R/L1 S/L2 T/L3 S1 S2 S3 S4 S5 B1+1 -+2 B2 L1 L2 L3 U/T1 V/T2 W/T3 +24 V SINK SOURCE MA MB MC +24 V 8 mA M U V W SC AM AC +V A1 AC 2 kΩ DC reactor (option)For 1-phase power supply use R/L1 and S/L2 Terminals marked -,+1,+2,B1,B2 are for connecting an option. Do not wire AC power lines to these terminals. Filter Fuses Main Switch Forward/Stop Reverse/Stop External Fault Fault Reset Multi-speed 1 Multi-function digital inputs (default setting) Link Thermal relay Braking resistor (option) J1000 Ground Multi-function relay output 250 Vac / 30 Vdc (10 mA to 1A) (default setting)Fault DIP switch S3 Shielded ground terminal Analog input power supply +10.5 Vdc, max. 20 mA Analog input Monitor output (default setting) Analog output 0 to +10 Vdc (2mA) (Output frequency) Shielded Cable Symbols: Use twisted pair cables Use shielded twisted pair cables Indicates a main circuit terminal Indicates a control circuit terminal. Power Supply DIP switch S1 Option unit connector I V Analog input 0 to 10 V (20 kΩ) or 0/4 to 20 mA (250 kΩ)
  • 13. 3 Electrical Installation 12 I80E-EN J1000 Quick Start Guide Wiring Specification Main Circuit Use the fuses and line filters listed up in the table below when wiring the main circuit. Make sure not to exceed the given tightening torque values. Tightening Torque Values Tighten the main circuit terminals using the torque values provided by the table below. Control Circuit Use wires within the specification listed below. For safe wiring use solid wires or flexible wires with ferrules. The stripping length or ferrule length should be 6 mm. Model JZA EMC Filter Type Main Fuse (Ferraz) Recom. Motor cable [mm²] Main Circuit Terminal Sizes Schaffner R/L1,S/L2,T/L3, U/T1, V/T2,W/T3, - , +1, +2 B1, B2 GND B0P1 A1000-FIV1010-SE A6T15 2.5 M3.5 M3.5 M3.5 B0P2 A6T20 2.5 M3.5 M3.5 M3.5 B0P4 A6T20 2.5 M3.5 M3.5 M3.5 B0P7 A1000-FIV1020-SE A6T40 2.5 M4 M4 M4 B1P5 A6T40 4 M4 M4 M4 20P1 A1000-FIV2010-SE A6T10 2.5 M3.5 M3.5 M3.5 20P2 A6T10 2.5 M3.5 M3.5 M3.5 20P4 A6T15 2.5 M3.5 M3.5 M3.5 20P7 A6T20 2.5 M3.5 M3.5 M3.5 21P5 A1000-FIV2020-SE A6T25 2.5 M4 M4 M4 22P2 A6T30 4 M4 M4 M4 24P0 A1000-FIV2030-SE A6T40 6 M4 M4 M4 40P2 A1000-FIV3005-SE A6T10 2.5 M4 M4 M4 40P4 A6T10 2.5 M4 M4 M4 40P7 A6T20 2.5 M4 M4 M4 41P5 A1000-FIV3010-SE A6T25 2.5 M4 M4 M4 42P2 A6T25 2.5 M4 M4 M4 43P0 A6T25 2.5 M4 M4 M4 44P0 A1000-FIV3020-SE A6T30 2.5 M4 M4 M4 Terminal Size M3.5 M4 Tightening Torque [Nm] 0.8 to 1.0 1.2 to 1.5 Terminal Screw Size Tightening Torque N·m Bare Wire Terminal Ferrule-Type Terminal Applicable wire size mm2 Recomm. mm2 Applicable wire size mm2 Recomm. mm2 MA, MB, MC M3 0.5 to 0.6 0.25 to 1.5 0.75 0.25 to 1.0 0.5 S1-S5, SC, +V, A1, AC, AM M2 0.22 to 0.25 0.25 to 1.0 0.75 0.25 to 0.5 0.5
  • 14. 3 Electrical Installation I80E-EN J1000 Quick Start Guide 13 ENGLISH EMC Filter Installation This drive has been tested in accordance with European standards EN61800-3:2004. In order to comply to the EMC standards, wire the main circuit as described below. 1. Install an appropriate EMC noise filter to the input side.See the list above or refer to the instruction manual for details. 2. Place the drive and EMC noise filter in the same enclosure. 3. Use braided shield cable for the drive and motor wiring. 4. Remove any paint or dirt from ground connections for minimal ground impedance. 5. Install an AC reactor at drives smaller than 1 kW for compliance with the EN61000-3-2. Refer to the instruction manual or contact your supplier for details. EMC Standards Compliant Wiring of Single- and Three Phase Units Main and Control Circuit Wiring Wiring the Main Circuit Input Consider the following precautions for the main circuit input. N L1 E N L1 PE Wiring distance as short as possible Cable shield grounding clamp Drive Cable clamp Braid shielded motor cable EMC Filter Grounding Surface (remove any paint) Metal plate Panel or mounting wall M Grounding Surface (remove any paint) Ground shield at motor side L3L2 L1 E L1 PE Wiring distance as short as possible Cable shield grounding clamp Drive Cable clamp Braid shielded motor cable EMC Filter Grounding Surface (remove any paint) Metal plate Panel or mounting wall M Grounding Surface (remove any paint) Ground shield at motor side L3 L2
  • 15. 3 Electrical Installation 14 I80E-EN J1000 Quick Start Guide • Use only circuit breakers that have been designed specifically for drives. • If using a ground fault circuit breaker, make sure that it can detect both DC and high fre- quency current. • If using an input switch is used, make sure that the switch does not operate not more than once every 30 minutes. • Use a DC reactor or AC reactor on the input side of the drive: • To suppress harmonic current. • To improve the power factor on the power supply side. • When using an advancing capacitor switch. • With a large capacity power supply transistor (over 600 kVA). Wiring the Main Circuit Output Consider the following precautions for the output circuit wiring. • Do not connect any other load than a 3 phase motor to the drives output. • Never connect a power source to the drives output. • Never short or ground the output terminals. • Do not use phase correction capacitors. • If using a contactor between the drive and motor, it should never be operated when the drive is outputting a voltage. Operating while there is voltage output can cause large peak currents, thus tripping the over current detection or damage the drive. Ground Connection Take the following precautions when grounding the drive. • Never share the ground wire with other devices such as welding machines, etc. • Always use a ground wire, that complies with electrical equipment technical standards. Keep ground wires as short as possible. Leakage current is caused by the drive. Therefore, if the distance between the ground electrode and the ground terminal is too long, potential on the ground terminal of the drive will become unstable. • When using more than one drive, do not to loop the ground wire. Control Circuit Wiring Precautions Consider the following precautions for wiring the control circuits. • Separate control circuit wiring from main circuit wiring and other high-power lines. • Separate wiring for control circuit terminals MA, MB, MC (contact output) from wiring to other control circuit terminals. • For external control power supply use a UL Listed Class 2 power supply. • Use twisted-pair or shielded twisted-pair cables for control circuits to prevent operating faults. • Ground the cable shields with the maximum contact area of the shield and ground. • Cable shields should be grounded on both cable ends.
  • 16. 3 Electrical Installation I80E-EN J1000 Quick Start Guide 15 ENGLISH Main Circuit Terminals Control Circuit Terminals The figure below shows the control circuit terminal arrangement. There are two DIP switches, S1 and S3, located on the control board Control Circuit Terminal Functions Terminal Type Function R/L1, S/L2, T/L3 Main circuit power sup- ply input Connects line power to the drive. Drives with single-phase 200 V input power use terminals R/L1 and S/L2 only (T/L3 is not used). U/T1, V/T2, W/T3 Drive output Connects to the motor. B1, B2 Braking resistor For connecting a braking resistor. +1, +2 DC reactor connection Linked at shipment. Remove the link to install a DC choke. +1, – DC power supply input For connecting a DC power supply. (2 terminals) Ground Terminal For 200 V class: Ground with 100 Ω or less For 400 V class: Ground with 10 Ω or less SW1 Switches analog input A1 between voltage and current input SW3 Used to select sourcing (PNP)/sinking (NPN, default) mode for the digital inputs (PNP requires external 24 Vdc power supply) Type No. Terminal Name (Signal) Function (Signal Level), Default Setting Multi- Function Digital Inputs S1 to S5 Multi-function digital input 1 to 5 Photocoupler inputs, 24 Vdc, 8 mA Note: Drive preset to sinking mode (NPN). When using source mode, set DIP switch S3 to “SOURCE” and use an external 24 Vdc (±10%) power supply. SC Multi-function input common Sequence common Analog Input A1 Analog input 0 to +10 Vdc (20 kΩ) resolution 1/1000 0/4 to 20 mA (250 Ω) resolution: 1/500 +V Analog input power supply +10.5 V (max allowable current 20 mA) AC Frequency reference common 0 V Multi- Function Relay Output MA N.O. (fault) Digital relay output 30 Vdc, 10 mA to 1 A 250 Vac, 10 mA to 1 A MB N.C. output (fault) MC Digital output common Monitor Output AM Analog monitor output 0 to 10 Vdc (2 mA or less), Resolution: 1/256 (8 bit) AC Monitor common 0 V S1 S2 S3 S4 S5 SC A1 +V AC AM AC MCMBMA Use a straght-edge screwdriver with a blade width of max 2.5 mm and a thickness of max 0.6 mm to release the terminals
  • 17. 16 I80E-EN J1000 Quick Start Guide 4 Keypad Operation 4 Keypad Operation LED Operator and Keys The LED operator is used to program the drive, to start/ stop it, and to display fault information. The LEDs indi- cate the drive status. Keys and Functions Display Name Function Data Display Area Displays the frequency reference, parameter number, etc. ESC Key Returns to the previous menu. RESET Key Moves the cursor to the right. Resets a fault. RUN Key Starts the drive in the LOCAL mode. The Run LED • is on, when the drive is operating the motor. • flashes during deceleration to stop or when the frequency reference is 0. • flashes quickly the drive is disabled by a DI, the drive was stopped using a fast stop DI or a run command was active during power up. Up Arrow Key Scrolls up to select parameter numbers, setting values, etc. Down Arrow Key Scrolls down to select parameter numbers, setting values, etc. STOP Key Stops the drive. ENTER Key Selects modes, parameters and is used to store settings. LO/RE Selection Key Switches drive control between the operator (LOCAL) and the control circuit terminals (REMOTE). The LED is on when the drive is in the LOCAL mode (operation from keypad). ALM LED Light Flashing: The drive is in an alarm state. On: The drive is in a fault state and the output is stopped. REV LED Light On: The motor rotation direction is reverse. Off: The motor rotation direction is forward. DRV LED Light On: The drive is ready to operate the motor. Off: The drive is in the Verify, Setup, Parameter Setting mode. FOUT LED Light On: The output frequency is displayed on the data screen. Off: Anything else than the output frequency is displayed on the data screen. STOP RUN STOP ALM REV DRV FOUT
  • 18. 4 Keypad Operation I80E-EN J1000 Quick Start Guide 17 ENGLISH Menu Structure and Modes The following illustration explains the operator keypad menu structure. XXXX XX XX XX XX XX XX XX XX XXXX DRVLEDisoff. Themotorcannotbestarted. : : : : Key operation description Turn the power on (DRV flashes) Forward Selection Reverse Selection<1> Output Frequency Output Current Output Voltage Monitor Display Verify Menu Setup Mode Parameter Setting Mode DRVLEDison. ARuncommandwillstartthemotor. The Monitor Displays are used to read out drive data like terminal status, output frequency, fault information etc. The Verify Menu lists up all parameters which are unequal to the default setting. The Setup Mode can be used to set up a minimum list of parameters necessary to run the application. In the Parameter Setting Mode all drive parameters can be set up. The LED is lit when LOCAL is selected <1> Switching to reverse:
  • 19. 18 I80E-EN J1000 Quick Start Guide 5 Start Up 5 Start Up Drive Setup Procedure The illustration below shows the basic setup procedure. Each step is explained more detailed on the following pages. Intstall and wire the drive as explained. Turn the power on. Initialize the drive if necessary using parameter A1-01. Set/check the basic parameters: Connect the load, run the motor and check the operation Fine tune and set application parameters if necessary. Final check the operation and verify the settings. Drive is ready to run the application START * b1-01, b1-02 for frequency reference and RUN command source * H1- , H2- , H3- , H4- , to configure the I/Os * Frequency reference values * C1- , C2- for Acceleration/Deceleration times and S-curves * E1- , E2- V/f pattern and motor data Run the motor without load, check the operation and verify, if the upper controller (e.g. PLC,...) commands to the drive work as desired.
  • 20. 5 Start Up I80E-EN J1000 Quick Start Guide 19 ENGLISH Power On Before turning on the power supply, • Make sure all wires are connected properly. • Make sure no screws, loose wire ends or tools are left in the drive. • After turning the power on, the drive mode display should appear and no fault or alarm should be displayed. Reference and Run Source The drive has a LOCAL and a REMOTE mode. The LED in the LO/RE key indicates the drive status. If the drive is operated in the REMOTE mode, make sure that the correct sources for the fre- quency reference and Run command are set in parameters b1-01/02 and that the drive is in the REMOTE mode. I/O Setup Multi-Function Digital Inputs (S1 to S5) The function of each digital input can be assigned in the H1- parameters. The default set- ting functions can be seen in the connection diagram on page 11. Multi-Function Digital Output MA-MB-MC (H2-01) The function of the digital output can be assigned in H2-01. The default setting is “Fault” (H2-01=E). The setting value of H2-01 consist of 3 digits, where the middle and right digit set the function and the left digit sets the output characteristics (0: Output as selected; 1: Inverse output). Analog Input A1 (H3- ) Analog Input A1 can be used to set the frequency reference when parameter b1-01. Use the H3- parameters to adjust the gain and bias for the analog input. Select the input signal level in the parameter H3-01. NOTICE! If the input signal level of input A1 is switched between voltage and current, make sure that DIP switch S1 is in the correct position and parameter H3-01 is set up correctly. Status Description LO/RE LED LOCAL The Run/ Stop command and the frequency reference are entered at the operator keypad. ON REMOTE The Run command source entered in parameter b1-02 and the frequency reference source entered in parameter b1-02 are used. OFF
  • 21. 5 Start Up 20 I80E-EN J1000 Quick Start Guide Analog Monitor Output (H4- ) Use the H4- parameters to set up the output value of the analog monitor output and to adjust the output voltage levels. The default monitor value setting is “Output frequency”. Frequency Reference and Acceleration/ Deceleration Times Frequency Reference Setup(b1-01) Set parameter b1-01 according to the frequency reference used. Acceleration/ Deceleration Times and S-Curves There are two sets of acceleration and deceleration times which can be set in the C1- parameters. The default activated accel/ decel times are C1-01/02. Adjust these times to the appropriate values required by the application. If necessary S-curves can be activated in the C2- parameters for softer accel/ decel start and end. Test Run Perform the following steps to start up the machine after all parameter settings have been done. 1. Run the motor without load and check if all input, outputs and the sequence work as desired. 2. Connect the load to the motor. 3. Run the motor with load and make sure that there is no vibrations, hunting or motor stalling occurs. After taking the steps listed above, the drive should be ready to run the application and per- form the basic functions. For details about more advanced setup refer to the technical man- ual. b1-01 Reference source Frequency reference input 0 Operator keypad Set the frequency references in the d1- parameters and used digital inputs to switch over between different reference values. 1 Analog input Apply the frequency reference signal to terminal A1. 2 Serial Communica- tions Option RS232C or RS422/485 Memobus communication 3 Potentiometer Option Potentiometer Option
  • 22. I80E-EN J1000 Quick Start Guide 21 6 Parameter Table ENGLISH 6 Parameter Table This parameter table shows the most impor- tant parameters. Default settings are bold type. Refer to the instruction manual for a complete list of parameters. Par. Name Description Initialization Parameters A1-01 Access Level Selection Selects which parameters are accessible via the digital operator. 0:Operation only 2:Advanced Access Level A1-03 Initialize Parameters Resets all parameters to default. (returns to 0 after initialization) No Initialize 2220: 2-Wire Initialization 3330: 3-Wire Initialization Operation Mode Selection b1-01 Frequency Reference Selection 0:Operator - d1- values 1:Analog input A1 2:Serial Comm.option 3:Potentiometer Option b1-02 Run Command Selection 0:Operator - RUN and STOP keys 1:Terminals - Digital Inputs 2:Serial Comm.option b1-03 Stopping Method Selection Selects the stopping method when the run command is removed. 0:Ramp to Stop 1:Coast to Stop b1-04 Reverse Operation Selection 0:Reverse enabled 1:Reverse prohibited b1-14 Phase Order Selection Switches the output phase order. 0:Standard 1:Switch phase order DC Injection Braking b2-02 DC Injection Braking Current Sets the DC Injection Braking cur- rent as a percentage of the drive rated current. b2-03 DC Inj. Braking Time/DC Excitation Time at Start Sets the time of DC Injection Brak- ing at start in units of 0.01 seconds. Disabled when set to 0.00 seconds. b2-04 DC Inj. Braking Time at Stop Sets the DC Injection Braking time at stop. Disabled when set to 0.00 seconds. Acceleration/ Deceleration C1-01 Accel Time 1 Sets the acceleration time 1 from 0 to the max. output frequency. C1-02 Decel Time 1 Sets the deceleration time 2 from the max. output frequency to 0. C2-01 S-Curve 1 S-curve at acceleration start. C2-02 S-Curve 2 S-curve at acceleration end. C2-03 S-Curve 3 S-curve at deceleration start. C2-04 S-Curve 4 S-curve at deceleration end. Slip Compensation C3-01 Slip Com- pensation Gain • Increase if the speed is lower than the frequency reference • Decrease if the speed is higher than the frequency reference. C3-02 Slip Com- pensation Delay Time • Decrease the setting when the slip compensation is too slow. • Increase the setting when the speed is not stable. Torque Compensation C4-01 Torque Compensa- tion Gain • Increase this setting when the torque response is slow • Decrease this setting when speed/ torque oscillations occur. Duty Mode and Carrier Frequency C6-01 Normal/ Heavy Duty Selection 0: Heavy Duty (HD) Constant torque applications 1:Normal Duty (ND) Variable torque application Par. Name Description
  • 23. 6 Parameter Table 22 I80E-EN J1000 Quick Start Guide C6-02 Carrier Fre- quency Selection 1:2.0 kHz 2:5.0 kHz 3:8.0 kHz 4:10.0 kHz 5:12.5 kHz 6:15.0 kHz 7:Swing PWM F: User defined Frequency References d1-01 to d1-08 Frequency Reference 1 to 8 Set the multi-speed references 1 to 8 d1-17 Jog Speed Jog speed V/f Pattern E1-01 Input Voltage Set- ting Input Voltage E1-04 Max. Out- put Freq. For a linear V/f characteristics, set the same values for E1-07 and E1- 09. In this case, the setting for E1- 08 will be disregarded. Ensure that the four frequencies are set according to these rules or OPE10 fault will occur: E1-04 ≥ E1-06 ≥ E1-07 ≥ E1-09 E1-05 Max. Out- put Voltage E1-06 Base Fre- quency E1-07 Middle Out- put Freq. E1-08 Mid. Out- put Voltage E1-09 Min. Out- put Freq. E1-10 Min. Out- put Voltage Motor Data E2-01 Motor Rated Current Motor rated current in Ampere. E2-02 Motor Rated Slip Motor rated slip in hertz (Hz). Par. Name Description (E1-04)(E1-06)(E1-07)(E1-09) (E1-10) (E1-08) (E1-05) Output voltage Output frequency E2-03 Motor No-Load Current Magnetizing current in Ampere. E2-05 Motor Line- to-Line Resistance Sets the phase-to-phase motor resistance in ohms. Digital Input Settings H1-01 to H1-05 DI S1 to S5 Function Selection Selects the function of terminals S1 to S5. A list of the major functions can be found at the table end. Digital Output Settings H2-01 DO MA/MB Function Set the function for the relay output MA-MB-MC. Major functions are listed at the end of the table. Analog Input Setting H3-01 A1 Signal Level Sel. 0:0 to +10 V (neg. input is zeroed) 1:0 to +10 V (bipolar input) 2:4~20mA (9 bit input) 3:0~20mA H3-03 A1 Gain Sets the input value in % at 10 V/ 20 mA analog input. H3-04 A1 Bias Sets the input value in % at 0 V/0 mA/4 mA analog input. Analog Input Setting H4-01 AM Monitor Selection Enter value equal to U1- monitor values. Example: Enter “103” for U1-03. H4-02 AM Gain Sets terminal AM output voltage equal to 100% monitor value. H4-03 AM Bias Sets terminal AM output voltage equal to 0% monitor value. Motor Overheat Protection L1-01 Motor Overload Prot. Sel. Sets the motor overload protection. 0:Disabled 1:Standard fan cooled motor 2:Standard blower cooled motor L1-02 Motor Overload Prot. Time Sets the motor overload protection time in min. Normally no change is necessary. Par. Name Description
  • 24. 6 Parameter Table I80E-EN J1000 Quick Start Guide 23 ENGLISH Stall Prevention L3-01 Stall Prevention Selection during Accelera- tion 0:Disabled - Motor accelerates at active acceleration rate and may stall with too heavy load or too short accel time. 1:General Purpose - Hold acceleration when current is above L3-02. L3-02 Stall Prev. Level dur- ing Accel. Sets the current level for stall pre- vention during acceleration. L3-04 Stall Prev. Selection during Decel. 0:Disabled - Deceleration as set. OV might occur. 1:General Purpose - Deceleration is hold if DC bus voltage rises high. 4:Overexciation Deceferation L3-05 Stall Prev. Selection during Run 0:Disabled - Motor stall or overload might occur. 1:Decel Time 1 - Reduce speed using C1-02. 2:Decel Time 2 L3-06 Stall Prev. Level dur- ing Run Sets the current level at which stall prevention during run starts to operate. Monitor Description U1-01 Frequency Reference (Hz) U1-02 Output Frequency (Hz) U1-03 Output Current (A) U1-06 Output Voltage Reference (Vac) U1-07 DC Bus Voltage (Vdc) U1-10 Input Terminal Status Par. Name Description 1: Digital input 1 (terminal S1 enabled) 1: Digital input 2 (terminal S2 enabled) 1: Digital input 3 (terminal S3 enabled) 1: Digital input 4 (terminal S4 enabled) 1: Digital input 5 (terminal S5 enabled) : ON : OFF Reserved U1-11 Output Terminal Status U1-13 Terminal A1 input level Fault Trace U2-01 Current Fault U2-02 Previous Fault DI/DO Sel. Description Digital Input Function Selections 3 Multi-step speed reference 1 4 Multi-step speed reference 2 5 Multi-step speed reference 3 6 Jog frequency command (higher priority than multi-step speed reference) 7 Accel/decel time selection 1 F Not used (Set when a terminal is not used) 14 Fault reset (Reset when turned ON) 20 to 2F External fault; Input mode: N.O. contact / N.C. contact, Detection mode: Normal/during operation Digital Output Function Selections 0 During Run (ON: run command is ON or volt- age is being output) 1 Zero Speed 2 Speed Agree 6 Drive Ready E Fault F Not used 10 Minor fault (Alarm) (ON: Alarm displayed) Monitor Description 1: Relay Output (terminal MA-MC closed MB-MC open) : ON Reserved : OFF
  • 25. 24 I80E-EN J1000 Quick Start Guide 7 Troubleshooting 7 Troubleshooting General Fault and Alarms Faults and alarms indicate problems in the drive or in the machine. An alarm is indicated by a code on the data display and the flashing ALM LED. The drive output is not necessarily switched off. A fault is indicated by a code on the data display and the ALM LED is on. The drive output is always switched off immediately and the motor coast to stop. To remove an alarm or reset a fault, trace the cause, remove it and reset the drive by pushing the Reset key on the operator or cycling the power supply. This lists up the most important alarms and faults only. Please refer to the instruction manual for a complete list. LED Display ALM FLT Cause Base Block The software base block function is assigned to one of the digital inputs and the input is off. The drive does not accept Run commands. ControlCircuit Fault There is a problem in the drive’s control circuit. Cannot Reset Fault reset was input when a run command was active. Option External Fault An external fault was tripped by the upper controller via an option unit. External Fault A forward and reverse command were input simultaneously for longer than 500 ms. This alarm stops a running motor. External Faults • An external fault was triggered by an external device via one of the digital inputs S1 to S5. • The digital inputs are set up incorrectly. Output Phase Loss • Output cable is disconnected or the motor winding is damaged. • Loose wires at the drive output. • Motor is too small (less than 5% of drive current). Overcurrent • Short circuit or ground fault on the drive output side • The load is too heavy. • The accel./decel. times are too short. • Wrong motor data or V/f pattern settings. • A magnetic contactor was switched at the output. to to
  • 26. 7 Troubleshooting I80E-EN J1000 Quick Start Guide 25 ENGLISH Heatsink Overheat • Surrounding temperature is too high. • The cooling fan has stopped. • The heatsink is dirty. • The airflow to the heatsink is restricted. Motor Overload • The motor load is too heavy. • The motor is operated at low speed with heavy load. • Cycle times of accel./ decel. are too short. • Incorrect motor rated current has been set. Drive Overload • The load is too heavy. • The drive capacity is too small. • Too much torque at low speed. DC Overvoltage DC bus voltage rose too high. • The deceleration time is too short. • Stall prevention is disabled. • Braking chopper/ resistor broken • Too high input voltage. Input Phase Loss • Input voltage drop or phase imbalance. • One of the input phase is lost. • Loose wires at the drive input. DC Undervoltage The voltage in the DC bus fell below the undervoltage detection level. • The power supply failed or one input phase has been lost. • The power supply is too weak. DC Charge Circuit Fault The charge circuit for the DC bus is broken. LED Display ALM FLT Cause or or
  • 27. 7 Troubleshooting 26 I80E-EN J1000 Quick Start Guide Operator Programing Errors An Operator Programming Error (OPE) occurs when an inapplicable parameter is set or an individual parameter setting is inappropriate. This monitor will display the parameter that is causing the OPE error. LED Operator Display Cause Corrective Action oPE01 Drive capacity and value set to o2-04 do not match. Correct the value set to o2-04. oPE02 Parameters were set outside the allowable setting range. Set parameters to the proper values. oPE03 A contradictory setting is assigned to multi-func- tion contact inputs H1-01 through to H1-05. • The same function is assigned to two inputs (this excludes “External fault” and “Not used”) • Input functions which require the setting of other input functions were set alone. • Input functions that are not allowed to be used simultaneously have been set. • Fix any incorrect settings. • Refer to the instruction manual for more details. oPE05 No option unit is installed and one of the follow- ing is true: • b1-01=2 or 3 • b1-02=2 • Install the required option unit. • Correct the values set to b1-01 and b1-02. oPE10 The V/f pattern setting is incorrect. • Check the V/f pattern settings. • Refer to the instruction manual for more details.
  • 28. ENGLISH Revision History The revision dates and numbers of the revised manuals are given on the bottom of the back cover. Date of Publication Rev. No. Section Revised Contents November 2007 - First edition December 2007 Wiring Specification Rasmi (EMC filter type) deleted MANUAL NO. TOEP C710606 28A Published in Japan December 2007 07-11 Date of publication Date of original publication 1 Revision number 1