Sauer 303 scope rings installation manual
•
1 like•469 views

Official scope installation manual

Recommended
Recommended
More Related Content
What's hot
What's hot (18)
Similar to Sauer 303 scope rings installation manual
Similar to Sauer 303 scope rings installation manual (18)
More from Optics-Trade
More from Optics-Trade (20)
Recently uploaded
Recently uploaded (9)
Sauer 303 scope rings installation manual
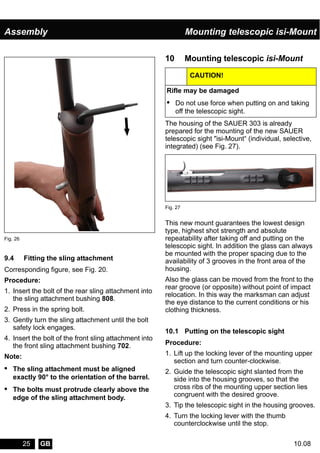
- 1. Assembly Mounting telescopic isi-Mount 25 10.08GB 9.4 Fitting the sling attachment Corresponding figure, see Fig. 20. Procedure: 1. Insert the bolt of the rear sling attachment into the sling attachment bushing 808. 2. Press in the spring bolt. 3. Gently turn the sling attachment until the bolt safety lock engages. 4. Insert the bolt of the front sling attachment into the front sling attachment bushing 702. Note: • The sling attachment must be aligned exactly 90° to the orientation of the barrel. • The bolts must protrude clearly above the edge of the sling attachment body. 10 Mounting telescopic isi-Mount The housing of the SAUER 303 is already prepared for the mounting of the new SAUER telescopic sight "isi-Mount“ (individual, selective, integrated) (see Fig. 27). This new mount guarantees the lowest design type, highest shot strength and absolute repeatability after taking off and putting on the telescopic sight. In addition the glass can always be mounted with the proper spacing due to the availability of 3 grooves in the front area of the housing. Also the glass can be moved from the front to the rear groove (or opposite) without point of impact relocation. In this way the marksman can adjust the eye distance to the current conditions or his clothing thickness. 10.1 Putting on the telescopic sight Procedure: 1. Lift up the locking lever of the mounting upper section and turn counter-clockwise. 2. Guide the telescopic sight slanted from the side into the housing grooves, so that the cross ribs of the mounting upper section lies congruent with the desired groove. 3. Tip the telescopic sight in the housing grooves. 4. Turn the locking lever with the thumb counterclockwise until the stop. Fig. 26 CAUTION! Rifle may be damaged • Do not use force when putting on and taking off the telescopic sight. Fig. 27
- 2. Mounting telescopic isi-Mount 2610.08 GB 5. Fold down the locking lever frontwards (in firing direction). 10.2 Removing telescopic sight Procedure: 1. Lift out the locking lever of the mounting surface towards the rear (opposite to firing direction). 2. Turn the locking lever counter-clockwise to the stop. 3. Tip the telescopic sight to the side upward from the housing grooves. 10.3 Changing eye distance 1. Remove telescopic sight (see section 10.2). 2. The telescopic sight is to be set on the housing so that the rear mounting top section is congruent with the other of the two back grooves. 3. Set on telescopic sight (see section 10.1). For mounting other than is described here, the J.P. Sauer & Sohn GmbH takes no guarantee for function and shooting performance. Fig. 28 CAUTION! Rifle may be damaged • When taking off the telescopic sight, the hand must always be placed on the telescopic sight so that it is held after loosening the mounting and does not fall. Fig. 29 Fig. 30