Instruction Manual | InfiRay Saim SCT V2 Thermal Riflescopes | Optics Trade
•
0 likes•78 views

https://www.optics-trade.eu/en/infiray-saim-sct35-v2.html

Recommended
Recommended
More Related Content
Similar to Instruction Manual | InfiRay Saim SCT V2 Thermal Riflescopes | Optics Trade
Similar to Instruction Manual | InfiRay Saim SCT V2 Thermal Riflescopes | Optics Trade (20)
More from Optics-Trade
More from Optics-Trade (20)
Recently uploaded
Recently uploaded (19)
Instruction Manual | InfiRay Saim SCT V2 Thermal Riflescopes | Optics Trade
- 1. InfiRay Outdoor • Saim SCT Series • Quick Start Guide • 07/2021 www.infirayouordoor.com All rights reserved and shall not be copied and distributed in any form without written permission
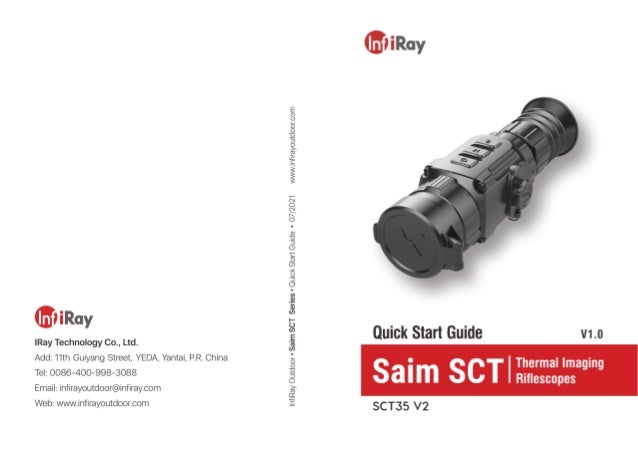
- 2. InfiRay Outdoor • Saim SCT Series • Quick Start Guide • 07/2021 www.infirayouordoor.com All rights reserved and shall not be copied and distributed in any form without written permission 1 Description The Saim series is a low-cost Thermal Imaging Riflescope, which can be mounted on various firearms for night hunting and target observation. Its compact size and lightweight design make it easy to carry. What makes it outstanding is long operation hours, good concealment and great ability to detect, recognize and identify objects or targets fast and easy. The Saim series effective at close and long ranges irrespective of light and harsh weather conditions, that is, in total darkness, through heavy smoke, haze, fog, and dust. 2 Components and Controls 1. Eyeshade 2. Eyepiece diopter adjusting ring 3. C (Calibration) button 4. M (Menu) button 5. P (Power) button 6. Type C interface 7. Battery compartment 8. Lens focus ring 9. Objective lens 10.Lens cover
- 3. InfiRay Outdoor • Saim SCT Series • Quick Start Guide • 07/2021 www.infirayouordoor.com All rights reserved and shall not be copied and distributed in any form without written permission 3 Battery Assembling Battery installation ➢ Open the battery compartment cover anticlockwise according to the schematic diagram on the cover. ➢ Install the batteries correctly as shown in Figure 2. ➢ When done, covering and pushing the battery cover till you hear “click” to ensure both sides of the cover is installed correctly. Attention - Disposable batteries are ONLY supported! Risks are existing to use rechargeable batteries due to nonstandard quality. - Please do not use different types of batteries or batteries with different power levels. - The Saim series supports external power supply via Type-C cable with a USB icon displayed on the screen. 4 Icons Instructions Image mode: White hot Image mode: Black hot Image mode: Red hot Image mode: Color / / / E-zoom Display brightness Image sharpness Image brightness Image contrast Ultraclear mode Wi-Fi Auto correction mode
- 4. InfiRay Outdoor • Saim SCT Series • Quick Start Guide • 07/2021 www.infirayouordoor.com All rights reserved and shall not be copied and distributed in any form without written permission Video out PIP Digital compass Motion sensor Battery type Zeroing type Image hue More Zeroing Defective pixels calibration Compass calibration Time and date System information Factory reset Return to the Main Menu Battery indicator 5 Operation ➢ Open the lens cover (10). ➢ Press and hold down the P (5) button for 3s to power the riflescope on. Waite for 6s until thermal image appears on the display. ➢ Diopter Adjustment: Adjust the sharp resolution of the icons on the display by rotating the diopter adjusting ring (2) of the eyepiece. ➢ Lens Focus Adjustment: rotate the lens focus ring to focus (8) on the object being observed. ➢ Calibration: calibration the image with a short press of the M (4) and C (3) button for shutter correction or long press the M (4) and C (3) button for background correction. ➢ Image Settings: adjust the image mode, display brightness, image sharpness in the shortcut menu (for more details, see the Shortcut Menu Functions section) ➢ To power off the riflescope, long press P (5) button for 5s until the shutdown option menu appears, select the “√” to shut down and “×” to cancel. Then short press the M (4) button to confirm the selection. ➢ Reticle On: click the M (4) button four times in a row while pressing
- 5. InfiRay Outdoor • Saim SCT Series • Quick Start Guide • 07/2021 www.infirayouordoor.com All rights reserved and shall not be copied and distributed in any form without written permission and holding the P (5) + C (3) button to invoke the reticle function for the first time use, then long press the P (5) + M (4) + C (3) button simultaneously for 7 seconds to turn the reticle on. This function should be activated when the reticle first enabled. Attention ➢ When the reticle is turned off, all the operations related to it in the menu will be hidden, including the adjustment of the reticle color and pattern (in shortcut menu), the options of zeroing and blind pixel correction in the advanced menu. 6 Zeroing Zeroing is recommended to be done at the temperature close to the riflescope operating temperature. Before implementing zeroing setting, please make sure that the reticle is on and zeroing type is selected in the main menu. ➢ Mount the riflescope on your weapon. ➢ Set a target at 100m distance, and power on the riflescope. ➢ For the first use of the riflescope, please make sure that the reticle is on before zeroing (according to the instructions of section 5 Operation.). ➢ Long press the M (4) button on the home screen to enter the main menu. ➢ Select one zeroing profile in the main menu. ➢ Select the Zeroing item, and press the M (4) button to enter the Zeroing interface. In the Zeroing interface, the reticle is shown as a small cross for position adjustment. ➢ Then aiming the center of the reticle at the bull’s-eye 100 meters away and shooting. ➢ Locating the bullet hole after shooting. ➢ If the bullet hole can be seen on the display screen: ⚫ Keeping the position of the device fixed, press and hold the M (4) and C (3) button at the same time to freeze the image, and a snowflake icon appears on the upper-left corner of the screen. ⚫ Move the reticle to the position of the actual impact point by the P (5) or C (3) button.
- 6. InfiRay Outdoor • Saim SCT Series • Quick Start Guide • 07/2021 www.infirayouordoor.com All rights reserved and shall not be copied and distributed in any form without written permission ⚫ Short press the M (4) button to switch the movement direction between UP-DOWN and RIGHT-LEFT. ⚫ Press and hold down the M (4) button to save and exit when the process is done. ➢ If the bullet hole cannot be seen on the display screen: ⚫ Keeping the position of the device fixed, measure the horizontal and vertical distance between the bull’s eye and the bullet hole. ⚫ According to the measured distance, move the reticle position by long or short pressing the P (5) or C (3) button until the distance marked on the scale plate consistent with the measured distance. ⚫ Short press the M (4) button to switch the movement direction between UP-DOWN and RIGHT-LEFT. ⚫ Press and hold down the M (4) button to save and exit when the process is done. Notes - To ensure the accuracy of the position, aiming the bull’s-eye again and repeat the operations until the bull’s-eye is hit. - In the zeroing interface, the reticle moves one pixel with a short pressing P (5) or C (3) button to the corresponding direction while ten pixels movement with a long-pressing. One pixel means to move 1.71cm at a distance of 100 meters or 0.62 inches at a distance of 100 yards. - Short press the P (5) + M (4) + C (3) buttons at the same time to switch units (cm/m, inch/yard). - In the zeroing interface, there is a white dot that represents the original position of the reticle before calibration implement. - After zeroing, the center of all reticle will be changed accordingly. 7 Shortcut Buttons Instructions To quickly realize the frequently used functions, the Saim SCT series made the default shortcut buttons of the most commonly used functions in the observation interface. Button Short press Long press P button E-zoom Power on /off M button Enter the shortcut menu Enter the main menu C button Take a photo Video recording M + C button Shutter correction Background correction
- 7. InfiRay Outdoor • Saim SCT Series • Quick Start Guide • 07/2021 www.infirayouordoor.com All rights reserved and shall not be copied and distributed in any form without written permission P + M button Turn the standby mode on/off Turn the stadiametric rangefinder function on/off P + M + C button Switch the units between cm/m and inch/yard —— 8 Shortcut Menu The basic settings (using the function of smooth digital zoom, adjusting the display brightness, switching the image palette, adjusting the image sharpness, selecting the reticle color and pattern) can be changed using the shortcut menu. ➢ In the home screen, short press the M (4) button to enter the shortcut menu. ➢ There are three pages and two functions on each page, one at the top and one at the bottom. ➢ On each page, press the P (5) button briefly to switch the options of the top function, and press the C (3) button briefly to switch the options of the bottom function. And each function has four options ➢ Press the M (4) button briefly to switch the next page.
- 8. InfiRay Outdoor • Saim SCT Series • Quick Start Guide • 07/2021 www.infirayouordoor.com All rights reserved and shall not be copied and distributed in any form without written permission Shortcut Menu Options and Descriptions Times of pressing the M (4) button Shortcut Menu Interface Operation 1 time Enter the first page of the shortcut menu to adjust the image palette and screen brightness ➢ Short pressing the P (6) button to adjust image palette from white hot, black hot, red hot to color. ➢ Short pressing the C (4) button to adjust the image brightness level from 1 to 4 gradually enhanced. 2 times Enter the second page of the shortcut menu to adjust E-zoom and image sharpness ➢ Short pressing the P (6) button to perform E-zoom parameter x1, x2, x3 and x4. ➢ Short pressing the C (4) button to adjust the image brightness level from 1 to 4 gradually enhanced.
- 9. InfiRay Outdoor • Saim SCT Series • Quick Start Guide • 07/2021 www.infirayouordoor.com All rights reserved and shall not be copied and distributed in any form without written permission 3 times Enter the third page of the shortcut menu to adjust the image brightness and image contrast ➢ Short press the P (6) button to cyclically adjust the image brightness level from 1 to 4 gradually enhanced. ➢ Short pressing the C (4) button to adjust the image brightness level from 1 to 4 gradually enhanced. 4 times Enter the fourth page of the shortcut menu to adjust reticle color and reticle pattern ➢ Short pressing the P (6) button to adjust the reticle color: white, black, red and green. ➢ Short pressing the C (4) button to select the reticle pattern. There are 8 patterns for selection. 5 times Exit to the home screen from Shortcut Menu ——
- 10. InfiRay Outdoor • Saim SCT Series • Quick Start Guide • 07/2021 www.infirayouordoor.com All rights reserved and shall not be copied and distributed in any form without written permission 9 Main Menu ➢ In the home screen, press and hold the M (4) button to enter the main menu, which including Ultraclear mode, Wi-Fi, auto shutter correction, video output, PIP, compass, motion sensor, battery type, zeroing type, more. ➢ Press the P (5) or C (3) button to move through the main menu items. ➢ Press the M (4) button briefly to set up the item parameter or to enter the function interface. ➢ Long press the M (4) button to exit the main menu. Main Menu Options and Descriptions Ultraclear Turn Ultraclear mode on/off ➢ Press and hold down the M (4) button to enter the Main Menu. ➢ Select the Ultraclear menu option with the P (5) / C (3) button. ➢ Turn Ultraclear mode on /off with a short press of M (4) button, along with the sound of shutter calibration. ➢ The icon will be displayed on the status bar in the upper left corner of the screen when the Ultraclear mode is on. ➢ Under heavy fog, rain or snow weather, Ultraclear Mode will show more image details. Wi-Fi Turn Wi-Fi function on/off ➢ Press and hold down the M (4) button to enter the Main Menu. ➢ Select the Wi-Fi menu option with the P (5) / C (3) button.
- 11. InfiRay Outdoor • Saim SCT Series • Quick Start Guide • 07/2021 www.infirayouordoor.com All rights reserved and shall not be copied and distributed in any form without written permission ➢ Turn Wi-Fi function on /off with a short press of M (4) button. ➢ The icon will be displayed on the status bar in the upper left corner of the screen when the wi-Fi is on. Auto shutter correction Turn the auto shutter correction on/off ➢ Press and hold down the M (4) button to enter the Main Menu. ➢ Select the Auto Shutter Correction menu option with the P (5) / C (3) button. ➢ Briefly press of the M (4) button to turn the auto shutter correction on /off. ➢ The icon will be displayed on the status bar in the upper left corner of the screen when the auto shutter correction is on. ➢ Before automatic calibration, there will be a 5 second countdown prompt behind the shutter icon on the status bar, that can be to cancelled this calibration during countdown with a short press of the Power (3) button. Video Output Turn video output on/off ➢ Press and hold down the M (4) button to enter the Main Menu. ➢ Select the Video Output option with the P (5) / C (3) button. ➢ Briefly press of the M (4) button to turn video out on/off. ➢ The icon will be displayed on the lower right corner of the screen when the video output function is on. ➢ Video out function enable connectivity with an eternal display or recording device.
- 12. InfiRay Outdoor • Saim SCT Series • Quick Start Guide • 07/2021 www.infirayouordoor.com All rights reserved and shall not be copied and distributed in any form without written permission PIP Turn Picture-in-Picture on/off ➢ Press and hold down the M (4) button to enter the Main Menu. ➢ Select the PIP option with the P (5) / C (3) button. ➢ Briefly press of the M (4) button to turn PIP on/off. ➢ When the PIP function is on, a small window will appear on the top of the display. Compass Turn on/off the digital Compass function ➢ Press and hold down the M (5) button to enter the Main Menu. ➢ Select the Compass menu option with the P (5) / C (3) button. ➢ Briefly press of the M (5) button to turn the digital compass on/off. ➢ When the compass function is turned on, it will reveal in the center of top status bar. Motion Sensor Turn on/off the motion sensor ➢ Press and hold down the M (5) button to enter the Main Menu. ➢ Select the Motion Sensor menu option with the P (5) / C (3) button. ➢ Briefly press of the M (5) button to turn the motion sensor on/off. ➢ Two scales are displayed on the right sides of the screen when the motion sensor is on. ➢ The horizontal scale shows tilt angle, and the vertical one shows pitch angle.
- 13. InfiRay Outdoor • Saim SCT Series • Quick Start Guide • 07/2021 www.infirayouordoor.com All rights reserved and shall not be copied and distributed in any form without written permission Battery Type Select the battery voltage ➢ Press and hold down the M (4) button to enter the Main Menu. ➢ Select the Battery Type option with the P (5) / C (3) button. ➢ Briefly press of the M (4) button to select 3V or 3.7V according the battery voltage. ➢ 3V is selected for dischargeable battery and 3.7V is for chargeable battery, but dischargeable battery is suggested only. Zeroing Type Select the zeroing type ➢ Press and hold down the M (4) button to enter the Main Menu. ➢ Select the Zeroing Type option with the P (5) / C (3) button. ➢ There are four types for selection. ➢ Briefly press of the M (4) button to select one zeroing type. Image hue Select the image hue ➢ Press and hold down the M (5) button to enter the Main Menu. ➢ Select the Image Hue option with the P (6) / C (4) button. ➢ Briefly press of the M (5) button to select C or W. C is for cool hue, and W is for warm hue.
- 14. InfiRay Outdoor • Saim SCT Series • Quick Start Guide • 07/2021 www.infirayouordoor.com All rights reserved and shall not be copied and distributed in any form without written permission More Enter the secondary menu for more settings ➢ Press and hold down the M (5) button to enter the Main Menu. ➢ Select the More menu option with the P (5) / C (3) button. ➢ Briefly press of the M (5) button to enter the secondary menu for more settings, including zeroing, defective pixels calibration, compass calibration, system information, factory settings. Zeroing Enter the zeroing interface Saim series support the 100m zeroing distance. ➢ Select the Zeroing option with the P (5) / C (3) button in the More submenu. ➢ Briefly press of the M (4) button to enter the zeroing interface. ➢ Then aim the center of the reticle at the bull’s-eye 100 meters away and shoot. ➢ Locate the bullet hole after shot. ➢ Then, zero your riflescope according the Section 5 Zeroing.
- 15. InfiRay Outdoor • Saim SCT Series • Quick Start Guide • 07/2021 www.infirayouordoor.com All rights reserved and shall not be copied and distributed in any form without written permission Pixels Defect Calibration Defect pixels are pixels that do not change brightness compare with others on the image, they are either brighter or darker than surrounding pixels. Saim series offer the possibility of removing any defective pixels on the sensor using software, as well as to cancel any deletion. ➢ Select the Pixels Defect Calibration option with the P (5) / C (3) button in the More submenu. ➢ Briefly press of the M (4) button to enter the pixels defect calibration interface. ➢ A small cross cursor instead of the reticle will appear on the center of the screen. ➢ The Picture in Picture (PIP) window will appear on the lower left corner of the screen. A tooltip is appeared on the bottom of the screen that displays the number of the blind pixels calibrated, the movement direction and location. ➢ Move the cursor to align with the defective pixel with a short or long press the P (5) / C (3) button. Short press to move one pixel every time and long press to move ten pixels once. ➢ Switch the movement direction with a short press of the M (4) button. ➢ After selecting the blind pixel, long press P (5) and C (3) button to calibrate the defective pixel, and press the same button again for cancelation. ➢ Repeat the above processes until all blind pixels are calibrated.
- 16. InfiRay Outdoor • Saim SCT Series • Quick Start Guide • 07/2021 www.infirayouordoor.com All rights reserved and shall not be copied and distributed in any form without written permission ➢ Press and hold the M (4) button to save the calibration and exit from the pixels defect calibration interface. Compass Calibration Calibrate the digital compass ➢ Select the Compass Calibration option with the P (5) / C (3) button in the More submenu. ➢ Briefly press the M (5) button to enter the Compass Calibration interface. ➢ An icon like a triaxial coordinate system appears on the screen. ➢ Follow the icon prompt to rotate the riflescope along three axes at least 360 degrees each axis in the 15 seconds. ➢ After 15s, the calibration is finished and exit to the home screen. Time Setting Reset the system date and time ➢ Select the Time Setting option with the P (5) / C (3) button in the More submenu ➢ Briefly press the M (5) button to enter the Time Setting interface. ➢ The order from left to right is year, month, day, hour and minute. And the time format is in 24-hours format. ➢ Switch among year, month, day, hour and minute with a short press of the M (5) button. The selected item
- 17. InfiRay Outdoor • Saim SCT Series • Quick Start Guide • 07/2021 www.infirayouordoor.com All rights reserved and shall not be copied and distributed in any form without written permission will turn blue and two triangle icons will appear above and below the value. ➢ Select the correct value with a short press of the P (5) / C (3) button. ➢ Save settings and exit to the superior menu with a long press of the M (5) button. System Information Show device information ➢ Select the System Information menu option with the P (5) / C (3) button in the More submenu. ➢ The relevant information of riflescope will be shown by a short press of the M (5) button. ➢ This item allows the user to view the following information about the riflescope: the product model, GUI version, SYS Info, Boot version, FPGA, PN and SN number of the riflescope, Hardware version. ➢ Press and hold the M (5) button to return to the submenu. Factory Reset Reset to the Factory Settings ➢ Select the Factory Reset option with the P (5) / C (3) button in the More submenu. ➢ A prompt box will appear on the screen with a briefly press of the M (4) button. ➢ Short press the P (5) or C (3) button to select the option. The
- 18. InfiRay Outdoor • Saim SCT Series • Quick Start Guide • 07/2021 www.infirayouordoor.com All rights reserved and shall not be copied and distributed in any form without written permission “√” is to reset to the default, and the “×” is to cancel. ➢ Confirm the selection with a short press of the M (4) button and exit to the home screen. Return Return to the main menu ➢ Select the Return option by P (5) or C (3) button. ➢ Short press the M (4) button to return to the main menu.
- 19. InfiRay Outdoor • Saim SCT Series • Quick Start Guide • 07/2021 www.infirayouordoor.com All rights reserved and shall not be copied and distributed in any form without written permission 10 Photographing and Video Recording Saim SCT series thermal imager is equipped with a function for video recording and photographing observed images onto the built-in memory card. The files of images and videos will be named after the time, so it is recommended to reset the system time in the Main Menu – More - Time Setting or to synchronize the system time and date in the Settings of the APP InfiRay Outdoor before using the camera and video function. For specific operations. Photographing ➢ Take a photo with a short press of the C (3) button in the home screen. ➢ A camera icon ( ) shows in the upper-right of the screen and the image will freeze for 0.5s when the function performs. Video recording ➢ Press and hold the C (3) button in the home screen to start the video recording. ➢ A tooltip showing the recording time in MM: SS (minutes: seconds) format will appear in the upper right corner of the display. ➢ The red dot in the tooltip flashes during recording. ➢ During recording, short press the Down/Photo button (3) to take a photo also. ➢ Press and hold the C (3) button again to exit the recording when done. ➢ Video and picture files are stored in the built-in memory card after video recording has been turned off. ➢ (Note that the video will not be saved if you skip the process and shut down the device suddenly instead). ➢ The photos and videos can be read on the computer via the USB cable. Note - You can enter and work on the menu during video recording. - The recording time is accumulated in minutes until the recording stops, that is, the time shows 60:00 after 59:59.
- 20. InfiRay Outdoor • Saim SCT Series • Quick Start Guide • 07/2021 www.infirayouordoor.com All rights reserved and shall not be copied and distributed in any form without written permission - The maximum duration of a video recording file is 10 minutes. When it’s more than 10 minutes, the video will be recorded onto a new file. - The number of files is limited by the capacity of the device's built-in memory. Regularly monitor the amount of free memory in the built-in memory card, transferring footage and photos to other media to free up space on the memory card. Memory Access When the device is turned on and connected to a computer, it is recognized by the computer as a flash memory card, which is used to access the device's memory and make copies of pictures and videos. ➢ Turn on the device and connect it to the computer through the USB cable. ➢ Double-click "my computer" on the desktop - double-click to open the device named "Infiray" - then click and open the device named "Internal Storage" to access memory. ➢ There are different folders named by time in memory. ➢ Recorded videos and photographs are saved in these folders in the format: IMG_HHMMSS_XXX. jpg (for photos) and VID_HHMMSS_XXX.mp4 (for video). HHMMSS- hour/minute/ second; XXX - three-digit common file counter (for photos and videos) which is NOT reset. 11 Wi-Fi Function The device is equipped with wireless communication with external devices (computer, smartphone) via Wi-Fi. ➢ In the home screen, press and hold the M (4) button to enter the menu. ➢ Select the Wi-Fi option with the P (5) / C (3) button. ➢ Briefly press of the M (4) button to turn Wi-Fi on. ➢ The device is recognized by an external device under the label ‘Saim_xxxxx-xxxxxxʼ, xxxxx-xxxxxx is the SN code of the device. ➢ Enter the password on an external device, and establish a connection. The initial password is 12345678. ➢ And then, the device can be controlled through the APP InfiRay Outdoor.
- 21. InfiRay Outdoor • Saim SCT Series • Quick Start Guide • 07/2021 www.infirayouordoor.com All rights reserved and shall not be copied and distributed in any form without written permission Set Wi-Fi name and password The Wi-Fi name and password of your device can be set in the APP. ➢ Click the "setting" icon in the APP to enter the setting interface. ➢ In the text box, enter and submit the name (SSID) and password of the new Wi-Fi. ➢ It needs to restart the device to take the new name and password effect. 12 Stadiametric Rangefinder ➢ In the home screen, press and hold the P (5) + M (4) buttons at the same time to enter the stadiametric ranging interface, and two horizontal lines will appear on the upper and lower positions of the cursor. ➢ Adjust the horizontal lines to the target position by the P (5) or C (3) button. ➢ The icon on the left shows the approximate distance of the corresponding target. ➢ Long press the M (4) button to exit to the stadiametric ranging interface. 13 PIP Function ➢ In the home screen, press and hold down the M (4) button to enter the Main Menu. ➢ Select the PIP option with the P (5) / C (3) button. ➢ Briefly press of the M (4) button to turn PIP on/off. ➢ When the PIP function is on, a small window will appear on the top of the display. ➢ The image in the small window is a 2x magnified image centered by the reticle center. ➢ When the main image is enlarged through the shortcut menu, the PIP image will be enlarged 2×synchronously.
- 22. InfiRay Outdoor • Saim SCT Series • Quick Start Guide • 07/2021 www.infirayouordoor.com All rights reserved and shall not be copied and distributed in any form without written permission 14 Specification Model Saim SCT35 V2 Resolution, pixels 384×288 Pixel size, μm 12 NETD, mk ≤40 Frame rate, Hz 50 Objective lens, mm 35, F1.0 Field of view 7.5°×5.7° Display 1024 ×768 OLED Magnification, x 2.81 - 11.24 Battery type CR123 ×2 ZMax. Operation time, h 3.5 Wi-Fi & Recorder √ Compass & Motion sensor √ Weight (without batteries), g <420 Dimension, mm 195 ×61 ×61 Detective range, m (Target size:1.7m*0.5m, P(n)=99%) 1818 Built-in memory, GB 32 USB type Type C