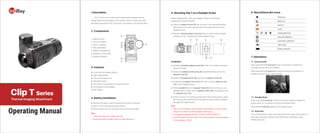
Compact Thermal Imager Clip T Series Manual
•
0 likes•376 views

https://www.optics-trade.eu/en/infiray-ctp13-thermal-imaging-clip-on.html

Recommended
Recommended
More Related Content
What's hot
What's hot (9)
Similar to Compact Thermal Imager Clip T Series Manual
Similar to Compact Thermal Imager Clip T Series Manual (20)
More from Optics-Trade
More from Optics-Trade (20)
Recently uploaded
Recently uploaded (20)
Compact Thermal Imager Clip T Series Manual
- 1. Clip T Series Thermal Imaging Attachment Operating Manual 1.Description Clip T Series is one of the most compact and cheapest thermal imager attachment for sights on the market, which is mainly used with day riflescope and low cost, low power consumption and miniaturization. 2. Components 1. Objective Lens 2. Power (P) Button 3. Type-C Interface 4. Menu (M) Button 5. Battery Compartment 6. Eyepiece Locking Ring 7. Eyepiece Interface 3. Features l 12µm thermal imaging detector l High image quality l The most compact size l Ultra light weight l Low power consumption and long endurance l HD resolution OLED Display l IP67 Rating 4. Battery Installation l Remove the battery cap by unscrewing it counter clockwise l Insert a CR123 with positive pole inwards l Return battery cap into housing, screw clockwise until tight Tips: Ø Avoid removing the O shape seal ring. Ø Notice the poles of battery placed in right directions. 2 3 1 4 6 7 5 Whitehot Blackhot Redhot Color Displaylightness ManualCalibration AutomaticCalibration USBmode BatteryIndicator A M 6. Menu/Status Bar Icons 7. Operations 7.1 Switch On/Off Press and hold the P button(2) to turn on the device. Waiting for 3 seconds to enter the home interface. Press and hold the P button (2) until the shutdown countdown is 0, release the button to turn off the device. 7.2 Standby Mode Press and hold P button(2) until the countdown appears, release the button within 3s countdown to active the standby mode. Short press P button(2) again to exit standby mode. 7.3 Status Bar In the home interface, there are system information hints at the bottom of the screen including: Palette, Screen Brightness, Calibration mode, Battery status etc. 5.Mounting Clip T on a DaylightScope Before installing Clip T onto your daylight device, the following preparations should be made: l Select an adaptor fixture (9) with an insert of the required diameter depending on the outer diameter size of the objective lens of your daylight device. l Prepare a thread adapter insert (8) that can match with the thread interface of Clip T eyepiece and metal adaptor fixture. Insallation l Install the threaded adapter insert (8) to Clip T by rotating clockwise along the thread. l Rotate the eyepiece locking ring (6) counterclockwise to lock the adapter insert (8). l Install the threaded insert (8) fully into the adapter fixture (9). l Install fully the adapter fixture (9) with Clip T onto the objective lens (10) of your daylight device. l Pull the handle (11) on the adapter fixture (9) to lock it firmly on your daylight device. Check that the adapter fixture (9) is snugly fitted onto the objective lens (10) . l If there is space or if the lever cannot reach the locking position, adjust the locking screw with the hex-nut wrench to ensure that the adapter fits tightly the objective lens. Tips: Ø Clip may be installed in wrong position while tighten on screw thread, change its position by adjust eyepiece locking ring. Ø The eyepiece interface thread (7) of Clip T series is M30*1.0; Ø A thread adapter ring with M52*0.75 thread interface will be presented in the package of Clip T; 8 9 10 7 11
- 2. 7.4 Calibration In the home interface, short press the P button(2) for shutter calibration. 7.5 Image Movement In home interface, press and hold the P button(2) and M button(4) to enter into the image movement interface. l The movement distance and direction on X Y axis appear on the interface. Ø Short press P button(2) to move upward one pixel. Ø Long press P button(2) to move upward ten pixels. Ø Press and hold P button(2) constantly to move upward continuously. Ø Press the M button(4) to move downward, and the adjustment mode is the same as steps above. l Press P button(2) and M button(4) simultaneously to switch the movement directions. l While switched to horizontal movement, press P button(2) to move towards left and M button(4) to move towards right. Movement method is same as vertical on Y-axis. l Long press the P button(2) and M button(4) simultaneously to save calibration data. Once saved, the device will exit this interface after 2s. Tips: While idle, the device will exit image movement interface in 30s, without saving. 7.6 Shortcut Menu In the home interface, short press the M button(4) to enter shortcut menu. Options in Shortcut menu are as follow: Palette - Screen Brightness – Calibration – Exit. l Palette: press P button(2) briefly to switch between White Hot - Black Hot - Red Hot - Pseudo Colour. l Screen Brightness: Press P button(2) briefly to adjust the screen brightness among four levels. l Calibration: short press P button(2) to switch between Automatic (A) mode and Manual (M) mode. Specifications l Improvements may be made to the design and software of this product to enhance its user features. l Technical parameters of the device may be improved without prior notice of the customer. Model CTP13 Microbolometer Resolution, pixels 256×192 Pixel size, µm 12 NEDT, mk ≤40 Frame refresh rate, Hz 25 Optical Specifications Objective Lens, mm 13 Field of view, degree 13.5×10.1 Magnification 1× Detection range, m (Target size: 1.7mx0.5m, P(n)=99%) 675 Display Type 0.39 OLED Resolution, pixels 1024×768 Operational Specifications Battery type CR123(3.7V)×1 Power consumption, mW About 800 Max. battery life(t=25 °C), h 3.5 Operation temperature, °C -20 ~ +50 IP Rating IP67 Dimension, mm 79×52×46 Weight(without battery), g ≤140 USB Type Type-C Eyepiece Interface M30×1.0 7.7 Type-C Mode In the home interface, while connected with Type C cable, press and hold the M button(4) and meanwhile quickly press P button(2) five times to activate Type C Mode for updating firmware. Repeat previous steps or plug out USB cable to exit Type C mode. 8. Cautions l Do not look directly at high radiation sources (such as solar). l Avoid contact lens with sharp items. l Please use standard battery. Don't throw used batteries anywhere or into fire. l Avoid to expose in high temperature environment (>60℃). l Avoid short circuit product. l Avoid put the device into fire. 9. Maintenance l Polish the device with soft cloth by dipping certain amount of alcohol. l For optical glass parts (such as eyepiece lens and objective lens), blow dust first, and then wipe slightly with charcoal pen or absorbent cotton swab that dipping unmethylated alcohol. 10. Customer Service 24h Hotline +86-400-998-3088 Fax +86-535-3410604 Email infirayoutdoor@infiray.com www.infirayoutdoor.com IRay Technology Co., Ltd. Add: 11th Guiyang Street, YEDA, Yantai 264006, P.R. China Tel: 0086-400-998-3088 Email: infirayoutdoor@infirayout.com Web: www.infirayoutdoor.com