
Recommended
More Related Content
Similar to App Inventor || Face emotion || Data saver || B.Sc. student task
Similar to App Inventor || Face emotion || Data saver || B.Sc. student task (20)
Recently uploaded
Recently uploaded (20)
App Inventor || Face emotion || Data saver || B.Sc. student task
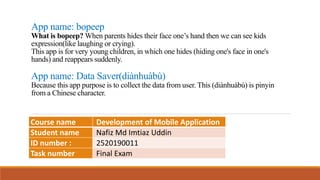
- 1. App name: bopeep What is bopeep? When parents hides their face one’s hand then we can see kids expression(like laughing or crying). This app is for very young children, in which one hides (hiding one's face in one's hands) and reappears suddenly. App name: Data Saver(diànhuàbù) Because this app purpose is to collect the data from user. This (diànhuàbù) is pinyin from a Chinese character. Course name Development of Mobile Application Student name Nafiz Md Imtiaz Uddin ID number : 2520190011 Task number Final Exam
- 2. Aim of task: bopeep- When user’s photo is properly displayed on the camera, the kid laughing. Otherwise kid is crying. We also hear mp3 sound from this app. Also user can use camera toggle. According to expression, here is included emoji when kid cry or laugh. Data Saver(diànhuàbù)- My goal is to build an app where student name and phone number can be storage through SQLite system. The task covers the following topics: ❑Building apps by selecting components and indicating their behavior. ❑Utilizing the Component Architect to choose components. A few components are visible the device’s screen and a few aren’t. ❑Bundling the apps we construct and downloading them to a device. ❑Building apps by selecting web component(Connectivity) and also using extension ❑Testing apps with App Inventor’s live testing. This lets we see how apps will look and carry on the device, step by step, indeed as we’re building them.
- 3. The App overview ( the final designed map image or Final app picture) - bopeep • Button * 2 • Label * 11 • HorizontalArrangement * 5 • Image * 4 • Player * 2 • Webviewer1 • Extension
- 4. Face Expression Here we have to attach mdl file in this extension. In mdl is saved labeling picture. And the extension must be attached WebViewer section. Because it is web browsing system to visible the InputMode system. I showed in this ppt that how to build mdl file for this extension. bopeep Attached WebViewer
- 5. Objects and Steps We know that the App Inventor environment has 3 main parts: 1. The Component Design: We employ it to choose components for our app and specify their properties. 2. The Block Side: We employ it to indicate how the components will behave. 3. We will test the apps build by utilizing the Android emulator that comes with the system. So, accordingly, first of all we will focus on component design. Because here we will decorate our interface in this part. Such as which button will work, what picture will be attached, etc. After the Component Design is done, we will go to the Block Side. There, how the buttons of the app will work, what will work on which button and what will come on which screen. Then we can use the emulator or our own handset for testing. bopeep
- 6. Objects and Steps 1. First of all, make background image and create a label(Status)- FontSize is 16. Other side is default. 2. HorizontalArrangement1: There are create 3 labels ▪ MatchLabel-Height-Full Parent, Width-55Pixels, Text: “0%’’ ▪ MachingPercentage1-Height-Automatic, Width-75Pixels, ▪ Graph1-Height-Full parent, Width-Automatic, BackgroundColor: Green 3. HorizontalArrangement2: Same as HorizontalArrangement1. Just Graph2 is BackgroundColor:Red 4. HorizontalArrangement3: There is 2 buttons(Start button and camera toggle), 1 label for space. ▪ First button: BackgroundColor: #6affebff FontSize: 16, Shape: rounded, Text:” Start”, TextColor: Default, Bold ▪ Camera toggle button: BackgroundColor: #3596ffff FontSize: 16, Shape: rounded, Text: ” Camera mode”, TextColor: White, Bold ▪ Space label: No text (all of default, just Width is 10 pixels) bopeep
- 7. Objects and Steps 5. Then create another Label for space(Only height change: 3Percent) 6. WebViewer: (It should be visible, height and width 200pixels respectively.) 7. Then create another Label for space(Only height change: 2 Percent) 8. HorizontalArrangement4: There is 2 Images and 1 label(all of should be invisible) ▪ Both image: (Height and Width 15 percent, 15 percent, attach the picture) ▪ StatusEmotion: FontSize: 18,Bold, Other is default. 9. HorizontalArrangement5: There is 2 Images (invisible) ◦ Both image: (Height and Width 225 pixels respectively, attach the picture. 10. Upload the extension for this section: InputMode: Video, MinimumInterval: 100, Attach the mdl file and attached the WebViewer. 11. Finally we need to 2 player: Attached mp3 respectively 12. Finally the designer section: put AppName(bopeep) and icon(icon.png) for app. bopeep
- 8. Introduction In this project, I have to create image classification in machine learning system. So, here is defined about image classification. It is the process of categorizing and labeling groups of pixels or vectors within an image based on specific rules. The categorization law can be devised using one or more spectral or textural characteristics. Exceptionally babies don't quite understand how to create sense of the visual world around them. They need an understanding that objects proceed to exist indeed when not unmistakable. This concept is depicted by the popular child analyst Jean Piaget as “object permanence.” bopeep
- 9. How to use this app? How to play this game with kid? We can play in 4 ways to play this game: 1. First of all, baby’s attention, 2. Hide face, 3. We can use this phrase: “I see you” or “where is your mother?”, 4. Repeat the game. A machine learns to form sense of visual information to some degree like a child learns visual signals. Both babies and computers require numerous illustrations (huge sets of preparing information). Too, they require the categories for the illustrations to be effectively discernable (outwardly particular information classes). bopeep
- 10. How to create model for extension? Create Names For Picture Classes First, include two facial presentation classes (appearing our face and covering up our face) for the show to memorize utilizing the include names box. Indeed though in this venture we are going make a demonstrate with as it were two classes. Then make the moment course NotMe and pay consideration to capitalizations), comparing to you covering up face. ADD EXAMPLES Select one of your classes from the dropdown menu, posture before the webcam, and press “Capture” to add an picture to that course for your show to memorize from. We ought to take almost 10+ pictures for each of our two classes. For the Me course, capture numerous postures of your completely appeared confront from numerous distinctive points and sides. For the NotMe label, capture numerous postures of my confront covered up by my hand. bopeep
- 11. How to create model for extension? bopeep
- 12. How to create model for extension? After clicking “Train Model” observe as a few fundamental data approximately the preparing handle is shown. When the preparing is wrapped up, we'll consequently be moved to the testing step. bopeep
- 13. How to create model for extension? Testing Model This step lets attempt extra illustrations to test model. This permits to see how well show performs on pictures it has not seen before. Adding illustrations in testing works in a comparative way to preparing. Utilize the webcam and tap the “Capture” button to test an picture. We'll see the result to the proper within the Classification window. The classification is appeared in green. Otherwise it will show red. bopeep
- 14. How to create model for extension? Repeat steps for a better Model 1. Check the pictures that are classified inaccurately. ▪We have to think about why image was not accurate. ▪Attempt to make strides the show to anticipate accurately. Go back to the preparing page and include more preparing pictures to undertake to address the destitute forecast. 2. Attempt testing pictures completely different conditions. ▪Moving face near or farther away from the camera ▪Utilize a distinctive foundation behind us. ▪Watch what happens to the expectations. bopeep
- 15. How to create model for extension? bopeep
- 16. Human face emotion(in kid face) PersonalImageClassifier returns an mistake, the when PersonalImageClassifier1.Error occasion square shows the blunder within the StatusLabel. The when PersonalImageClassifer.ClassifierReady block is called when the classifier is prepared to begin classifying pictures. StartButton and ChangeCameraButton are enabled. “Ready” is shown within the StatusLabel. Graph1 and Graph2 are assigned the names of the show names (“Match” and “Not Match”). bopeep
- 17. Human face emotion(in kid face) When PersonalImageClassifier1.GotClassification occasion handler block begins by initializing two local variables. •Matching local varis the certainty level for the “Me” class (appearing face). •NotMatching local var is the certainty level for the “NotMe” class (not show face). Be beyond any doubt to supplant the default “not found” Content piece with a “0” from Math squares. This makes beyond any doubt that a certainty level of 0% is assigned in case the classifier has not however returned a result. When ChangeCameraButton is squeezed, the camera switches from front to back or back to front. bopeep
- 18. Human face emotion(in kid face) Presently here is characterized picture classification result date from the component expansion is gotten and utilized. When the classifier produces a classification for what it sees, the when PersonalImageClassifier1.GotClassification occasion handler block is called. The result records the classifications within the frame of a information structure called a “dictionary”. In computer science, an associative array, map, symbol table, or dictionary is an abstract data type composed of a collection of (key, value) pairs, such that each possible key appears at most once in the collection. To discover out the esteem of a specific key from the result, utilize the get esteem for key block. bopeep
- 19. Human face emotion(in kid face) Now need to labeling some part: ▪To begin with, set the MachingPercentage1 content to the certainty level of the “Me” course. This value may be a decimal between and 1, so we'll have to be change over it to a rate (increasing by 100) and include the “%” symbol. ▪Secondly, note that Graph1 could be a colored name appearing the certainty level of the “Me” lesson by its width. And the other two MachingPercentage2 and Graph2 have to be similar to the previous one. bopeep
- 20. Human face emotion(in kid face) Make some condition: Presently construct the if-then-else conditional block, which tests whether the course with the next level of certainty is the “Me” class. This means that the system recognizes appearing face with a higher level of confidence. First, build the code blocks for the then part of the if-then-else block set: •Show the happy baby image and that emoji. Here text color is green Also here is attached a mp3. •Here when baby is smiled, then mp3 player is turn on. Here text color is red. If we want that we can another part(crying) add for else section.
- 21. Inside App inventor (Blocks Tab) bopeep
- 22. Component List 1. List of the Design section components • Button * 2 • Label * 11 • HorizontalArrangement * 5 • Image * 4 • Player * 2 • Webviewer1 • Extension 1. List of the Block Section components 1. Using Built-in function Text, Variable. Control, Logic, Dictionaries, Colors, Math I. When the extension is GotClassification • Local var * 2 • get value for key * 2 (Me, NotMe labels) • Then set 4 labels • Join function * 2(MachingPercentage1 and NotMachingPercentage2) • if else statement • Text * 2 • TextColor * 2 • Image * 2 • Player * 2 II. Button(Start, Camera toggle) * 2 III. Call extension for ToggleCameraFacingMode IV. Call extension for StartContinuousClassification V. Call extension for StopContinuousClassification VI. Extension errorCode VII. Extension is ClassifierReady • Text * 3 • Label * 5 • Logic(true) * 2 (add in 2 buttons) bopeep
- 23. Program flow chart Open the app Click camera toggle for right pose bopeep Start the button If the pose is not right on camera(mdl) If the pose is right on camera(mdl) Show higher confidence(Label-Me) Show higher confidence(Label-NotMe) Show kid laughing mood and related emoji and hear the sound Show kid laughing mood and related emoji and hear crying sound Repeat
- 26. App Interface Labelling )optional)- bopeep
- 27. Demo App working from your mobile When baby smile, we hear laughing mp3. And when baby cry, we hear crying mp3. bopeep
- 28. Final point and result ➢ With this app, little kid will be able to spend their time. ➢ Parents who hide their faces with one hand can play with this app with their children. ➢ There is a label here that indicates the baby is crying or smiling. ➢ Some more emotion could have been added here, if better extensions had been found. ➢ The funny thing here is that when the baby expresses the expression of laughter, we hear its mp3 sound. It is similar to when the user camera pose is not appropriate, the app kid is cried. ➢ The construct apps by selecting components within the Designer, and after that within the Pieces Editor, tell the components what to do and when to do it. ➢ Here is first app: In App Inventor VersionName is img-classifier- emotion and VersionCode is 101. ➢ And finally is testing handset. It is perfectly run. The next will be upgraded according to the needs for the audience. bopeep
- 29. Data saving app inventor in SQLite way
- 30. The App overview ( the final designed map image or Final app picture) -Data Saver • Button * 5 • Label * 11 • TextBox * 3 • ListPicker * 2 • HorizontalArrangement * 3 • Notifier * 1 • TinyDB * 1 • Extension-PedrozaSQLite1
- 31. The App overview ( the final designed map image or Final app picture) -Data Saver • Button * 2 • Label * 2 • TextBox * 1 • ListView * 1 • HorizontalArrangement * 1 • VerticalArrangement * 1 • Notifier * 1 • TinyDB * 1 • Extension-PedrozaSQLite1
- 32. Objects and Steps We know that the App Inventor environment has 3 main parts: 1. The Component Design: We employ it to choose components for our app and specify their properties. 2. The Block Side: We employ it to indicate how the components will behave. 3. We will test the apps build by utilizing the Android emulator that comes with the system. So, accordingly, first of all we will focus on component design. Because here we will decorate our interface in this part. Such as which button will work, what picture will be attached, etc. After the Component Design is done, we will go to the Block Side. There, how the buttons of the app will work, what will work on which button and what will come on which screen. Then we can use the emulator or our own handset for testing. Data Saver
- 33. Objects and Steps 1. First of all, create a label for space(Height-3percent), Then create label(write part), then again create label for space(Height-3percent), again label for writing part. 2. Then create 3 TextBox. First TextBox should be unenabled(FontSize: 17). Others TextBox is enabled. Here FontSize: 15, put hint for these TextBox. 3. HorizontalArrangement1: There are 3 buttons and 2 labels. ◦ All button has same properties. Just color and text change. ◦ Label: both of label Width: 1 percent. 4. Label: for space(Height: Full parent, other properties is default) 5. HorizontalArrangement2: Drag 2 ListPicker, 1 label ◦ ListPicker: both of same. Just Text and Background is changed. ◦ Label: for space(Height: Full parent, other is default) Data Saver
- 34. Objects and Steps 6. HorizontalArrangement3: There are 3 buttons and 1 labels. ◦ All button has same properties. Just color and text change. ◦ Label: for space(Height: Full parent, other is default) Then we need to Notifier and TinyDB and extenston(PedrozaSQLite) for this UI section Finally the designer section: put AppName(diànhuàbù) and icon(icon.png) for app. -------------------------------------------------------------------------------------------------------------------------------------------- VerticalArrangement1: Label1(writing part, FontSize: 25), TextBox(Height: 20% and width is 60%, Hint: “SQL statement” other is default), Label2(writing part, FontSize: 12). HorizontalArrangement1: There are 2 buttons and 1 ListViewer. ◦ All button has same properties. Just color and text change. ◦ ListViewer: Height: 50% and width: 70percent, ImageHeight and ImageWidth is 200 respectively. TextSize is 22. Again we need to Notifier and extension for this section. Data Saver
- 35. Data Saver What is SQLite? SQLite is a software library that implements a self-contained, serverless, zero-configuration, transactional SQL database engine. SQLite is the most widely deployed SQL database engine in the world. The source code for SQLite is in the public domain. FEATURES of this app •SQL Statements executes asynchronously, very useful in large databases. •Good practices to avoid as possible SQL Injections. •Opportunity to use rawQuery and write SQL statements. •Compile a statement to reuse it later (on next release). •Query result in a list for easy use.
- 36. Data Saver AfterQuery: Event handler after the ExecuteRawQuery or Query is executed and returns a list with the selected data and number of records. ErrorOcurred: Event handler when an error ocurred, returns a string with a message from the error.
- 37. Data Saver Query: Executes pre-compiled QUERY statement with specified parameters. Parameters: 1) String table: Name of the table. 2)List columns: List of which columns to return, passing an empty list will return all columns. 3) String selection: Filter declaring which rows to return, formatted as an SQL WHERE clause, passing an empty string will return all rows. 4) YailList selectionArgs: List with the arguments that will replace onto ‘?’ in the selection filter. 5) String groupBy: A filter declaring how to group rows, formatted as an SQL GROUP BY clause (excluding the GROUP BY itself), passing an empty string will cause the row to not be grouped. 6) String having: A filter declare which row groups to include if row grouping is being used, passing an empty string will cause all row groups to be included. 7) String orderBy: How to order the rows, formatted as an SQL ORDER BY clause (excluding the ORDER BY itself), passing an empty string will use the default sort order (unordered). 8) String limit: Limits the number of rows returned by the query, formatted as LIMIT clause, passing an empty string denotes no LIMIT clause. Return: The result query is available in the AfterQuery event handler.
- 38. Data Saver Insert: Executes pre-compiled INSERT statement with specified parameters. Parameters: 1) String table: Name of the table. 2) YailList columns: List with the columns that will contain the data to be inserted in the database. 3) YailList values: List with the data to be inserted in the database. Returns the row ID of the newly inserted row, or -1 if an error occurred. Replace: Executes pre-compiled REPLACE OR INSERT INTO statement with specified parameters. Parameters: 1) String table: Name of the table. 2) YailList columns: List with the columns that will contain the data to be replaced in the database. 3) YailList values List with the data to be replaced in the database. Returns the row ID of the newly replaced row, or -1 if an error occurred.
- 39. Data Saver Delete: Executes pre-compiled DELETE statement with specified parameters. Parameters: 1) String table: Name of the table. 2) String whereClause: Optional WHERE clause to apply when deleting (Example: ‘ID = ?’), pasing an empty a string will delete all rows. 3) List whereArgs: List with arguments for the WHERE clause. These arguments will be replaced by ‘?’ in the whereClause. Returns the number of rows affected if a whereClause is passed in, 0 otherwise. Update: "Executes pre-compiled UPDATE statement with specified parameters. Parameters: 1) String table: Name of the table. 2) YailList columns List with the columns that will contain the data to be inserted in the database. 3) YailList values List with the data to be inserted in the database. 4) String whereClause: optional WHERE clause to apply when updating, leave an empty string to update all rows. Include ?s, which will be updated by the values from whereArgs. 5) YailList whereArgs: List with the columns that will contain the data to be updated in the database. Returns the row ID of the newly inserted row, or -1 if an error occurred.
- 40. Data Saver RawQuery: Executes the provided rawQuery Statement asynchronously. Returns a YailList with the selected data and number of records in the AfterQuery Event. Parameters: 1)String SQL statement. 2) List selectionArgs: List with the arguments that will replace ‘?’ in where clause in the query, to prevent SQL injections. SingleSQL: Execute a Single SQL Statement asynchronously and returns whether the transaction was succesful in the AfterExecution Event Handler. Use it when returned data isn’t needed. Parameters: String sql. GetPath: Returns the path to the database.
- 41. Inside App inventor (Blocks Tab)
- 42. Inside App inventor (Blocks Tab)
- 43. Component List 1. List of the Design section components • Button * 5 • Label * 11 • TextBox * 3 • ListPicker * 2 • HorizontalArrangement * 3 • Notifier * 1 • TinyDB * 1 • Extension-PedrozaSQLite1 -------------------------------------------------------------------------------- • Button * 2 • Label * 2 • TextBox * 1 • ListView * 1 • HorizontalArrangement * 1 • VerticalArrangement * 1 • Notifier * 1 • TinyDB * 1 • Extension-PedrozaSQLite1 1. List of the Block Section components 1. Using Built-in function Text, Variable, Math, List, Control I. ListPicker(listSelect)-3 var is attached II. Select list item list * 3 III. Local var * 2 IV. ListPicker.AfterPicking * 2 V. ListPicker.BeforePicking * 2 VI. Button * 5 (for different work) VII. Replace, Query, Insert, Update , etc --------------------------------------------------------------------------- 1. Using Built-in function Text, Variable, Control, List I. PedrozaSQLite1.AfterExecution II. PedrozaSQLite1.AfterQuery III. PedrozaSQLite1.ErrorOcurred IV. RawQuery, SingleSQL etc. Data Saver
- 44. Program flow chart Open the app Input name Insert Save the DB storage Replace that primary id Update the primary id from input section Select/Delete/Path /playground Delete from DB storage Show the path Select the statement Input phone Update Replace Delete Select Select the statement Show the data Show the link of DB SQLite app inventor Select from playground Execute the table Select the statement Show the data Data Saver
- 45. Final App UI Data Saver Primary key
- 46. App Interface Labelling )optional)- Data Saver
- 47. Demo App working from your mobile Data Saver
- 48. Final point and result ➢ This app has been used to store data. Although TinyDB has been used here. But here the concept of SQLite has been applied. ➢ The main tasks of SQLite insert, update and delete exist here. And here's the idea of SQLite primary key. ➢ We can even view and execute all these data in the playground. ➢ If there is a need to delete any data, we can do that. ➢ The construct apps by selecting components within the Designer, and after that within the Pieces Editor, tell the components what to do and when to do it. ➢ Here is our second app: In App Inventor VersionName is JXUST- PhoneBook2021 and VersionCode is 2019. ➢ And finally is testing handset. It is perfectly run. The next will be upgraded according to the needs for the audience. Data Saver
- 49. Thank You