
Recommended
Recommended
More Related Content
Similar to Multimedia for Learning.pptx
Similar to Multimedia for Learning.pptx (20)
Recently uploaded
Recently uploaded (20)
Multimedia for Learning.pptx
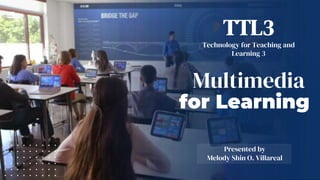
- 1. Multimedia for Learning Presented by Melody Shin O. Villareal TTL3 Technology for Teaching and Learning 3
- 2. Multimedia Learning • Advanced technology combining different media including text, graphics, images, audio, video animation in one computer application • Refers to the process of building mental representation from words and pictures. a.WORDS — written, spoken/verbal b.PICTURES a.static (illustration, photos & graphic) b.dynamic (video & animation)
- 3. Developed by Ricard Mayer in 1997 • American professor of Psychology at the University of California, Santa Barbara. • Two channels for absorbing and processing information 1.Visual Channel — illustrations, printed words and videos 2.Auditory Channel — spoken words Cognitive theory for Multimedia Learning
- 4. Mayer’s Multimedia Principles 1.Coherence Principle • Remove extra information and put only the essential content needed 2.Signalling Principle • Essential information is highlighted and given emphasis 3.Redundancy Principle • Students learn better from graphics and narration than from graphics, narration and on-screen text. 4.Spatial Contiguity Principle • In designing your slides, put the corresponding illustration or pictures close to the text 5.Temporal Contiguity Principle • Present illustration and text simultaneously 6.Segmenting Principle • Lesson must be presented in user-paced segments rather than as a continuous unit
- 5. Mayer’s Multimedia Principles 7. Pre-training Principle • Provide a list of terms and a glossary before presenting if the topic is difficult 8. Modality Principle • Visuals are presented with spoken words 9. Multimedia Principle • Use words and visuals than putting just words on the slides 10. Personalization Principle • Use casual and conversational narration than formal 11. Voice Principle • Use the teacher’s voice rather than using a machine or robotic voice 12. Image Principle • Add relevant images and words and present the lesson with minimum of face-showing
- 6. 1. Extensive Understanding Richard Mayer’s Cognitive Theory of Multimedia Learning • When students are able to learn through auditory and visual channels simultaneously, they absorb more sensory information leading to an increase in student attentiveness and information retention. Benefits of Multimedia in Education 2. Surge in positive emotions • Multimedia learning is more fun for learners • It increase their knowledge and engagement to the subject being taught
- 7. 3. Greater access to diverse knowledge • Students and teachers can access and gather information from a diverse range of sources. Benefits of Multimedia in Education 4. Immersion and Exploration • Immersive multimedia resources allow teachers to teach by experience without leaving the classroom.
- 8. Presentations and Video Multimedia Applications Adobe Premiere Pro Office 365 PowerPoint Canva Sway Professional level video editing software Presentation software that allows user to create presentation slides containing images, videos, links, text and graphics. Free online graphic design platform that allows user to create professional looking designs. App from Microsoft Office. Digital storytelling app to share interactive presentations, reports, stories, newsletters etc.
- 9. Multimedia Tools For teachers and students Projeqt Edmodo TED-Ed Socrative Educational tool that connect teachers & students. Teachers can create online collaborative groups, administer and provide educational materials, measure student performance and communicate with parents. Tool allowing users to create multimedia presentations, with dynamic slides embedded with interactive maps, links, online quizzes, videos Educational platform that allows creating educational lessons with the collaboration of teachers, students & animators. This website allows equal access to information & can have active participation in the learning process of others. System that allows teachers to create exercises and educational games which students can solve using their mobile devices.
- 10. •Create Canva Account •Navigate to Canva.com. Click ‘Sign Up’ and enter needed information. You can download the Canva App and create an account in your mobile phone. 1 •Choose/ Customize Dimensions for your Design •Click ‘Create a design’ and customize your desired dimensions or choose your design type in the Canva homepage. 2 •Choose/ Customize Template •Choose from the suggested templates in your chosen design type (e.g. infographic)or you can customize your own template. 3 •Add and Edit Design Elements •Click ‘+’ sign to add elements as shown in the left corner (graphics, line & shapes, stickers), add text, video, pictures, audio and more. 4 •Download your Canva Creation •Once done, click ‘Share’ at the top right hand of the page. To download, choose file type and click ‘download’. Click ‘more’ for other options. 5
- 11. •Sign In •Visit ‘sway.office.com’ then click ‘Sign in’ on the top menu bar. On the My Sways page, click ‘Create New’ to start creating your first Sway. 1 •Give your Sway a Title •Click the ‘Title you Sway’ placeholder text shown in the first card on the Storyline and encode your Sway title. 2 •Create your Sway Storyline •Your Storyline is where you type, edit, and format your content. Content is arranged by adding cards. Tap ‘+’ icon at the bottom to add text, images, videos or Office documents. 3 •Change the Style of your Sway •To choose a style, click ‘Design’ on the menu bar and select ‘Styles’ or ‘Remix’. You can adjust the colors, font, textures by clicking ‘Customize’ button in the Styles pane. 4 •Share your Sway •Once done, click the ‘Share’ button on the top menu bar. Click ‘More Options’ for additional options. 5
- 12. •Go to ed.ted.com •Click ‘Register’ to sign-up an account. 1 •Create a Lesson •Click ‘Create a Lesson’. Search for a video on Youtube or simply paste the video’s link into the search bar. Change the title of the video if needed. 2 •Use the TED-Ed lesson editor •Use the ‘Let’s Begin’ section to add content. Add your introduction, questions, discussion, supplement info and conclusion. Tap ‘More’ button to preview the lesson or get help. 3 •Publish and share your lesson •Tap the ‘Publish button’ when you’re done, share the lesson publicly using the social sharing icons or send the lesson to your students privately by generating a link 4 •Edit or revisit your lessons •You can revisit, revise or edit your drafts by visiting the Ted-Ed activity page 5
Editor's Notes
- Eliminate excess materials Teachers can use contrast and highlights, or underline important words to point out the most essential or key words or information. Pictures and the text must be place in a close distance Text and graphics must be presented in the same slide
- 8. Students learn better when visuals are presented with spoken words or narration than just presenting visuals and on-screen texts 10. Make use of the simple or common language in the narration so students will easily understand or grasp the information
- 2. A study conducted by NYU suggests that positive emotions must be considered as important factors in instructional design because it affect learner’s experience and performance