Video Equipment Cheat sheet from John Maybury 2020
•
0 likes•205 views

Camera, editing, apps, audio, lighting

Recommended
More Related Content
What's hot
What's hot (18)
Similar to Video Equipment Cheat sheet from John Maybury 2020
Similar to Video Equipment Cheat sheet from John Maybury 2020 (20)
Recently uploaded
Recently uploaded (20)
Video Equipment Cheat sheet from John Maybury 2020
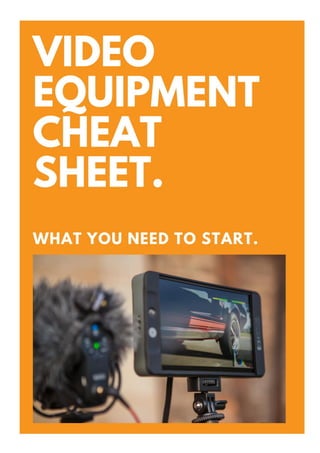
- 2. Updated 26th November 2019 This cheat sheet outlines the basics for people wanting to shoot DIY social media video. I’ve highlighted the major things you’ll need - camera (phone) apps, audio, lighting and tripod with gimbal. There are links to what I’ve purchased (Amazon) OR if you like to support NZ retailers, most of these items can be purchased locally too. 1. Phone (Camera) Android Most smart phones have good enough quality for shooting video for social media. That said, a lot of them don’t let you plug in an external microphone so if you’re looking for a good free app then download from Google Play Store this one Open Camera. It allows me record audio using a lapel microphone that simply plugs into the headphone jack on the phone. Since December 2018, I’ve found another app which is 10 X better, and it’s called Filmic Pro. It allows you to change your exposure which means less work in the editing suite. It’s got tons of options including automatic zooming and panning, it has its own audio meter and you can alter the frame rate. It does however cost USD $20 to download but it’s worth it. iOS Like Android, you can simply use in in-built video platform but the farther you go from your phone, the worse the audio will get. So, use an app. There are video recorder apps like Pro Shot (costs USD $5 from iTunes) or Movie Pro (about the same price) and Filmic Pro is also available but at $25 If your iPhone has a headphone jack then you can use most of the audio options on this page however if you have an iPhone 7 and above, you’ll notice there is no jack. You can use air pods (Bluetooth) or your headphones that came with your purchase. If you want a clean aesthetic with no buds or cables, then watch this YouTube tutorial on how to connect a good microphone receiver/lapel microphone to your phone. You’ll need the Apple lightning jack for your audio. 2. Audio I always recommend that you use an external microphone for quality audio on your videos. Yes, you can use the in-built phone microphone but that limits your videos to holding your phone within half a metre of your face. Go further away or want a wide shot or you’re outside and you want something in the background - then your audio will suck. I use a little lapel microphone at NZD $60 with an extension lead for most of my videos. If you get this one – make sure you get the extension. I recently upgraded to this iRig Mic Lav option which has a dual mic connection (for interviews). You can bundle-buy these things together. If you’re doing a livestream from your laptop I’d recommend a USB Microphone and the best one is the Blue Yeti or I use the Audio Technica AT2020 USB Microphone which is a little cheaper. You could use a boom mic on a stand but the lead lapel is probably easier to start. I use the microphone arm which affixes to a table – lust like a radio station. Most of these arms can be bought locally. I purchased mine at The Rock Shop. You can use Bluetooth headsets for your audio, but quality may vary depending on your phone and headset. If you’re using a videographer to shoot your videos, then they should have receiver-based, cordless lapel mics that connect to their audio system. For live interviews on your phone, you can purchase a dual lapel microphone that plugs into your headphone jack.
- 3. 3. Tripod and Gimbal There are any number of handheld units that support your phone while shooting your videos. The Ulanzi or the Zhiyun Handheld Gimbal Stabilizer. They’re cheap (under NZD $30) and a dime a dozen. Just don’t purchase the add-ons like the lighting or audio. I recommend getting a tripod. I like to use my hands when I talk and sometimes hold props or want to walk into or out of frame. You get more versatility with a tripod. When I started, I used this tripod which is lightweight and easy to use. However it broke after just a month (I accidently sat on it) so I purchased this new one for NZD $299 delivered– that was more expensive but it’s solid and perfect for indoor or outdoor use. You simply screw the camera stabilizer onto the QR plate and you’re away. 4. Editing There are lots of options when it comes to editing. Based on price, operating system and specs. Most of the videographers will use Adobe Premiere but if you want to edit yourself there’s a number of easy-to-use options that don’t have to cost a lot or more importantly, don’t take expert editing skills. I use Camtasia which is a one-off purchase for around USD $400. If you do choose this option, then I have a tutorial on YouTube of how to use it. I think it’s easy and non-technical. Other video colleagues use software like Power Director (for PC) which costs around NZD $175 or Final Cut Pro for Mac at around NZD $600. If you want free video editing I’ve heard that Lightworks is quite good and it’s available on both Windows and iOS. Or there’s a number of apps to edit on your phone. When I started, I was a little slow in the editing function but now I can record a one- minute video from start to end (shoot, edit with captions, post on social media) in less than one hour. 5. Lighting This is where it can get expensive! The best way is to do your video is to shoot during the day in natural sunlight. You can’t beat it. If you do need some lighting, I recommend using reflectors first and then research the kind of lighting that suits your video. Reflectors cost about NZD $109 and I purchased them locally at Photo Shack Auckland. They come in a gold and silver (and other colours) but the silver will be the one you’ll need. Simply use the sun to light up your face. The gold hue can be used to give you that warmer look (like you’ve stepped out of the tanning clinic) but for me this is unnatural. Use the silver. If you’re shooting at night, then use cool white bulbs vs the warmer (yellow) ones. I’ve seen a few video creators using this light ring which can be quite effective. I purchased mine from Photo Gear via Trade Me for NZD $120 including delivery (the online price was significantly cheaper than going into the store). Download the Seven Sales Videos for your business here: https://now.johnmaybury.com/