
Recommended
More Related Content
Similar to Copy of 22_Mobile Data entry.pptx
Similar to Copy of 22_Mobile Data entry.pptx (20)
Recently uploaded
Recently uploaded (20)
Copy of 22_Mobile Data entry.pptx
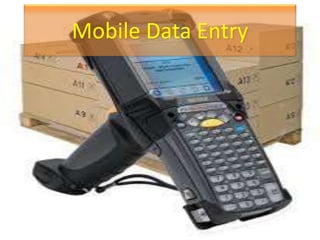
- 2. Use Mobile Data Entry Although all processes in SAP Extended Warehouse Management can be done with desktop transactions or in the warehouse management monitor, resources in the warehouse will use mobile devices for their work. In a complex warehouse, the usage of mobile devices is a requirement for fast and accurate data entry.
- 3. Radio Frequency Framework Extended Warehouse Management (EWM) includes the implementation of a radio frequency (RF) framework satisfying the following objectives: • Decouples business logic from the physical presentation of application data on a selected presentation device and enables personalized menus and screens • Supports a large variety of device sizes, device types, and data entry types By providing an RF framework, greater efficiency and fast, error-free data communication can be attained in the warehouse through the use of mobile RF devices.
- 4. Support for GUI and Character-Based Devices and Browser-Based Devices GUI devices are connected to the SAP system just like any other client-dependent PC. The screens can be touch screens, using predefined pushbuttons, or they can be operated using a keyboard. If you are using touch screens, you simply “touch” the appropriate positions on the touch screen instead of clicking with the mouse on a pushbutton.
- 5. Character-based devices are linked to the system through WebSAPConsole. WebSAPConsole operates on a Windows NT/Windows 2000 platform and interacts with the RF terminals connected to it. This concept is currently supported by the leading providers of RF terminals.
- 6. The system uses ITSmobile for connecting browser-based devices. ITSmobile uses the tried-and-tested ITS template technique to do this. This technique is based on the concept that an HTML template for visualization in the browser is provided for every screen (dynpro) of the application. Dynamic content/data can be included in the templates at runtime using HTMLBusiness (HTMLB). ITSmobile is delivered with a new template generator that allows you to generate the templates of simple screens directly. If necessary, you can then change these further to meet your requirements. You can also create a completely new template generator or create a new template generator based on the one delivered.
- 7. Bar Code Support The RF framework supports the use of bar codes for identification and verification purposes. SAP currently supports EAN 128 bar code types, but you can also support other types within the RF framework.
- 8. Screen Layout Personalization Using the RF screen manager, you can customize the appearance of RF presentation screens to ensure that they are consistent with the attributes of the presentation devices being used. SAP provides screens based on a screen size of 8x40. Menu Personalization Using the RF menu manager, you can define your own menus and menu hierarchy for the RF device transactions.
- 9. Standard RF Functionalities The SAP RF framework provides standard RF functionalities, including the following: • Logon Logon to the RF environment enables the tracking of resources, stock on resources, and warehouse order (WO) selection. After logging on to the system, a resource can operate as an active resource, which can request and execute work in the warehouse. • Logoff • Recovery During logon, the system checks with the content provider whether the user is logged on as a resource, and if so, whether he or she was interrupted during WO execution. The system checks whether a specific WO that was assigned to the resource, and already started, was stopped before completion. If yes and if the WO can be locked, it finds the WO's data and displays the screen of the relevant step to continue the process. • Work execution transactions for the following warehouse processes: –Picking –Putaway – Loading – Unloading –Deconsolidation –Packing – Inventory – Replenishment
- 10. RF Navigation Menu navigation The RF framework supports the following options for menu navigation to RF transactions: 1. Standard navigation You choose the required menu item. 2. Direct navigation to transaction You enter the number of the required menu item displayed in the Menu field. 3. Virtual navigation Unlike the first options where navigation is accomplished from the displayed menus, this option enables “virtual” navigation between menus. You enter the numbers of all required menu items, including those not displayed on the current screen, but rather displayed on subsequent screens.
- 11. RF Navigation • Transaction navigation When in the screen for a particular logical transaction, you may be required to enter data, validate existing data, or a combination of both. When data entry is required, the input field is open. You enter the data by scanning bar codes or typing. If you enter data manually, you choose Enter after entering the value. After all input fields on the screen are filled, one of the following occurs: • If the Skip Shortcut indicator is set, the posting (for example, WT confirmation) is automatically triggered. • If the Skip Shortcut indicator is not set, you automatically navigate to the Shortcut field. You can invoke functions by choosing the corresponding function key pushbutton, or entering the function key in the Shortcut field. Where necessary, you enter exception codes in the Shortcut field (for example, for differences).
- 12. RF Function Keys Function keys are provided with the RF framework. Standard function keys are not displayed in the function key line of an RF screen. Rather, they are accessed directly via the function key or shortcut.
- 13. Transaction-specific function keys are displayed in the function key line. If more than four function keys/pushbuttons exist for a screen, > is displayed, and you can then choose F5 to display the other pushbuttons.
- 14. RF Framework Settings The following sections present the most important objects and settings in the RF framework. RF Screen Manager The RF screen manager is a tool that enables you to customize the appearance of RF presentation screens, so as to ensure that they are consistent with the attributes of the presentation devices being used. The RF screen manager enables you to do create, copy, and delete display profiles and to edit screens of a display profile The display profile is a group of settings that determine the appearance of RF presentation screens, including screen templates and the formats of screen elements. By defining your own display profiles, you can determine the following screen display characteristics: • Screen size • Screen element attributes, including: • Number of pushbuttons available for the screen • Text length for pushbuttons, logical transactions and menu items • How messages are displayed • Screen template function groups and screen numbers
- 15. Presentation Device Presentation devices classify the different kind of devices you use in your warehouse. When defining a presentation device, you enter its characteristics, such as display profile, presentation device type, data entry type, function keys quantity, various indicators, and signal assignments The presentation devices can be assigned to a resource (which is part of resource management).
- 16. Presentation Profile The presentation profile (together with the personalization profile) is used to support different menu structures for different users. The presentation profile is assigned to the application (the standard application for EWM is 01). The personalization profile is used to enable the customer to make changes to the SAP standard. With the personalization profile you can support different user groups working in different menus and, therefore, different processes. The personalization profile for standard transaction is ‘**’.
- 17. RF Menu Manager With the RF menu manager you can define your own menus. First you create your menu items for the main menu and the submenus. In the hierarchy, you define whether a logical transaction is triggered (field LTRANS) or if the user jumps to a submenu (field LMENU). SAP delivers the default menu with application ‘01’, presentation profile‘****’, and personalization profile ‘**’. These entries can only be maintained in an SAP system. In a customer system, these entries are locked for changes.
- 18. Wizards There are two wizards available, which are started directly from a running RF transaction with Ctrl+Shift+F1. Split screen This wizard guides you through the steps necessary to split the RF transaction screen into several screens. These screens are then displayed in your preferred sequence. You can also configure the function codes that are displayed in each resulting screen. The wizard contains the following steps: • Assign Fields to Split Screens • Assign Function Codes to Split Screens / Assignment • Assign Function Codes to Split Screens / Pushbuttons • Define Target Function Group and Screen Numbers • Define Personalization Profile • Complete (Creating the new screens and customizing in database)
- 19. Modify screen This wizard guides you through the steps necessary for modifying an RF transaction screen. Each time you add or remove fields from the screen, the wizard generates an updated screen. To display the new screen to a specific group of users, enter the user's personalization profile, and the wizard automatically adjusts the Customizing. Once you run the wizard, the new screen is displayed in Screen Painter, so that you can verify the contents or make manual adjustments. The wizard contains the following steps: • Select Target Screen Fields • Assign Verification Fields • Define Target Function Group and Screen Number • Define Personalization Profile • Complete (Creating the new screens and customizing in database)
- 20. Resources Management in EWM
- 21. Resources in EWM A resource is an entity representing a user or equipment, which can execute work in the warehouse. It can log on to a radio frequency (RF) or non-RF environment. Once the resource is logged on to the system, it can receive work for execution and it can be tracked and displayed in the warehouse management monitor.
- 22. A resource belongs to a resource type (a grouping of resources with similar technical or physical qualifications) and resource group (a grouping of resources for queue assignment purposes). Resource management maximizes the efficiency of warehouse processes by: • Facilitating the management and distribution of work via queues • Enabling the execution of work by resources in a radio frequency (RF) and non-RF environment • Optimizing the selection of warehouse orders for resources requesting work • Enabling effective monitoring and controlling of resources
- 23. Assignment of Warehouse Orders to a Resource Warehouse orders (WOs) can be assigned to resources in radio frequency (RF) and non-RF environments. In an RF environment, WOs can be assigned manually or automatically, while in a non-RF environment, WOs are only manually assigned. In the case of automatic WO assignment to a resource, the WOs must belong to a queue to which the resource is assigned, and in which the resource is authorized to work.
- 24. Queues A queue is a logical file to which warehouse tasks for processing are assigned. Queues define movements by which work in the warehouse is managed and assigned. The management and distribution of work in the warehouse is accomplished by the assignment of resources and WOs to queues. A resource may execute only those WOs that belong to one of its allowed queues (unless the WOs are manually assigned). This means a queue to which the resource or resource group is assigned, and in which the resource is authorized to work. In addition, a resource working within a particular operating environment may execute only those WOs that belong to a queue in the same operating environment.
- 25. Resource Assignment to Queue You can assign a resource to a specific queue, or assign its resource group to a sequence of allowed queues. WO selection will be performed first according to the resource’s assigned queue, and, in the absence of an assigned queue, according to the resource group’s queue sequence. Warehouse Order Assignment to Queue When the system creates a warehouse task (WT), it searches for an appropriate queue to assign to it, based on the following WT parameters: • Source activity area • Destination activity area • Bin access type • Warehouse process type
- 26. Resource Setup You define a resource in the transaction for resource maintenance. To do so, on the SAP Easy Access screen, choose Extended Warehouse Management → Master Data → Resource Management → Maintain Resource. Alternatively, you can define a resource by using the warehouse management monitor (you can start the same transaction with the method Maint. Resource).
- 27. Resource Type A resource type is a grouping of resources with similar technical or physical qualifications, which determines the following for its corresponding resources: • Horizontal and vertical velocity: The velocity of a resource can influence the latest starting date (LSD) of a warehouse order. • Applicability of position management: Position management enables an RF device user to validate handling units (HUs) by their position number, rather than by their HU number. This is particularly useful when the HU number tags are not readily accessible, such as when the HUs are stacked on top of each other. • Qualifications and preferences (reflected by priority values) regarding bin access types and HU type groups
- 28. Resource Group The resource group determines the sequence of allowed queues for its corresponding resources, which can influence which warehouse orders are selected for a resource. To use system-guided processing, the queues must be assigned to the resource groups in the desired sequence. As the warehouse orders are selected from the queues according to the queue sequences, this represents a sort of prioritization of the warehouse orders for this resource type.
- 30. Define Queues Define Queue Determination Criteria
- 31. Define Queue Access Sequences
- 32. Test one Inbound cycle and one Outbound cycle to check if Queue determination is working 1. Look out for ID in EWM and Create Putaway task 2. Check Queue in Warehouse Order 3. Look out for ODO in EWM and create pick task 4. Check Queue in Pick Warehouse order
- 33. Define Resource Types /SCWM/RGRP - Maintain Resource Group
- 34. /SCWM/QSEQ - Maintain Queue Sequence for Resource Group /SCWM/RSRC - Maintain Resource
- 35. /SCWM/USER - Maintain Users
- 36. Try to Log in to RFUI transaction with the Created Resource Transaction : /SCWM/RFUI
- 37. Create One simple and complex Inbound Cycle and execute with RF Screens Perform one outbound cycle also with RF Screens
- 39. Define Steps in Logical Transactions Copy from **** to create a new Presentation Profile ZGW2
- 40. Copy from Standard Personalization profile to create custom profile
- 41. RF Menu Manager Copy from standard Menu to your custom Presentation profile and Custom personalizaiton profile Make changes in the Menu
- 42. Assign Presentation Profile to Warehouse /SCWM/USER - Maintain Users