Unit 8(rational expressions) week 22 - simplifying rational expressions
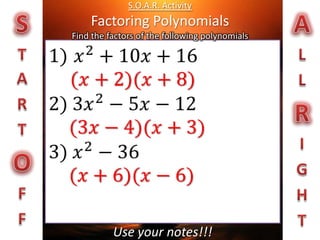
1. S.O.A.R. ActivityFactoring PolynomialsFind the factors of the following polynomials STARTOFF ALLRIGHT 1)𝑥2+10𝑥+16 2) 3𝑥2−5𝑥−12 3)𝑥2−36 (𝑥+2)(𝑥+8) (3𝑥−4)(𝑥+3) (𝑥+6)(𝑥−6) Use your notes!!!
2. Factor x2+10x +16 TRASH CAN METHOD Step 1: Factor out GCF Step 2: Use Diamond Step 3: Rewrite 16 8 Step 4: Factor out GCF’s 2 10 Step 5: Take out Trash! ( )( ) x x + 2 + 8 1 1 ( )( ) x + 2 x + 8
3. Factor 3x2- 5x-12 TRASH CAN METHOD Step 1: Factor out GCF Step 2: Use Diamond Step 3: Rewrite -36 4 Step 4: Factor out GCF’s -9 -5 Step 5: Take out Trash! ( )( ) 3x 3x -9 + 4 3 1 ( )( ) 3x + 4 x – 3
4. Factor x2 -36 TRASH CAN METHOD Step 1: Factor out GCF Step 2: Use Diamond Step 3: Rewrite -36 -6 Step 4: Factor out GCF’s 6 0 Step 5: Take out Trash! ( )( ) x x + 6 -6 1 1 ( )( ) x – 6 x + 6
5. What are we doing today Mr. Morgan? If at first you don’t succeed, try, try, try, and try again.” MONDAY TUESDAY WEDNESDAY THURSDAY FRIDAY S.O.A.R Agenda/Morgan Daily News/Binder Checks Post Test Standard 11.0 Introduction to Unit 8: Rational Expressions CN: Simplifying Rational Expressions Homework Club Meeting
6. PREPARE CORNELL NOTES Simplifying Rational Expressions Mr. Morgan – Algebra ICA Standard 12.0Who uses this? Rational Expressions can be used to find the volume to surface area ratio of many plants and animals like a hummingbird or even ratios for healthy living like working out.
7. Unit 8: Rational Expressions Vocabulary Rational Expressions Common Factors
8. Unit 8: Rational Expressions Rational Expressions Rational expressions are fractions with polynomials on the top and bottom. Like… 𝑥2+10𝑥+16 3𝑥2−5𝑥−12
9. Unit 8: Rational Expressions Simplifying Rational Expressions Step 1: Factor the top and bottom Step 2: Slash out common factors Like… Slashing means dividing out common factors. Dividing common factors leaves you with 1 1 Ex. (x + 3) (x + 3) 1 𝑥+8 2(x – 4) 𝑥+2𝑥+8 2(x – 4)(x + 2) 𝑥+8 2(x – 4) =
10. Example 1: Factor and Slash! Simplify each rational expression, if possible. A. B. Factor the numerator and the denominator when possible. Divide out common factors. Simplify.
11. You Try! Factor and Slash! Simplify each rational expression, if possible. a. b. Factor the numerator and the denominator when possible. CW Divide out common factors. Simplify.
13. Questions & Summary QUESTIONS & SUMMARY 1)Input questions and key concepts to the left. 2)Underline key words or finish incomplete notes 3) Briefly summarize the lecture notes.
18. S.O.A.R. ActivityFactoring PolynomialsFind the factors of the following polynomials STARTOFF ALLRIGHT 1)𝑥2−4𝑥−5 2) 5𝑥2−2𝑥−7 3)𝑥2−81 (𝑥−5)(𝑥+1) (5𝑥−7)(𝑥+1) (𝑥+9)(𝑥−9) Use your notes!!!
Timeline graphic with pictures(Intermediate)To reproduce the picture effects on this slide, do the following:On the Home tab, in the Slides group, click Layout, and then click Blank.On the Insert tab, in the Illustrations group, click Picture. In the Insert Picture dialog box, select a picture and then click Insert. Select the picture. Under Picture Tools, on the Format tab, in the bottom right corner of the Size group, click the Size and Position dialog box launcher.In the Size and Position dialog box, on the Size tab, resize or crop the picture as needed so that under Size and rotate, the Height box is set to 2.65” and the Width box is set to 9”. Resize the picture under Size and rotate by entering values into the Height and Width boxes. Crop the picture under Crop from by entering values into the Left, Right, Top, and Bottom boxes. Under Picture Tools, in the Format tab, in the Picture Styles group, click Picture Shape, and then under Rectangles click Round Same Side Corner Rectangle (eighth option from the left).Drag the top yellow diamond adjustment handle slightly to the right to decrease the amount of rounding on the corners. Under Picture Tools, in the Format tab, in the Picture Styles group, click Picture Effects, point to Shadow, and then under Inner click Inside Center (second row, second option from the left).To reproduce the timeline effects on this slide, do the following:On the Home tab, in the Drawing group, click Shapes, and then under Rectangles click Rectangle (first option from the left). On the slide, drag to draw a rectangle.Select the rectangle. Under Drawing Tools, on the Format tab, in the Size group, do the following:In the Shape Height box, enter 0.73”.In the Shape Width box, enter 9”.On the Home tab, in the bottom right corner of the Drawing group, click the Format Shape dialog box launcher. In the Format Shape dialog box, click Fill in the left pane, select Solid fill in the Fill pane, and then do the following:Click the button next to Color, and then under Theme Colors click Black, Text 1, Lighter 35% (third row, second option from the left).In the Transparency box, enter 20%.Also in the Format Shape dialog box, click Line Color in the left pane, and then in the right pane, select No line. Also in the Format Shape dialog box, click Shadow in the left pane. In the right pane, click the button next to Presets, and then under Inner click Inside Center (second row, second option from the left). Drag the rectangle onto the bottom of the picture. Press and hold SHIFT and select the rectangle and the picture. On the Home tab, in the Drawing group, click Arrange, point to Align, and then do the following: Click Align Selected Objects. Click Align Center.Click Align Top.Click Align to Slide.Click Align Center. To reproduce the month labels for the timeline, do the following:On the Insert tab, in the Text group, click Text Box, and then on the slide, drag to draw the text box.Enter text in the text box (in this example the text is “JAN”), select the text, and then on the Home tab, in the Font group, select Gil Sans MT Condensed from the Font list, select 18 from the Font Size list, click the arrow next to Font Color, and then under Theme Colors click White, Background 1, Darker 35% (fifth row, first option from the left).On the Home tab, in the Paragraph group, click Center to center the text in the text box. Select the text box. On the Home tab, in the Clipboard group, click the arrow under Paste, and then click Duplicate. Repeat the process until there is a total of six text boxes. On the slide, drag the text boxes onto the rectangle to form a timeline. On the Home tab, in the Editing group, click Select, and then click Selection Pane. In the Selection and Visibility pane, press and hold CTRL and select all six text boxes and the rectangle.On the Home tab, in the Drawing group, click Arrange, point to Align, and then do the following:Click Align Selected Objects.Click Align Middle. In the Selection and Visibility pane, press and hold CTRL and cancel the selection of the rectangle, keeping the text boxes selected. On the Home tab, in the Drawing group, click Arrange, point to Align, and then do the following:Click Align to Slide.Click Distribute Horizontally. To change the text in the duplicate text boxes, click in each text box and edit the text.To change the color of the second text box from the left, select the text box, and then on the Home tab, in the Font group, click the arrow next to Font Color, and then under Theme Colors click White, Background 1 (first row, first option from the left). To reproduce the vertical line with text effects on this slide, do the following:On the Home tab, in the Drawing group, click Shapes, and then under Lines click Line (first option from the left).Press and hold SHIFT, and then drag on the slide to draw a straight, vertical line. Select the line. Under Drawing Tools, on the Format tab, in the Size group, in the Shape Width box, enter 1.2”.On the Home tab, in the bottom right corner of the Drawing group, click the Format Shape dialog box launcher. In the Format Shape dialog box, click Line Color in the left pane, and then do the following in the right pane:Select Solid line.Click the button next to Color, and then under Theme Colors click White, Background 1, Darker 25% (fourth row, first option from the left).Also in the Format Shape dialog box, click Line Style in the left pane, and then do the following in the right pane:In the Width box, enter 0.75 pt.Under Arrow Settings, click the button next to Begin type, and then click Oval Arrow (second row, third option from the left).Click the button next to Begin size, and then click Arrow L Size 1 (first row, first option from the left).Click the button next to End type, and then enter Oval Arrow (second row, third option from the left).Click the button next to End size, and then enter Arrow R Size 1 (first row, first option from the left).On the Home tab, in the Clipboard group, click the arrow under Paste, and then click Duplicate. Select the duplicate line. Under Drawing Tools, on the Format tab, in the Size group, in the Shape Width box, enter 2.6”.Press and hold SHIFT and select both lines. On the Home tab, in the Drawing group, click Arrange, and then do the following:Point to Align, and then click Align Selected Objects.Point to Align, and then click Align Center.Drag both lines together on the slide to position them under one of the timeline month labels. Press and hold SHIFT and select both lines and the text box they are under. On the Home tab, in the Drawing group, click Arrange, and then do the following:Click Align Selected Objects.Click Align Center.On the Insert tab, in the Text group, click Text Box, and then on the slide, drag to draw the text box.Enter text in the text box, select the text, and then on the Home tab, in the Font group, select Gill Sans MT from the Font list, select 20 from the Font Size list, and then click the arrow next to Font Color and click White, Background 1 (first row, first option from the left).On the Home tab, in the Paragraph group, click Align Text Left to align the text left in the text box. On the slide, drag the text box to position it to the right of the vertical line. To reproduce the background on this slide, do the following:Right-click the slide background area, and then click Format Background. In the Format Background dialog box, click Fill in the left pane, select Gradient fill in the Fill pane, and then do the following:In the Type list, select Linear.Click the button next to Direction, and then click Linear Down (first row, second option from the left).Under Gradient stops, click Add or Remove until two stops appear in the drop-down list.Also under Gradient stops, customize the gradient stops that you added as follows:Select Stop 1 from the list, and then do the following:In the Stop position box, enter 50%.Click the button next to Color, and then under Theme Colors click Black, Text 1 (first row, second option from the left).Select Stop 2 from the list, and then do the following:In the Stop position box, enter 99%.Click the button next to Color, and then under Theme Colors click Black, Text 1, Lighter 35% (third row, second option from the left).
Each number has that many units. E.g. 25 has 25 units.
Picture with three text columns(Intermediate)To reproduce the picture effects on this slide, do the following:On the Home tab, in the Slides group, click Layout, and then click Blank.On the Insert tab, in the Illustrations group, click Picture. In the Insert Picture dialog box, select a picture and then click Insert. Select the picture. Under Picture Tools, on the Format tab, in the bottom right corner of the Size group, click the Size and Position dialog box launcher.In the Size and Position dialog box, on the Size tab, resize or crop the picture as needed so that under Size and rotate, the Height box is set to 1.48” and the Width box is set to 9.17”. Resize the picture under Size and rotate by entering values into the Height and Width boxes. Crop the picture under Crop from by entering values into the Left, Right, Top, and Bottom boxes. On the Home tab, in the bottom right corner of the Drawing group, click the Format Shape dialog box launcher. In the Format Shape dialog box, click Line Color in the left pane, select Gradient line in the right pane, and then do the following:In the Type list, select Linear. Click the button next to Direction, and then click Linear Up (second row, second option from the left). Under Gradient stops, click Add or Remove until two stops appear in the drop-down list.Also under Gradient stops, customize the gradient stops that you added as follows:Select Stop 1 from the list, and then do the following:In the Stop position box, enter 0%.Click the button next to Color, and then under Theme Colors click White, Background 1 (first row, first option from the left).Select Stop 2 from the list, and then do the following:In the Stop position box, enter 100%.Click the button next to Color, and then under Theme Colors click White, Background 1, Darker 25% (fourth row, first option from the left).Also in the Format Shape dialog box, click Line Style in the left pane, and then in the right pane, in the Width box, enter 1 pt. On the Home tab, in the Drawing group, click Shape Effects, point to Glow,and then do the following:Under Glow Variations,select any option in the first row (5 pt glow options).Point to More Glow Colors, and then under Theme Colors click White, Background 1, Darker 25% (fourth row, first option from the left).On the Home tab, in the Drawing group, click Arrange, point to Align, and then click Align Center.To reproduce the first column heading on this slide, do the following:On the Home tab, in the Drawing group, click Shapes, and then under Rectangles, click Rectangle (first option from the left). On the slide, drag to draw a rectangle.Under Drawing Tools, on the Format tab, in the Size group, do the following:In the Shape Height box, enter 1”.In the Shape Width box, enter 2.92”.On the Home tab, in the bottom right corner of the Drawing group, click the Format Shape dialog box launcher. In the Format Shape dialog box, click Fill in the left pane, select Gradient fill in the right pane, and then do the following:In the Type list, select Linear.Click the button next to Direction, and then click Linear Down (first row, second option from the left).Under Gradient stops, click Add or Remove until two stops appear in the drop-down list.Also under Gradient stops, customize the gradient stops that you added as follows:Select Stop 1 from the list, and then do the following:In the Stop position box, enter 32%.Click the button next to Color, and then under Theme Colors click Tan, Background 2 (first row, third option from the left).Select Stop 2 from the list, and then do the following:In the Stop position box, enter 100%.Click the button next to Color, and then under Theme Colors click Tan, Background 2, Darker 25% (third row, third option from the left).Also in the Format Shape dialog box, click Line Color in the left pane, select Gradient line in the Line Color pane, and then do the following:In the Type list, select Linear.Click the button next to Direction, and then click Linear Up (second row, second option from the left).Under Gradient stops, click Add or Remove until two stops appear in the drop-down list.Also under Gradient stops, customize the gradient stops that you added as follows:Select Stop 1 from the list, and then do the following:In the Stop position box, enter 0%.Click the button next to Color, and then under Theme Colors click White, Background 1 (first row, first option from the left).Select Stop 2 from the list, and then do the following:In the Stop position box, enter 100%.Click the button next to Color, and then under Theme Colors click White, Background 1, Darker 25% (fourth row, first option from the left).Also in the Format Shape dialog box, click Line Style in the left pane. In the right pane, in the Width box, enter 1 pt. On the Home tab, in the Drawing group, click Shape Effects, point to Glow, and then do the following:Under Glow Variations,select any option in the first row (5 pt glow options).Point to More Glow Colors, and then under Theme Colors click White, Background 1, Darker 25% (fourth row, first option from the left).On the slide, right-click the rectangle and then click Edit Text. Enter text in the text box and select the text. On the Home tab, in the Font group, select Gill Sans MT from the Font list and then select 24 from the Font Size list.On the Home tab, in the Paragraph group, click Align Text Left to align the text left within the text box.Under Drawing Tools, on the Format tab, in the WordArt Styles group, click the arrow next to Text Fill, and then under Theme Colors click Tan, Background 2, Darker 75% (fifth row, third option from the left). On the Home tab, in the bottom-right corner of the Drawing group, click the Format Shapes dialog box launcher. In the Format Shapes dialog box, click Text Box in the left pane. In the right pane, under Internal margin, enter 1” in the Left box to increase the left margin in the rectangle to accommodate the embossed number. On the Home tab, in the Drawing group, click Shapes, and then under Lines, click Line (first option from the left).Press and hold SHIFT, and then on the slide, drag to draw a straight, vertical line. Under Drawing Tools, on the Format tab, in the Size group, in the Width box, enter 0.75”.On the Home tab, in the bottom-right corner of the Drawing group, click the Format Shapes dialog box launcher. In the Format Shapes dialog box, click Line Style in the left pane, and then do the following in the right pane:In the Width box, enter 2.25 pt.Click the button next to Dash type, and then click Round Dot (second option from the top). Also in the Format Shapes dialog box, click Line Color in the left pane. In the right pane, click the button next to Color, and then under Theme Colors click White, Background 1 (first row, first option from the left). On the slide, drag the line onto the rectangle, just left of the text box. On the Insert tab, in the Text box, click Text Box and then on the slide, drag to draw another text box. Enter 1 in the text box and select the text. On the Home tab, in the Font group, select Calisto MT from the Font list and then enter 50 in the Font Size box.On the Home tab, in the Paragraph group, click Center to center the text within the text box.Under Drawing Tools, on the Format tab, in the WordArt Styles group, click the arrow next to Text Fill, and then under Theme Colors click Tan, Background 2, Darker 25% (third row, third option from the left). Drag the text box onto the rectangle, left of the dotted vertical line. On the Home tab, in the Editing group, click Select, and then click Selection Pane. In the Selectionand Visibility pane, press and hold CTRL to select the text box, line, and rectangle.On the Home tab, in the Drawing group, click Arrange, point to Align, and then click Align Middle. To reproduce the other column headings on this slide, do the following:On the Home tab, in the Editing group, click Select, and then click Selection Pane. In the Selectionand Visibility pane, press and hold CTRL to select the text box, line, and rectangle.On the Home tab, in the Drawing group, click Arrange, and then under Group Objects click Group. On the Home tab, in the Clipboard group, click the arrow under Paste, and then click Duplicate. Repeat the process until you have a total of three groups of shapes.Select each group in the Selection and Visibility pane and drag it on the slide to form a row under the picture. Also in the Selection and Visibility pane, press and hold CTRL and select all three groups. On the Home tab, in the Drawing group, click Arrange, point to Align,and then do the following:Click Align Middle. Click Distribute Horizontally. To change the numbers in the duplicate text boxes (second and third from the left), click in each text box and edit the text. To reproduce the first column (the “subtext” portion) on this slide, do the following:On the Home tab, in the Drawing group, click Shapes, and then under Rectangles click Rectangle (first option from the left). On the slide, drag to draw the rectangle so that the top edge is just below the first column heading and the bottom edge is at the bottom of the slide. Under Drawing Tools, on the Format tab, in the Size group, in the Shape Width box, enter 2.92” so that the subtext column is the same width as the column heading above it. On the Home tab, in the Drawing group, click the arrow next to Shape Outline, and then click No Outline.On the Home tab, in the bottom right corner of the Drawing group, click the Format Shape dialog box launcher. In the Format Shape dialog box, click Fill in the left pane, select Gradient fill in the right pane, and then do the following:In the Type list, select Linear.Click the button next to Direction, and then click Linear Down (first row, second option from the left).Under Gradient stops, click Add or Remove until three stops appear in the drop-down list.Also under Gradient stops, customize the gradient stops that you added as follows:Select Stop 1 from the list, and then do the following:In the Stop position box, enter 0%.Click the button next to Color, and then under Theme Colors click White, Background 1 (first row, first option from the left).In the Transparency box, enter 100%. Select Stop 2 from the list, and then do the following:In the Stop position box, enter 50%.Click the button next to Color, and then under Theme Colors click Tan, Background 2, Darker 25% (third row, third option from the left).In the Transparency box, enter 25%. Select Stop 3 from the list, and then do the following:In the Stop position box, enter 100%.Click the button next to Color, and then under Theme Colors click White, Background 1 (first row, first option from the left).In the Transparency box, enter 100%. On the slide, right-click the column and then click Edit Text. Enter text in the text box and select the text. On the Home tab, in the Font group, select Gill Sans MT from the Font list and then enter 22 in the Font Size box.On the Home tab, in the Paragraph group, click Center to center the text within the rectangle.Under Drawing Tools, on the Format tab, in the WordArt Styles group, click the arrow next to Text Fill, and then under Theme Colors click White, Background 1, Darker 50% (sixth row, first option from the left). On the Home tab, in the bottom-right corner of the Drawing group, click the Format Shapes dialog box launcher. In the Format Shapes dialog box, click Text Box in the left pane. In the right pane, under Text layout, in the Vertical Alignment list, select Top. To reproduce the other columns (the “subtext” portion) on this slide, do the following:Select the first “subtext” rectangle. On the Home tab, in the Clipboard group, click the arrow under Paste, and then click Duplicate. Repeat the process until you have a total of three “subtext” rectangles.Drag each duplicate on the slide to form a row under the “text heading” rectangles. Press and hold SHIFT and select all three “subtext” rectangles. On the Home tab, in the Drawing group, click Arrange, point to Align, and then click Distribute Horizontally. To reproduce the background on this slide, do the following:Right-click the slide background area, and then click Format Background. In the Format Background dialog box, click Fill in the left pane, select Gradient fill in the right pane, and then do the following:In the Type list, select Radial.Click the button next to Direction, and then click From Center (third option from the left).Under Gradient stops, click Add or Remove until two stops appear in the drop-down list.Also under Gradient stops, customize the gradient stops that you added as follows:Select Stop 1 from the list, and then do the following:In the Stop position box, enter 0%.Click the button next to Color, and then under Theme Colors click White, Background 1 (first row, first option from the left).Select Stop 2 from the list, and then do the following:In the Stop position box, enter 100%.Click the button next to Color, and then under Theme Colors click Tan, Background 2 (first row, third option from the left).
Picture with three text columns(Intermediate)To reproduce the picture effects on this slide, do the following:On the Home tab, in the Slides group, click Layout, and then click Blank.On the Insert tab, in the Illustrations group, click Picture. In the Insert Picture dialog box, select a picture and then click Insert. Select the picture. Under Picture Tools, on the Format tab, in the bottom right corner of the Size group, click the Size and Position dialog box launcher.In the Size and Position dialog box, on the Size tab, resize or crop the picture as needed so that under Size and rotate, the Height box is set to 1.48” and the Width box is set to 9.17”. Resize the picture under Size and rotate by entering values into the Height and Width boxes. Crop the picture under Crop from by entering values into the Left, Right, Top, and Bottom boxes. On the Home tab, in the bottom right corner of the Drawing group, click the Format Shape dialog box launcher. In the Format Shape dialog box, click Line Color in the left pane, select Gradient line in the right pane, and then do the following:In the Type list, select Linear. Click the button next to Direction, and then click Linear Up (second row, second option from the left). Under Gradient stops, click Add or Remove until two stops appear in the drop-down list.Also under Gradient stops, customize the gradient stops that you added as follows:Select Stop 1 from the list, and then do the following:In the Stop position box, enter 0%.Click the button next to Color, and then under Theme Colors click White, Background 1 (first row, first option from the left).Select Stop 2 from the list, and then do the following:In the Stop position box, enter 100%.Click the button next to Color, and then under Theme Colors click White, Background 1, Darker 25% (fourth row, first option from the left).Also in the Format Shape dialog box, click Line Style in the left pane, and then in the right pane, in the Width box, enter 1 pt. On the Home tab, in the Drawing group, click Shape Effects, point to Glow,and then do the following:Under Glow Variations,select any option in the first row (5 pt glow options).Point to More Glow Colors, and then under Theme Colors click White, Background 1, Darker 25% (fourth row, first option from the left).On the Home tab, in the Drawing group, click Arrange, point to Align, and then click Align Center.To reproduce the first column heading on this slide, do the following:On the Home tab, in the Drawing group, click Shapes, and then under Rectangles, click Rectangle (first option from the left). On the slide, drag to draw a rectangle.Under Drawing Tools, on the Format tab, in the Size group, do the following:In the Shape Height box, enter 1”.In the Shape Width box, enter 2.92”.On the Home tab, in the bottom right corner of the Drawing group, click the Format Shape dialog box launcher. In the Format Shape dialog box, click Fill in the left pane, select Gradient fill in the right pane, and then do the following:In the Type list, select Linear.Click the button next to Direction, and then click Linear Down (first row, second option from the left).Under Gradient stops, click Add or Remove until two stops appear in the drop-down list.Also under Gradient stops, customize the gradient stops that you added as follows:Select Stop 1 from the list, and then do the following:In the Stop position box, enter 32%.Click the button next to Color, and then under Theme Colors click Tan, Background 2 (first row, third option from the left).Select Stop 2 from the list, and then do the following:In the Stop position box, enter 100%.Click the button next to Color, and then under Theme Colors click Tan, Background 2, Darker 25% (third row, third option from the left).Also in the Format Shape dialog box, click Line Color in the left pane, select Gradient line in the Line Color pane, and then do the following:In the Type list, select Linear.Click the button next to Direction, and then click Linear Up (second row, second option from the left).Under Gradient stops, click Add or Remove until two stops appear in the drop-down list.Also under Gradient stops, customize the gradient stops that you added as follows:Select Stop 1 from the list, and then do the following:In the Stop position box, enter 0%.Click the button next to Color, and then under Theme Colors click White, Background 1 (first row, first option from the left).Select Stop 2 from the list, and then do the following:In the Stop position box, enter 100%.Click the button next to Color, and then under Theme Colors click White, Background 1, Darker 25% (fourth row, first option from the left).Also in the Format Shape dialog box, click Line Style in the left pane. In the right pane, in the Width box, enter 1 pt. On the Home tab, in the Drawing group, click Shape Effects, point to Glow, and then do the following:Under Glow Variations,select any option in the first row (5 pt glow options).Point to More Glow Colors, and then under Theme Colors click White, Background 1, Darker 25% (fourth row, first option from the left).On the slide, right-click the rectangle and then click Edit Text. Enter text in the text box and select the text. On the Home tab, in the Font group, select Gill Sans MT from the Font list and then select 24 from the Font Size list.On the Home tab, in the Paragraph group, click Align Text Left to align the text left within the text box.Under Drawing Tools, on the Format tab, in the WordArt Styles group, click the arrow next to Text Fill, and then under Theme Colors click Tan, Background 2, Darker 75% (fifth row, third option from the left). On the Home tab, in the bottom-right corner of the Drawing group, click the Format Shapes dialog box launcher. In the Format Shapes dialog box, click Text Box in the left pane. In the right pane, under Internal margin, enter 1” in the Left box to increase the left margin in the rectangle to accommodate the embossed number. On the Home tab, in the Drawing group, click Shapes, and then under Lines, click Line (first option from the left).Press and hold SHIFT, and then on the slide, drag to draw a straight, vertical line. Under Drawing Tools, on the Format tab, in the Size group, in the Width box, enter 0.75”.On the Home tab, in the bottom-right corner of the Drawing group, click the Format Shapes dialog box launcher. In the Format Shapes dialog box, click Line Style in the left pane, and then do the following in the right pane:In the Width box, enter 2.25 pt.Click the button next to Dash type, and then click Round Dot (second option from the top). Also in the Format Shapes dialog box, click Line Color in the left pane. In the right pane, click the button next to Color, and then under Theme Colors click White, Background 1 (first row, first option from the left). On the slide, drag the line onto the rectangle, just left of the text box. On the Insert tab, in the Text box, click Text Box and then on the slide, drag to draw another text box. Enter 1 in the text box and select the text. On the Home tab, in the Font group, select Calisto MT from the Font list and then enter 50 in the Font Size box.On the Home tab, in the Paragraph group, click Center to center the text within the text box.Under Drawing Tools, on the Format tab, in the WordArt Styles group, click the arrow next to Text Fill, and then under Theme Colors click Tan, Background 2, Darker 25% (third row, third option from the left). Drag the text box onto the rectangle, left of the dotted vertical line. On the Home tab, in the Editing group, click Select, and then click Selection Pane. In the Selectionand Visibility pane, press and hold CTRL to select the text box, line, and rectangle.On the Home tab, in the Drawing group, click Arrange, point to Align, and then click Align Middle. To reproduce the other column headings on this slide, do the following:On the Home tab, in the Editing group, click Select, and then click Selection Pane. In the Selectionand Visibility pane, press and hold CTRL to select the text box, line, and rectangle.On the Home tab, in the Drawing group, click Arrange, and then under Group Objects click Group. On the Home tab, in the Clipboard group, click the arrow under Paste, and then click Duplicate. Repeat the process until you have a total of three groups of shapes.Select each group in the Selection and Visibility pane and drag it on the slide to form a row under the picture. Also in the Selection and Visibility pane, press and hold CTRL and select all three groups. On the Home tab, in the Drawing group, click Arrange, point to Align,and then do the following:Click Align Middle. Click Distribute Horizontally. To change the numbers in the duplicate text boxes (second and third from the left), click in each text box and edit the text. To reproduce the first column (the “subtext” portion) on this slide, do the following:On the Home tab, in the Drawing group, click Shapes, and then under Rectangles click Rectangle (first option from the left). On the slide, drag to draw the rectangle so that the top edge is just below the first column heading and the bottom edge is at the bottom of the slide. Under Drawing Tools, on the Format tab, in the Size group, in the Shape Width box, enter 2.92” so that the subtext column is the same width as the column heading above it. On the Home tab, in the Drawing group, click the arrow next to Shape Outline, and then click No Outline.On the Home tab, in the bottom right corner of the Drawing group, click the Format Shape dialog box launcher. In the Format Shape dialog box, click Fill in the left pane, select Gradient fill in the right pane, and then do the following:In the Type list, select Linear.Click the button next to Direction, and then click Linear Down (first row, second option from the left).Under Gradient stops, click Add or Remove until three stops appear in the drop-down list.Also under Gradient stops, customize the gradient stops that you added as follows:Select Stop 1 from the list, and then do the following:In the Stop position box, enter 0%.Click the button next to Color, and then under Theme Colors click White, Background 1 (first row, first option from the left).In the Transparency box, enter 100%. Select Stop 2 from the list, and then do the following:In the Stop position box, enter 50%.Click the button next to Color, and then under Theme Colors click Tan, Background 2, Darker 25% (third row, third option from the left).In the Transparency box, enter 25%. Select Stop 3 from the list, and then do the following:In the Stop position box, enter 100%.Click the button next to Color, and then under Theme Colors click White, Background 1 (first row, first option from the left).In the Transparency box, enter 100%. On the slide, right-click the column and then click Edit Text. Enter text in the text box and select the text. On the Home tab, in the Font group, select Gill Sans MT from the Font list and then enter 22 in the Font Size box.On the Home tab, in the Paragraph group, click Center to center the text within the rectangle.Under Drawing Tools, on the Format tab, in the WordArt Styles group, click the arrow next to Text Fill, and then under Theme Colors click White, Background 1, Darker 50% (sixth row, first option from the left). On the Home tab, in the bottom-right corner of the Drawing group, click the Format Shapes dialog box launcher. In the Format Shapes dialog box, click Text Box in the left pane. In the right pane, under Text layout, in the Vertical Alignment list, select Top. To reproduce the other columns (the “subtext” portion) on this slide, do the following:Select the first “subtext” rectangle. On the Home tab, in the Clipboard group, click the arrow under Paste, and then click Duplicate. Repeat the process until you have a total of three “subtext” rectangles.Drag each duplicate on the slide to form a row under the “text heading” rectangles. Press and hold SHIFT and select all three “subtext” rectangles. On the Home tab, in the Drawing group, click Arrange, point to Align, and then click Distribute Horizontally. To reproduce the background on this slide, do the following:Right-click the slide background area, and then click Format Background. In the Format Background dialog box, click Fill in the left pane, select Gradient fill in the right pane, and then do the following:In the Type list, select Radial.Click the button next to Direction, and then click From Center (third option from the left).Under Gradient stops, click Add or Remove until two stops appear in the drop-down list.Also under Gradient stops, customize the gradient stops that you added as follows:Select Stop 1 from the list, and then do the following:In the Stop position box, enter 0%.Click the button next to Color, and then under Theme Colors click White, Background 1 (first row, first option from the left).Select Stop 2 from the list, and then do the following:In the Stop position box, enter 100%.Click the button next to Color, and then under Theme Colors click Tan, Background 2 (first row, third option from the left).